Welcome to Our Community

Some features disabled for guests. Register Today.

CoreXY - e3d inspired

Discussion in '3D printers' started by j0achim, May 1, 2018.
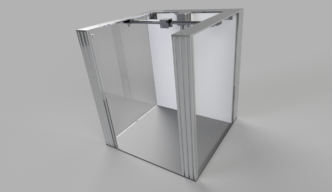
  1. j0achim

    j0achim New
    Builder

    Joined:
    Oct 20, 2017
    Messages:
    16
    Likes Received:
    40
    j0achim published a new build:

    Read more about this build...
     
  2. evilc66

    evilc66 Journeyman
    Builder

    Joined:
    Jan 9, 2015
    Messages:
    392
    Likes Received:
    153
    I have literally been working on the same basic design over the last three weeks :)

    I too decided on aluminum for the gantry, as the price of 6mm/1/4" carbon fiber is insane. The weight difference isn't all that much, with aluminum (I spec'd 6061-T6) being only a little heavier. I wasn't too concerned over stiffness, as the linear rail would add the bulk of the stiffness, and with it extending almost to the bearings, the tiny unsupported area isn't going to flex much if at all.
     
  3. Kevon Ritter

    Kevon Ritter Veteran
    Builder

    Joined:
    Apr 30, 2015
    Messages:
    597
    Likes Received:
    292
    The thing about using extrusion for the entirety of the frame is that you can fudge the shape square. With this style, you have to make sure your cuts are perfect. The other thing is the cost of aluminum. Extrusions is also a lot less $$$ and does not require much processing other than a saw. A 1/4" x 24" x 24" cast plate is in excess of $150 and still requires a water jet or mill. I'm not here to down talk the design at all, but one thing that played a huge role in the tool changer video (I'll have to find the link) is that he stated that the machine was designed and built based on an unlimited budget.

    As an alternative to cast plate, what about 1/2" HDPE? Also you don't need 1/4" carbon. Even our high performance rc boats are crashing at over 80mph with 3-4mm carbon internal parts without an issue. I think my 4x300x400mm sheet was only $75.

    It's a long video, but worth a look.
     
  4. evilc66

    evilc66 Journeyman
    Builder

    Joined:
    Jan 9, 2015
    Messages:
    392
    Likes Received:
    153
    I was personally going to just use standard 6061 plate over cast tool plate. Drops the cost to a third of tool plate. The big detractor to using extrusion over a machined plate is tramming the linear rails. If the plate is machined with accuracy, the rails should be about perfect. Extrusion would take a lot more adjustment to get them parallel. And if you want to use M5 hardware, it forces you to use a larger rail and carriage, increasing the cost anyway.
     
  5. j0achim

    j0achim New
    Builder

    Joined:
    Oct 20, 2017
    Messages:
    16
    Likes Received:
    40
    Cost is actually surprisingly low all considering. Where e3d is working with a unlimited-budget printer, I have opted for most bang for the buck, researching what parts are the best quality at lowest possible cost.

    Buying 15 lengths of extrusion to otherwise build a similar looking cube to the design would actually surpass the cost of the aluminium plate bits for this build. Now I had to buy a whole stock plate (the plate would allow me to build 3 sets of top/bottom/x-gantry and heatbed assembly) but the final cost of the aluminium I will use in the design will be 85$. Obviously getting top/bottom/x-gantry and heatbed plates milled or waterjet-cut on a mechanical workshop would add a lot to the cost as most workshops calculate cost based on the work/travel-time for the tool-head, but I have my own CNC milling machine so I save quite a bit by doing this myself.

    As for shedding some weight on the X-gantry I plan on doing a triangular cutout pattern on the beam. (think metal bridge construction)


    I tried my best sourcing cast aluminium locally without any success, but I have rather decided I will anneal the aluminium myself before I do the final milling. (5052 aluminium)


    Unless I get some obstacles along the way the cost I have projected for the mechanical build is around 300-350 USD calculated from my local currency (in similar fashion as e3d this is the barebone machine)
     
  6. Kevon Ritter

    Kevon Ritter Veteran
    Builder

    Joined:
    Apr 30, 2015
    Messages:
    597
    Likes Received:
    292
    It's nice and convenient when you can do the work yourself. I look forward too seeing this take form. Have you thought about electronics yet?

    As for the extrusion...
    • I don't believe E3D is using 2040. It looks much bigger, maybe 3060.
    • 550mm is kind of an awkward length if you go by the Part Store sizes (250, 500, 1000, 1500). Is that something you factored in already? I know some retailers get up to 6m lengths of extrusion. I wonder what the Part Store gets...
     
  7. j0achim

    j0achim New
    Builder

    Joined:
    Oct 20, 2017
    Messages:
    16
    Likes Received:
    40
    Well I ended up buying 600mm extrusion lengths from Ooznest.co.uk from experience I know that the lengths are perfect cuts from my previous purchases through them.

    IIRC in the mrrf2018 video they did mention standard v-slot extrusion, 30x... is that considered stadard?


    For electronics I am going to use a 24v psu that I received from Ooznest that was originally meant for the OX CNC (I ended up enclosing my CNC electronics with PC cabinet and computer PSU instead), 750Watt heatbed 220v (SSD relay) DuetWifi as motherboard and e3d hotends.
     
    #7 j0achim, May 3, 2018
    Last edited: May 3, 2018
  8. pek

    pek Journeyman
    Builder

    Joined:
    Apr 17, 2017
    Messages:
    196
    Likes Received:
    130
    Very interested by this build :)
     
  9. greylab

    greylab New
    Builder

    Joined:
    May 11, 2018
    Messages:
    1
    Likes Received:
    0
    I will keep an eye out for this build i am looking to do a very similar build
     
  10. j0achim

    j0achim New
    Builder

    Joined:
    Oct 20, 2017
    Messages:
    16
    Likes Received:
    40
    Test cuts done, starting the aluminium cuts shortly :)

    IMG_20180521_165830.jpg
     
    GrayUK likes this.
  11. j0achim

    j0achim New
    Builder

    Joined:
    Oct 20, 2017
    Messages:
    16
    Likes Received:
    40
    Top plate, I am very satisfied with the result, considering its the very first part I have made with the cnc :)


    IMG_20180521_204046.jpg
     
  12. Michael Abbott

    Builder

    Joined:
    May 17, 2016
    Messages:
    1
    Likes Received:
    0
    Really interested in this. I have a Delta and and corexy printer. I built the Delta after getting a small one to learn how it all works. Basically have done the same thing with a Corexy. Just got done reading the E3D blog on their tool changer and started pondering building my own to support the tool changer notion. Basically, as you said, it's not unlimited budget but want to get as much as I can stick into a decent design. I too have the tools to make my own metal parts so looking forward to how this progresses.
     
  13. j0achim

    j0achim New
    Builder

    Joined:
    Oct 20, 2017
    Messages:
    16
    Likes Received:
    40
    Bottom plate complete.

    IMG_20180524_204426.jpg
     
    devnull, evilc66, pek and 2 others like this.
  14. j0achim

    j0achim New
    Builder

    Joined:
    Oct 20, 2017
    Messages:
    16
    Likes Received:
    40
    Gantry complete, next on the agenda is sled.

    IMG_20180527_143504.jpg

    IMG_20180527_143516.jpg
     
    devnull, yo tiro and evilc66 like this.
  15. Awestruck

    Awestruck New
    Builder

    Joined:
    Dec 17, 2017
    Messages:
    76
    Likes Received:
    13
    Nice work. I'll follow along.

    I was inspired by the E3D design as well, though I'm not able to build a similar machine right now.
    Where did you pickup your linear guides?
     
  16. j0achim

    j0achim New
    Builder

    Joined:
    Oct 20, 2017
    Messages:
    16
    Likes Received:
    40
    I wanted to make things perfect so for past few weeks I have been waiting for parts from China, mainly being M3 screws and spacers, sourcing these things locally is hard and would cost a small fortune.

    Also I had to redesign both top and bottom plate, unfortunately I had not accounted correctly for the thickness of the Z axis rail, I could make compromises moving the Z extrusion further back but I then had to make even more compromises for print volume limiting the Y axis to about 270mm instead of the planned 300mm, not a huge deal but heck I have both the tools and aluminium to do it right the first time ;)

    CoreXY v15.png

    Updates coming shortly when both top and bottom plates have been recut.
     
    cmwwebfx likes this.
  17. tablefx

    tablefx New
    Builder

    Joined:
    Jul 26, 2014
    Messages:
    10
    Likes Received:
    4
    this is an interesting thread and I'm digging your approach. im headed down a similar path but will be opting for a triple z configuration using 1 motor. this should allow the motor to be mounted in the cool zone fairly easily.

    similar to this but with mgn rails
    Assembling the TripleZ (en)
     
  18. tablefx

    tablefx New
    Builder

    Joined:
    Jul 26, 2014
    Messages:
    10
    Likes Received:
    4
    I didn't explain my z motor thinking clearly in my previous post. My thoughts are to mount the Z-axis motor to the far right extrusion. passing the belt through a small slot in what will be the dividing wall between hot/cold zone. Can then connect that up to the triple Z system using a continuous 15mm PU belt. I'm shooting for a 500x500x700 build volume and will use 6mm 6061 for the sheet stock.
     
  19. tablefx

    tablefx New
    Builder

    Joined:
    Jul 26, 2014
    Messages:
    10
    Likes Received:
    4
  20. cmwwebfx

    cmwwebfx New
    Builder

    Joined:
    Dec 2, 2017
    Messages:
    62
    Likes Received:
    5
    Nice work so far. Following along on this as well.
     
  21. cmwwebfx

    cmwwebfx New
    Builder

    Joined:
    Dec 2, 2017
    Messages:
    62
    Likes Received:
    5
    Any idea when you will release the drawing files for the plates and gantry?
     
  22. j0achim

    j0achim New
    Builder

    Joined:
    Oct 20, 2017
    Messages:
    16
    Likes Received:
    40
    Sorry been a busy summer and fall moving to a new town and into a 'new' house. So I have not had a lot of time to work on the project.

    I am currently doing some remodeling in the house but hope to get some spare time in a few weeks time, now I have a proper garage with all tools and equipment readily available.

    During next revisions I plan on using cheaper material's and faster to cut for prototype development being either lexan or plexiglass.

    I'll share the fusion 360 files as soon as I get my build computer set up in my garage.
     
    cmwwebfx likes this.
  23. blackbool

    blackbool New
    Builder

    Joined:
    Mar 22, 2016
    Messages:
    1
    Likes Received:
    1
    can't wait !
     
    cmwwebfx likes this.
  24. JK47TheWeapon

    Builder

    Joined:
    May 23, 2017
    Messages:
    1
    Likes Received:
    1
    Your design look great!

    Any updates as to if/when you will release the CNC files for the plates? I don't have a CNC myself so I would have to have a local company do it for me.
     
    blackbool likes this.
  25. tablefx

    tablefx New
    Builder

    Joined:
    Jul 26, 2014
    Messages:
    10
    Likes Received:
    4
    can't wait to see the next update on this design.
     
    blackbool likes this.
  26. IBICO74

    IBICO74 New
    Builder

    Joined:
    Jul 3, 2018
    Messages:
    2
    Likes Received:
    0
    I have the same idea of a build, but I am placing mgn and belt on top. Did you get it finished?
     
  27. antonyking

    Builder

    Joined:
    Aug 27, 2016
    Messages:
    37
    Likes Received:
    15
    Hi, great job... did the fusion360 files ever get uploaded?

    Any updates on the finished project.

    Antony
     
    Aleksandar likes this.
  28. myfordvmb

    myfordvmb New
    Builder

    Joined:
    Sep 27, 2018
    Messages:
    3
    Likes Received:
    2
    I too am building a E3D inspired machine. Started late last year, still quite a bit to do...

     
    Rick 2.0 likes this.
  29. antonyking

    Builder

    Joined:
    Aug 27, 2016
    Messages:
    37
    Likes Received:
    15
    That is pretty awsum... do you have a build site or forum post?

    What size is your bed?

    Would you share your design for the top plate?
     
  30. myfordvmb

    myfordvmb New
    Builder

    Joined:
    Sep 27, 2018
    Messages:
    3
    Likes Received:
    2
    No build site or forum post. The machine has been designed in 2D in LibreCAD. So just a dxf. Physical bed size is 300X300 but usable area more like 270 in Y axis with tool head clerances.
     
    sethu madhavan s likes this.

Share This Page

  1. This site uses cookies to help personalise content, tailor your experience and to keep you logged in if you register.
    By continuing to use this site, you are consenting to our use of cookies.
    Dismiss Notice