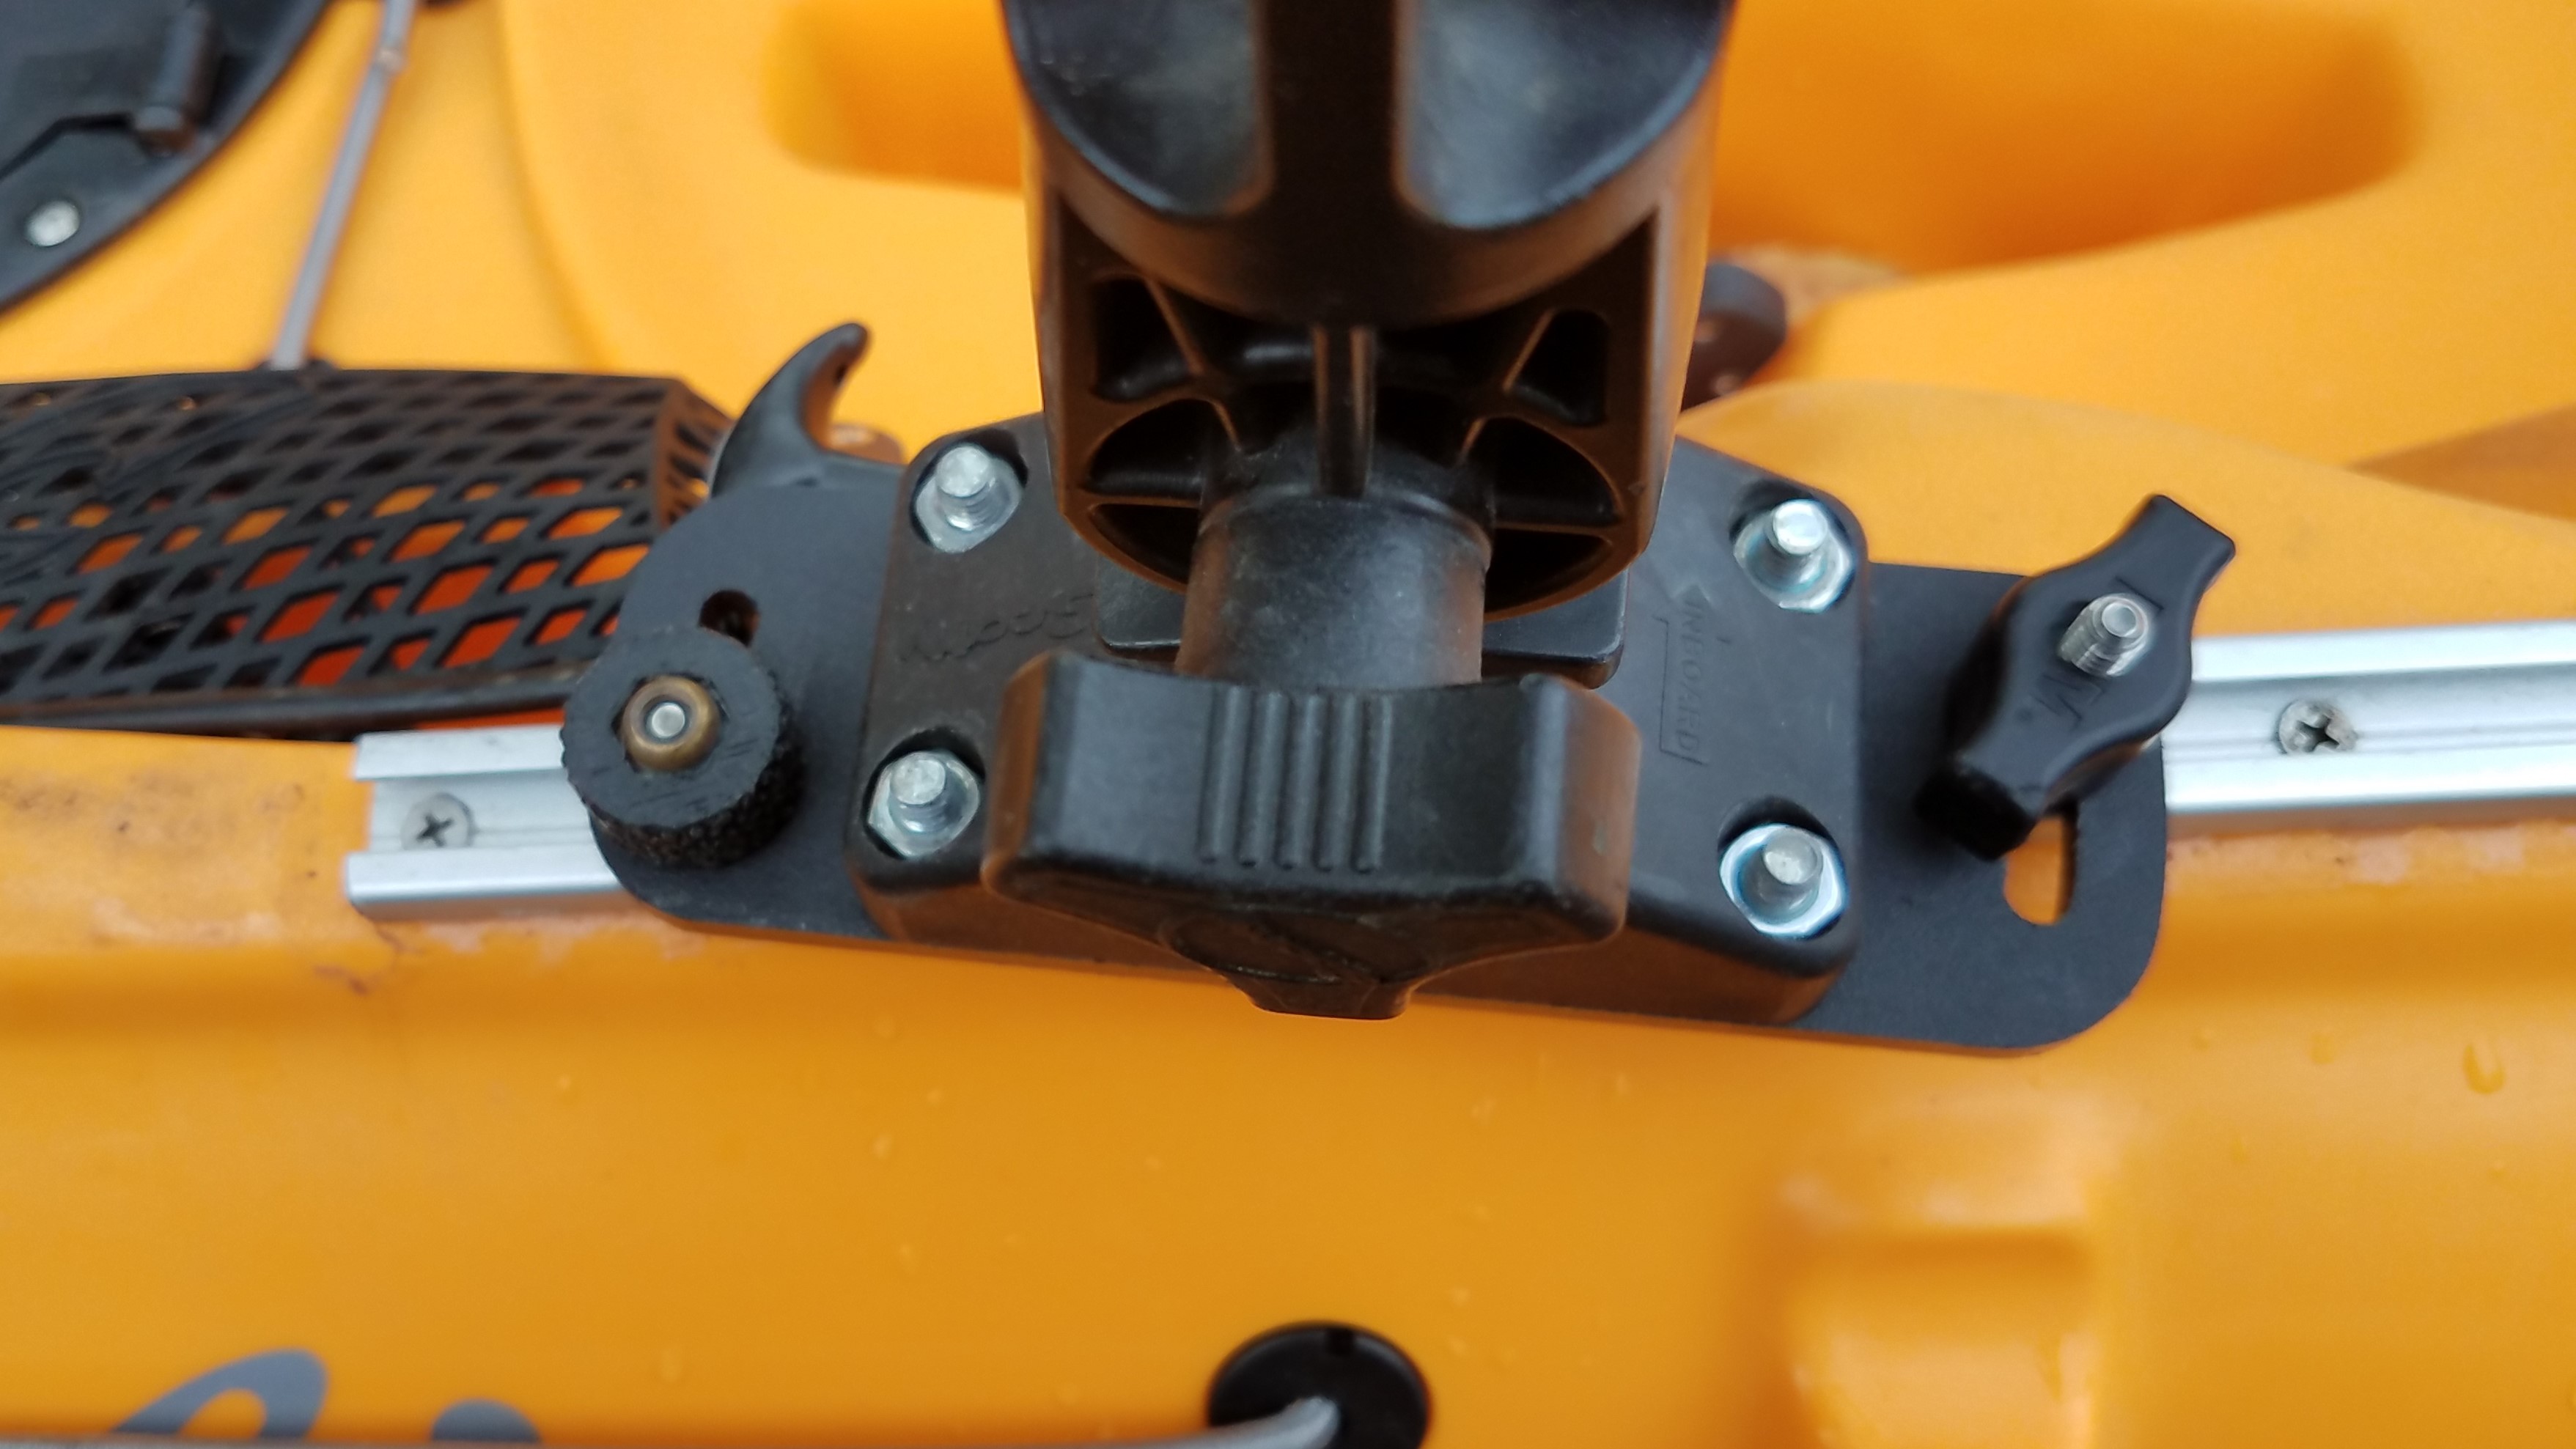
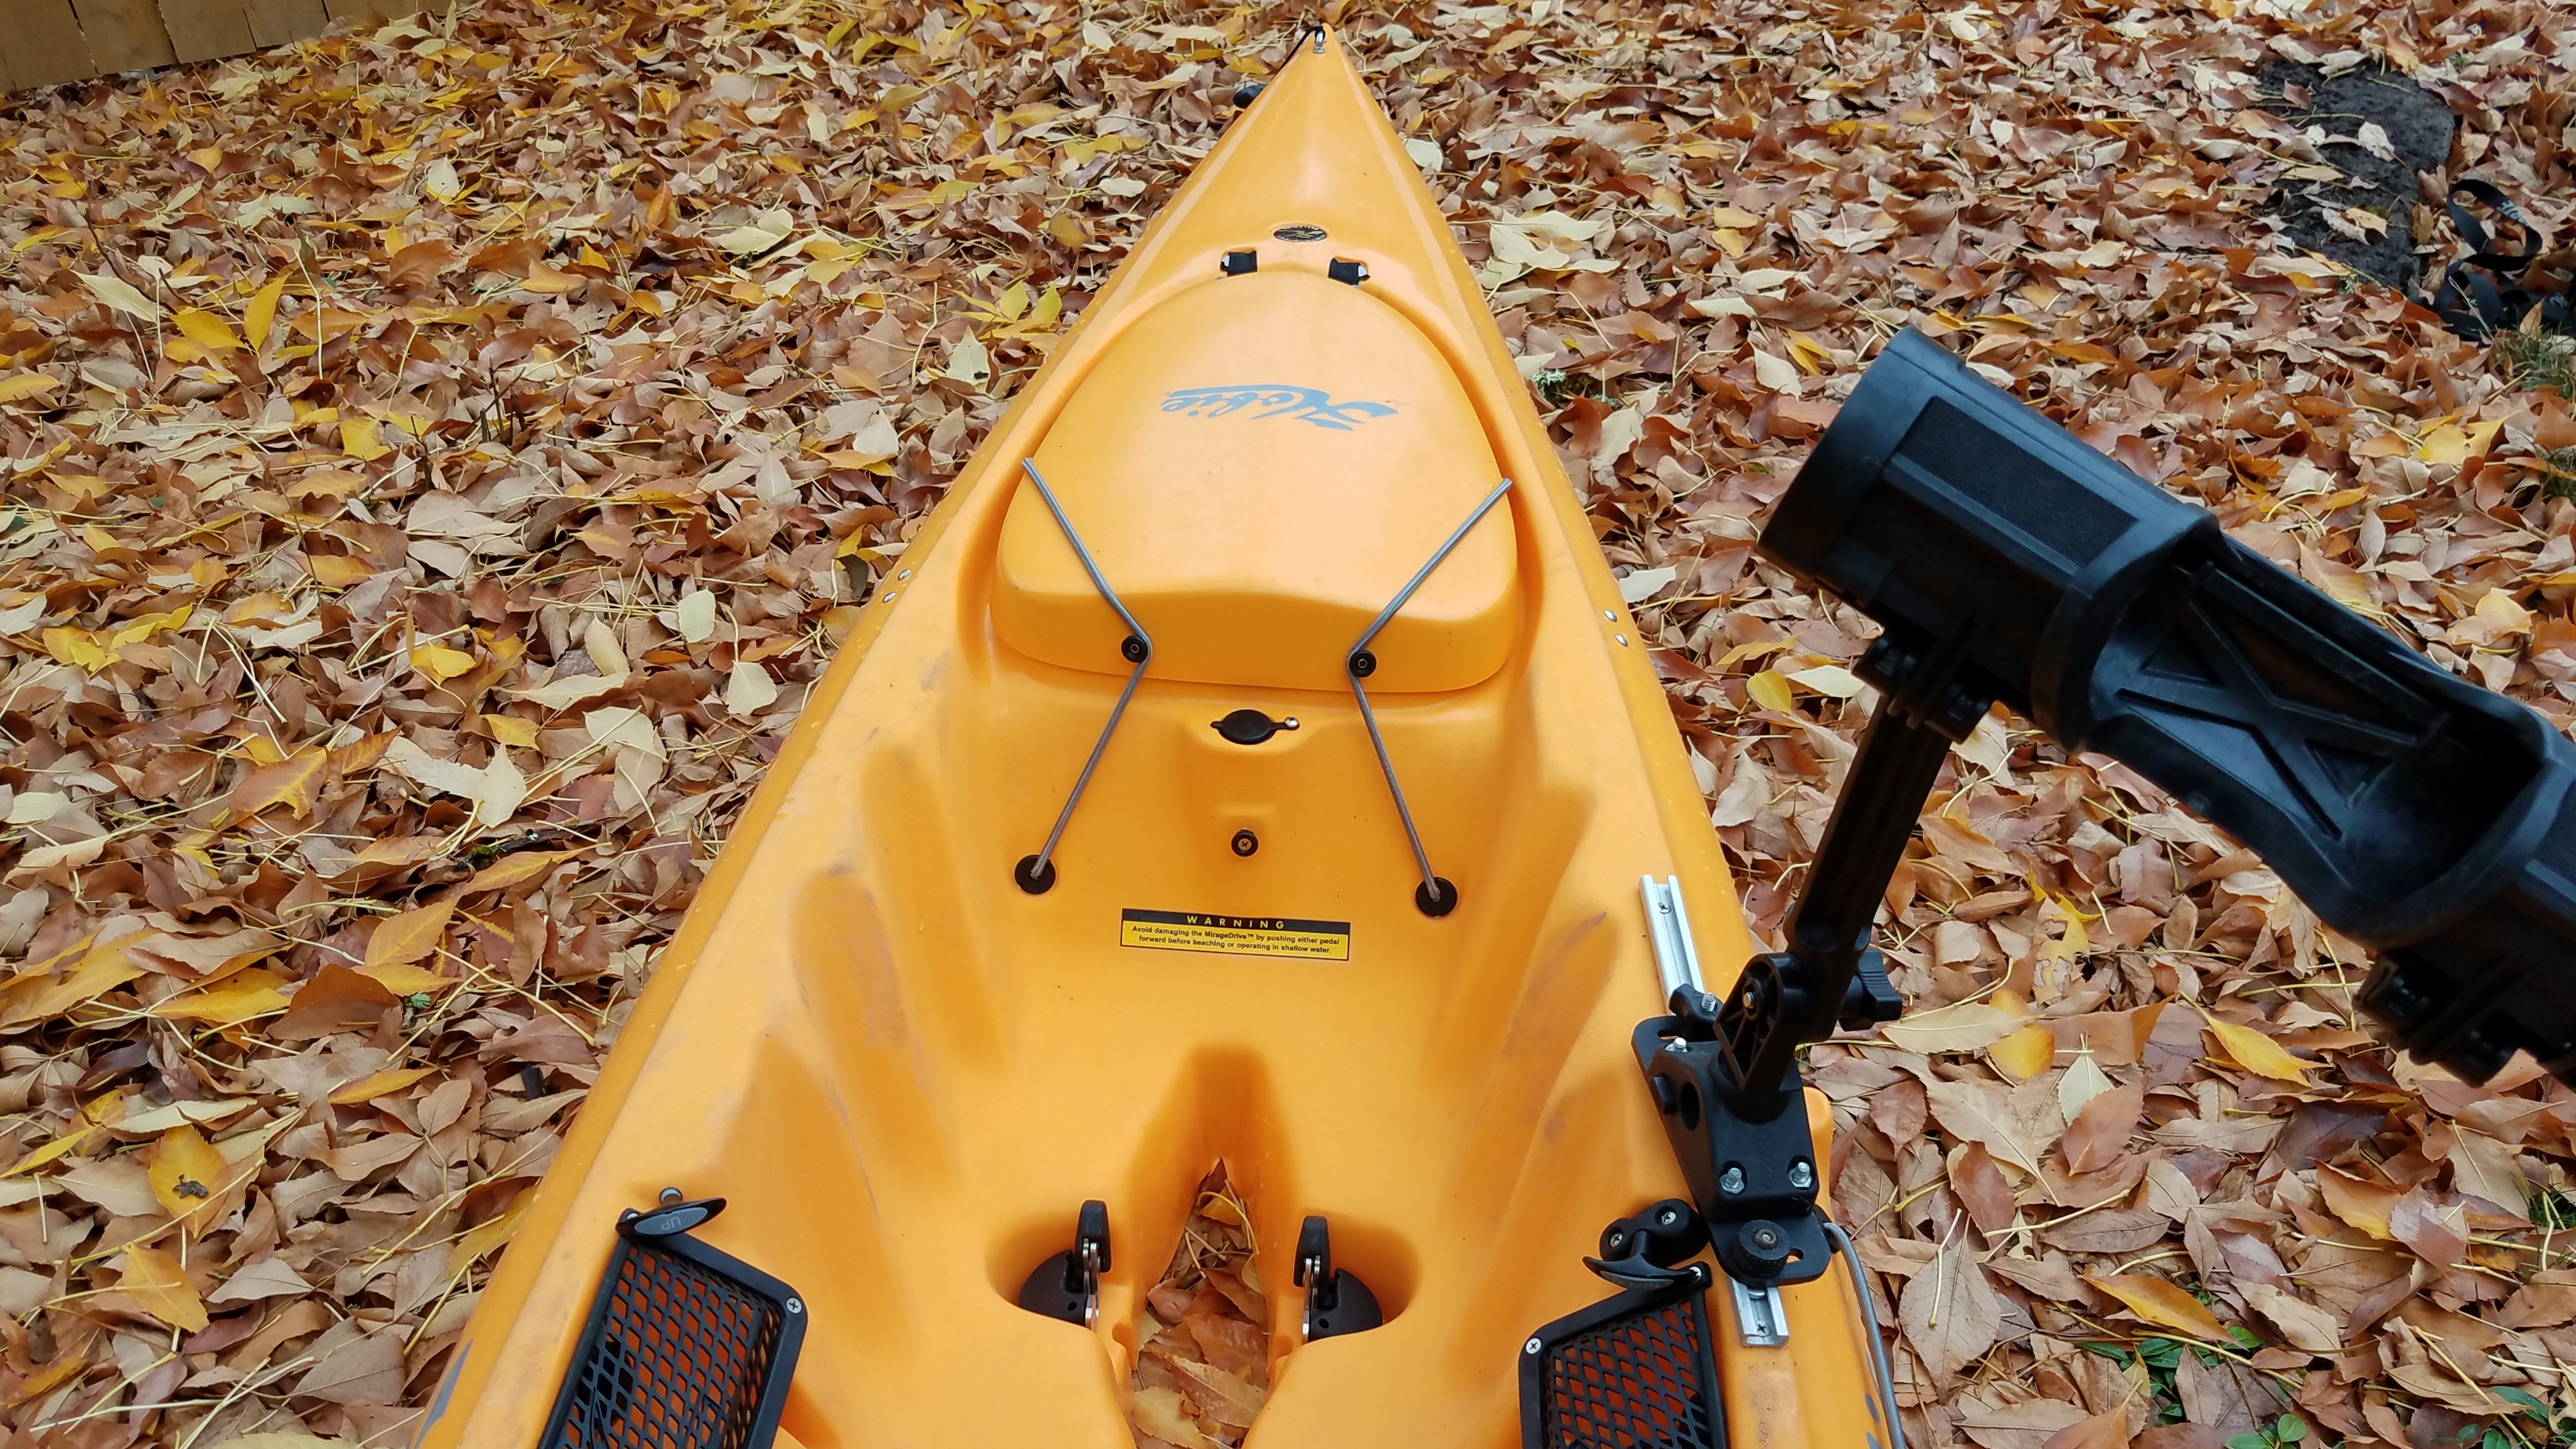
As a person that spends a lot of his fishing time trolling for salmon from a kayak, I was suffering a major first world problem. I love the Scotty mounts and the Orca rod holder - especially with the Scotty Slip Disks - but with only 30 degrees per slot on the rod holder base (12 positions) my rod tip was either too far forward (didn't like the rod tip "action"), or too far back (sore neck form staring off to the side). Not only that, but it was slightly different on the various kayaks I fish from. Anyways, I got bored one rainy winter day and designed the Mark I version, cut it from 1/8 inch aluminum. It has two 15 degree arced slots at each of the two track mounting points. So, now I can adjust to my hearts content! I thought I was the smartest guy in the world. I planned to test it with the brass toilet bolts and some knurled knobs I 3D printed (1" Diameter Knurled Knob for 1/4x20 nuts and bolts by Frugalshave).
- Software:
- CAD - Fusion 360 / CAM - Estlcam
- Machine Time:
- Less than 10 minutes with tool changes
- Bit or Laser Size:
- 1/8 (3.175mm) two straight flute cutter and an 82 degree coutersink bit.
- Feeds & Speeds:
- 2500 mm/min
- Materials:
- HDPE
Then I mounted it. D-oh. The bolt heads hung up on the track taking away much of its adjustability. It is not adjustable if the bolts on the underside attaching the rod mount are not countersunk, which is tough do with 1/4"-20 bolts in 1/8" aluminum. How did I not think of that?
Mark II:
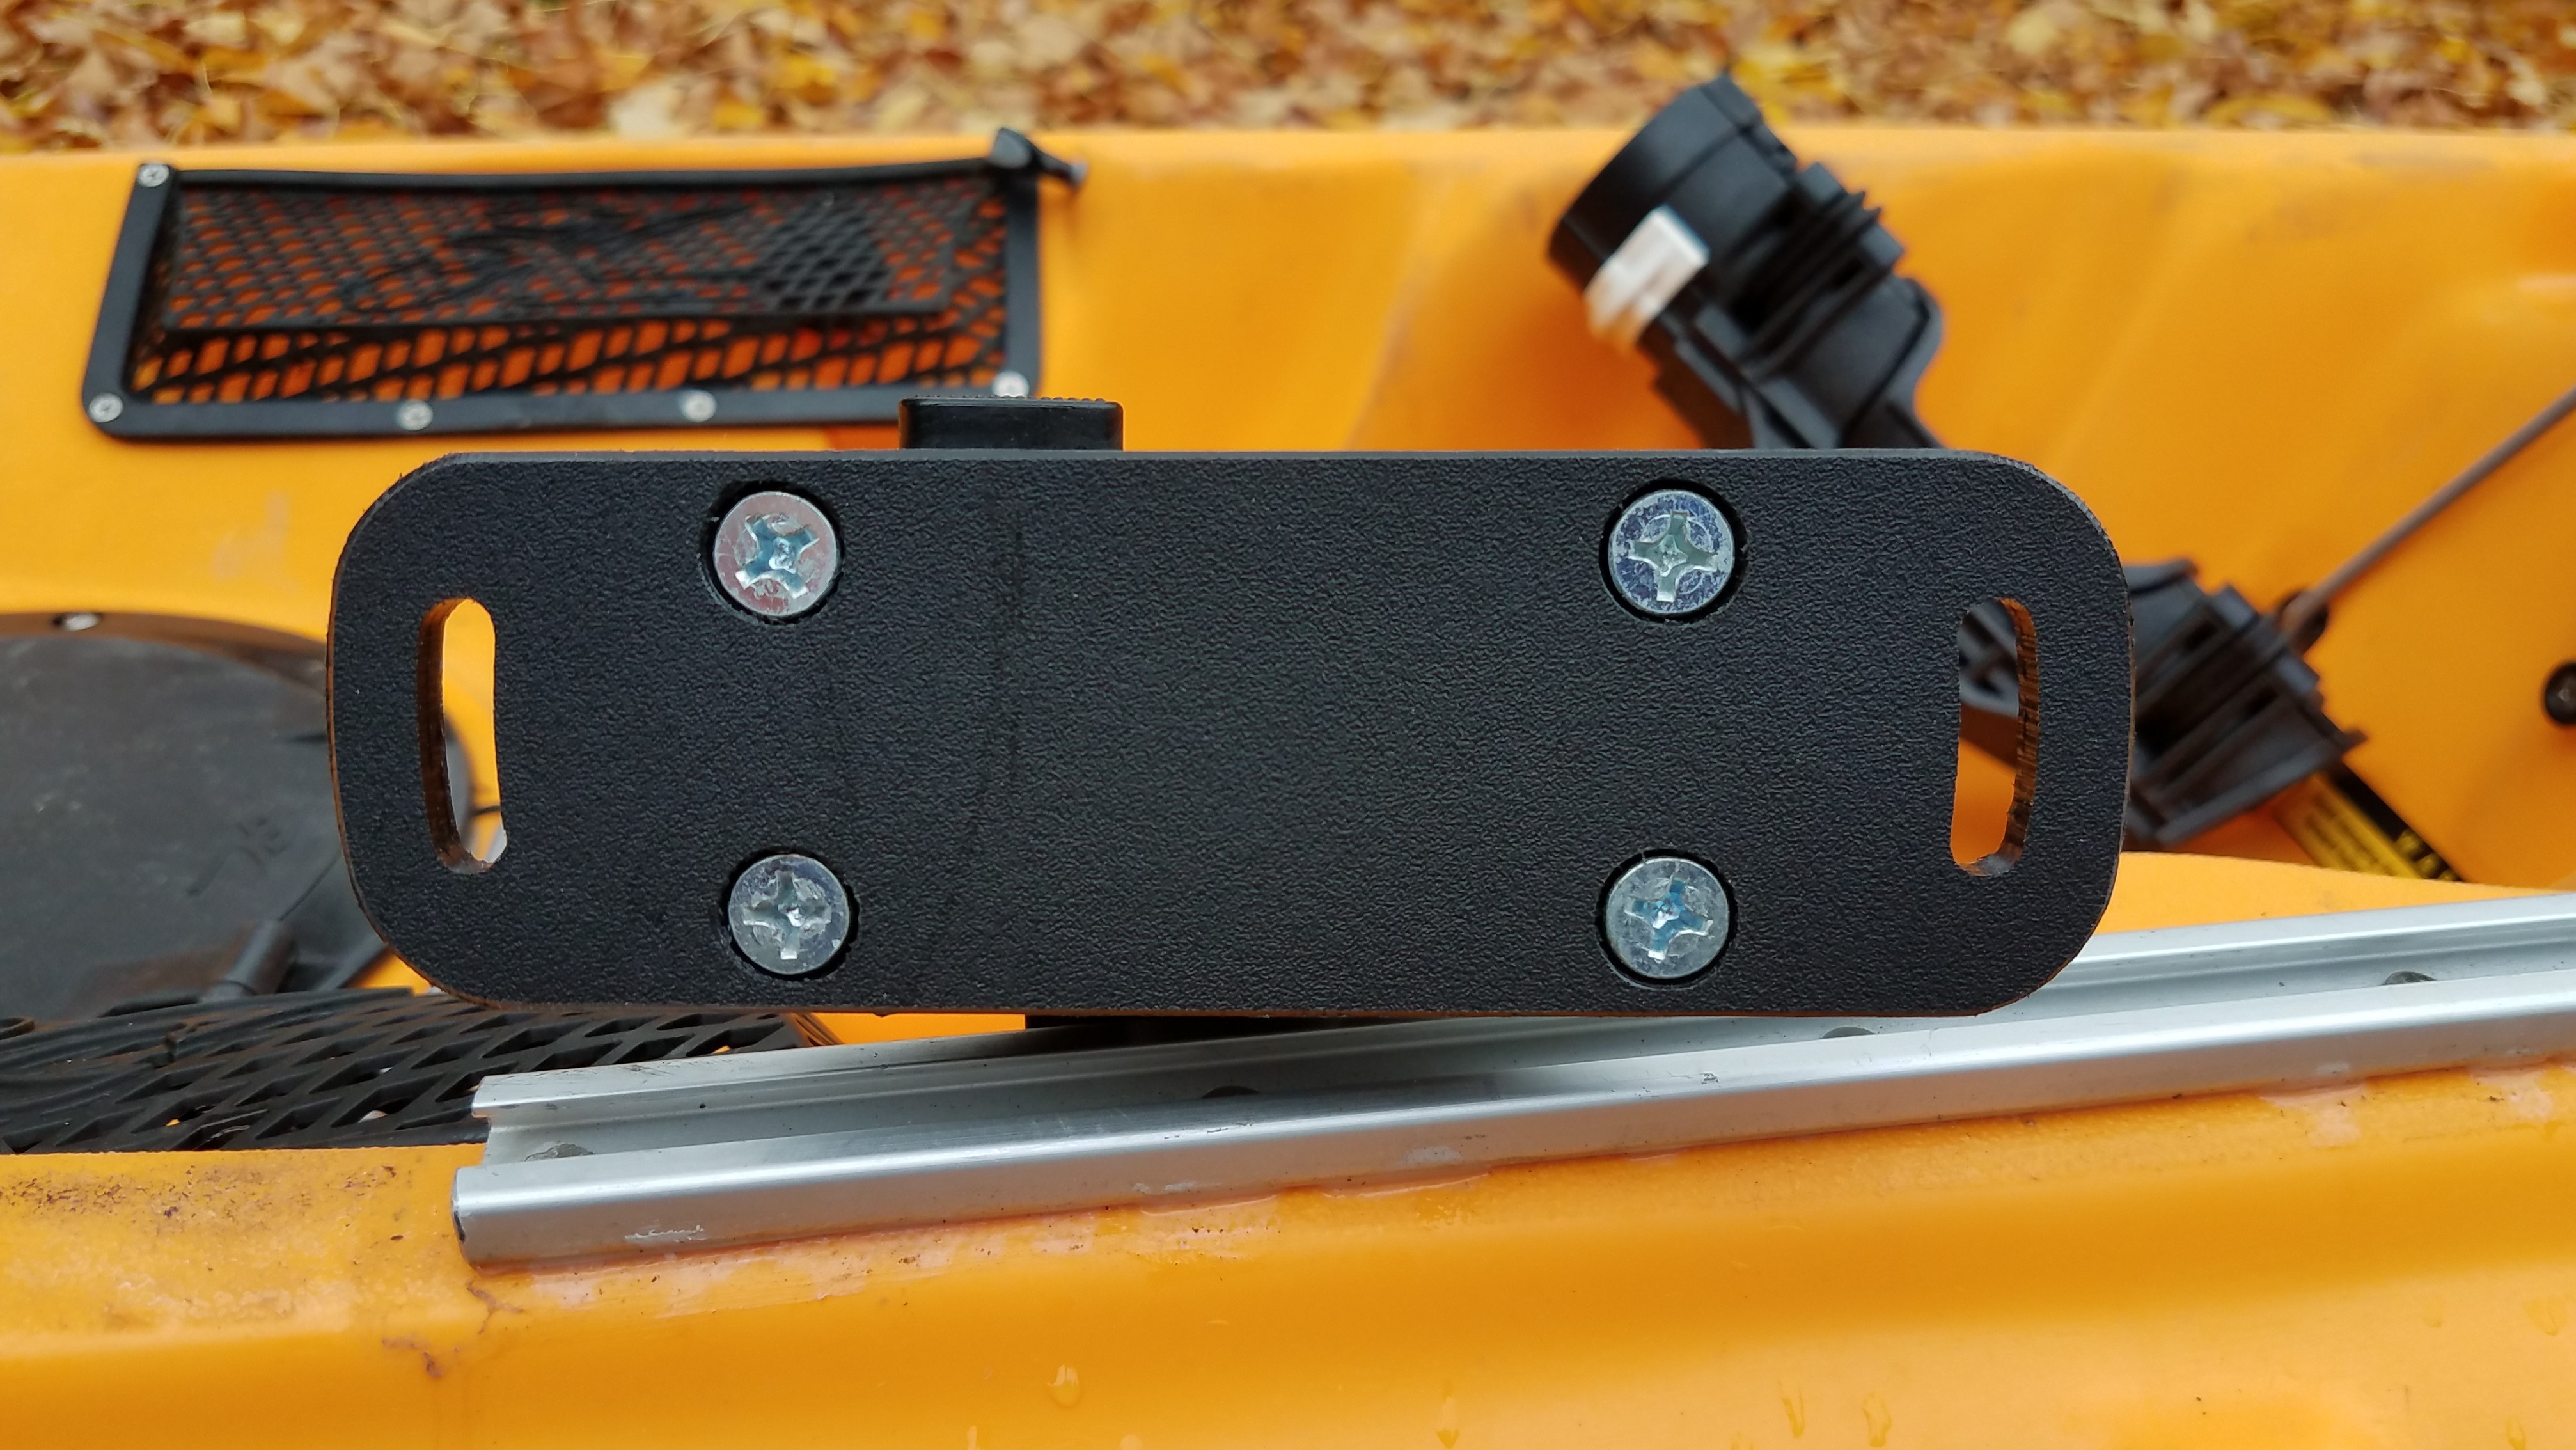
I did have an old cutting board which is made from HDPE plastic just like Starboard. So, Mark II was cut and the countersinks were added. The rod holder is attached with 4 machine screws. This thing has been used hard for two years and has had a lot of salmon yanking on it, so I considered the design a success.
The countersinks on the bottom were crudely done by hand on this version.
MARK III
Since the mount has worked so well for me, I purchased some black Starboard, fired up the CNC, and made a couple more. I slightly changed the design, as well. The Mark II is on the left, the Mark III is on the right. This would be easy to adjust to any brand of rod older mount if I knew the hole spacing.
I'm sure the Smithsonian will be contacting me for the original prototype, so that has been securely stored away.
The following video shows the project and an easy way to zero on small work pieces if you are trying to use up scrap. I don't know why I didn't think of it sooner. The video (3:02 min) may also be a little detailed process-wise, but some nerds like me like details -- so here it is:
Finished product 1/4" thick (technically 6mm):

Beginner Adjustable Rod Holder Track Mount For Fishing
Other Stuff Project created by Giarc, Oct 22, 2018
![[IMG]](proxy.php?image=https%3A%2F%2Fphotos.smugmug.com%2Fphotos%2Fi-zs2xt6Q%2F0%2F13a55ded%2FXL%2Fi-zs2xt6Q-XL.jpg&hash=5b6b6e051d50a8855cd491eef7f3a8e5)
![[IMG]](proxy.php?image=https%3A%2F%2Fphotos.smugmug.com%2Fphotos%2Fi-6cwG942%2F0%2F4436f58c%2FXL%2Fi-6cwG942-XL.jpg&hash=1a9cc2f05e6845810c329d4366324758)
![[IMG]](proxy.php?image=https%3A%2F%2Fphotos.smugmug.com%2Fphotos%2Fi-n799TNh%2F0%2F4551b32b%2FXL%2Fi-n799TNh-XL.jpg&hash=7c83312ba7ad7a9d7a2c55b6aaf9a319)
![[IMG]](proxy.php?image=https%3A%2F%2Fphotos.smugmug.com%2Fphotos%2Fi-hHFd82C%2F0%2F0fd86519%2FXL%2Fi-hHFd82C-XL.png&hash=6aed1ad24e24520f430c461495eaeba7)
Share this Project
Armadillo Works, Ariel Yahni and Mark Carew like this.
User Comments
Sort Comments By