Welcome to Our Community

Some features disabled for guests. Register Today.

TrueUP Glide

Discussion in '3D printers' started by Keith Davis, Sep 9, 2016.

  1. Keith Davis

    Keith Davis Veteran
    Builder

    Joined:
    Dec 11, 2013
    Messages:
    506
    Likes Received:
    393
    Keith Davis published a new build:

    Read more about this build...
     
  2. Keith Davis

    Keith Davis Veteran
    Builder

    Joined:
    Dec 11, 2013
    Messages:
    506
    Likes Received:
    393
    The two knurled wheels are the height adjustment - notice the endstop arm below the screw
    The bracket contains a 8mm nylon nut for the Z axis screw. That 5mm screw on the side just impinges that nut to hold it in place in it's cavity. Nylon nuts do not have backlash between the nut and screw threads. Since nylon is self-lubricating, the thread-to-thread fit is tight.
    It printed o.1mm layers with no problem. The bushing (and housing bracket) is 30mm long and using a centered single set screw to tension the bushing into the V-slot allows the bushing to align itself with the V-slot. There is no opportunity for binding as this is a very solid and snug fit against the extrusion.

    I should be receiving a spool of Taulman Alloy 910 on Tuesday. I think I'll print that entire Z axis housing in nylon. Cutting threads in it will eliminate the need for the nylon Z nut. I also plan to eliminate the outside bushing, instead printing that bushing shape right into the housing and then using a bushing on the inside for tensioning.
     
  3. Lozza50

    Lozza50 New
    Builder

    Joined:
    May 20, 2014
    Messages:
    6
    Likes Received:
    1
    G'Day Keith,
    Finally got to you . I just viewed your new design. Could you answer 2 questions please.
    1. Ship to Australia lknow it's expensive. However to purchase parts here is very difficult as suppliers do not have to variety of parts you are fortunate to have. I do not have the time or patience to chase pasts.
    Shipping I will leave it up to you to pick shipping.
    2. Will sainsmart handle 5 nema 17 's. To incorporate a dual extruder.
    Cheers
    Laurie
    Melbourne Australia
    Email. lauriemattila50@ hotmail.com
     
  4. Anthony Bolgar

    Anthony Bolgar Journeyman
    Builder

    Joined:
    Jan 14, 2016
    Messages:
    354
    Likes Received:
    198
    Nice sleek build @Keith Davis . I look forward to seeing the source filers for it.
     
  5. Anthony Bolgar

    Anthony Bolgar Journeyman
    Builder

    Joined:
    Jan 14, 2016
    Messages:
    354
    Likes Received:
    198
    Nice sleek build @Keith Davis . I look forward to seeing the source filers for it.
     
    Ernest Jackson and Mark Carew like this.
  6. Keith Davis

    Keith Davis Veteran
    Builder

    Joined:
    Dec 11, 2013
    Messages:
    506
    Likes Received:
    393
    I'll be rewriting the build page this weekend Anthony. I've made a few changes to the design. Plus, build files and a 15 page DIY step-by-step tutorial with over 100 images.
     
  7. Anthony Bolgar

    Anthony Bolgar Journeyman
    Builder

    Joined:
    Jan 14, 2016
    Messages:
    354
    Likes Received:
    198
    Wow,very thorough. Quick question, do you live in the GTA? Myself, I am in Niagara Falls, Ontario.
     
  8. Keith Davis

    Keith Davis Veteran
    Builder

    Joined:
    Dec 11, 2013
    Messages:
    506
    Likes Received:
    393
  9. Christian Setla

    Builder

    Joined:
    May 22, 2016
    Messages:
    37
    Likes Received:
    6
    Looking forward to it!

    Now back to waiting for parts <sigh>. I ordered some bearings last winter for the OneZ and when I went to plonk them in the other day, it turns out the outside diameter was larger than what I had ordered.... Next time I'm checking stuff when it arrives instead of just tossing it in the project box! :)
     
  10. Keith Davis

    Keith Davis Veteran
    Builder

    Joined:
    Dec 11, 2013
    Messages:
    506
    Likes Received:
    393
    Chris!!! You've had more problems on that build with wrong parts delivered, and no parts delivered!, than I've had in 4 years put together!! You need to tell us how you do that :ROFL:

    Getting this together - preview http://3dwrx.com/TrueUp/DIY Should finish up Sunday on re-write of the build page.
     
    Ernest Jackson likes this.
  11. Christian Setla

    Builder

    Joined:
    May 22, 2016
    Messages:
    37
    Likes Received:
    6
    It's a gift....

    Regards

    Kaptain "Insert sound of eyes rolling here" Zero
     
  12. Holy1

    Holy1 New
    Builder

    Joined:
    Nov 7, 2014
    Messages:
    15
    Likes Received:
    2
    Hi, I see you are selling this. I would buy one but you don't ship to Canada. Bummer
     
  13. Keith Davis

    Keith Davis Veteran
    Builder

    Joined:
    Dec 11, 2013
    Messages:
    506
    Likes Received:
    393
    Hi Holy1. I ship to Canada, but not for the standard $40 shipping charge.

    Use the Email Support on the site's Support page to send me your mailing address and I'll respond with a shipping quote.
     
  14. Anthony Bolgar

    Anthony Bolgar Journeyman
    Builder

    Joined:
    Jan 14, 2016
    Messages:
    354
    Likes Received:
    198
    I have a U.S. drop ship address in Niagara Falls, NY, for my business. I then broker the goods across the border myself. If anyone in Canada needs to, I can receive the package for them and then re-mail it once it is in Niagara Falls, Canada. It costs me $6.00 USD to receive the package, so I would charge $10.00 USD to forward the package for someone, plus the cost of the Canadian postage.
     
  15. Christian Setla

    Builder

    Joined:
    May 22, 2016
    Messages:
    37
    Likes Received:
    6
    Keith, perhaps it's just *me* (and why wouldn't it be, considering how long it's taking me to get the OneZ together...<sigh>) but the pdf bom is not displaying for me like the one on the OneZ.

    The parts are on one page, links on the next page and there are 4 pages in total. I'll upload a screenshot for you. It may as I said be me, as I use Linux and non-adobe pdf readers, but I wonder, seeing the OneZ bom displays normally.

    If' it's just me, no worries... I'll figure it out what goes where.


    And Anthony, that is a very kind offer for fellow Canadians. I'm lucky that I only live an hour from the border and there are 2 commercial outfits that can take care of bringing it up to Winnipeg for a fee. A lot of small packages gets expensive though...
     

    Attached Files:

    Anthony Bolgar likes this.
  16. Keith Davis

    Keith Davis Veteran
    Builder

    Joined:
    Dec 11, 2013
    Messages:
    506
    Likes Received:
    393
    I the problem is that I printed the bom to pdf as a portrait size instead of landscape. It displays that way for me too (so it's not just you!). I fixed that. Download it again.
     
  17. Christian Setla

    Builder

    Joined:
    May 22, 2016
    Messages:
    37
    Likes Received:
    6
    Looks good now, tnx.
     
  18. Keith Davis

    Keith Davis Veteran
    Builder

    Joined:
    Dec 11, 2013
    Messages:
    506
    Likes Received:
    393
    How would that be a plus over just shipping it direct?
     
  19. Christian Setla

    Builder

    Joined:
    May 22, 2016
    Messages:
    37
    Likes Received:
    6
    Keith,

    It depends on where the package is going, and who the shipping company is. Some companies like to pad their profits with ludicrous "brokerage" charges. It's the reason why Canadians don't want to order from the US unless it's shipped via USPS which does not have a brokerage fee, but rather just the taxes (and only if Canada Customs decides to collect, and often they do not) and there's a fixed charge to cover the expenses that Canada Post incurs when collecting and managing the money on behalf of the CBSA (Canada Border and Services Agency).

    Back when I was an avid photographer, I would order camera lenses from New York as the price was 1/3 of what was being charged in Canada at the time. The company I dealt with in NY would only ship via one company who offered econo shipping and overnight shipping to Canada. While the econo ground shipping was much much cheaper, the brokerage charge equaled exactly the same as the companies Next Day Air service (where the brokerage is covered in the Next Day Shipping price). It cost *me* the same to have it shipped next day air as it did with econo ground service, so I always specified Next Day Air... at least I got something for my money!

    However, more often, a business in the US does not ship USPS (many use companies like FedEx, UPS or DHL instead) and will ship to any lower 48 at no charge... So, sometimes it pays to have a drop point on the US side of the border and then either pick it up there, or have some service pick it up and bring it across the border. I have had several quotes over the past few years of $0 shipping to ND (about a 1 hr drive from here), but $80+ to my address in Canada. It's cheaper for me to drive to the US, pick up the item and bring it across the border myself.

    The problem is the shipping companies, not the buyer/seller..... It may very well be cheaper for you to ship to a US address at $40 and the customer dealing with the rest, than having you ship directly to a Canadian address.

    I used to see these problems all the time when I worked as a letter carrier. People would buy something from Amazon in the US with cheap shipping to Canada, but the brokerage costs would make a $15 item cost $35 or more + our taxes on top.....
     
    Anthony Bolgar likes this.
  20. Balu

    Balu Well-Known
    Builder

    Joined:
    Apr 14, 2014
    Messages:
    81
    Likes Received:
    30
    Just to answer your question:

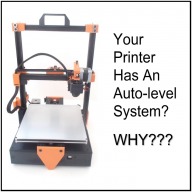
    My printer is going to have an auto-level system because I am going to print on different (swappable) build surfaces that might differ in height. So it's less of an "auto-level", but more of a "height detection" system. :)
     
  21. Keith Davis

    Keith Davis Veteran
    Builder

    Joined:
    Dec 11, 2013
    Messages:
    506
    Likes Received:
    393
    Then build a "height detection" system. ;) Much easier.

    But one of my pet peeves about auto-level is about height changes. I use different first layer height for PLA and ABS (for example). PLA can have less "squish" than ABS and still adhere, producing a better quality object. An auto-level system assumes one height fits all and the way to change that is in slicing with Z Offset: setting. But, different suppliers, and even different colors from the same supplier, can benefit from different heights as well as different types of plastic. So micro-adjusting height for a particular type-manufacturer-color may require multiple slicings with different offsets. I just find it easier to use a manual height adjustment screw.

    But, as I pointed out, auto-leveling requires using microstepping for it's fine gradations to get the bed level, and then continues using that microstepping algorithm to theoretically maintain the "level" that it detected. But the inaccuracy of microstepping was the cause of the problem to begin with. If your leveling system is re-leveling at the start of each print, then the amount that it is changing is the amount that your last layer on the previous print was un-level. Yes, auto-level systems do achieve a perfectly level first layer, but also guarantee that other layers will not be perfectly level throughout the print.
     
  22. OrigamiB

    OrigamiB New
    Builder

    Joined:
    Nov 26, 2015
    Messages:
    17
    Likes Received:
    12
    Do you use no microstepping on Z? I currently use 32x on duet WiFi electronics. I did for a time use no microstepping on ramps 1.4 and the noise was horrible. My concern though is that I use the Z offset feature of S3D for first layer, and that needs microstepping. Might have to do some tests.

    I have a very similar set up to you actually, and have arrived at all the same conclusions. I use two acme screws, driven by a closed loop belt and high torque nema 17. I have not centrally mounted my X axis motor, but I did switch to anti backlash nuts to sort out the unbalanced axis. When I used brass nuts (the common ebay type) the backlash was horrible. Most people assume that the weight of the axis will stop the backlash, but actually it makes it into a see-saw, with the pivot point on the heaviest side of the axis.

    I also use 6mm tooling plate. The typical pcb board heaters (mk3, also common ebay crap) warp so much under heat, and I'm almost certain this moved the bed on every heating cycle.

    I have to say though, your build beats me on compactness and minimalism. Mine is a tank.
     
  23. Keith Davis

    Keith Davis Veteran
    Builder

    Joined:
    Dec 11, 2013
    Messages:
    506
    Likes Received:
    393
    Been there with the TANK. By the time I did a host of modifications with my Ordbot it was a monster and ready for the dumpster - which is where it went when I needed the room in my shop.

    As the article I linked to in the build writeup says, microstepping uses current fluctuations, and 1/32 uses very little current, which is why it is quieter than 1/6, and 1/6 is quieter than 1/8 etc. Microstepping not only smooths out motion, it does it cooler and quieter with less amperage, at the expense of some accuracy. On an Z axis, that inaccuracy is cumulative over multiple prints whereas it is not cumulative over prints on X & Y. That's why the industry has seen the microstepping "drift" there, and developed ways to treat the symptoms without attempting to cure the cause.

    I use 400 step motors on X & Y axis, mostly because I have a bin full of them. And I use only 1/6 microstepping on those axes, mostly because I have a bin full of a4988 drivers too. But, I use 16 tooth pulleys instead of the more common 20 tooth. A 16 tooth GT2 will give 0.005 accuracy compared to 0.00625 for a 20. On objects that are "square" that means that even though the axis moves by microsteps, it should be stopping travel on a full step. I don't ever create "square" objects at that resolution, but with 0.005 I know I'm not going to be bridging a full step anywhere. On curved surfaces, I doubt that the 0.005 resolution is hitting full steps more often than with 0.00625.
     
  24. Christian Setla

    Builder

    Joined:
    May 22, 2016
    Messages:
    37
    Likes Received:
    6
    I have to agree with Keith, micro stepping is not a solution, but rather a poor solution looking for a problem to solve. Auto level is also not a proper solution to non level build plates. It is far better to get the level straight and keep it there... If a different Z hight is needed for a print, add it to the g code.
     
  25. Keith Davis

    Keith Davis Veteran
    Builder

    Joined:
    Dec 11, 2013
    Messages:
    506
    Likes Received:
    393
    A good solution to a non level build plate is (drumroll) a level build plate.

    Prusa's new MK2 has 9 point auto-leveling. Their marketing video shows how that handles a build plate that is about 20 degrees off square from the X axis and still puts the object squarely on the plate. Cool! Now, how/why do you design a printer so the Y axis can swing 20 degrees either way? I don't know, but if there ever is a reason to do that, I guess maybe a 9 point auto-level is the way to go.
     
  26. Ryan James

    Builder

    Joined:
    Sep 8, 2014
    Messages:
    41
    Likes Received:
    15
    On the DIY guide, the first picture is broken. I'm sure I could figure it out anyway, but just wanted to give a heads up.
     
  27. Christian Setla

    Builder

    Joined:
    May 22, 2016
    Messages:
    37
    Likes Received:
    6
  28. Ryan James

    Builder

    Joined:
    Sep 8, 2014
    Messages:
    41
    Likes Received:
    15
  29. Ryan James

    Builder

    Joined:
    Sep 8, 2014
    Messages:
    41
    Likes Received:
    15
    Also, the BOM for Frame Assembly shows 2 M5x8mm screws but the PDF BOM does not show any at all.
     
  30. Keith Davis

    Keith Davis Veteran
    Builder

    Joined:
    Dec 11, 2013
    Messages:
    506
    Likes Received:
    393
    Thanks for the heads up Ryan. BOM and URL fixed.
     
  31. Balu

    Balu Well-Known
    Builder

    Joined:
    Apr 14, 2014
    Messages:
    81
    Likes Received:
    30
    It's called math. You can simulate a crooked Y axis by just moving X and Y accordingly?
     

Share This Page

  1. This site uses cookies to help personalise content, tailor your experience and to keep you logged in if you register.
    By continuing to use this site, you are consenting to our use of cookies.
    Dismiss Notice