Welcome to Our Community

Some features disabled for guests. Register Today.

Evil Ox

Discussion in 'CNC Mills/Routers' started by evil2002usna, Mar 27, 2016.
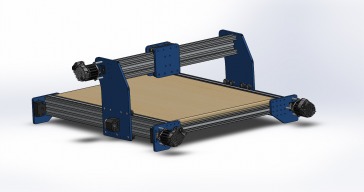
  1. evil2002usna

    Builder

    Joined:
    Jul 1, 2015
    Messages:
    8
    Likes Received:
    12
    Chris Hauser likes this.
  2. Mark Roberts

    Builder

    Joined:
    Sep 19, 2014
    Messages:
    10
    Likes Received:
    8
    I really like the rigidity and squareness this could give you, especially if one finishes the ends of the C-Beams on a milling machine. Fine adjustments of squareness could be accomplished with very thin steel or brass shim stock. Great idea. Can't wait to see more!

    I too would like to use ball screws. May I ask what you are paying for them and where you get them?

    Also I have 3v NEMA 34 steppers left over from the upgrade of my Tormach PCNC 1100 from Series 2 to Series 3. I have been planning to use those for the Y and X axes. They are beefy suckers but they are so strong that they'll have no trouble carrying a heavy gantry around. Also I like their speed. I am using them now on an old non-OpenBuild's build I made 2 years ago. Using 45 VDC and 7 amps I can scream along at 300 inches/minute using a 10mm pitch ball screw directly connected to the motor shaft through a spider coupler. I know they can handle more voltage than that so who knows what maximum speeds could be realized. My build does both plasma and wood routing with a relative quick changeover of adapters and spoil material. When I saw the C-beam for the first time I knew I wanted to use them for rigidity and the ability to shield the ball screws from debris. I am working on designing more shielding using a soft plastic material that runs the length of the Y rails and is pushed slightly out of the way when the Y motion occurs.

    Mark R
     
  3. evil2002usna

    Builder

    Joined:
    Jul 1, 2015
    Messages:
    8
    Likes Received:
    12
    I bought three 700mm ballscrews from Amazon for $113.00 a piece. They come with the nut and the two bearing blocks on either end. Basically it is the cheap chines SFU1605 ballscrews they sell everywhere. The plates were specifically designed with this type of ballscrew in mind. I also just received the ballscrew nut housing from Amazon as well, i had to wait a little while longer for those since they werent a prime purchase. You can buy longer ballscrews from ebay for probably close to the same price if you are willing to wait a little longer form them.
     
    GrayUK likes this.
  4. evil2002usna

    Builder

    Joined:
    Jul 1, 2015
    Messages:
    8
    Likes Received:
    12
    Just cut the first Y-Gantry today and mounted one of the Ballscrew housings. Everything is progressing as planned.
     

    Attached Files:

    GrayUK likes this.
  5. GrayUK

    GrayUK Openbuilds Team Elder
    Staff Member Moderator Builder

    Joined:
    May 5, 2014
    Messages:
    1,668
    Likes Received:
    627
    Now, that is looking really good. :thumbsup:
     
  6. evil2002usna

    Builder

    Joined:
    Jul 1, 2015
    Messages:
    8
    Likes Received:
    12
    And one more gantry. The only thing slowing me down now is trying to keep the wife happy by not spending too much money. My larger Ox has been performing beautifully. I don't know if I mentioned in earlier posts but I also plan to run this CNC with the same Clearpath servo motors I am using on my larger machine. Check out Neo7CNC on YouTube if your not sure what I am talking about.
     

    Attached Files:

  7. GrayUK

    GrayUK Openbuilds Team Elder
    Staff Member Moderator Builder

    Joined:
    May 5, 2014
    Messages:
    1,668
    Likes Received:
    627
    Yes, the Neo7 is a nice machine and those servos are sweet! :thumbsup:
    There is a thread about keeping your wife "happy" somewhere here. :D
    I think it involved bribery. :rolleyes:

    Remember: A man has got to do, what a man has got to do.
    Sneaky is Best. :ROFL:
     
    MaryD and Josh B like this.
  8. evil2002usna

    Builder

    Joined:
    Jul 1, 2015
    Messages:
    8
    Likes Received:
    12
    Finally got around to cutting the extrusions to length to fit the Ballscrew I purchased for the Y-Axis. I was putting it off because I had to take the machine apart again and I was worried about cutting it too short. Well luckily I got it right on the first try. Now I just need to buy the rest of the extrusions for tge x-axis and finish cutting the gantry plates on my cnc.
     

    Attached Files:

  9. Mark Carew

    Mark Carew OpenBuilds Team
    Staff Member Moderator Builder Resident Builder

    Joined:
    Jun 28, 2013
    Messages:
    2,741
    Likes Received:
    2,407
    Looks like a nice beefy system in the works :thumbsup:
     
  10. evil2002usna

    Builder

    Joined:
    Jul 1, 2015
    Messages:
    8
    Likes Received:
    12
    Finally got the x axis pieces put in now just need to design the Y-Axis. Uni IMG_20160717_182032998.jpg IMG_20160717_182010989.jpg
     
  11. slm222

    slm222 New
    Builder

    Joined:
    May 17, 2016
    Messages:
    23
    Likes Received:
    2
    Looks really good thus far! I also really like the rover setup. If that channel on the x isn't being used have you considered adding in a 20x40 piece to add some extra rigidity?
     
  12. evil2002usna

    Builder

    Joined:
    Jul 1, 2015
    Messages:
    8
    Likes Received:
    12
    No, I was actually planning on supporting the x-carriage with polycarbonate wheels on the inside and outside of the C-Beam with the open space. I was hoping that would add rigidity in a different way. It might be overkill, but so is this whole project.
     
    slm222 likes this.
  13. slm222

    slm222 New
    Builder

    Joined:
    May 17, 2016
    Messages:
    23
    Likes Received:
    2
    Good Deal! I look forward to your outcome
     
  14. slm222

    slm222 New
    Builder

    Joined:
    May 17, 2016
    Messages:
    23
    Likes Received:
    2
    any update?
     
  15. evil2002usna

    Builder

    Joined:
    Jul 1, 2015
    Messages:
    8
    Likes Received:
    12
    Well this update is 4 years late, but I didnt have time to work on this project very much. I did end up finishing the design and build and everything is working as planned. Here are some quick pictures of the finished product. I did change out the x-axis with a linear rail that I got for free from work but it was originally v-wheels. I plan on doing the same to the z-axis and the y-axis eventually.

    IMG_2545.jpg IMG_2546.jpg IMG_2547.jpg IMG_2548.jpg IMG_2549.jpg
     
    MaryD likes this.
  16. MaryD

    MaryD OpenBuilds Team

    Joined:
    Apr 13, 2016
    Messages:
    649
    Likes Received:
    639
    Wow, nice job!
     
  17. cnc machinest phil

    Builder

    Joined:
    Sep 7, 2017
    Messages:
    28
    Likes Received:
    4
    Ok I see you have the clearpath servos. looks very nice. I am just trying to finish an upgrade from steppers to the clearpath sd servos. What controller did you use? I am using an arduino and grbl but I am finding little to no info on connecting the clearpath to the arduino. So I may have to look elsewhere for a controller. Any info? Thanks.
     

Share This Page

  1. This site uses cookies to help personalise content, tailor your experience and to keep you logged in if you register.
    By continuing to use this site, you are consenting to our use of cookies.
    Dismiss Notice