- Machine Type:
- OpenBuilds WorkBee
- Software:
- Fusion 360
- Electronics:
- Other Controller
- Materials:
- Parts list:
(4x) M4 x 10mm button head screws
(2x) M4 x 16mm button head screws
(4x) M4 nuts
(6x) M4 washers
(4x) M5 x 8mm low profile screws
(4x) M5 drop-in tee nuts
(2x) 0.5mm x 7mm x 20mm Spring (or similar)
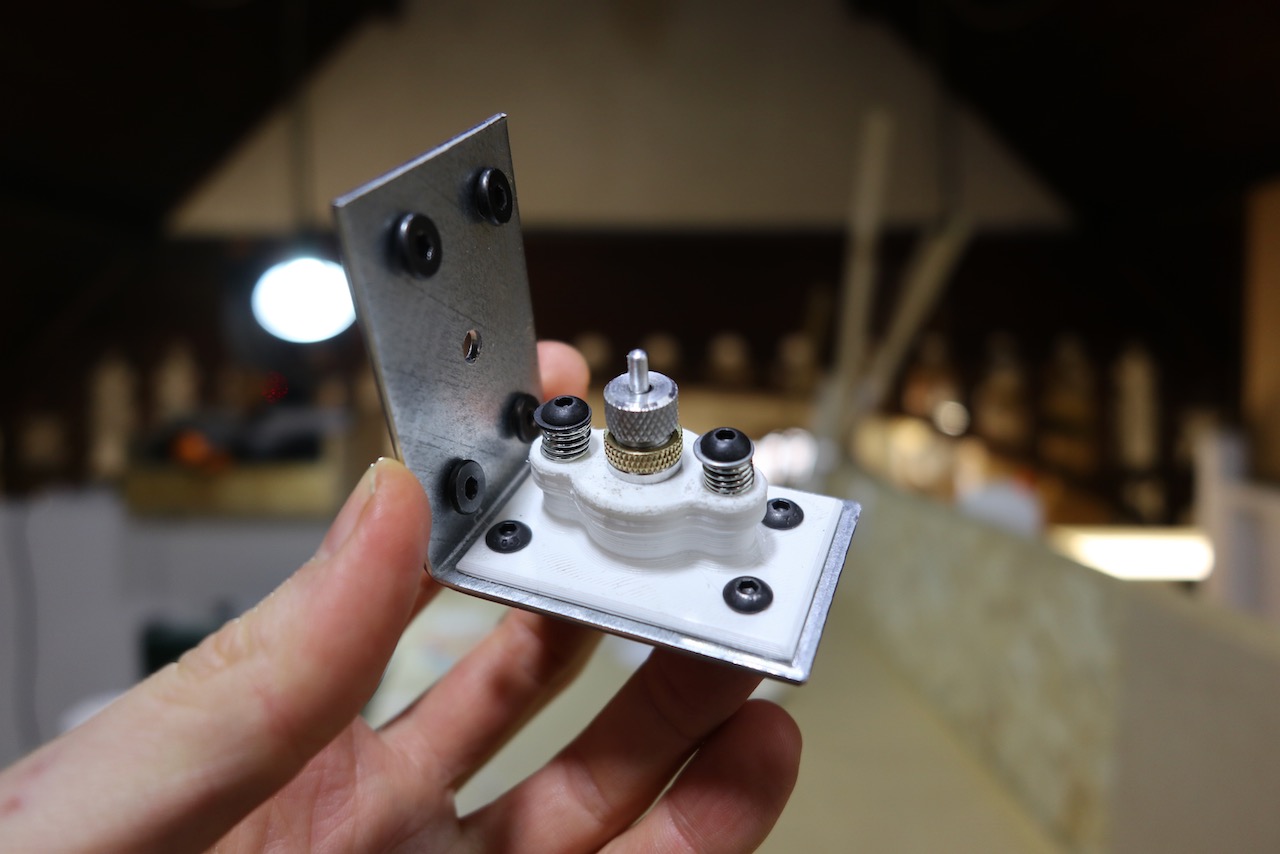
(1x) Metal right-angle bracket
https://www.screwfix.com/p/sabrefix-heavy-duty-angle-brackets-galvanised-40-x-60mm-25-pack/71671
(1x) Blade holder
https://www.amazon.co.uk/gp/product/B07PF7W5VD/ref=ppx_yo_dt_b_asin_title_o01_s00?ie=UTF8&psc=1
Additional tools:
12mm drill bit
Alan key set
M4 screw thread tapping set (preferable but optional)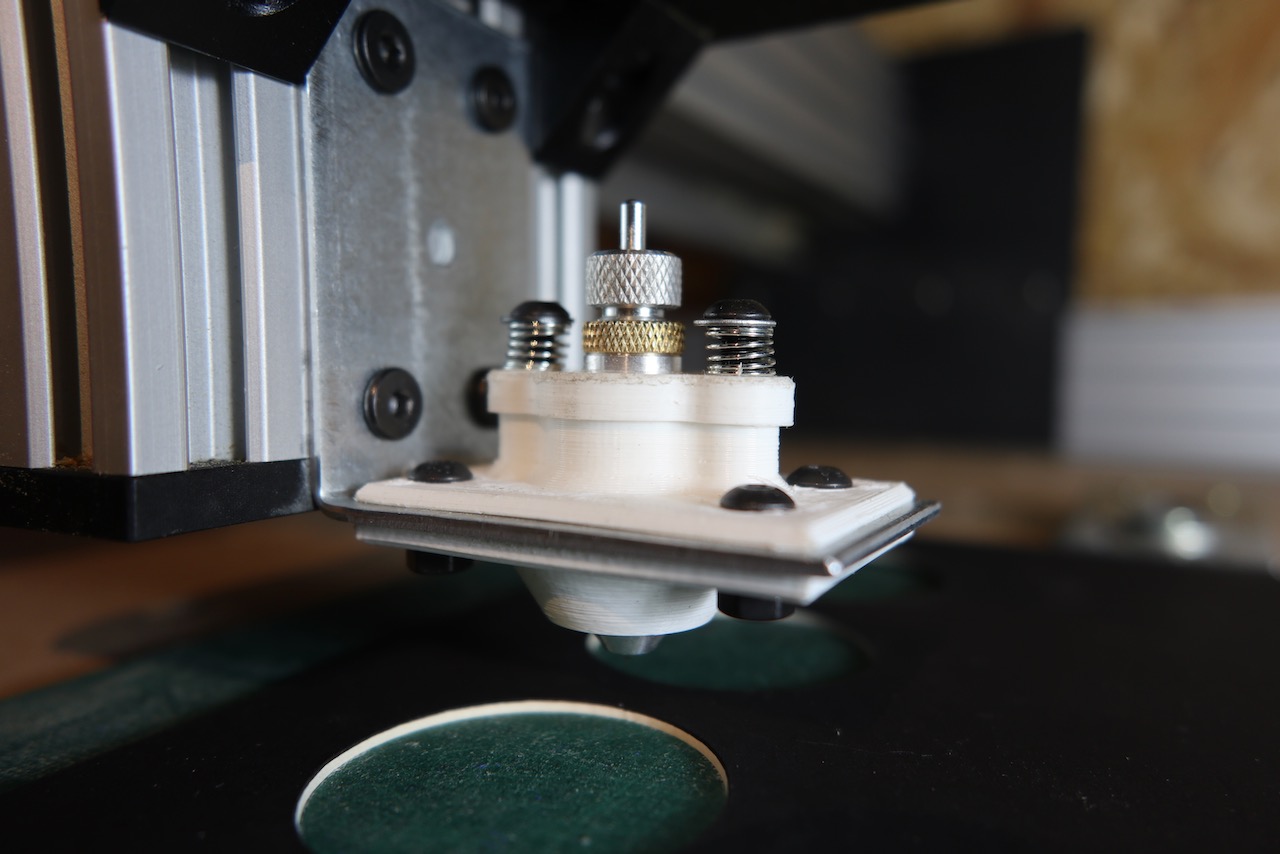

The printable parts for this design are fairly fast and straightforward to print.
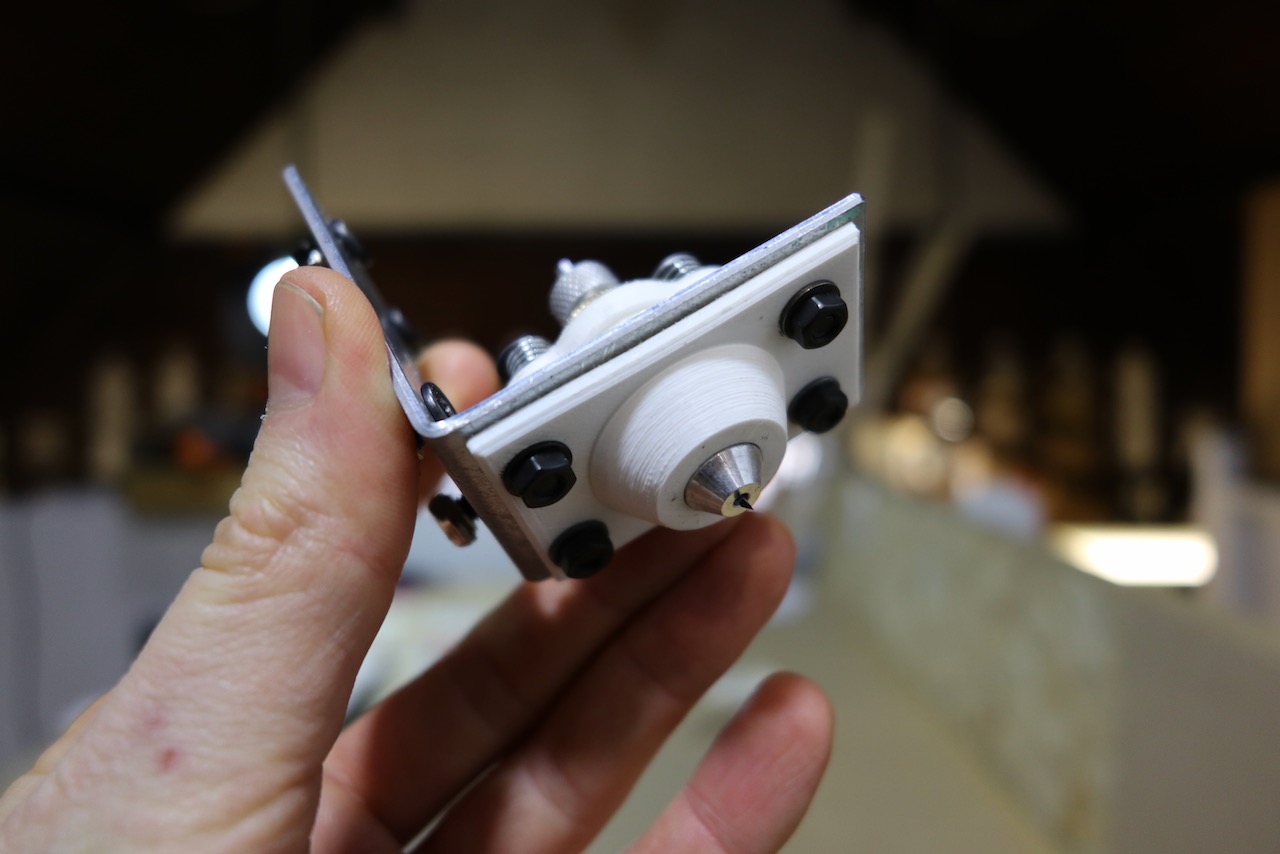
You'll need to purchase a plotter blade holder, that you can get very cheaply from places like eBay and Amazon.
You'll also need a metal right-angle bracket, which creates the rigidity for the tool and attaches directly to the Z axis of your Workbee CNC using the four drop-in tee nuts and M5 x 8mm low profile screws.
Parts list:
(4x) M4 x 10mm button head screws
(2x) M4 x 16mm button head screws
(4x) M4 nuts
(6x) M4 washers
(4x) M5 x 8mm low profile screws
(4x) M5 drop-in tee nuts
(2x) 0.5mm x 7mm x 20mm Spring (or similar)
(1x) Metal right-angle bracket
https://www.screwfix.com/p/sabrefix-heavy-duty-angle-brackets-galvanised-40-x-60mm-25-pack/71671
(1x) Blade holder
https://www.amazon.co.uk/gp/product/B07PF7W5VD/ref=ppx_yo_dt_b_asin_title_o01_s00?ie=UTF8&psc=1
Additional tools:
12mm drill bit
Alan key set
M4 screw thread tapping set (preferable but optional)
I used the steel right-angle brackets listed and drilled out the central hole with a 12mm drill bit for the blade holder to fit through. You could just as easily adjust the files for another bracket, or bend your own bracket out of some 2mm steel using a vise and drill the holes to match.
If you'd rather use a different blade holder, then you can also easily adjust the files for this.
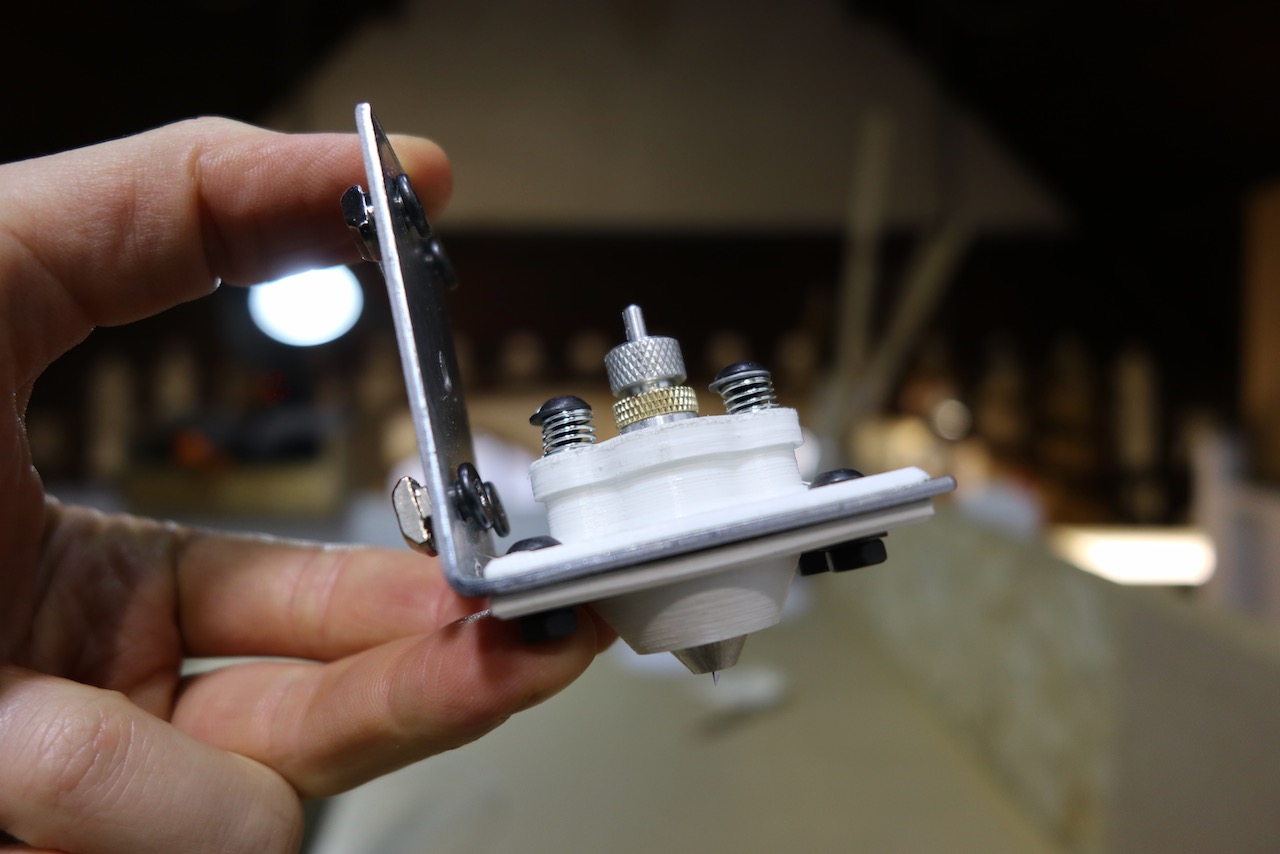
The main aim is to make a snug but freely moving fit around the blade holder within the custom parts, so that the springs can be adjusted to create an even pressure and cut depth across your CNC table.
I threaded the holes under where the springs sit with a tapping tool to create a smooth action for tightening and loosening them, but if you don't own this tool, you could get away with drilling the hole and forcing the screws in.
A cutting mat or sheet of MDF with an even layer of spray mount (left to dry) on it work very well as a method of holding your work piece.
Intermediate Openbuilds Workbee Cnc Drag Knife Plotter Cutter Blade
Workshop Project created by Thomas Forsyth, Jan 27, 2021
Share this Project
manja, Juanjo Martinez, Ruben_v and 19 others like this.
User Comments
Sort Comments By