Just Loom It
- Software:
- CorelDraw, Cambam, Mach 3
- Machine Time:
- 20 hours give or take
- Bit or Laser Size:
- .125 and .250 end mills o-flute
- Feeds & Speeds:
- 55 IPM 10,000 to 20000 rpm
- Materials:
- Walnut, Maple, wood glue,1/4-20 threaded barbed inserts, 6" 1/4-20 all thread, brass wood screws, wax
I am a wood worker by heart, not an expert at all; I love to create exciting new things, simple things, not complicated things like looms. I must admit that when I was asked to create this mini loom I had my doubts as to whether or not I could do it. The biggest challenge that I had was research, I did not know that there were so many different types of looms. I stayed away from the large floor looms because I knew that the loom I was going to make would be small enough to fit on a lap. After more than 5 months of research and collaboration with other textile artist, I was able to come up with this design.
I am going to rate this loom as an advanced wood working project. You may or may not need to make changes to the design to suit your needs. Perhaps you are making to give as a gift or wanting to pass on an heirloom piece. What’s most important is that you have fun making this project.
I don’t own a planer or a table saw so I purchase all of my exotic and domestic hard woods already cut, surfaced and correct size. This is the wood supplier that I use. I have found their product to be of high quality standard. For example If you order a board 6” wide ½” thick 24" long that is exactly what you get and the wood finish is so smooth that it takes little sanding to finish.
No matter where you purchase your lumber I recommend that you purchase additional materials just in case you need a back up. Like I said I am a wood worker at heart, not an expert, and I mess things up more often than not. Some of the wood listed I already had on hand from a previous project. I chose to use Walnut and Hard Maple for the contrasting artistic value, you can use which ever wood you want, I think you could even use Birch plywood.
3 - Pieces of ¾” x10” x 24” Hard Maple
2 - Pieces of 3/8” x 8” x 24” Walnut
1 – Piece of 3/8” 4” x 24” Hard Maple
1 - Piece of ¼” walnut plywood 16” x 24”
1 - Piece of ¼” walnut 6” x 24”
These items purchased from local hardware store
1 - Hardwood dowel rod 7/8” diameter 36” long
1 - Hardwood dowel rod 3/16” diameter 36” long
2 - Each barbed threaded inserts I used ¼-20
2 - Each ¼ - 20 all thread 12” long cut to size
2 - Crown nuts
2 - Washers
4 - Self tapping wood screws
1 - Wood glue I prefer to use “Gorilla Wood Glue”
Sand paper various grit 220 to 1500
1 - Teak oil (optional)
1 – Wood wax (optional)
Lint free tack cloth
Clean cotton rags and pads
91% Isopropyl alcohol used to clean the wood and raise the grain for final 1500 grit sanding. There are many tutorials on Youtube.com that explain this process.
Equipment and software that I used for this project:
Let me emphasize that I am not a wood worker, I am a maker of things and I used a home builtDIY CNC router with 1.25hp Makita palm router to make the parts for this loom, actual machine used for this project is shown in one of the pictures. Without this machine I would have never been able to complete the project let alone start it.
1/8” compression endmill
Mach3 was used but you can also use the open source software known as LinuxCNC
CamBam was used for the final design and the creation of tool paths and g-code, You could use Fusion 360 which is available for free.
4 - 8” clamps from the local Harbor Freight tool store
Rubber bands used as clamps
Double stick tape was used to mount some of the thin pieces of wood to the waste board.
I started this entire loom making process by setting up my machine to cut the parts, I inserted the 1/8” compression bit into my router, I used this bit because it was the only bit that I had on hand. I wish I had a ¼” compression bit but those things are rather expensive and I could not afford one when I started this project.
The first parts that I cut were the uprights for the loom. I mounted the ¾” thick Hard Maple to the waste board of my machine, making sure that everything was flat and secure and there was no movement in the board. I created a couple of different g-code files for each of the uprights, making sure that all of the settings were spot on and because I used such a small end mill I set a spiral ramp setting to reduce the forces placed on the bit as it entered the work piece. I made the pockets and drilled the holes for the dowels first so that I could check the fit of the dowels prior to cutting out the profiles. The goal was to have a smooth slip fit for the dowels and the other hardware that I would eventually use for assembly. Once I had the two uprights made I verified that the two upright profiles and dowel pockets and bolt holes were a mirror image of each other, I checked for proper dowel alignment and fit. The reason I chose to make these two parts first is because once you have the main skeletal form you can make adjustments to the other parts as needed and in my case I needed to make changes to the size of the drawer.
The drawer was far too large to fit the opening that I had made in the upright, so changing the dimensions of the drawer by 8 percent helped with the fit issue.
For the sake of not repeating myself I mounted all materials to the waste board in a similar fashion as the 3/4" hard maple was mounted to the waste board of my machine. I use home made clamps and double stick tape..
Just to make sure that the draw would fit I cut a drawer test part to see if the part would fit and made more adjustments as needed and once satisfied with the fit I continued to make the remaining drawer parts. I cut 6 individual drawer parts to create the depth that I needed for the drawer, added the back and the drawer front.
I would like to point out that you can adjust the depth of the drawer simply by adding or subtracting one or more of the drawer parts.
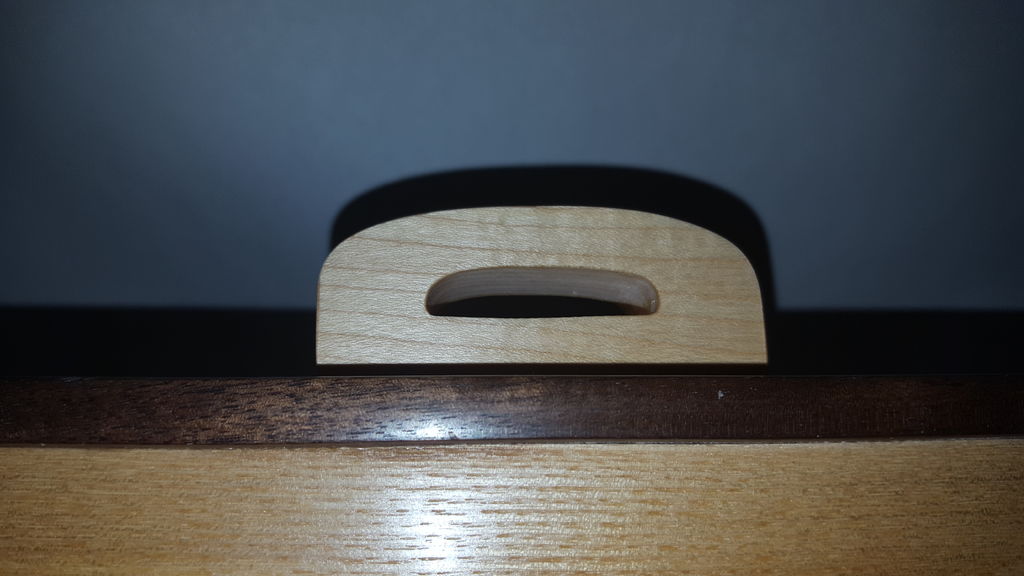
In order to properly assemble the drawer you need to cut two pieces of 3/16 dowel at least 8” long or longer depending on how deep you made your drawer. These dowels are cut from the 3/16” diameter by 36” long dowel. The drawer parts must line up accurately in order to fit in the drawer cutout that was made in one of the uprights. The holes in each of the drawer parts have a dual purpose, firstly to keep the parts in alignment for gluing up the drawer and finally for an aesthetic element of the drawer as seen on the drawer face.
See the drawer in the pictured example
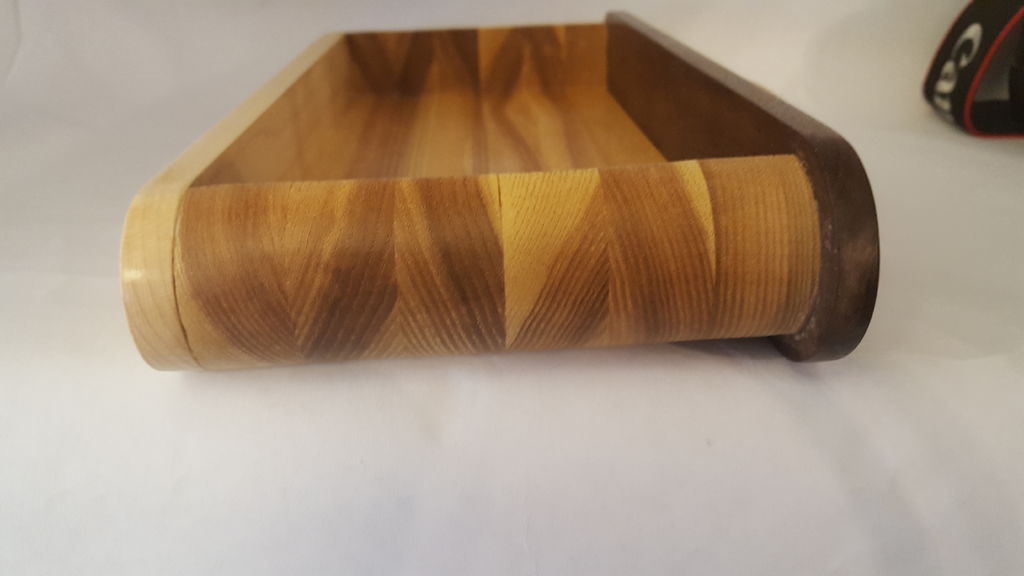
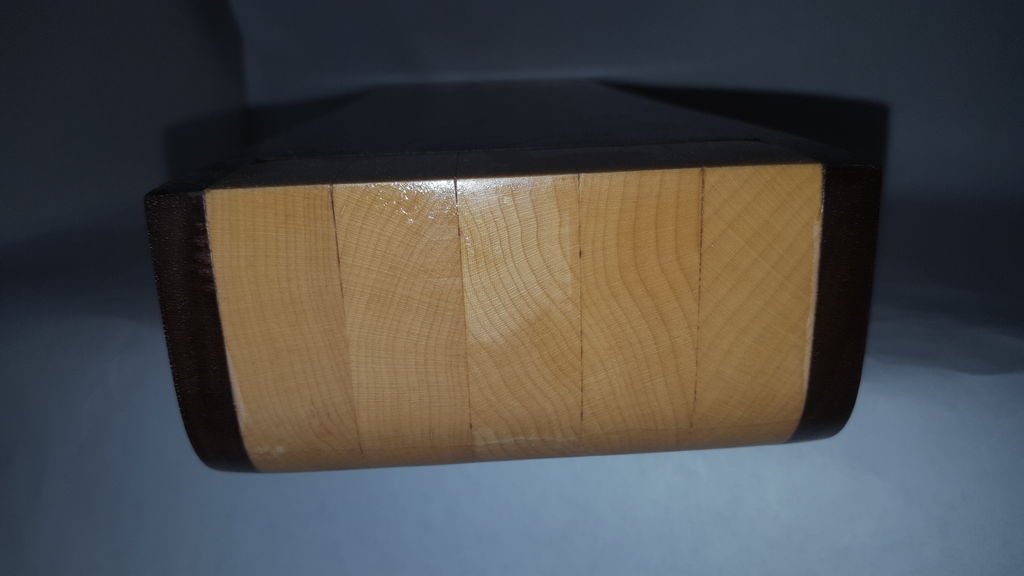
I followed this same process for cutting the loom/drawer body parts, which include the 10 pieces that make up the right and left side, the front, back, the top and bottom.
Gluing the side parts is straight forward, make sure that everything is perfectly aligned, flat, square etc then clamp. Double check to make sure the parts is in alignment. Remove excess glue before moving forward. After the right and left side of the loom/drawer body have dried you can install the top and bottom pieces that you made from walnut plywood or hard wood. The recesses in the side parts should allow for a flush fit, remove excess glue and allow to dry. What you should have is the loom/drawer body as one piece now you can add the front and back pieces to complete the drawer body, making sure that you align all of the holes. I used an all-thread to help with this process.
See the loom/drawer body in the pictured example
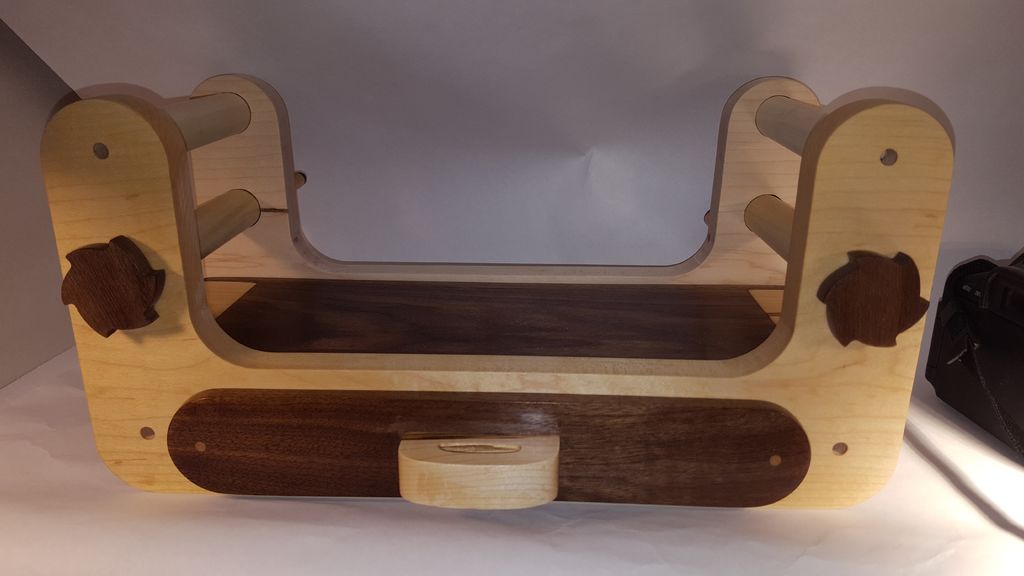
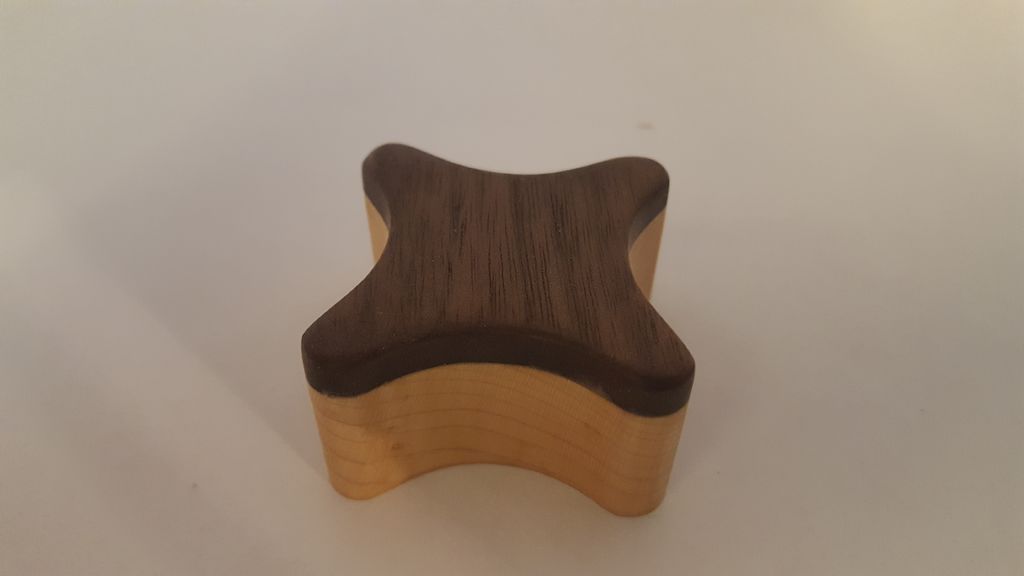
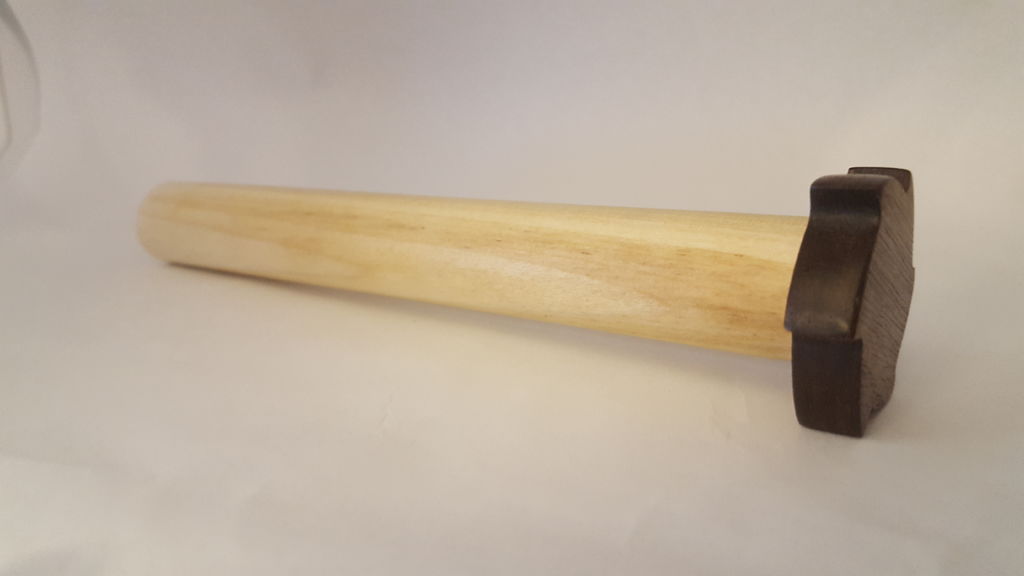
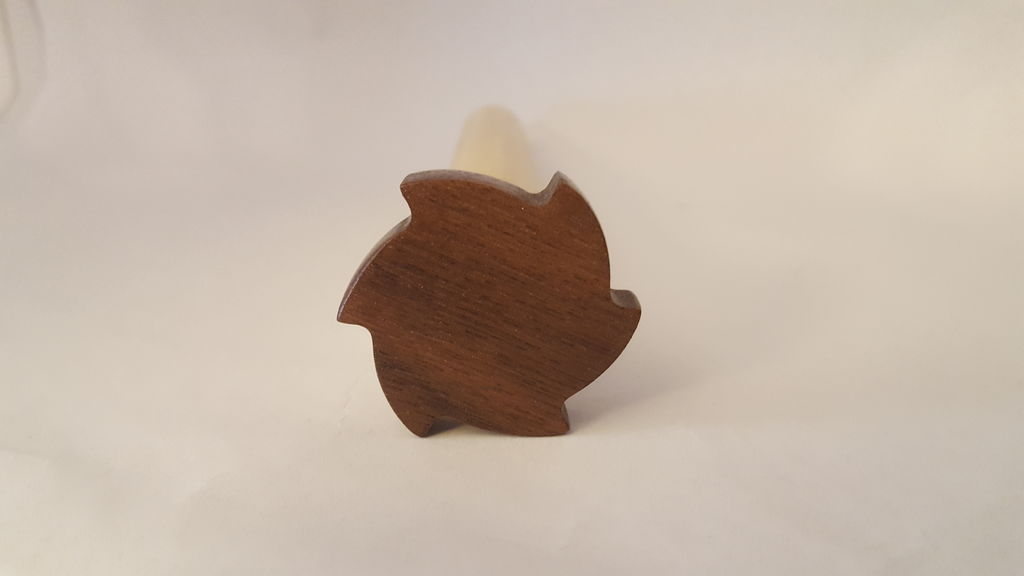
To make the crank handles I used scrap pieces of ¾” hard maple and ¼” walnut. I cut a hole all the way through the hard maple large enough to fit the dowel; I made sure that the dowel fit was rather snug. The profile was the same for both the maple piece and the walnut piece. I glued the two pieces together to complete the crank. The gears were made from 3/8” walnut. I cut a .200 deep pocket the diameter of the dowel was cut for each gear, The gears were glued to the end of a dowel. The gear locks were made from the same 3/8” walnut and fastened to the loom upright using a brass wood screw.
Using my wife’s jewelers saw, I carefully cut two sections of the 7/8” dowel 5” long these fit in the pockets on the inside of the loom uprights and two sections of the 7/8” dowel were cut 7” long and they go through the uprights. On these two longer dowels I glued a gear on one end and hand pressed a crank handle on the opposite end, I did not use glue with the crank handle. I applied wax only to the areas of the dowels that went through the uprights, I did not add wax to any other area of the dowels.
See the loom in the pictured example
I did not add my G-Code because not all machines are created alike. You know your machine and your software better than I do. It is possible that the files I created with my software may not be compatible with your software and the dimensions may not represent the same dimensions that I achieved when I made the parts for my loom. You may need to adjust the files accordingly.
Each part that I created was sanded smooth using 220 grit standard wood sand paper. I continued sanding using various grit of wet/dry sand paper up to 1000 grit. I removed the wood dust using a vacuum after which I wiped each part using a cotton cloth saturated with 91% Isopropyl Alcohol, this process raises the grain of the wood ever so slightly and then you knock down the drain by lightly sanding with 1500 grit wet/dry sand paper. I removed the wood dust with a lint free tack cloth. I then applied paste wax for wood and buffed with a cotton pad.
The end result should resemble something like what glass would feel like. You can also leave the finish as is or apply paste wood wax or other finish to protect the wood.

Share this Project
Rob.C, Peter Gamache, Scotty Orr and 5 others like this.
User Comments
Sort Comments By