- Software:
- Vectric Aspire, Grbl Panel
- Machine Time:
- 20-30 minutes
- Bit or Laser Size:
- Diamond Drag bit for the engraving and a 30deg 0.1mm flat vbit for cutting
- Feeds & Speeds:
- 100ipm for the engraving
20ipm for the cutting. I prefer to take slow shallow cuts, as I found that the bit does not break. :)
- Materials:
- 0.015" Brass plate.
Premium Exterior Blue tape. It sticks better to non wood surfaces.
2P10 CA glue and activator
#0000 Steel Wool
Fishing Swivel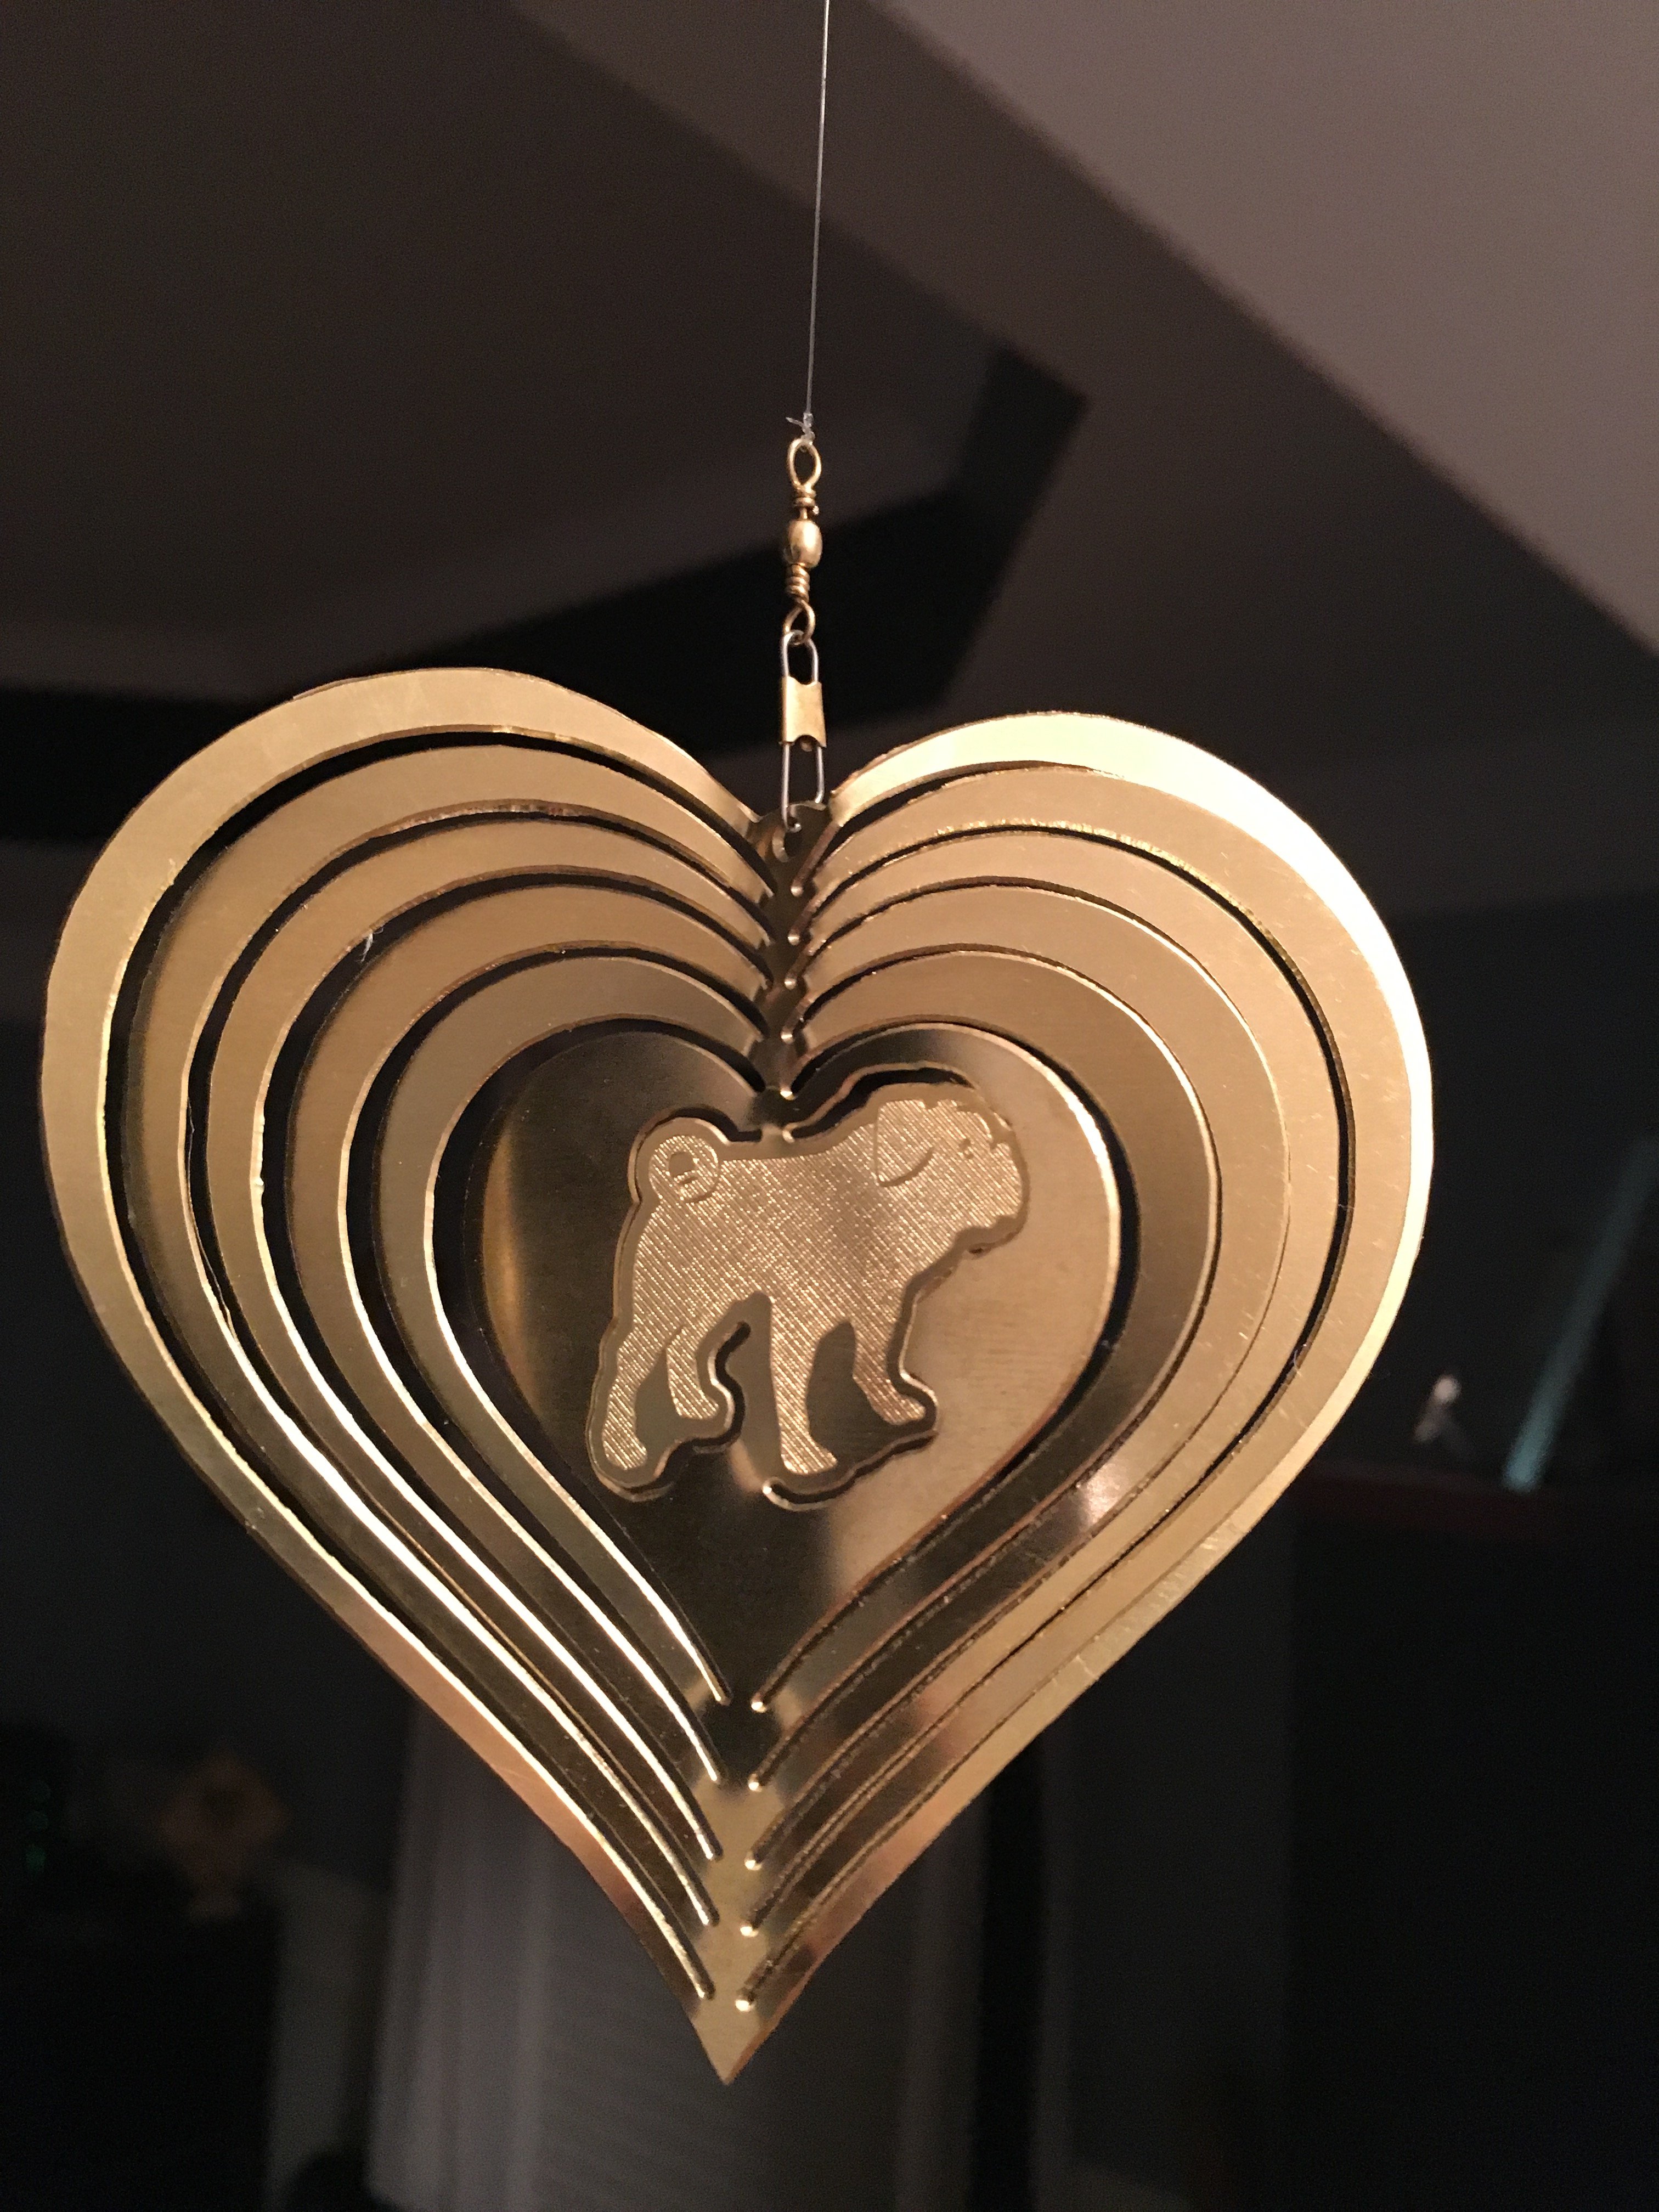
Here is a link to a gif of the piece moving in the light.
I started off by using steel wool to polish both surfaces of the brass. Once satisfied, I cleaned the brass with Isopropyl Alcohol (IPA) so the tape has a good surface to adhere to.
I am using my Openbuilds MiniMill to make this piece. I have MDF attached to my machine as a spoil board. I cover the entire spoil board with blue tape. Try not to overlap the pieces, since it will negatively affect the machining when dealing with such thin material (FYI-the tape is 0.005" thick,or 33% of the material thickness). I trim off the excess tape, because I can. The process is repeated on the brass.


Apply the 2P10 CA Glue (super glue) to the spoil board. It only needs two lines of glue to hold the material in place. If there were several pieces being cut free, I would plan it out more. I also avoid the seams of the tape since there could be a small gap, because you didn't overlap the tape. Right?

Now, spray the CA Glue Activator on the tape applied to the brass piece. The activator will cause a nearly instant bond with the glue on the spoil board.
Magical Stuff

This is a lot of build-up for just mounting the material. I use my fingers to keep one edge square and flush with the spoil board when lining up the brass. Once it hits the spoil board, I press firmly in the center to be sure it is flat as can be.
The first toolpath is the engraving of the pug figure. I mount the spring loaded Diamond Drag bit. Then manually touch it to the surface of the brass, and drive it down a few more millimeters to take into any possibility of unevenness. If you are used to using a metal touch off plate and a wire attached to the bit, DON'T. Diamonds don't conduct electricity. Ask me how I know.


The next toolpath is the cutting out of the brass piece. Change the tool to the tiny 30deg 0.1mm flat v-bit. Again, I manually zero the Z since the alligator clip I use sometimes slips off the small bit. Plus the tip is so tiny and fragile looking.


When first working with brass, I had problems with that tiny tip popping off after a few minutes of running. So now, I slow way down and take shallow cuts. It takes longer, but I haven't damaged a bit since (knocks wood). I took 8 passes to get to the final depth of 0.03". Also, ramp your plunges whenever you get the chance.
The sharp ones among you may be wondering why it took me 0.03" to cut only 0.015". I wanted a little more space between the pieces of brass, so I went further with the v-bit to give me the look I was after. Plus it is hard to tell if the bit cut all the way through since it is only a 0.1mm diameter tip.
Now that the machining is done, carefully remove the piece from the spoil board and the tape from the brass. Because it was cut with a v-bit, the edges will be very sharp. Also, there will probably be a burr on the bottom side.
I used some 400 grit sand paper on a hard, flat surface to sand the backside and edges down to remove the burs. Then followed up with more steel wool to get the shine back.
This brings us to the look and feel portion of the program. The rings of the heart and dog have to be bent in such a way to reflect light at different angles. This was my first time trying this so maybe I'm doing it wrong, but I like it. I started at the center and gave the dog a tweak. Then I moved out one ring, and bent the right side back and the left side forward. I repeated the process several times, going from one to another, tweaking here and there until I was happy with the result.

The last step is to clip on a fishing swivel and some fishing line to hang it up.

I hope you enjoyed this project and make one of your own. The artwork is below in DXF and AI formats. If for some reason you don't like pugs (what kind of a person are you?!?!), you can of course change the inner graphic and shape.

Please hit me up with any questions here or on my Instagram.
-Nick Wiegand, @runcnctv

Share this Project
Batcrave, ManCrafting, MFCarew and 8 others like this.
User Comments
Sort Comments By