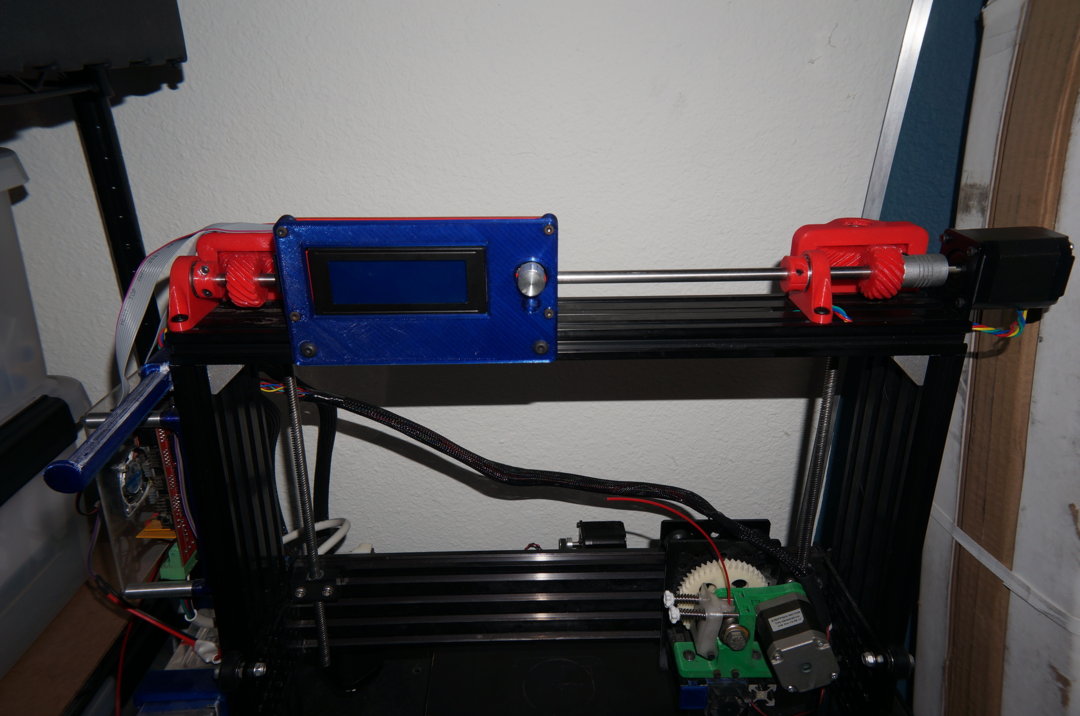
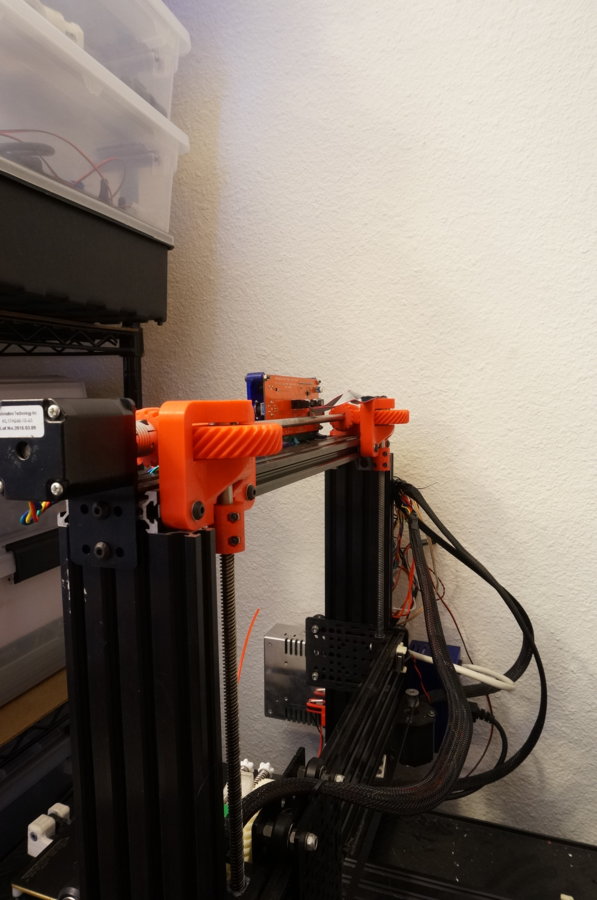
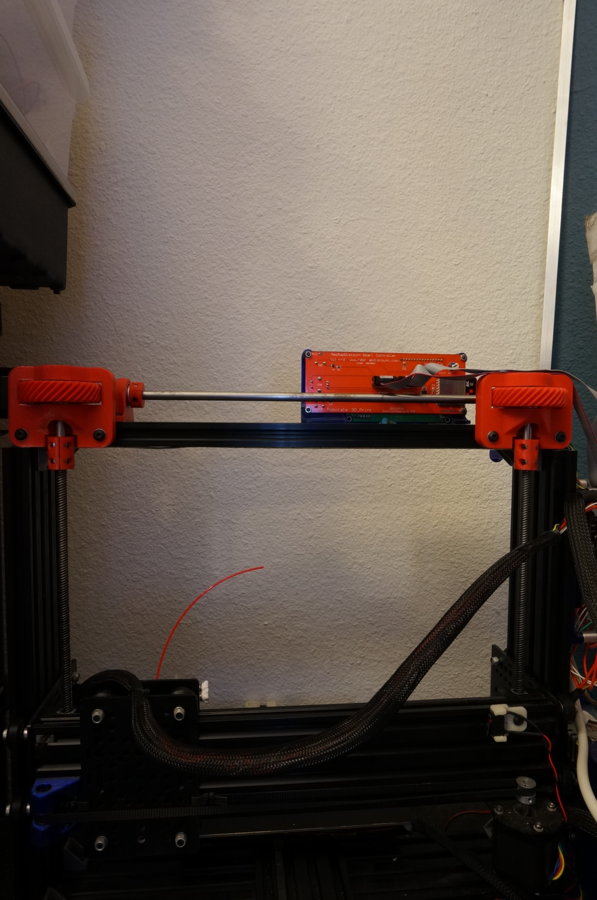
This is a conversion I for my Voxel Ox 3D Printer to sync the Z leadscrews and drive them from a single motor, using a shaft and gear transmission.
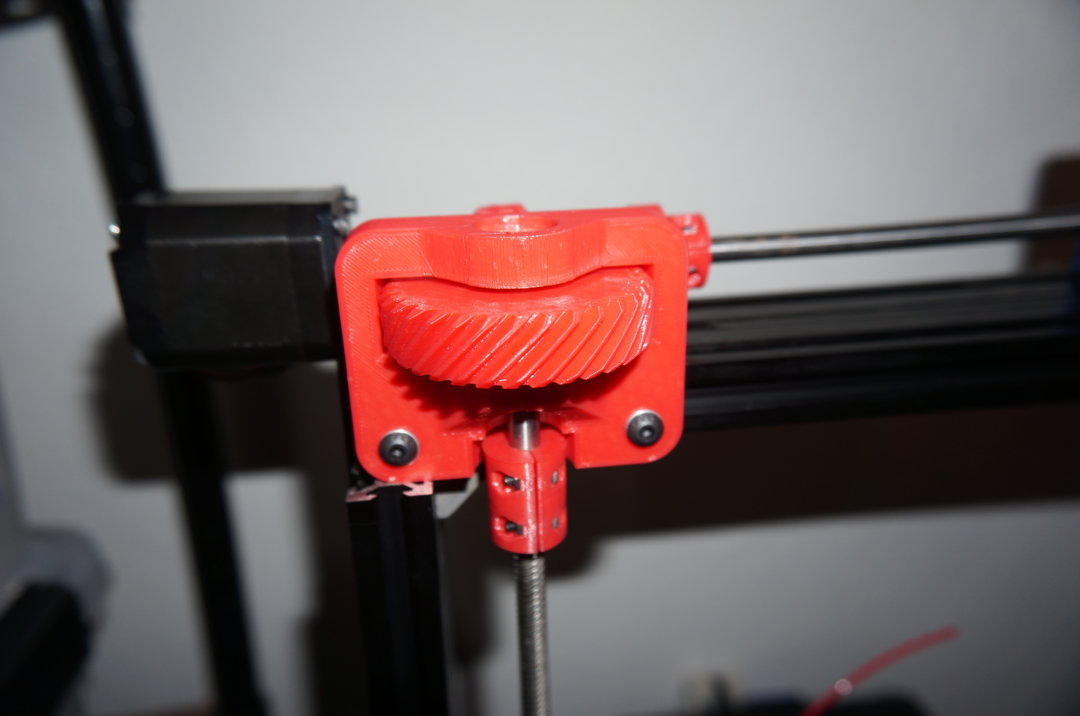
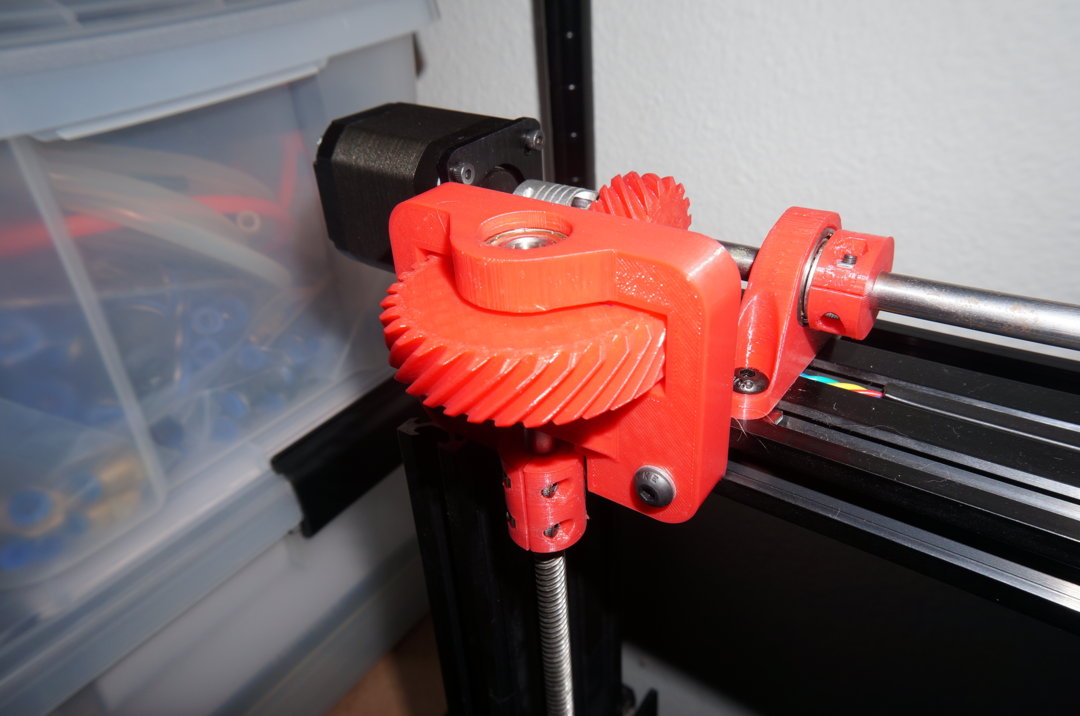
The gears are helical spur gears, modified slightly from an OpenSCAD design by Parkinbot. The modifications I made were to chamfer the edges (its crazy how sharp the teeth feel with no chamfer when handling the gears, especially if you are pressing on by hand)
Prepare the Frame:
Use M5 tap on the center hole of top 2060 extrusion on the right side of printer. This will be used for the top bolt of the motor mount.
If converting from original Voxel Ox configuraiton, remove the leadscrew mount plates, standoffs, and disconnect the left motor.
Prepare the 8mm rod:
Prepare the gear mounts:
- Cut the shaft to length based on top extrusion minus about 30mm.
- Cut two short pieces of shaft for the output gear axles. Mine were about 60mm.
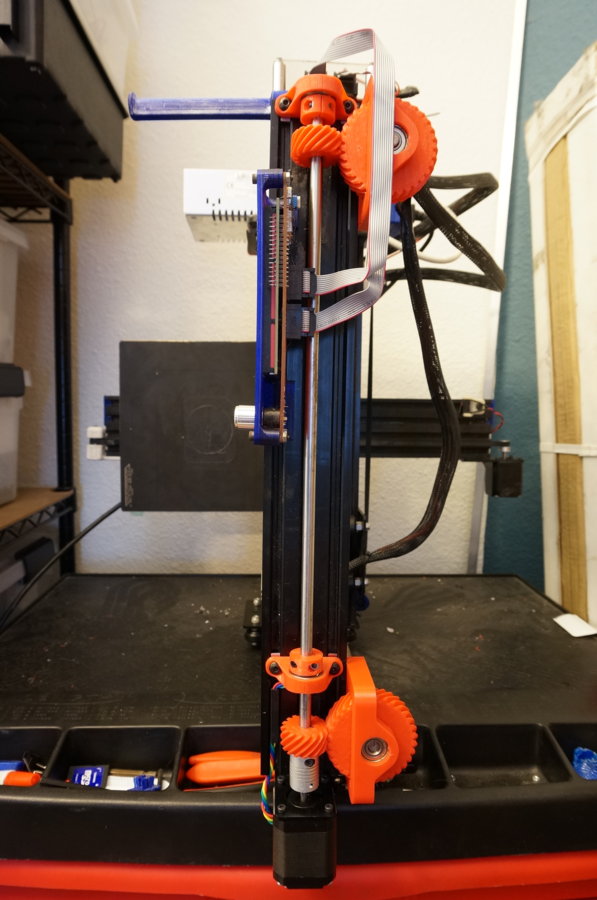
Assemble the driveshaft:
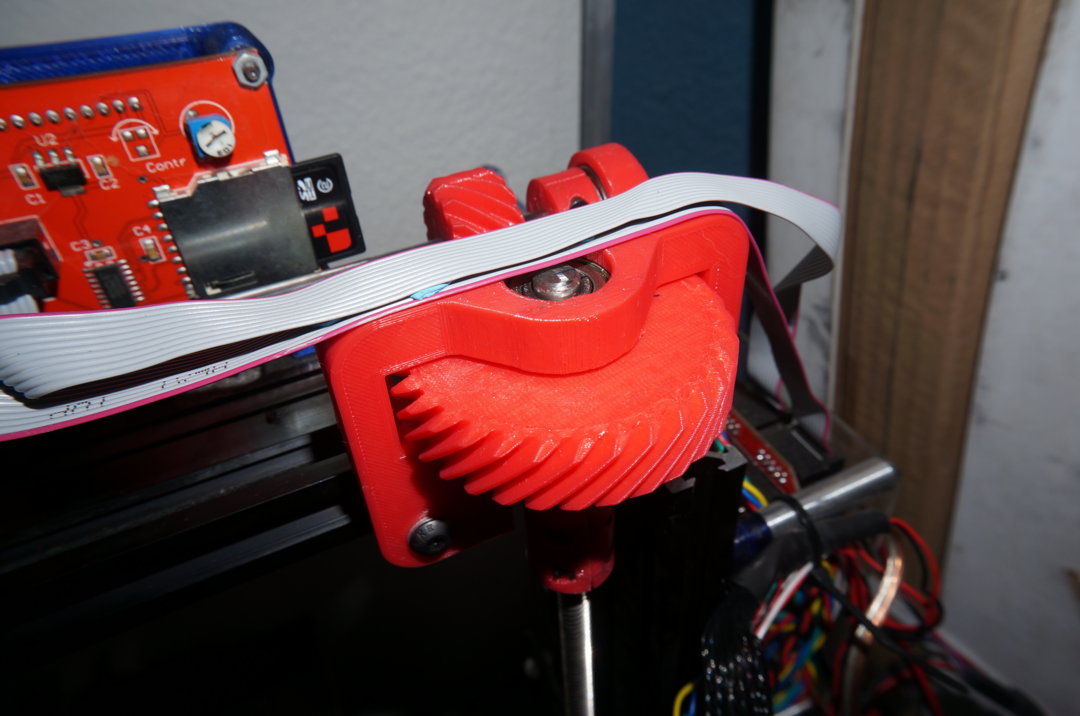
- Press the 608 bearings into each gear mount
- Position output gear inside gear mount with washers between gear and each bearing
- Press short shaft onto gear while keeping washers aligned. An arbor press or vise can be useful to aid in pressing the gear.
- Slide tee-nuts onto rear face of top extrusion
- Loosely fasten gear mounts to frame so they can still slide left/right
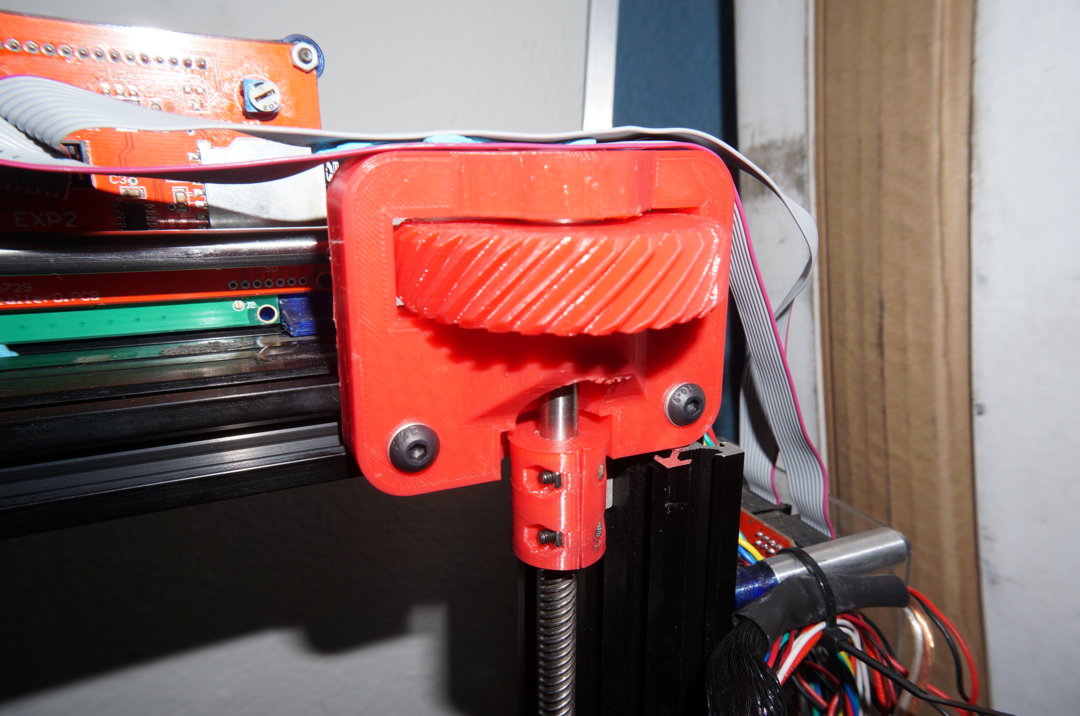
- Fasten 8mmx8mm coupler between gear mount short shaft and leadscrew
- Raise carriage to top, align gear mounts to minimize leadscrew deflection, and tighten gear mounts to frame.
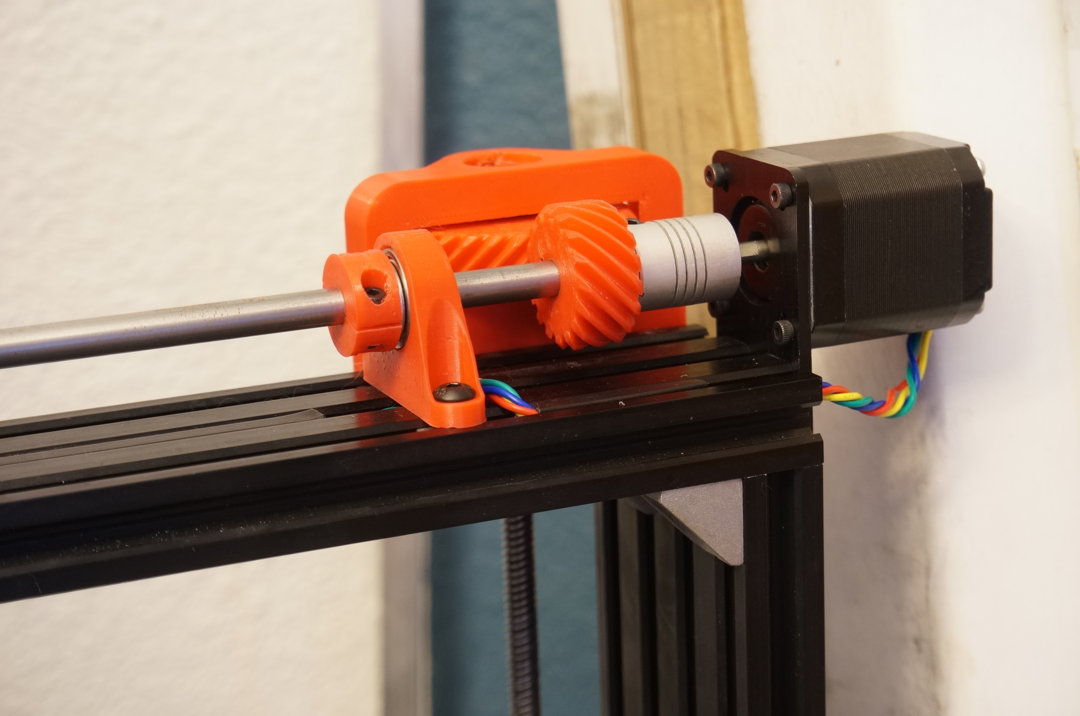
Arrangement of things along the shaft starting from the motor side:
Note that the pillow blocks have one flat/open side which is the side that washer and stop collar should go on to stop bearing from popping out of pillow block. Also the two pillow blocks should face opposing each other.
- motor-driveshaft coupler
- drive gear
- pillow block / bearing
- washer
- stop collar
- empty middle section
- drive gear 2
- stop collar2
- washer
- bearing / pillow block 2
For the driveshaft I used 8mm rod from McMaster sold as "Tight-Tolerance Multipurpose O1 Tool Steel Rods", because they were cheaper than other options I saw. However this proved to be much tighter fit for the 608 bearings than I anticipated. I have a Harbor Freight arbor press which can be useful for pressing bearings etc, but not when the shaft is much longer than the press height.
I ended up sanding the inner race of a bearing with a small piece of sandpaper on a dowel until I could slide the right side bearing into place without too much effort. I would recommend some other non-tight-tolerance rod for anyone else wanting to try this.
Fine adjust meshing of gears:
Loosen pillow block bolts and motor mount bolts just enough to be able to adjust the shaft separation. Slide the shaft assembly toward or away to find your best balance between backlash vs friction/excess noise. I found that a perfectly tight mesh has 0 backlash but a bit more friction than I would like. I back it off just a hair and the backlash is really only a hair also, but with acceptible friction.
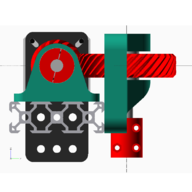
Note: The OpenSCAD views are mirrored left/right compared to how I assembled it on the printer, but the parts are the same.
Voxel OX with Helix Gear Z Transmission (single z motor)
Build in 'Cartesian Style Bots' published by thehans, Jun 4, 2018.
This is a modification I made to my Voxel Ox 3D Printer Z axis, which synchronizes the Z leadscrews via a shaft and helical gear transmission. It prevents the two Z leadscrew from getting out of adjustment relative to each other, and uses a single Z motor instead of two. This build is just documenting the specific changes I have made to the Z-axis, since the frame and other axes are still from the original Voxel Ox design.
-
-
Build Author thehans, Find all builds by thehans
-
- Loading...
-
Build Details
- Build License:
-
- CC - Attribution - CC BY
Reason for this Build
I had issues with my Z leadscrews settling under gravity and becoming out of level when the machine was off. This conversion prevents the two leadscrews from becoming out of sync. -
Attached Files:
Parts list
Qty Part Name Part Link Comments 0 Link -
Attached Files:


