Ever wonder how and why your 3d printer can not remain level?
My first printer was a rigid Ord Bot. To get it unlevel I would have needed a big hammer. Yet every print or so I had to re-level it again. Obviously the X & Y axes could not change their positioning without that hammer so the problem had to be in the Z axis. And, unlike the X & Y axes, the Z axis had two stepper motors.
Googling the history of stepper motor development quickly revealed the problem. Full Steps are actually physical positions in a stepper motor, while microsteps are merely theoretical. Microsteps are created by fluctuations in current and the motor is just as likely to stop on the next full step as on the theoretical microstep. Over hundreds of layer changes two microstepping stepper motors can not, by design, remain in sync with each other. I changed the jumpers and firmware on the Ord Bot to Full Steps for the Z axis and over the next 2,000 hours never had to re-level the printer. Microstepping was developed to smooth and quiet the stepper motor operation, at the expense of accuracy. Even though I never had to re-level the Full Step version Ord Bot, it was obnoxiously noisy and jerky.
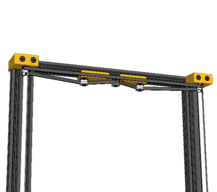
Next, I reset the jumpers and firmware back to 1/16 microstepping, then mounted a pulley and bearings on the top ends of each Z screw and rigged up a timing belt to force the two Z screws to remain in sync and unplugged one of the Z axis stepper motors. That configuration ran 5,000 hours with no re-leveling necessary.
Over the last few years I've developed over a dozen printer designs using this "Synchronous Leveling" concept and have published them on this OpenBuilds forum and sold them on my website and Ebay.
I then designed an Upgrade Kit to accomplish the same thing on a Creality CR-10s printer and another Kit for the Anet A6 printer. I've sold more than 100 of these kits on Ebay and off my 3dWrx.com website and have more than 100 customers who can confirm they've never re-leveled their printers after installing the upgrade.
Since you already have a 3D printer, I'm releasing the SKP & STL files for those kits here. By downloading the STL files and consulting the parts BOMs, you can build your own kits and convert these two printers at a fraction of what I sell these kits for.
By reviewing the pictures and instructions and the SKP files you can probably see how to design your own upgrades for other cartesian printers you may have. One of our members, @Steve Jeppesen, has been quite creative at doing that.
CR-10S STL Files: http://3dwrx.com/Upgrades/CR-10/final-product-stl.zip
CR-10S SPK Files: http://3dwrx.com/Upgrades/CR-10/final-product-skp.zip
CR-10S BOM File: http://3dwrx.com/Upgrades/CR-10/CR-10S-BOM.pdf


Anet A6 STL Files: http://3dwrx.com/Upgrades/Anet/final-skp.zip
Anet A6 SKP Files: http://3dwrx.com/Upgrades/Anet/final-stl.zip
Anet A6 BOM File: http://3dwrx.com/Upgrades/Anet/Anet-A6-BOM.pdf


Upgrading Your 3D Printer With Synchronous Leveling
Build in 'Cartesian Style Bots' published by Keith Davis, Feb 9, 2020.
Upgrading printers for Synchronous Leveling
-
-
-
- Build Progress:
-
- Build Complete!
Attached Files:
Bahman, Hey-Ole, Machiavelli and 5 others like this. -
-
Build Author Keith Davis, Find all builds by Keith Davis
-
- Loading...
-
Build Details
- Build License:
-
- CC - Attribution NonCommercial - No Derivs - CC BY NC ND
Reason for this Build
To share an engineering technique with the Open Builds communityInspired by
BldrBot S2


