I haven't submitted a build here before, because I'm only on my second one so far. The first one ended up being something of a failure, so I returned to the drawing board and came up with this, a rather wonky-looking Cartesian design.
What's so special about it? Well, it tackles a few problems that I had with my old design:
1) It is self-contained. My old moving-table design took up a bunch of room, because the table needed to be larger than the cutting surface for various reasons.
2) It (should have) nearly zero slop in every direction. I was able to eliminate slop in all but one with my old design, but what I was getting in that one direction was really bad, because
3) It allows me to mill at many different heights without rebuilding the machine. I need to use this for everything from etching PCBs way down on the board to end milling long pipes stuck in a clamp, pointed directly up the Z axis.
4) It will not miss steps. With a moving-table design, I found that I would lose steps dependent on the weight of whatever I had on the table. This design only moves itself, rather than whatever it's milling, so doesn't run into that problem.
Alright! What's the design philosophy behind this guy? Well, the main enabling piece is the 120 angle tee nut that got added just a few months ago. I saw that thing and went "Aha, now I can make triangles!" By... making hexagons. BUT IT'S CLOSE.
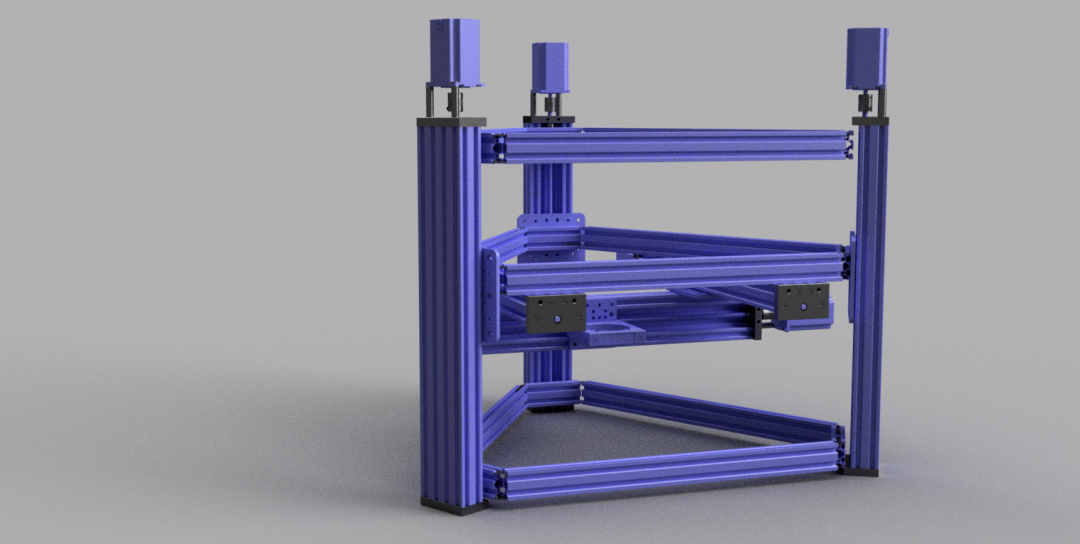
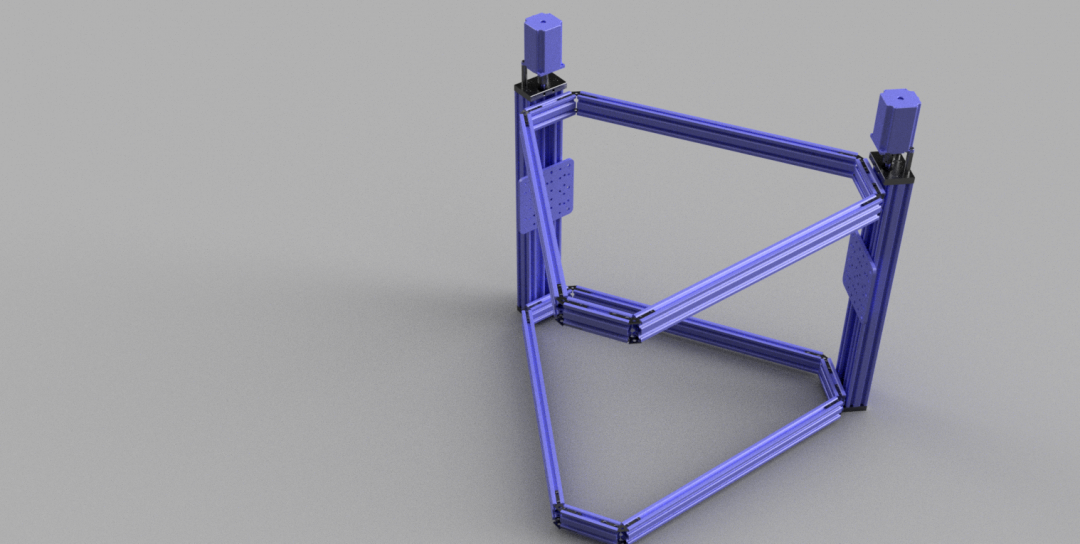
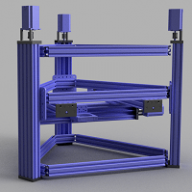
So the design is built around trying to create a base as close to a triangle as possible. Partly because 3 motors for one axis seems just right, partly because triangles are very stable. A hexagon is used, since I need a mounting surface for the Z axes.

Each end is either a 80mm or 500mm 20x40 V-slot beam. The Z axes are mounted on the shot sides using right-angle connectors with spacers. Spacers are necessary because the same hexagon has to go on the moving plates, which have an additional thickness offset from the C-Beams that make up the axis.
The axes themselves are standard-fare 500mm C-Beams with threaded rods, XL gantry plates, and high-torque NEMA 23 motors. They're driven from a TinyG.
The axes are connected both at the bottom and at the top by these hexagon structures.
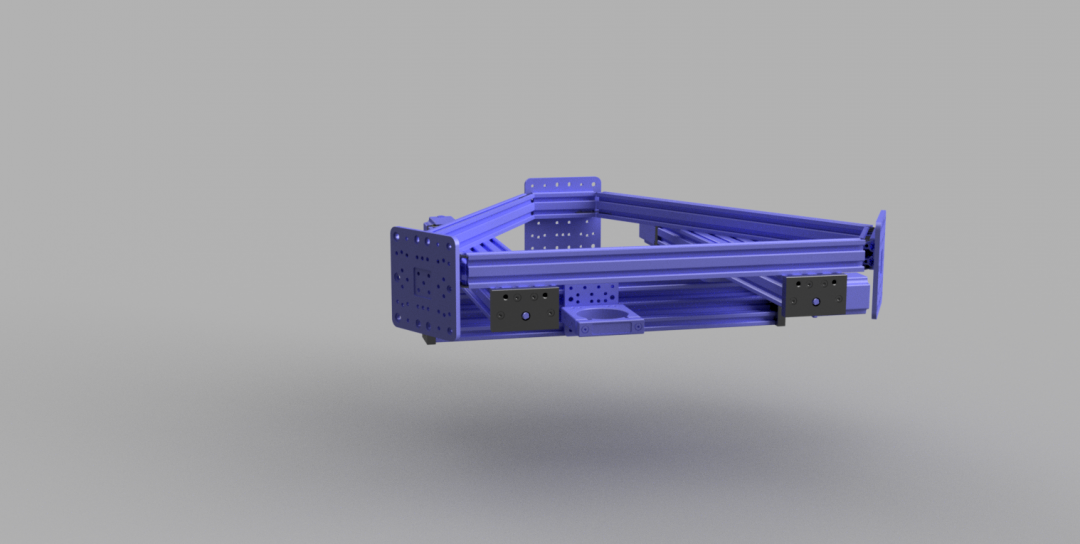
The platform portion of the mill is made of another hexagonal structure and three motorized axes. Two of them move in the Y direction, with their gantry plates facing down. Directly attached to those is the last axis. It varies only in that it uses a standard C-Beam gantry plate instead of an XL one, because the XL one would hit against the Y axes and reduce the useful motion of the machine.
The renders don't show the 90-degree connectors that make an appearance throughout the build, to actually fasten everything together. Fusion 360 was already chugging as it was, so I simply didn't have the patience for them!
Now, I haven't built this yet, so I can't 100% vouch for its practicality. Some connections, specifically between the Z axes and the short parts of the hexagon, are gonna be tricky do to overlapping right angles and MakerLink pieces: the 80mm number will require futzing so that the screws through the right angles go through the MakerLink screw sockets.
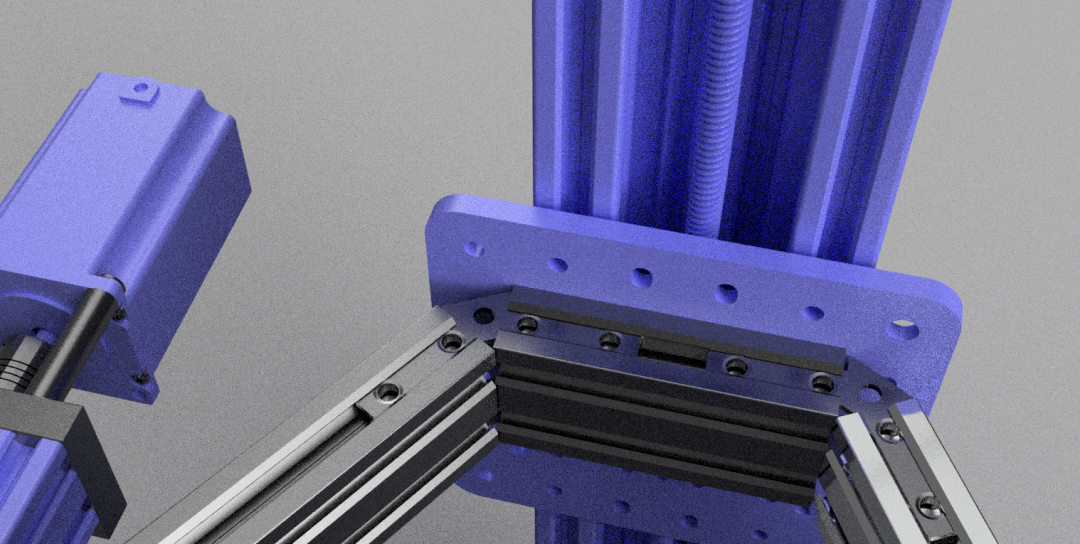
Hmmmm prolly needs to be shorter. That's some suspect lining up there.
But, I do plan on going ahead with this, and will post pictures once the physical thing is built, including how-tos on getting the TinyG to work with so many motors.
Triangular CNC Milling Machine
Build in 'Other Style CNC Mills' published by FancyKiddo, May 6, 2017.
A wonky build to eliminate slop on a long Z axis
-
-
Build Author FancyKiddo, Find all builds by FancyKiddo
-
- Loading...
-
Build Details
- Build License:
-
- CC - Attribution Share Alike - CC BY SA
Reason for this Build
Making lightsabers and synthesizers aw yeah! -
Parts list
Qty Part Name Part Link Comments 4 120-Degree Angle Nuts http://openbuildspartstore.com/120-angle-tee-nut-makerlin... Link 10 Pack! 9 20x40x500 V Rail http://openbuildspartstore.com/v-slot-linear-rail/ Link 1 20x40x1000 V Rail http://openbuildspartstore.com/v-slot-linear-rail/ Link Cut into 9 80mm lengths, plus extra 6 High Torque Motors http://openbuildspartstore.com/nema-23-stepper-motor-high... Link 6 500mm C Beam Actuators http://openbuildspartstore.com/c-beam-linear-actuator-bun... Link 5 with XL Gantry Plates instead of the normal ones 24 9mm Aluminum spacers http://openbuildspartstore.com/aluminum-spacers/ Link These are the perfect length to space your connections between the Z axes and the hexagon structure 1 1 Ton of Right-Angle brackets http://openbuildspartstore.com/black-angle-corner-connector/ Link Yeah I'm not gonna count these. Because you can slap on as many as you want, depending how much you want to spend and how much you think it helps 1 1 Ton of Tee Nuts http://openbuildspartstore.com/tee-nuts-25-pack/ Link Don't you already have lots of these? You should 1 Router Mount http://openbuildspartstore.com/router-spindle-mount/ Link Not much of a mill without something to spin a bit! 1 1 Ton of every length of Screw http://openbuildspartstore.com/low-profile-screws-m5/ Link Unless you want to use glue, I guess? 0 Link