
The Archon Revision 2.0
Hello Everyone!If you like it!!! please vote!!! it only takes a minute thanks
here is the link....
http://bit.ly/PowerPackVote
This is my first build post ever here on Openbuilds.com and I want to take the opportunity to say how amazed I am at the amount of talented people there are here at Openbuilds. I will try really hard to be as thorough and methodical in my approach to describe my setup process and my theories behind the choices I made to make this Gargantuan of a machine a real possibility!!! I will do my best, step by step, to describe the build process. thank you Makerparts.ca for being one of the only trusted Canadian distributor's "that I know of" of Openbuilds gear here in Ontario helping builders and hobbyist's alike to stay inspired and build awesome stuff. and course thank you to all that have inspired me here on Openbuilds.com and also thank you to Openbuilds and its co-founders for not only providing the tools and materials that builders need in order to make all of this happen, but also providing a solid platform and ideology for its business model and helping makers alike stay connected by building a community of like minded individuals that ultimately share the same passion. to build things new and old, to build things never once possible and build them better. and last but not least I want to thank my family for keeping me motivated and making sure I didn't pull all the hair out of my head.My beautiful girlfriend for standing beside me through the toughest of times, and of course Bentlee the dog, who I could always count on to remind me that eating and drinking was important and that no matter how fixated and focused I was flexing my brain muscles, it was important to still use the washroom.
so in the words of some sage like advice from some Merlin likeness of a man that may or may not have existed at some time or other,
"Necessity is the mother of all invention".....so without further adieu here I go!!!
STEP 1 SOURCE ALL THE PARTS!!!
Probably the hardest part of this whole process was sourcing all the parts, and establishing what exactly I needed in order to complete this build. I first established that I wanted this to be a big machine with a huge cutting capacity roughtly 10'X5' machine, in order to accommodate full sheets of 4'X8' sheets of plywood. because it became apparent to me that some of my customers and potential markets where limited to what I could physically cut with my Smaller Cartesian machine and second I was tired of not being able to nest a full sheet of material, to cut down on material waste and not having to cut down an important workshop material I use for my customers with a skilsaw in order to fit the raw materials onto the machine was paramount.
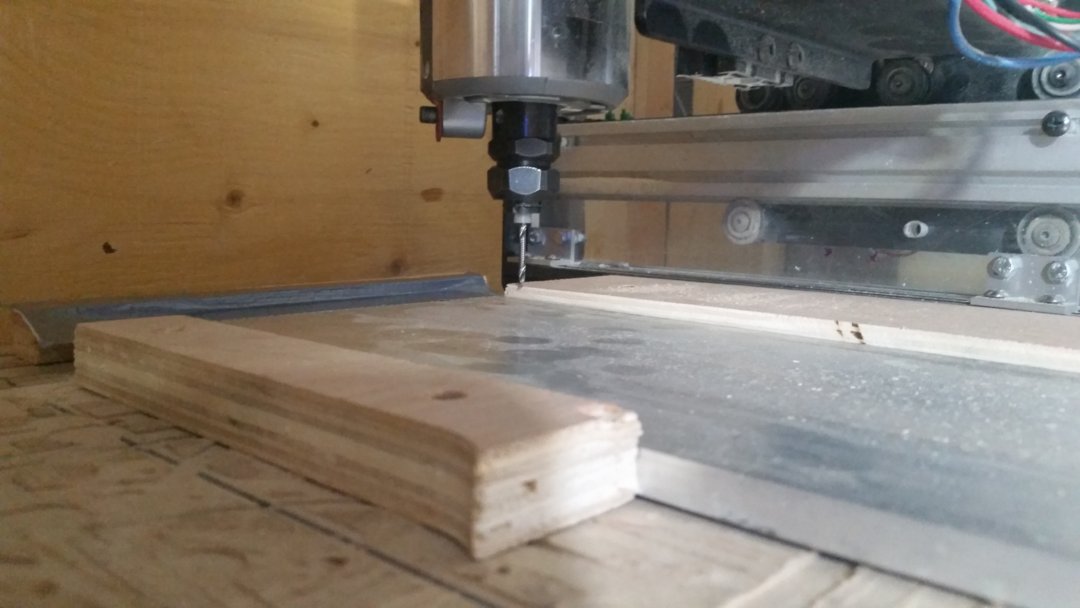
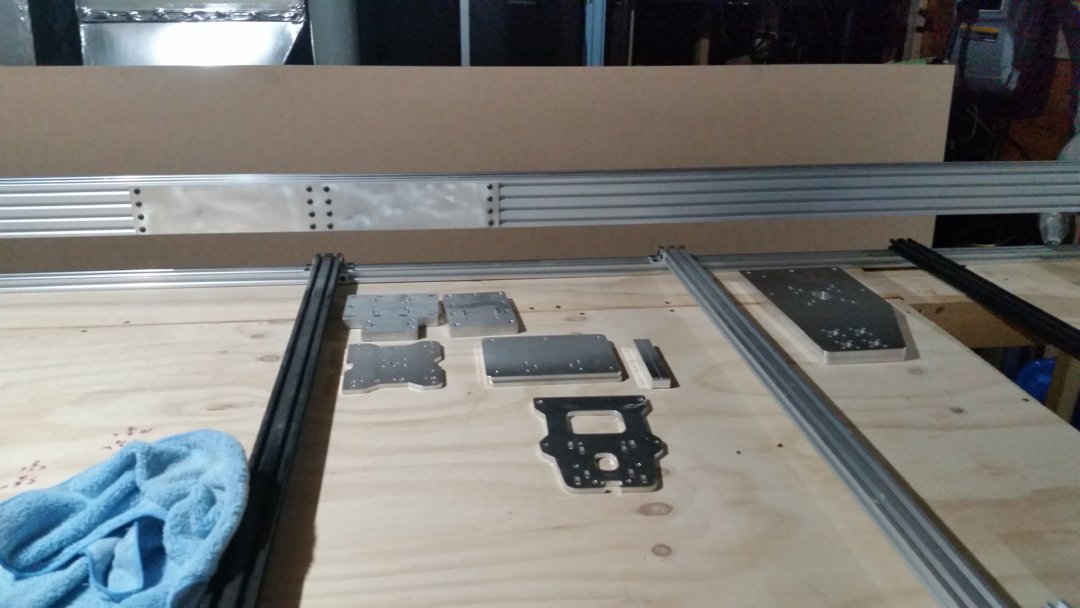
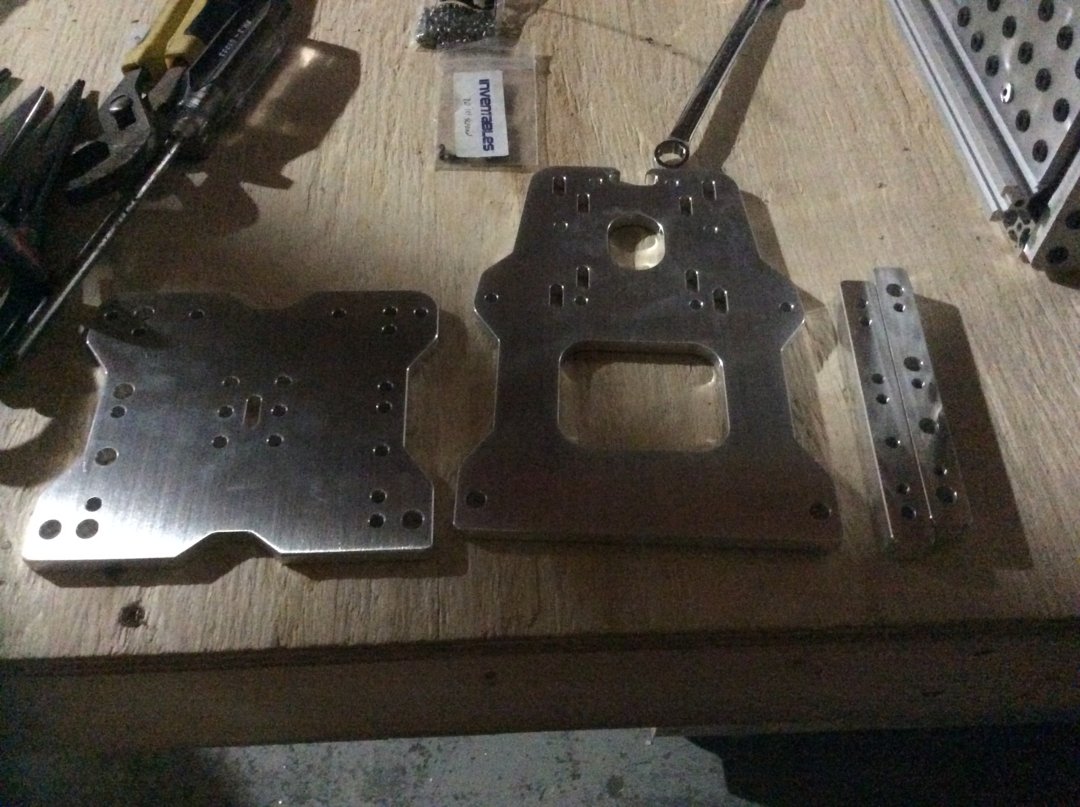
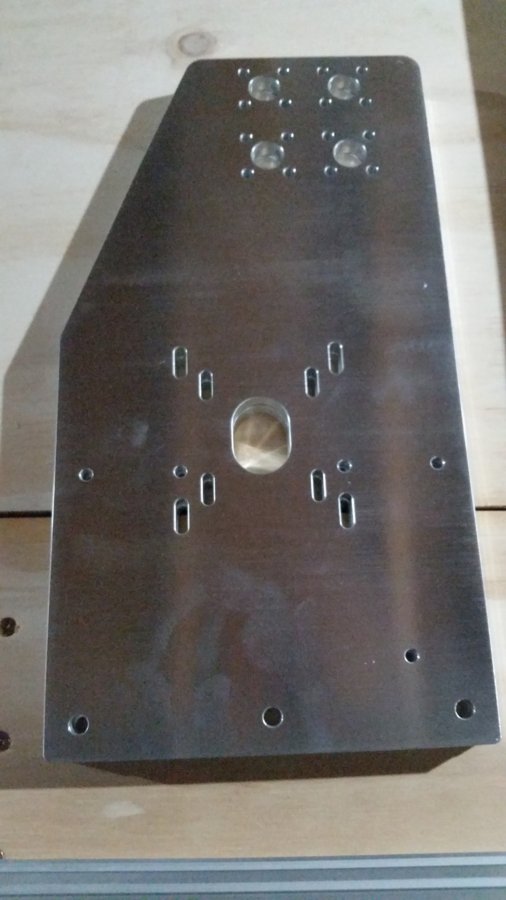
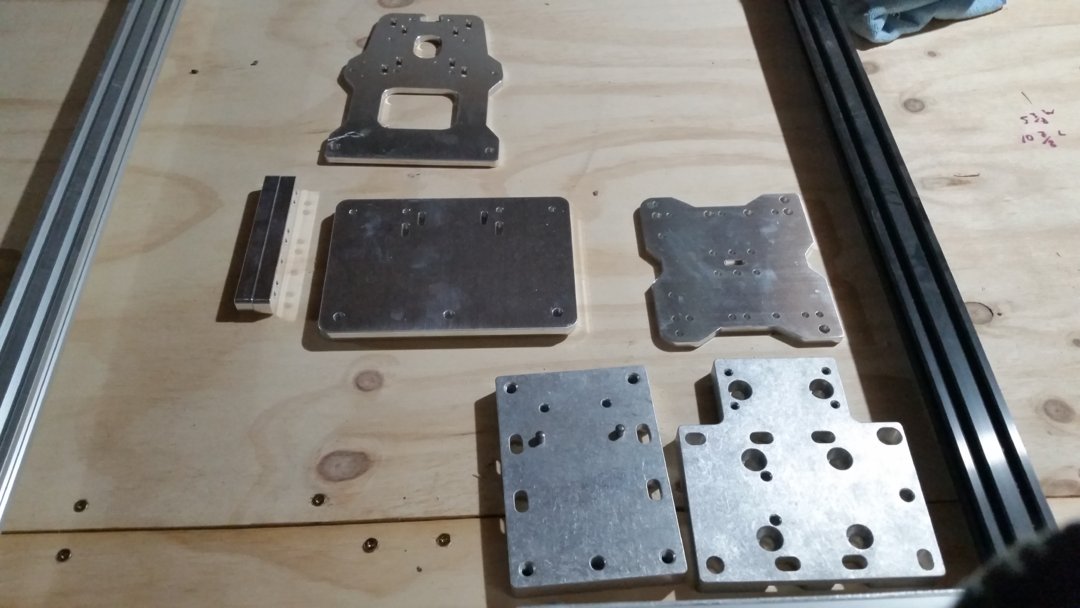
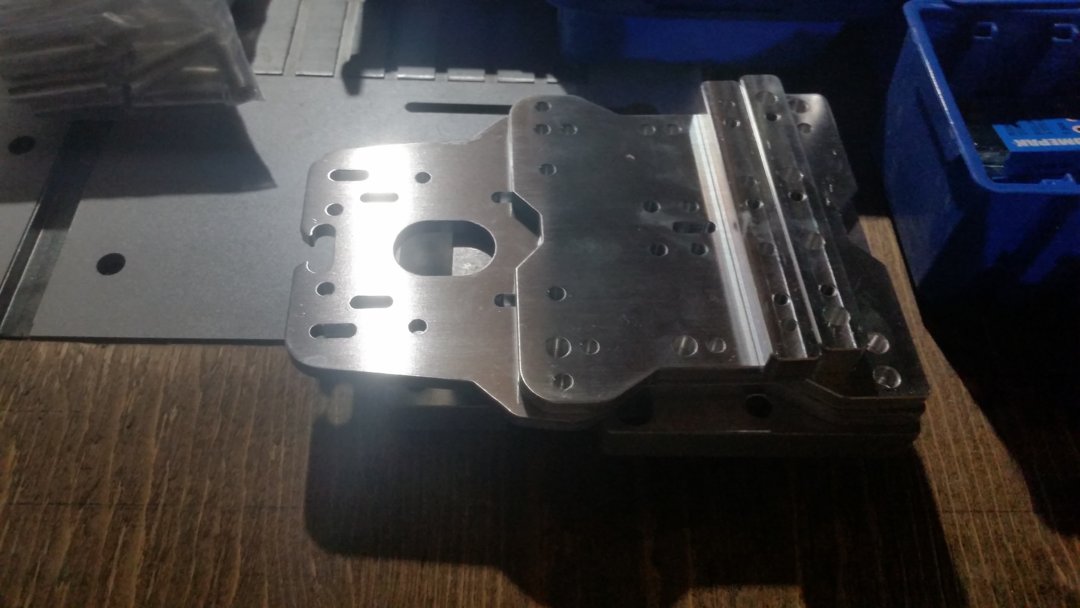
I really liked the Ox Idea that has been floating around on openbuilds and the net, but there was no known solution's on line in regards to supporting the Nema 34 class motors, so I had some hard decision's to make. so I drew up some basic sketchup files as to how I wanted all the plates to be, and designed all my plates around the Nema 34 platform.Wow What a journey its been. I had a machine barely capable of cutting aluminum, it was obviously possible for me to cut out the parts I needed on this machine but the quality would have suffered and all of the mounting hole's in my plates had to be super precise. so I got in contact with Chris Laidlaw from Blue Ox solution's to help me bring my design elements to life. So I sent him what I had for overall dimensions and final formats for most of the plates and asked him if he would ever so kindly cut for me the Ox style plates I desperately needed in order to accommodate the Nema 34 Behemoths I wanted to employ in this build.
Oh yah before I forget I named this contraption the ARCHON because they are tough to axe-down in Starcraft II, and well If could spend more time playing that game, I definitely would, OK talk to you guys later, I'm going to go ladder up on SC2!!!!!!! .......Man do I ever love this game.lol
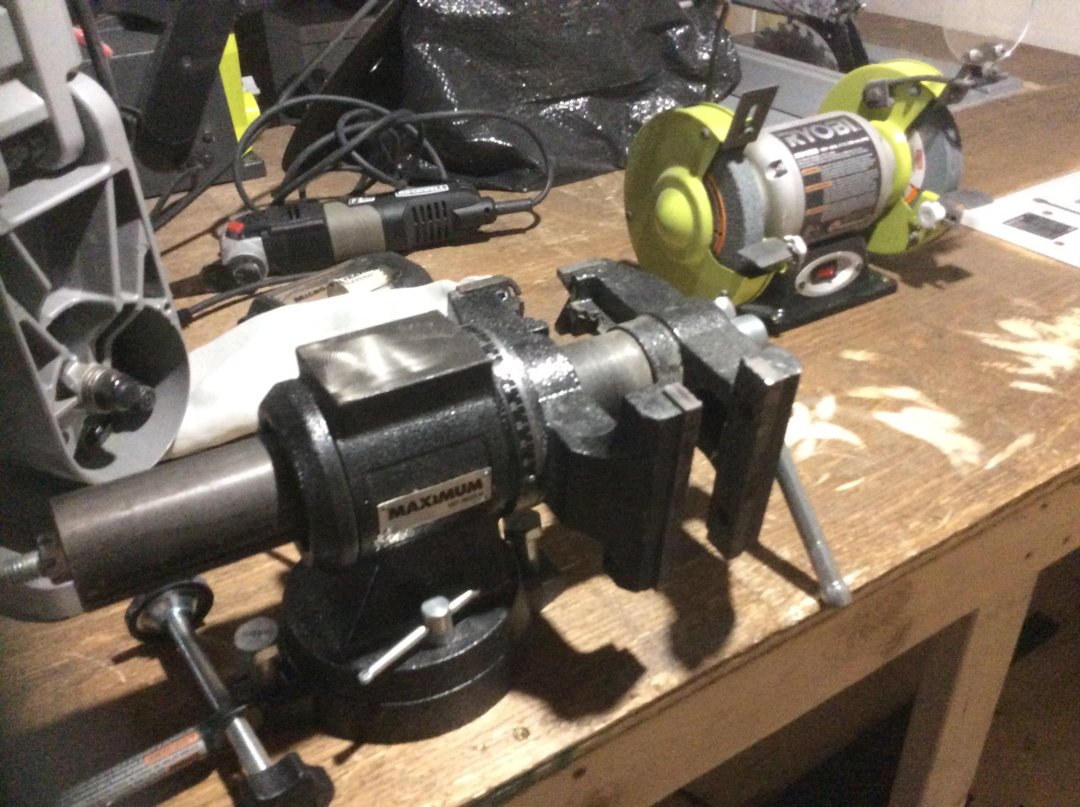
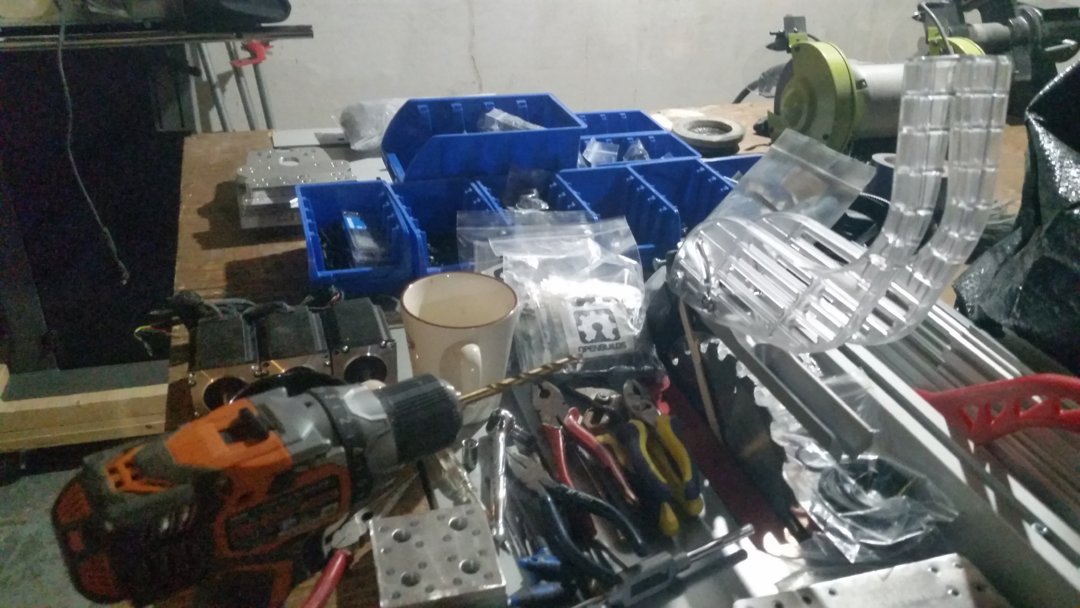
I won't go into full details here in this section as to the exact parts list because I have included it in the below section of this build thread. but I knew for sure I needed 3x Nema 34 motors, 1x Nema 23 motor for the Z axis, A C beam actuator kit "cause I liked it", at least 50' to 60' feet of 3GT belting, pulleys, delrin wheels, lots of different sized lengths of M5 bolts, nylock nuts, aluminum spacers and washers, power transmission couplings, more on that later. and a boat load of structural aluminum, provided to me from Openbuilds/Makerparts. and so far this is only the structural aspect of my machine, not including yet all the wiring, proximity sensors, main power source, VFD inverter for the spindle, Air cooled high torque high speed spindle, motor drivers, and controller, liquid oil sprayer for metal cuts. and possibly some new CAD and CAM software to help me with design and roughing and finishing cuts!!!! mostly wood and Aluminum, Yah I know what your thinking lol, Exausting....right?
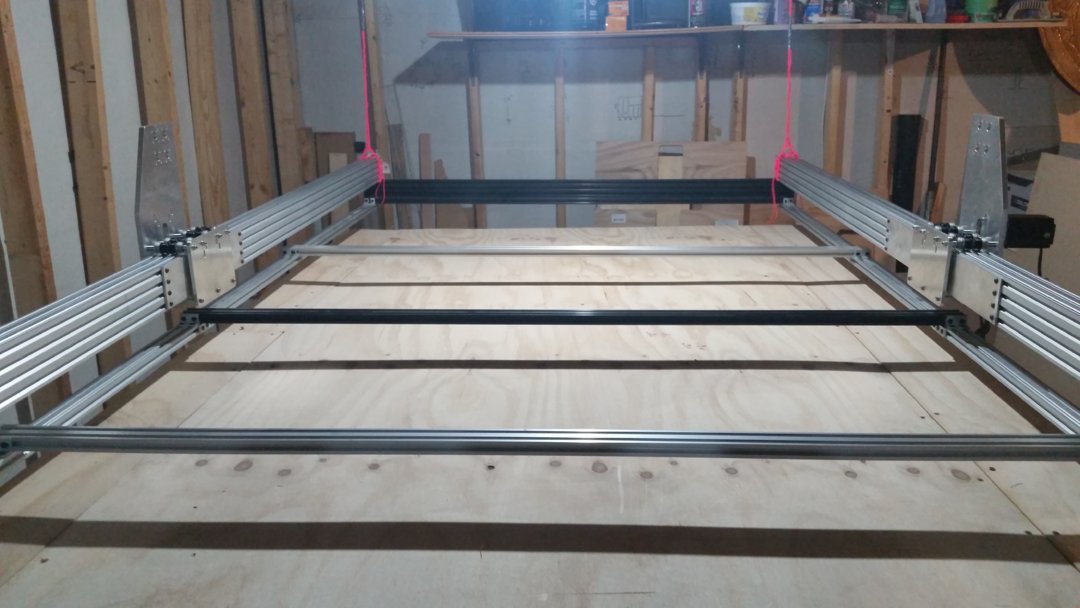
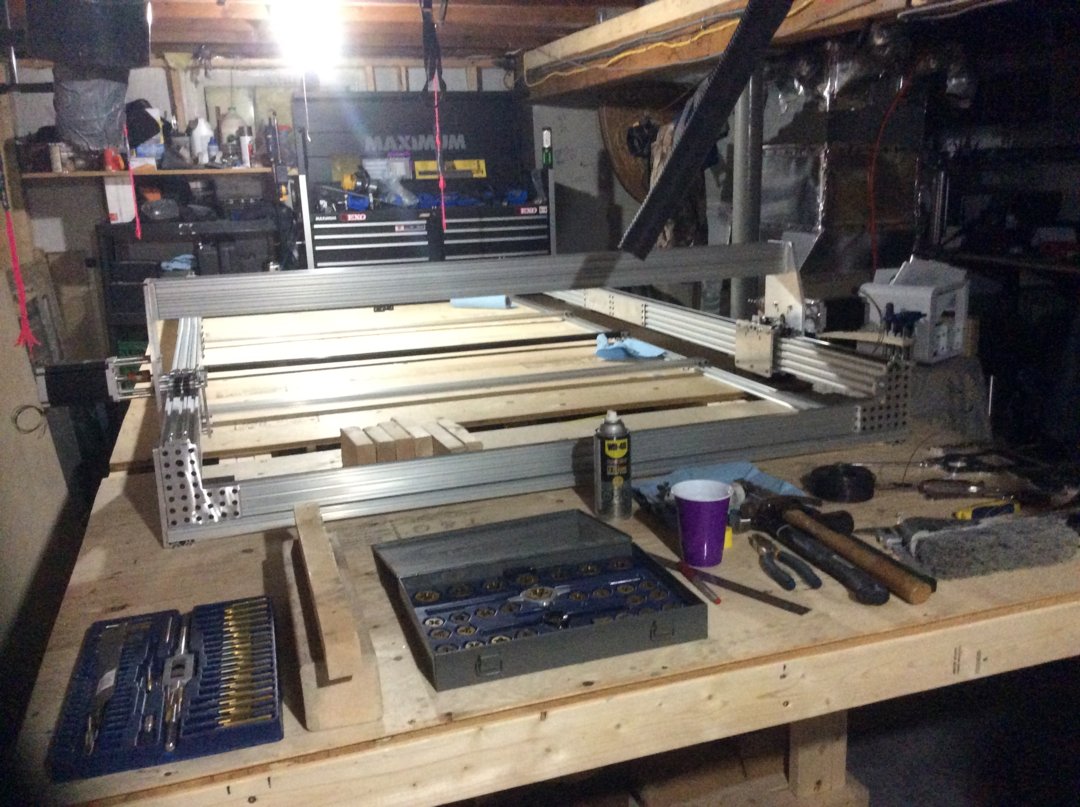
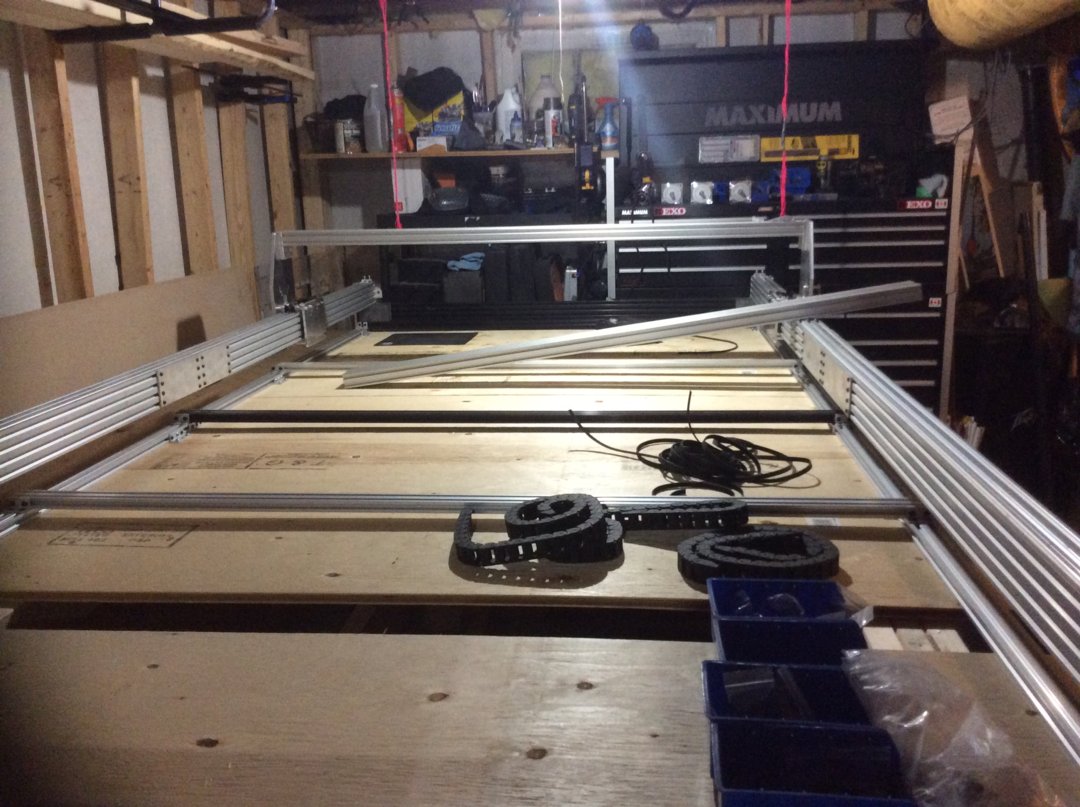
STEP 2 FRAMING THE TABLE FOR THE BEAST!!!!
The Structural Process wasn't as straight forward as I wanted it to be, but usually none of the projects I tend to take on are, So I went to the drawing board.
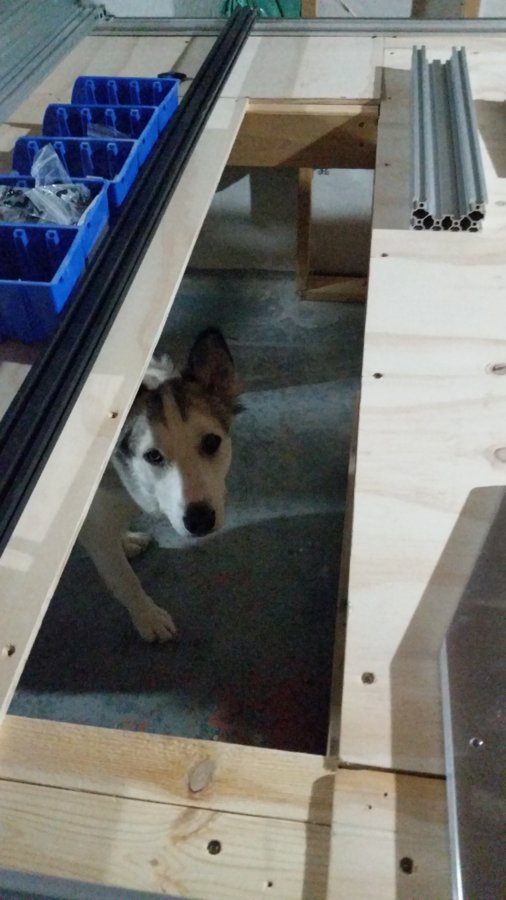
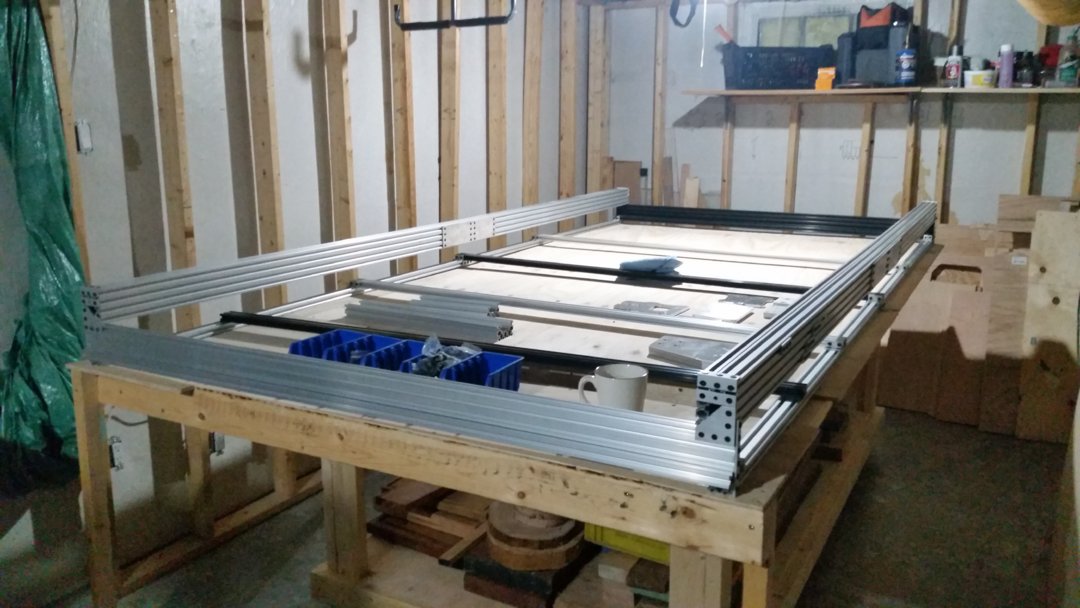
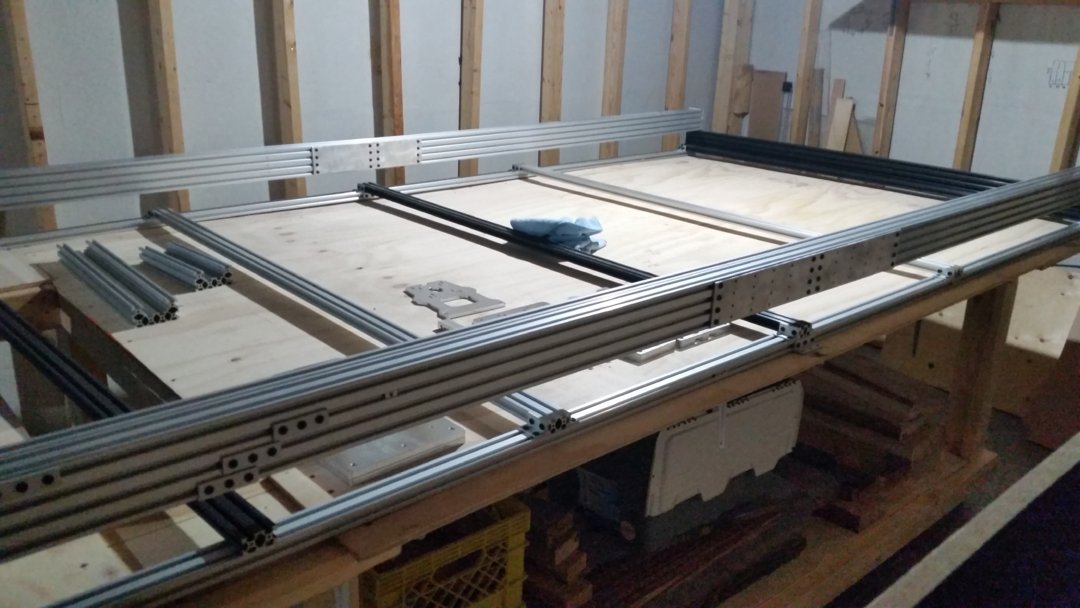
So since this was going to be a really big machine. I needed an actual table for it to sit one for its useful life. So I planned and Engineered a large format wooden table using structural timbre. 2x4' and 3x4 sheathing for the top, as well as a storage shelf located underneath. nothing super over the top but of course since our climates where I live are so very much extreme in overall fluctuations in outdoor temperature, I had to pay close attention to the warp in my wood. the last thing I wanted was a table that was obviously off kilter, I didn't want this off-balance issue to become a transferred issue to the ARCHON. so I paid close attention to my level guide and tried the best I could to make sure that the foundation was alot more like marble than sand, symbolically speaking."Uruk we need more logs for pit's of sauron", "trying to be funny, but anyways the table turned out well.
The first time I sheathed the top of the table I wasn't using my thinking cap and I was trying to use scraps around the workshop so that I didnt have to spend anymore CHA-CHING than I had too, I like to try my best at using scraps when I can to save on costs, and not to waste, Cause I like to live by that old fashioned point of view, "waste not want not" and I like to be mindful of our Canadian Caniferous forests" and all the little creatures that live and scurry in and out of it. "Enters In Rush the Canadian Band" playing the trees.
take a peak at some of the pictures you will notice a square gap in between two pieces of top sheathing, this was done on purpose because I am thinking I want to employ some wood vise clamps underneath the table some how so that I can possibly engrave on materials on there sides rather than just there faces.
So I managed to balance the frame well enough in the air, as you can see I was already a good portion of the way through the build when I decided to make a change to the top sheathing, but I honestly believe it was necessary and it had to be done if I didn't want more headaches later on in the build. so there are of course some "spoiler alerts" early on in this build but I mean who likes suspense anyways?! So there you have it for the "tables table."
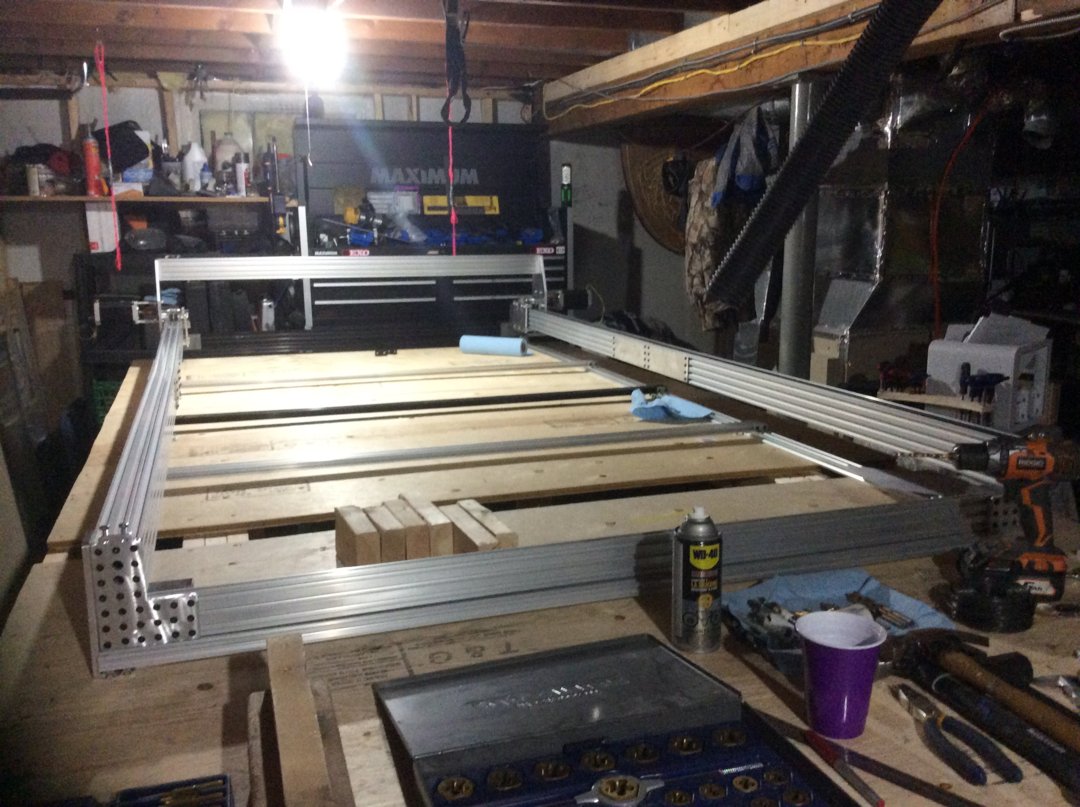
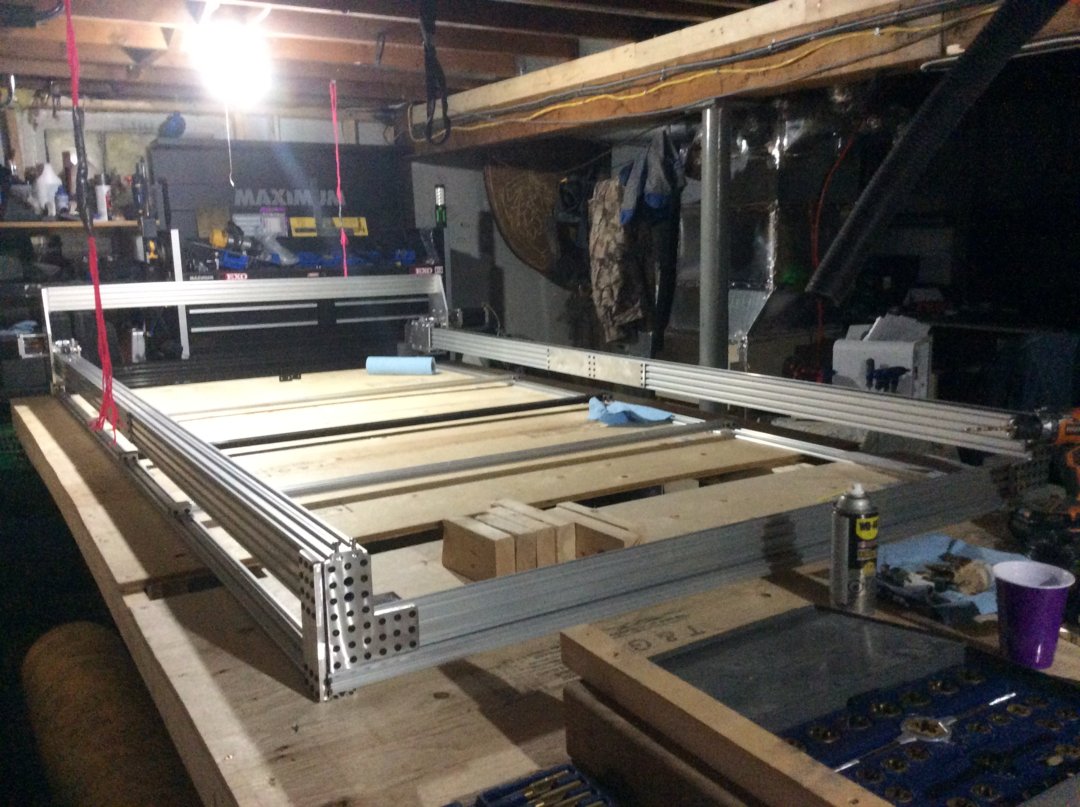
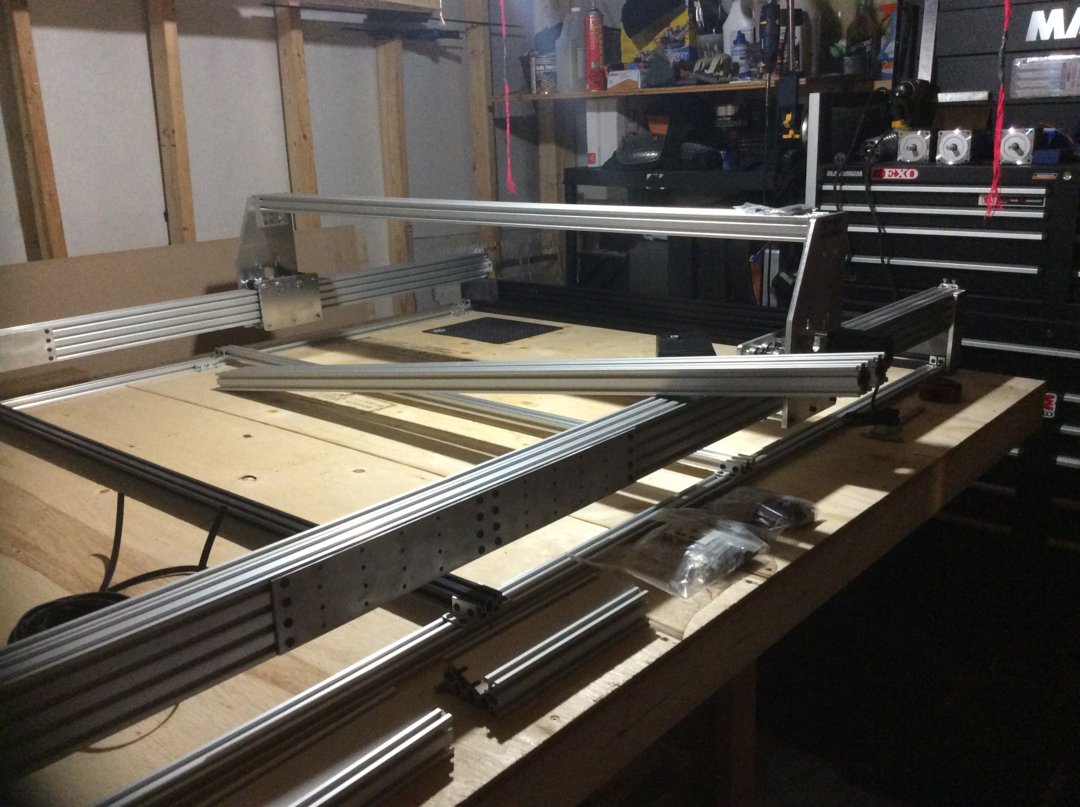
STEP 3 FRAMING THE ACTUAL BEAST!!!!
I framed the ARCHON with:
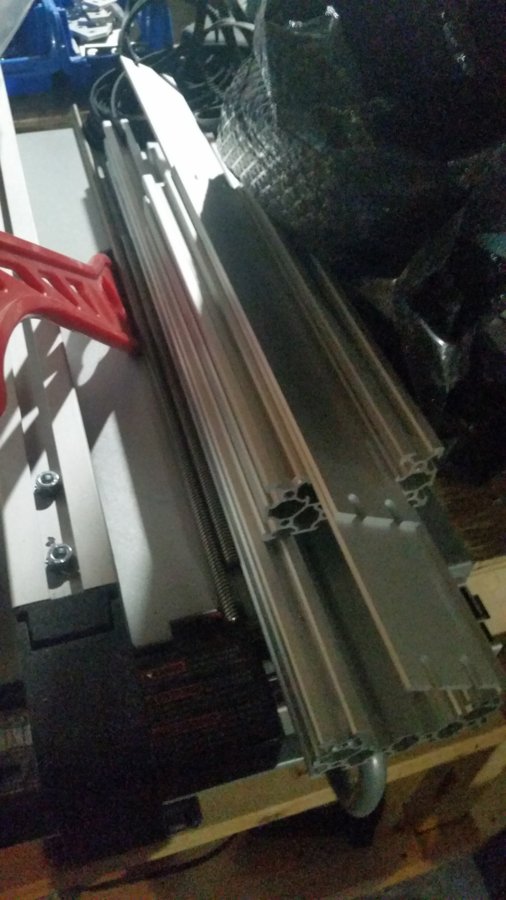
4x C-beam 1000mm long Aluminum beam extrusions
4x 20x80 1000mm long Aluminum beam extrusions
6x 20x40 1000mm long Aluminum beam extrusions
3x 20x60 1000mm long Aluminum beam extrusions
4x 40x40 1000mm long Aluminum beam extrusions
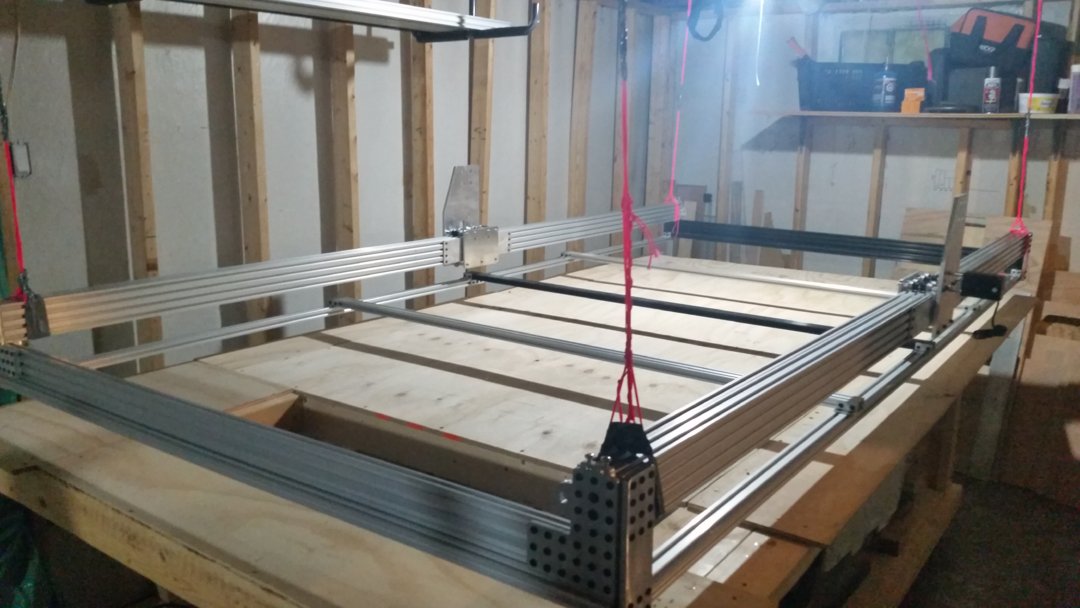
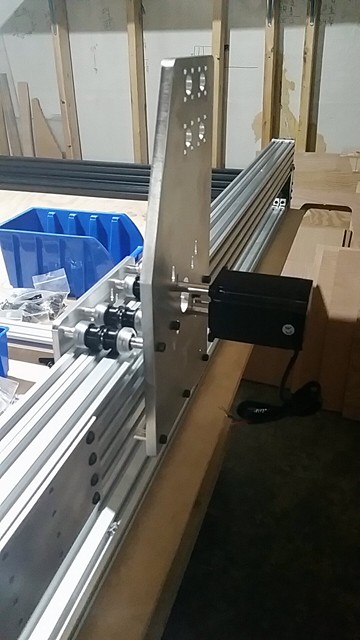
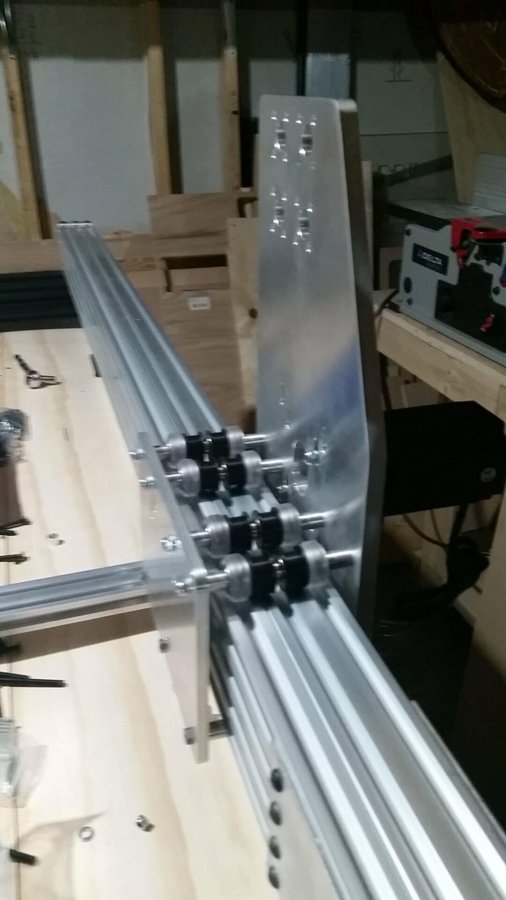
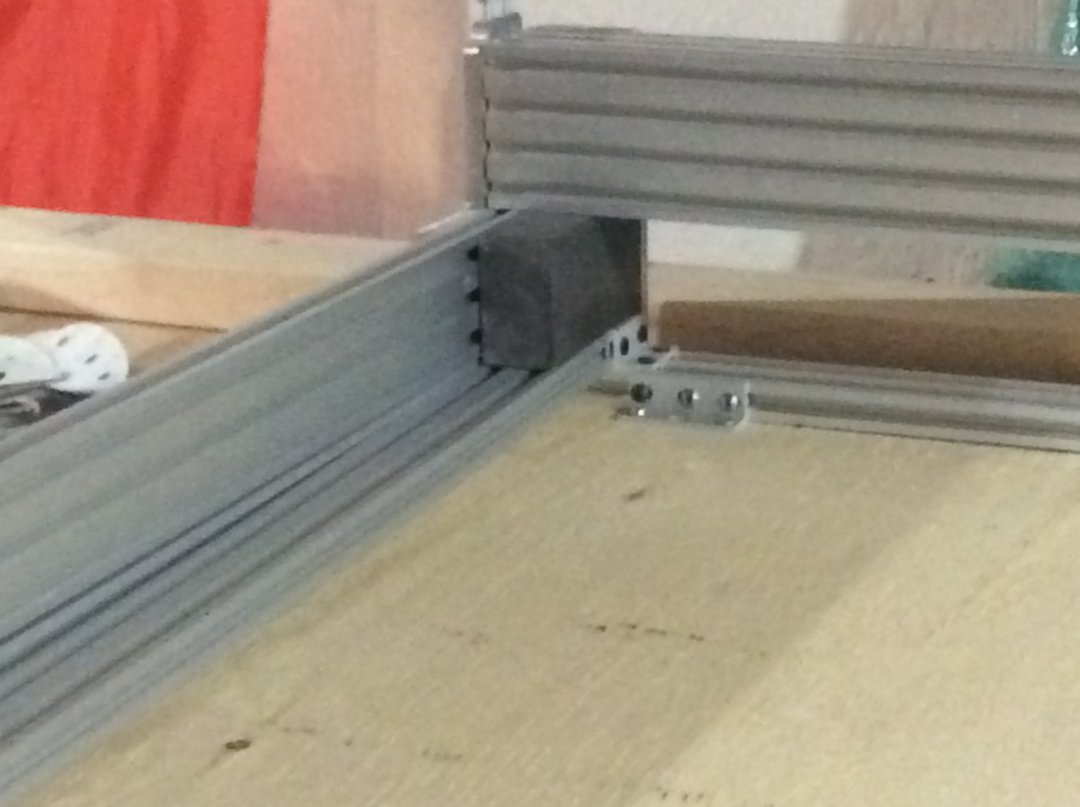
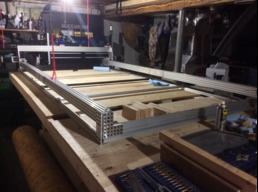
I combined on both sides the C-beam and 20x80 beam to make up the two Y travel ways.
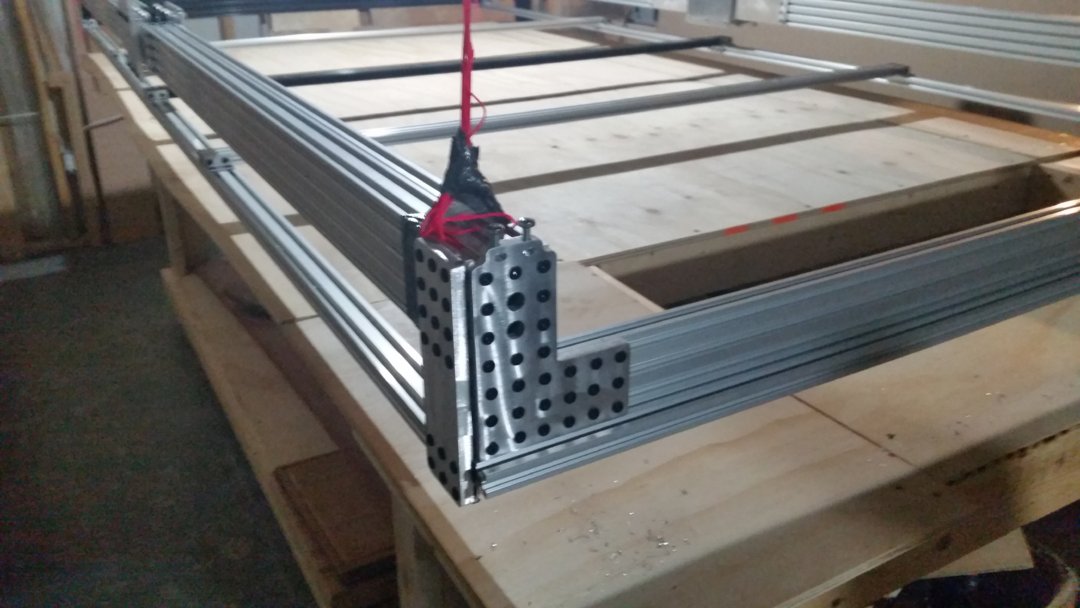
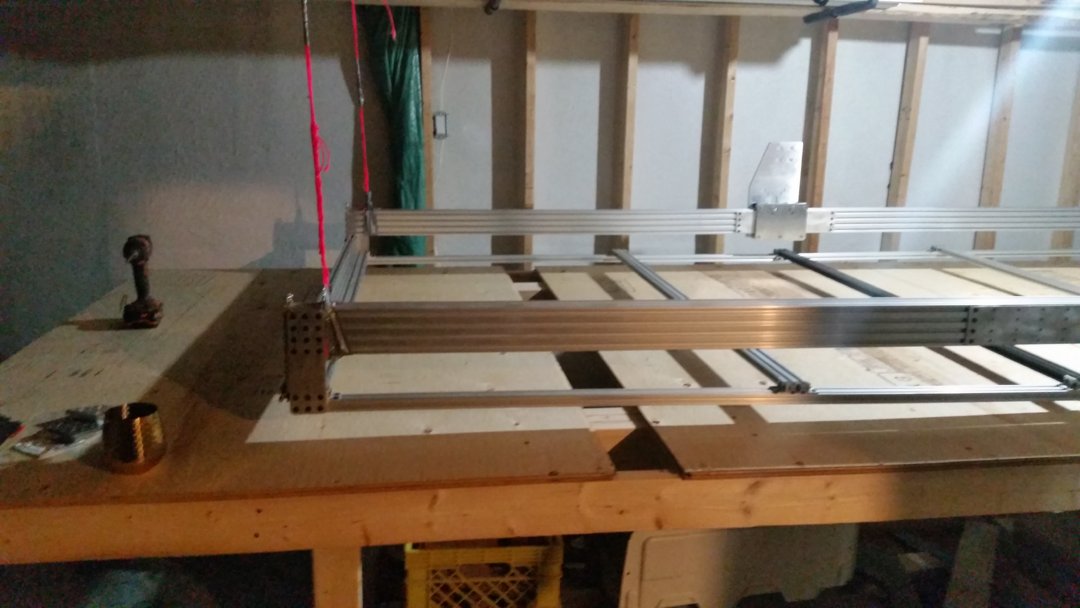
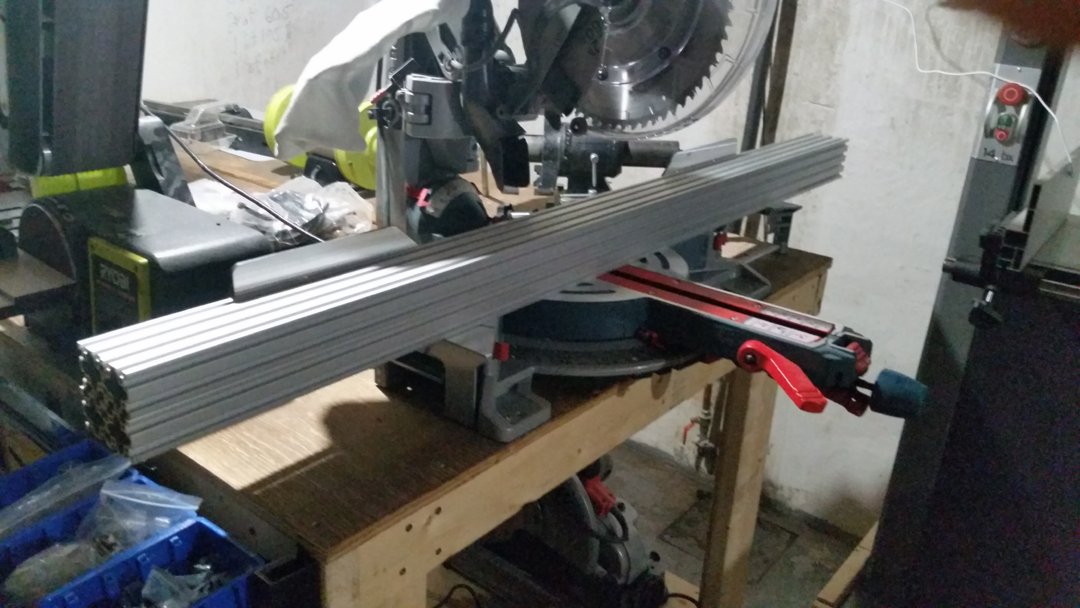
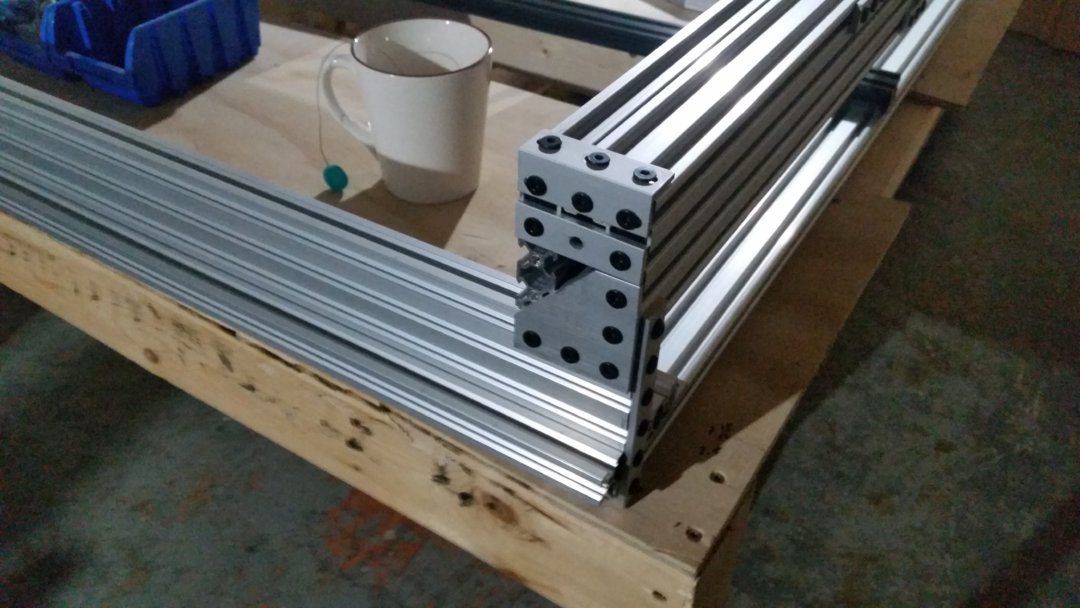
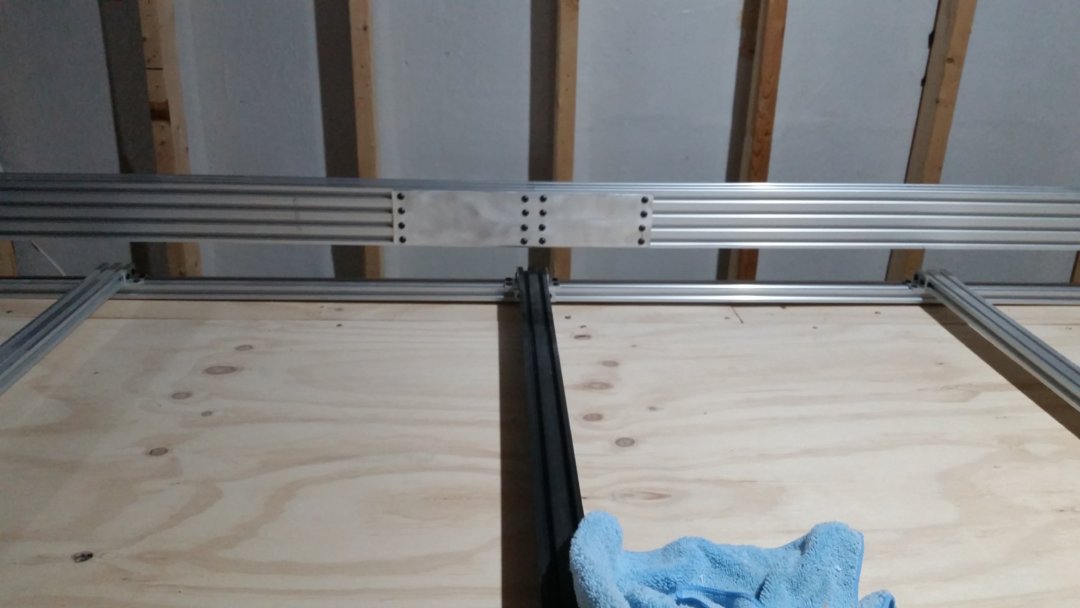
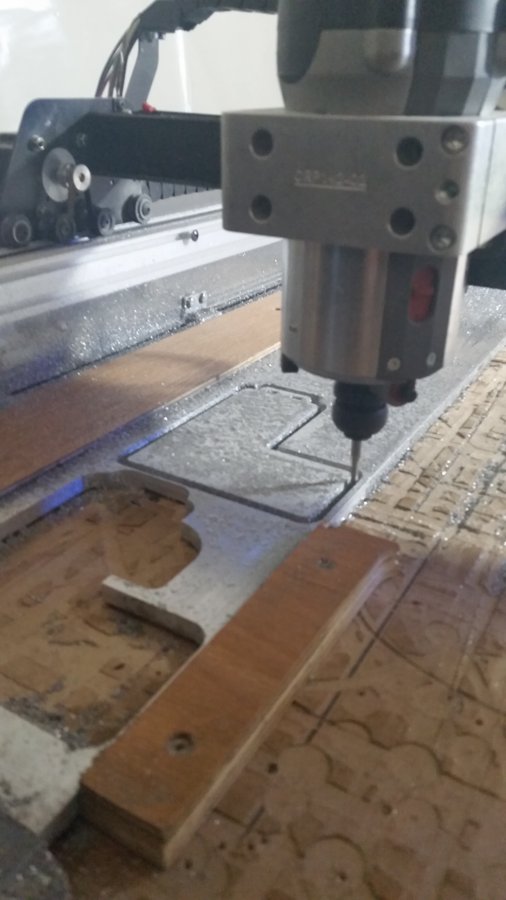
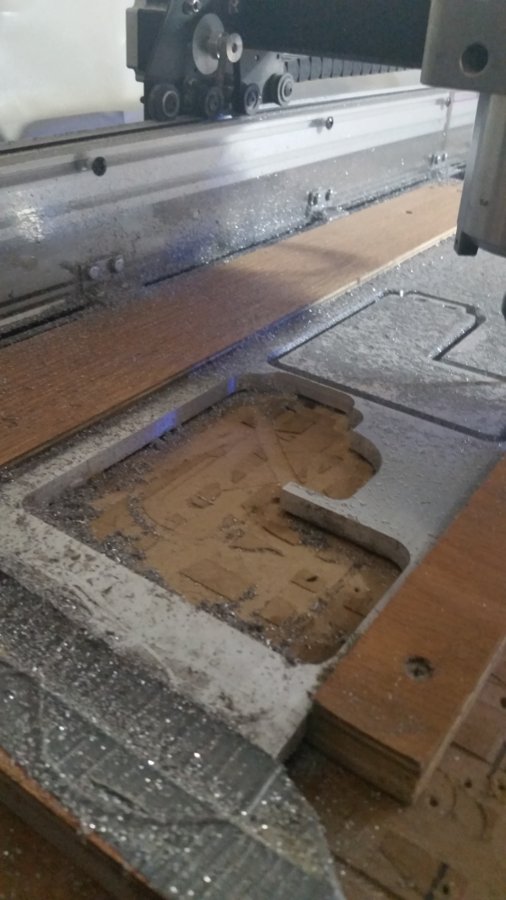
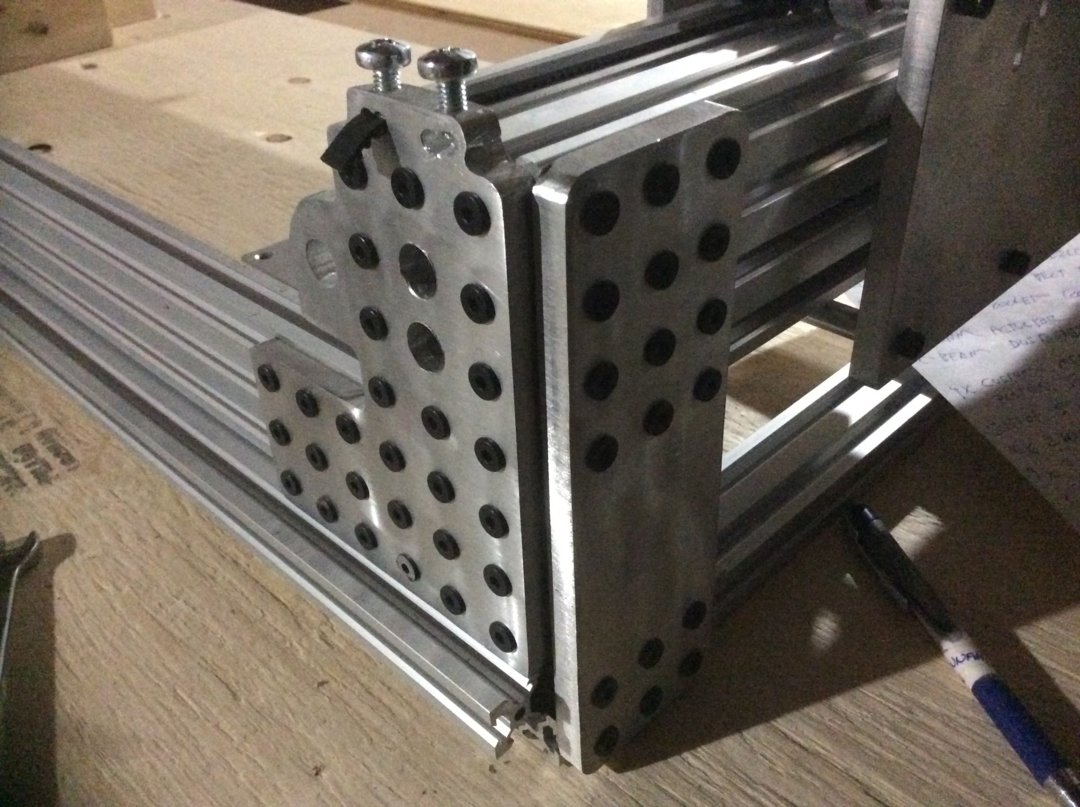
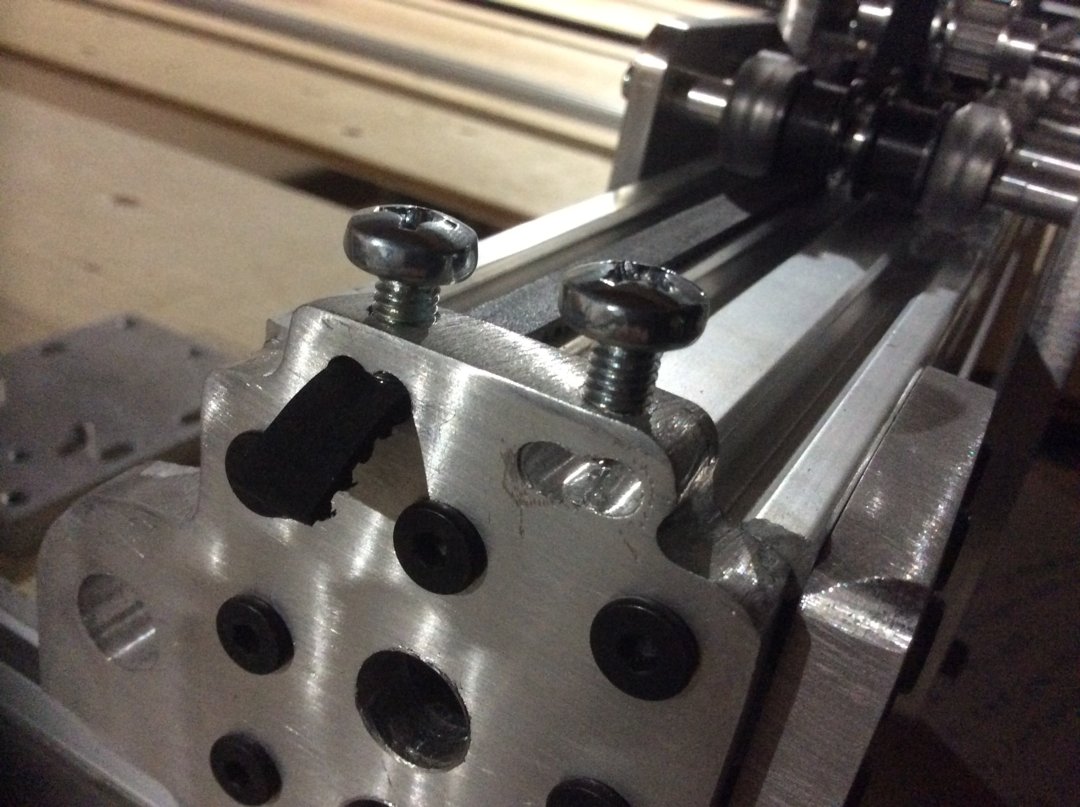
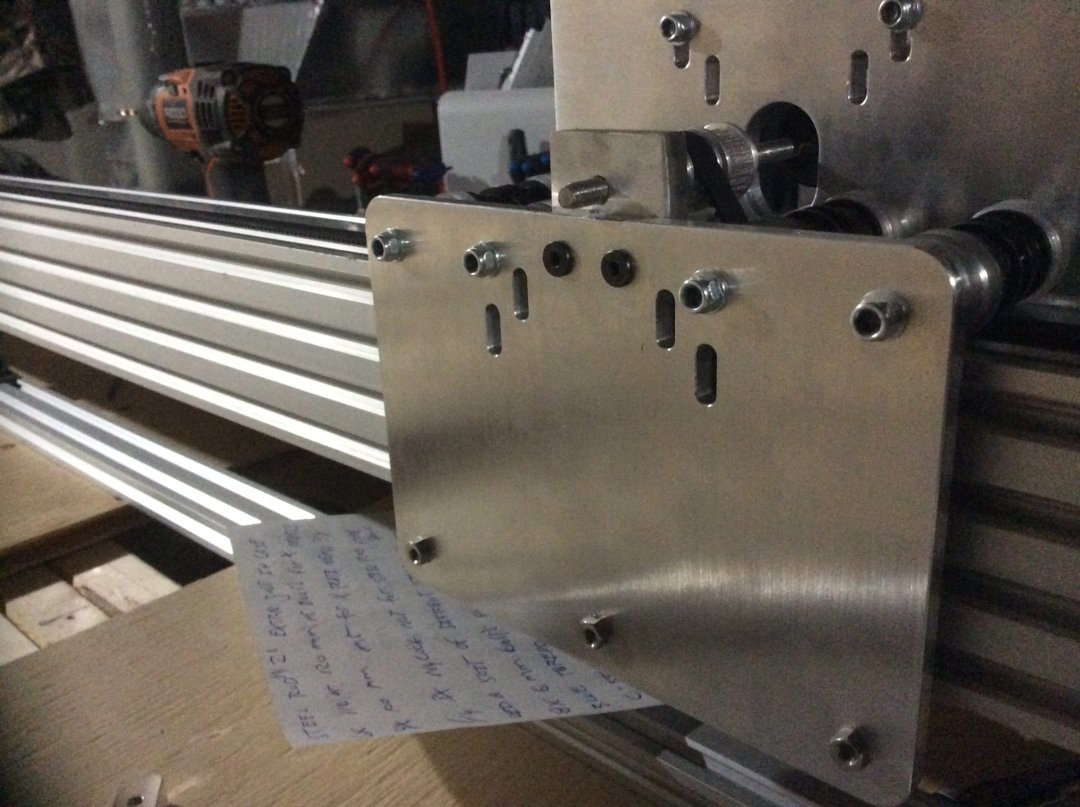
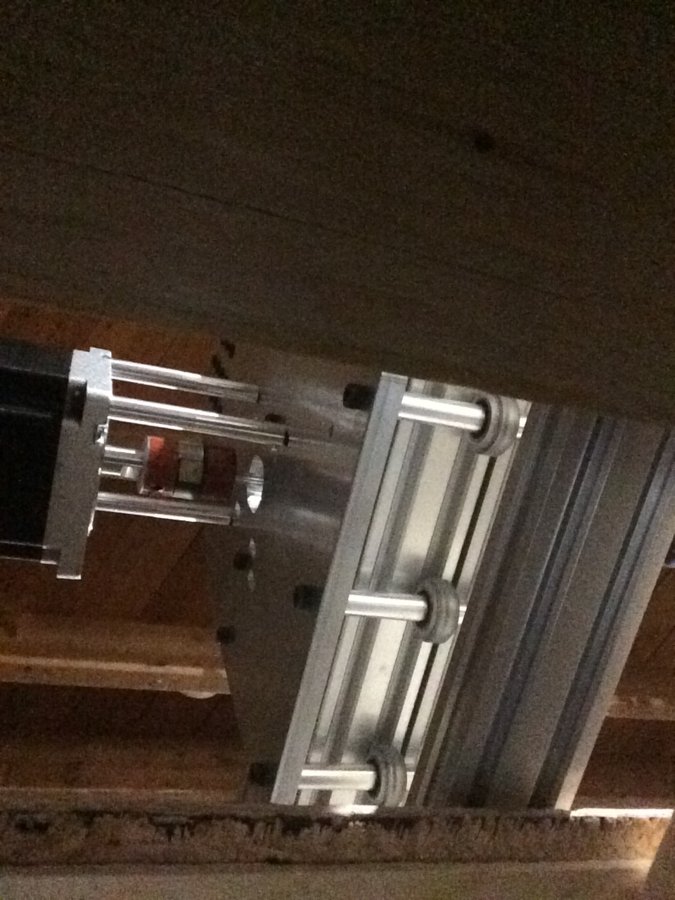
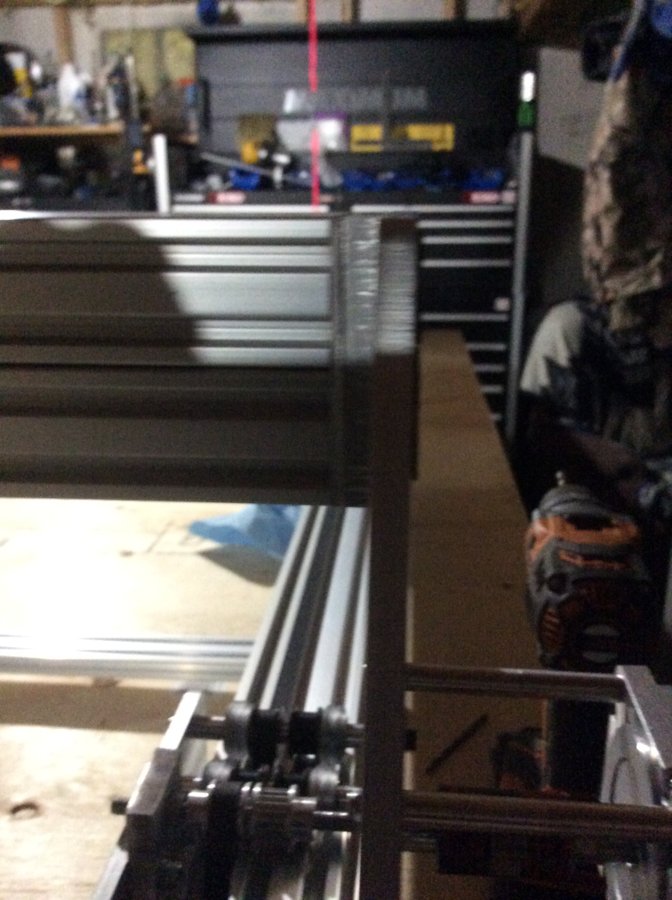
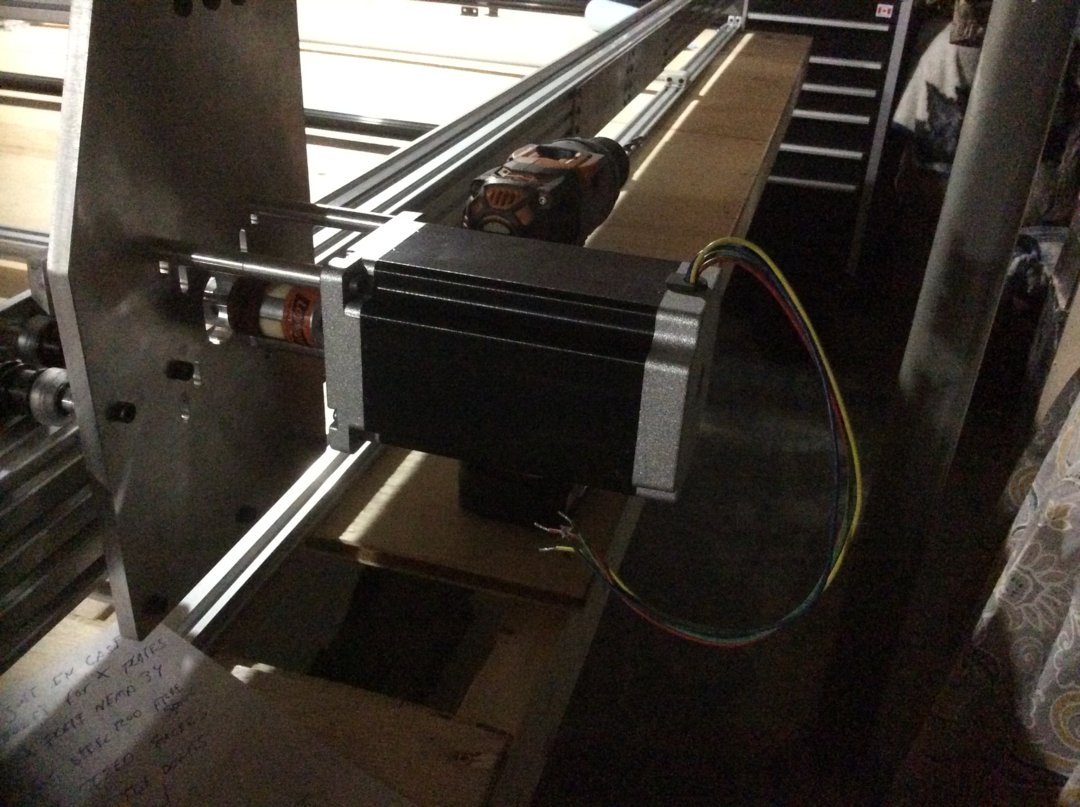
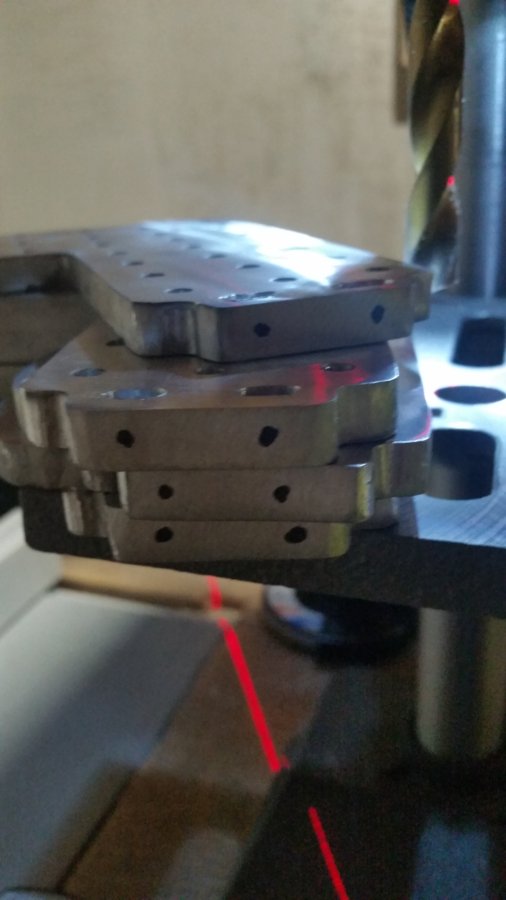
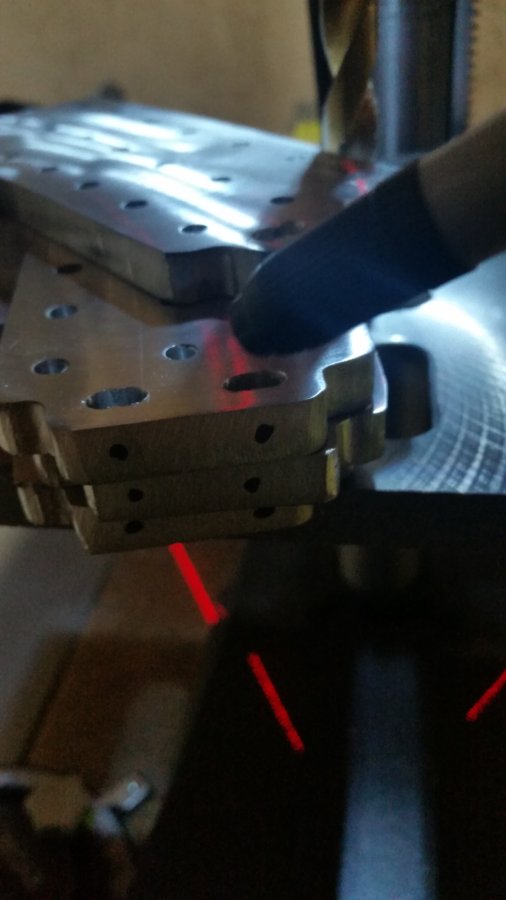
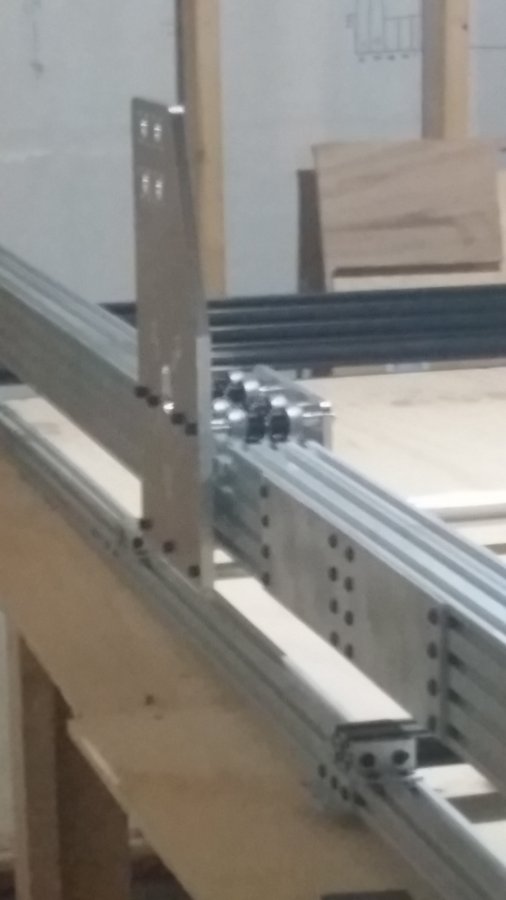
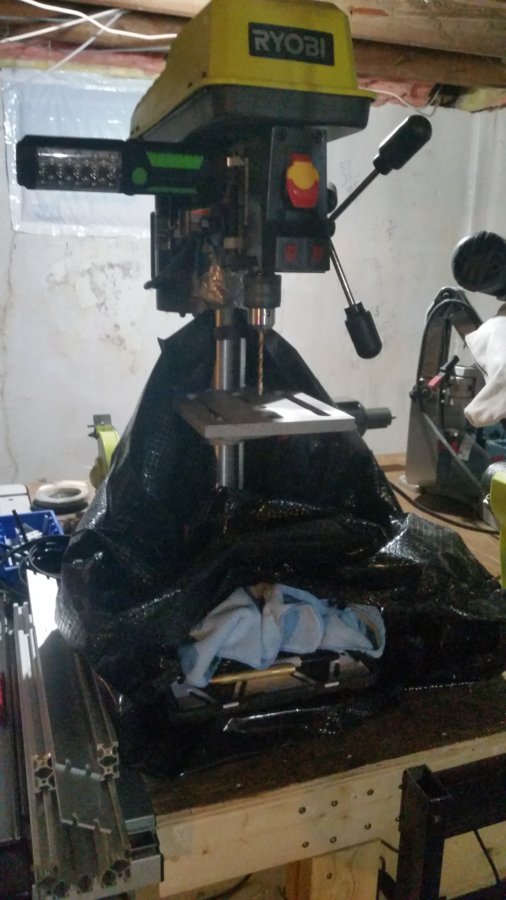
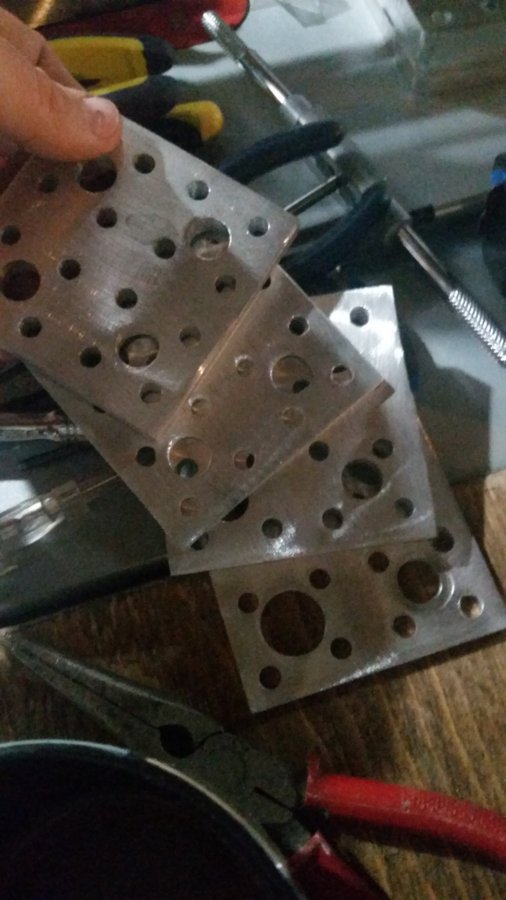
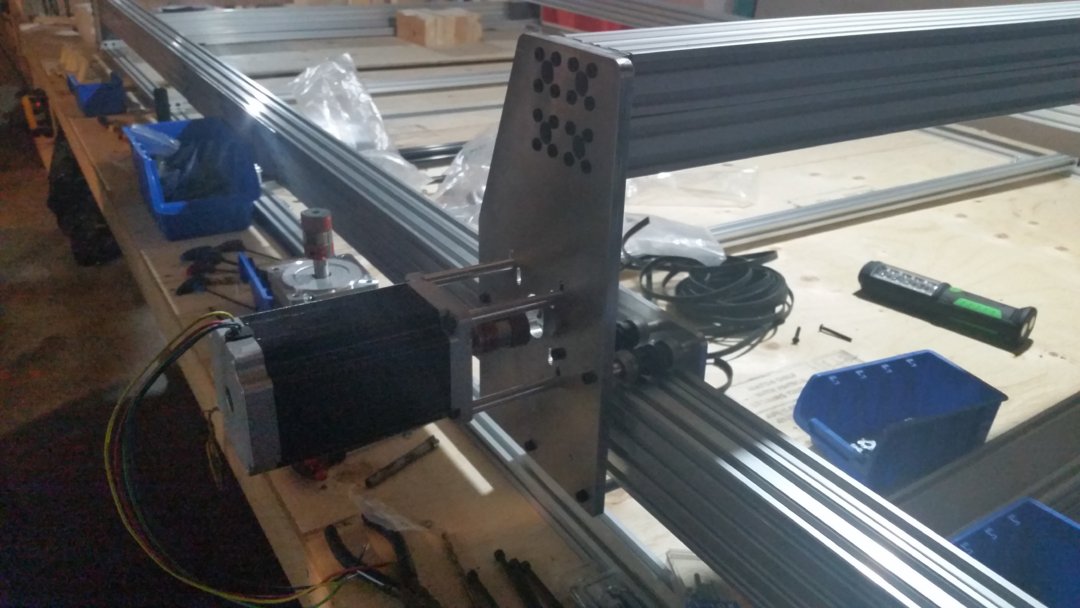
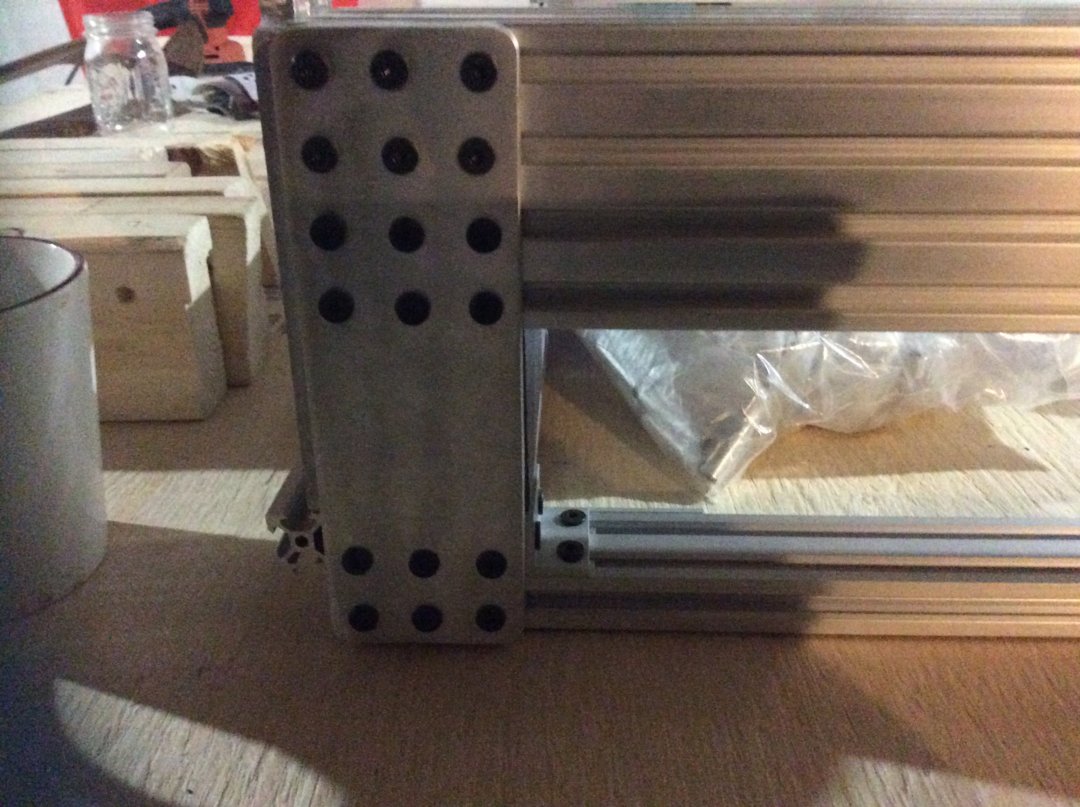
I used the 20x40 rail for rib support. I used the 20x60 rails for end ribbing support and last but not least I bunched the 40x40 rail to make a super beam 80x80 rail for the X travel way. I used basic end joiners for the initial fitting of all these components, but then later realized it was important to make myself my own end joiners to help stiffen the frame. I needed all the strength and stiffness I could get so I over engineered many aspects of this build in hopes that it would encourage the machine to become more rigid and less prone to sagging and especially in the Y traverse. I milled out some cool looking end plates and side end plates to replace the aluminum joiners. using my small cartesian machine, I only ended up cutting out the perimeter shape fully through using only my small cartesian and some WD-40 for lubricant. I didnt mill out the holes I just allowed my machine to plot the holes on the plates by marking the points with shallow cuts and then used my drill press to finish the job all the way through. I used some 1/8" thickness aluminum to join together the C beams and 20x80 rail using nothing but 15mm 5m bolts and the accompanying t-nuts to hold it all together. to my surprise this joining method worked very well and I do not see any potential sagging as of yet in the centre of the Y beams fingers crossed this will be the only thing I will have to do to make sure that the Y travel does not become compromised over time by weight, friction and gravity pushing down on them by the weight of the X travel way and the Nema 34's
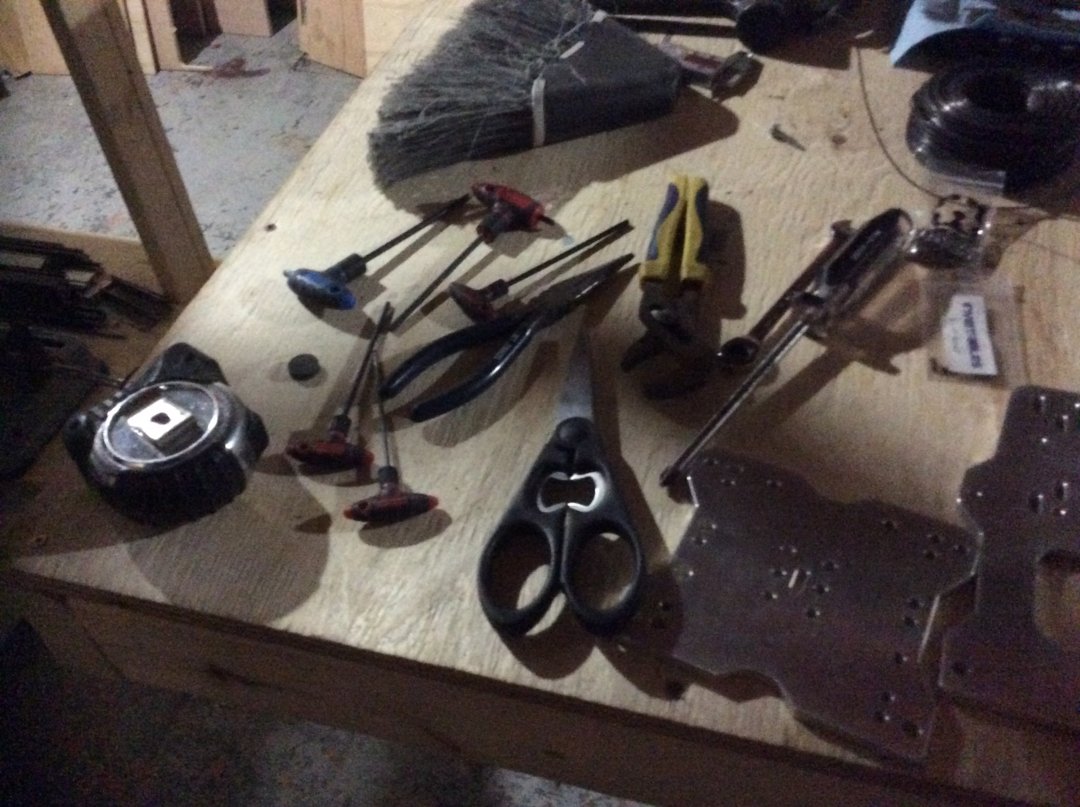
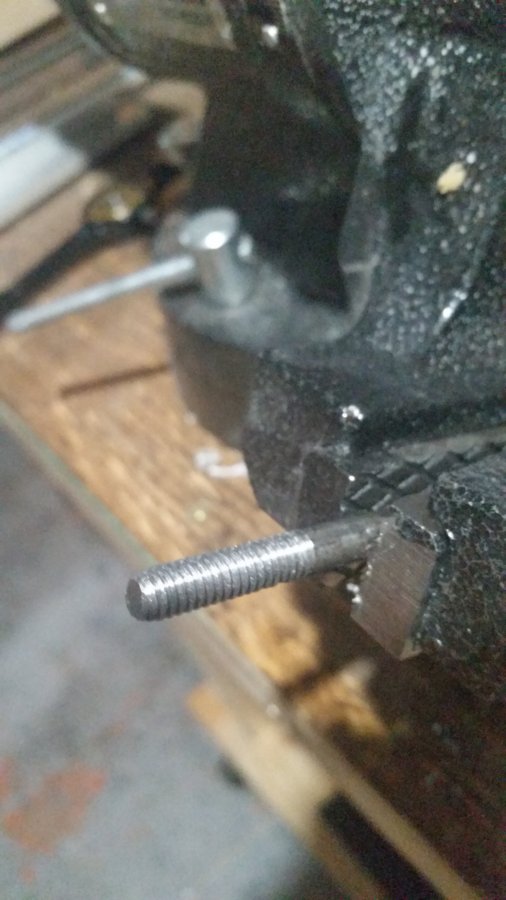
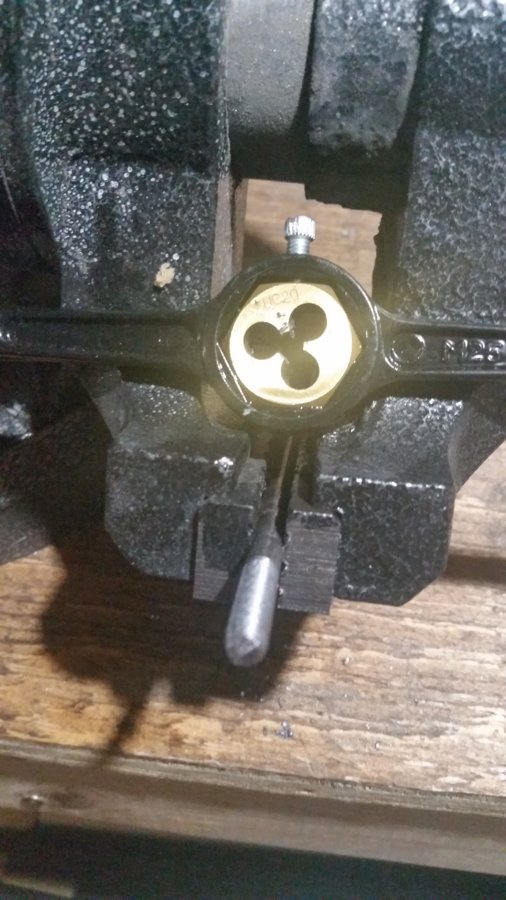
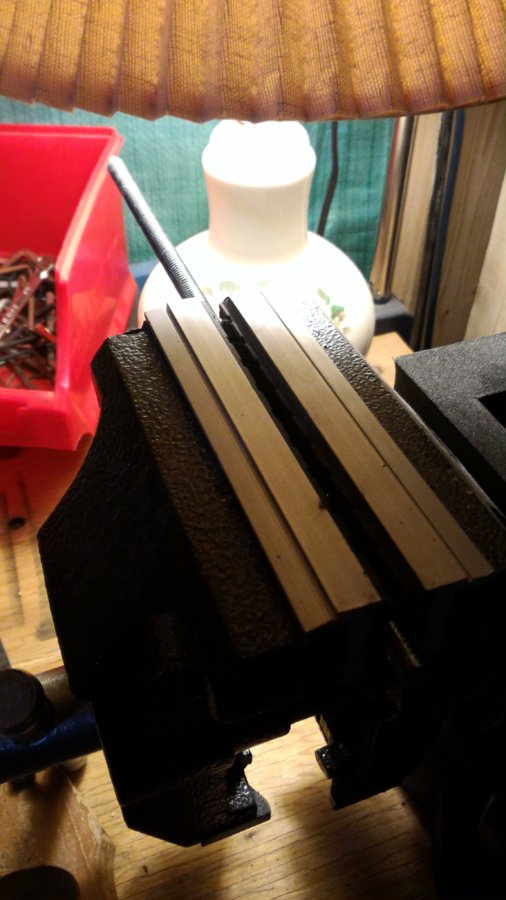
I of course spend a great deal of time threading the holes of the aluminum extrusions by hand with a typical tap and dye kit. using lubricant to aid in the shaping. all in all I sourced most of my aluminum from a great local metal fabrication shop that has been family owned and operated by some amazing people here in my small town. I have much respect for the business owner, and him and his family have been an integral part in shaping the economy and business sectors in my area for a very long time. and in spite of the ongoing and recent economic downturn that is hitting many north american sectors both in the states and in the Canadian north him and his family have pushed through and stayed strong. I really appreciate the help thank you, your help was integral.
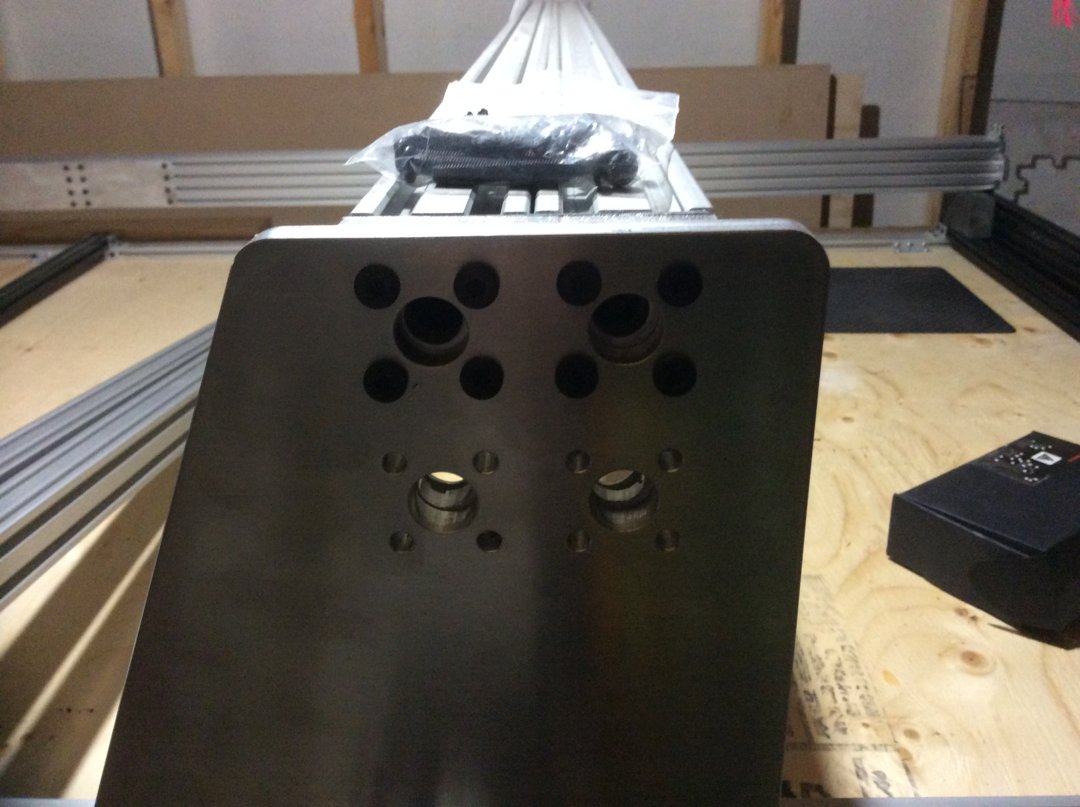
In regards to the shaping and polishing of the brackets I designed for myself I didn't do anything special to them, I just hit them hard with a flap disc to take away the scratches and dents and buffed away most of the old oxide layer no polishing. I made holes in two of the Y end brackets to hopefully allow some fancy Proximity sensors. I am still not sure but the holes are there just in case. the plates I made for ends are also 3/8 structural aluminum nice and thick and hecka-strong!!!! I love working with aluminum.
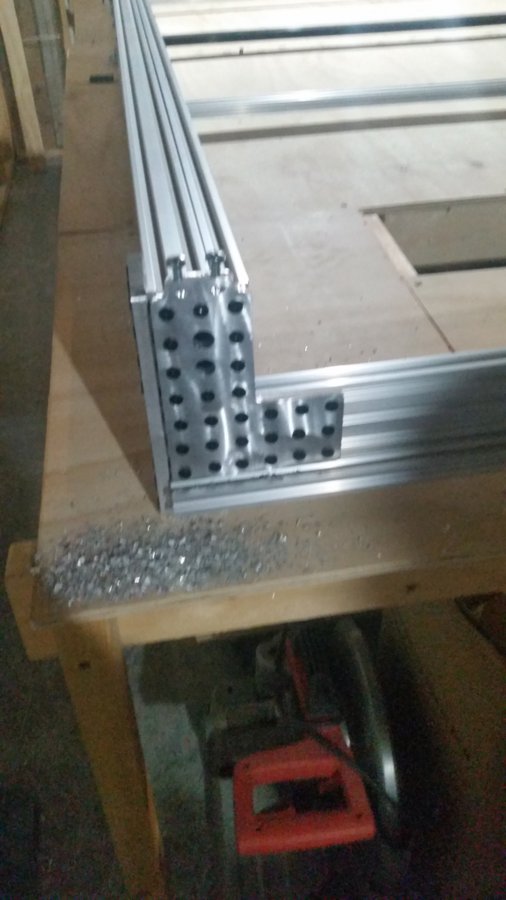
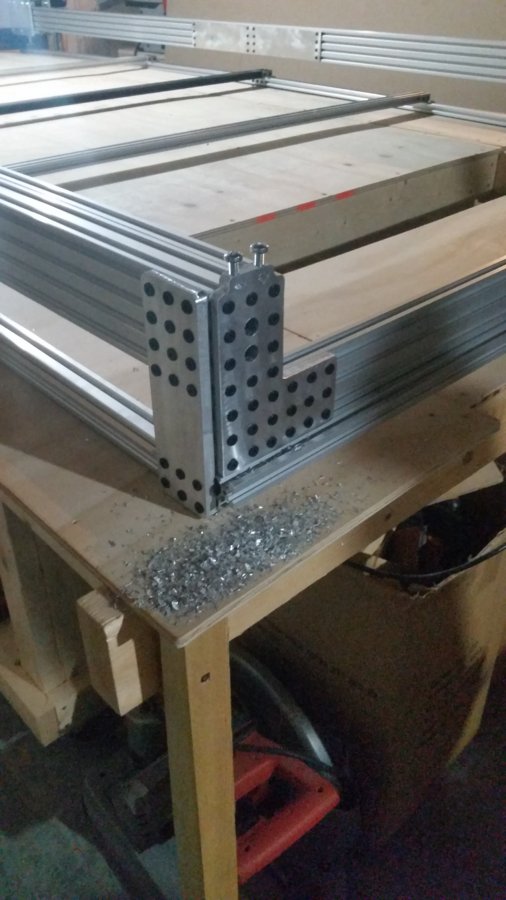
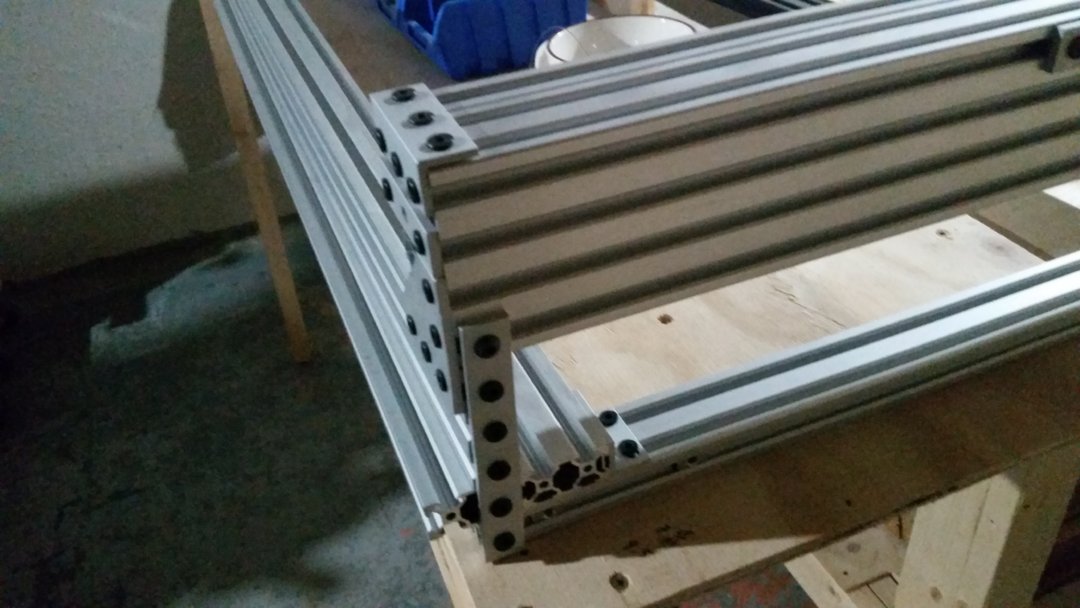

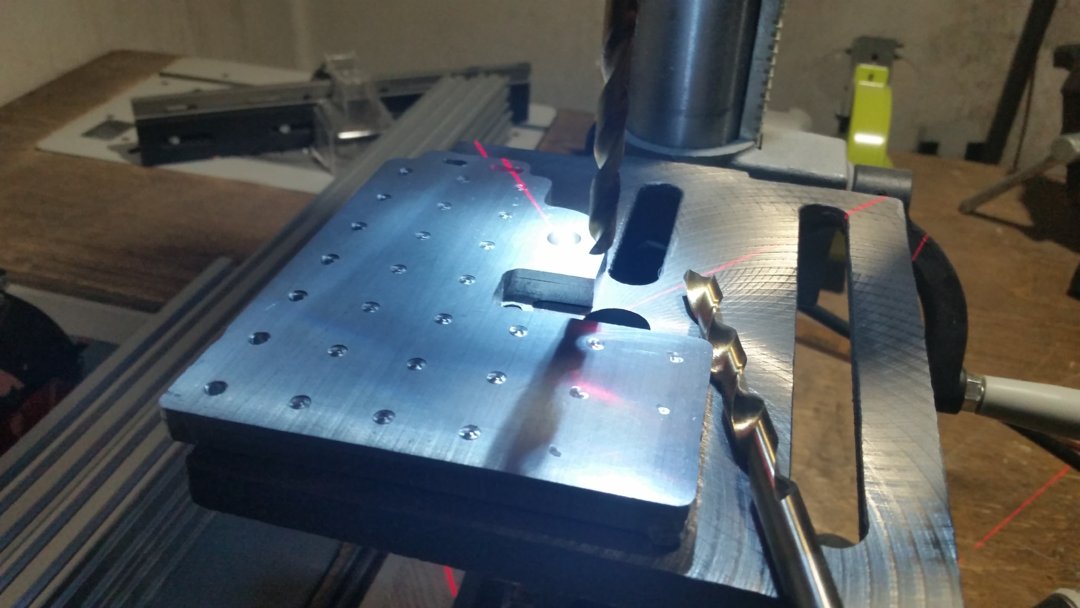
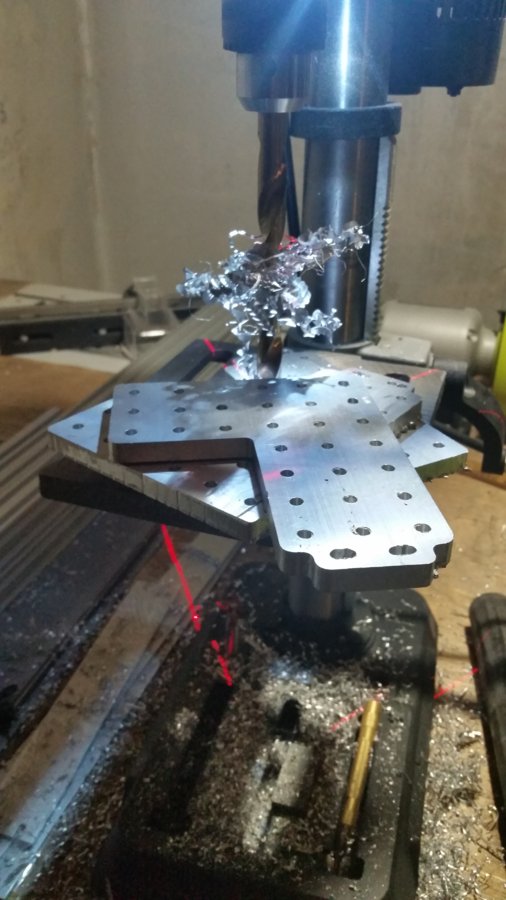

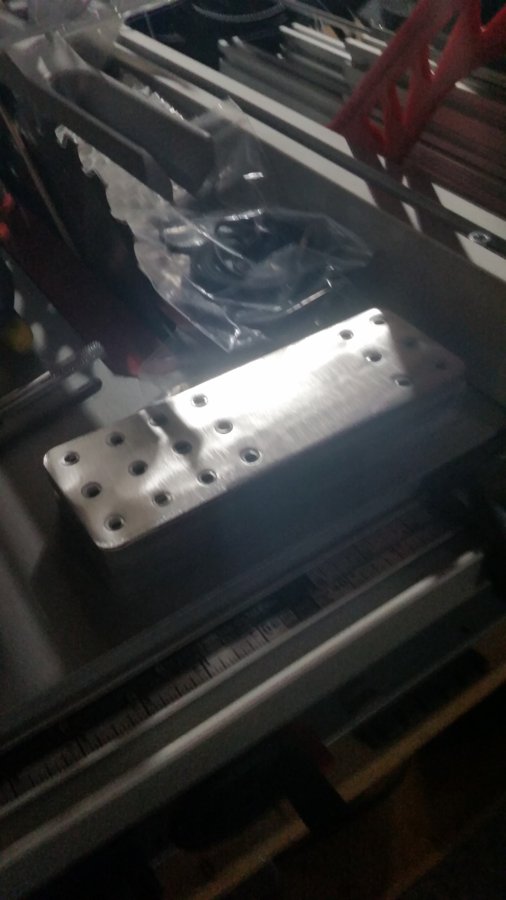
I also made sure to drill some over-sized holes into the end brackets to accommodate the wiring.
not much else to say really. It took awhile to get a handle on how I wanted to fashion everything together. and there was definitely a bunch of trial and error and it definitely took longer than expected, tapping the holes took a long while and fastening everything together one m5 bolt at a time took much patience. but overall it got finished and that's the main thing.
STEP 4 POWER TRANSMISSION AND PLATES!!!!
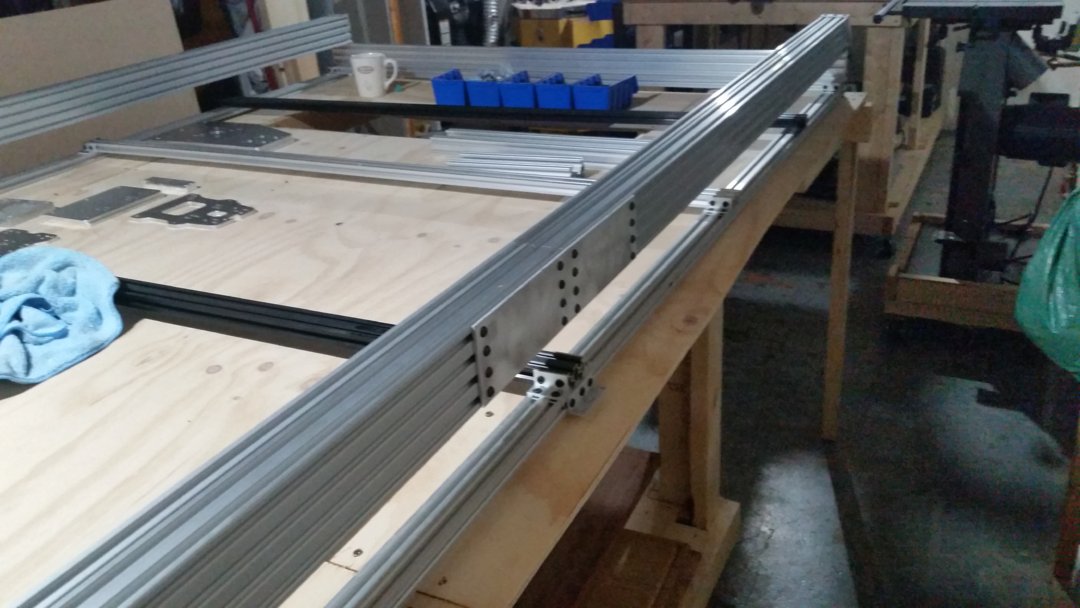
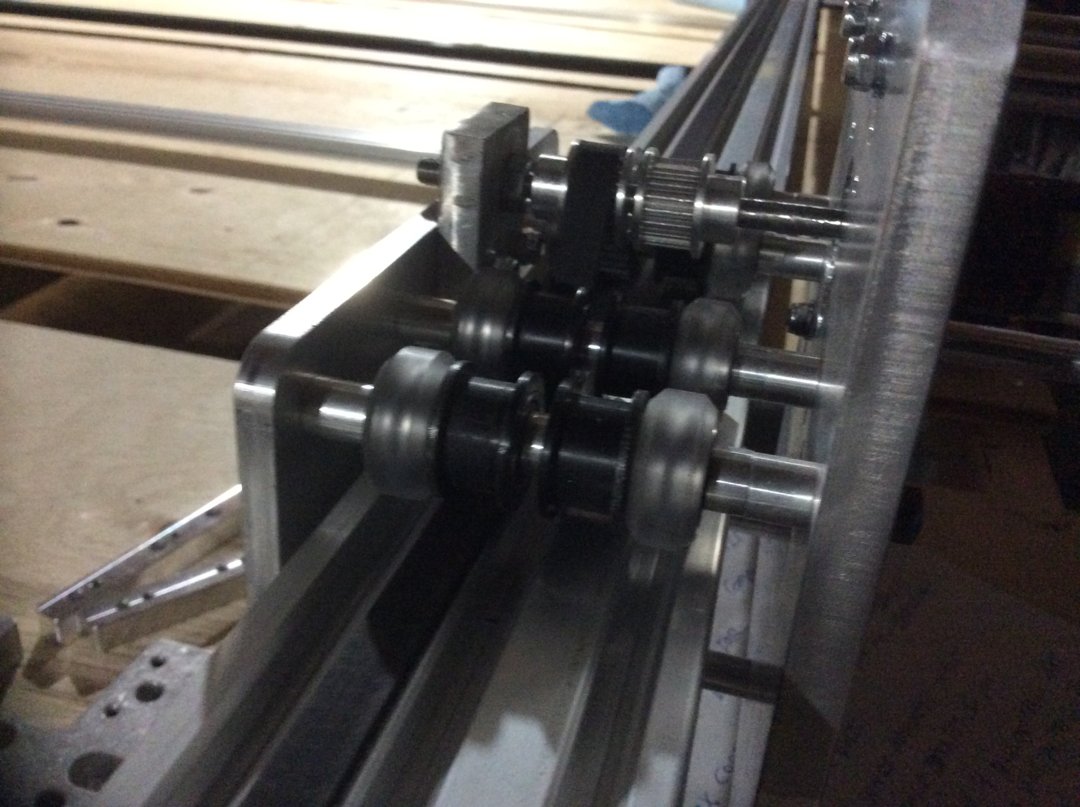
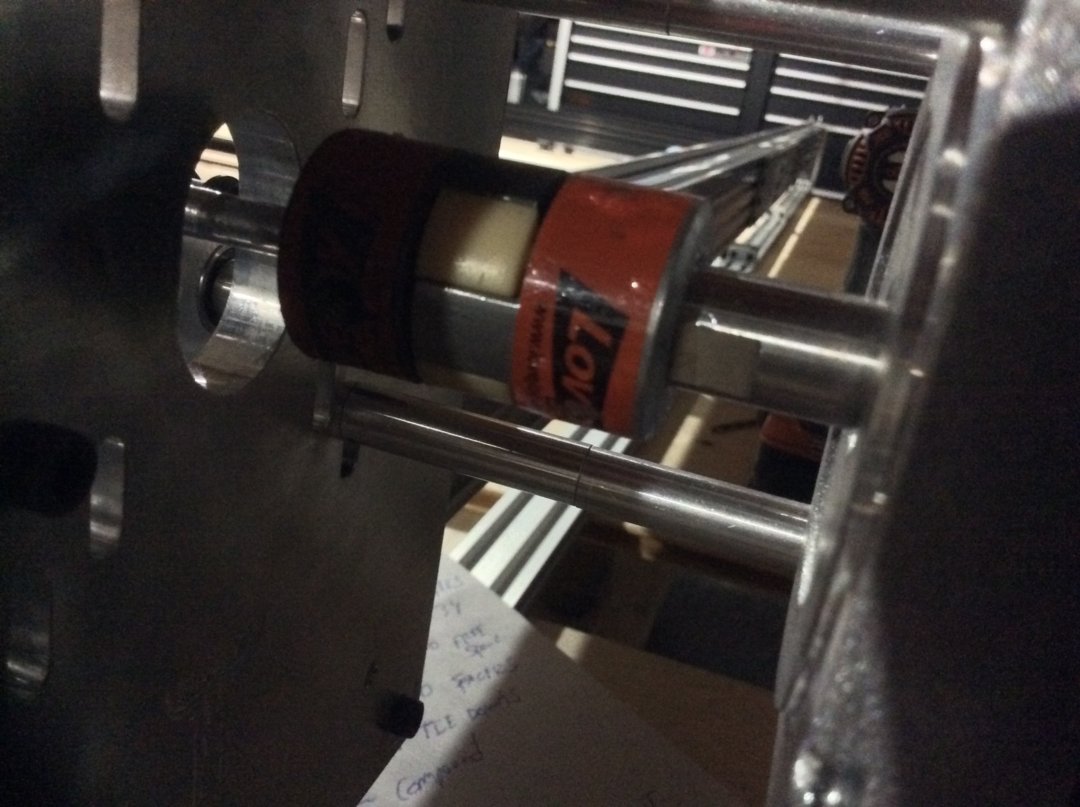
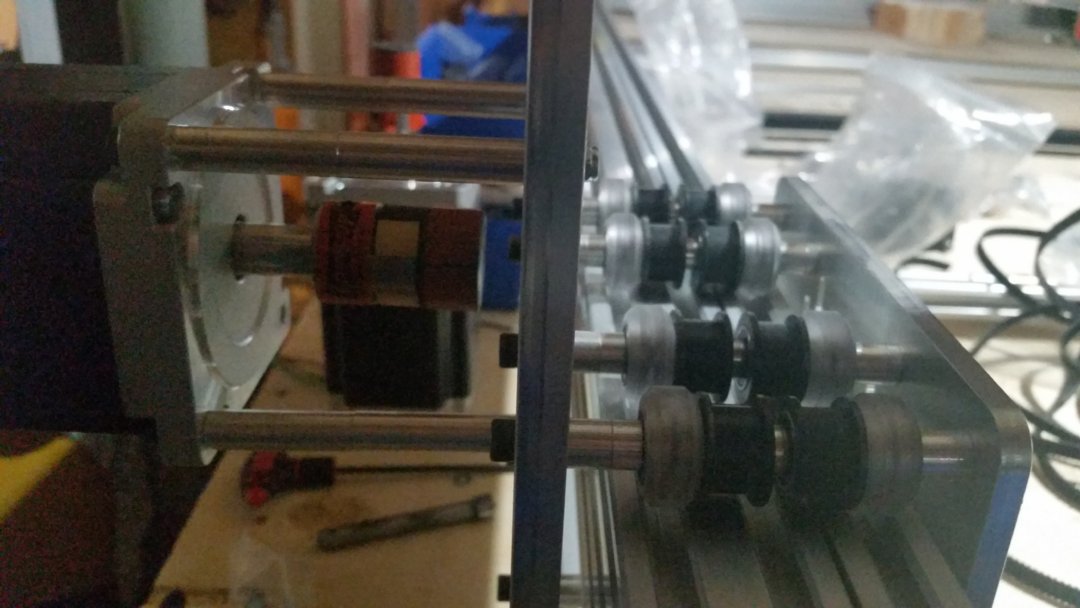
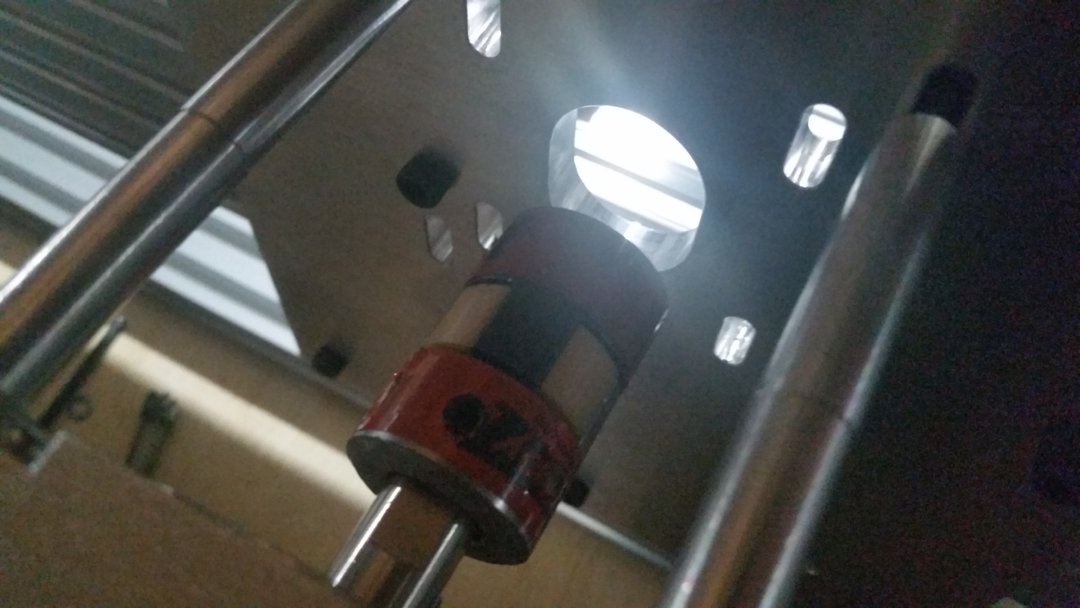
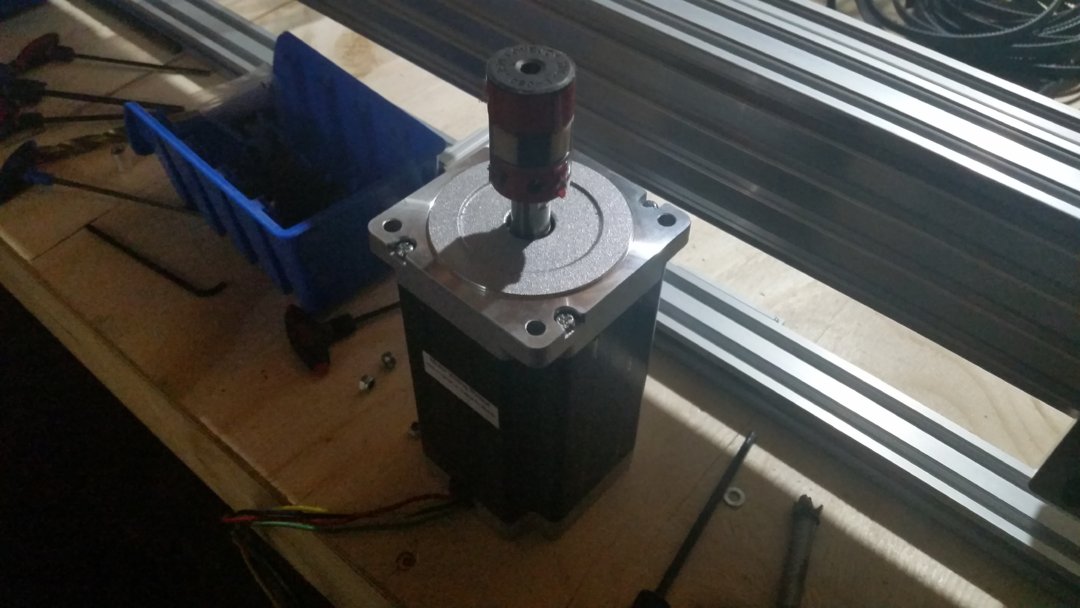
This was obviously going to be the hardest part of the compounded equation. How do I drive this thing??? well it was obvious to me that I wanted to employ belts so I did research on the different sizes and pitches of belting I had already had some experience with 2GT belting but realized it had some draw backs being only 6mm length and being overall smaller in size and strength. so I opted for the next best thing I chose to use some 3GT belting 9mm width and used the pulleys and idler wheels to accommodate them. I found a pattern in assembling this and just followed it the whole way through. also I knew early on I wanted to have two belts on either side of the Y traverses running in synchronicity at the same time helping each other pull the weight of this mammoth. I knew there where going to be some timing issues to allow the belts to work in perfect harmony but I was planning on using threadlock on all the couplings and pulleys so that they stay as mirrored objects to themselves, so that the belts are all dopplegangers to themselves. I also used some Love-joy couplings regular sintered L-050 couplings with the spiders in between. I used the 0.50" and the 0.25" couplings together with the flex shaft spider in between and married it all together using loctite threadlocker. also in this equation where two very small engineered bracket ends that I fastened to the top middle of the Y stiffener plates to allow the 0.25 steel rod to pass through and marry all the components together. I used a course threaded dye 0.25" to make the end threaded, so to pass through and used a 0.25" nylock nut to keep everything nice and tight. The whole process was tricky but it was definitely manageable and turned out great. I have files of all the plates that I have included to go along with this build at the bottom of the page, there is no sense in me describing every single step I used, because I am starting to realize I wouldn't have had the patience or the energy to be a writer. and I understand that pictures tell a thousand words. so please forgive me for not being as thorough as I would like to be. but I don't want to veer anyone of path, and make for a very boring and dull book. lol so to speak. I want to say thanks again to Blue Ox solution's for your help and a huge shout out to len1007 ebay member for all the awesome electrical component ideas!!!! thanks.
I fastened the stiffener plate and Y plates together using 100mm long M5 Metric black oxide bolts. and used a combination of aluminum spacers and washers to get all the pulleys and idler wheels to line up straight in conjunction with the 9mm belts. as you can see I am still waiting on lots of components for this build like all of the belting. here I have only one belt connected at this time, because I am still waiting on all the length I need in the mail. I really wanted to get this whole build straightened out to have all kinds of finished pictures for the openbuilds "POWER PACK GIVEAWAY" but sadly I wont have all the components necessary to have any fully complete pictures but I will post them as soon as I get all the pieces put together. I am still waiting on longer 120mm m5 bolts to finish assembling the X gantry to the X Rail and belting. I should have enough wheels pulleys and idlers to finish setting up the X gantry.
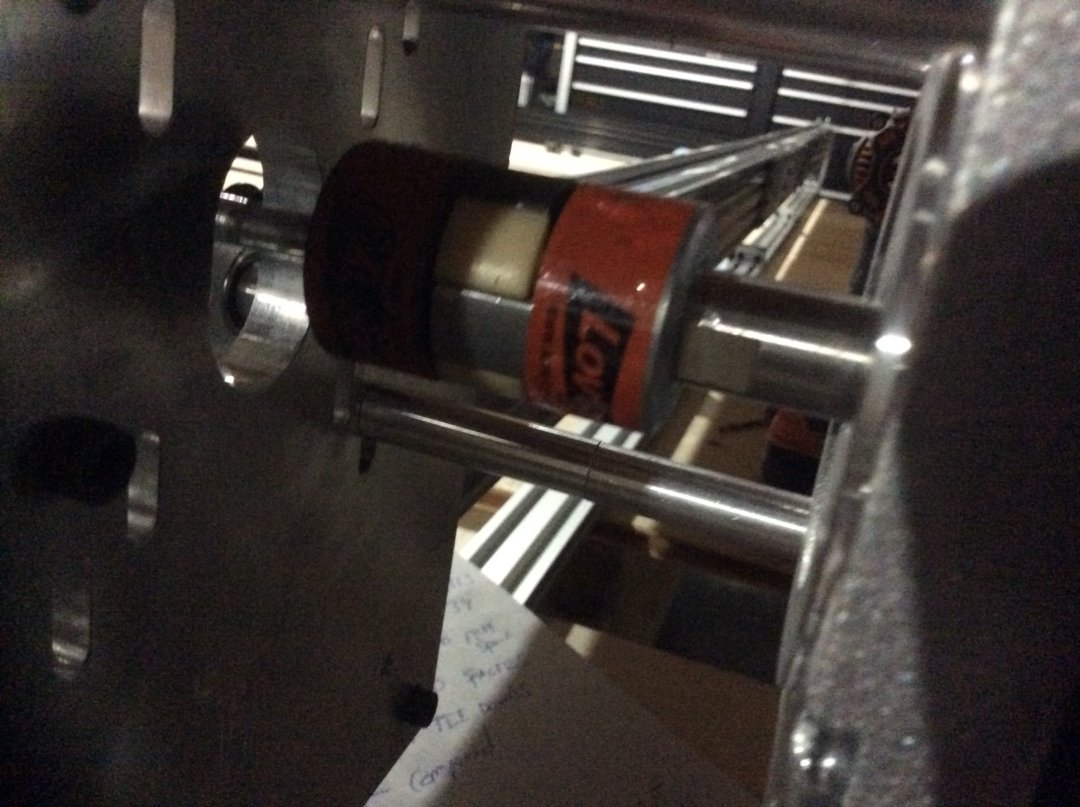
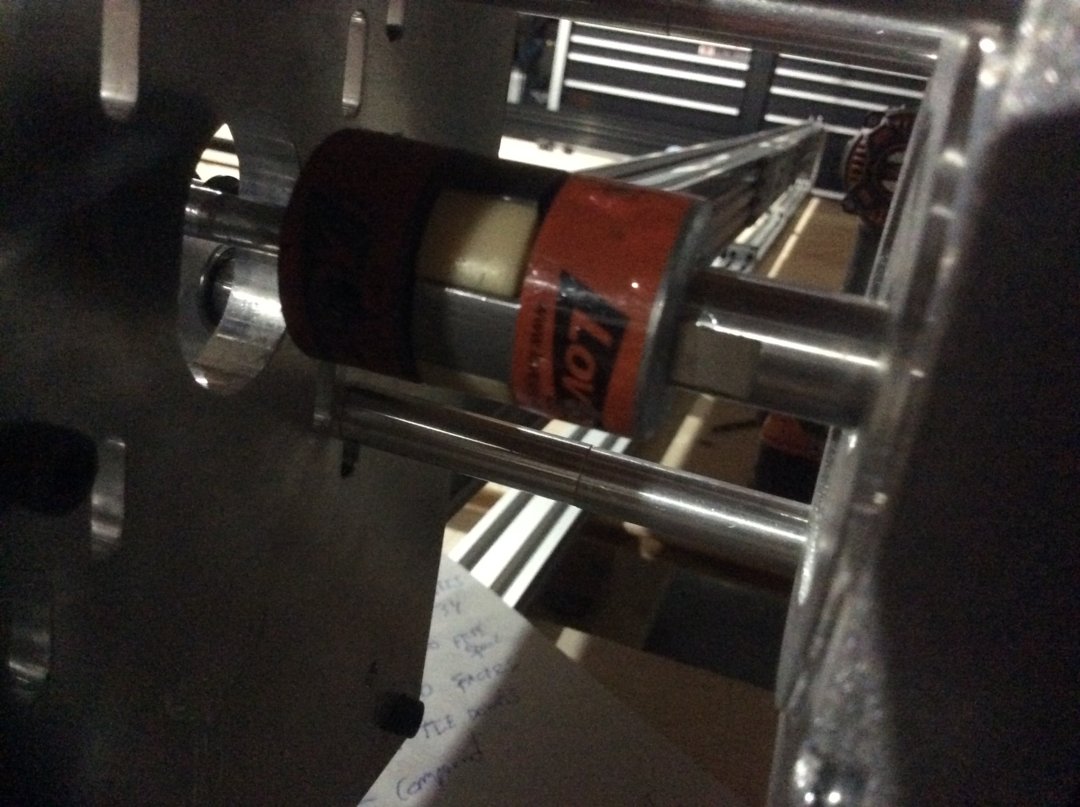
Also if you take a look, I have a picture that shows how I have the plates running on the belly of the Y rails. all I needed to use was three extreme delrin wheels underneath spaced apart equally using aluminum spacers and these Y plates are rock solid!!!!! I was super happy with this part of my build.


STEP 5 CONCLUSION AND FINAL THOUGHTS
So basically all that is left to do now with this build is power it using the power of flowing electrons!!!
All joking aside lol to fully finish this build I will most definitely need a solid power supply, solid motor drivers, all the wiring and a nice interface controller between the machine and the host computer. I would like to try my hand at some fully fledged 3d nesting cad and cam software like Mach 3/4 and also get into milling more aluminum. I am thinking of including a nice oil jet sprinkler on the head of the z axis, to keep the cutting piece nice and cool and create less friction for my spindle of choices carbide bits. a new spindle with a VFD and pendant would be very nice since I have been using regular router spindles to great success, but am very limited to the rather slow RPM's and torque. also a bunch of cable carriers would be an asset as well, cause i dont feel like hanging all the wiring from the ceiling with zip ties lol jj
To conclude this build I would like to say thank you to open builds for offering some kick-butt building supplies and materials. and also I would like to thank the online community for all of the much needed inspiration and ideas!!! truly Openbuilds would not be as great, if it were not for the huge support of its members!!!
My next builds are going to include an ACRO system, because I am intrigued at this laser business, also I would love to play with a mini-mill for PCB Milling purposes, or one similar, and I would really love to make a larger than normal 3d printer based heavily on TEVO black widow format with nema 23's instead of 17's possibly with an updated MOBO in the shape of a smoothieboard perhaps?
anyways thank you for allowing me to share with you guy's and gal's my build and thank you in advance for the chance at the awesome POWER PACK SURGE GIVEAWAY!!!!!
The Archon R2
Build in 'Cartesian Style CNC' published by Sword66, Mar 19, 2018.
The Archon "In the style of Cartesian movement." A brief overview, guide and summary of my highly experimental build. and some insight into the challenges of building such a large format/belted machine.
-
-
Build Author Sword66, Find all builds by Sword66
-
- Loading...
-
Build Details
- Build License:
-
- CC - Attribution Share Alike - CC BY SA
Reason for this Build
I decided to build this machine to allow for even greater speeds/rapids also to allow me to cut dimensionally bigger pieces of materials in all three Axis.Inspired by
Chris Laidlaw "Blue Ox Solutions" Brian Oltrogge "Grunblau Studio" len1007 Ebay member -
Parts list
Qty Part Name Part Link Comments 4 C beam 1000mm http://openbuildspartstore.com/ Link N/A 4 20x80 Beam 1000mm http://openbuildspartstore.com/ Link N/A 6 20x40 beam 1000mm http://openbuildspartstore.com/ Link N/A 3 20x60 beam 1000mm http://openbuildspartstore.com/ Link N/A 4 40x40 beam 1000mm http://openbuildspartstore.com/ Link N/A 2 Custom Y ox plates Extra large http://chrisclub.wix.com/precision-machining Link N/A 2 Custom Y stiffener plates http://chrisclub.wix.com/precision-machining Link N/A 2 Custom Y end plate with Proximity sensor hole http://Inhouse.com Link N/A 2 Custom Y end plate without Proximity sensor hole http://Inhouse.com Link N/A 4 Custom Y side stiffener plates http://Inhouse.com Link N/A 60 3GT belting 9mm belting in "feet" http://openbuildspartstore.com/ Link N/A 3 Lovejoy couplings 0.50 "honed out to 9/16" http://fastenal.com Link N/A 3 Love joy Couplings 0.25" http://fastenal.com Link N/A 3 Lovejoy coupling spiders http://fastenal.com Link N/A 3 Nema 34's http://ebay.com Link N/A 16 16+ 9mm Belt Idler wheels http://openbuildspartstore.com/ Link N/A 8 9mm belt idler's for x plates http://openbuildspartstore.com/ Link N/A 1 Custom X plates http://chrisclub.wix.com/precision-machining Link N/A 22 so far only 22 Xtreme V delrin wheels http://openbuildspartstore.com/ Link N/A 6 9mm 3GT pulley's http://openbuildspartstore.com/ Link N/A 2 Y power transmission transfer plates http://inhouse.com Link N/A 1 X power transmission transfer plates http://inhouse.com Link N/A 16 100mm 5m black oxide bolt's http://fastenal.com Link N/A 1 steel rod 1/4 2' Extra just in case http://Inhouse.com Link N/A 6 110 or 120 mm m5 bolt's for x plates http://fastenal.com Link N/A 4 100mm m5 for x plate Nema 34 http://fastenal.com Link N/A 3 1/4 Nylock nut for steel rod free spool assemblies http://inhouse.com Link N/A 999 Used a suit of different sized spacers http://openbuildspartstore.com/ Link N/A 8 6mm bolts for belt tie downs http://inhouse.com Link N/A 1 Blue thread locker loctite http://inhouse.com Link N/A 1 Red thread locker loctite http://inhouse.com Link N/A 1 C beam actuator 500mm http://openbuildspartstore.com/ Link N/A 1 C beam dust shield http://openbuildspartstore.com/ Link N/A 4 custom 1/8 aluminum plates for middle Y traverse http://inhouse.com Link N/A 999 suit of m5 nuts and bolts http://openbuildspartstore.com/ Link N/A 16 so far... 2 hole angle brackets http://openbuildspartstore.com/ Link N/A 9 so far....3 hole angle brackets http://openbuildspartstore.com/ Link N/A 2 4 hole plate for 80x80 extrusion 3/8" thick http://inhouse.com Link N/A 2 4 hole plate for 80x80 extrusion 1/8" thick http://inhouse.com Link N/A 999 still much much more to complete this thing!!!! http://Idontknow.com Link almost there though!!!!
-
Attached Files:
-


