My Tevo is three weeks old and still hasn't printed. During first run I ran into extruding problems. First, I did it perfectly but clogged the nozzle. Then, I began to experience issues loading filament. So, I began to examine options for alternative extruders.
I have settled on an experiment with a metal tube, piece of hard steel mount (custom made with a dremel) and ultimately I'd like to replace the 12V full-sized NEMA 17 extruding motor with a much lighter 3.5V half-pint NEMA 17. Be careful to get the appropriate step down or otherwise modify the driver. I'm still doing research on this while I await a part.
Steps to reproduce:
- Remove metal extruder mount and belt suspension system for the extruder/motor.
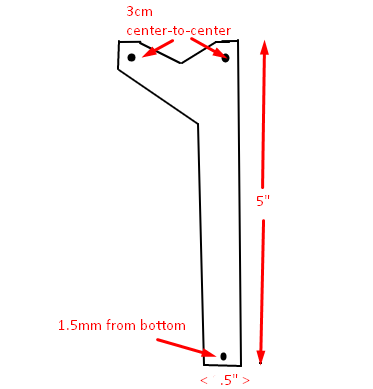
- Cut piece of Tie Plate to match required specifications. Bottom dimensions: You can drill a single hole in the bottom about 1.5mm from edge which is approximately 1/2" wide. The bracket is "an upside down L" shape (see image) ... Cut most of the steel away up to the last 1.5", where you will create a stepper motor mount. Expand the suggested Tie Plate's existing holes, or drill new ones. (I used a dremel to turn the top two holes into ovals because they are not placed quite wide enough) Top dimensions: default size.
- Measure and cut the steel tube to approximately the length of the Tie Plate + 1" -- you may need to adjust this to fit. Err early on the side of length, and cut back to perfect size. Motor's PTFE connector should "sit" on top of the tube, with the tube's weight fixed on the center of the nozzle through the lower PTFE connector.
- Unscrew one of the cold-end mounting screws from the effector and rescrew to attach the plate. I used 2 small washers and 1 nut to offset the screw so it would hold the metal flush with the effector's mounting rim. Personally, I mounted the motor first, but you should make sure the plate fits before reassembling with the motor.
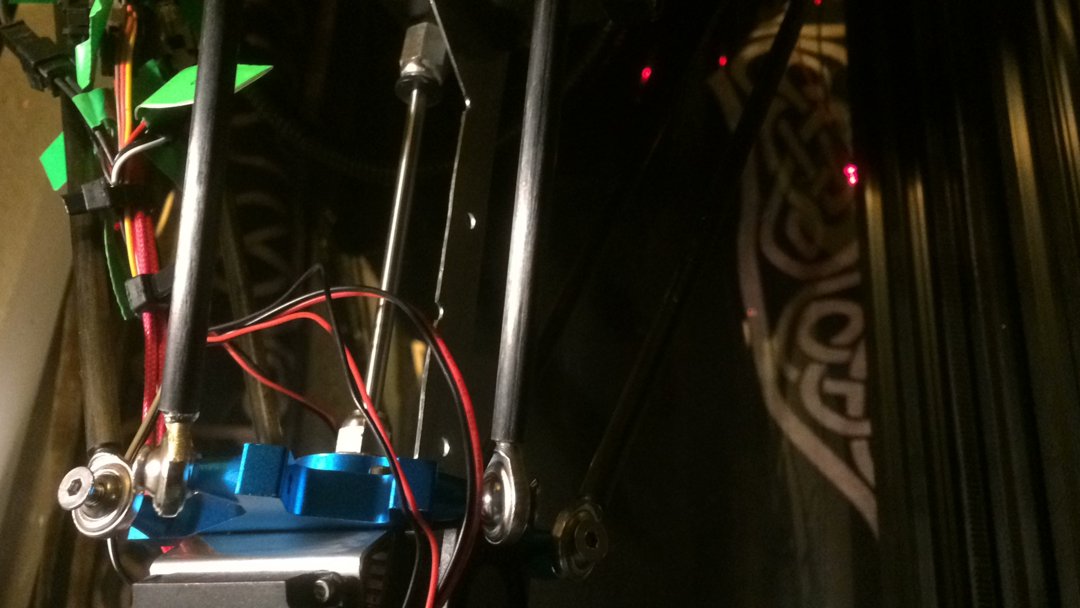
- Remove the fully tested plate and attach the motor such that it faces away from the center. Mount using the MK8 on the other side. Make sure the PTFE connectors are approximately on top of each other. Before mounting, fit the metal tube into the MK8's PTFE PC4/01 connector, then slide the entire mount onto the effector's PTFE PC4/01 connector. This should hold it in place good enough for you to tighten the one mounting screw. Voila, you have a directly mounted extruder on your TEVO Little Monster's effector.
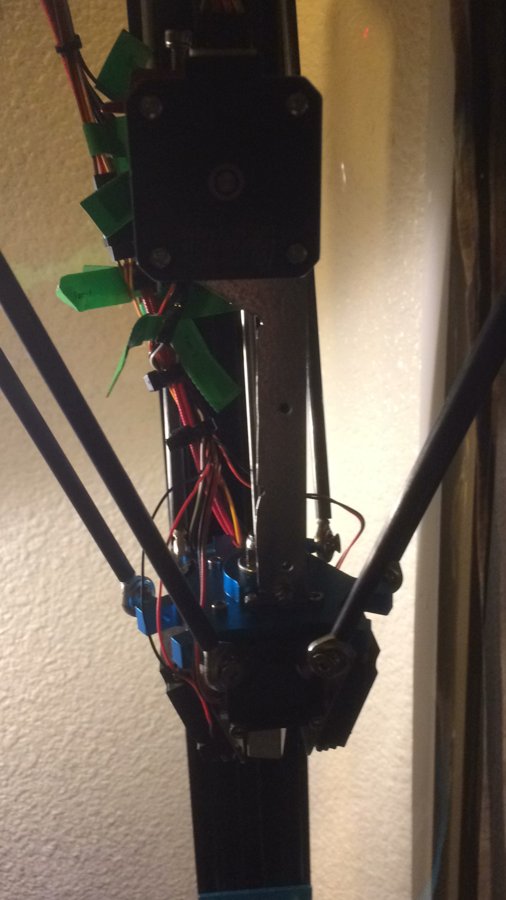
- Use wire to harness the wires coming from the top of the deltabot approximately where the old extruder was "floated"
Observations so far:
a) The weight is distributed down toward the tool head now, making it pull the entire effector down after running calibration, yet I can still home it without an issue. This can be fixed by adjusting the axis trucks. I'm pretty sure this will fall onto prints at the end, so it's important to fix this issue or you will have to be right there when the print ends. Note that this happened before, so this may not be a new emerging issue. Also, the weight is only increased slightly by the MK8 and the metal plate, so its not like it should be that much heavier than when it was in its out-of-box mount suspended, however, if you had tightened the belts this does create a tension that might help the trucks slip less ... but regardless the weight is still on all of the trucks in both configurations.
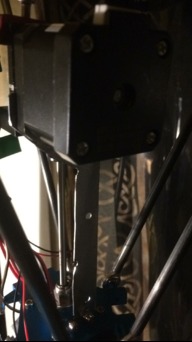
b) With the default NEMA 17 I am hitting the stepper causing a slight bow in the left front effector arm when in the extreme near that corner. This is one half of the reason I want to switch to a slim NEMA 17. The other half is to decrease weight. (You can test this yourself using the calibrate feature.)
c) There is a noticeable shiver (in the out-of-box tevo build configuration it was suspended-extruder bounciness) which will effect toolhead backlash when moving quickly. Looking forward to running some test prints. Many of the videos online complain about the settings being too quick, so backlash was a problem then too.

- Parts list
- Qty Part Name Part Link Comments
- (1) 304 Stainless Steel Tube (exterior dia 3mm) "Capillary Tube" no rubberized interior -- $3-8 I bought a variety pack on Amazon ($20 https://www.amazon.com/gp/product/B01N7D6AMN ) because I wasn't sure what diameter I needed, must fit in a PC4/01 PTFE connector fitting try this link: 5pcs 304 Stainless Steel Capillary Tube OD 3mm x 2mm ID Length 250mm | eBay
- (1) 1-13/16 in. x 5 in. Tie Plate
$1 You can also use any other rigid metal or get the longer strong tie, available at Home Depot in the house building section (used for studs)
Tie Plate: Search Home Depot website (or just show up and find the galvanized stud section in the home building area) and look for a tie plate that matches the dimensions (or get an even longer one if you want)
1-13/16 in. x 5 in. Tie Plate
Model # TP15
Internet #100375260
Store SKU #464236
Store SO SKU #592854
- (1) MK8 Makerbot All-Metal Extruder (Optional!) Link: LMGTFY $8 (optional) Make sure to get the right kind. I bought right but meant left, had to order two. Otherwise extrude means retract and ftw
- (1) Three feet reliable rigid coated wire or tiewraps $0.10 I used wire to harness the wiring to a centralized position in place of the Tevo base belt-mounted extruder to keep the wires from tangling and dropping below the nozzle tip
TEVO Little Monster Direct Mount Extruder
Build in 'Delta Bots' published by h3rb, Mar 20, 2018.
Cheap, experimental Modification to Tevo Little Monster's bowden system for the extruder
-
-
Build Author h3rb, Find all builds by h3rb
-
- Loading...
-
Build Details
- Build License:
-
- CC - Attribution Share Alike - CC BY SA
Reason for this Build
The default extruder was garbage and the effector's bowden system did not work for me out of the box. The plastic tubing didn't allow filament to traverse, and as I worked on it it because obvious that this system was flawed. Wish it had worked immediately. I have not yet print-tested this but will update the build when I have more information. Awaiting parts for final build and confirmation. -
Parts list
Qty Part Name Part Link Comments 1 304 Stainless Steel Tube (exterior dia 3mm) http://lmgtfy.com/?q=3mm+O.D.+stainless+steel+capillary+tube Link $3-8 I bought a variety pack on AMZN because I wasn't sure what diameter I needed, must fit in a PC4/01 PTFE connector fitting 1 1-13/16 in. x 5 in. Tie Plate http://lmgtfy.com/?q=Simpsons+Strong+Tie+TP15 Link $1 You can also use any other rigid metal or get the longer strong tie, available at Home Depot in the house building section (used for studs) 1 MK8 Makerbot All-Metal Extruder (Optional!) https://lmgtfy.com/?q=MK8+All-Metal+Extruder Link $8 (optional) Make sure to get the right kind. Buy the purple or try the gold. You don't need the stepper. I bought right but meant left, had to order two. Otherwise extrude means retract and ftw 1 Three feet reliable rigid coated wire or tiewraps Link $0.10 I used wire to harness the wiring to a centralized position in place of the Tevo base belt-mounted extruder to keep the wires from tangling and dropping below the nozzle tip 0 Link 0 Link
