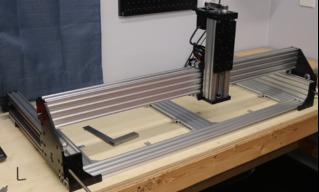
SPHINX 1050 BUILD
This build is going to be posted real time, I will be making updates as I progress with the build. Final page layout and formatting will take place once build is complete. So check back often !
4 / DEC / 2018
25 / NOV / 2018
24 / NOV / 2018
As I get ready tonight to edit the "Day Two" build video. I wanted to do a quick update with a Pro Tip.
If you recall my original Sphinx build "Here" you will see the X-axis C-beam is 3mm longer then the base frame 20x60 extrusion. This is a requirement if you want to end up with a properly squared machine. Having the base frame extrusion and the X-axis extrusion both at 1000mm will result in your gantry becoming a Isosceles trapezoid.
If like me you already have your extrusion in hand and it measures a true 1000mm

We can correct the problem before it becomes one by using four additional precision 3mm spacers.

You will mount these to one side of your X-axis gantry between the Y-axis side plate and your C-beam


As we can see, Perfectly square.By doing this quick Mod we are able to save our build and continue on using our 1000mm extrusion.

11 / NOV / 2018
8 / NOV / 2018
This morning I brought the Sphinx 1050 cnc kit from Openbuilds into my mini makerspace. I forgot to grab a boxed photo. Everything was packaged very well as is usual with Openbuilds. Starting out how I do with most kits, I opened everything then cross checked the packing sheet included with the shipment.


Using a storage organizer with a few extra bins I had laying around I was able to get all of the hardware ready for assembly. Taking your time to organize everything really does pay off during a build like this.

Taking a close look at the Openbuilds Sphinx Plates, I am impressed with the quality , look and feel. They look great in black. I can easily see a blackout Sphinx build now that we have the black c-beam and v-slot available.

For the electronics / control side of this build. I am going back to what I would normally do on the cnc milling machines I have built. I will be using a Mesa ethernet control card , Gecko G540 , Steel nema enclosure, Safety contact, Full wiring diagram, ect. ect. For software I will be using LinuxCNC. I am still waiting on a few parts to come in before I can really dive into this build. However if there is any interest in documenting the control cabinet and electronics in greater detail just let me know so I can film / photograph the process and steps involved.

! Next Update to follow soon !
Sphinx 1050
Build in 'Cartesian Style CNC' published by Kyo, Dec 4, 2018.
This is going to be a Sphinx 1050 build. Starting off as a stock kit build using industrial electronics and opensource control software. Mods and upgrades to follow.
-
-
-
- Build Progress:
-
- Build in Progress...
Akhmad Sobari, Marcjwebb, CharlieShimota and 17 others like this. -
-
Build Author Kyo, Find all builds by Kyo
-
- Loading...
-
Build Details
- Build License:
-
- CC - Attribution Share Alike - CC BY SA
Reason for this Build
This Sphinx build will primarily be used for making renshape Patterns. I would also like to venture into cnc Plasma. I have a design upgrade in mind for that.
Inspired by
-
Parts list
Qty Part Name Part Link Comments 1 Sphinx 1050 Kit https://openbuildspartstore.com/openbuilds-sphinx-1050-20... Link Main Machine Kit 4 Nema 23 Motors https://openbuildspartstore.com/nema-23-stepper-motor/ Link A Exellent choice for a base build, However I will upgrade to the HT Nema 23 motors at a later time. 1 Dewalt 611 https://openbuildspartstore.com/dewalt-dwp611-1-25-hp-max... Link I have had good luck running Dewalt 611 Routers. A Nice choice to purchase with your kit. 1 Gecko G540 https://amzn.to/2SVUoYg Link One of the best options for this style and size of router. 1 Mean Well 36V 16.6A Power Supply https://amzn.to/2ATu36k Link You can not go wrong with a Mean Well PS, I wish the Part Store carried this 36V option.

