A few years ago I built am OX CNC (1000mm x 1500mm). This machine has been great, but I wanted to make it even better. I decided to convert it to a lead screw design. I upgraded my OX CNC to lead screws on all the axis. The goal was to upgrade the OX CNC with no changes to the OX CNC plates.
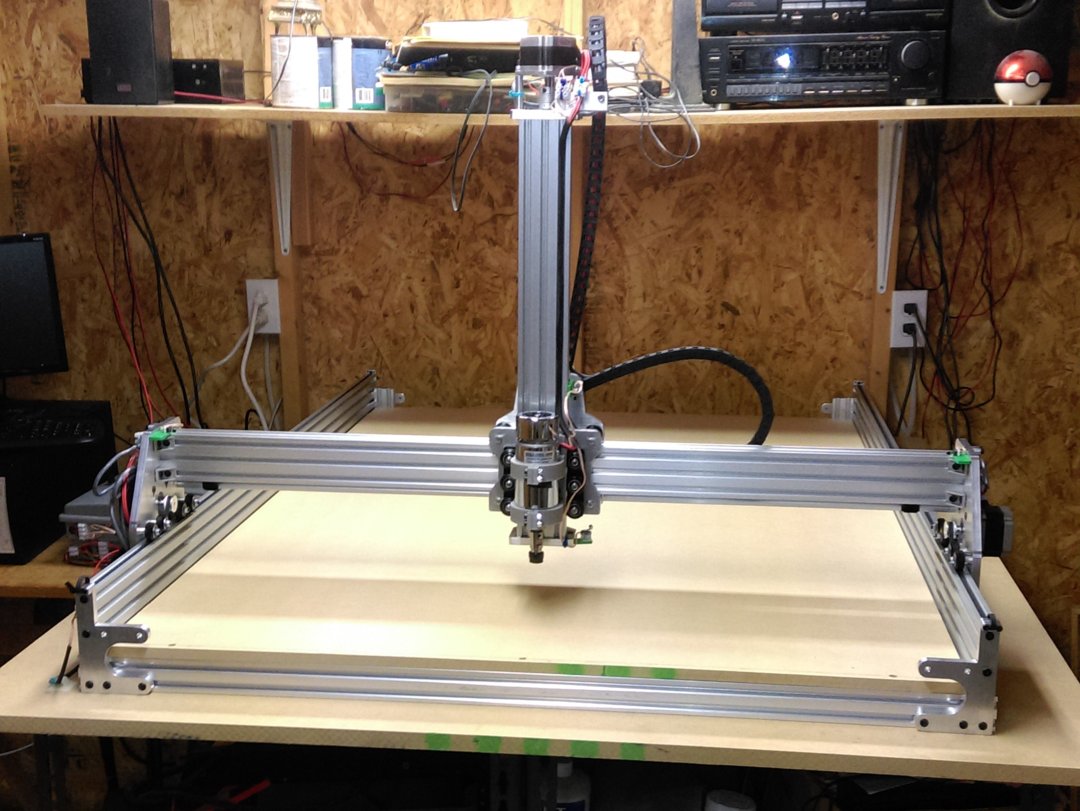
Old OX CNC.
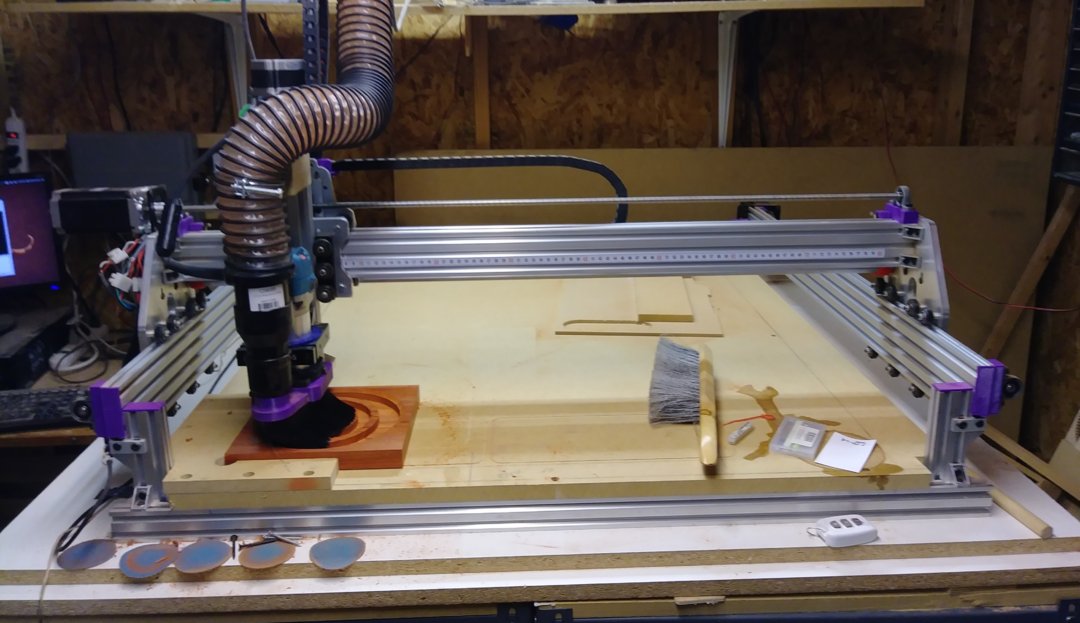
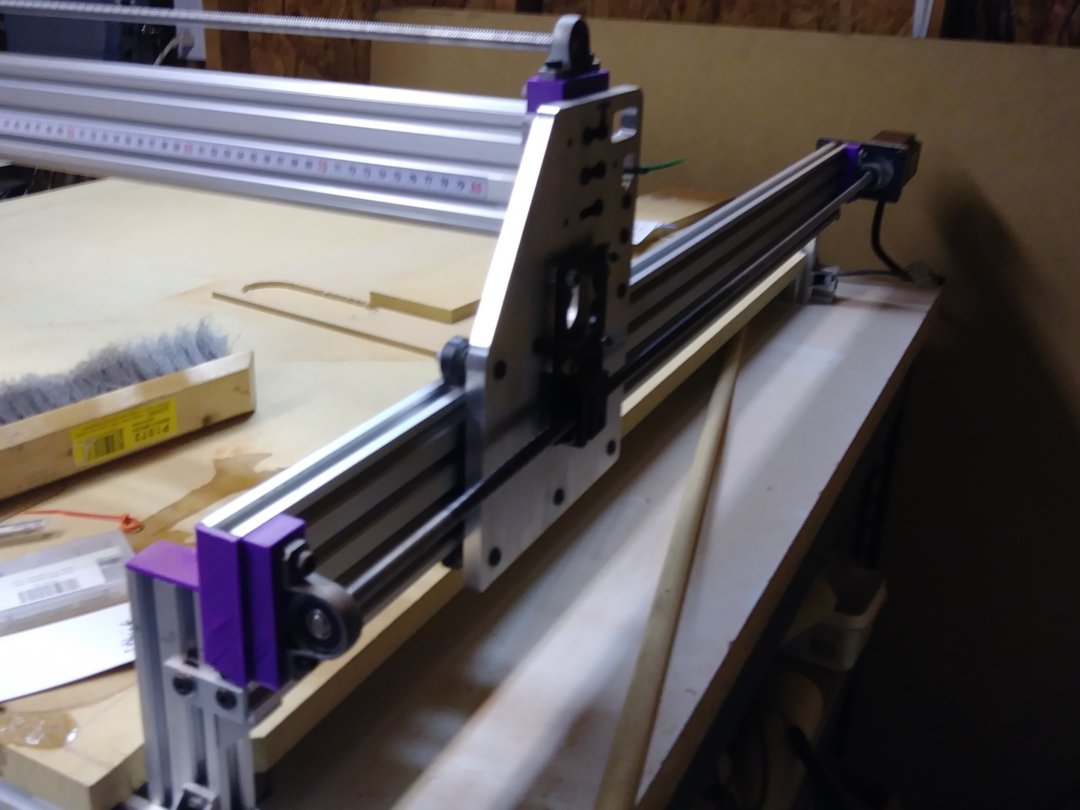
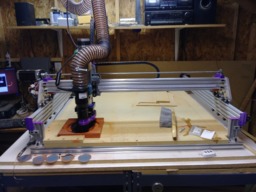
New OX CNC. To make some room in my shop I down sized the CNC to 1000mm x 1000mm. The new lead screw setup works great!!
Parts List:
6 x OX CNC Pillow Block Spacer (3D design OX CNC Pillow Block Spacer)
(Printed to size required)
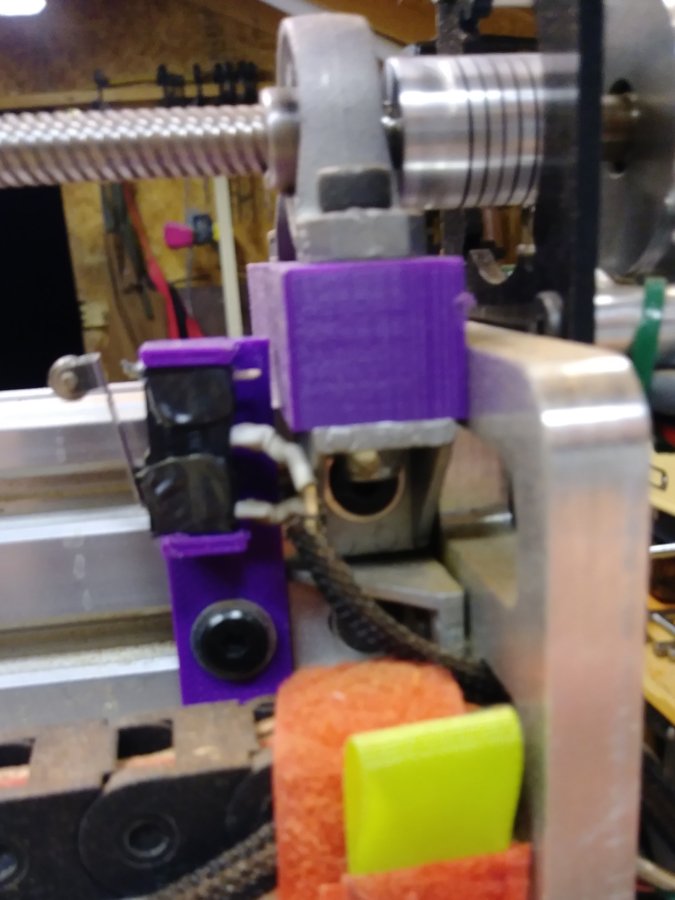
As also modified this limit switch from Thingiverse (Limit switch bracket by tommyolofsson) to support left and right. I also integrated it into the Y-Axis Pillow Block Spacer.
OX CNC Limit Switch right and left (3D design OX CNC Limit Switch right and left)
4 x 6” of 20 x 40 extrusion
4 x 2 Hole Joining Strip Plate
22 x Cast Corner Bracket (Depending on the orientation of mounting, I has to grind of some of the nubs on the back.)
3 x 3D Printer T8 1000mm Lead Screw Rod Shaft Coupling Mounting Bearing W/ Screw Nut (3D Printer T8 1000mm Lead Screw Rod Shaft Coupling Mounting Bearing W/ Screw Nut | eBay)
5 × Motor Mount Plate - NEMA 23 Stepper Motor
18 × 40mm Aluminum Spacers
18 x 3mm Aluminum Spacers
Precision Shim - 10x5x1mm (quantity will vary based on tuning)
3 x Anti-Backlash Nut Block for 8mm Metric Acme Lead Screw
2 bags each Low Profile Screws M5 (10mm, 20mm, 65mm cut to sizes required) I went thru a lot of screws!!
Bag of Tee Nuts
2 x Nylon Insert Hex Locknut - M5
About 10 x
Drop In Tee Nuts
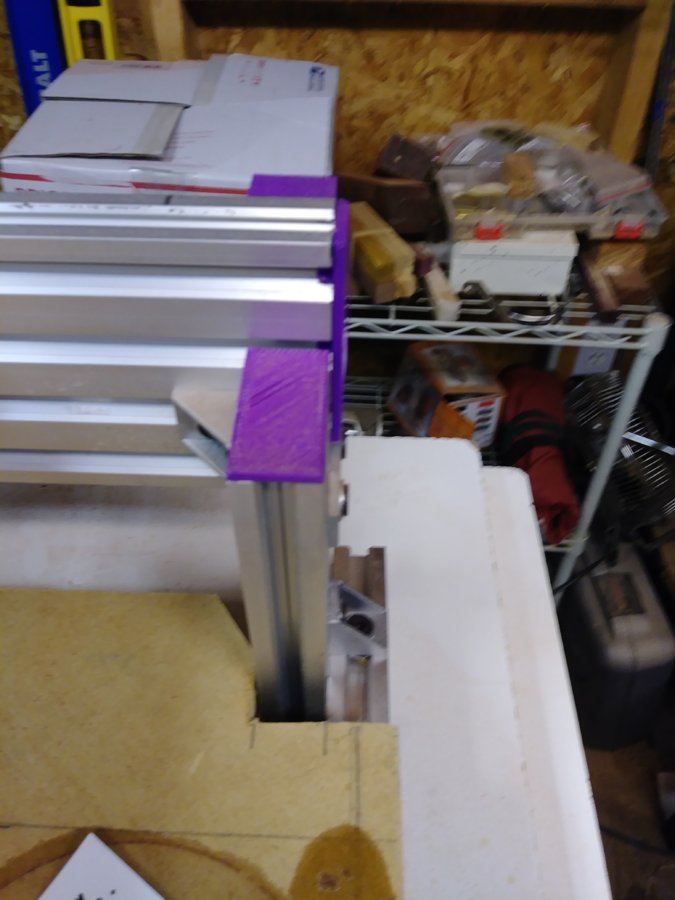
To increase the Z-axis height, I used 6” of 20 x 40 extrusion to replace the original bracket. This increased the Z-axis height by 3 inches. I used 5 x Cast Corner Bracket and a flat 2 hole bracket to brace/connect the extrusion.
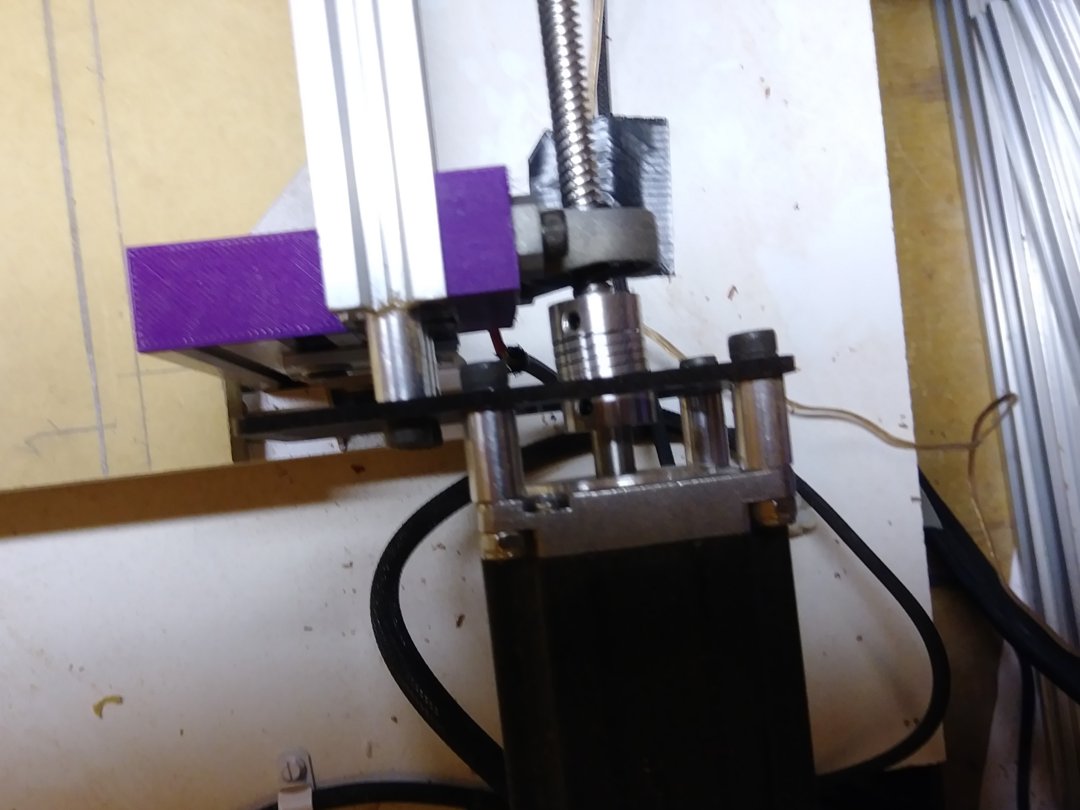
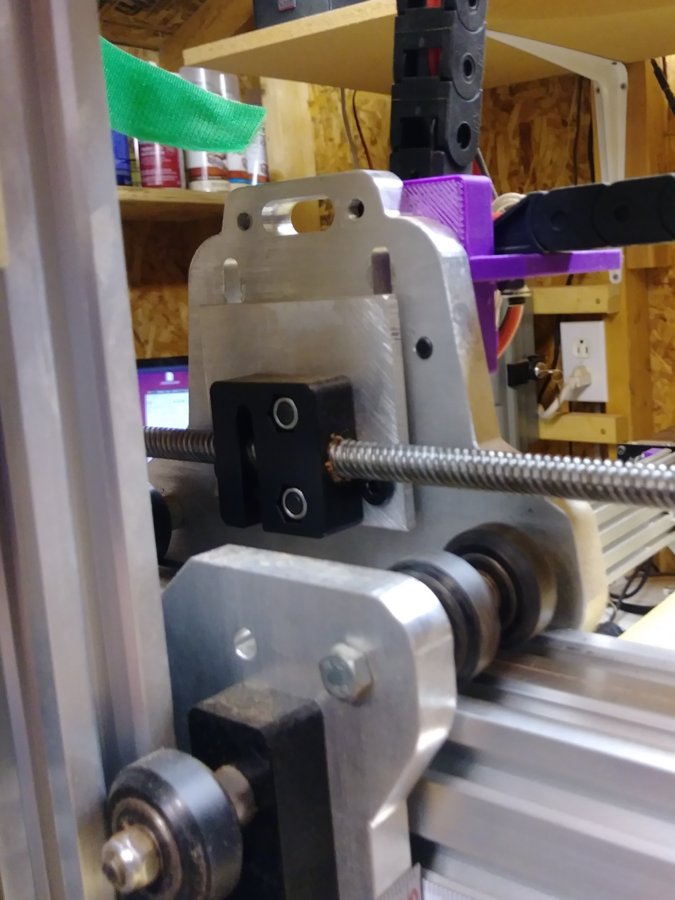
To mount the Anti-Backlash Nut Block for 8mm Metric Acme Lead Screw to the OX CNC Y plates I used NEMA 23 Stepper Motor mount plates along with 3 mm × Aluminum Spacers. To get the Nut block to lineup I had to file the slot to make it slightly larger. I mounted the plate replacing the Y-Axis stepper motors.


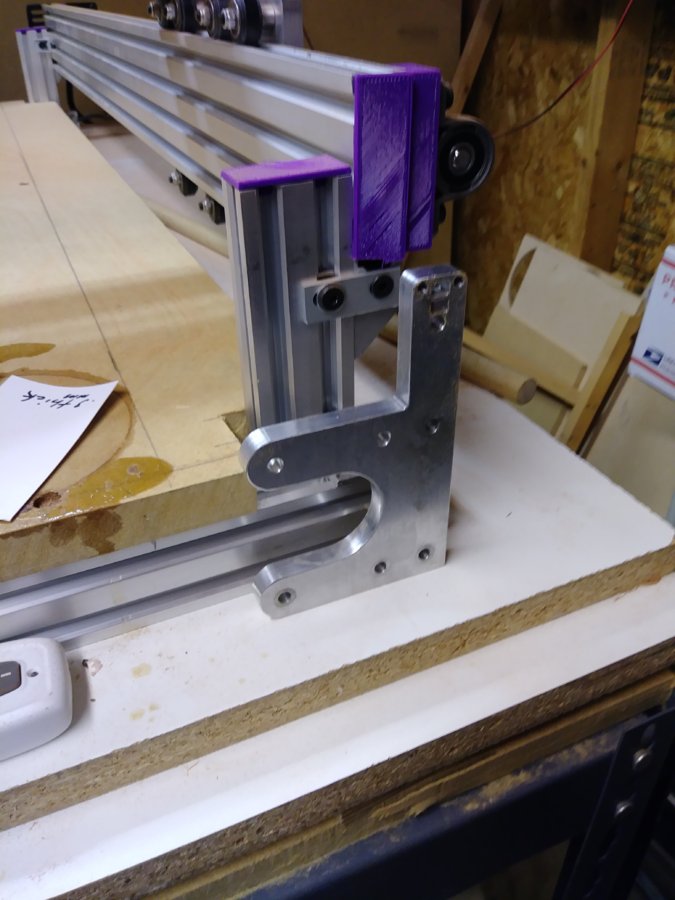
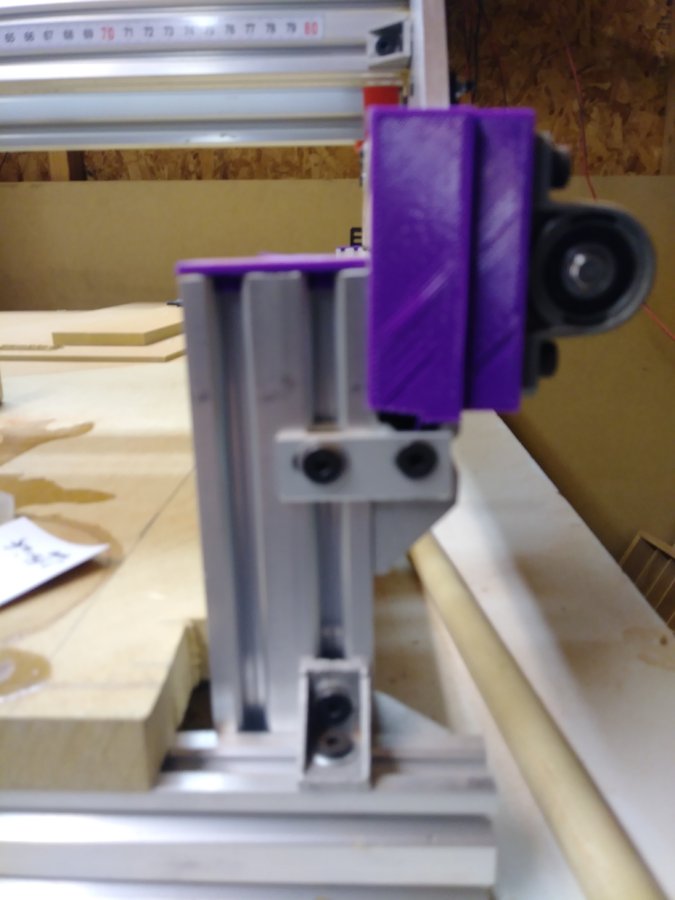
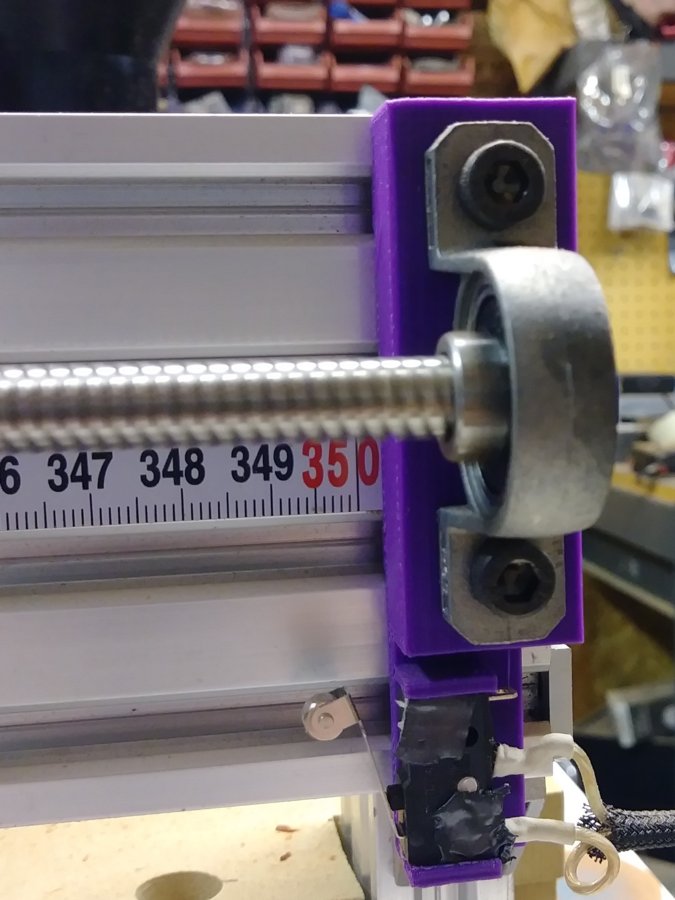
To mount the pillow blocks for the Y-Axis lead screws to the 20 x 80 extrusion, I created and 3D printed spacers in TinkerCad (www.TinkerCad.com).
OX CNC Pillow Block Spacer
3D design OX CNC Pillow Block Spacer
Note: my OX CNC plates are 5/16 aluminum plater. You will need to modify the file for you plate thickness. The over height of the part includes the 1.5 mm guides on the bottom of the part. Make sure you take this into account when adjusting the spacers to your machine. I also provided limit switch mounts.
OX CNC Limit Switch right and left
3D design OX CNC Limit Switch right and left
I used the following lead screws due to the fact that they came with the pillow blocks.
3D Printer T8 1000mm Lead Screw Rod Shaft Coupling Mounting Bearing W/ Screw Nut
3D Printer T8 1000mm Lead Screw Rod Shaft Coupling Mounting Bearing W/ Screw Nut | eBay
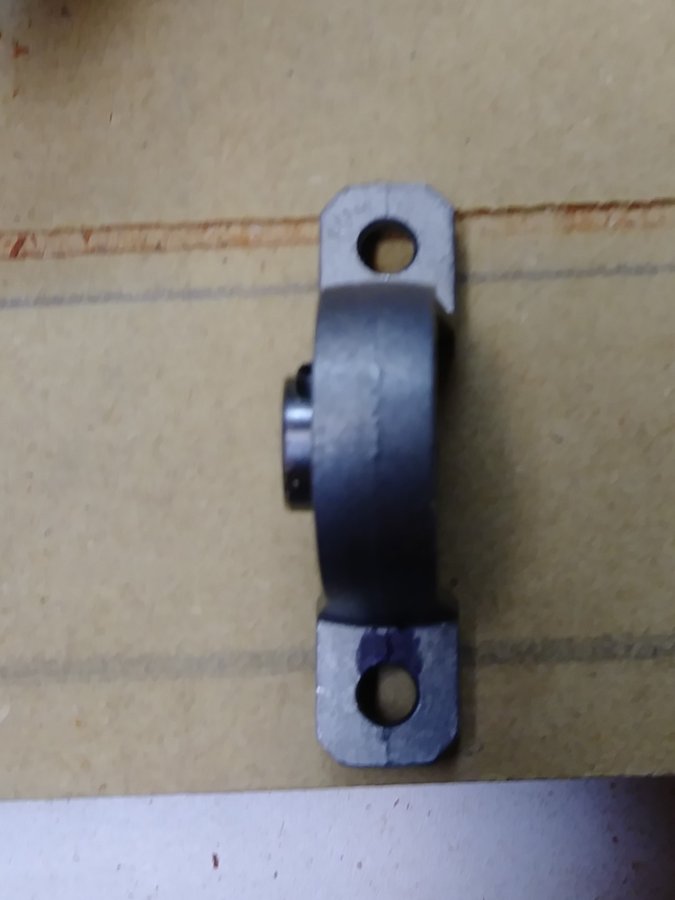
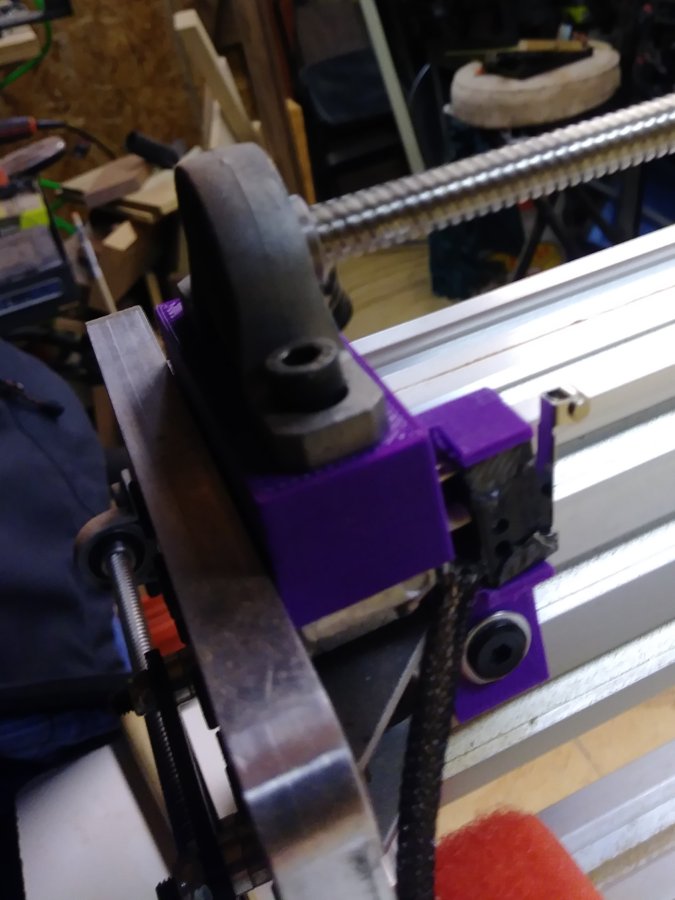
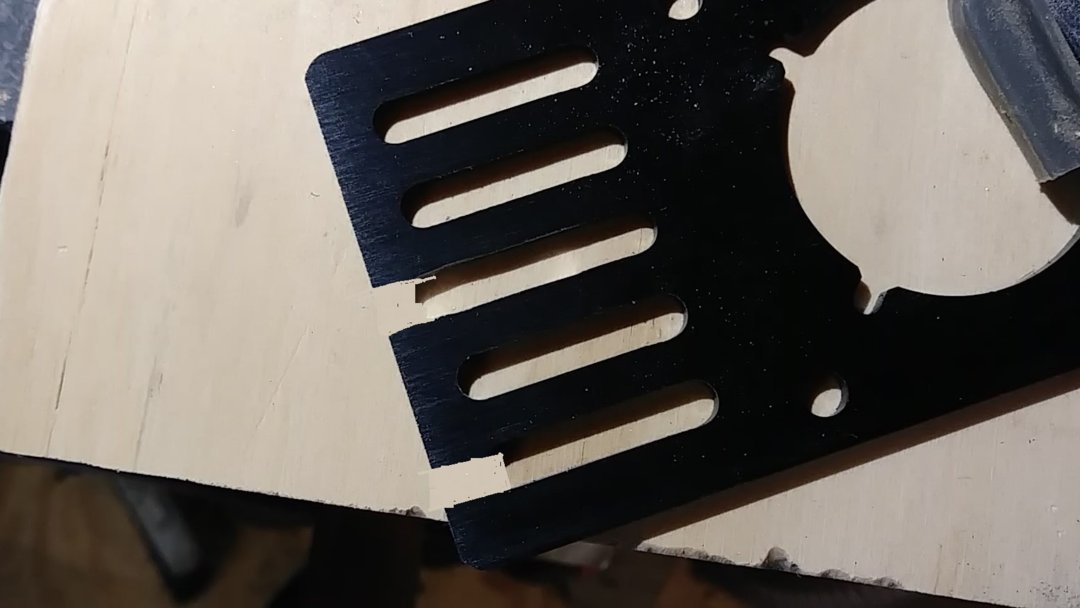
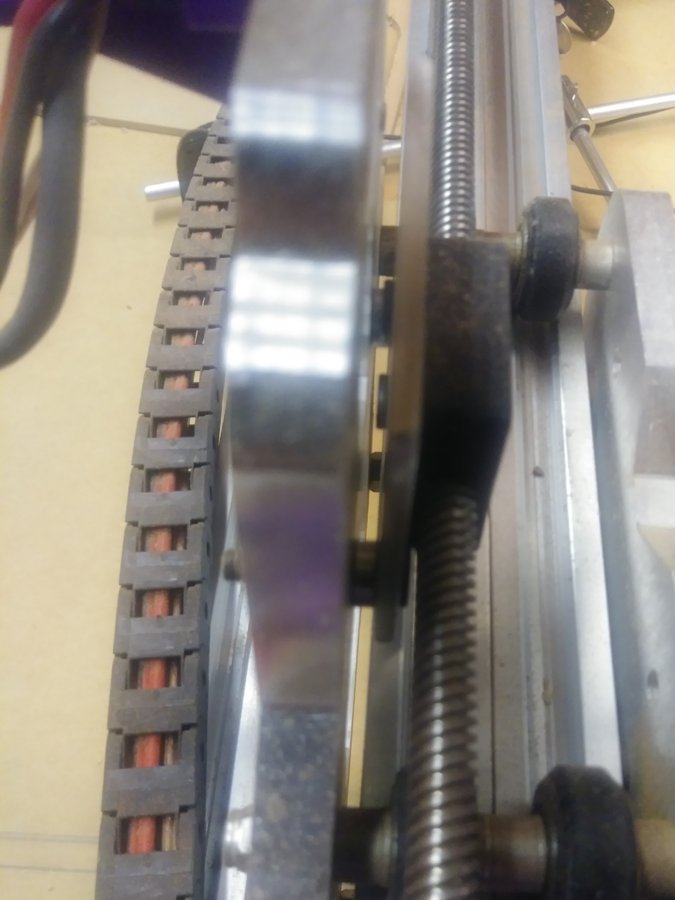
To make the pillow block alignment work for the 20 x 80 extrusion, I had to file the bottom screw slot of each pillow block elongate the hole. Area that was filed is highlighted in black. Note: If you want the set screws all facing inward you will need alternate the holes enlarged.
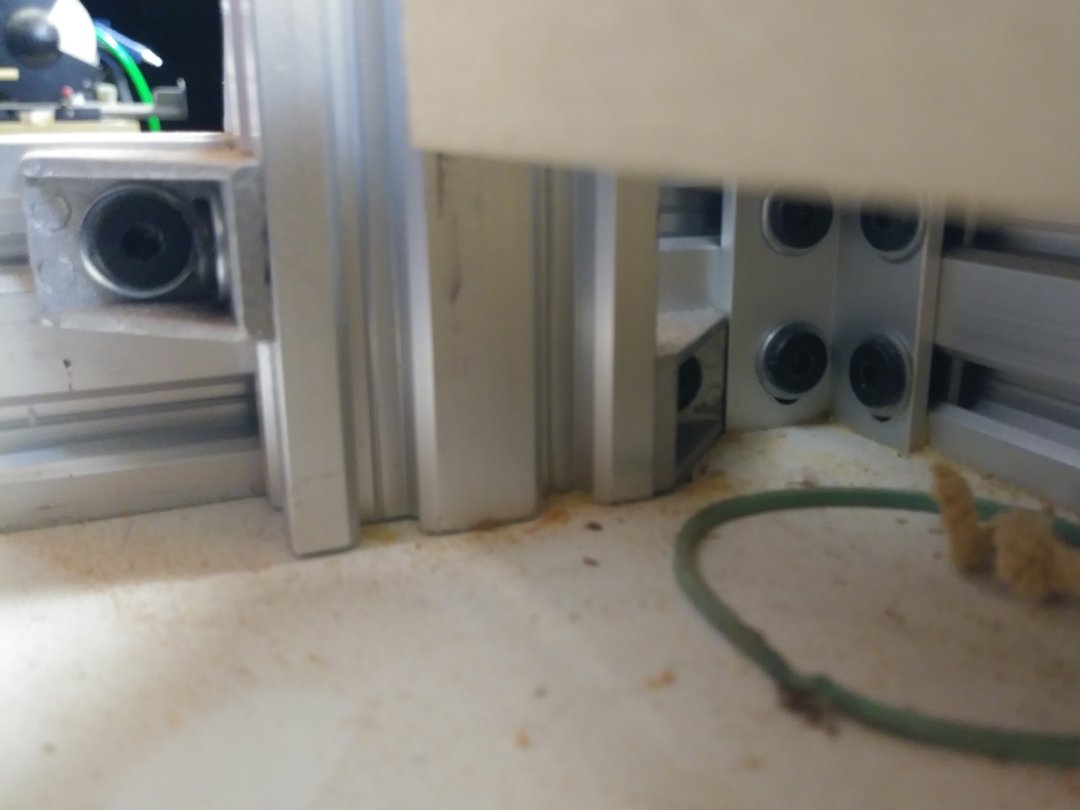
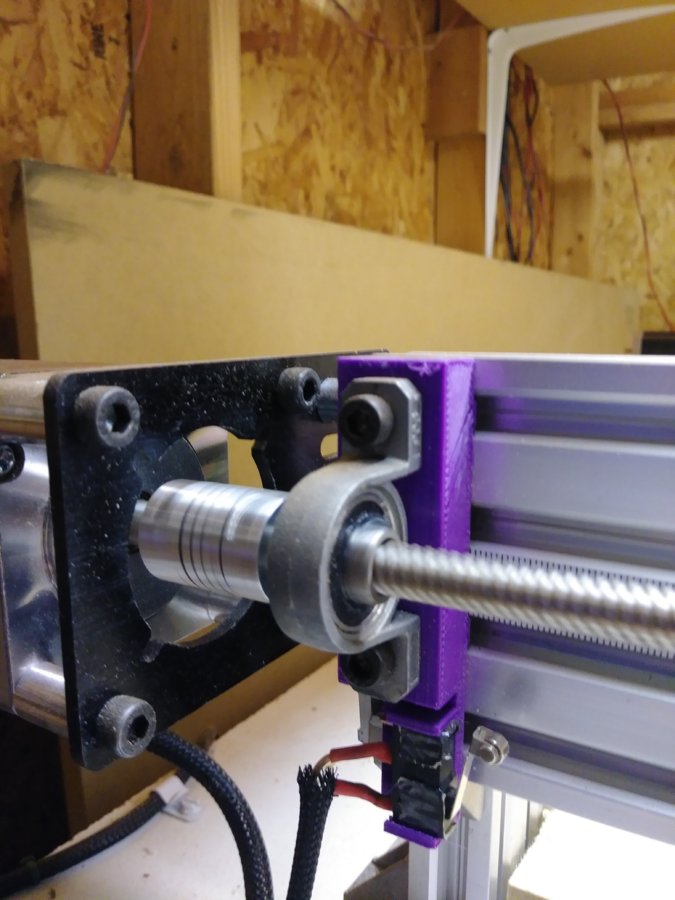
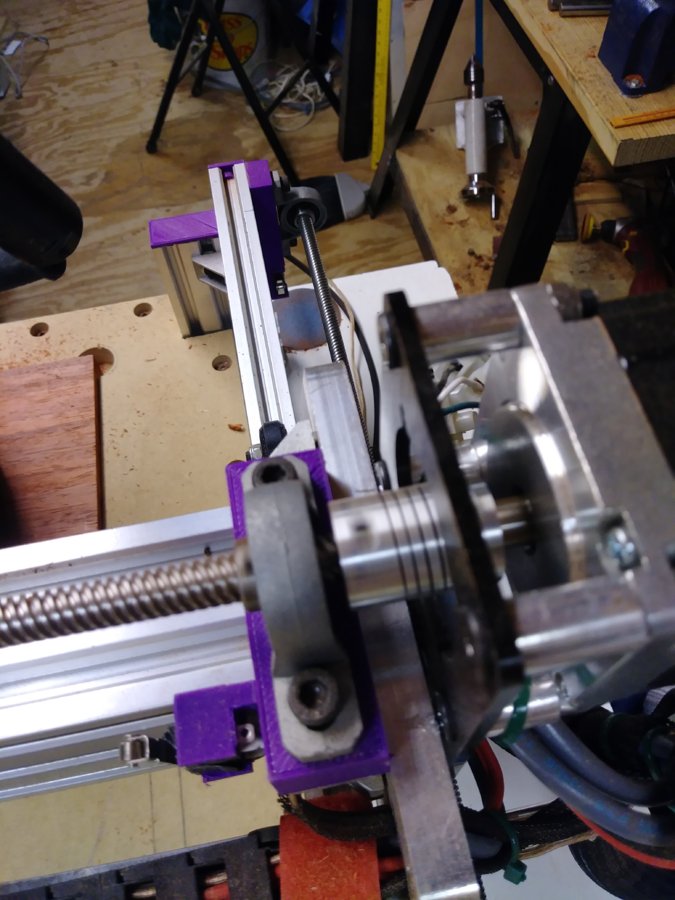
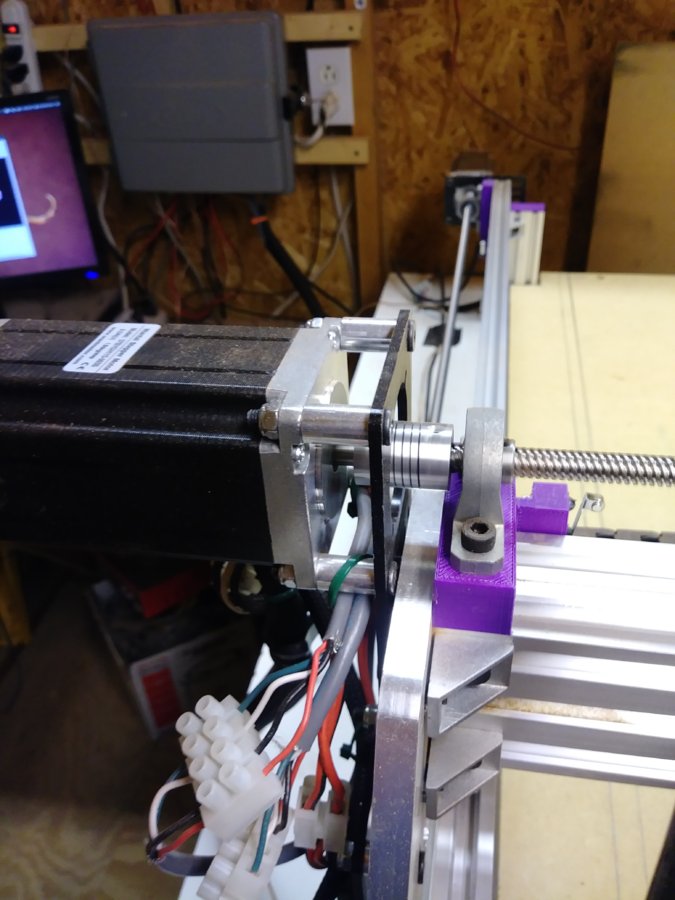
To mount the Nema 23 stepper motors, I used NEMA 23 Stepper Motor Mount Plate with 40mm aluminum spaces screwed in to the top 3 holes of the tapped 20 x 80 aluminum extrusion aligned to the lead screw. The bottom hole is used for the 2 hole plate brace. I used spacers on the Nema 23 motor to provide room to connect the coupler. The spacer sizes may need to be adjusted based on your setup. I used 40mm aluminum spaces.
To mount the pillow blocks for the X-Axis lead screws to the 40 x 40 extrusion, I created and 3D printed spacers in TinkerCad (www.TinkerCad.com).
OX CNC Pillow Block Spacer
3D design OX CNC Pillow Block Spacer
One side is connected to the extrusion and the other side is connected to a 90 degree cast bracket.
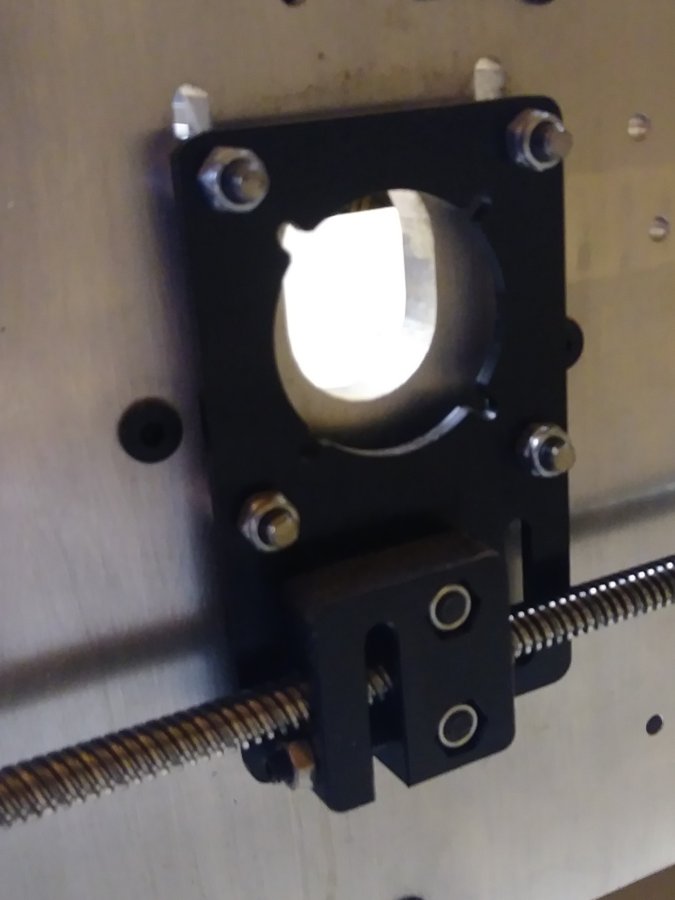
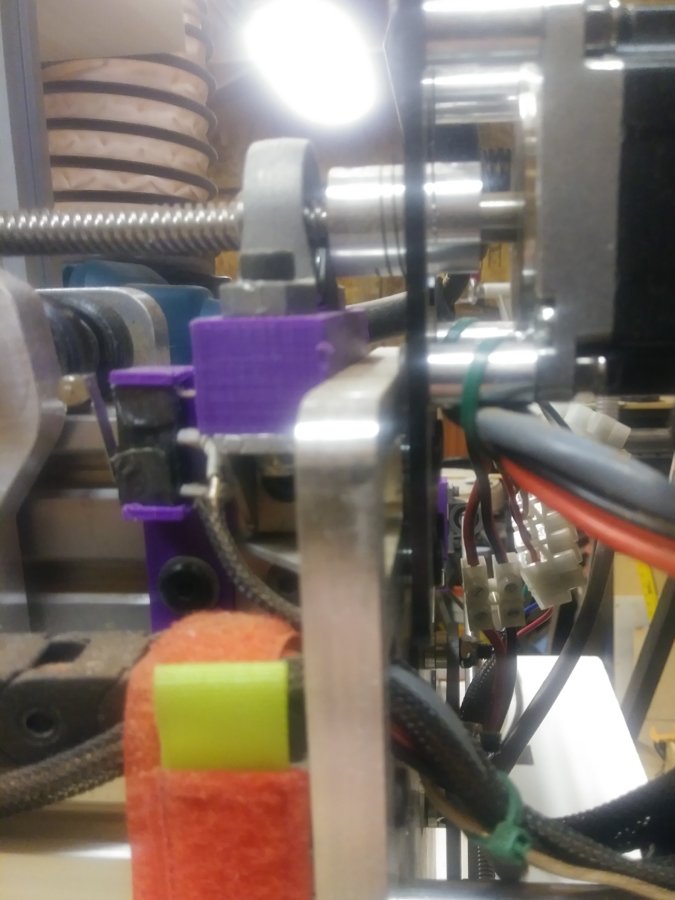
The stepper motor is connected to the Y plane using a NEMA 23 Stepper Motor mount. Two of the mounting slots have to be cut thru to provide enough movment to align the lead screw. I used 3mm spacers between the motor mount plate and the Y-Axis plate. I used 40mm aluminum spacers on the Nema 23 motor to provide room to connect the coupler. The spacer sizes may need to be adjusted based on your setup.
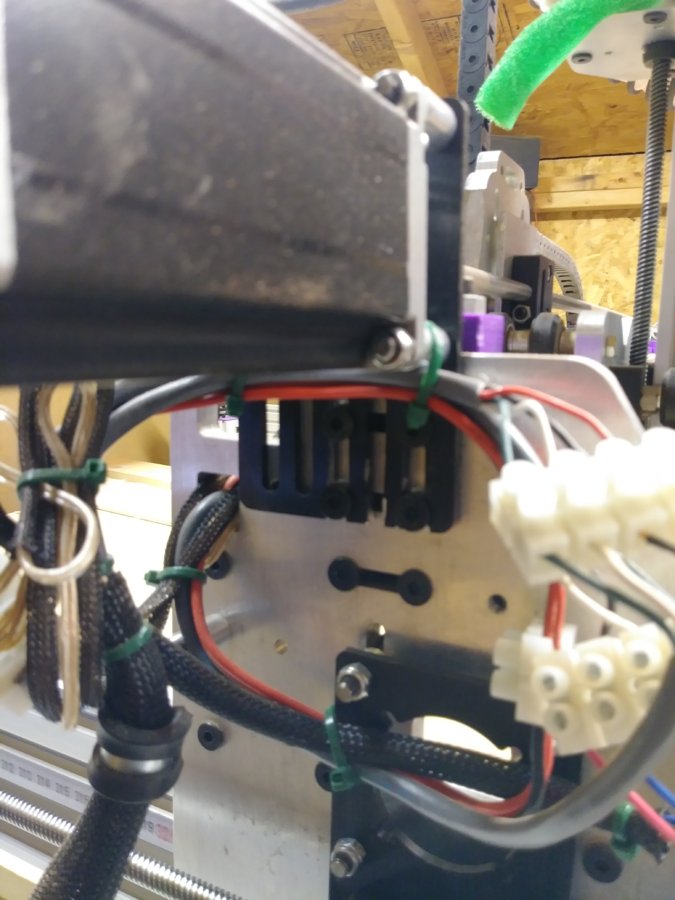
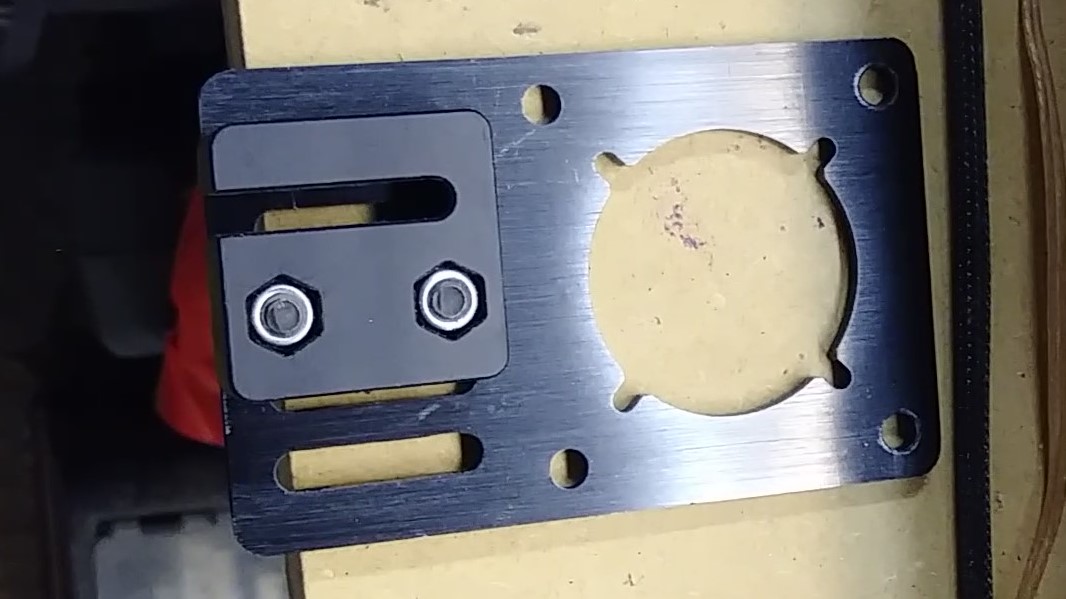
To mount the lead screw nut to the X-Axis carriage, took a 1/8” piece of aluminum plate and drilled 2 holes aligned with the bottom holes in the Nema 23 mounting location. I then aligned the lead screw nut to the lead screw and marked the holes and them drilled and mounted the lead screw nut. I used 3 mm spacers behind the plate to align to the lead screw. Use 1mm precision shims for fine tuning the alignment.
The dust shoe is based of Dewalt DWP611 Thread-On Dust Shoe for X Carve on thingiverse.
Dewalt DWP611 Thread-On Dust Shoe for X Carve by nmackes
I modified the base to support the Makita RT0701C router and widened the groove to support a glued in brush.
3D design Makita RT0701C Dust shoe
The hose is help to the Z-Axis with a block of wood spacer 6 hole 90 degree bracket and a hose clamp.
I run LinuxCNC driving a parallel port breakout and individual tb6560 drivers. I am working on upgrading to tb6600 drivers.
Somewhat Simple Lead screw conversion for an OX CNC
Build in 'Cartesian Style CNC' published by CDUH, Feb 8, 2018.
Somewhat Simple Lead screw conversion for an OX CNC.
-
-
Build Author CDUH, Find all builds by CDUH
-
- Loading...
-
Build Details
- Build License:
-
- CC - Creative Commons Public Domain (CCO 1+)
Reason for this Build
Making my Great OX CNC better!!Inspired by
OX CNC -
Parts list
Qty Part Name Part Link Comments 6 OX CNC Pillow Block Spacer https://tinkercad.com/things/lFXtjSbmEGN Link Pillow block spacers I created 4 6” of 20 x 40 extrusion Link 2 2 Hole Joining Strip Plate Link 22 Cast Corner Bracket Link Depending on the orientation of mounting, I has to grind of some of the nubs on the back 3 3D Printer T8 1000mm Lead Screw Rod Shaft Coupling http://www.ebay.com/itm/3D-Printer-T8-1000mm-Lead-Screw-R... Link 5 Motor Mount Plate - NEMA 23 Stepper Motor Link 18 40mm Aluminum Spacers Link 18 3mm Aluminum Spacers Link 10 Precision Shim - 10x5x1mm Link quantity will vary based on tuning 3 Anti-Backlash Nut Block for 8mm Metric Acme Lead S Link 2 2 bags each Low Profile Screws M5 Link 10mm, 20mm, 65mm cut to sizes required 1 Bag of Tee Nuts Link 2 Nylon Insert Hex Locknut - M5 Link 10 Drop In Tee Nuts Link I used about 10