A LONG time ago we reached out to to the OB team about "kitting" the OX, this was back when both companies were super young. Heck, both were out of stock of most items, most the time as the V-Slot craze became a way of life for most us builders.
SMW3D has a rather large change coming and we wanted to make sure the OX with all its mods was back were it started.
The OX is still a super fun build and even more fun to use and learn on.
The build has seen constant evolution as builders came back with their comments and suggestions.
We wanted to post it here and provide back all the experience, four years worth, that has gone into the build from amazing makers like you guys.
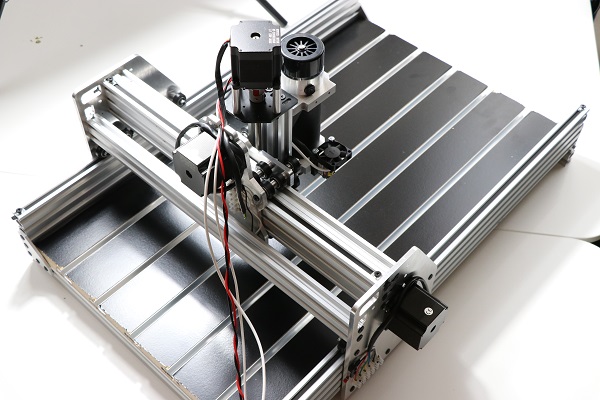
The gantry plates still retain the OG look about them but do have modifications:
Some things that we hacked:
- 4 axles across the top of the X
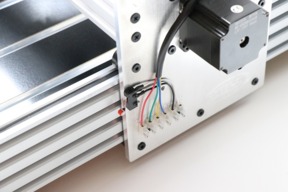
- "Sugar cube" electrical connections added
- Motors mount directly to the plates
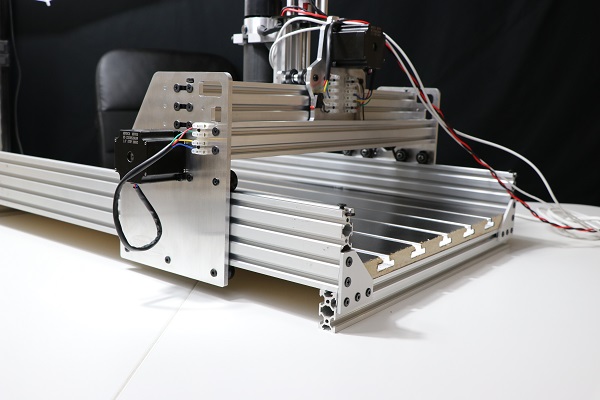
- Limit switches
- Slimmed front X/Z plate to allow more Z
- We have always used U.S. aluminum 1/4" machined here at hobby-fab
- The spindle clamps have always been machined by us out of U.S. 1/2" aluminum
We learned what was critical about the build, such as the "X" 20x60s and 20x40 must be cut and surfaced together to create a super rigid and square build. Also, from experience there is no win in making the build taller. It is a CNC router, it is made for sheet material.
- Using a DC spindle with a ESC (we like to control spindle speed via gcode.. and we like our ears
)
- 10 x 15 cable chains on X/Y
- Toss a laser on it, because who doesn't like two machines in one? A little spin, a little pew-pew.. PVW
- Sizes from 500x500 to 1500x1500 - The OX is ridiculously easy to stretch.
- Full written build instructions (we also made a set of videos as we got too far away from the original)
- GT3 belt and pulleys (new builders often think this is a weak point, lift the hood of your car, fiberglass reinforced belts have been a smooth, quiet, and strong transmission system for a long time. In addition, its pitch is consistent through the entire length of travel.)
- Self tapping screws, no more thread tapping the metal.
The build is still composed of:
All the hardware metal etc has always been genuine OB products.
- 20x80s on the Y axis
- 20x60s and a 20x40 on the X
- 20x40s on the front and rear supports and under the bed support
So here it is, the BOM is in the instructions, the DXFs are attached. A big thank you to all the builders that have been with us through the years improving and hacking and working the OX and to the OB team for continuing to make great products!
Notes about the files, some holes are 4.2mm others are 2.1mm these are tapped holes. Kind of a pain for a home brew but we added these to make it easier for the end builder. 4.2mm is for M5 x .8 tapped holes, 2.1mm is for M2.5 holes.
There are no logos on the plates in the DXF, if you have someone cut them have them throw your name on them, after all it is your build!
Oh almost forgot, the waste board shown here is slatwall. Just a bad idea...


SMW3D OX
Build in 'CNC ROUTER BUILDS' published by Brandon Satterfield, Apr 24, 2018.
The SMW3D OX, original other than a lot of learning!
-
-
Build Author Brandon Satterfield, Find all builds by Brandon Satterfield
-
- Loading...
-
Build Details
- Build License:
-
- CC - Attribution Share Alike - CC BY SA
