
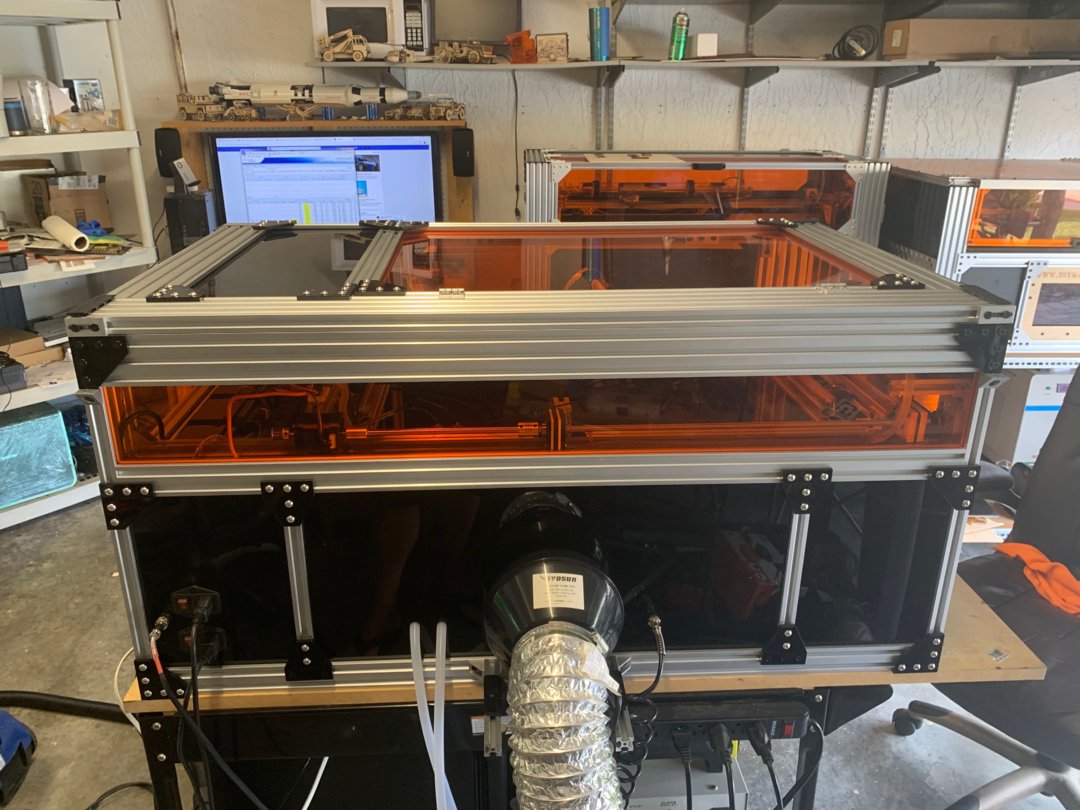
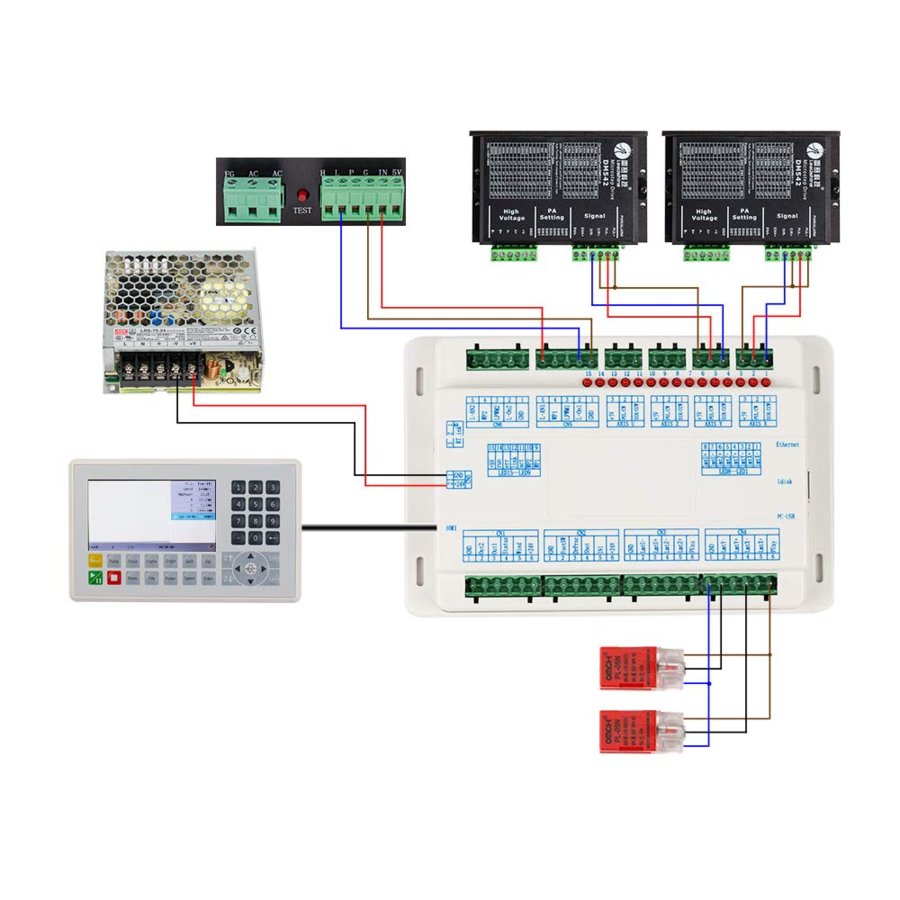
Openbuilds Tabletop Co2 LaserThe laser controller is a RUIDA 6445 DSP "Digital Signal Processor", this type of controllers are very common and installed on most big co2 lasers around, the controller consist on two principal modules, the controller main board and the display panel, the main board is where you make all electrical connections to the laser primary components, like stepper motor drivers to control motion signal, Co2 laser tube power supply for pwm control, limit switches "end stops" for homing purposes, other connections are available for other type of accessories, communication with this board can be set for normal USB or via the Ethernet port thru a network switch or a wifi router, wifi with an Apple express wifi extender was my choice, and a direct USB thumb drive to upload files without a tethered PC. The display panel have a very good size color screen, and a numeric keypad for direct value entries and not on increments like the RDC6442, able to change current cutting/engraving parameters, machine settings etc.


Laser Controller
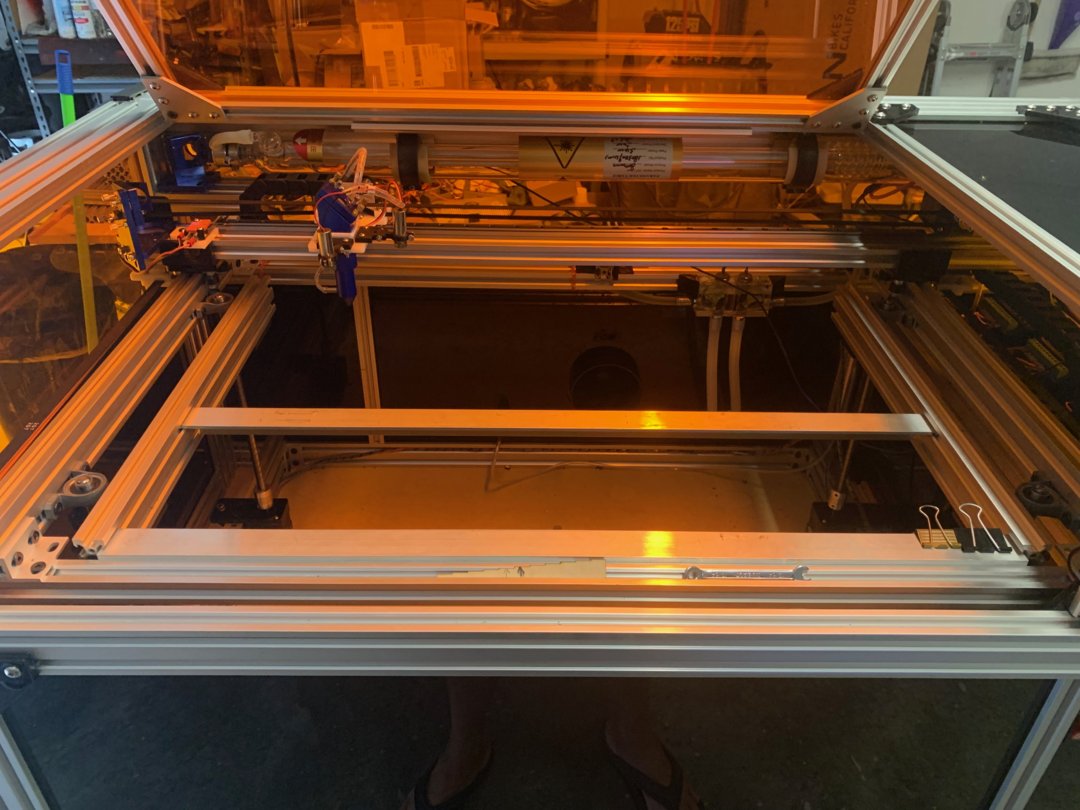
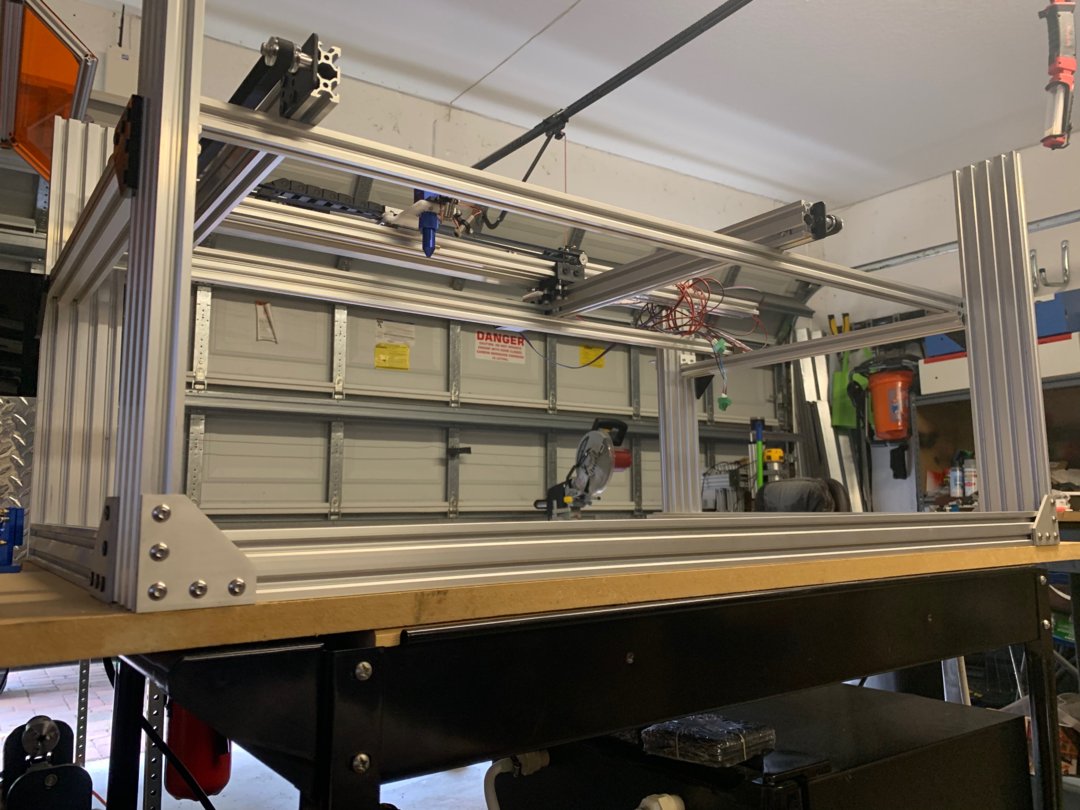
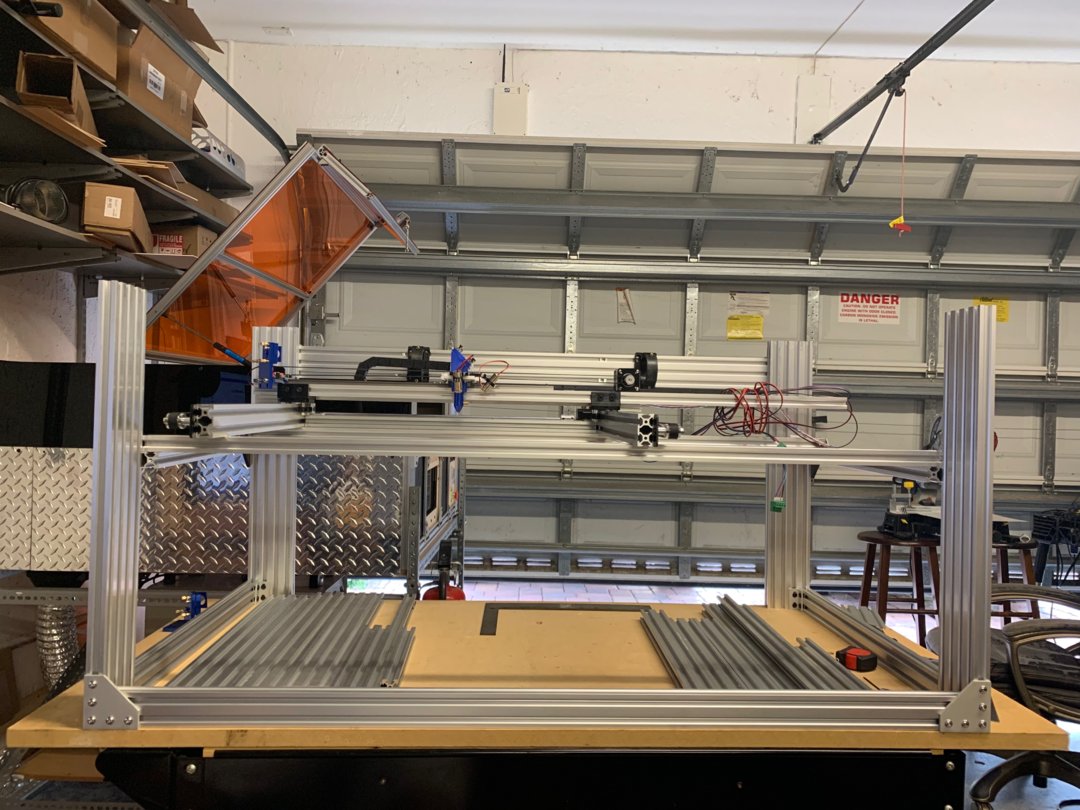
The Co2 laser X Y stage or the gantry it is a bit atypical to the normal setups you may see on other type of CNC builds, the Y axis must be operated by a single motor instead of two like the Acro Laser or a C-Beam cnc Router rig, this is for safety reasons, as you notice in this type of build and other traditional commercial Co2 laser machines the laser tube is fixed in a steady base then the laser beam travels bouncing on mirrors and a focusing lens before making contact with the work piece surface, meaning that a perfect mirror alignment must be maintain all the time, that is why we want only one motor moving that axis in case of a motor or a stepper driver failure that can compromise the mirror alignment and having a Hi power Class 4 invisible laser missing a mirror and start a catastrophic fail, resulting on complete machine losses or even your own house, but if the laser tube is mounted on top of the X gantry and having all mirrors in the same moving platform should be a safe move to use a dual clone motor setup on the Y axis.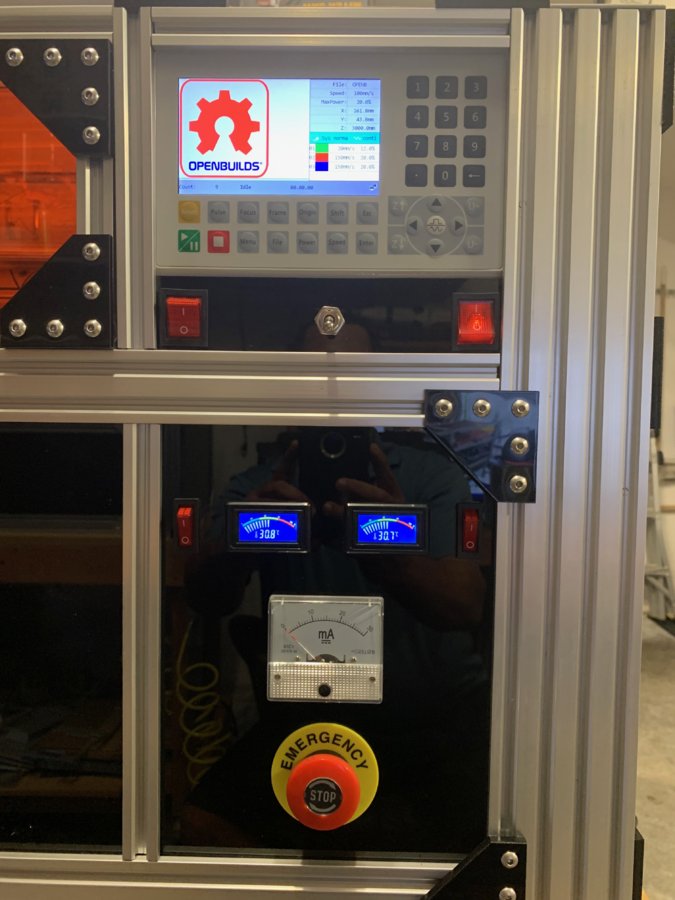
X Y Stage (The Gantry Motion System)
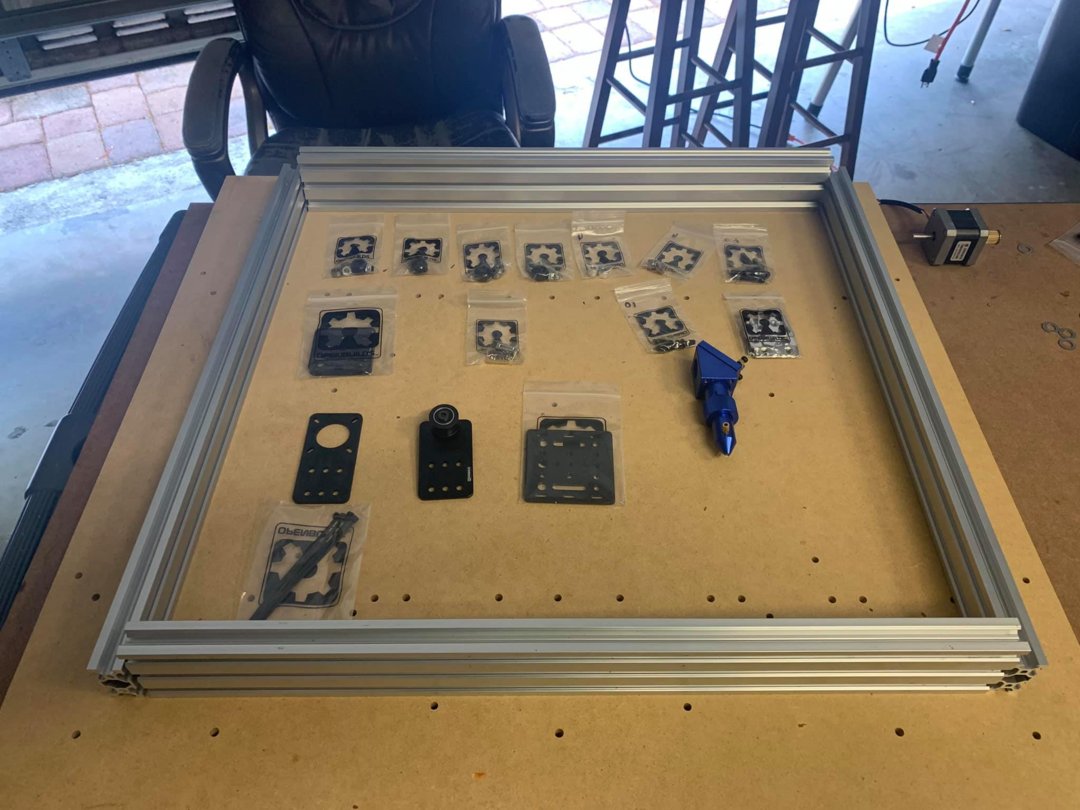
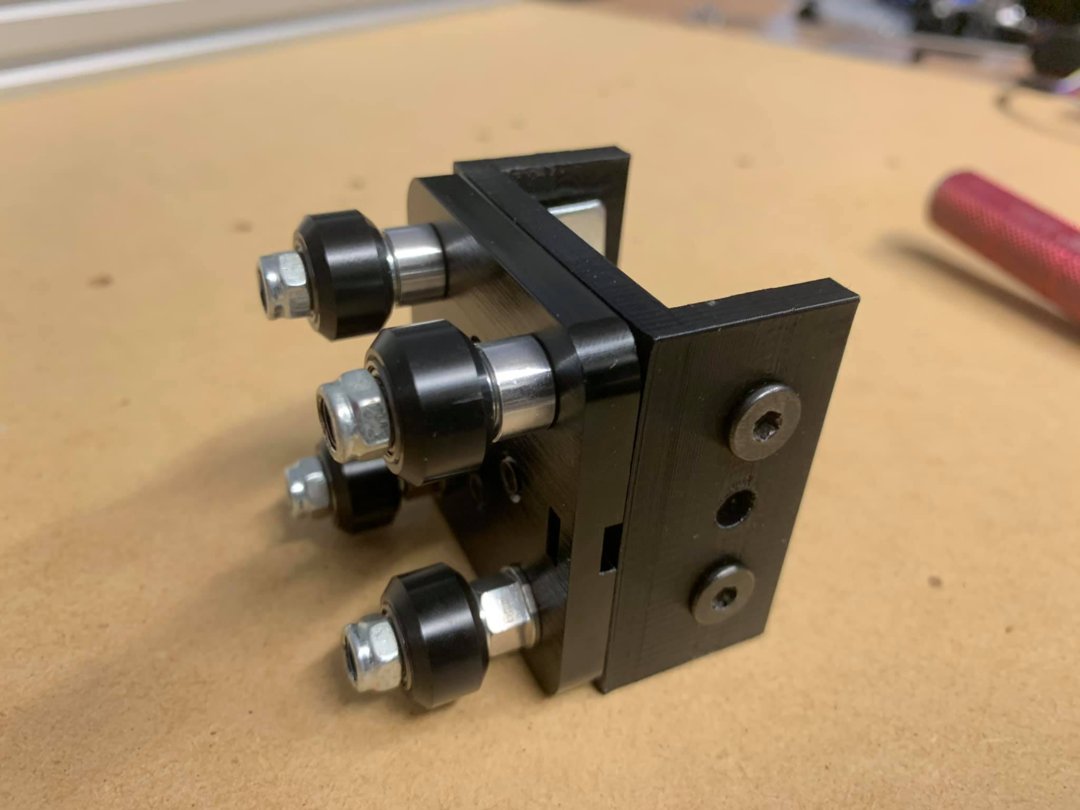
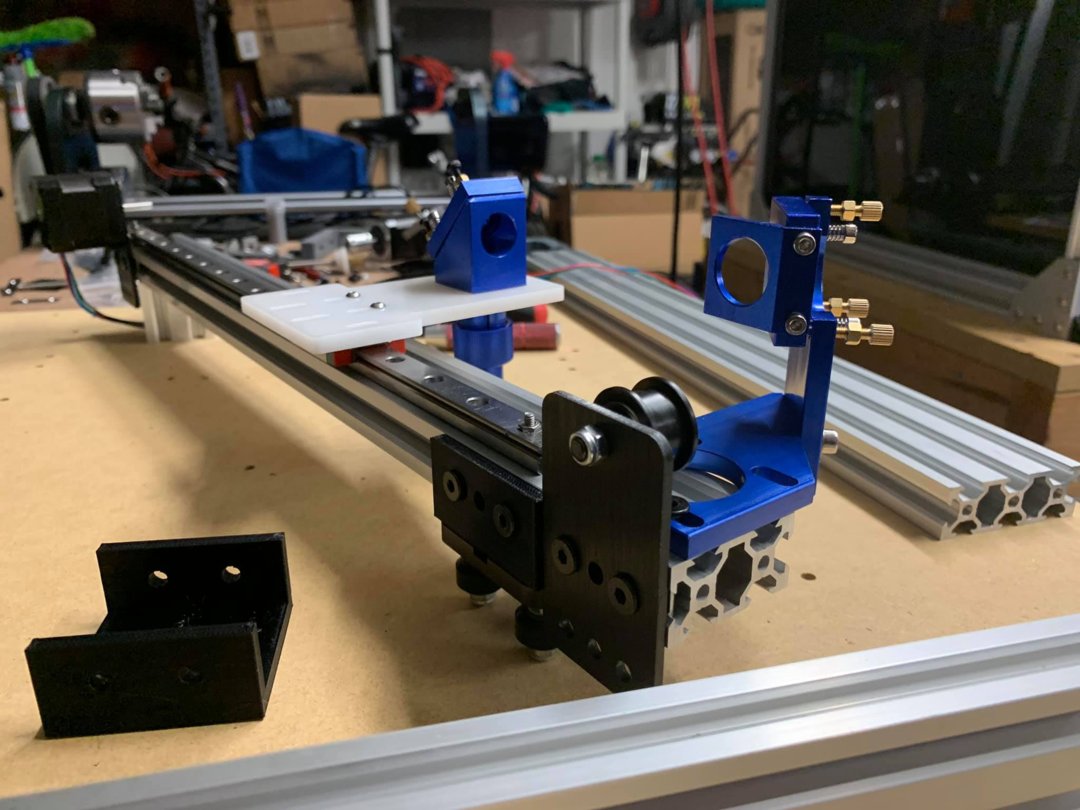
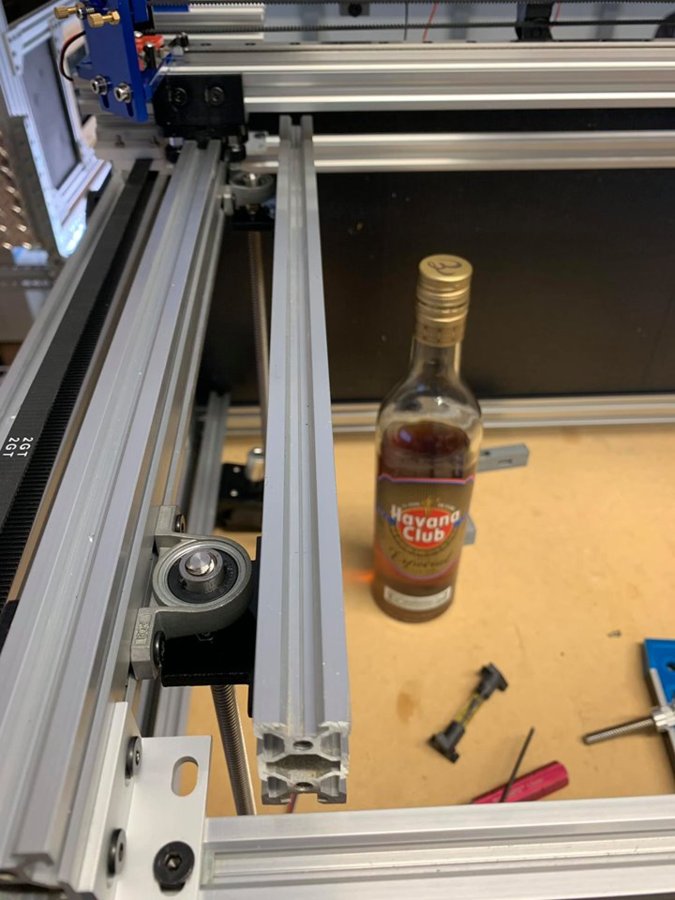
So for the size of this build I decide to use Nema 17 1.8deg motors, one Dual Shaft for the Y axiz, and one Single Shaft for the X axis, on both axis a 20 teeth Gt2 10mm wide pulleys were used, also using the same OpenBuilds nema 17 mounts I make 2 bearing supports for the 8mm shaft, and 2 mini V gantry set to mount the X axis rail on top.
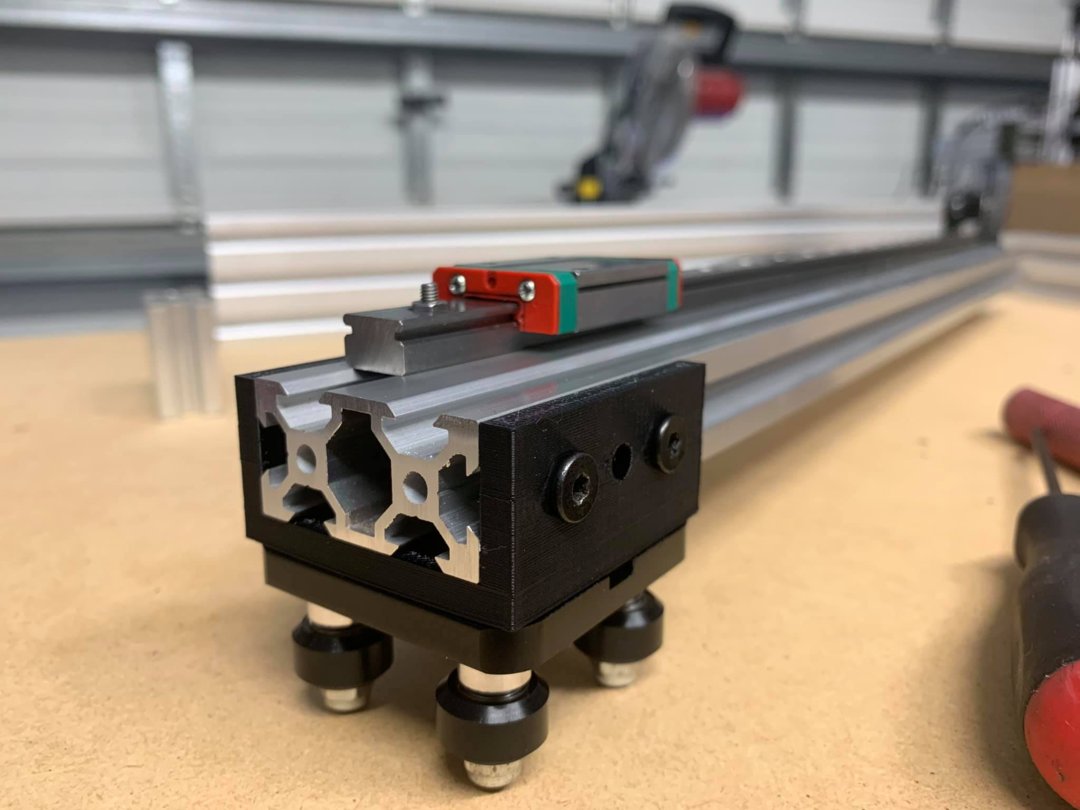
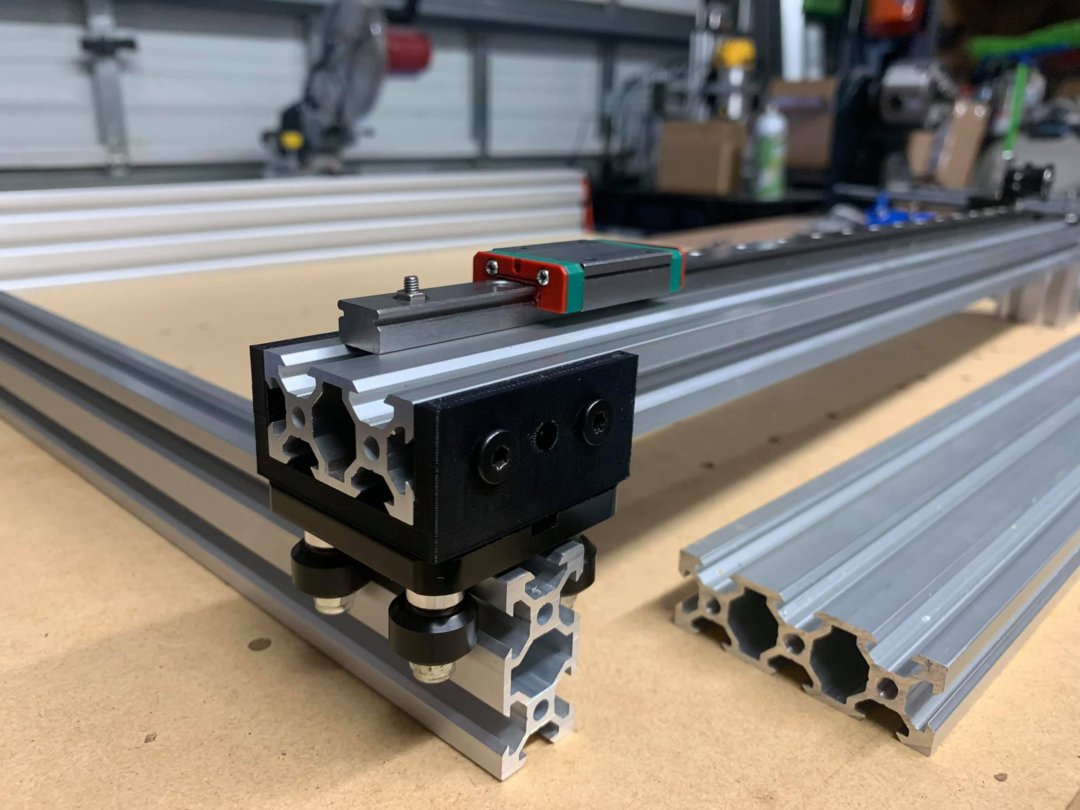
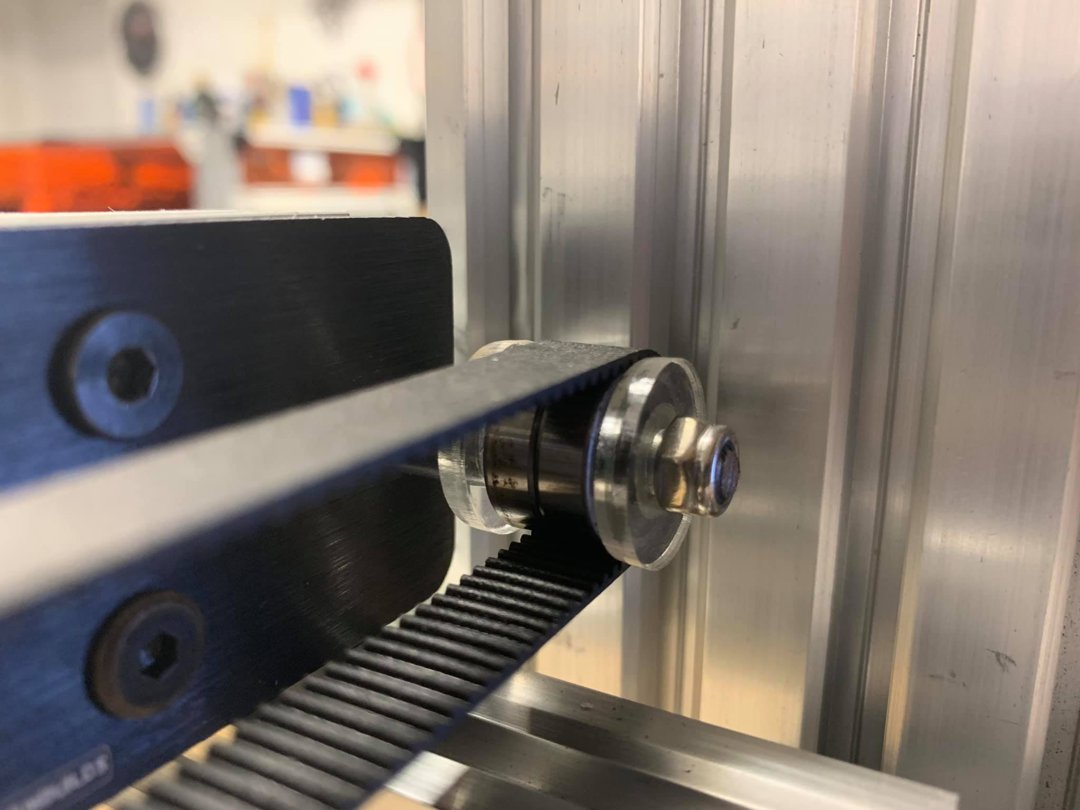
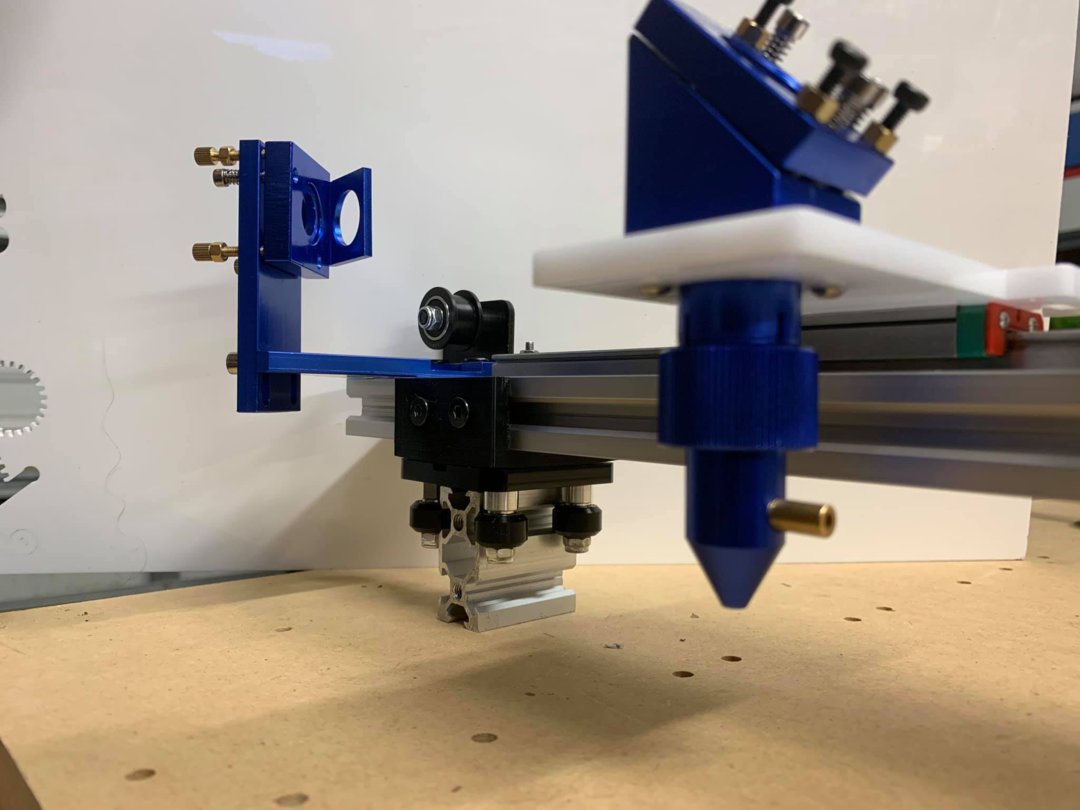
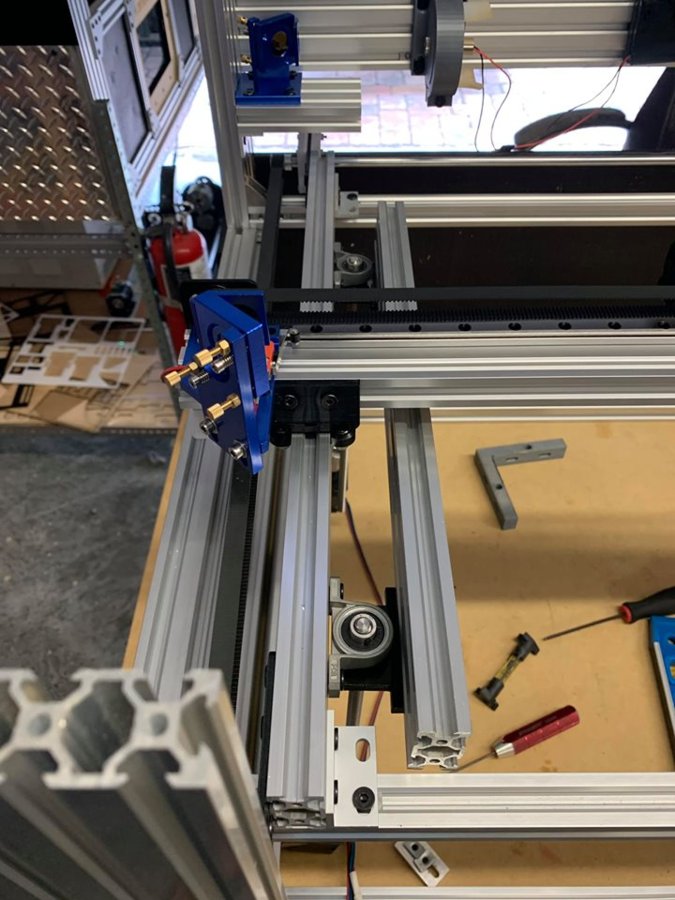
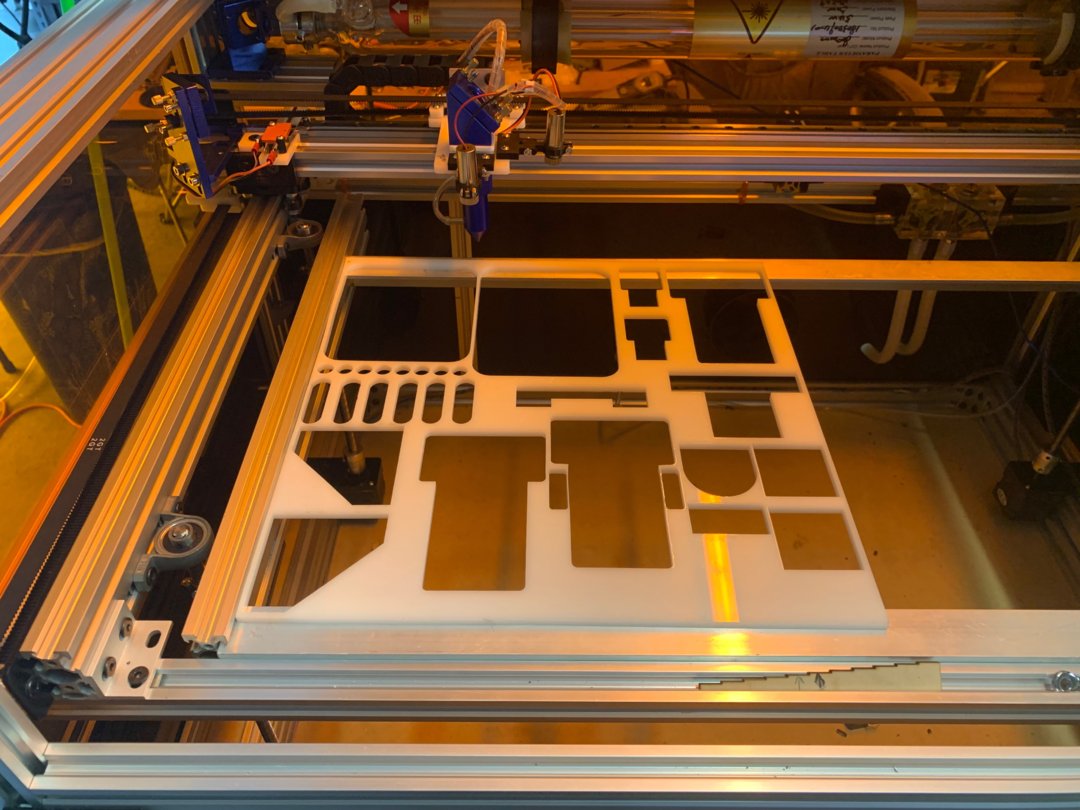
For the X axis I decide to test a different motion system with the HIWIN type linear rails the model used is MGN12H, but a mini V gantry set will do the job ok, both axis motion are mounted on 20x40 extrusions, laser head mount/belt tension is a laser cut acrylic model available on the files section of this build as well the Y axis belt mounts.
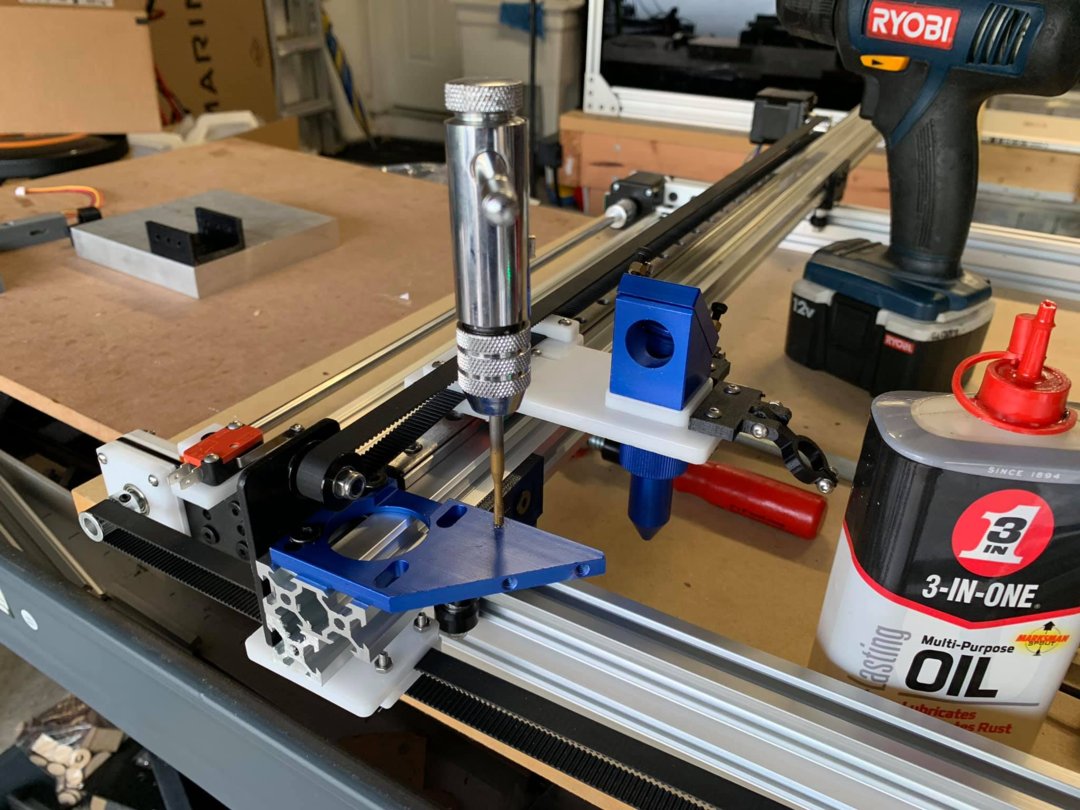
A good way to do this X Y stage is making it as a module, and test it several times before mounting it on the machine frame, always try to avoid using your machine frame structure extrusions as a motion rail, it will be a very bad "cut corner" move when the time comes to the mirror mounts alignment process.
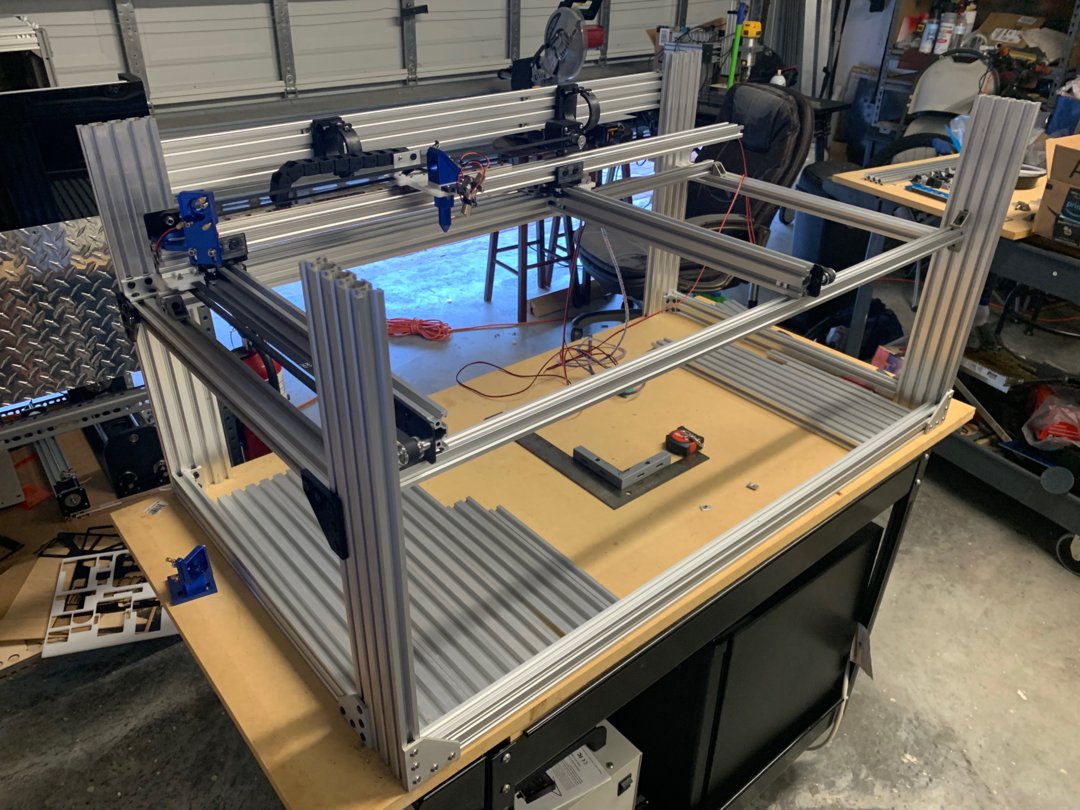
The Z axis motion on a laser cutter is mainly used to correct focal distances between the laser head lens and the working piece to be cut or engrave on the working bed, so we need that vertical movement of the working bed to precisely achieve that focal point distance, good focus is the main key for success on laser cuts.


Z Motion System and Working Bed
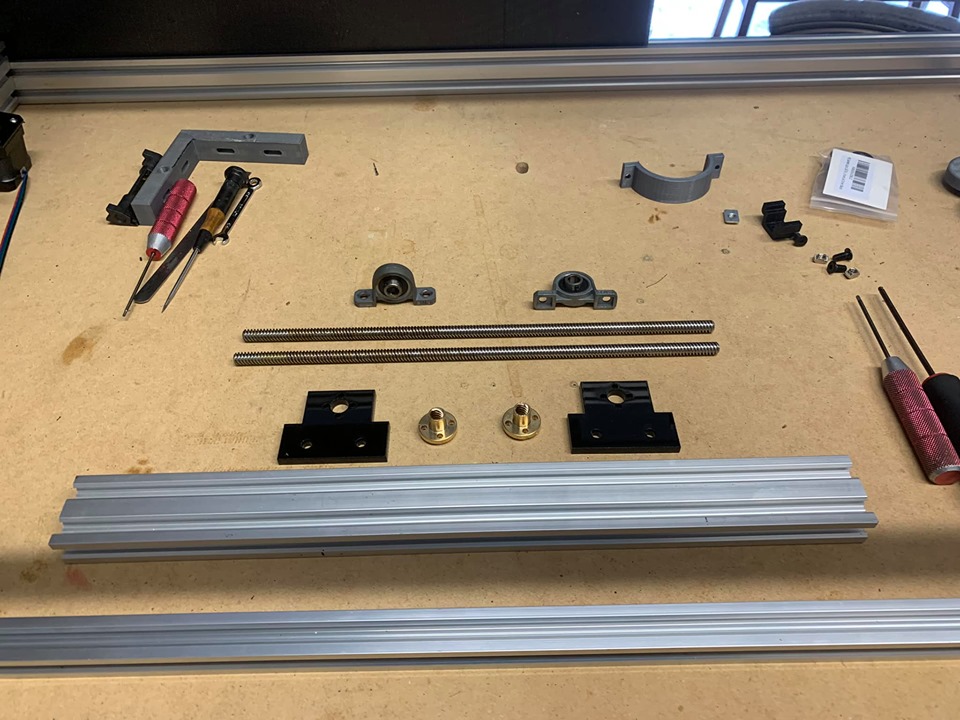
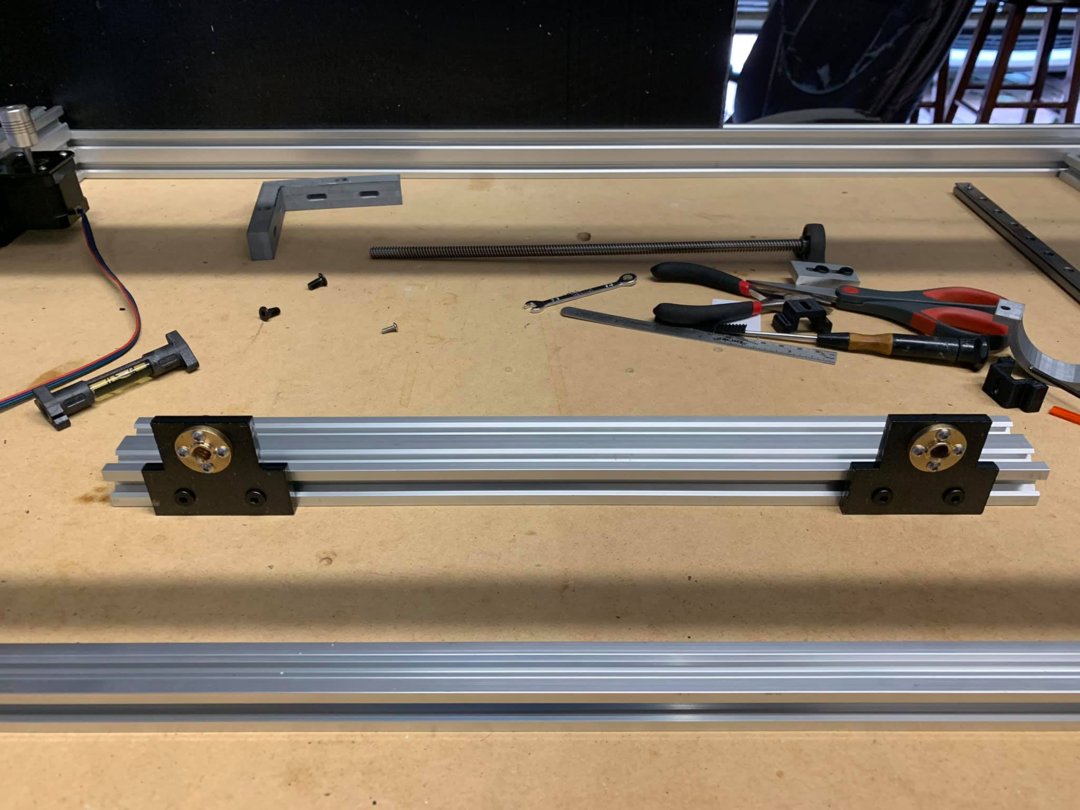
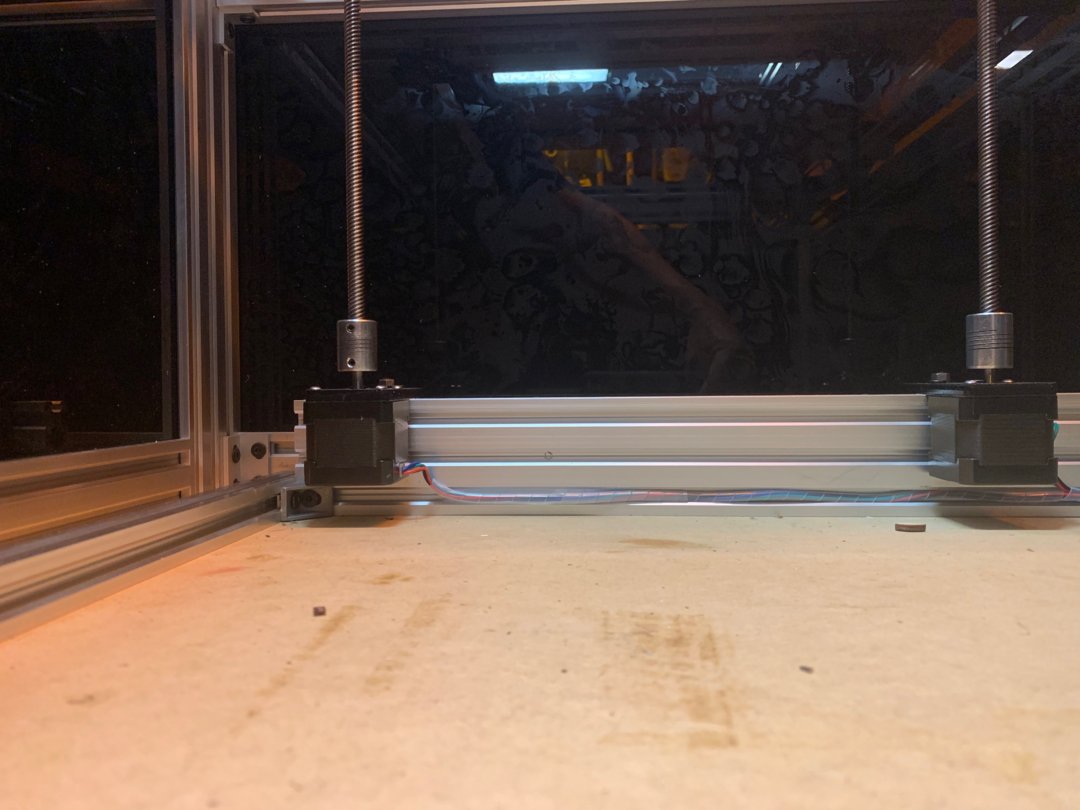
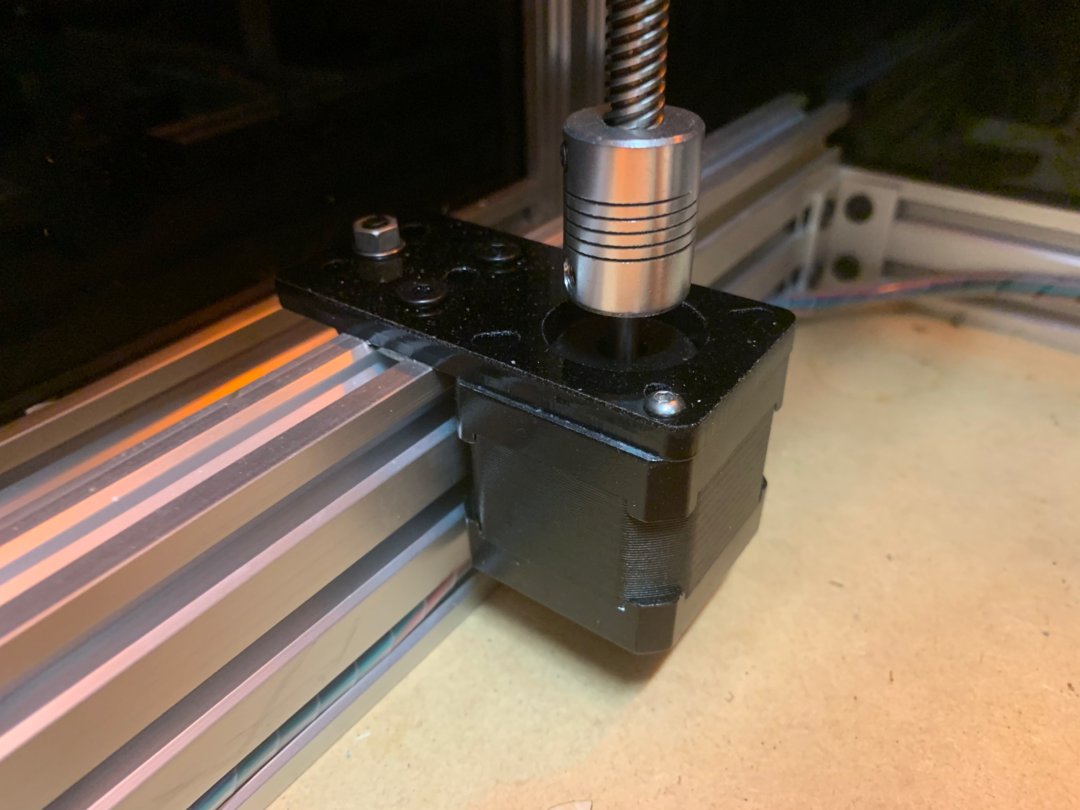
In this build I also decide to make the Z axis motion a bit different from conventional commercial machines, that consist in the principle of 4 lead screws on each corner of the working bed area and mechanically actuated by one motor and a timing belt and pulleys on each lead screw, in my case I decide to drive "actuate" each lead screw by a direct connection to a stepper motor using normal aluminum flexible couplings 5mmx8mm and 250x8mm Metric Acme Lead Screws achieving a travel distance of 200mm from the laser head tip.
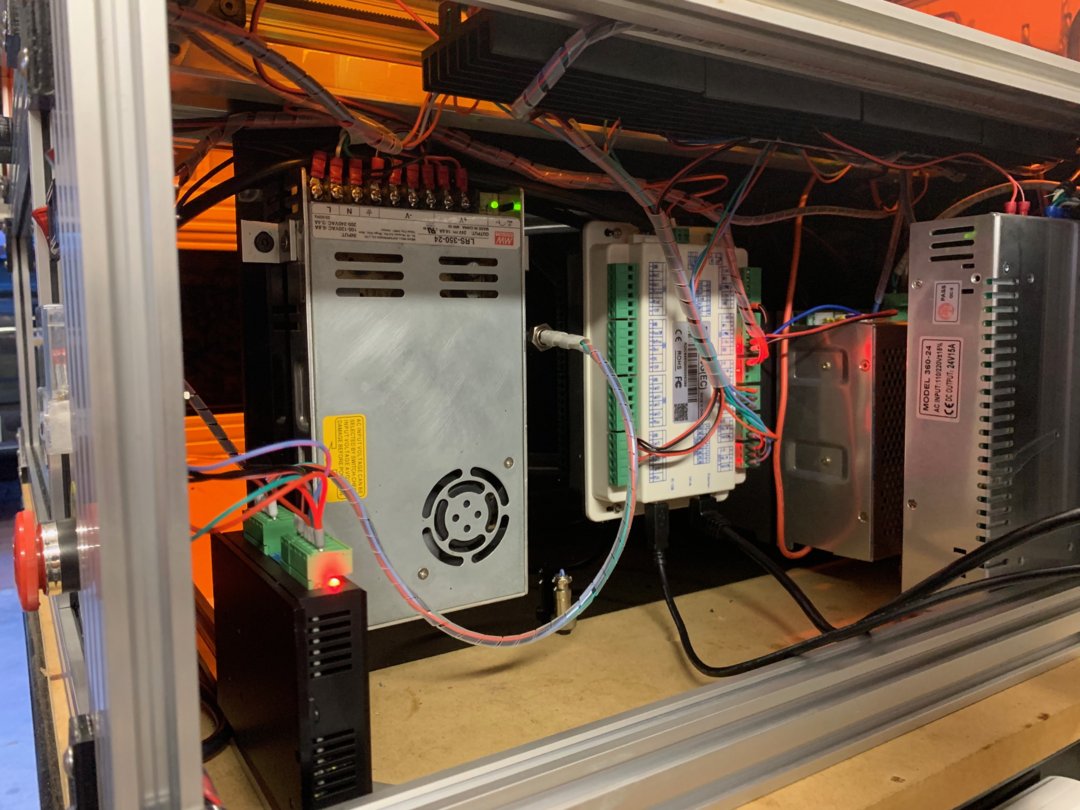
Why and How 4 motors? The main reason of the 4 motors is force, in my case I have a Chuck type rotary device "attachment" that weights 19.5 pounds so lift force is a big concern, how you can connect them is very simple, one pair of motors connected in series or parallel to one stepper driver (2 drivers are need it), then clone the Z axis signal from the main laser controller to each stepper driver, also a dedicated 24v power supply is connected to the stepper drivers to keep main electronic components in a separate circuit, so 2 24v PSU were used. The lead screw nut plate is on the files section of this build.
List of electronics and electrical devices:

Electronics Components
1- Co2 Laser tube 800x50mm 40-50w
2- Co2 Laser tube power supply (LPSU) HY-T50
3- 24v power supplies, X2 Meanwell 14.6A
4- Main Laser Controller, Ruida RDC6445G
5- X5 Nema 17 Stepper motor 1.8 step angle (X axis)(Z axis)
6- Dual shaft nema 17 motor 1.8 step angle (Y axis)
7- X4 TB6600 Stepper motor drivers
8- DM542 Stepper motor driver (rotary plug driver)
9- X2 Water flow indicators with temperature probes and digital display
10- Analog ammeter 30MhA
11- 2 On OFF rocker switches
12- 1 On-On Toggle switch
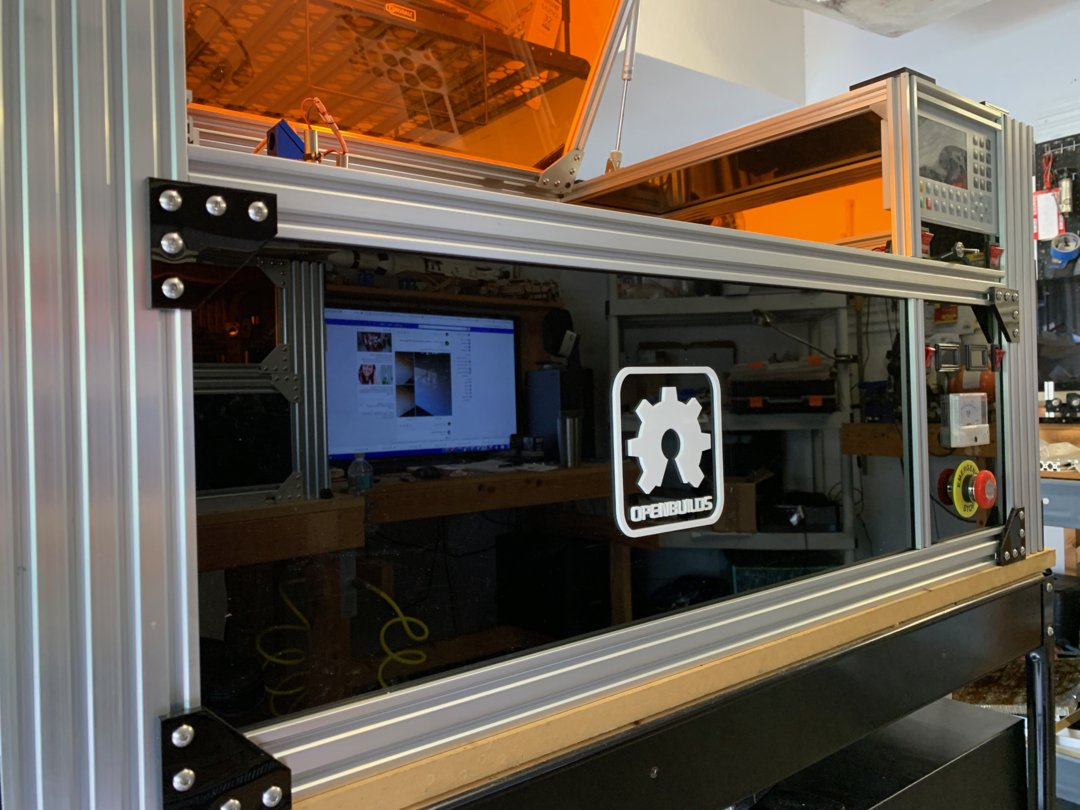
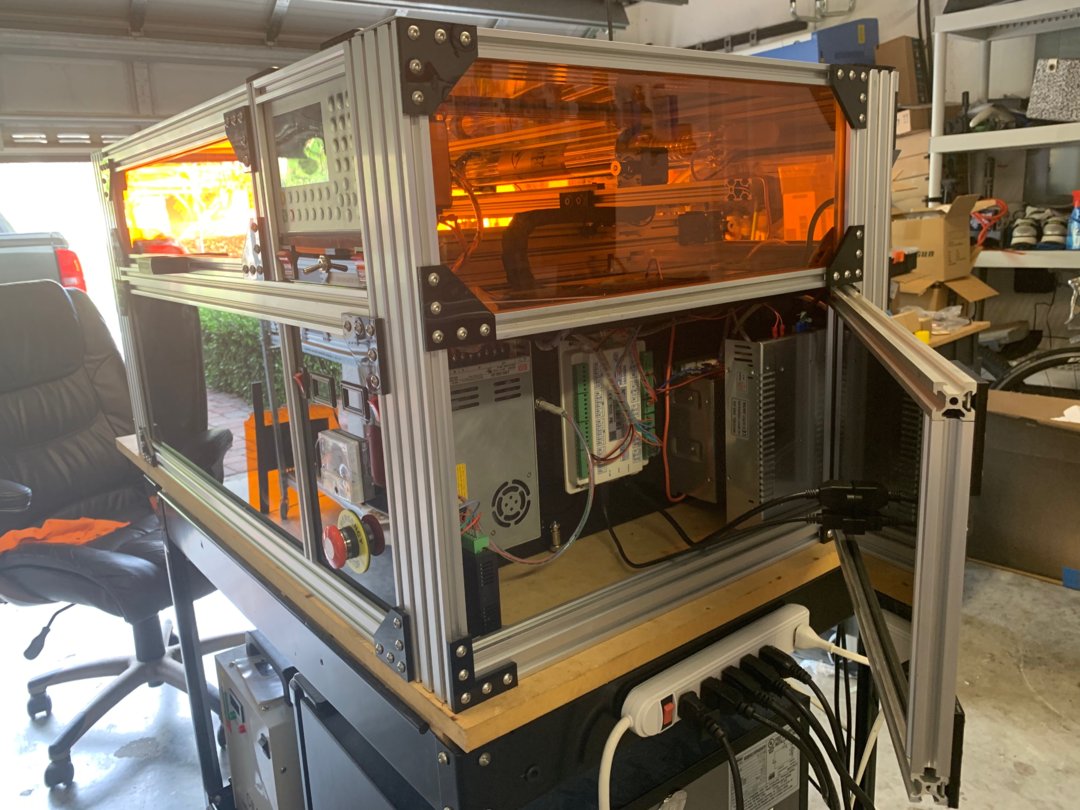
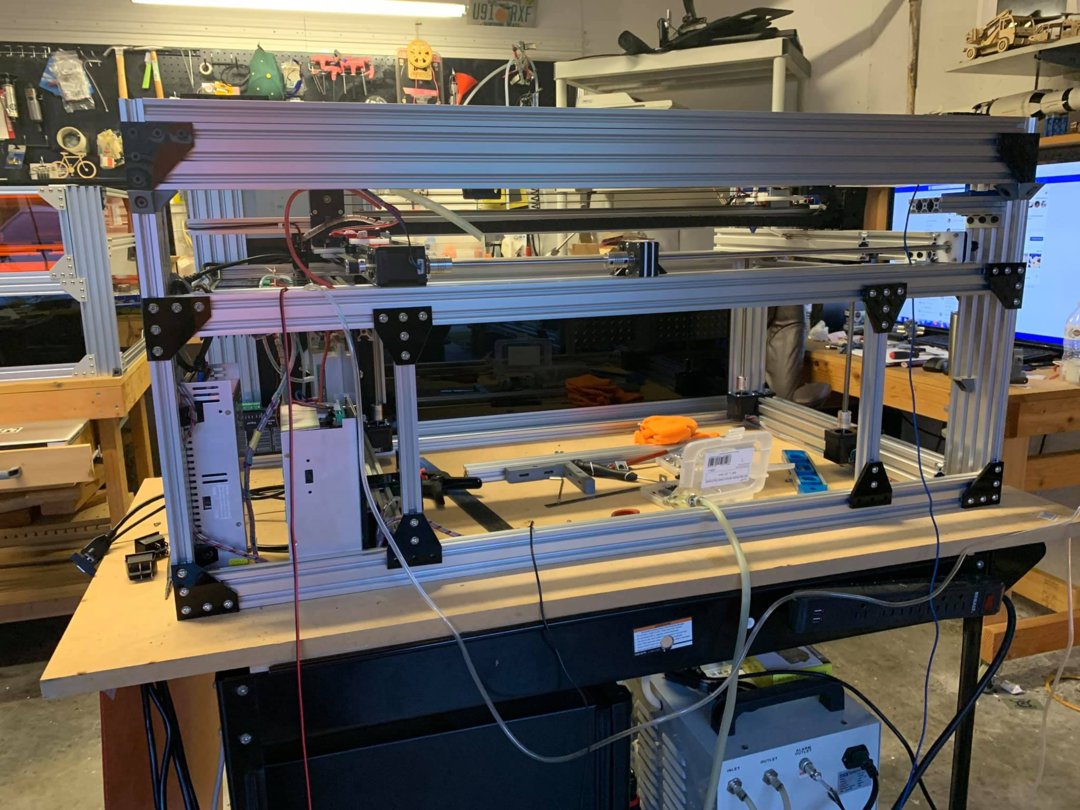
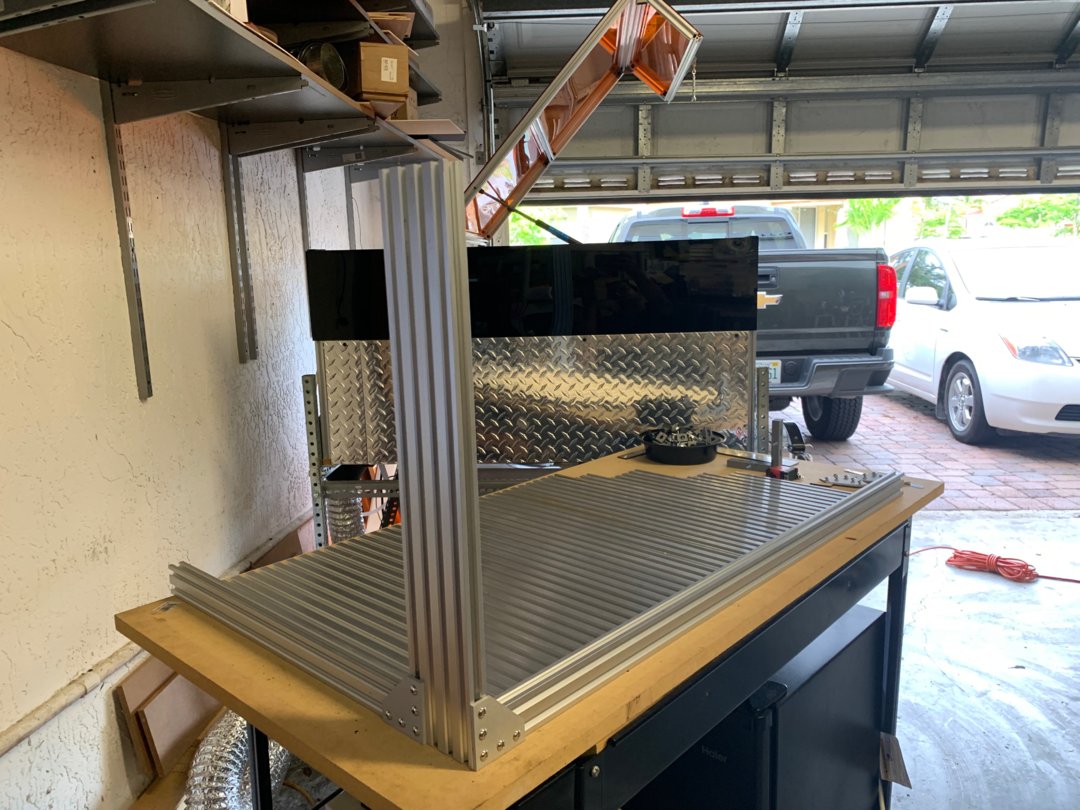
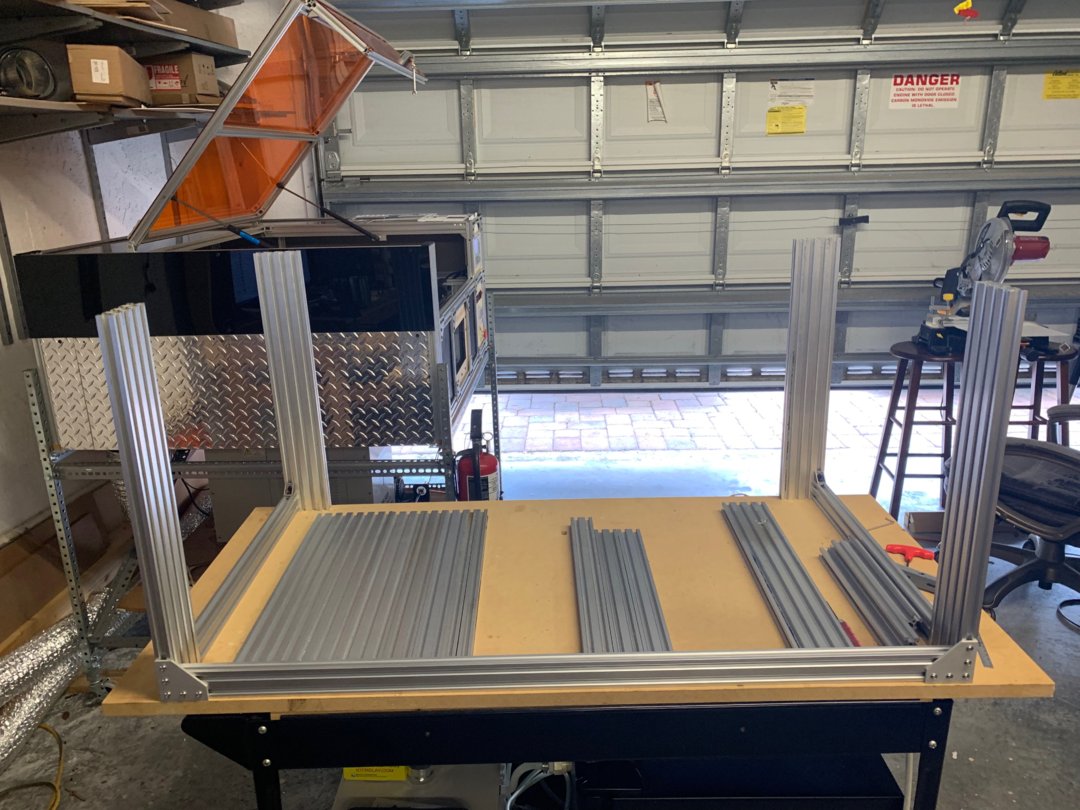
Machine Frame
A quick look of the frame and a tip how to use a laser pointer to pre-align the mirror mounts


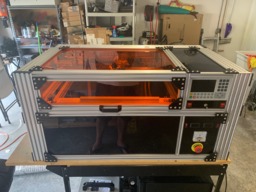
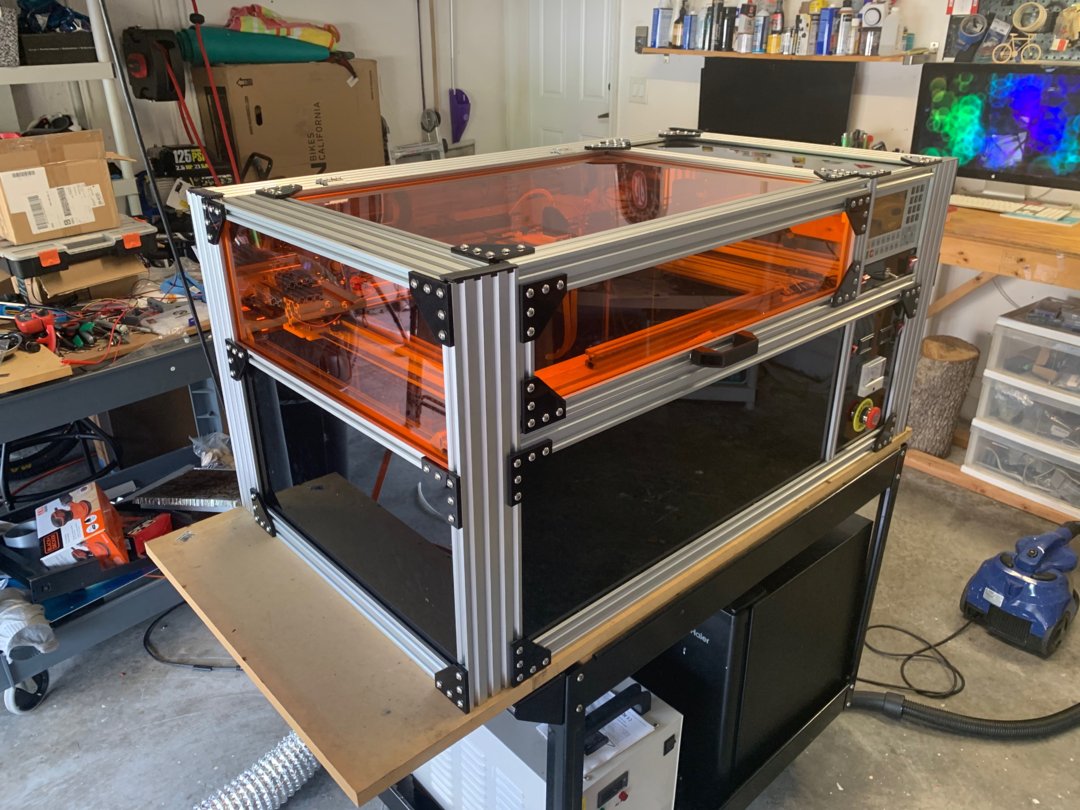
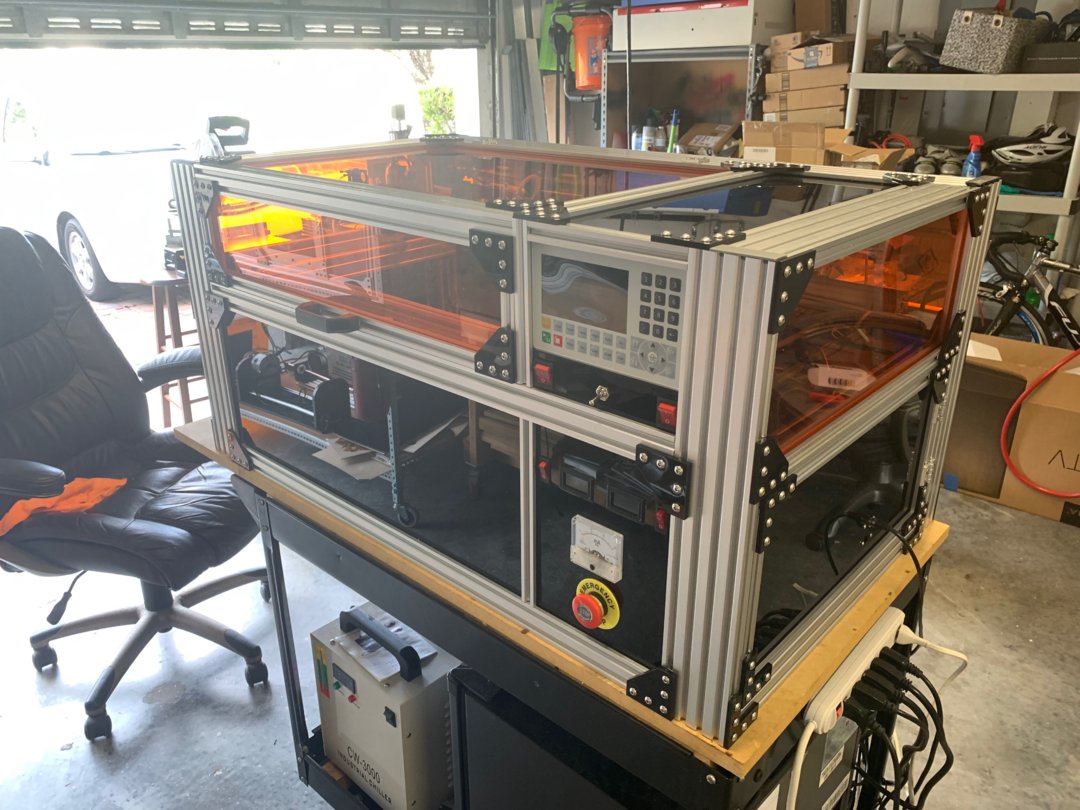
Openbuilds Table Top 50w Co2 Laser Cutter/Engraver
Build in 'Laser Cutter Builds' published by pedrofernandez, Oct 13, 2019.
DIY build of a Co2 Laser cutter/engraver 12x24 working area.
-
-
Build Author pedrofernandez, Find all builds by pedrofernandez
-
- Loading...
-
Build Details
- Build License:
-
- CC - Attribution - CC BY
Reason for this Build
Originally an expansion from a previous build and became to be a full new build -
Parts list
Qty Part Name Part Link Comments 1 Ruida RDC6445G Co2 Laser Controller https://www.ebay.com/itm/Ruida-CO2-Laser-Controller-DSP-R... Link Other laser controllers like a Trocen 708c or a Cohesion 3d Laser board can be use 1 CO2 Laser Head Set Mirror Mount https://www.ebay.com/itm/K-Series-CO2-Laser-Head-Set-Mirr... Link 1 50w Co2 Laser Tube https://www.ebay.com/itm/45W-50W-CO2-Laser-Tube-Metal-Hea... Link For this build do not exceed 850 mm length 1 HY-T50 Co2 Laser Power Supply https://www.ebay.com/itm/50watt-Laser-Engraving-Machine-P... Link 6 V-Slot® 20x80 Linear Rail 500mm https://openbuildspartstore.com/v-slot-20x80-linear-rail/ Link External frame part 500 mm 8 V-Slot® 20x40 Linear Rail 1000mm https://openbuildspartstore.com/v-slot-20x40-linear-rail/ Link External frame part 1000 mm 6 V-Slot® 20x40 Linear Rail 500mm https://openbuildspartstore.com/v-slot-20x40-linear-rail/ Link External frame part 500 mm 1 V-Slot® 20x80 Linear Rail 1000mm https://openbuildspartstore.com/v-slot-20x80-linear-rail/ Link External frame part 1000 mm 1 V-Slot® 20x60 Linear Rail 1000mm https://openbuildspartstore.com/v-slot-20x60-linear-rail/ Link External frame part 1000 mm 2 V-Slot® 20x60 Linear Rail 500mm https://openbuildspartstore.com/v-slot-20x60-linear-rail/ Link Z axis stepper motor support rail 500 mm 6 V-Slot® 20x20 Linear Rail 1000mm https://openbuildspartstore.com/v-slot-20x20-linear-rail/ Link Internal X Y stage support and Lid 1000 mm 34 90 Degree Joining Plate https://openbuildspartstore.com/90-degree-joining-plate/ Link External Frame Parts 2 Mini V Gantry Kit https://openbuildspartstore.com/mini-v-gantry-kit/ Link Y axis motion 5 NEMA 17 Stepper Motor https://openbuildspartstore.com/nema-17-stepper-motor/ Link X axis Motor and z axis 10 Motor Mount Plate - NEMA 17 Stepper Motor https://openbuildspartstore.com/motor-mount-plate-nema-17... Link All motors and idler pulleys mounts 1 MGN12 700mm Linear Rail Guide with MGN12H Carriage https://www.amazon.com/gp/product/B07JFZ5K11/ref=ppx_yo_d... Link I do not recommend cloudray ones 250 Low Profile Screws M5 10mm https://openbuildspartstore.com/low-profile-screws-m5-10-... Link External frame screws 10 L Bracket Double https://openbuildspartstore.com/l-bracket/ Link internal Parts 2 L bracket Triple https://openbuildspartstore.com/l-bracket/ Link Internal Parts 50 Low Profile Screws M5 8mm https://openbuildspartstore.com/low-profile-screws-m5-10-... Link internal parts 50 Low Profile Screws M5 10mm https://openbuildspartstore.com/low-profile-screws-m5-10-... Link internal parts 1 Emergency Stop Switch https://amazon.com Link 2 24v Power Supply https://openbuildspartstore.com/24v-meanwell-power-supply... Link With out the box kit 4 Ball Bearing 688Z 8x16x5 https://openbuildspartstore.com/ball-bearing-688z-8x16x5/ Link Y axis shaft support 2 GT2 20 teeth 5mm pulley bore for 10mm belt https://amazon.com Link Y axis & X axis 1 GT2 20 teeth pulley 8mm bore for 10mm belt https://amazon.com Link Y axis 3 20 teeth idler pulley 5mm bore for 10mm belt https://amazon.com Link all axis 1 Dual shaft nema 17 motor https://www.lightobject.com/NEMA-17-42HSM03-Dual-Shaft-St... Link Y axis motor -
Attached Files: