This is a pretty standard OpenBuilds Mini Mill. I went with some smaller NEMA 23 steppers that I've had sitting in a box since circa 2010, a cheap 24V power supply from Amazon, and a CNC xPro v3 driver board.
A note on the xPro: this is one of the most well-made boards I've ever come across. The silk screen labeling is clear and very useful, negating the need for a hookup reference in most cases. The connectors are solid and correctly sized. No cold solder joints in evidence. (That last one makes it leaps and bounds better than the two eBay driver boards I've got, both of which died after an hour of use.)
I use 5-pin aviation panel-mount connectors for power, motors and limit switches on the larger machine. For the minimill, the cables are short enough and the machine is so portable that going with the larger connectors seemed like overkill.
I mounted the xPro and power supply to the back of the Z axis as was shown in the minimill build video.
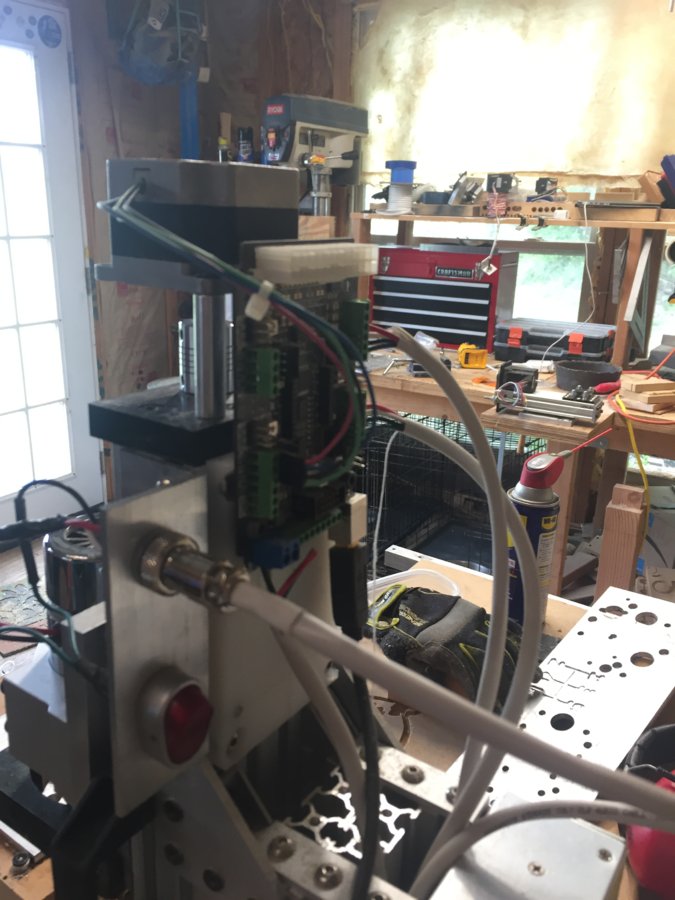
To mount the xPro, I cut a piece from a 3/8" HDPE cutting board ($6 at Walmart) and attached that to the c-beam with some t-nuts and 12mm M5 low-profile screws. I drilled and tapped the HPDE to accept screws to hold the xPro, and drilled clearance holes to match the t-nuts. Power and motor cables run through the channel on the back c-beam piece, behind the power supply.
So far, the only real modification I've made was to flip the Z axis supports around so that the bracing is on the back of the Z axis c-beam rather than the front.
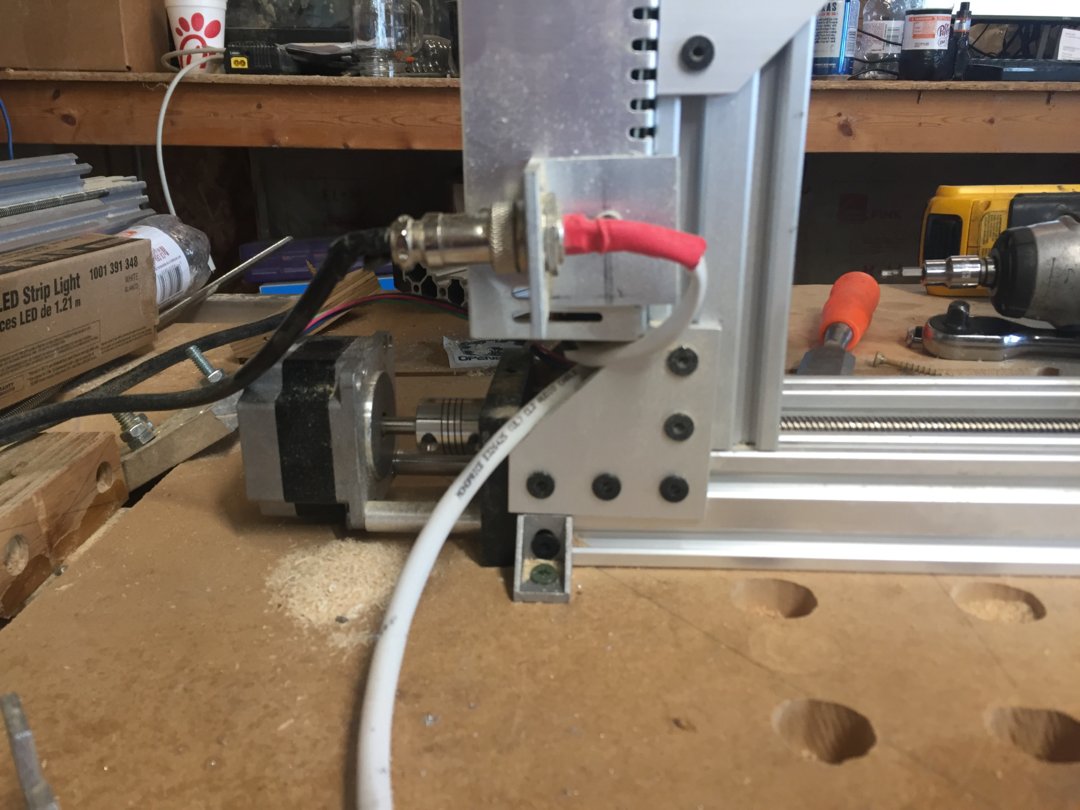
This allows the gantry plate to go all the way to the vertical c-beam section (z-axis support) rather than hitting the 90-degree connectors. As far as I can tell, this hasn't affected stability at all. If it does, I can always add more rear bracing. This arrangement gives about another 7/8" of travel in Y.
This reduces the travel along the Y axis up front, leaving slightly less working room when mounting or removing work pieces. So far, that hasn't been a problem for me and is well worth the extra Y travel.
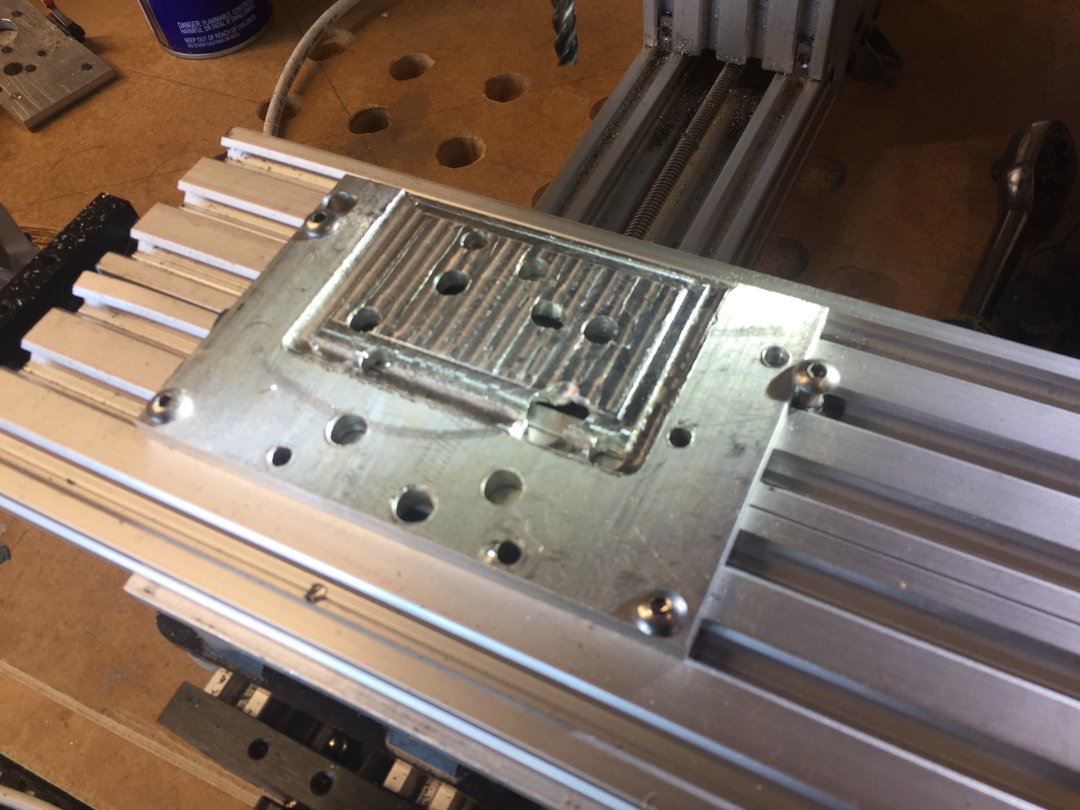
I also made an adapter plate to mount my tiny, 400W eBay spindle to the Z plate. It lets the spindle poke through the Bosch router mount quite nicely, so that I don't have to remove the screws that go through the Z plate into the mount in order to swap the router for the spindle. The spindle isn't nearly as powerful as the Bosch router, but it is *very* quiet. At some point, I'll upgrade to a 2.2kw or larger spindle, at least for the big router.
I'm considering converting this to a c-beam XL at some point. But, I'm rebuilding my 4' x 3' router by replacing some unsupported 20mm linear rail with c-beam. Having the larger machine may eliminate the need for a larger mill.
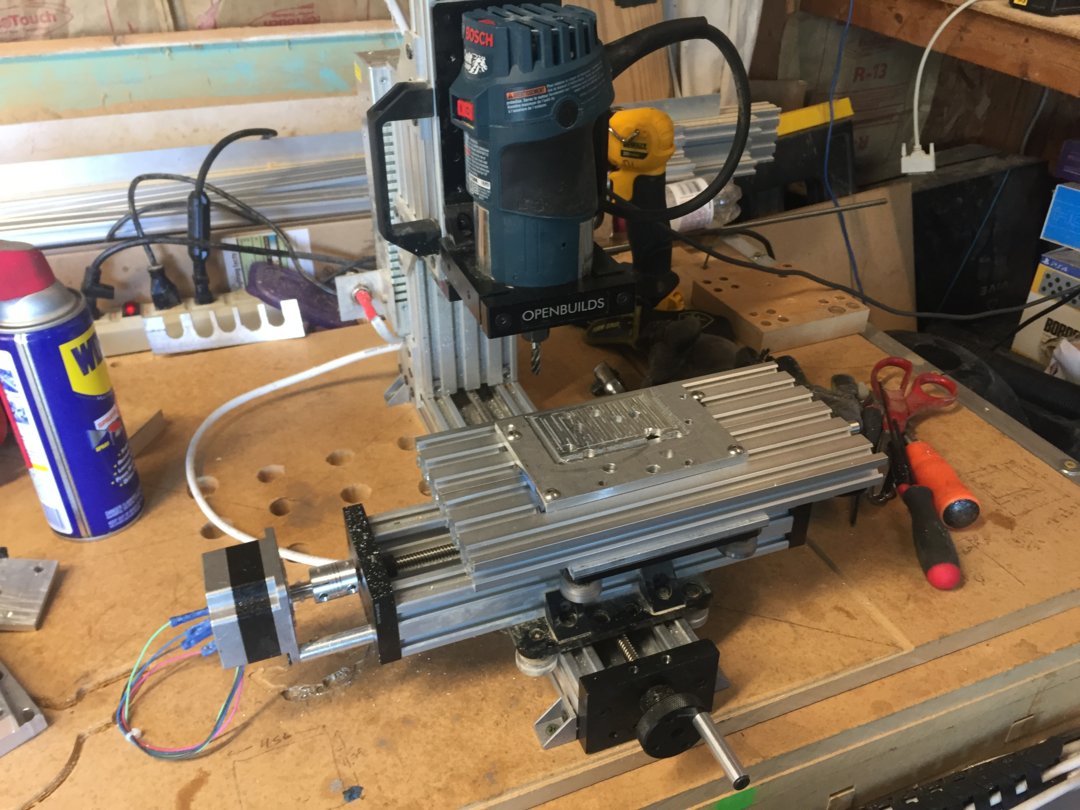
This is a great kit. It was fun and easy to assemble, extensible, and works very well for cutting small, precise parts from softer material. I have been able to cut 1/4" 6061 aluminum with the spindle, going slow and shallow.
Update - V-Slot Extrusion Table
I needed a better mounting system for the minimill, so I cut two 250mm sections of v-slot from two of the 1500mm rails. (The big router is 1250 x 1000 mm, so I had some extra v-slot on the ends.)
I used some transfer screws to mark a 5" x 5" x 1/4" piece of 6061 aluminum to match the x-axis gantry plate, and drilled the holes to ~6mm. I ran 20mm M5 screws through the bottom of the gantry, through the aluminum, and into some t-nuts in the bottom of the v-slot.(I could have done this on the minimill itself, but that seemed like overkill for drilling 12 holes.) This gives me a nice v-slot table that clears the c-beam end plates. It *almost* clears the NEMA 23 stepper motor.
Practical upshot: I managed to make a nice, clamp-friendly table from scraps. Of course, I have to be careful not to cut into the table. The v-slot makes it easy to mount an easily-removable waste board along with the work piece when necessary.
Now, you could just mount your wasteboard directly to the gantry plate, with some spacers to clear the c-beam end mounts. But, having the v-slot gives me an easy way to mount a piece without having to mount it too precisely. This could also be the basis of an ad-hoc vise, or just a nice way to mount fixtures for workpiece alignment.
I still need a way to keep the cutting area clear of chips when cutting aluminum. I'm looking at air blast gadgets. Also, I need to build an enclosure for this thing to keep the debris from flying all over the shop.
Thanks to the OpenBuilds team for making this available, and for providing great support.
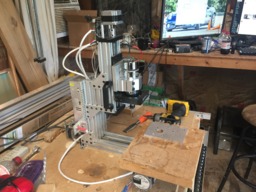
Minimill with slight modifications and v-slot table
Build in 'X/Y Table Style CNC Mill' published by Techvette, Apr 24, 2018.
This is a slightly-modified OpenBuilds minimill with some more Y travel and a v-slot table.
-
-
Build Author Techvette, Find all builds by Techvette
-
- Loading...
-
Build Details
- Build License:
-
- CC - Attribution Share Alike - CC BY SA
Reason for this Build
I needed to make some small, precise parts for other projects, including a 4' x 3' CNC gantry router and some car parts.
