
WHAT IS THIS ALL ABOUT?
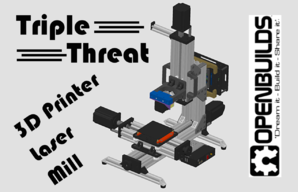
OpenBuilds is once again sponsoring a live demonstration for Midwest RepRap Festival MRRF on March 29, 30, 31 2019 in Goshen, Indiana. This time I will be transforming a standard OpenBuilds MiniMill into a convertible machine, capable of being a 3D printer and a standard CNC mill by just changing out the working tools mounted to a standard OpenBuilds Router / Spindle Mount. BONUS - I also made an interchangeable mount for an L-Cheapo 10 watt laser, in a custom laser housing.
I am a member and founder of Northwest Ohio Maker Society. We do these builds and demonstrations to further interest and understanding in maker groups and open design.
Some questions that exist for this build.
1) Will the X and Y axes acme threaded rod allow movements quick enough to be effective for 3D printing.?
2) Will the movements in the X and Y be repeatable and accurate enough for 3D printing?
3) How noisy will the machine be while printing?
4) Will the OpenBuilds Mini Bed provide an acceptable amount of printing surface
Materials
I am starting with a standard OB MiniMill kit, OB Nema 23 standard steppers, 24V Meanwell power supply w/ OB Power Case kit, OB wiring kit and 3 limit switch kits. The controller for this build is not standard - a Duet3D's Duet Wifi 1.04 mounted in the OpenCase mounting kit. The Duet Wifi is capable of providing me with multiple tool setups that can be switched between in their easy web interface.
For the 3D printer conversion, I have OB Mini Heated Bed setup for 24V and an E3D Titan Aero 24V driven by an OB Nema 17 stepper.
BONUS - For the laser conversion, I have a 10 watt L-Cheapo from Robots! Everywhere! that I placed in a custom housing. I created an interchangeable mount swappable between the E3D Titan Aero and a CNC router.
The following steps are part of my pre-show preparation. These steps are necessary to ensure time to design and print is not a factor in demonstrating the machine at MRRF 2019. All of my custom designed 3D printed part designs are listed in the attached files section as STL's. STEP files can be added as well. Currently these designs are Beta level and subject to change.
SHOW PREP
To make the 3D printing hotend interchangeable with the CNC milling router, I designed a bracket based loosely on the 3D printable bracket design E3D openly provides. My bracket mounts the Titan Aero to the front face of the OB router/spindle mount with the front piece removed. This means I can remove the router from the mount, set aside the front of the mount with the router, bolt up the Titan Aero, plug everything into the dedicated plugs hotend wire harness. I printed this on my custom delta printer using Atomic Carbon Fiber filled PETG. I recommend this material from Atomic for all of my structural items because it has awesome strength and rigidity, plus looks great, too.


The heated bed requires me to bolt on the custom designed bed spacer mounts directly to the standard X-axis gantry plate, removing the normal spoil board in the process. Then, I just need to plug the bed heat and thermistor into the dedicated bed wire harness. Again, these spacers were printed with Atomic Carbon Fiber PETG for stability during heat cycling.

A filament holder was also added to the side of the Z axis C beam. This was just a 105mm long piece of 20x20 linear rail attached with a black angle corner bracket. I created a simple filament reel stop that bolted onto the end of the 20x20 rail to prevent the reel from sliding off unexpectedly.

I am mounting the Duet wifi board in the OpenCase to the Z axis lower C-beam with a custom designed mount. It utilizes existing holes in the OpenCase plate and aligns to the outer slots of the C-beam. It is spaced to allow the 80mm fan to mounted to the back of the OpenCase plate to cool the underside of the duet and still allow breathing space and a track to run the wiring.
PREP UPDATE - March 18, 2019
I found a home for the Meanwell power supply under the machine which is spaced upward with a couple of stabilizer struts (20x20 v-slot) mounted under the Y axis to raise it up enough. I routed the wiring for the triple capability of CNC, 3D printer, laser.


I fired up the Duet Wifi and configured the parameters for the axes and the printer extruder. I used the OB limit switches, but angled the pins and soldered the wires to save space on all 3 axes.


While setting up the Duet, I included the commands to switch to laser mode in the config.g file and have built a prototype breadboard for the special PWM conversion circuit needed by the Duet with this laser. The laser has its own tiny 12V Mean Well RS-15-12


One thing I have changed from before, I have put aside the OB Mini Heated Bed because I didn't have a readily available thermistor for it and I didn't want to print directly to it anyway. I have currently replaced it with a piece of unheated 3/16" thick polycarbonate plate, 127mm x 127mm. This will work fine with PETG for demonstration purposes. You can also see the ring-shaped part cooler I designed for this arrangement on the OB router/spindle mount. The laser attachment is also shown, below.


That is what I have so far. I am hoping this works as expected. You, the reader, will need to wait until MRRF 2019 to find out if we have been successful! See you then.

Here is a link to Thingiverse publishing of the build if anyone is interested... OpenBuilds MiniMill - Triple Threat Conversion by TheKizard
Before the show, I was able to have a prototype board for the laser PWM made by OSHPark. We soldered on the components and installed this proto board in place of the breadboard and wires. The only wires on this board now are the 24V power input and the 3 output wires to the laser controller. The 12V meanwell power supply was also eliminated because the L-Cheapo controller can handle 12V or 24V.

SHOW DEMONSTRATION SECTION
MRRF 2019 show is complete and so is the Triple Threat. The show this year was amazing and we were able to show off the MiniMill 3-in-1 conversion to hundreds of people.


Live OpenBuilds MiniMill -> MiniPrint/Laser Conversion Demo @ MRRF2019
Build in 'Cartesian Style Bots' published by obmilllivebuild, Dec 29, 2021.
Transformation of an OpenBuilds Mini Mill into a convertible 3D printer / CNC mill with interchangeable tooling. Maybe a bonus conversion TBD.
-
-
Build Author obmilllivebuild, Find all builds by obmilllivebuild
-
- Loading...
-
Build Details
- Build License:
-
- CC - Attribution - CC BY
Reason for this Build
This was an idea collaboration between OpenBuilds and myself to promote the Mini Mill and show its diversity. -
Attached Files:
