
Sometime ago, i've built a small CNC Laser engraver, but it doesn't satisfy me, both the electronics and the mechanical...
After a while i've started to design a new control board for the Laser, this time i want all the electronics on a single PCB, both the movement control and the current driver of the laser.
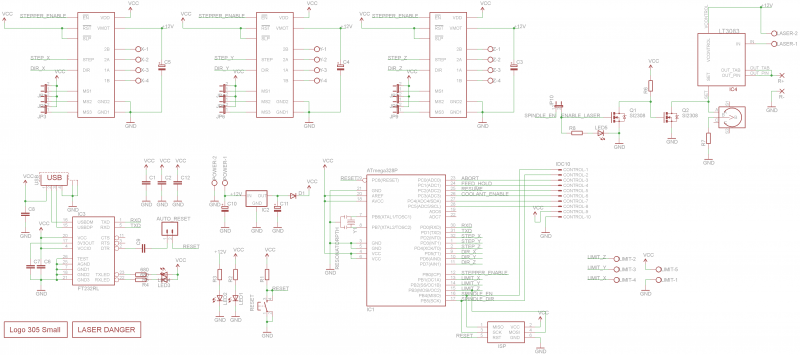
The first step was to design the circuit : I've used the standard GRBL pin assignment, the LT3083 to drive the laser and the stepstick to move the motors.
NOTE: This is a REV1, I have already identified an improvement to do ...
Schematics (REV 1):
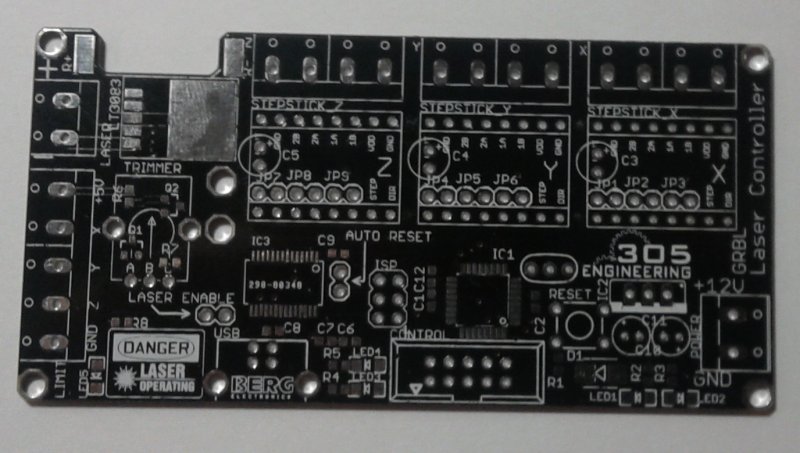
PCB (REV 1):

With these files I have made the PCBs:
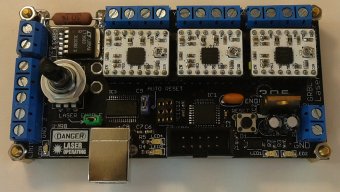
Then I've soldered all the components and this is the result:
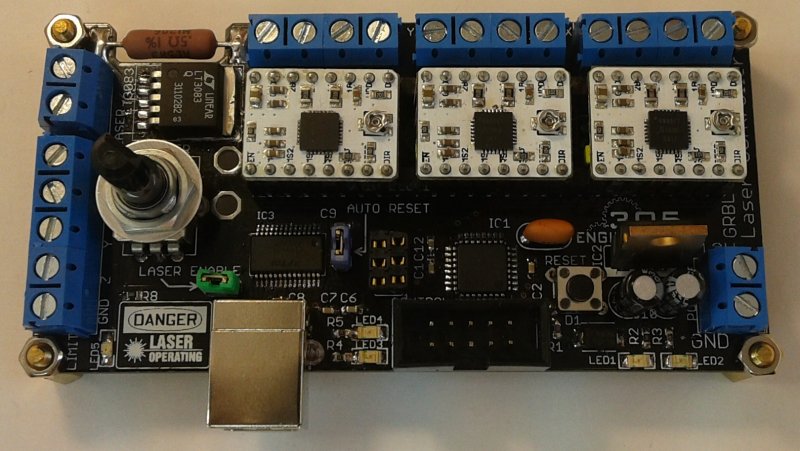
(In the next build i'll use the vslot to build the mechanics)
Update:
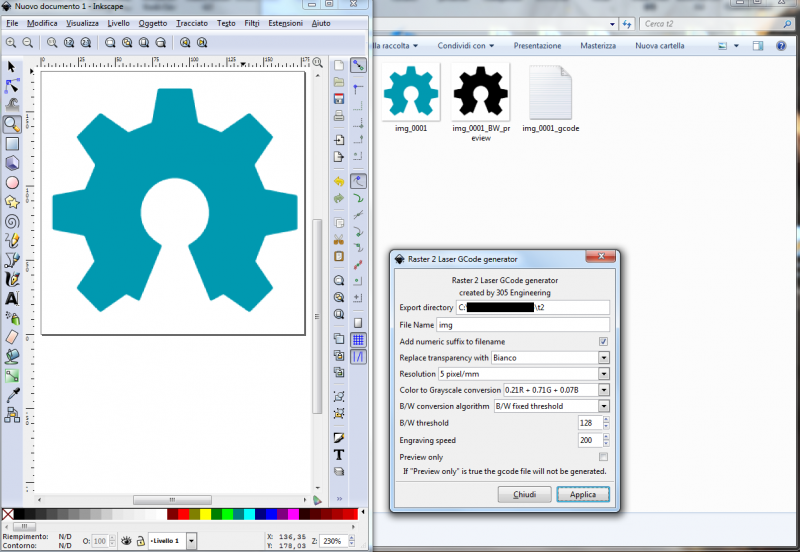
With the need to generate the GCode for the laser directly from an image, i've started to write an extension for Inkscape (http://www.inkscape.org/).
Installing:
Step 1) Download from "Attached Files:" (at bottom)
Step 2) Extract the archive and simply copy all the files in the folder "Extensions" of Inkscape
Code:Windows ) "C:\<...>\Inkscape\share\extensions" Linux ) "/usr/share/inkscape/extensions" Mac ) "/Applications/Inkscape.app/Contents/Resources/extensions" for unix (& mac maybe) change the permission on the file: chmod 755 png.py chmod 755 raster2laser_gcode.py chmod 644 raster2laser_gcode.inx
Usage:
Step 1) Resize the inkscape document to match the dimension of your working area
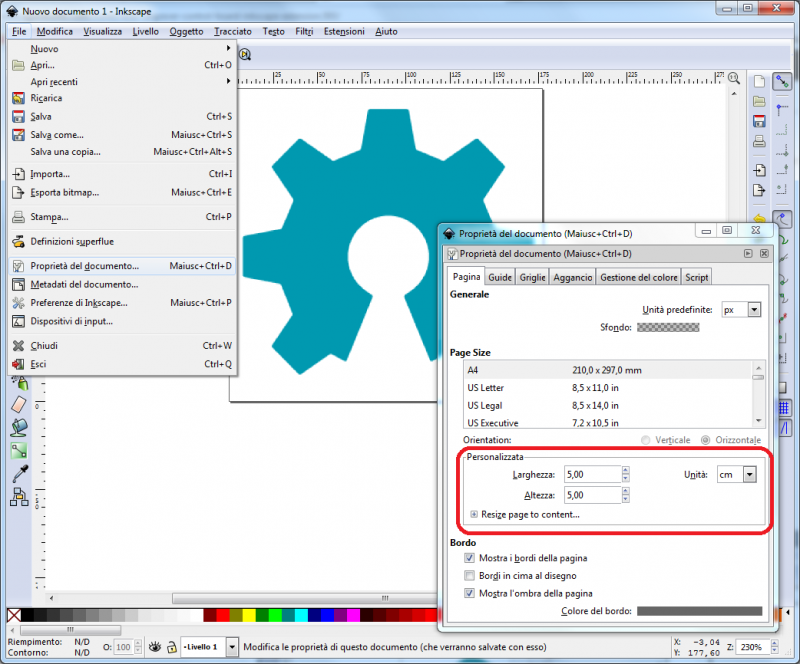
Step 2) Draw or import the image
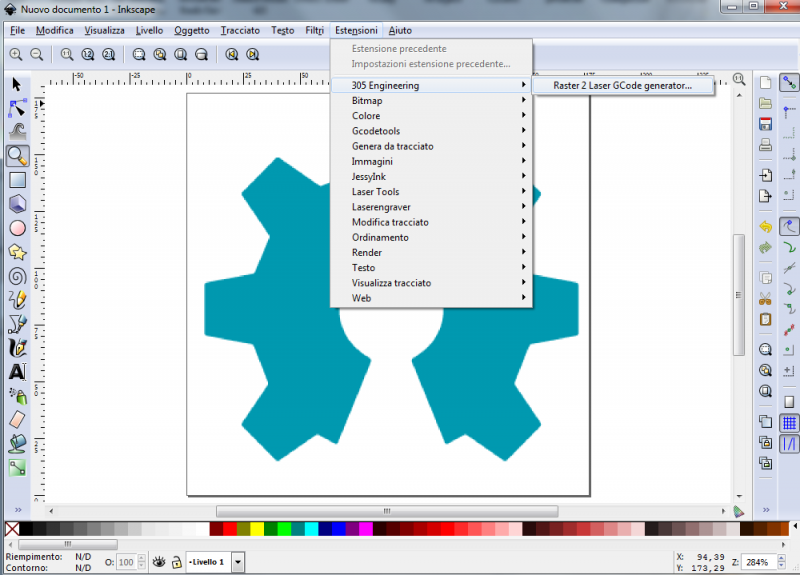
Step 3) To run the extension go to: Extension > 305 Engineering > Raster 2 Laser GCode generator
Step 4) Play!
Laser Engraver Control Board + Inkscape extension
Build in 'Circuit - Software Project' published by oni305, Nov 27, 2014.
This is a PCB designed to control a laser Engraver CNC
-
-
Build Author oni305, Find all builds by oni305
-
- Loading...
-
Build Details
- Build License:
-
- CC - Attribution NonCommercial - CC BY NC
Reason for this Build
I've started this project to have a single board for controlling a small Laser cnc -
Parts list
Qty Part Name Part Link Comments 0 Link -
Attached Files: