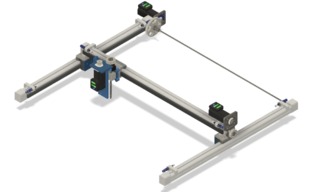
Herewith, want to show you how i build my Co2 Laser.
First of all:
This i a mashine for me, not for sale!
It is not finish, but on the way
Based on Aluminiumprofile in 30x30 ,
The main axis are from Festo DGE-25-ZR-KF, with Timing belts and linearrails in 25mm, working distance 650mm, Vmax 10m/s
the Y axis is Festo DGE-25 SP-KF, with ballspindle in 1605 and linearrails in 25mm, working distance 930mm, Vmax 0.5m/s
Special:
The Z axis is divided in two parts. on the top. Support the laserhead up.
The other part is movable down to 130mm. Guided linearrails in 15mm and ballspindle in 1204.
This mobeable part presents to Focus the laser to the working Level. Special Fittings needed to put a miniscus lense inside. futured to take two miniscus lenses, to have hp laser and a Incredible small laserpoint for example: engraving.
Electrical parts are based and selected on Germany Standard,
To Prevent high Risk injurys, i put a safetycircuit which allows to stop the mashine immediatly at monitored faults.
Servomotors IHSV57 with 0.57Nm and 180W which allows to have fast and continuous Velocity, smooth and exact positioning. Used with 48V. All drives will devide one powersupply with 48V 10A continuous and 15A for 4sec. Enough
Every support is made by my own and on DIY Mill mashine.
Here are some details about the milestones.
Laser DIY
Build in 'Laser Cutter Builds' published by holographic, Mar 8, 2019.
How i construct and create my DIY Co2 Laser cutter and engraving mashine. details will follow
-
-
-
- Build Progress:
-
- Build in Progress...
Phil Jennings, SEADog5339 and MaryD like this. -
-
Build Author holographic, Find all builds by holographic
-
- Loading...
-
Build Details
- Build License:
-
- CC - Attribution NonCommercial - No Derivs - CC BY NC ND
Reason for this Build
Hello Laser? A Dream comes true -
Attached Files:
-


