
Hey all!
This build is in progress.
First off, this is probably my 10th design as far as a router goes. I did my first couple for my senior design project my senior year of college. But my goals for the machine have changed, and as I learned of different manufacturing capabilities, the design changed. I am honestly not sure if this is the best out of all of my past designs, but I am running with it none the less.
My goal for this machine:
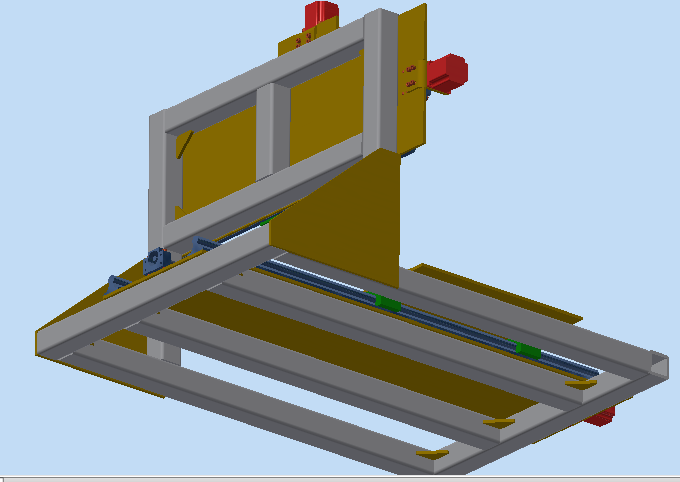
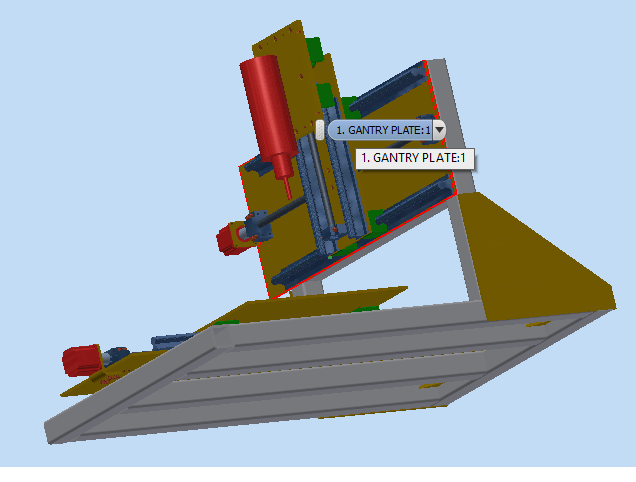
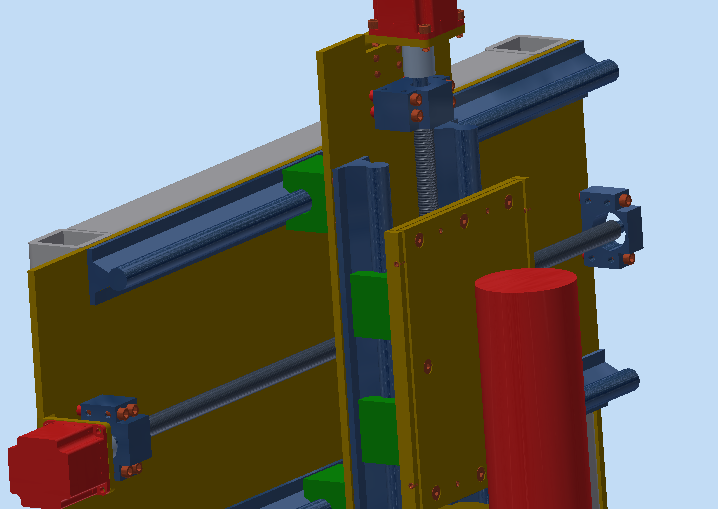
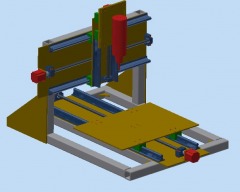
With my goals in mind, I decided to go with a fixed gantry design. The reason for this is improved rigidity, only 3 steppers and ballscrews needed, and a simpler design. The set back is obviously decreased travel, but that's a trade off that I am willing to make.
- Accuracy/Repeatability of +/- 0.01''
- Ability to cut all soft materials, and some metals including aluminum
- Simple design, reduced costs, and fewer parts (than my past designs at the least)
- Cutting area of at least 12'' x 24''
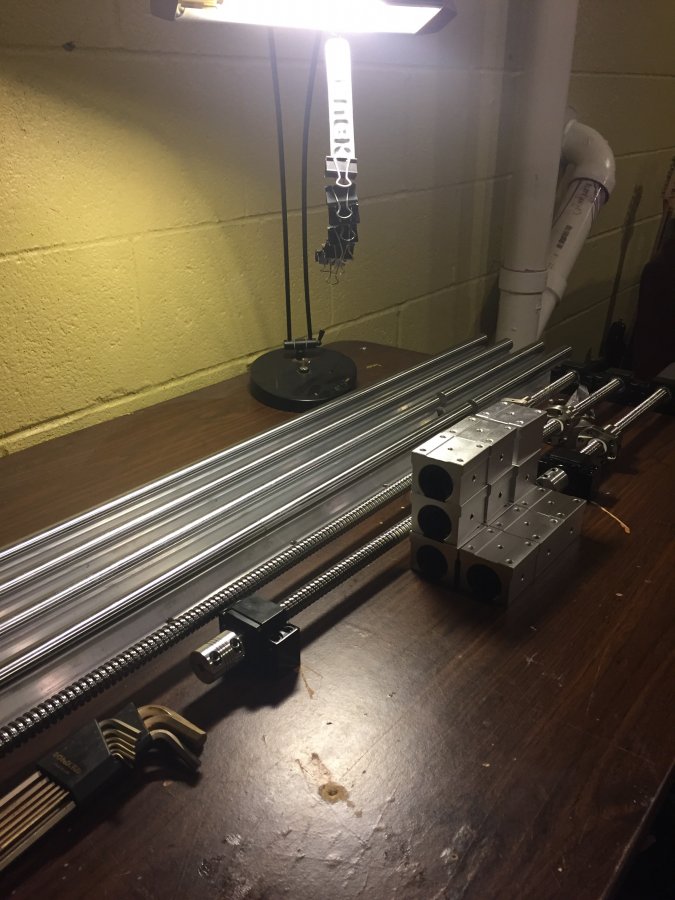
OK, on with the build. To start, I am using the wonderfully manufactured chinese ballscrews and supported linear rails from ebay. They are 1000mm, 700mm, 300mm lengths. Not awful quality, but **** near close to it. The holes on the rail supports look like they were located by lowest paid and worst seeing person in the plant. But, the kit will work for what I need.
I work at a metal fabricating company, and have access to an awesome build pro weld table, 2 cnc brake presses, 2 lasers, one laser with a chuck that has the ability to laser cut tubes. This is where my recent design stemmed from. That said, all non purchased components are laser cut and welded. All of the steel is 1/4'' plate, and the tubing is 2'' x 2'' x 1/4'' steel tubing. I am waiting on the tubing to arrive at my work, and have already wrote the programs to cut them on the laser. Same with all of the flat plates. I did not need to get the tubing cut on the laser, but it allows me to puzzle tab the entire frame together, which ensures location accuracy, and helps with alignment. Also, all lengths will be +/- .001'' coming off of the laser, and the laser cut features on the plates have a similar tolerance. Another plus is that steel is incredibly cheap. Much cheaper than going with extruded aluminum. So as this build progresses, this is the material used.
Since welded anything tends to be out of wack fairly easily, I need a method of creating flat mounting surfaces for my rails. I was researching different methods, and decided that I am going to try using precision epoxy on a few critical surfaces to obtain this. I have never used epoxy other than to fix a car door handle before, so this should be interesting.
I am also waiting on my electronics. I have just purchased a NEMA 23 kit from cnc router parts, which comes with 3 NEMA 23 motors @420 oz-in holding torque, a 7.3A power supply, a leadshine MX3660 controller, shielded cables, and anethernet smooth stepper kit. Before I checked out, I also threw in 6 limit switches, an E-Stop, and a copy of MACH 3. Pretty excited to get all of this in and start playing with this stuff. As a side note, I have absolutely no clue what I am doing when it comes to controlling this thing, and with the electrical. It took me a few weeks of research to determine that these components will probably work for me. That's what is great about building this thing. I would never learn about this stuff if I bought a machine (as if they are affordable or something).
That is pretty much is so far. I am still in the collecting stage, but the parts are showing up and I am on track to get my parts cut within a week or two (hopefully). I will be using this page to document my progress. It will be interesting for me to look back on, and to use for reference should I ever do this again, even if no one else looks at this.
-Matt

Fixed Gantry Welded Steel Router
Build in 'Cartesian Style CNC' published by Matt Barile, Mar 22, 2017.
Fully welded, fixed gantry CNC router, with chinese linear motion parts, in progress
-
-
Build Author Matt Barile, Find all builds by Matt Barile
-
- Loading...
-
Build Details
- Build License:
-
- CC - Creative Commons Public Domain (CCO 1+)
Reason for this Build
Building this for experience, and to have the ability to create whatever I can think of.