Here are some of the features that I have designed into the build.
- 1500 mm x 1500 mm C Beam gantry.
- It uses a double belt system that I developed
- 6.5 inch Z axis
- ball screws on Z with 16 mm linear slides.
- I am using 2 400 oz./in motors on X
- I am using 1 400 oz./in motors on Z
- I am using 1 800 oz./in motors on Y
- Using Mach 3
- Fusion 360 for design
- 6 Axis NVEM CNC 200KHz Ethernet MACH3 Card Breakout Interface Motor Motion Board
- using DM860 A stepper drives for two nema 34 motors ( X axis ) and one DM860 A stepper drive for the Y.
- there will be many tools mounted to the gantry. laser etching, Plasma, Torch, and Router.
- 3 separate water tables for the plasma. this allows me to only fill one at a time Approx (15gal).
- there are two removable metal framed wooden table halves sitting over the water bed for work bench and routing.
- 4 axis wireless pendant.
- All of this is setting on a 2 x 2 x 3/16 tube steel frame that allows for tool storage on the bottom.
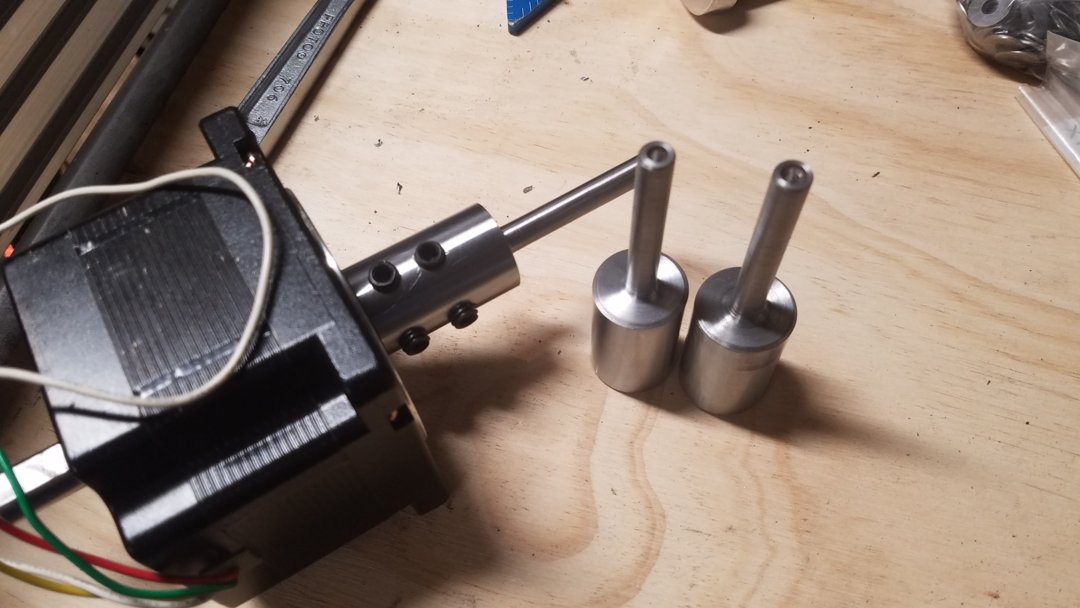
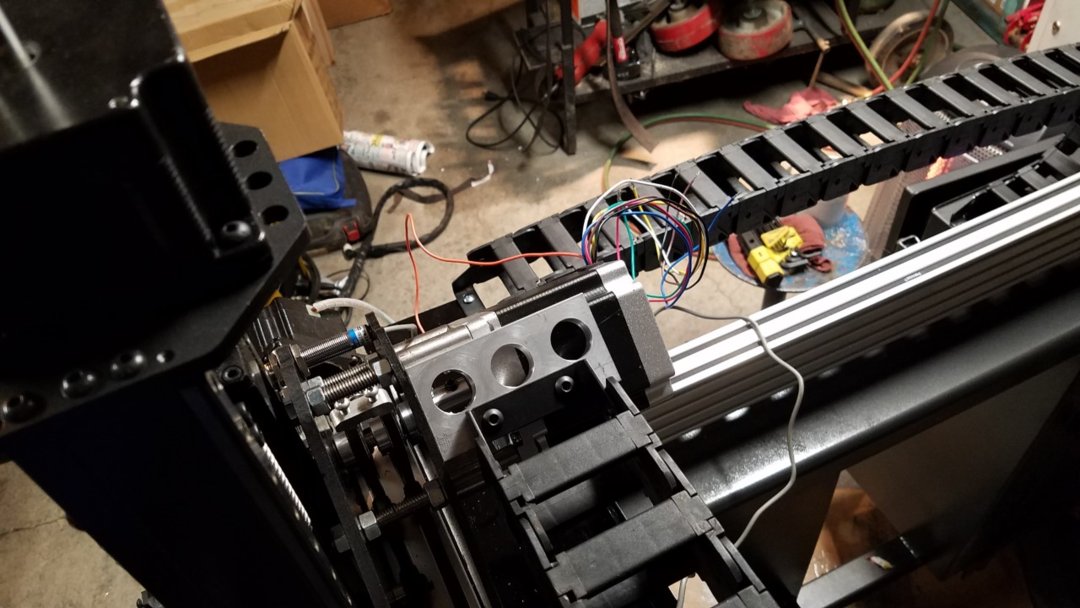
I machined these couplers So I could use two sheaves. When machining these you must make sure they stay concentric.
Here are the two sheaves mounted on the coupler.
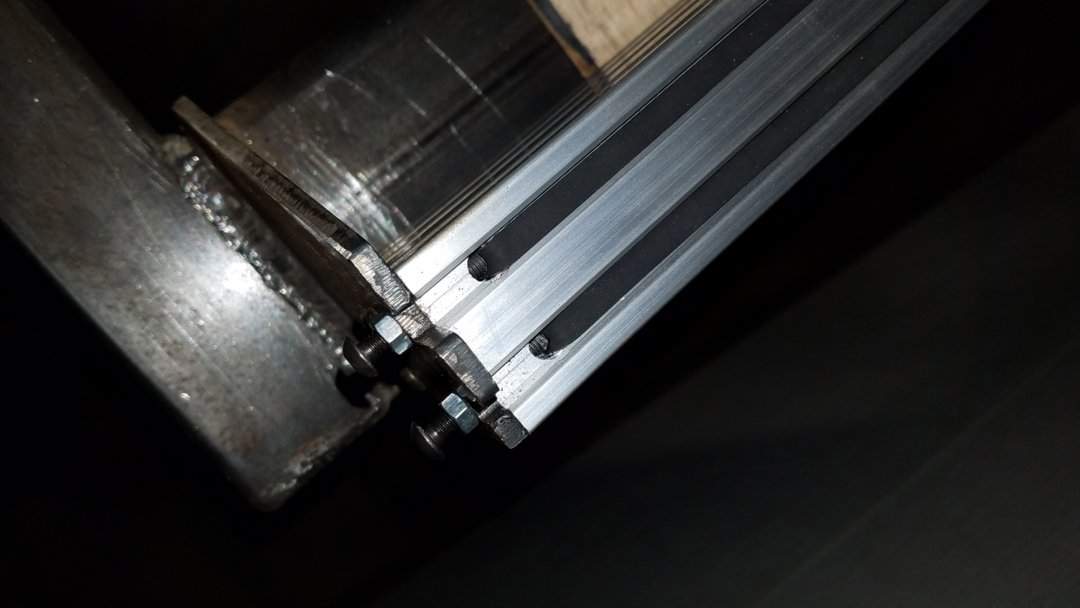
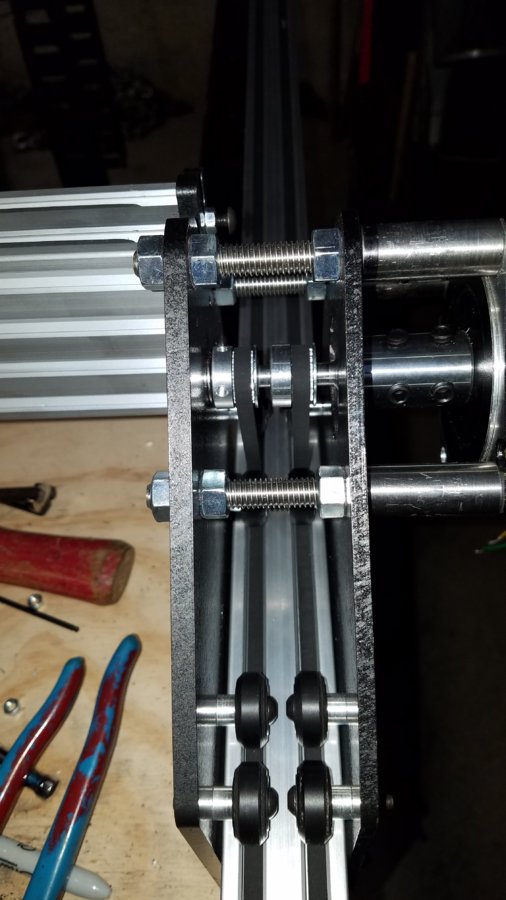
Here I drilled two holes in the C-beam and used the mounting bolts to hold the belts in place.
Here I used extra long bolt to mount the plate. The belt-tensioner slides on those two bolts. I slipped a piece of a black zip tie on top of the belt. I tightened the first one to tight and broke the belt.
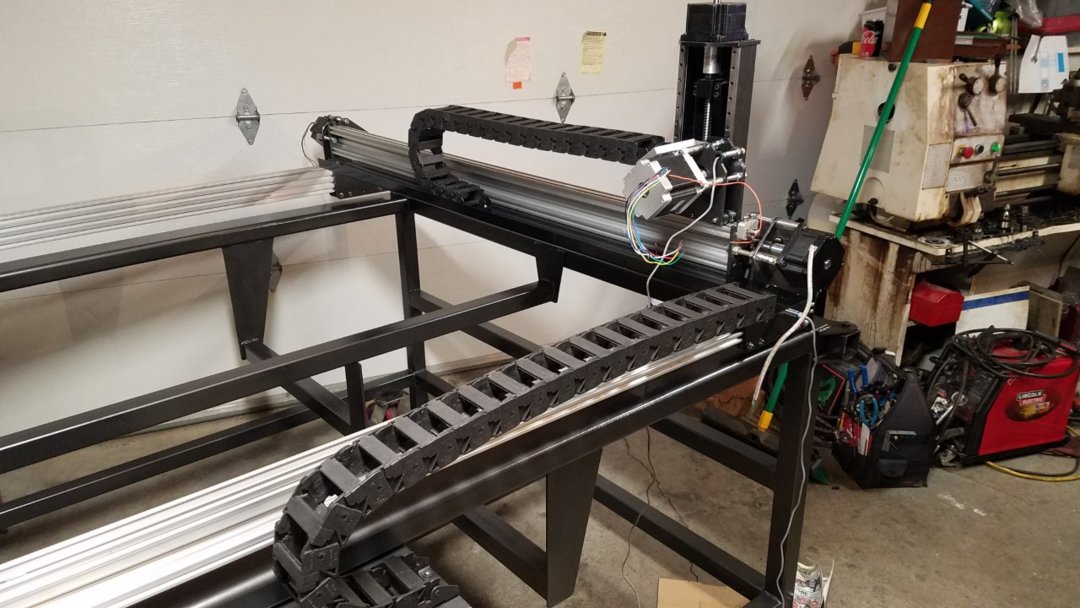
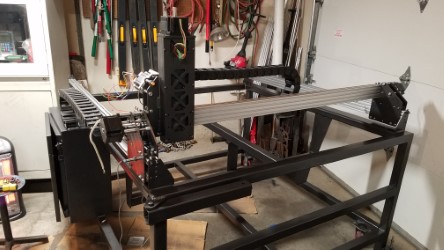
Now she is all painted and the wire track is mounted.
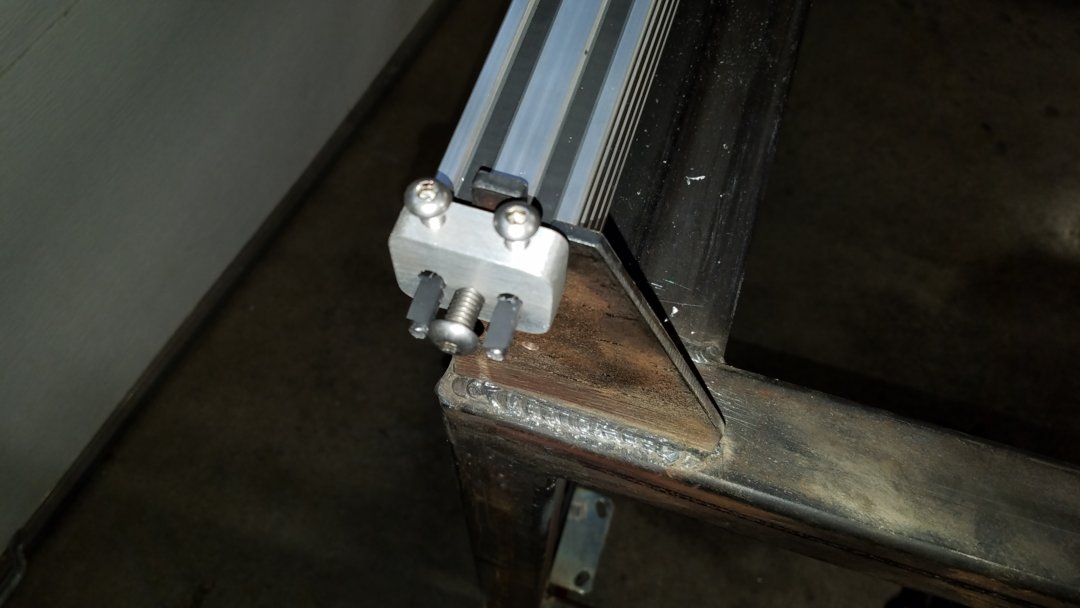
X axis Mount.
The bottom of this picture shows panagraph arm that will hold my laptop.
Electrical will come soon!!!

This is my my rough layout. I have (2) 60 volt 5.9 Amp power supplies one for the two 400 oz/in motors and 1 for the 800 oz/in motor the third power supply is a 12 volt 60 amp power supply for the Z axis. You guys and Gals might ask why I used that combination. Well, simply because that is what I had left over from my other builds. I typically like to use the highest voltage that the driver can handle. That is not the case this time. The third DM860 driver is for a 4th axis (Rotary). The Controller is a NVEM 6 axis Ethernet controller. The relays up top are for the router, emergency stop and then one more will be added for a torch solenoid.
I am closer to a finished design. I will be changing out the two relays for two different types with the correct operating voltage.
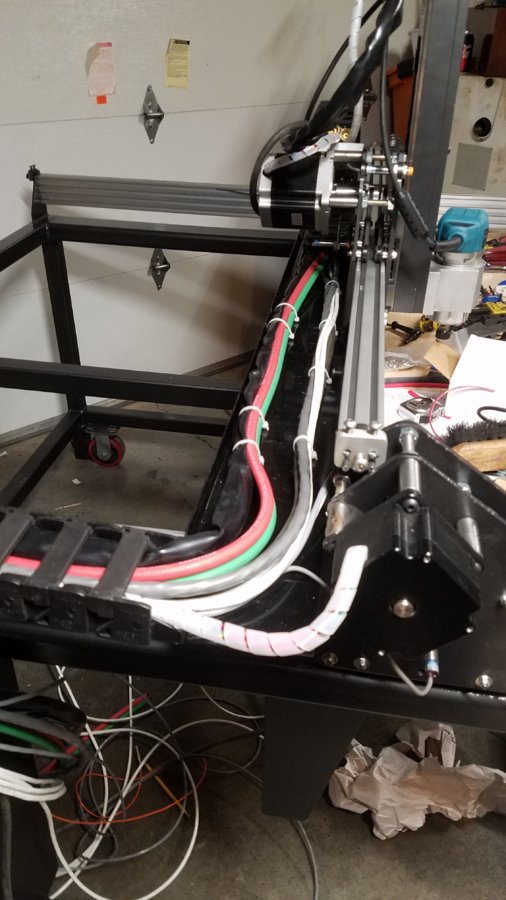
Here I am starting my wire management before I run the rest of the wires.
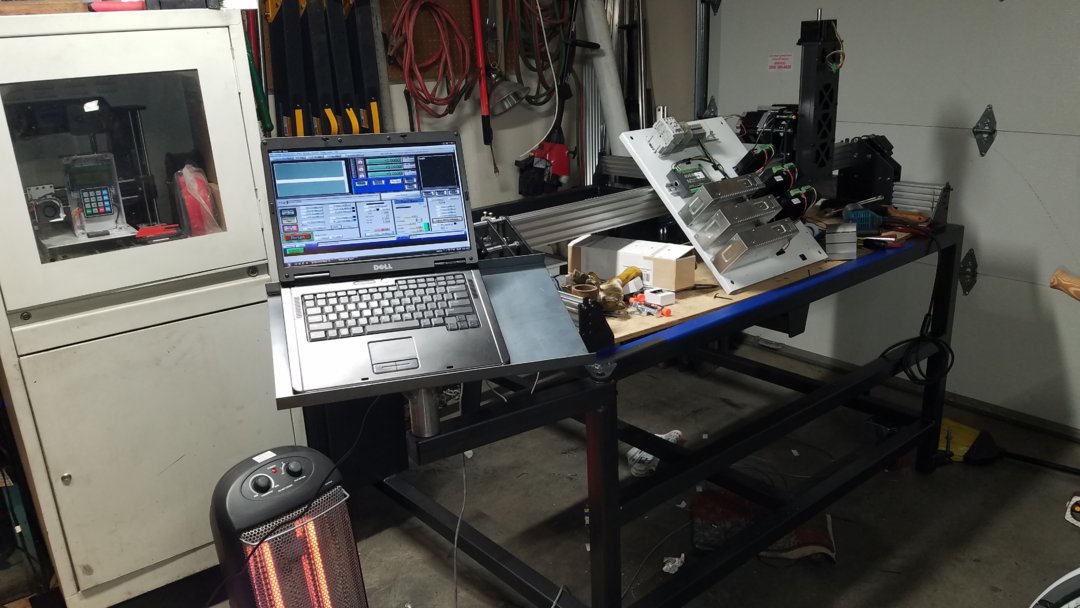
Mach3 on the computer sitting on the new panagraph-arm. I was doing an imaginary test run,
While wiring this machine I have learned a few things. If you are creating a CNC plasma, make sure you do your home work. There are many things to consider. Here is a short list of considerations.
I did not develop any of this. I found these items from many different sites on the Web, I just compiled them. If you have any suggestions I will add them to the build document.
- Purchase a Pilot arc plasma (NOT a HF plasma) there is a difference. The high frequency does cause noise issues in your electronics. the pilot arc grounds the tip to start the arc. The PWM of the inverter style units still create noise which is why you have to do all these other thing to make it write.
- Use a motion controller that is optically isolated. even the cheap ones come optically isolated.
- Run a ground rod and connect it to your table with in 20'
- Use foiled twisted wires with ground. (For everything.)always ground this in one spot back inside your cabinet.
- keep THC out of main cabinet. try to buy a unit that has an external voltage divider to keep plasma voltage away from other electronics.
- use a noise filter on the main power.
- do not run run the torch lead in with wires if you can help it. I am ignoring this one until it bites me in the butt. It is to nice and neat inside the wire track.
- If you are using plasma you should use an Ethernet motion card.
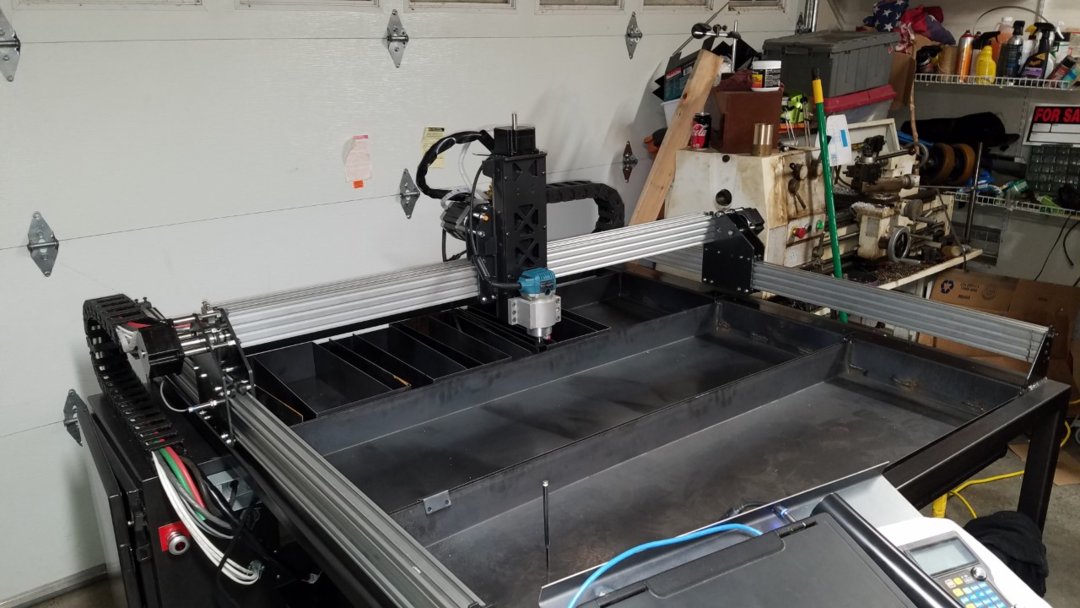
Here is a picture of the water beds that I created. I built 3 individual water sections. This allows me to fill one section ( 15 gallons) for smaller cuts and not have to fill the whole table full of water.
I have made some jog moves with the pendent. It runs very fast and will be great for plasma cutting. I was disappointed with the X axis and added the second C-Beam that I ordered in anticipation that it would not be stiff enough. Now with the router mounted and while making fast Y moves it is rock steady. I still have no illusions that it will be a great router table but, should be sufficient for my limited wood skills.
CUT SMITH
Build in 'Cartesian Style CNC' published by Weldsmith, Mar 9, 2018.
I am building a multi tool CNC. I plan to have a quick change tooling system that will accept Routers, oxy acetylene torch, Plasma torch. etc. there will be a water bed under the convertible router table / work bench. The inspiration to build this machine is from having a small garage and not a shop.
-
-
Build Author Weldsmith, Find all builds by Weldsmith
-
- Loading...
-
Build Details
- Build License:
-
- CC - Creative Commons Public Domain (CCO 1+)
Reason for this Build
I am a tinkerer and this machine will help me get my TINKER ON!!Inspired by
Not one build has inspired me. but I have to give open builds Props. I have been collecting parts for along time to build a cnc gantry style machine. However I fell in love with the open build belt drive system and this made me change my plans and I am now building a C beam. -
Attached Files:


