
Alright so this is a work in progress and I'll be modifying and updating things as I go along but I just wanted to get the ball rolling so here she is. I tried to be a little different and give her a bit more shape just for aesthetics which almost made me ruin everything because of math but then I realized I could just lower a bar and everything would be alright. It's a giant puzzle with no real instructions and a rollercoaster full of emotions trying to keep everything within a reasonable budget to realize that you made a few wrong cuts and now you are going to have to get another bundle of extruded aluminum... my cuts were fine, but I just kept changing the design.
That's the end of my first rant. I'll be back later for more.
I'm building my own 80w Co2 Laser with a probably a print size of about 500x600. Not so sure as of yet but the final numbers should be around there. I'm also going to be adding an old Surface Pro 1 I had into the machine and that's going to be one of the ways to control the laser/ software as well as a reprapdicount smart controller screen.
I'll be adding details and photos from the beginning until the point that I am right now so stay tuned!
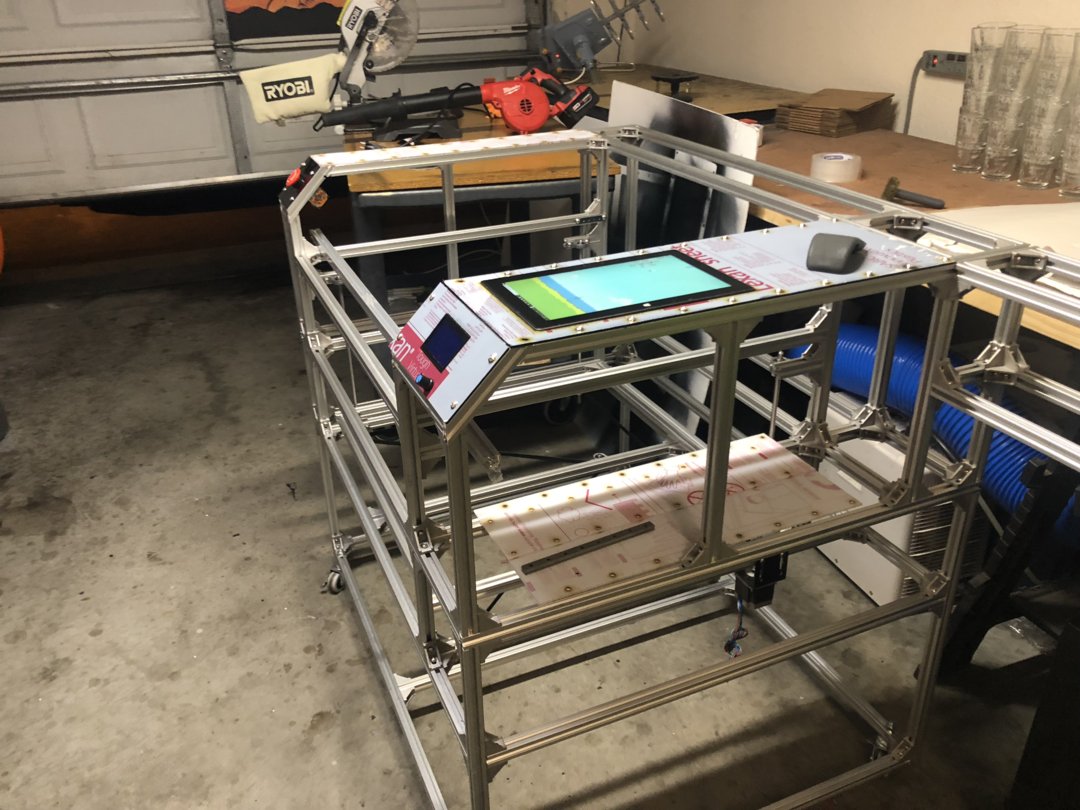
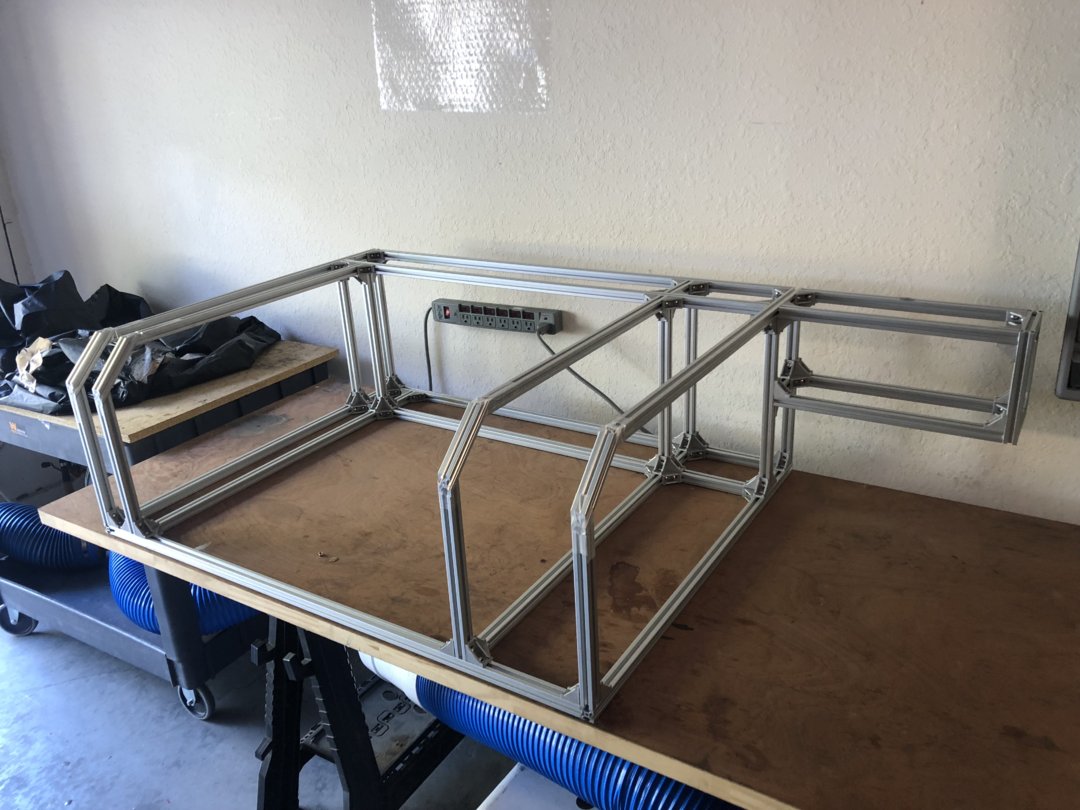
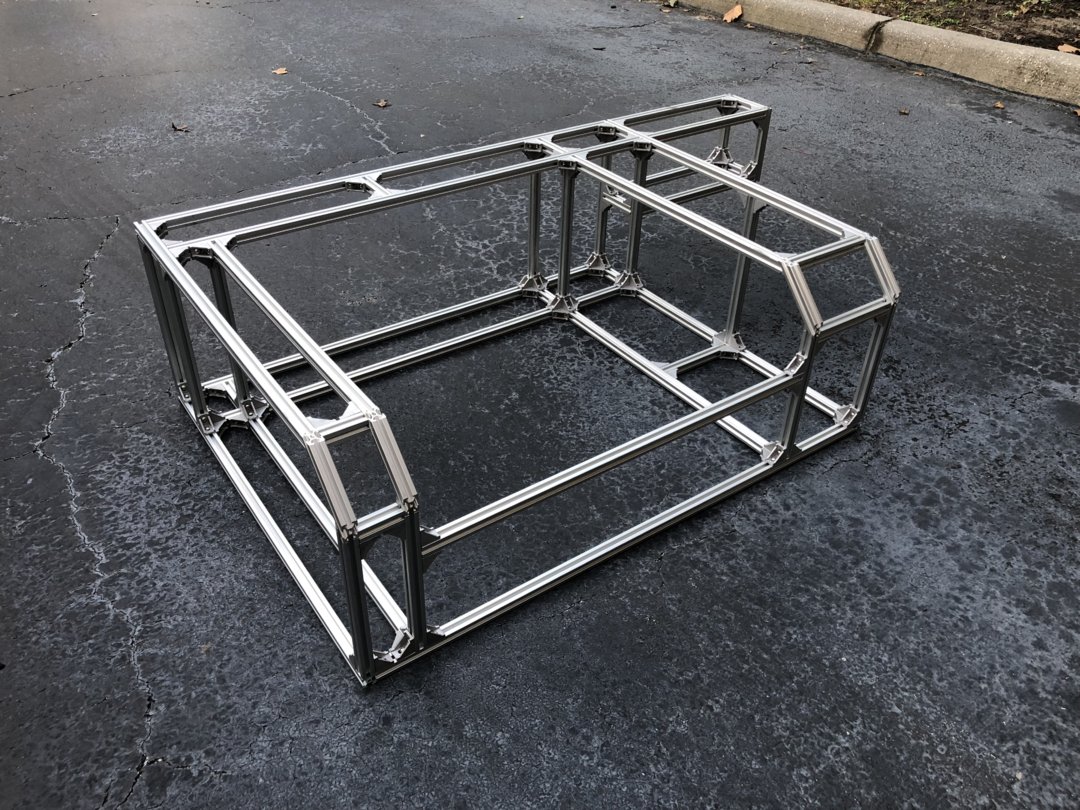
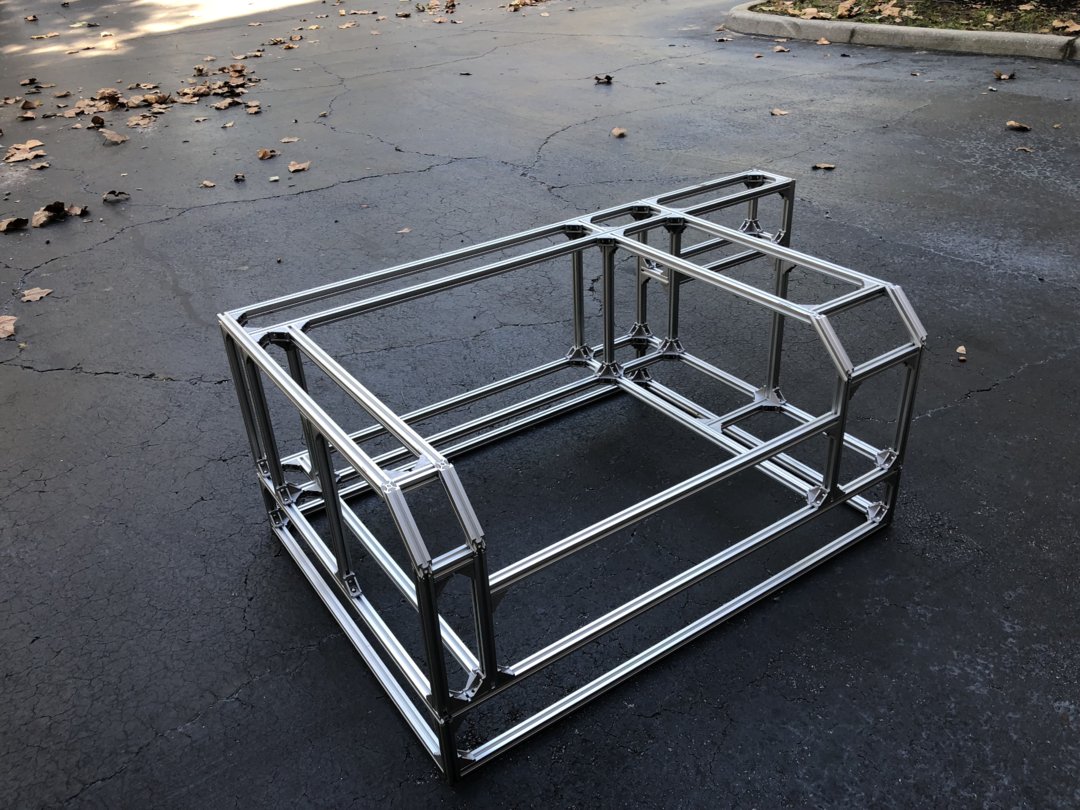
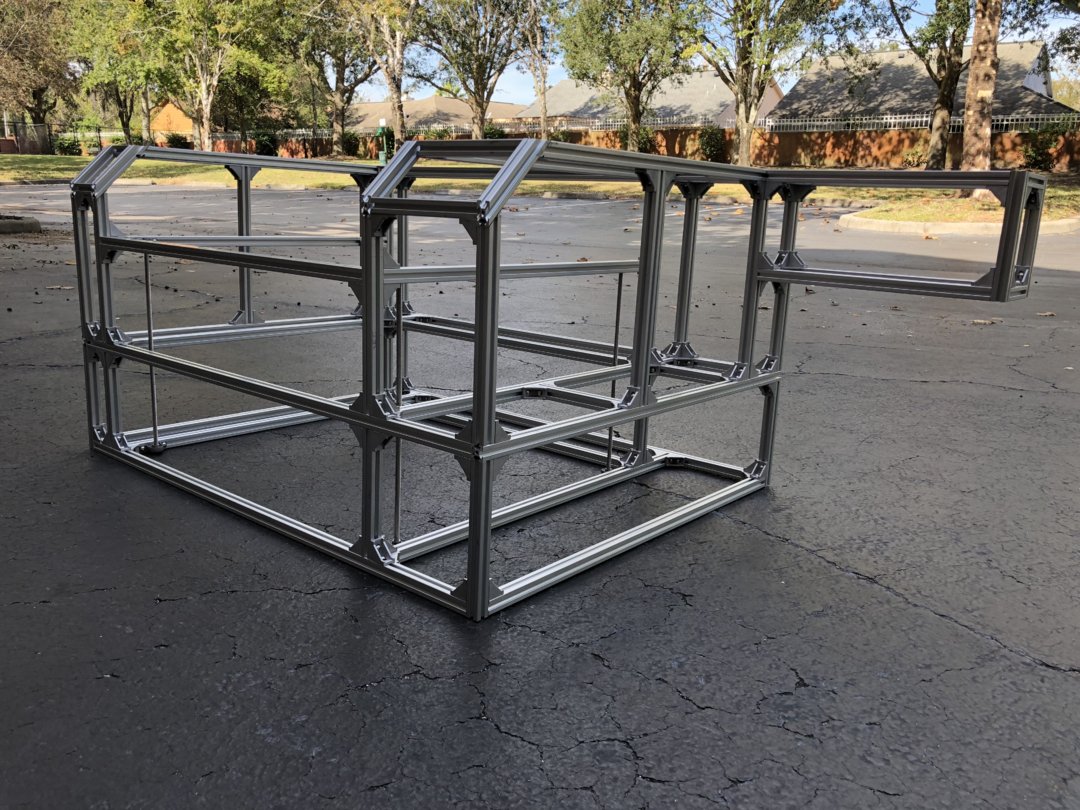
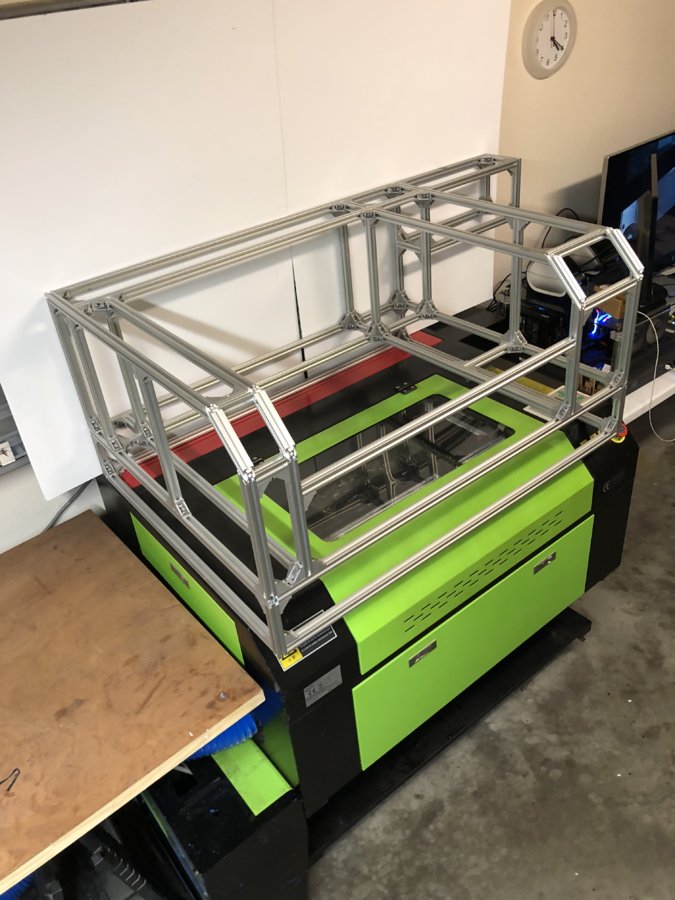
So this is the frame for my machine I feel like I overbuilt it just a tad bit but I'm happy with the outcome. I drew it on Sketchup and color coded all the beams so when it came time to cut, I could just count how many of each piece I needed. After I made all the cuts I stacked all the like pieces together and just used the model to show me which piece went where.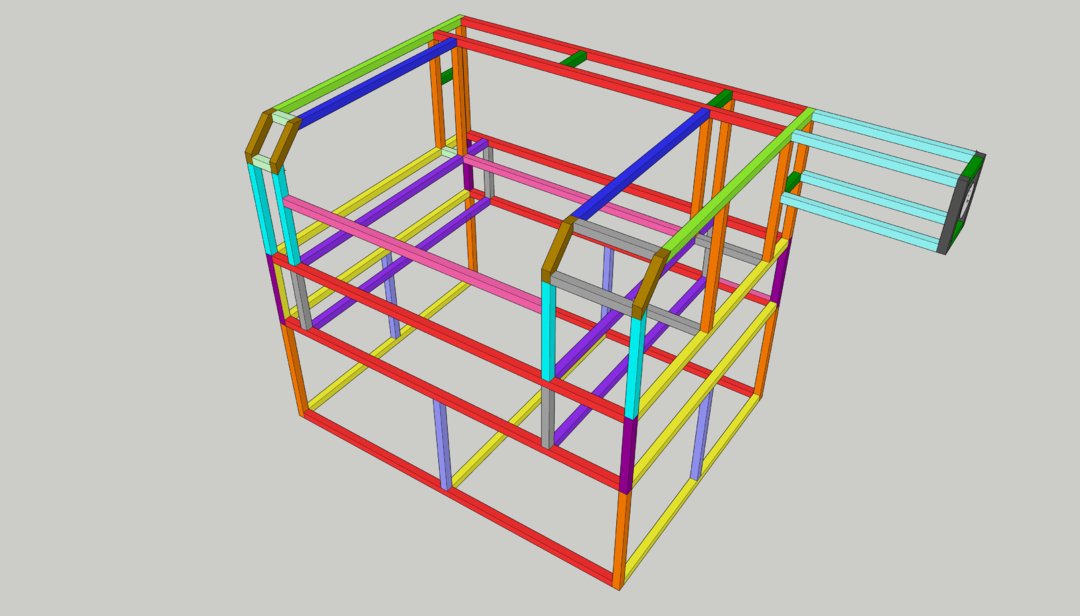
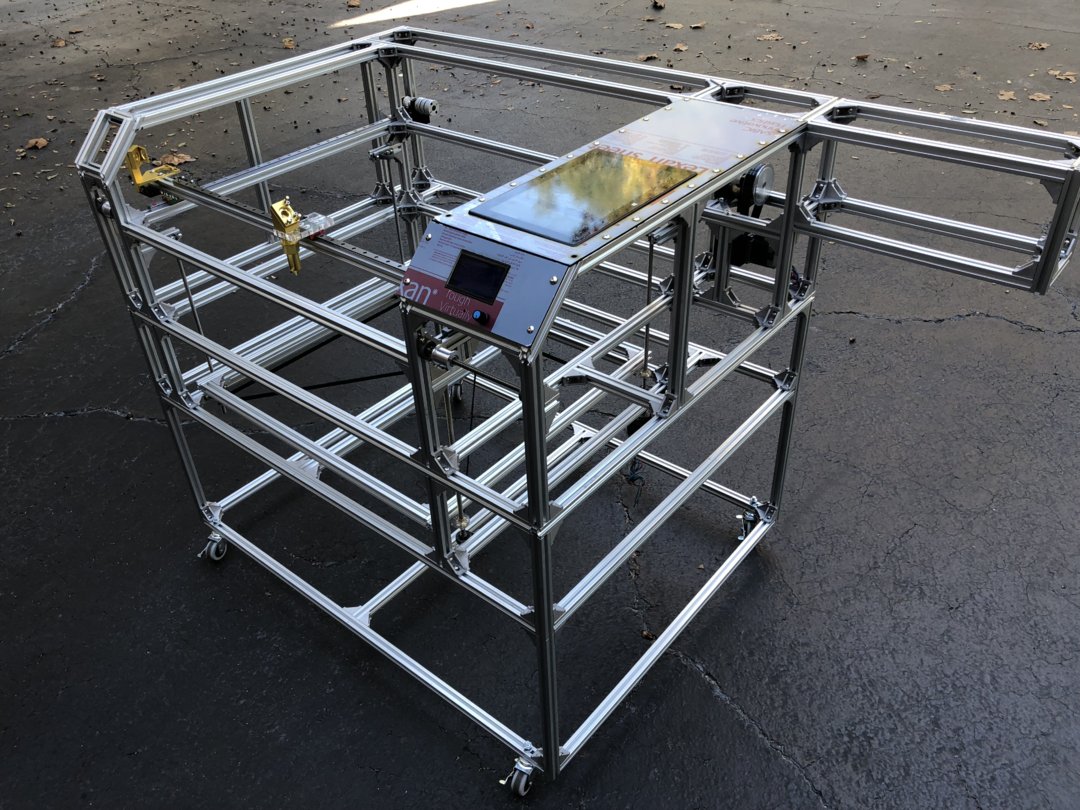
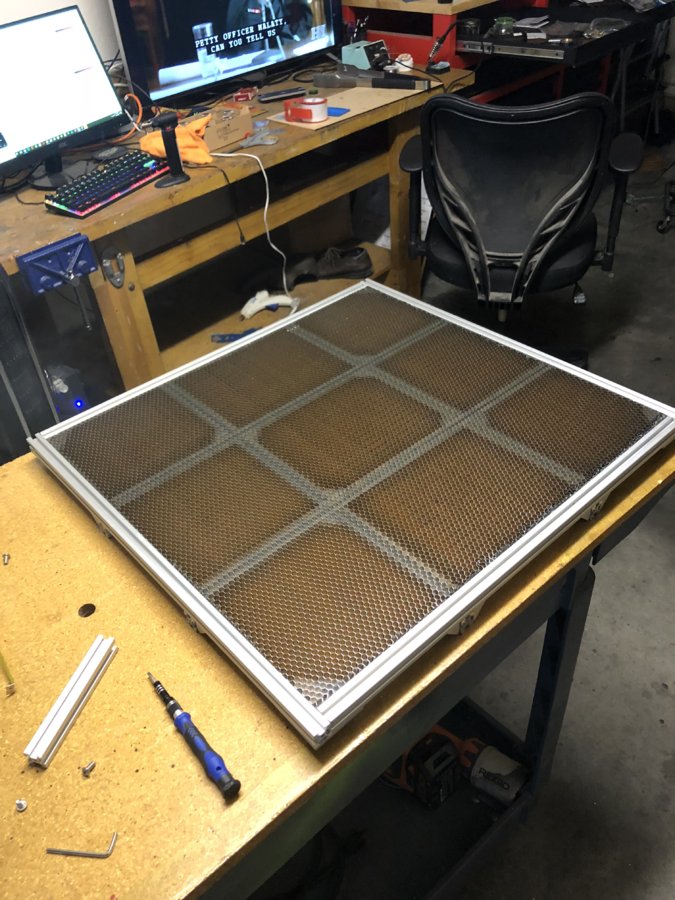
The machine measures 1040mm long, 800mm deep, 920mm tall, and with the laser extension, the machine is 1420mm long. The print area should be about 640mm by 560mm, and I'll have about 300mm of travel for the Z-axis
I'm using 2020 T rail extruded aluminum, nema 23 step motors, Cohesion3D control board, an old windows surface pro as a built-in pc so I can control the machine that way, ethernet so I could control it with a second pc I have in the garage, or via the reprapsicount display.
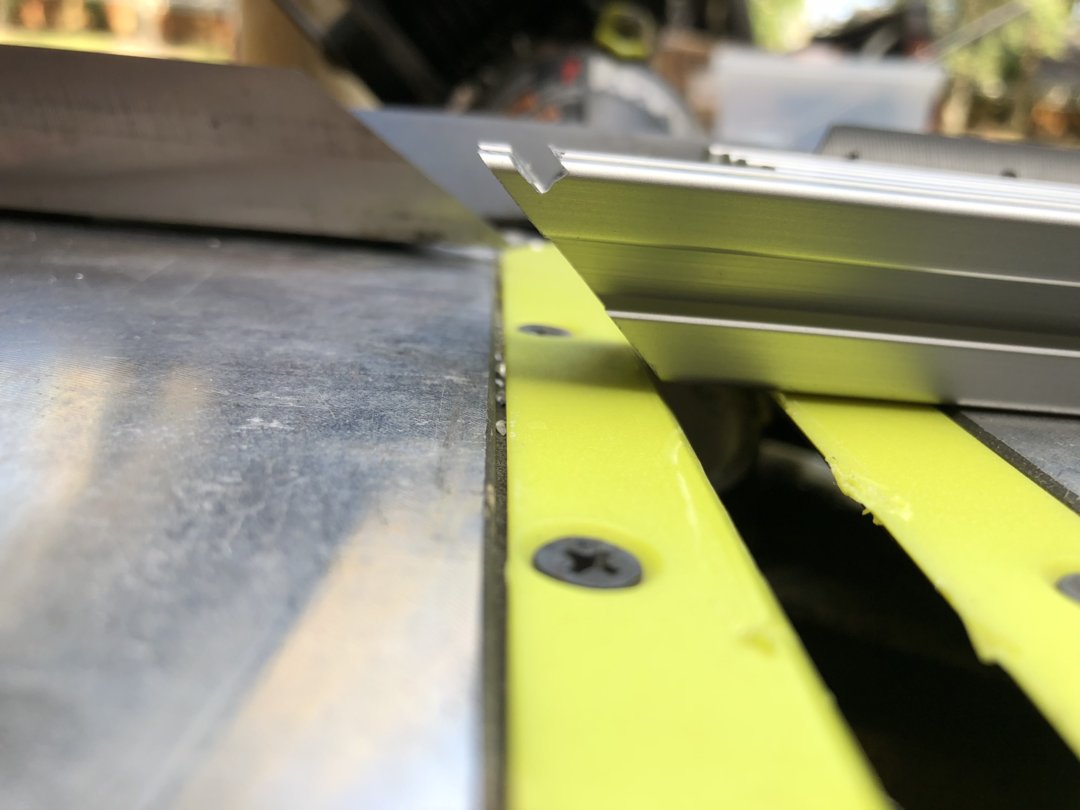
I wanted to give my machine a bit more shape than what I've seen so I decided to cut a 45-degree angle in the front.
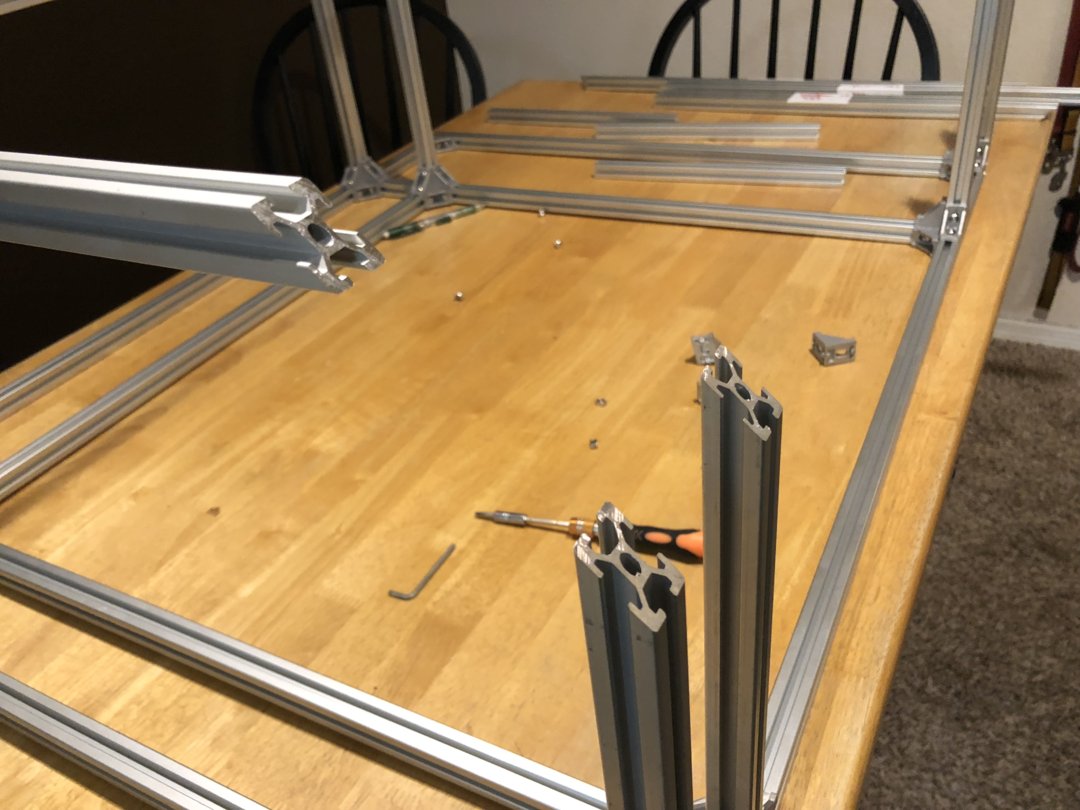
In the drawing, it worked but when it came time to assemble it, I realized that I didn't have any way to connect those pieces together. I would have needed a 135-degree bracket of sorts so that I could brace it from the inside. I didn't have anything here that I could make it out of so I just decided to try this out.
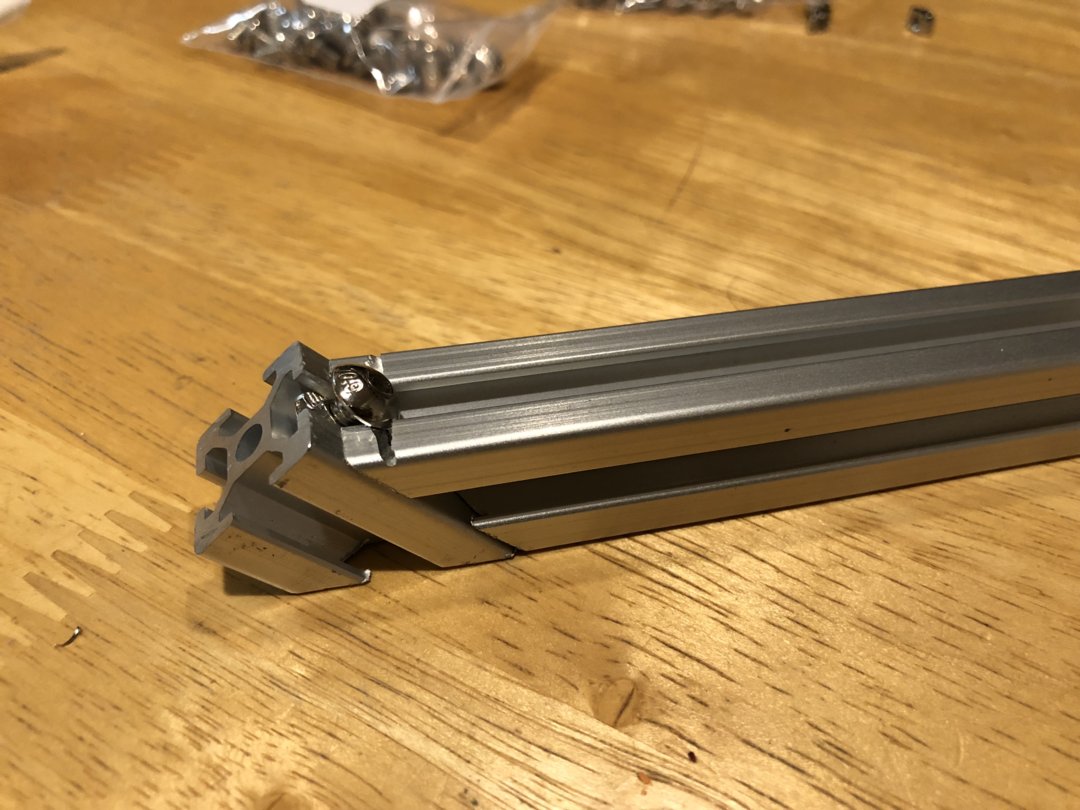
I cut a 45-degree slit across one of the beams about 2mm below the original cut. This allowed me to slide one of my M5 screws in there. That picture was my first test with a Dremel to make sure that it would even work, and it did.
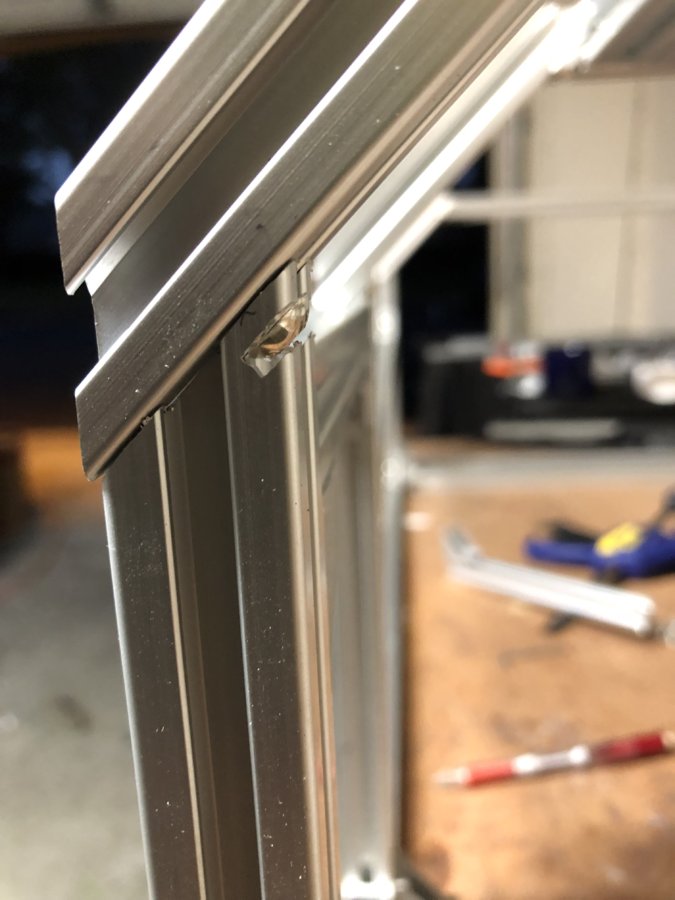
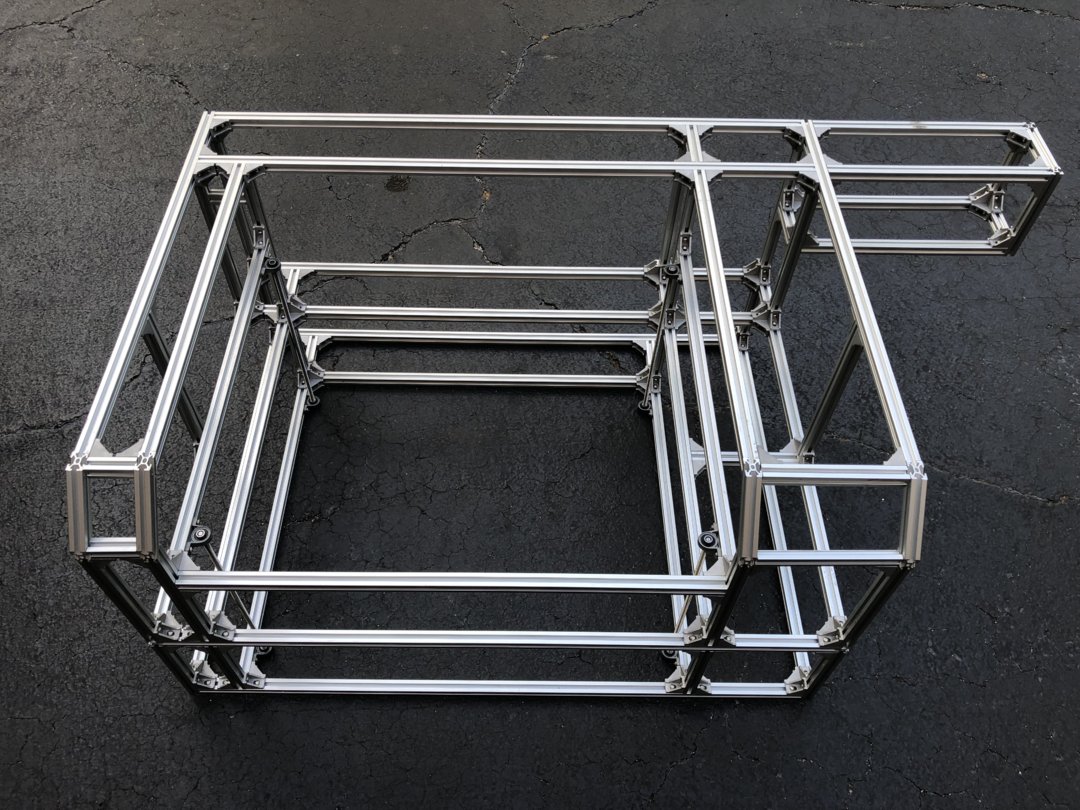
Here is how it looked assembled and from the side.
And then here is her evolution
Ignore the e-stop. It's not going to be placed there.
Apparently, I forgot to take pictures while putting on the linear rails but it really wasn't that exciting.
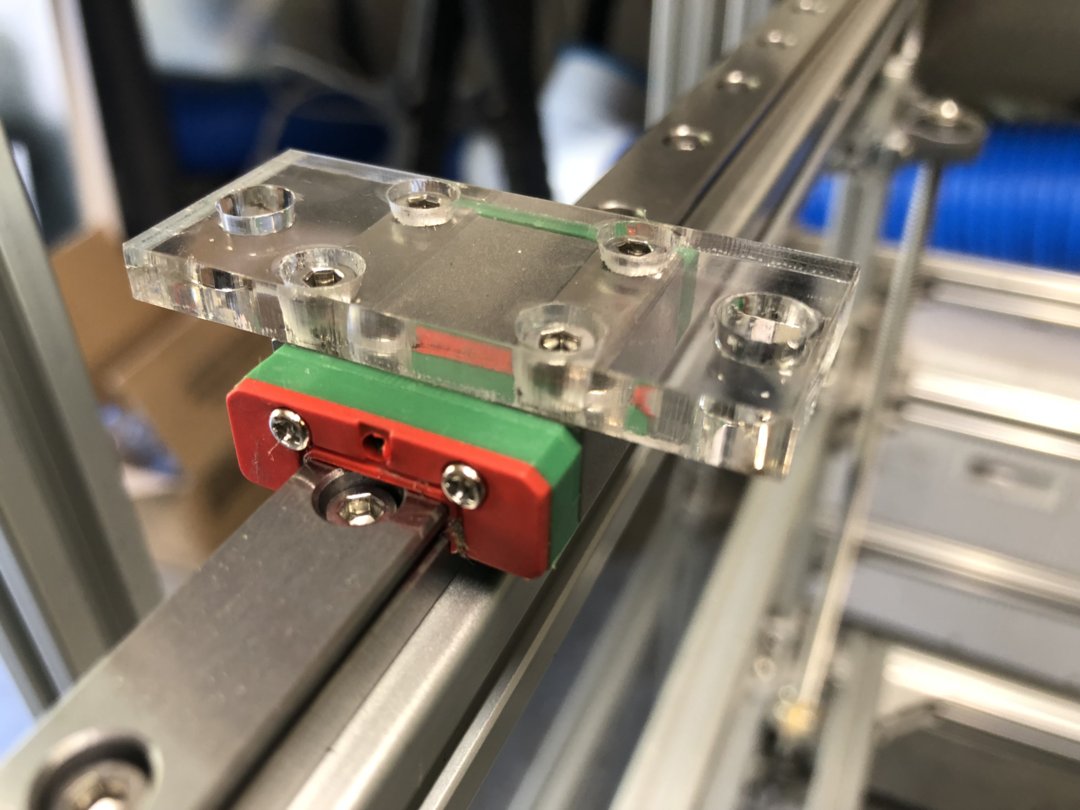
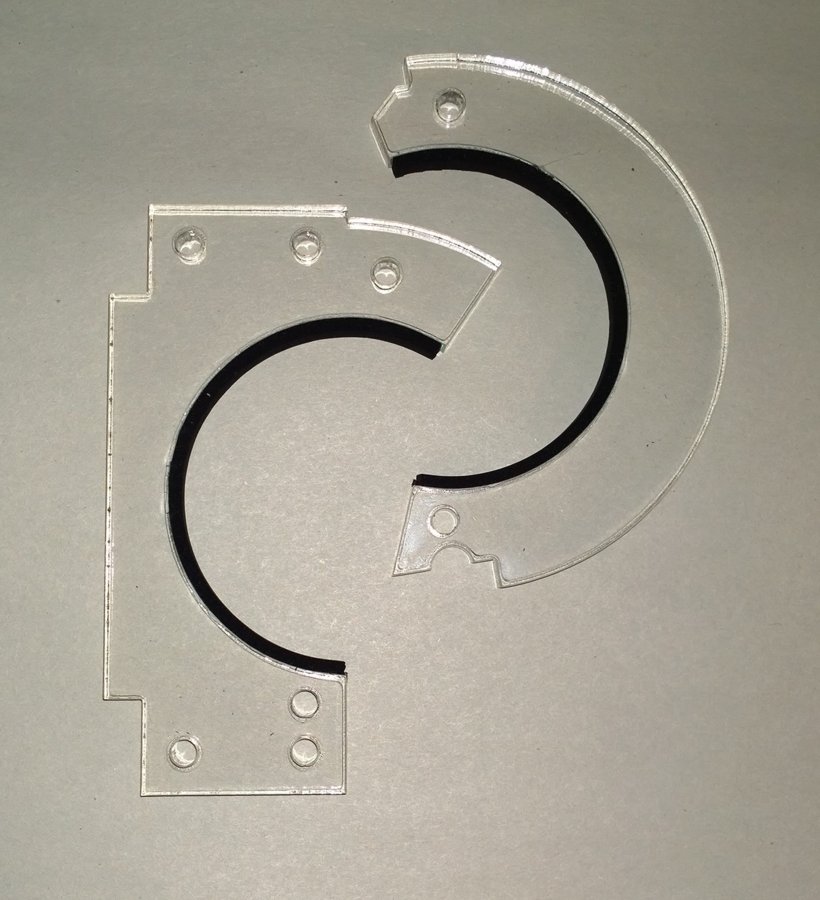
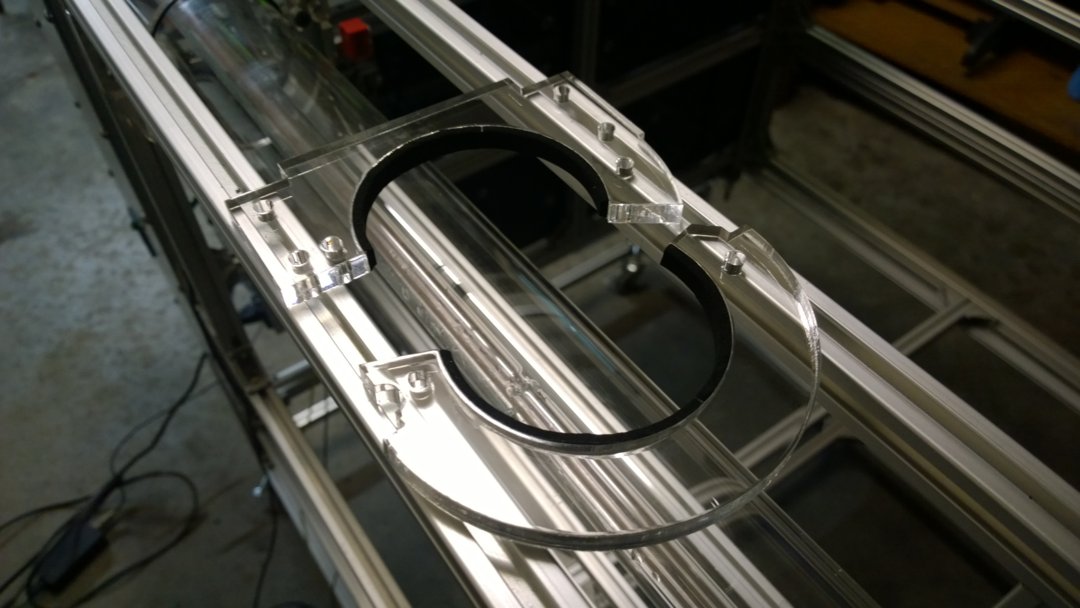
The next puzzle to solve was how to attach the MGN12C Carrier block to the X-axis beam. Luckily I do already own an 80W laser cutter so I went ahead and took some measurements and cut me out a pair of brackets out of 5mm acrylic I had laying around. Made the 4 3mm holes so that I could attach it to the block, and then put two 5mm holes on the extending part so that I could then attach that to the X-axis beam.
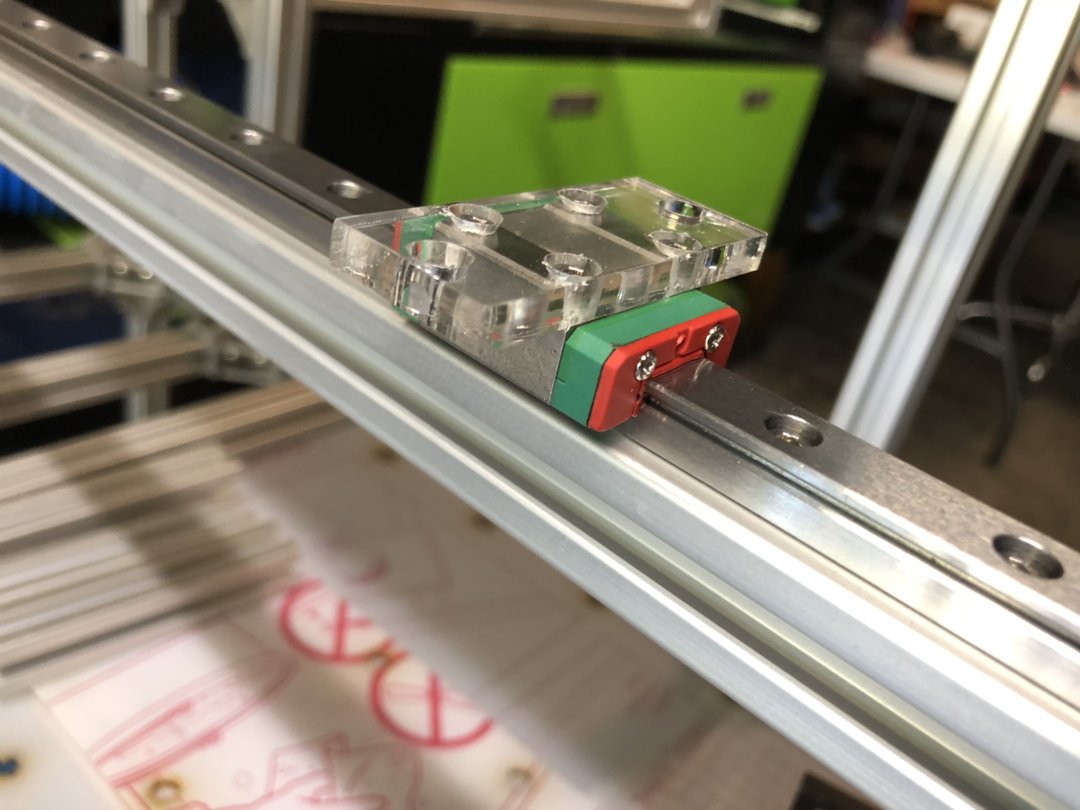
I did something similar for the bracket that holds the laser head and then went ahead and attached that to the block and then to the rail itself.
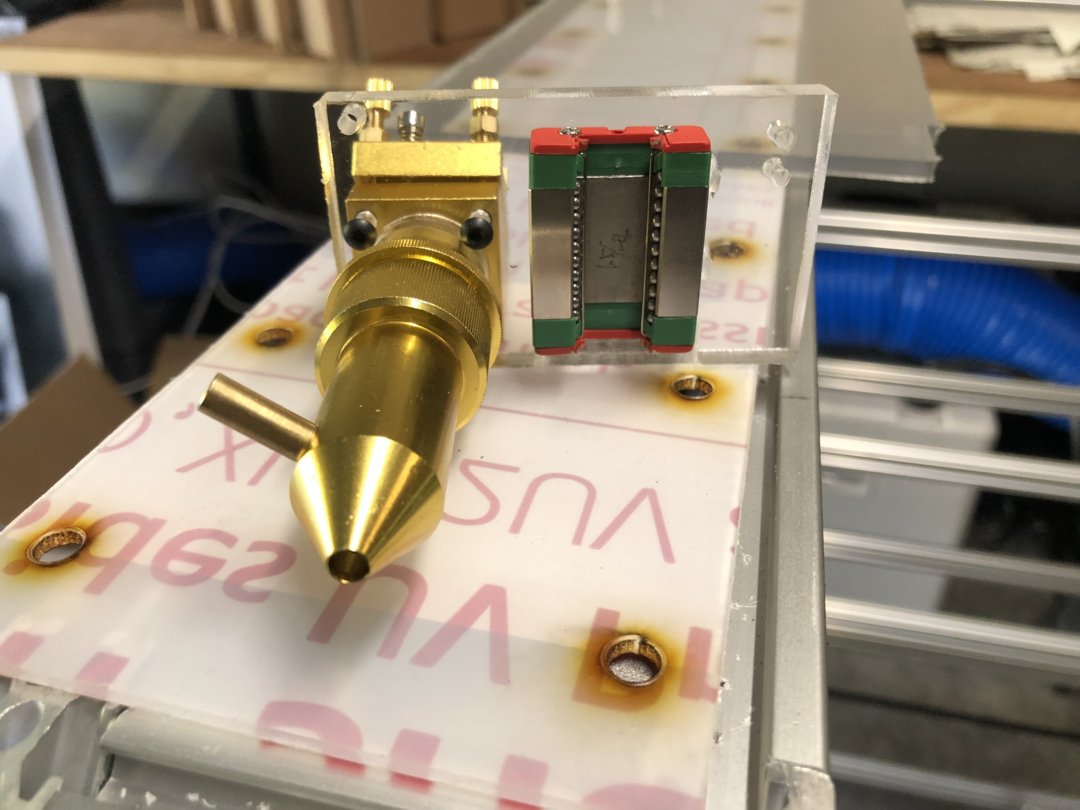
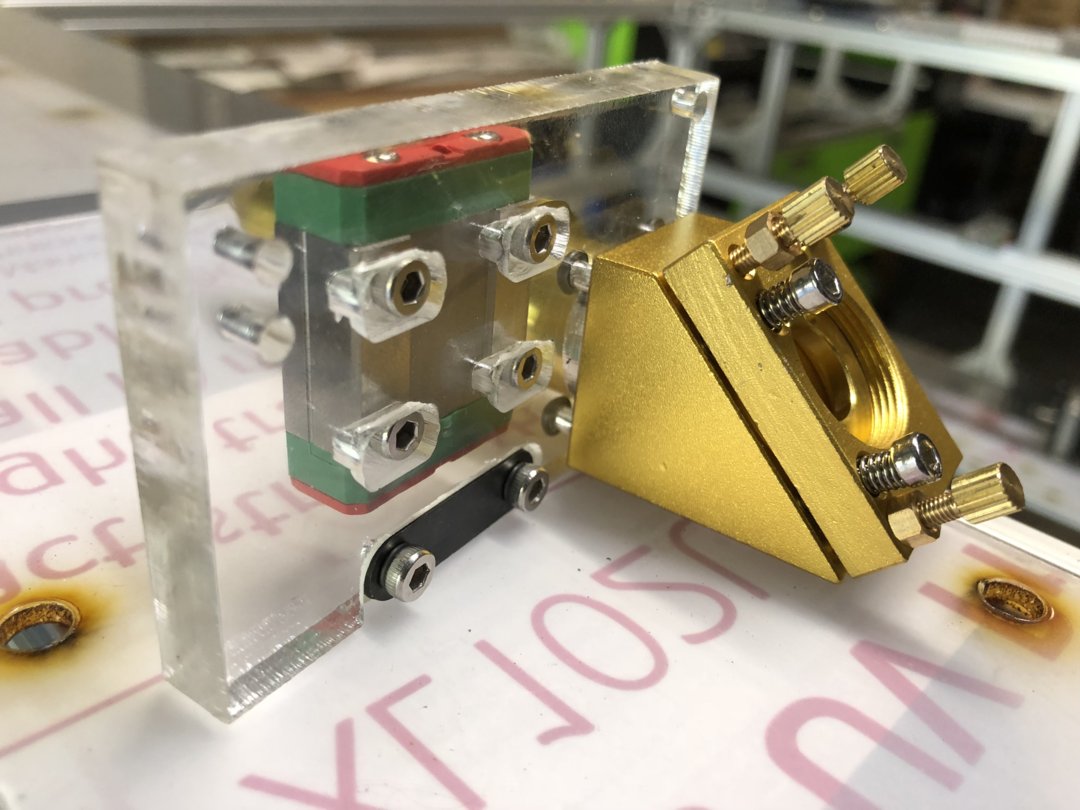
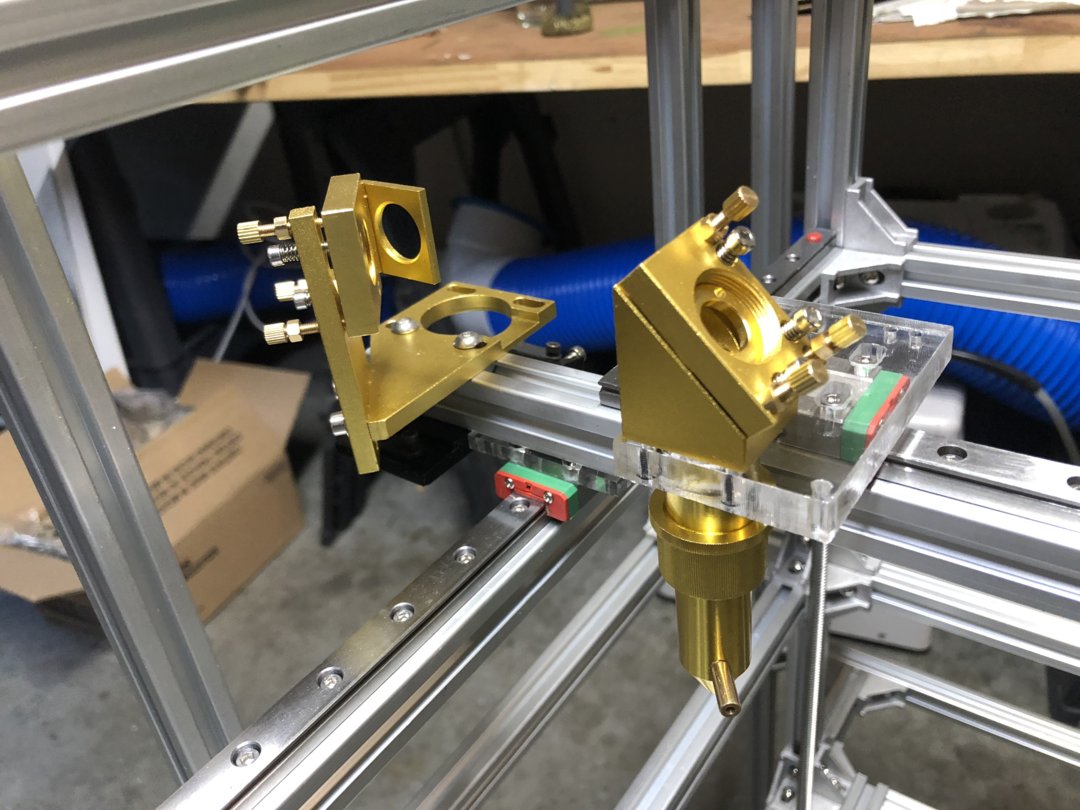


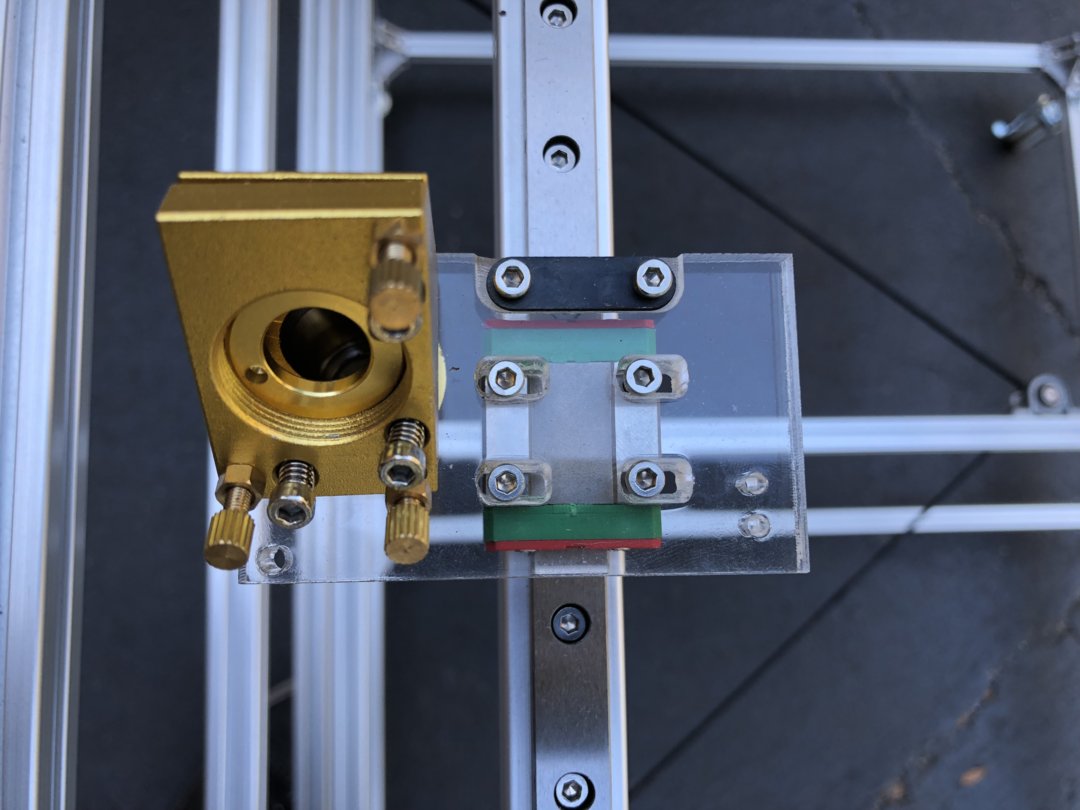
My plan is to eventually in the future replace those parts with aluminum parts but if it ain't broke...
Also one last thing until my next update.
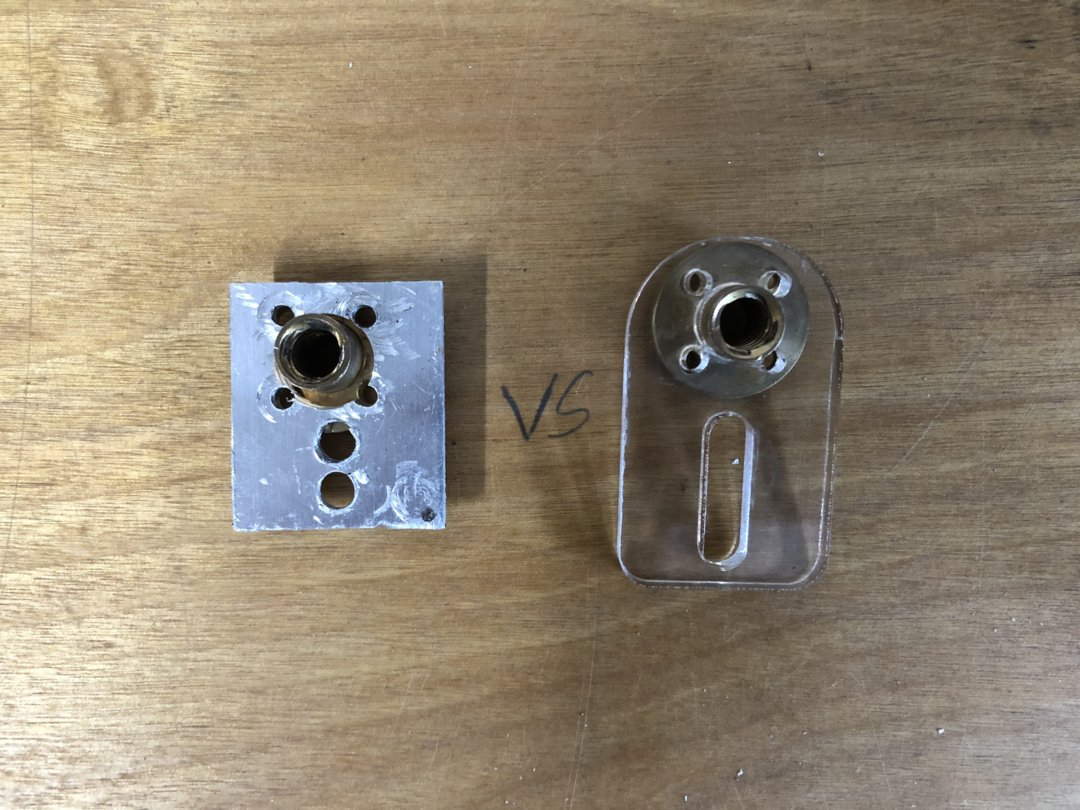
The left was the brainchild of 4 hours a sleep every night for about 4 days straight, the right was what I came up with after a full nights rest. Sometimes it is better to just stop working, step back and rest, it pays out in the end. That's the nut plate that attaches to the lead screw / z-axis bed which I still haven't entirely worked out. Those pictures are coming soon.
Update 12/23/18
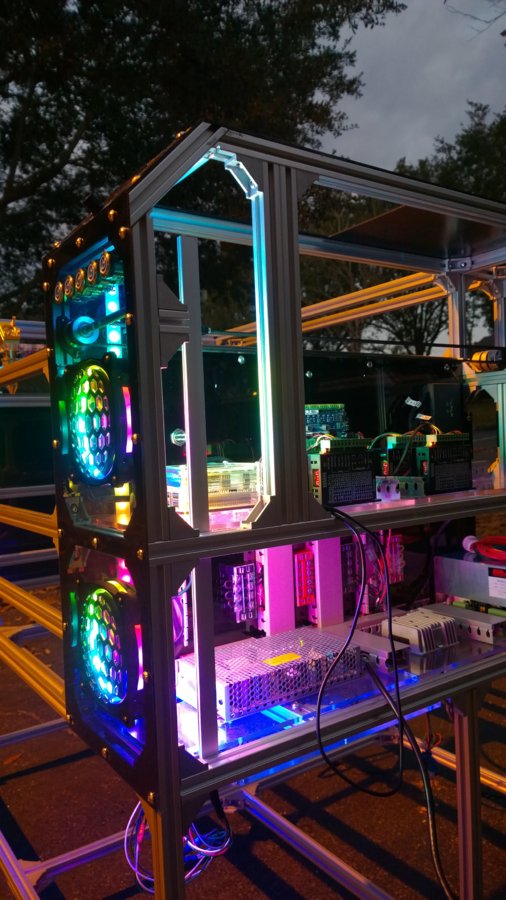
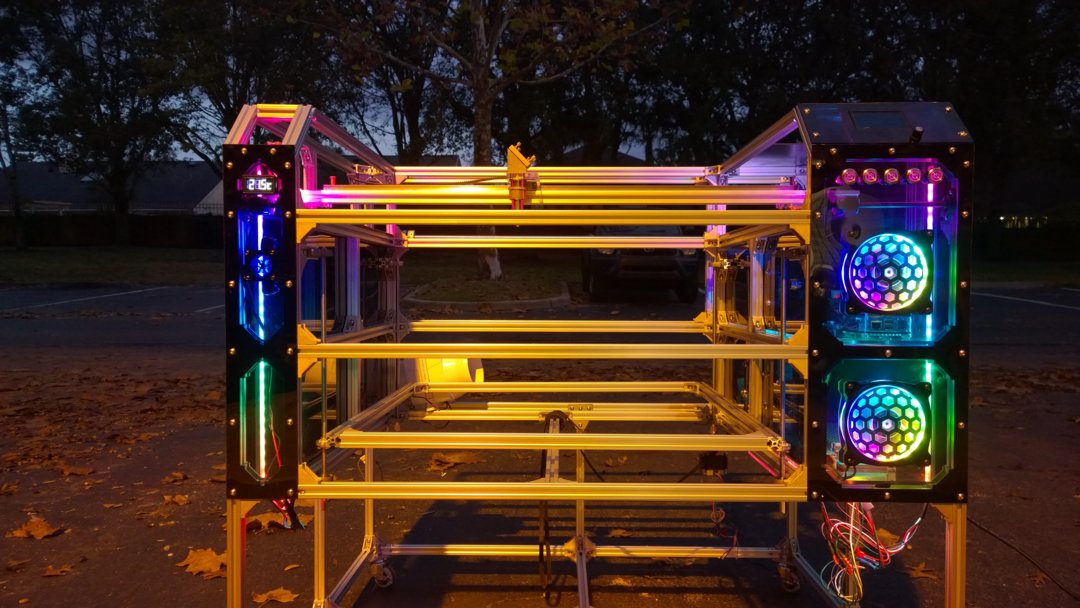
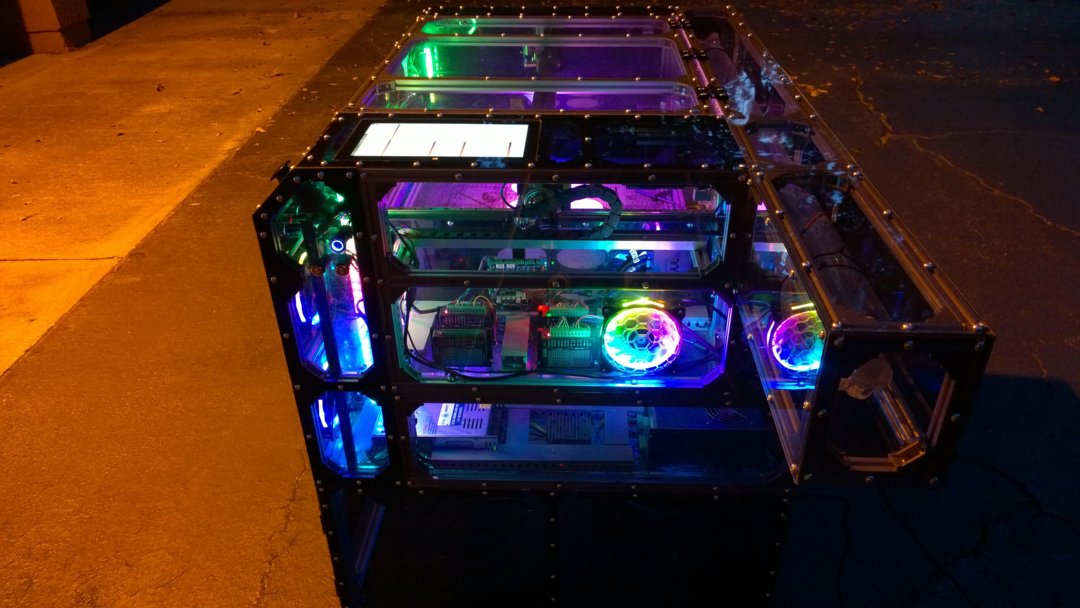
So I haven't been able to work on the machine at all these past 2 weeks but it did give me time to think about the overall look of the machine. I usually paint everything sublime green and black and I wasn't sure whether I wanted to the do the with this one.
These are my past two laser machines, the original K40 I bought ages ago, and the current 80w laser that I never finished painting.
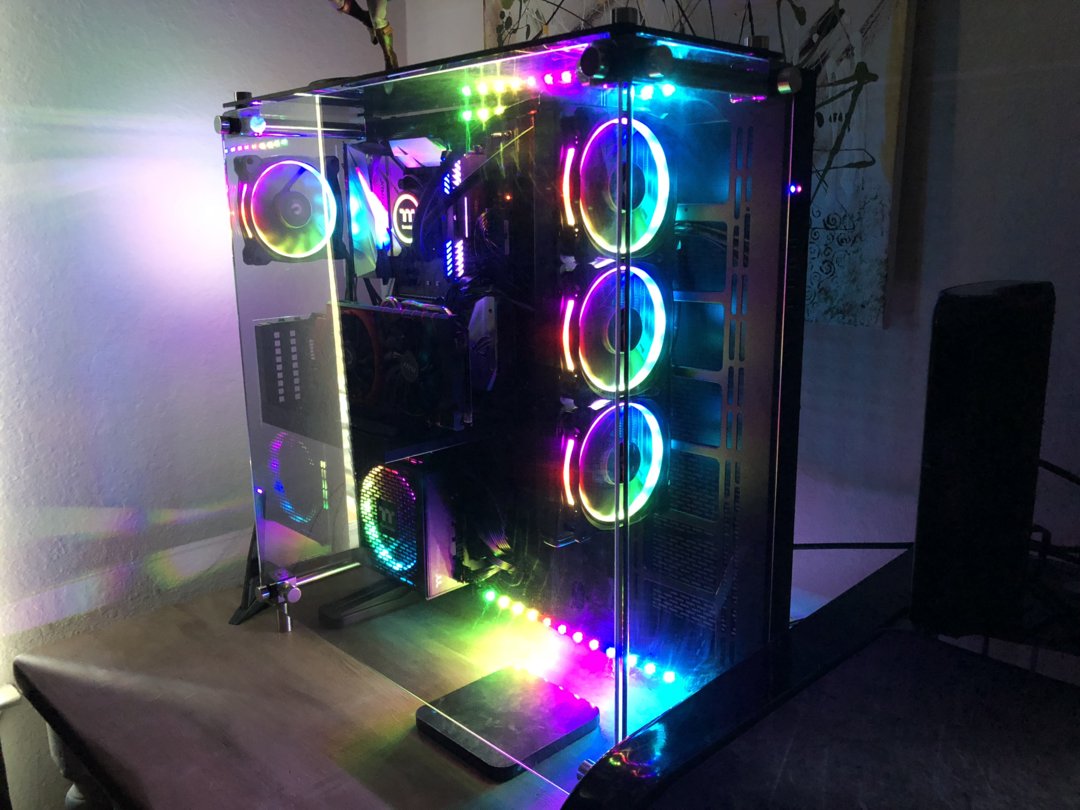
For this build, however, I'm drawing inspiration from a pc I built earlier this year. It's all basic crap on the computer but I love the case and I love the RGB Fans that I have so I'm going to make something similar.
I understand that making my laser flashy will not improve performance but I'm going to be using her every day and I want to make sure that she is aesthetically pleasing.
Everything is still in the prototyping phase. I love the way the extruded aluminum frame looks and I didn't want to cover up all the work that I've done so I took inspiration from the LAYZOR build and I bought 5% Window tint and I covered a piece of Lexan with it to be used as my front panel. I wanted to be able to somewhat see the inside of the machine but I didn't want it to be just clear Lexan on the machine.
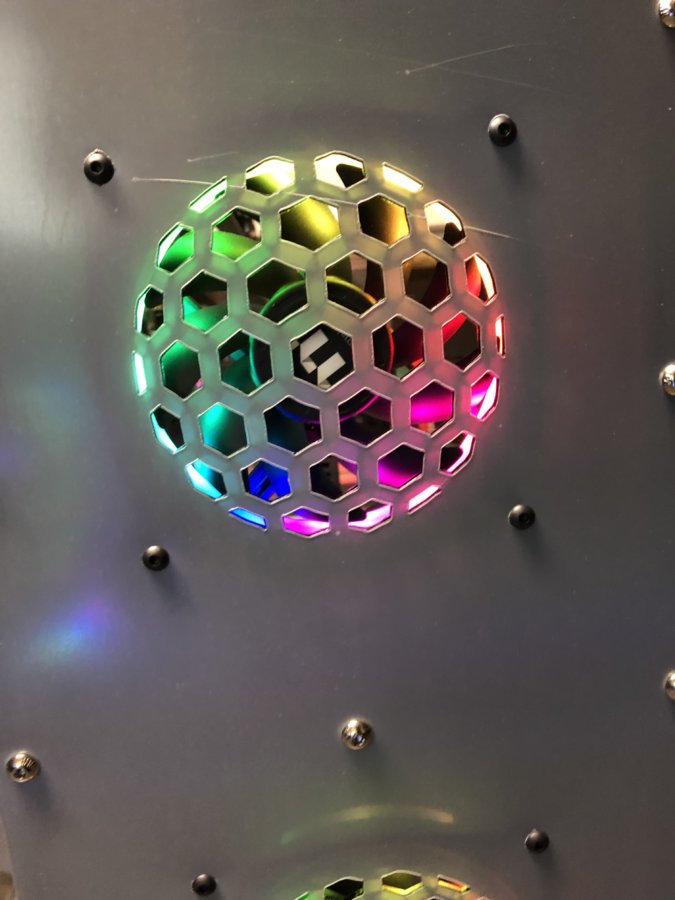
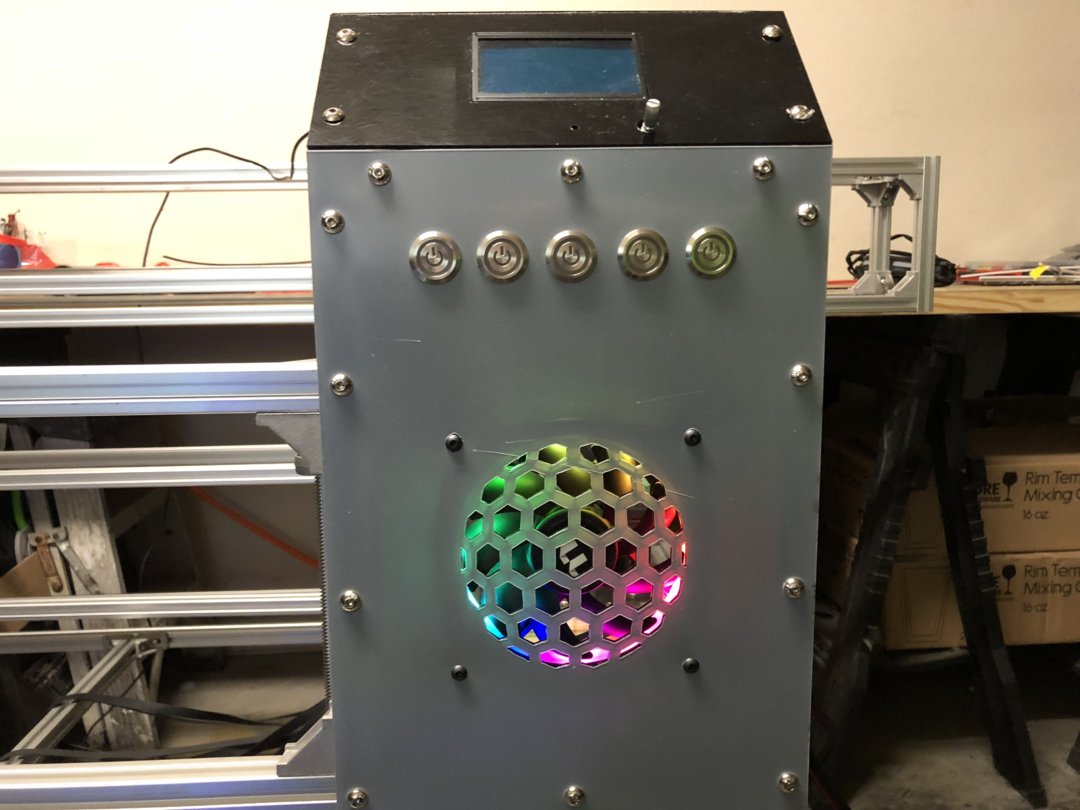
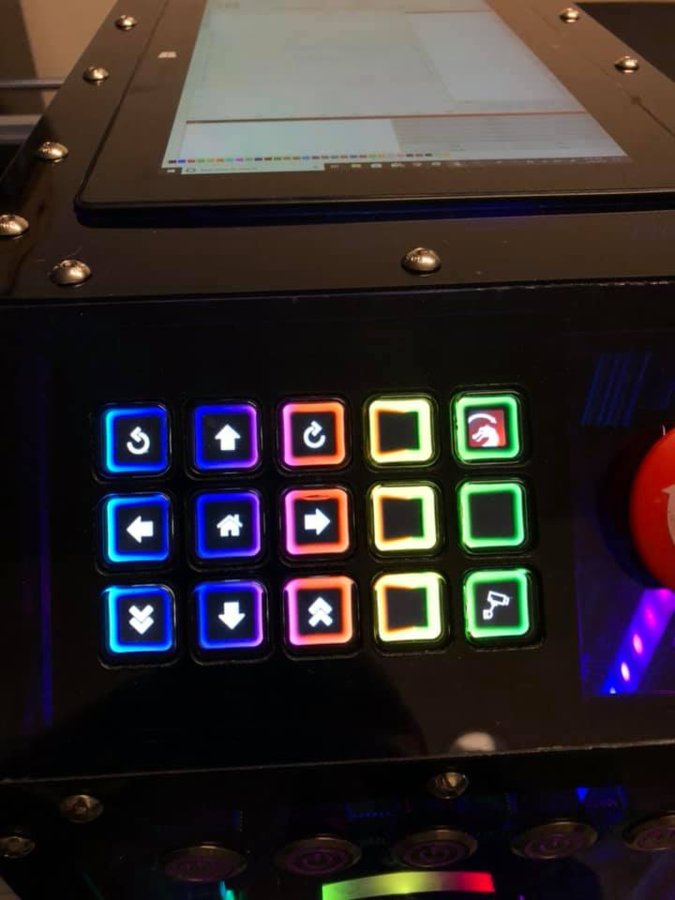
I cut 5 holes for buttons on the front of the machine to control the air assist, water pump, exhaust, and other peripherals, and I'm going to be using two Thermaltake Riing 12 pc fans to pull air in. This was my first test and it turned out fairly well.
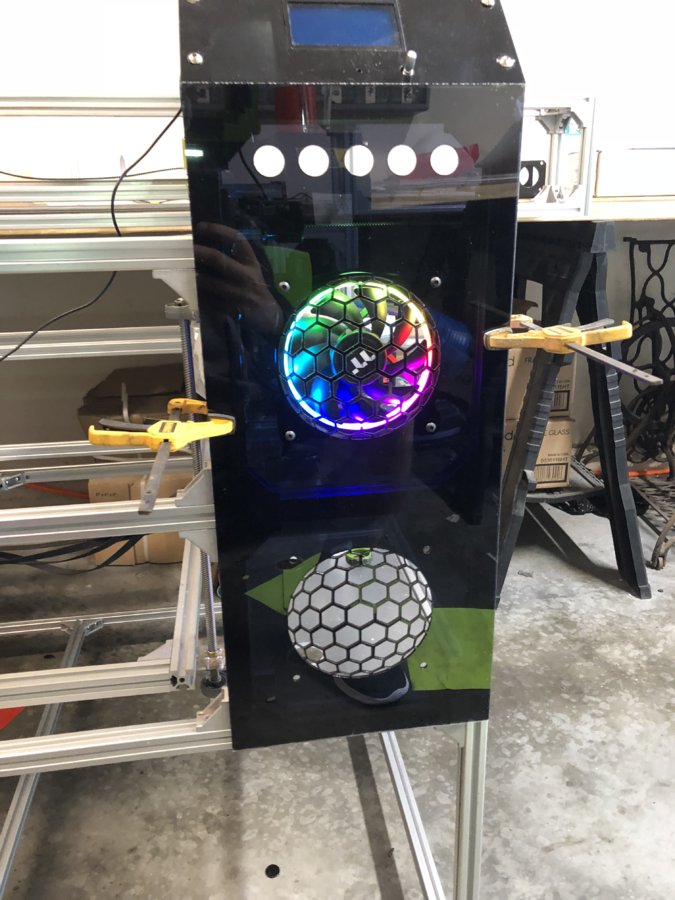
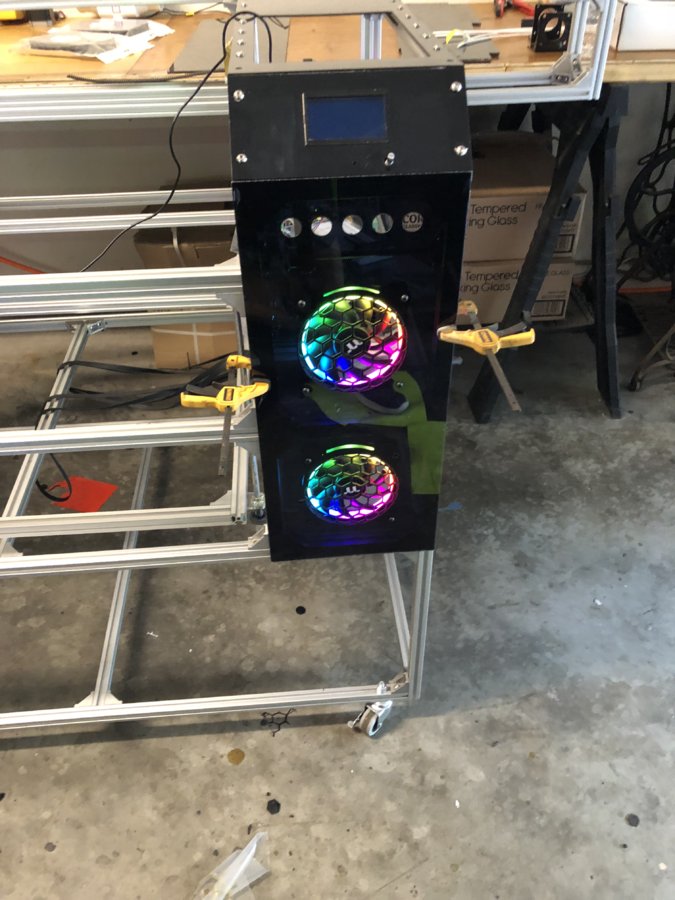
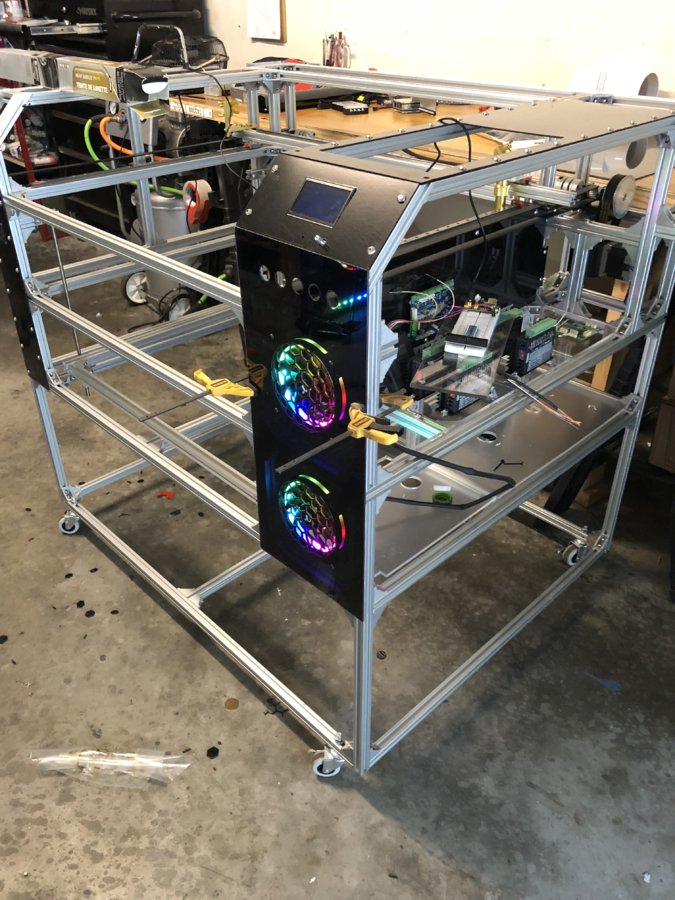
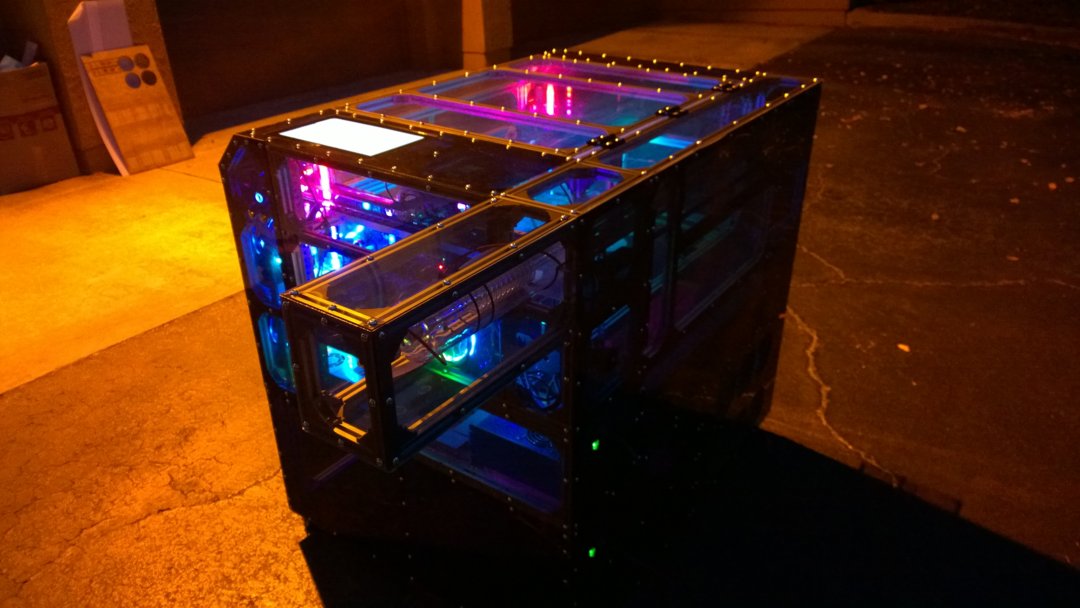
I ended up redesigning the front panel a bit. I made the grill part thicker instead of the thinner lines. The protective film is still on the panel so that why it looks grey.
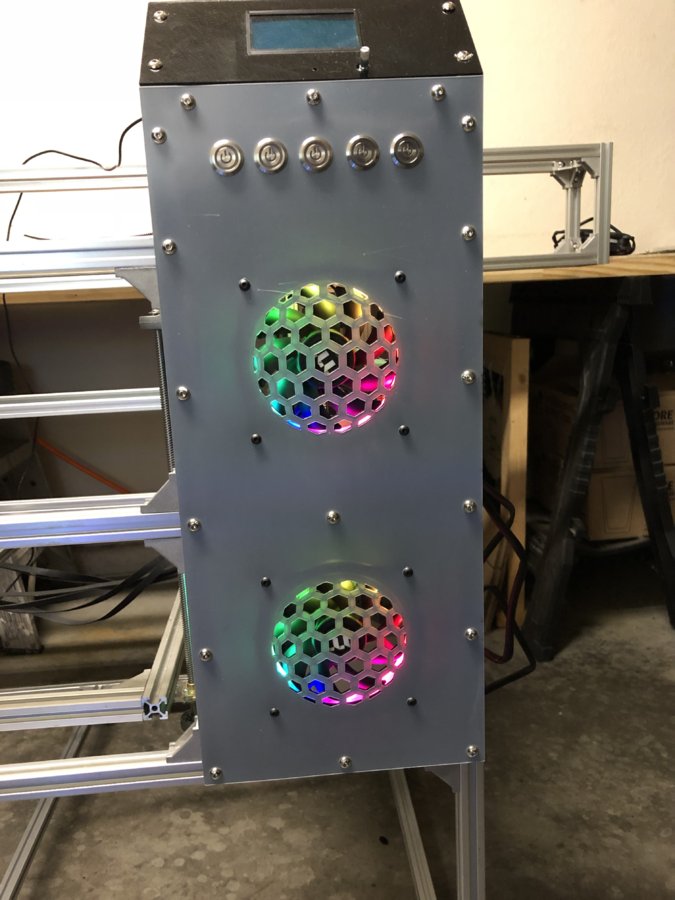
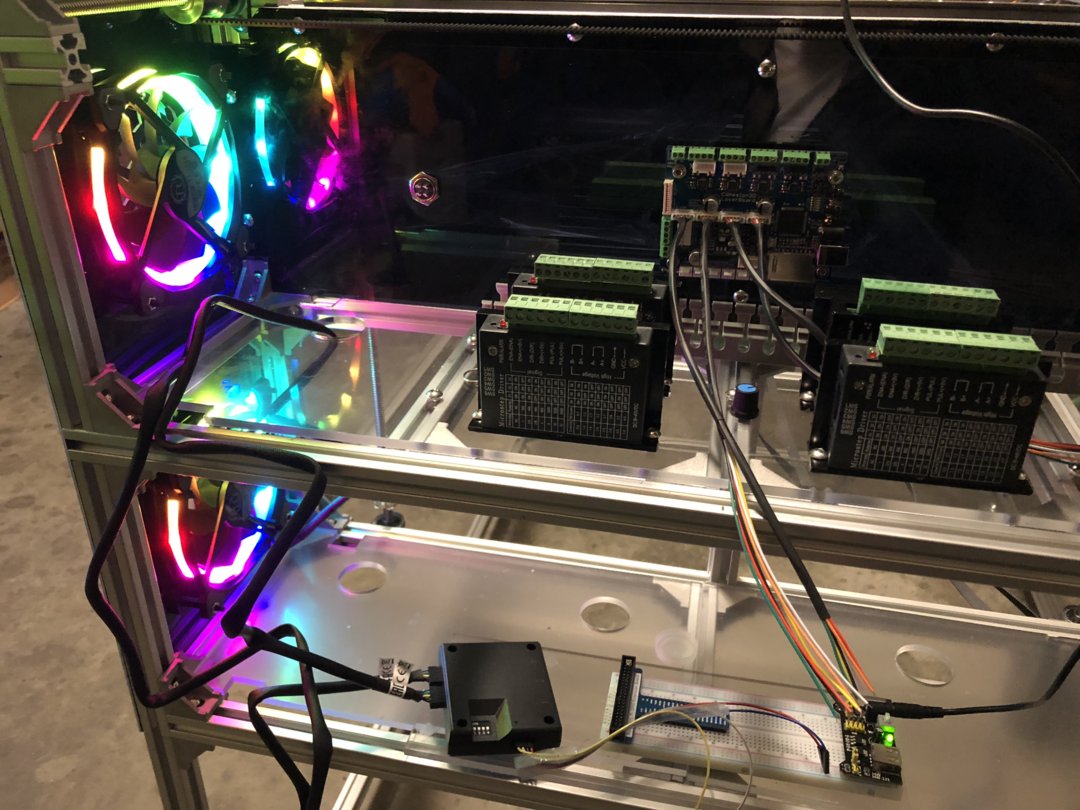
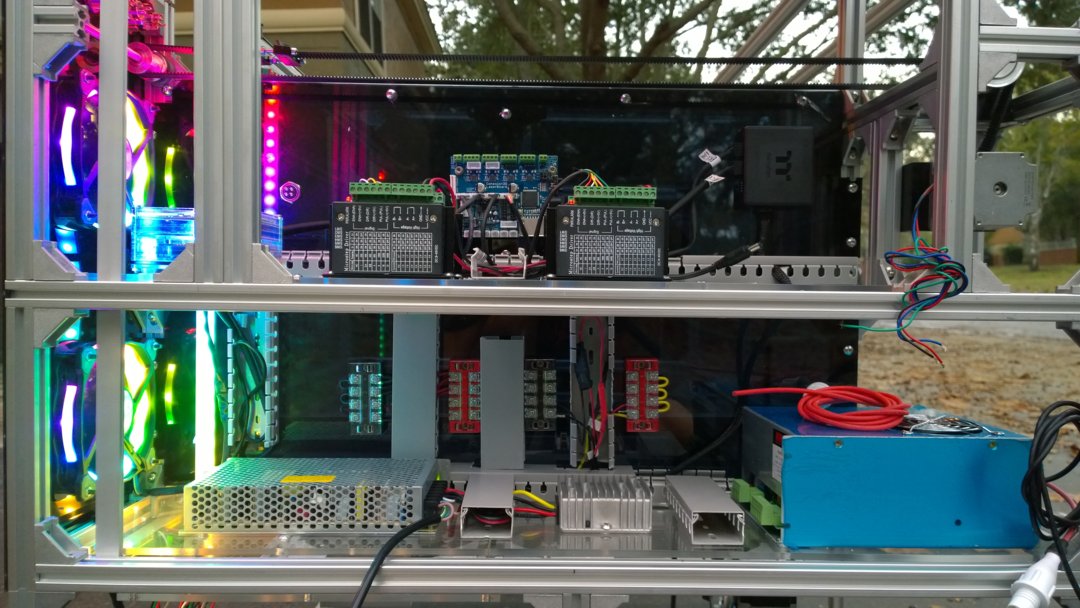
I'm using a breadboard to power the 5v rail of the fans to power the light. Later on, I will power the 12v side to actually power the fan. I also went ahead and mounted the control board (using the Cohesion3D LaserBoard) and placed the external drivers where they are are going to go.
Update 01/02/19
I went ahead and added a little bit more lighting to the build and I'm happy with the way it looks. I got a strip of addressable LEDs off of Amazon and bought a raspberry pi 3 to control them. Here's how it looks so far.
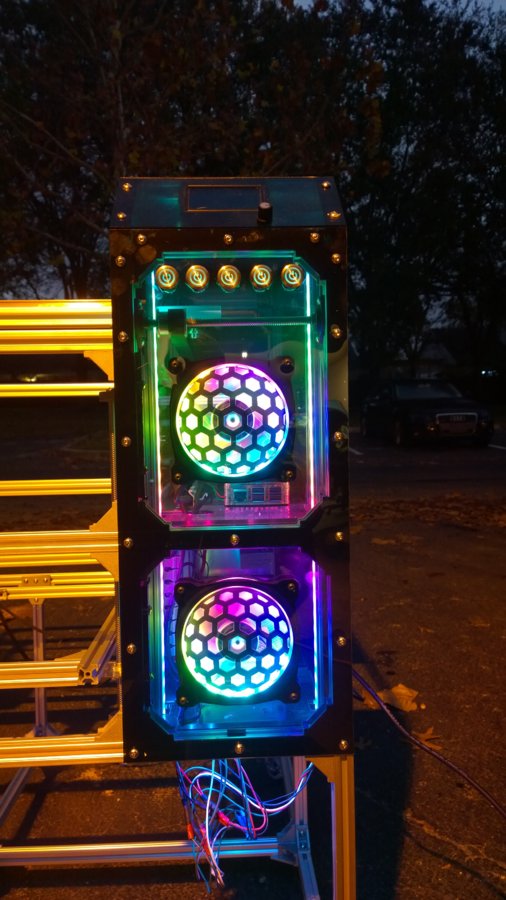
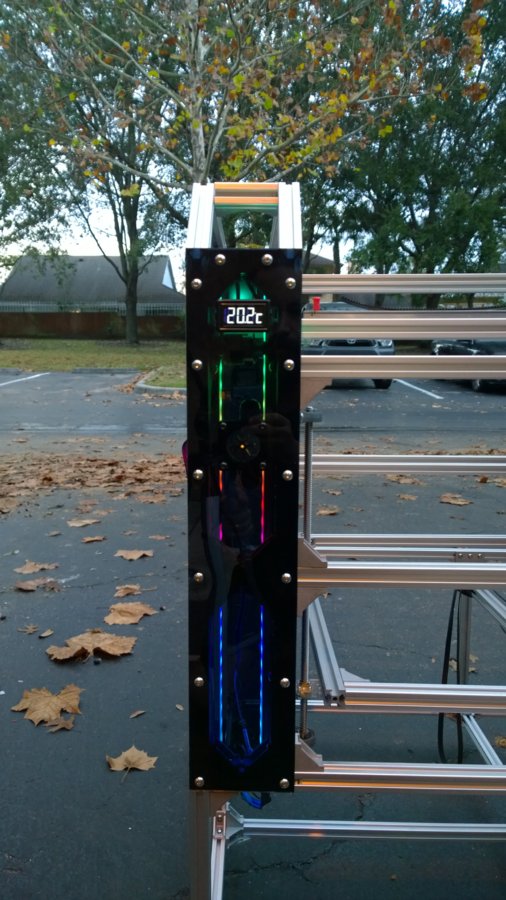
I added a temperature gauge for the water on the left panel and its connected to a water flow indicator which you can't really see in this picture but the idea will be that once I push the button to turn on the water pump, a white LED light will illuminate behind the flow indicator thus glowing through the tinted panel and then you will be able to see the indicator spinning while the water is flowing through it.

I had never messed around with a raspberry pi but they are pretty neat. The reason why I added all the lights to this build other than to make her look pretty, was because I wanted to get out of my comfort zone and I want to try to learn new things and I have. It's pretty crazy how many things you can do with those computers. It will all come in handy for my next build.
I'm also working on my electronics cabinet and it's almost done (or so I keep telling myself). With the exemption of wiring the motors, end stops, and making all the buttons on the front panel work... and connecting the laser, everything else should be wired up and I have all my cable raceways in place to manage all the cables.
01/07/19
So a quick update on the progress of the machine. Only text for right now, I'll add pictures later.
So the machine is coming along great I'd say. I was stalling because I needed a bracket to hold the stepper motor for the X axis and I couldn't find anything that was just right so I had to fab my own out of acrylic. It actually turned out quite nice and I can replace it in the future once I get myself a milling machine. But with that finally in place, I was able to put the belt on and that I went ahead and wired the x and y stepper motors so I could finally test the sucker and IT'S ALIVE.
I was able to jog the motors for X and Y via LightBurn, and although one of the directions was inverted and I'll have to swap two cables around, I'm happy with the progress. Definitely a milestone for my build.
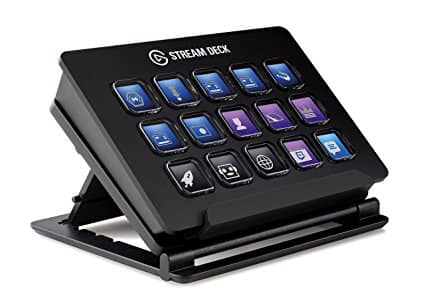
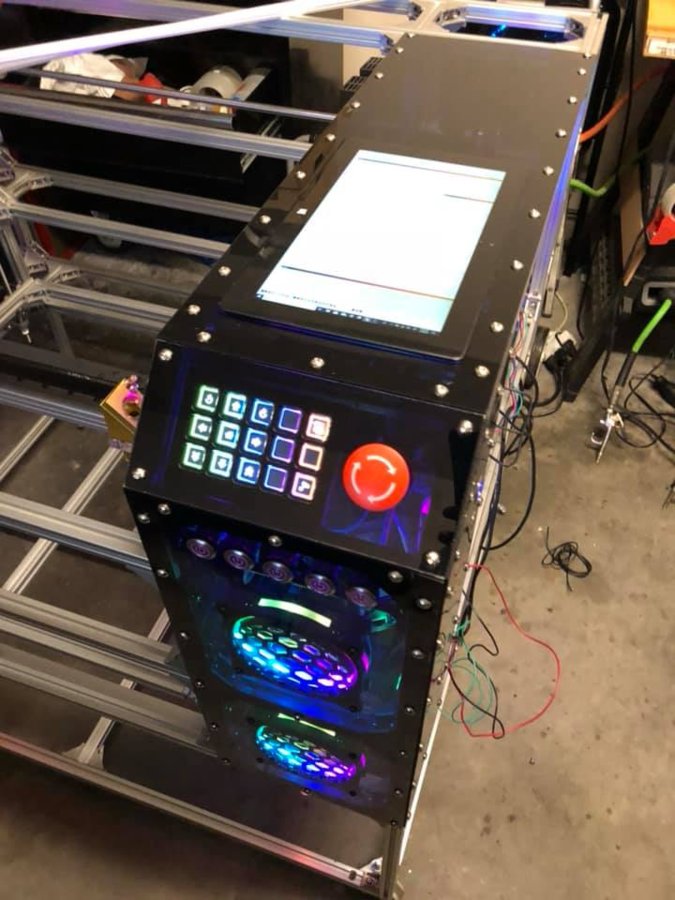
I also decided to do away with reprapdiscount controller. When I first started the build it made sense but all my plans have changed and I will do without it. Instead, I will be adding an ElGato Streamer Deck controller that has 15 buttons that can be macro-ed out and that will go connected to my surface pro, and then in part control the laser via the LightBurn software. The Streamer Deck is just a fancy 15 key keyboard. The neat thing is that each key has its own LCD display so you can use an image as the background of the button. So I can put arrows and use them as my directional buttons, or I can use the LightBurn logo and use it as a quick launch.
I can finally see the end of the build but psychologically I'm not ready for it to end. This thing has consumed so much of my brain power for the past month and a half that I feel like once I'm done with it, I'm not going to know what to do with myself... until I figure out my next project or start playing Smash Ultimate or Fortnite again.
01/09/19
Quick update for anyone for anyone that read my last post. This is an ElGato (now part or Corsair) Stream Deck.
And here is how it looks once I mounted it to my machine and added a few buttons.

01/15/19 Update
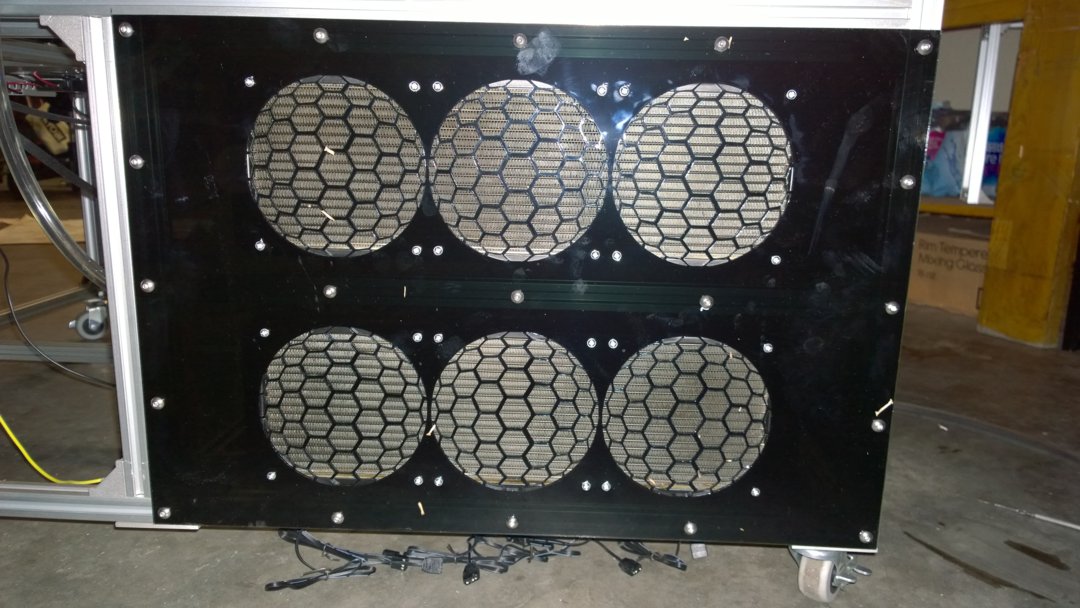
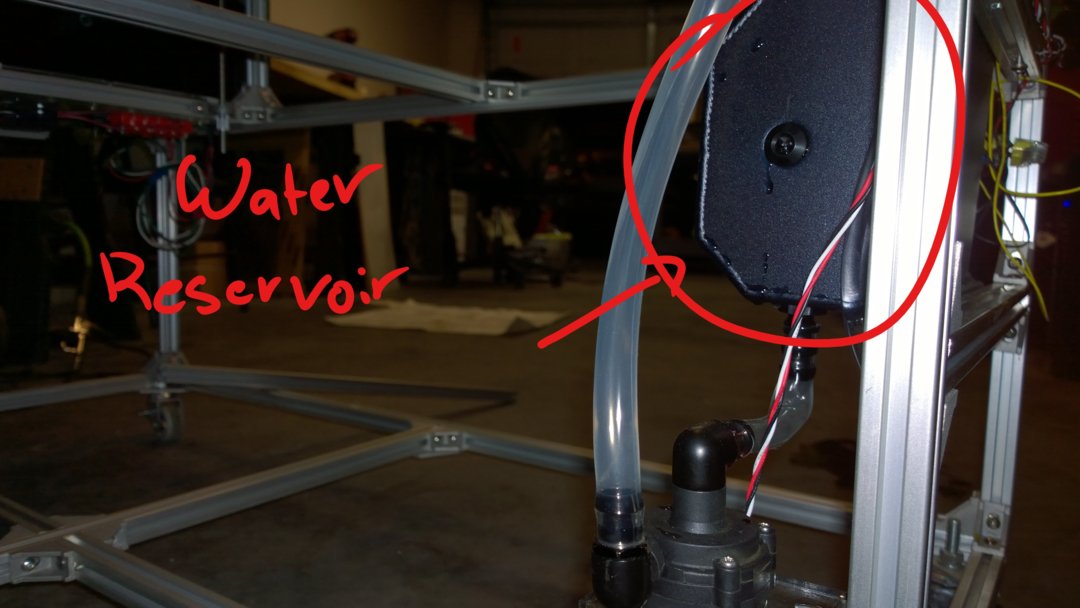
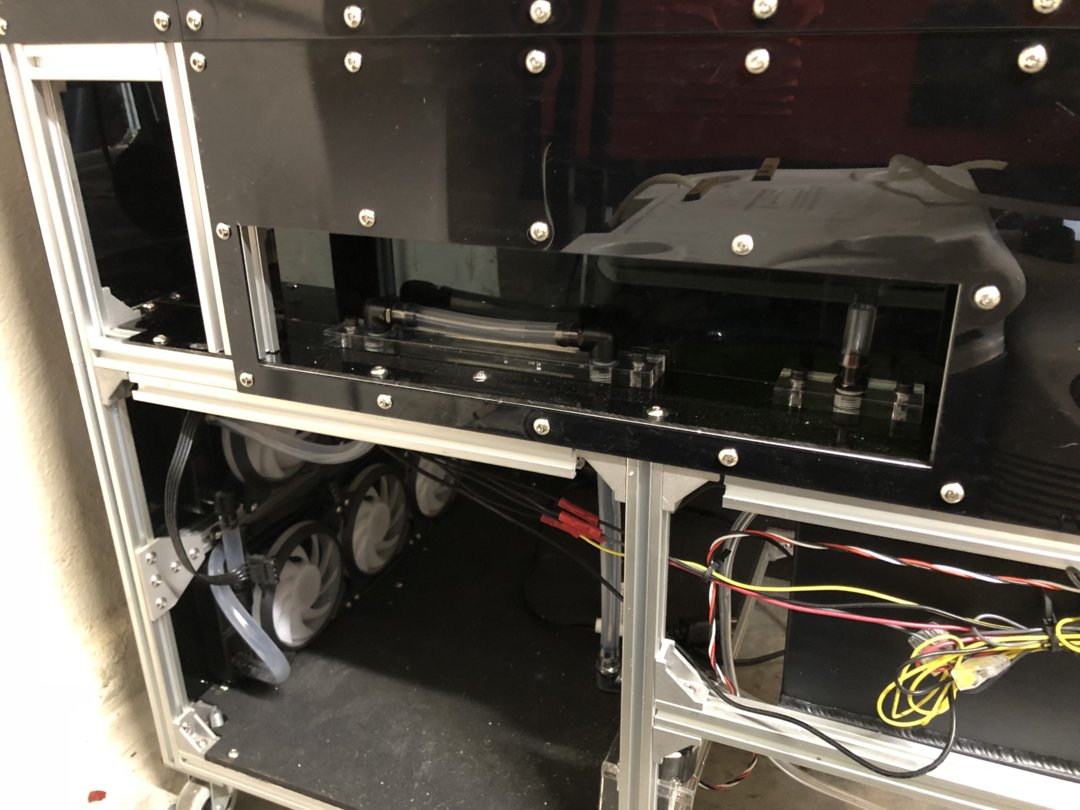
Alright, so I'm getting closer and closer to finishing this build. Today I added a few more things to the machine. Added a Water Pump, a 1L Water reservoir, and an inline water pump, 2 360 radiators, and 6 fans to bring the temp down.
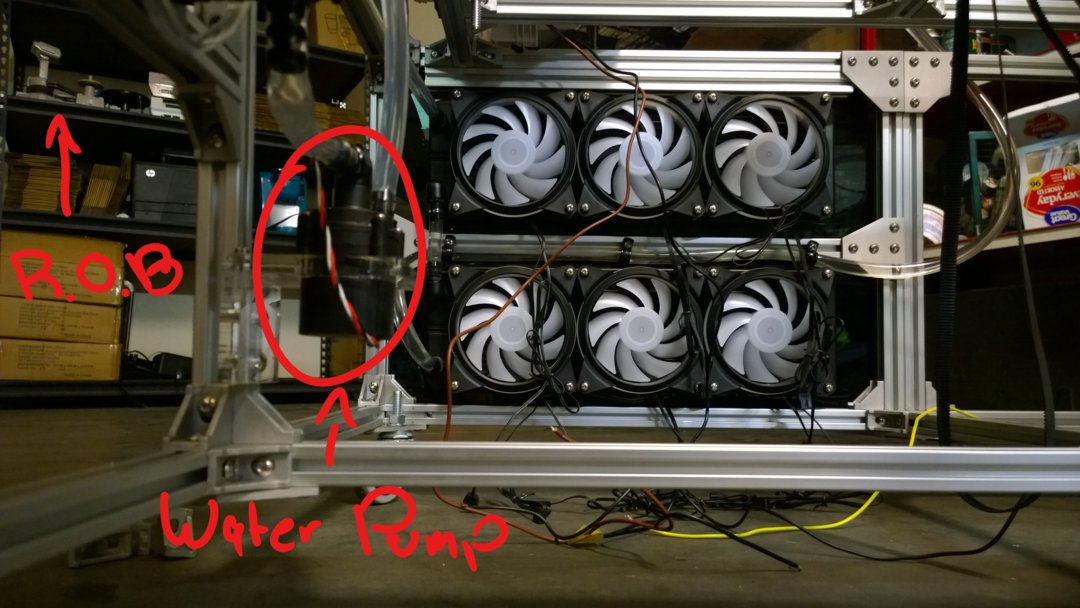

My 80w Chinese laser came with an extremely loud exhaust, air assist, and water pump, all 110v. My goal for this build is to replace all those peripherals with DC components so that I can eliminate all those loud components with much quieter ones and so that I can eliminate all those plugs and control everything directly from the laser (that's the purpose of all the buttons on the front of the machine.)
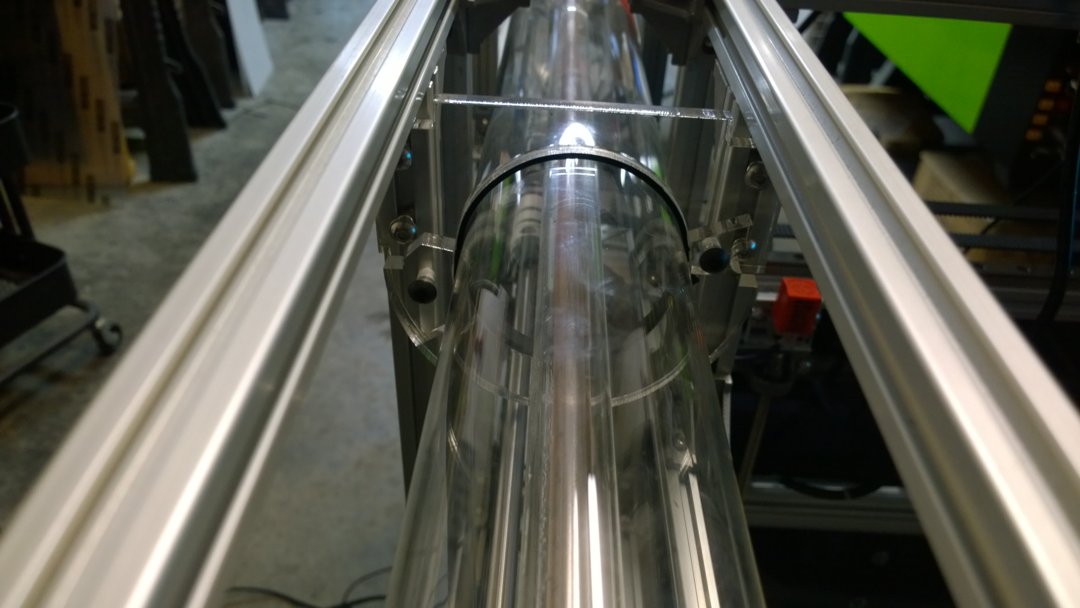
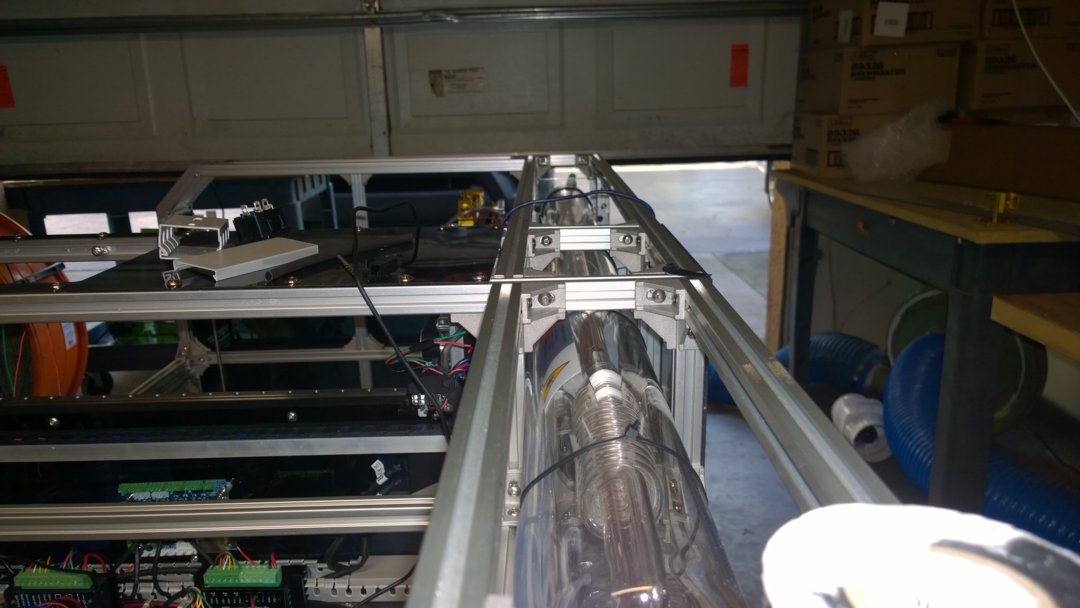
I'm also close to finishing all the wiring and hopefully, within the next few days I'll figure out a way to mount the laser tube on the frame.
01/17/19 Update
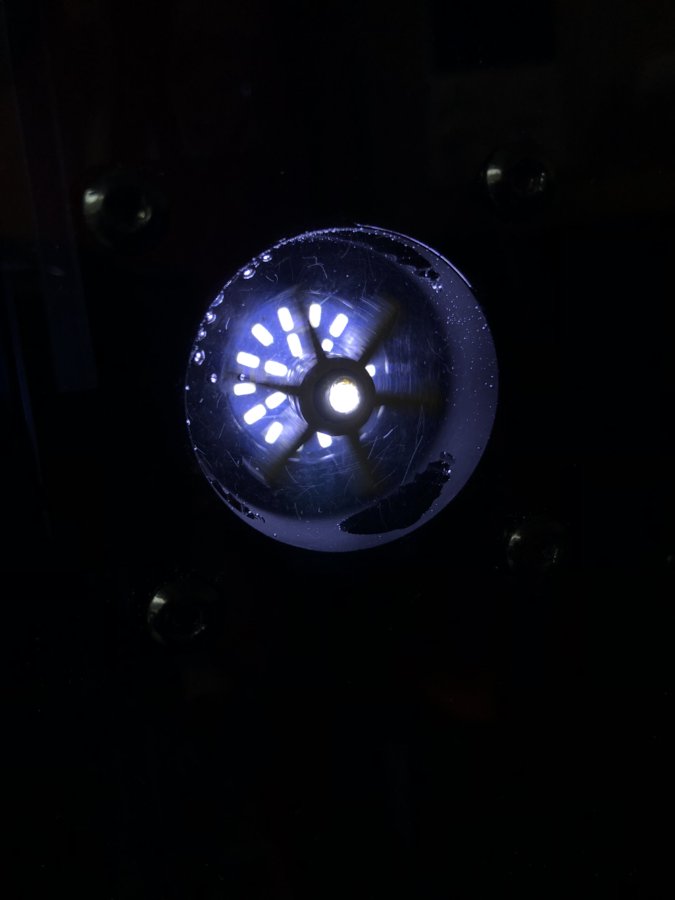
So I believe I found the solution for the laser tube. I ended up making my own brackets today. I cut them out of 8mm thick acrylic and it looks like it's going to work. I'll mount it and take pictures tomorrow.
Also, this is what the water flow sensor looks like once the water pump is turned on. Once I connect the laser tube tomorrow and actually finish the tubing, then I'll be able to add more water into the system and make it sound less like a toilet flushing when it starts up.
01/23/19 Update
As of 2 days ago, I finished running the cables that go to the laser head (for red dot or other peripherals) through the drag chain as well as an airline. I also have a 12v fan attached to the head but more than likely I'll end up scrapping that idea and use an air pump instead. I placed my limit switches where they belong, using NPN NO Proximity Switches, wired them in place, tested them, ran it and so far it all works. I'm using a Cohesion 3D LaserBoard as my controller and I ran into a few complications and learned a few things about the NPN switches and posted more about it in further detail at their forum.
Next step is to line up, square up, and tension the belts. I can jog the motors using lightburn right now and get the laser head to move, but when I try to start a job depending on where in the bed it is located, it grinds and loses a lot of steps but that’s another issue for another day. So far I'm pleased with the build.
02/01/19 Update
Alright, so a quick little update. So today I had some time to mess with the belts and with the tracking. She’s not perfect yet but it’s moving without grinding or missing steps so so far so good.
I also had time to finish making my Z table. Had to make it extra beefy because the only material I had to work with was more extruded aluminum but it turned out pretty good.
Here a little video of her moving.
03/02/19 Update
(I'll be adding pictures later on today)
Alright, so it's been a while. I wish I was a bit further along than I am but I ran into a few bugs with the controller and that just halted the production until I could figure it out. Using a Cohesion3D LaserBoard.
So I was having an issue with the X-axis. The laser would cut any design just fine, but if I sent it a scan job it would go haywire. It would cut a circle perfectly but if I send the same job as a scan, in the same spot the circle would start at the same bottom point but then it would bend and warp the rest of the way. I could never imitate the same pattern twice so I knew that it couldn't be anything mechanical. I was running GRBL 1.1
I redid some of the wirings to see if it was noise or something interfering with GRBL and nothing, tried EMI filters and nothing, shorter USB cable (6" !!!!) and the same issue. Checked all my mirrors, everything was leveled, belts were tensioned and un-tensioned and re-tensioned again like 20 times, was getting a bullseye on all 4 corners, looked for extra vibrations, etc, etc and nothing.
So I then moved to other components, maybe it was the microstep driver, swapped it and the same issue continued. So then I thought I had it. It had to be the motor, it was the last thing left to check. I swapped and just like that... the problem persisted. After almost giving up on life I decided to just scrap the microstep driver and connect the X motor directly to the controller and that fixed it.
I'm not sure why this happened but all I know is that I can now laser images without it looking like Michael J. Fox hand drew them. So with that issue finally resolved, I started the build once again.
I finished wiring Z, slapped on a 3M loop belt, tensioned it and I got Z working. At the moment I cut the bottom out of plexi so that the laser wouldn't cut the belt on accident but I will be replacing this with an aluminum sheet later. (This will make sense once I add the pictures)
Also since the laser was down for so long I had some time to think about issues that will arise in the future. Like the fact that I live in Florida and although the weather has been nice outside and temperatures have been pleasant this winter, SUMMER is coming and my ambient water chiller is not really going to cut it once it's 36 degrees C outside. So I started working on a workaround.
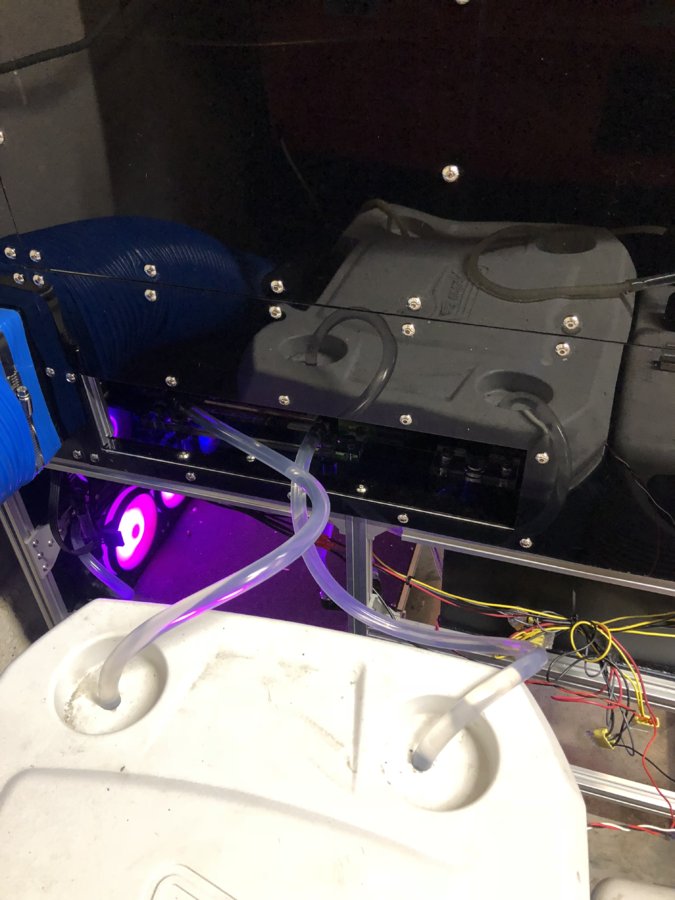
I decided to add water in / out ports somewhere on the outside of the machine so that I could have quick easy access to them in the future and I also wanted a fill port. Here is what I came up with.
The water pump pushes the water up, goes through the tube, then through the 90-degree elbow, goes through the horizontal tube in the picture, then past the other 90-degree elbow, then it goes down to the radiators. If I need to tap into the system now, all I need to do is remove that horizontal tube and run a line in and out to the two 90 degree elbows.
I then got an idea. I already own an actual water chiller that I use with my other 80w laser and I was wondering how I could use it with this machine while still keeping a closed-loop system. I have a water pump inside a 12-15 Gallon cooler that pumps water to the chiller, then a line runs in and out of the laser tube, with the return going back into the cooler. So I decided to start using my new bypass immediately. I removed the small tube, ran two lines for in and out and connected that to a small radiator and I then submerged the radiator in the water chilled cooler and it worked great. I still have a closed-loop system, the water in the radiator gets chilled by the water in the water cooler without them mixing. I tested the laser earlier today for 2 hours and the temperature never reached 26C
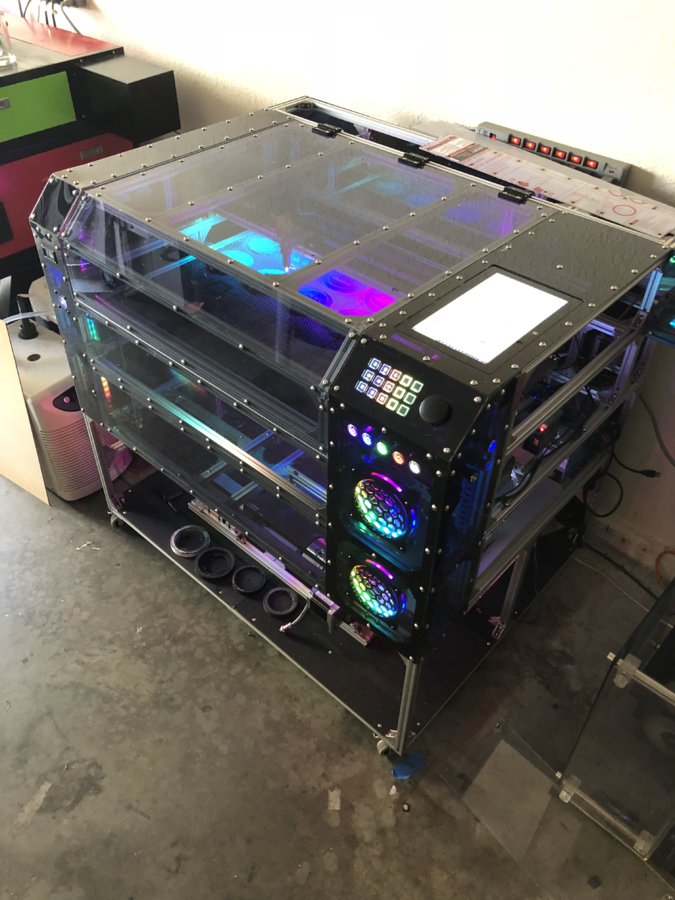
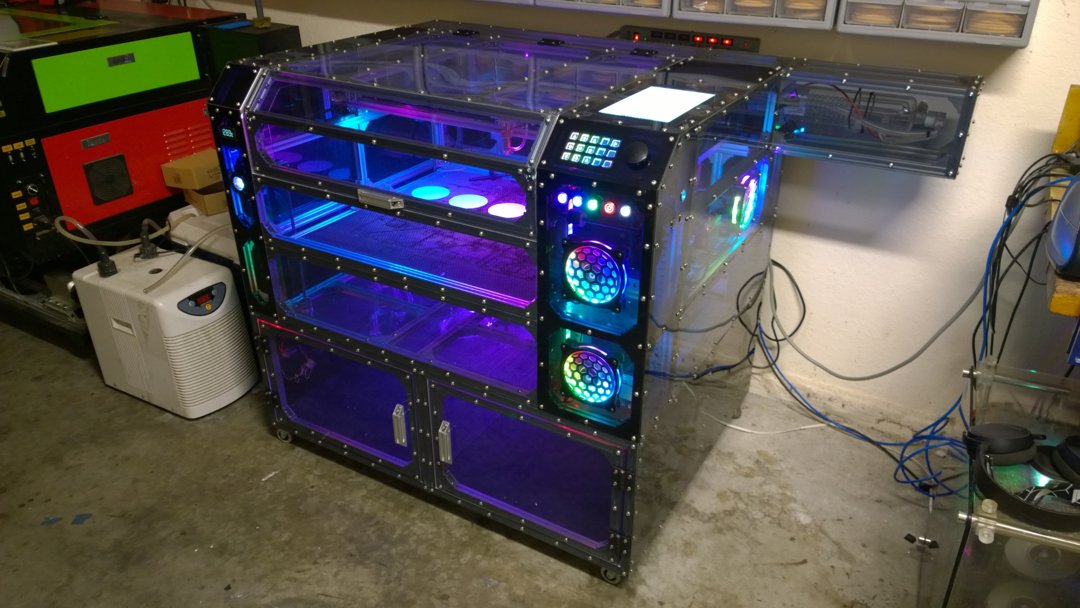
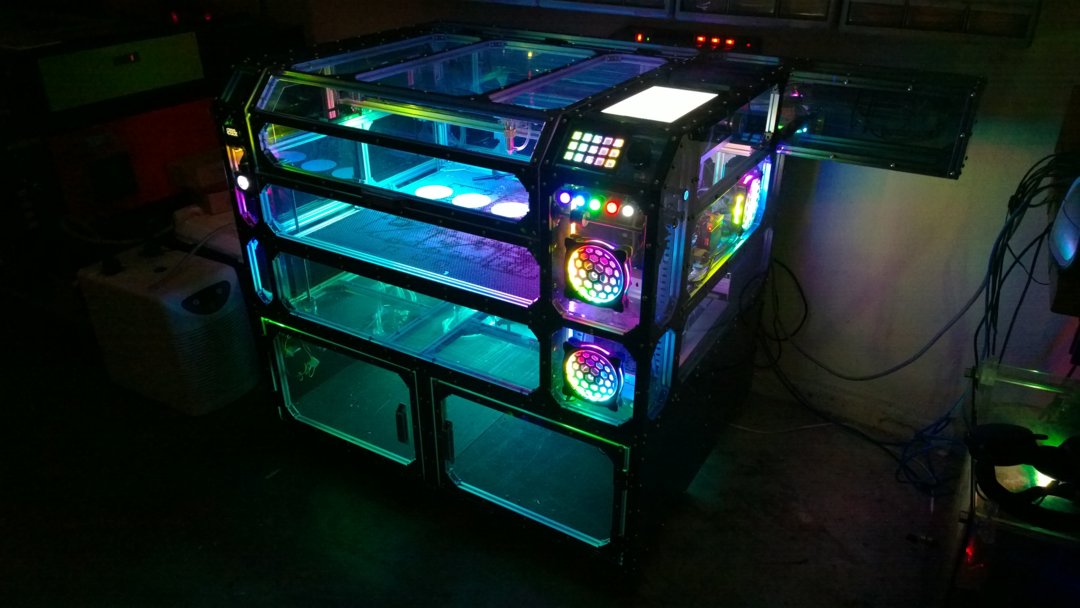
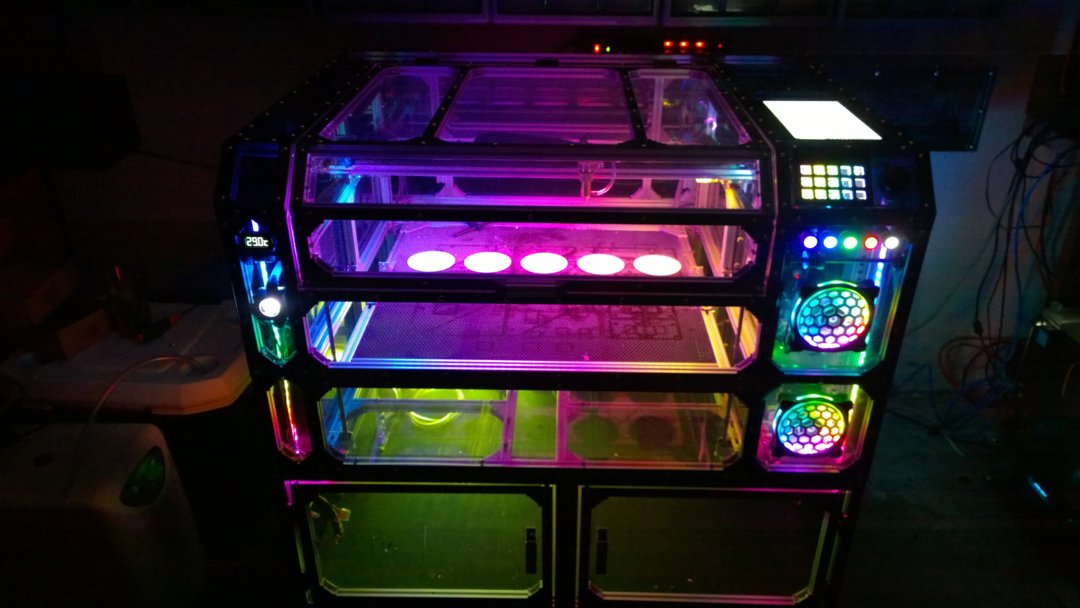
03/06/19 Photo Update
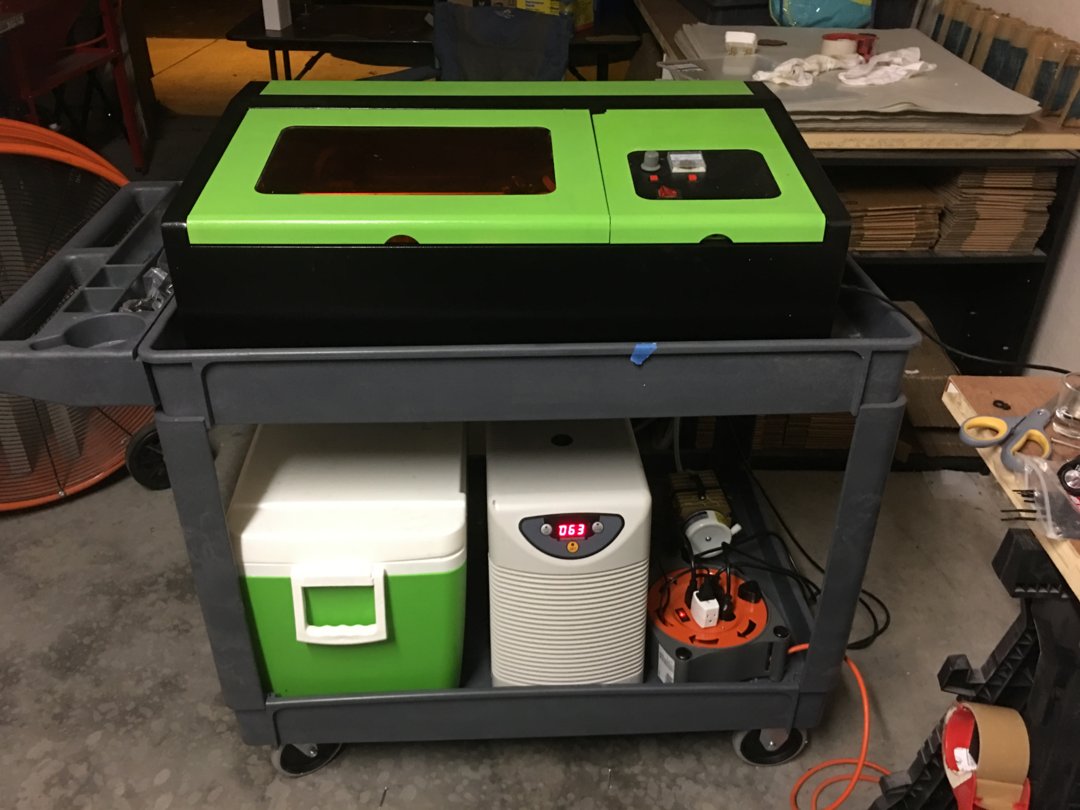
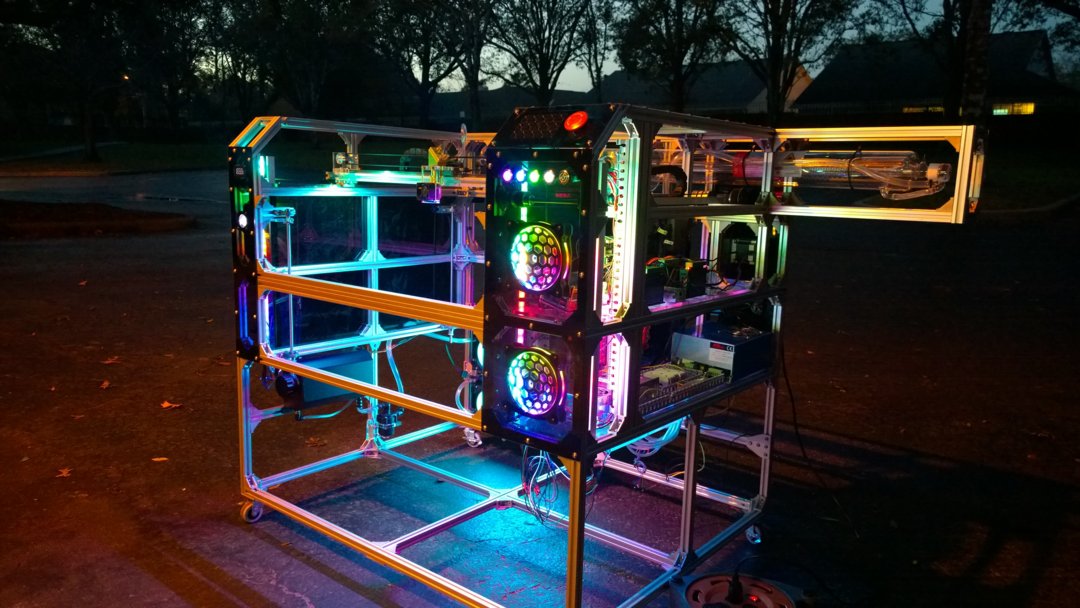
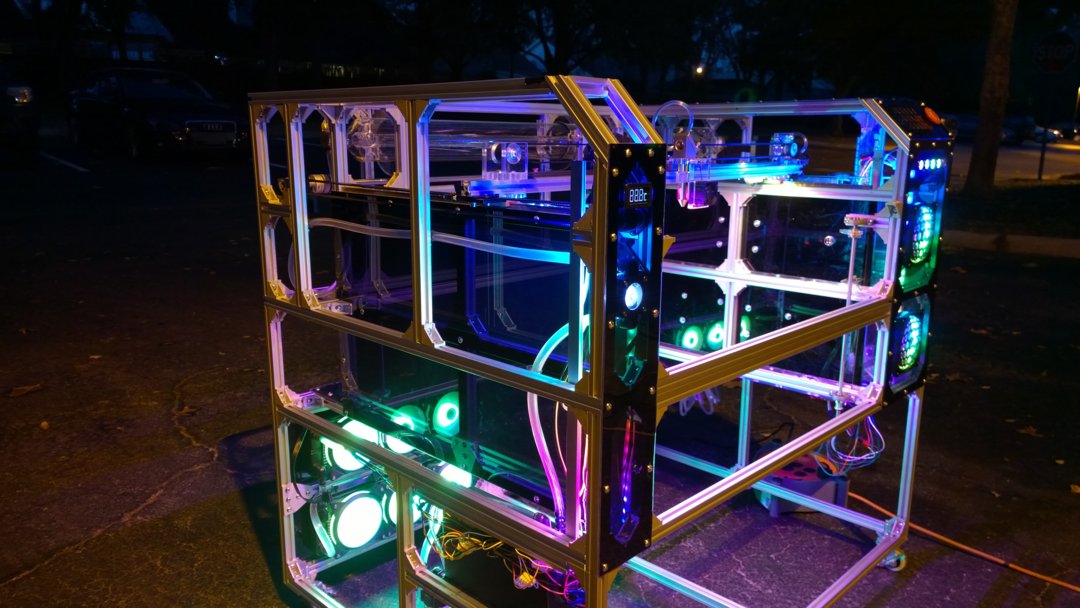
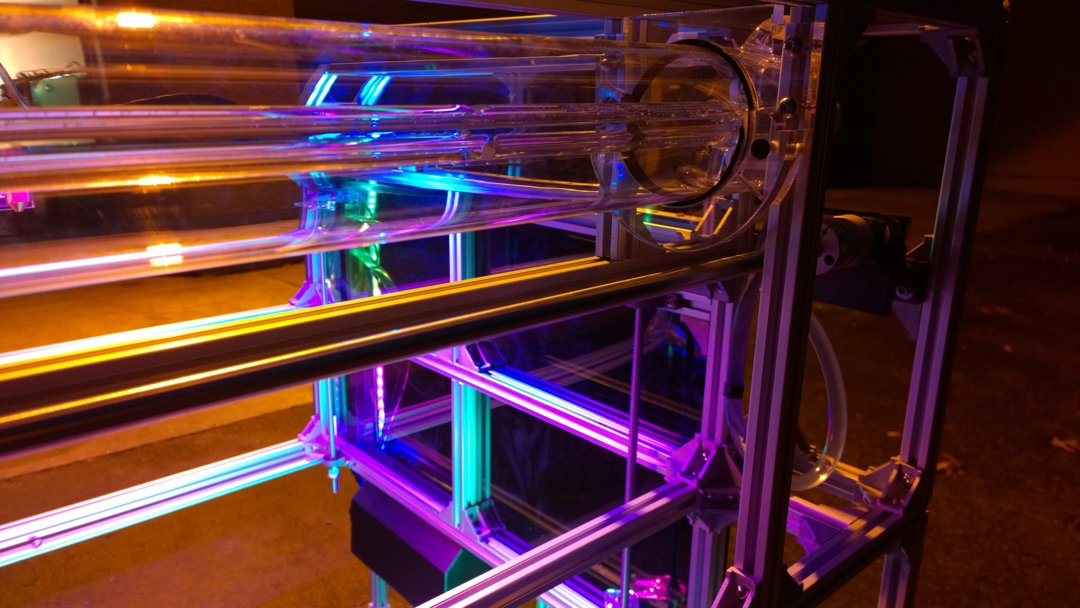
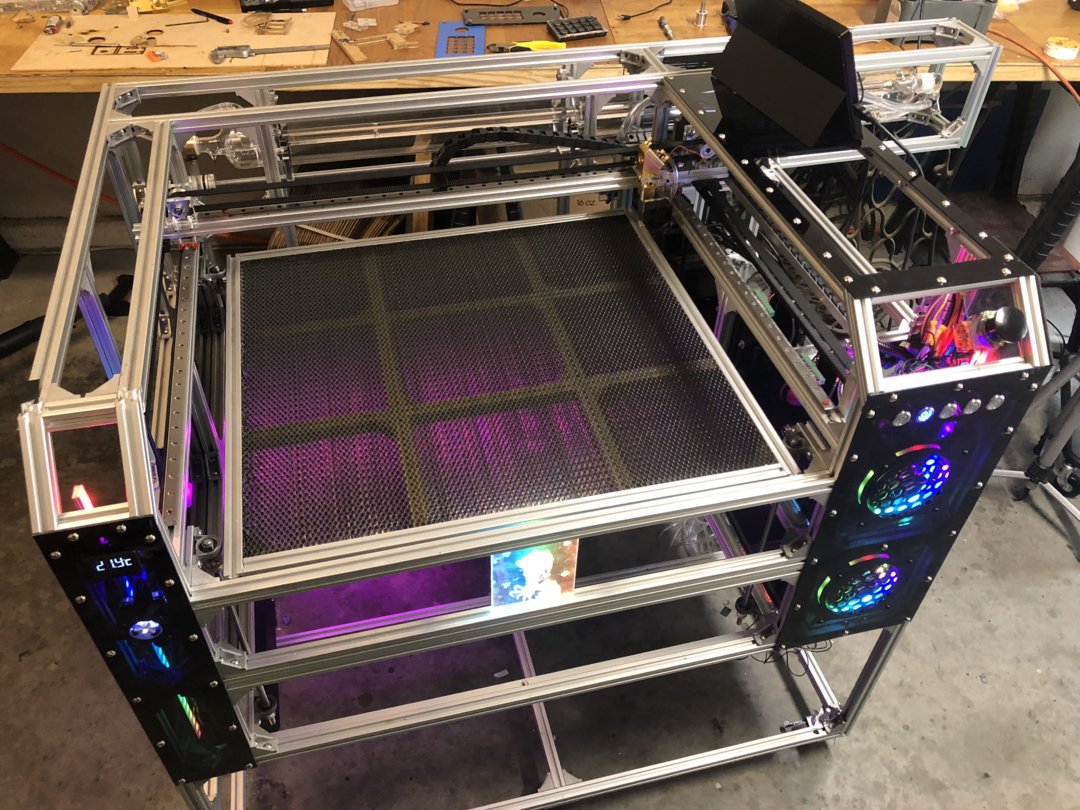
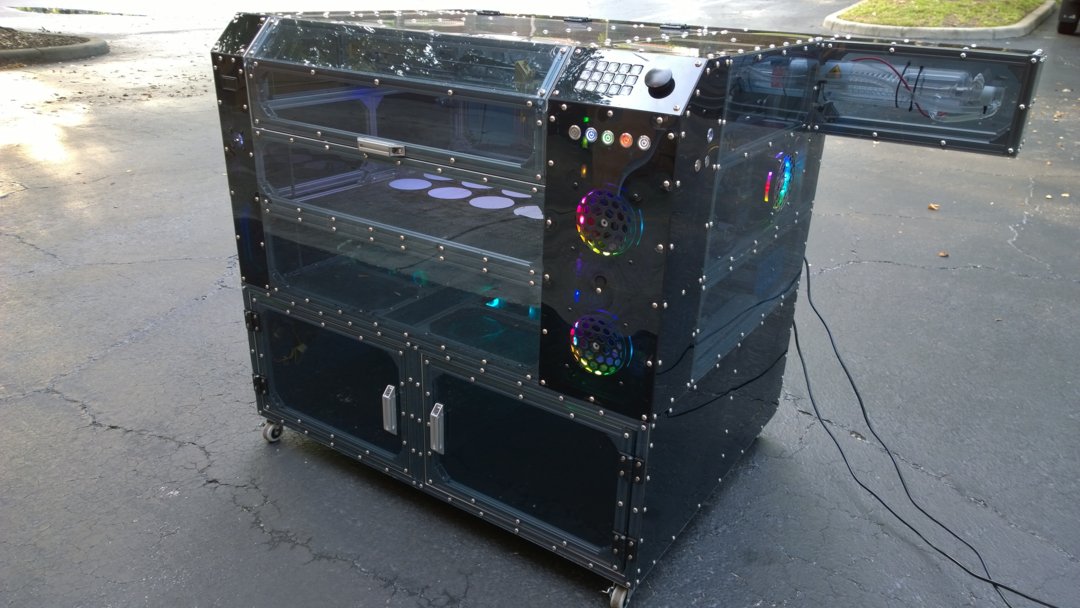
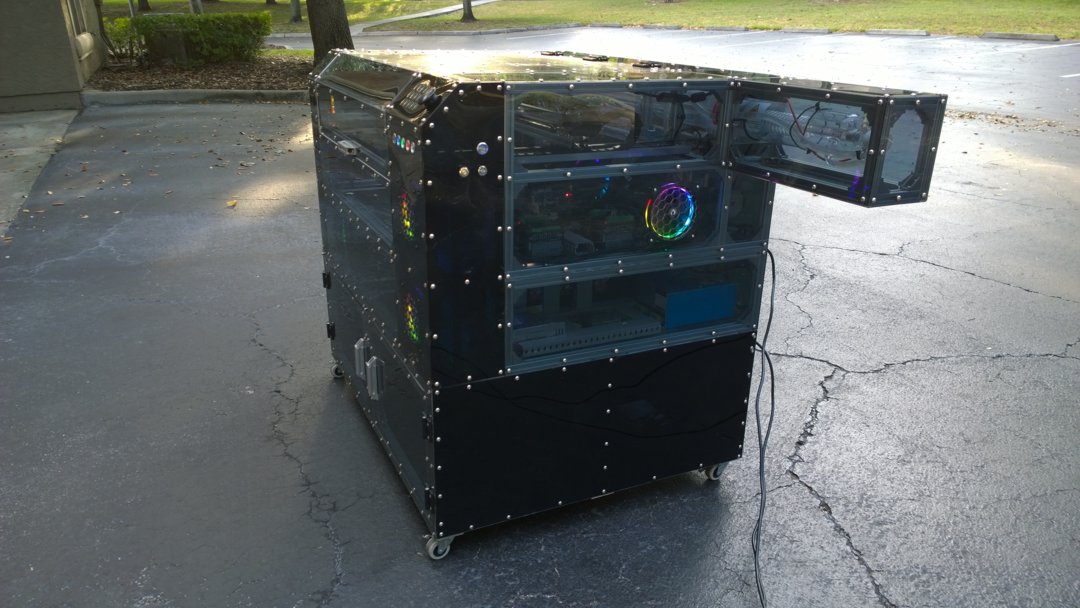
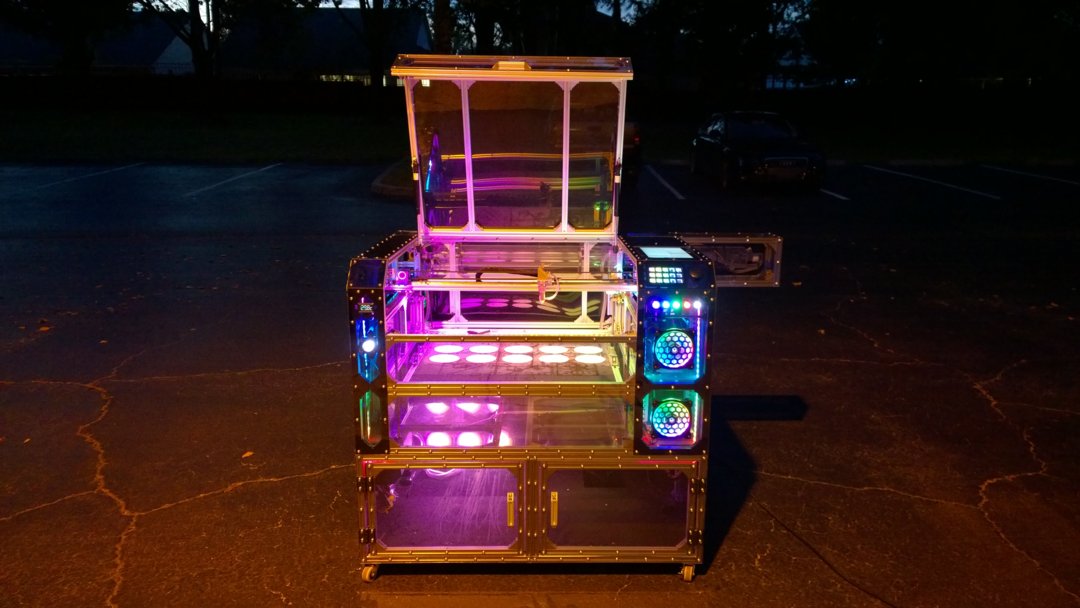
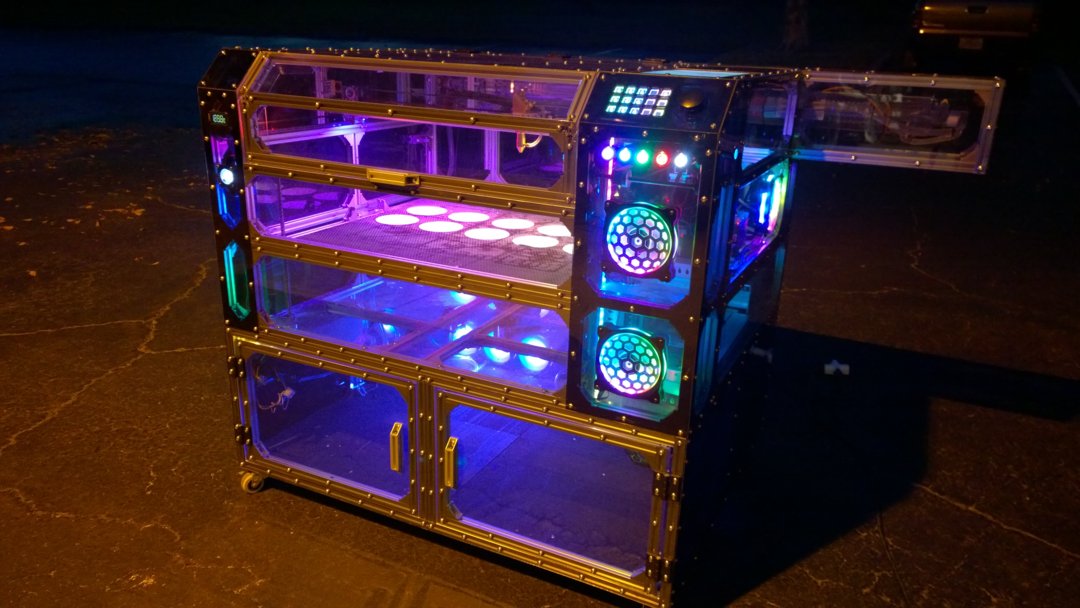
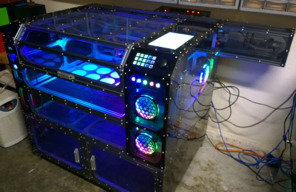
A quick picture of how the Machine looks as of right now
![IMG_5875[4258].jpg](https://openbuilds.com/attachments/img_5875-4258-jpg.38718/)
![IMG_5873[4264].jpg](https://openbuilds.com/attachments/img_5873-4264-jpg.38719/)
I still need to finish covering the lid, the top cover of the laser tube, the electronics panel, and the bottom storage area and it's done.
Should be a few more days until it's done.
03/20/19 Quick Video Update
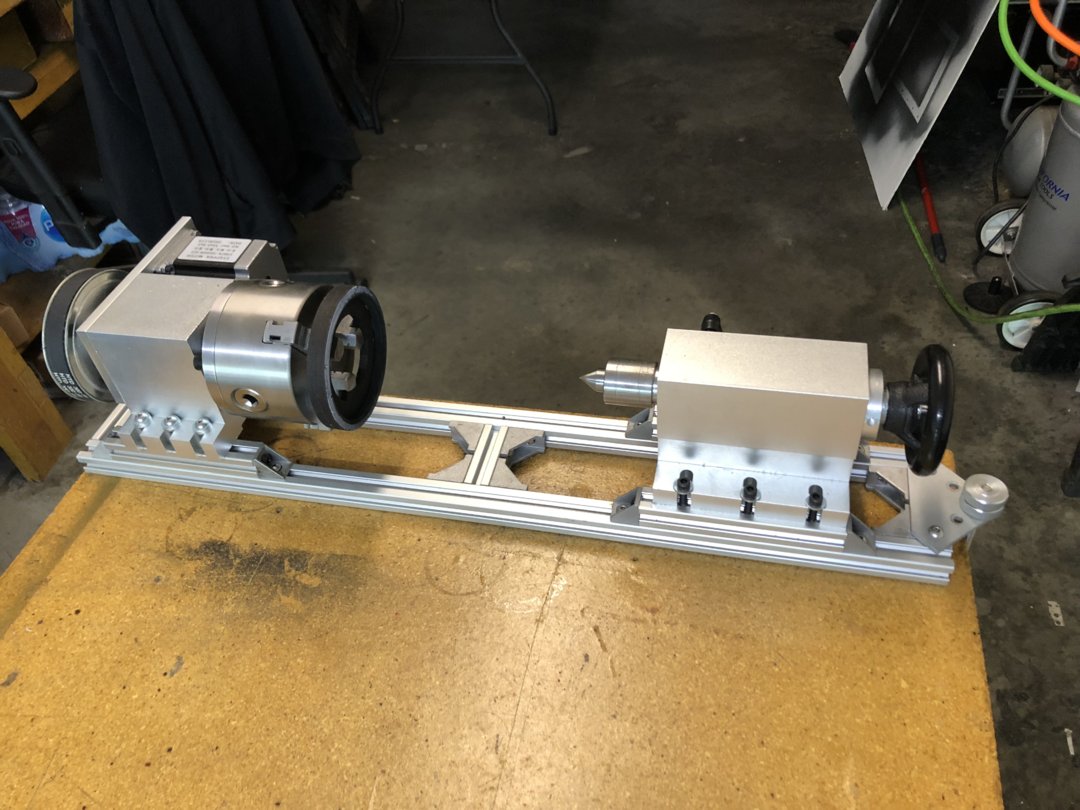
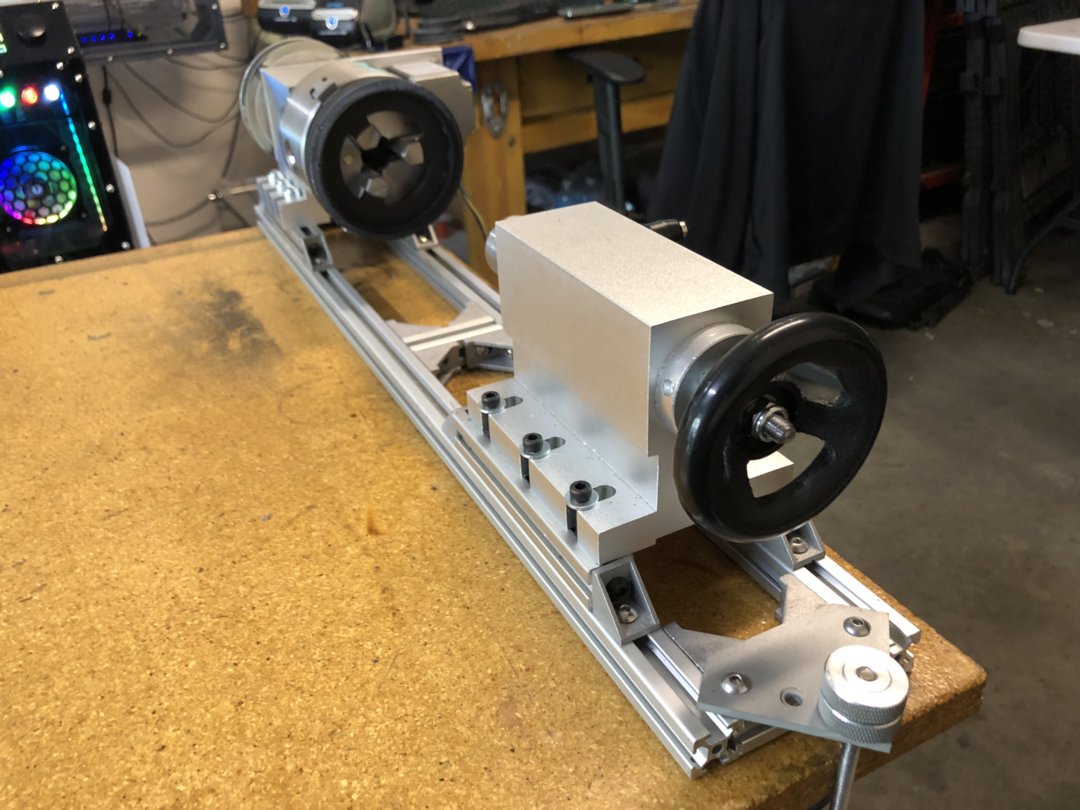
Also, this is the rotary that I made for this build.
06/01/19 Quick Text Update
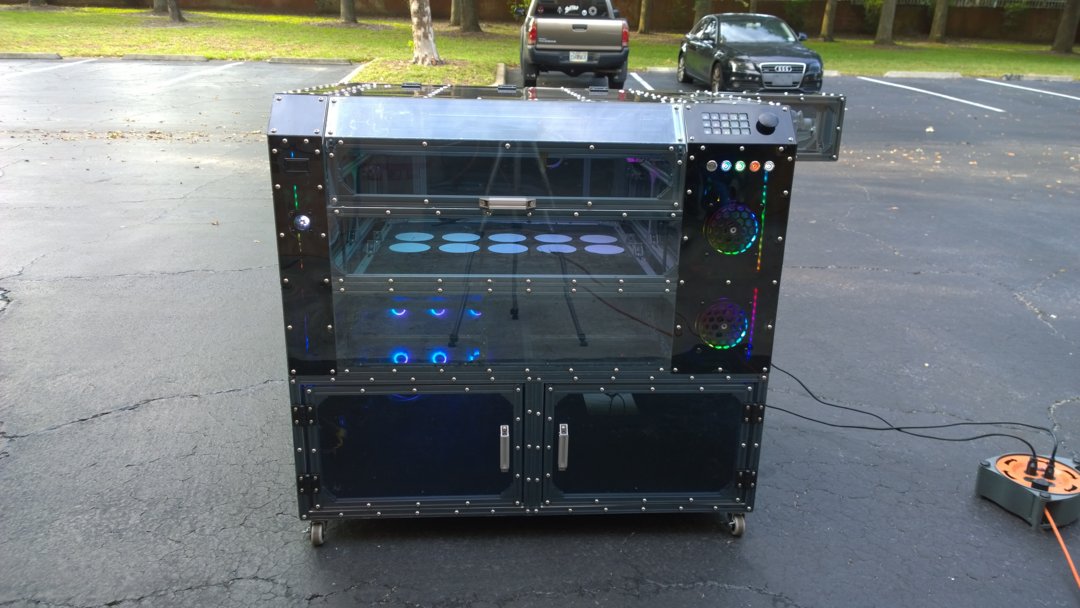
Alright, I just wanted to declare that the laser build is finally complete. I will try to take some decent pictures and post them tonight. Stay tuned.
06/01/19 Night Update
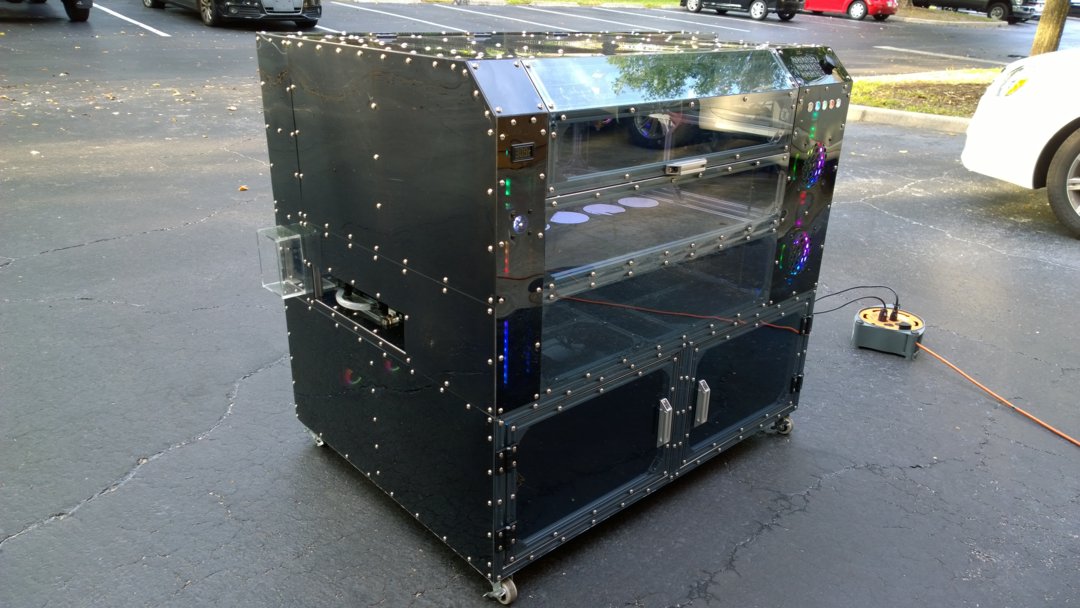
Here are some of the pictures as promised.
06/13/19 Update
So the laser is fully completed however I’m still looking for things to do / fix / whatever, so I remembered that I needed to work on my floor. I made everything plexiglass including the floor under the bed. I couldn’t find a solution I loved originally so I figured I would figure it out eventually, and eventually is here.
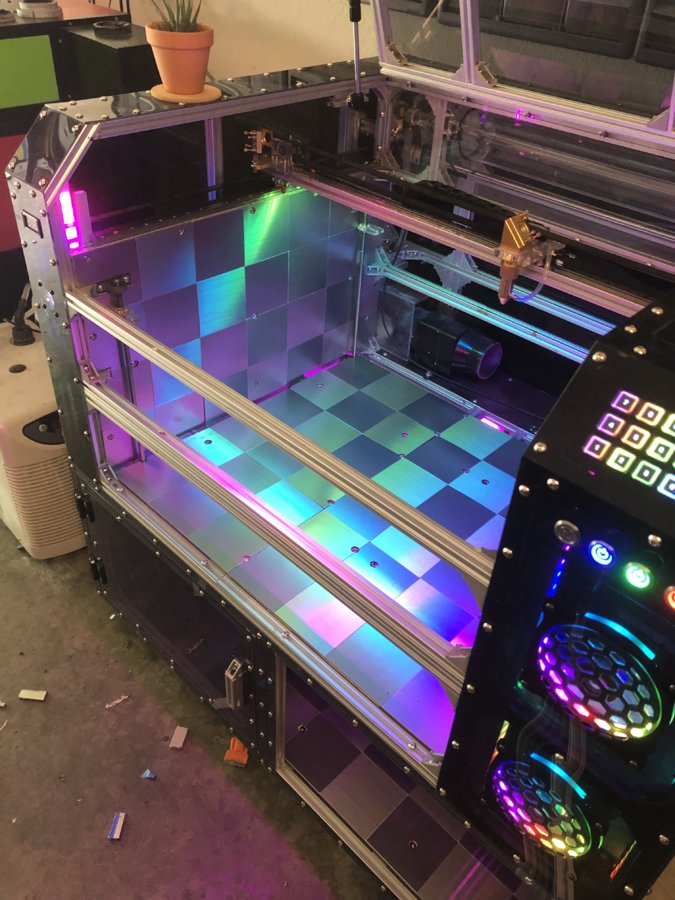
I wanted to cover the floor with aluminum but I didn’t just want to cover it with a sheet. After much research, I found some aluminum tiles, meant for kitchen backsplashes and I love them.
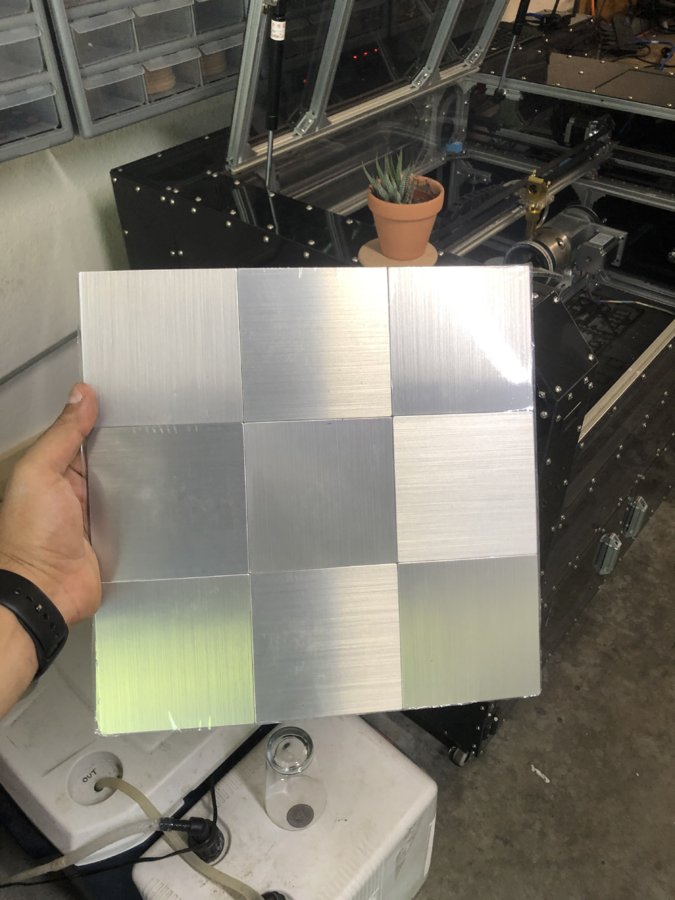
Here is how they look inside the machine. I removed the bed so I could get in there.
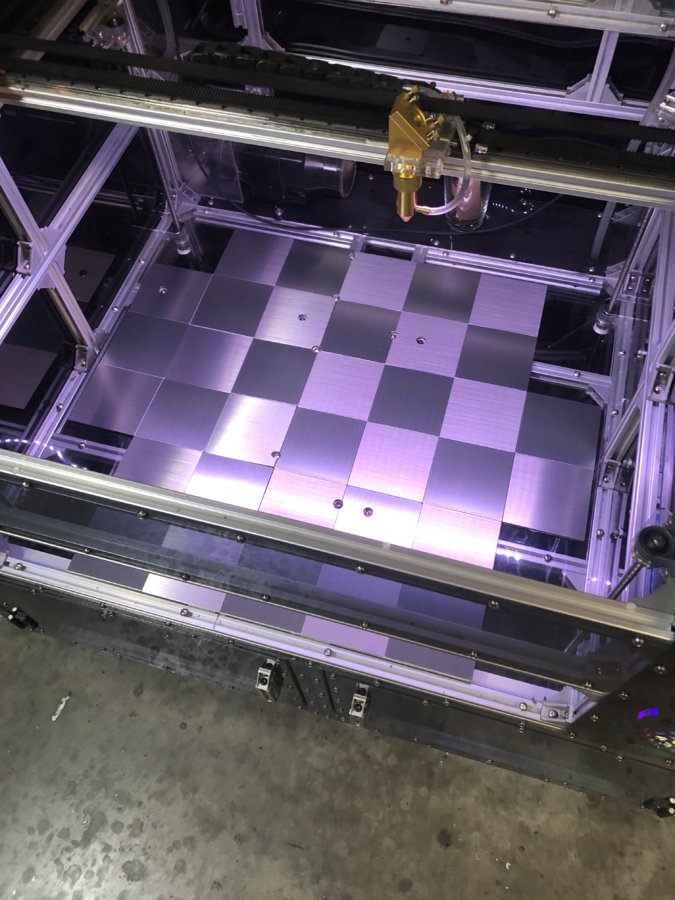
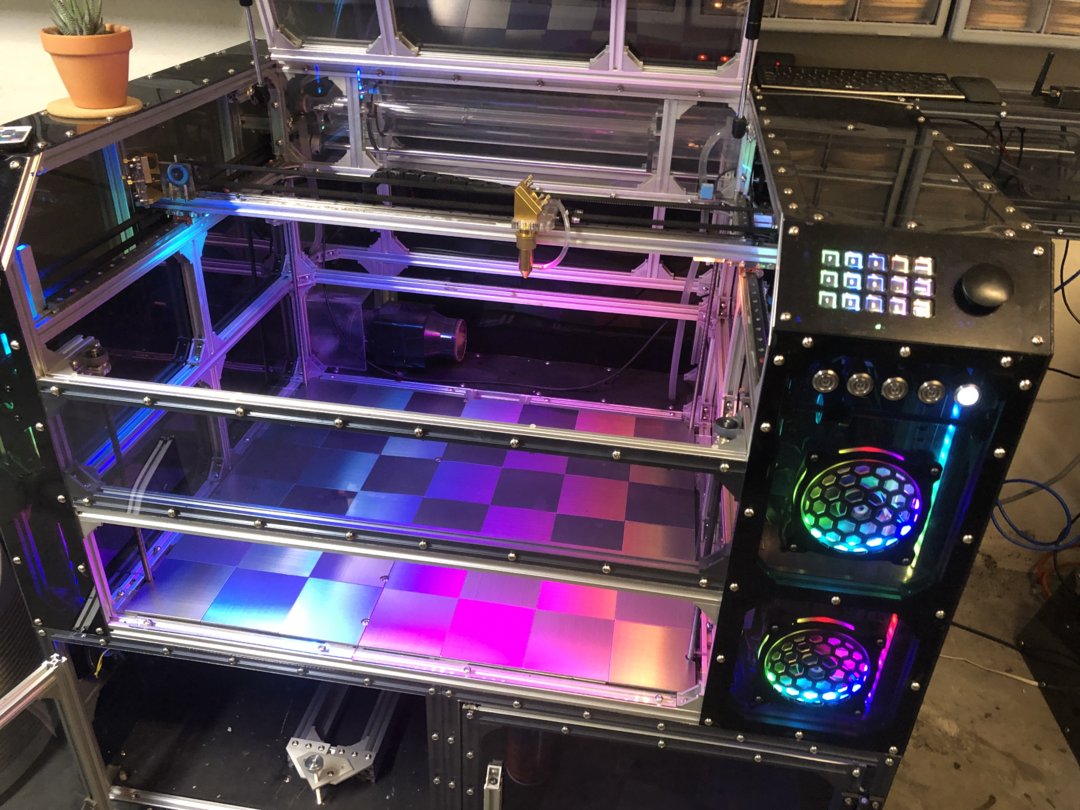
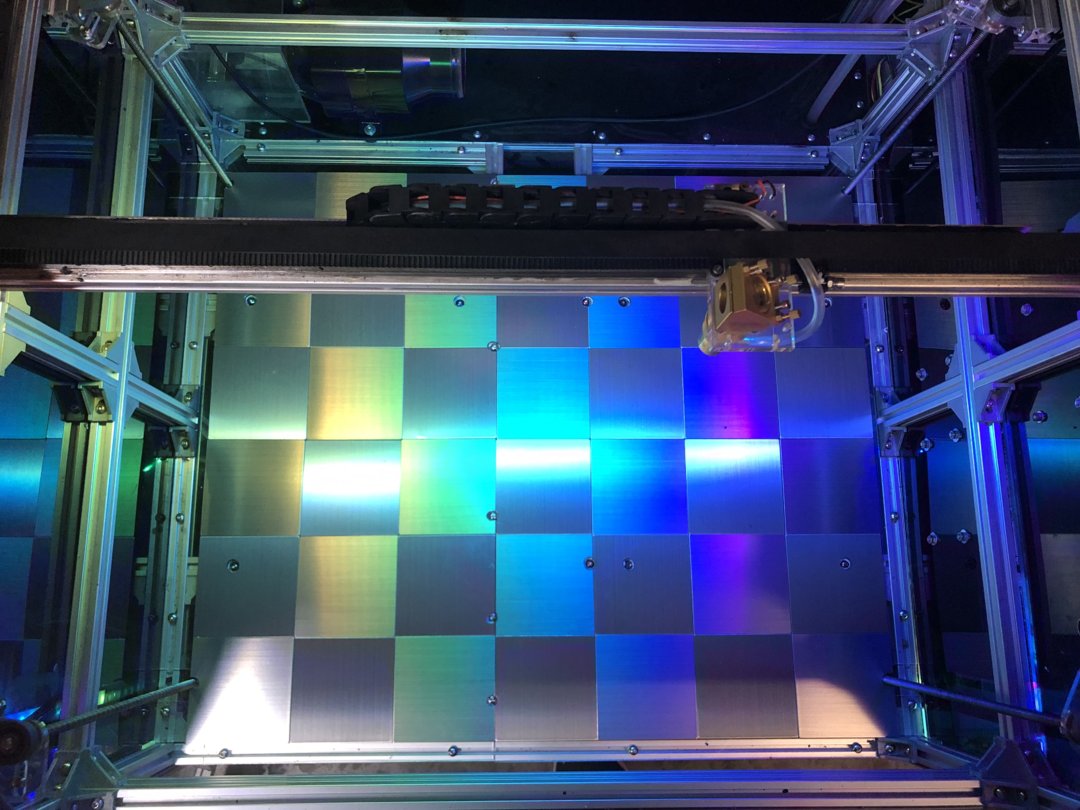
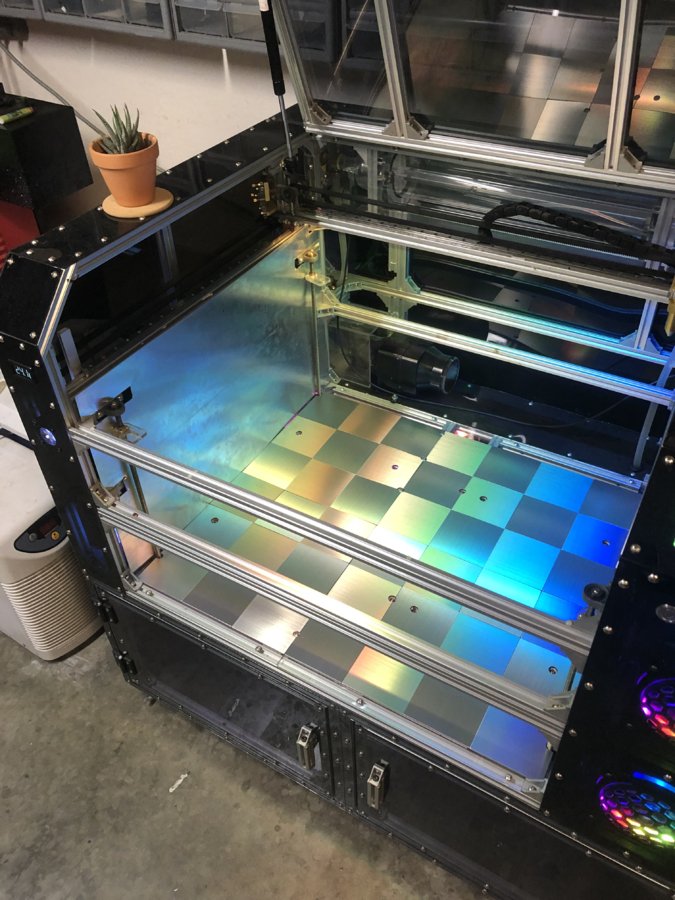
So after putting them down, I fell in love with them, especially how the light reflects off of them, so I decided to put them everywhere.

I decided to cover the wall panels as well. I first covered the sides with a sheet of aluminum, and then I placed the tiles on top of that.

Update 06/20/19
Here is a video of me testing out a lightburn camera that I have mounted on my lid. This camera actually goes to my other laser, I need a different lens for this one. I believe that's a 140-degree lens and I need a 60-degree one.
Update 08/07/19
I finally added the 90-degree camera to the lid of my machine and got it calibrated via Lightburn. Here's a video I took with the camera etching a glass.
I also updated the way that I cool the system.
The closed-loop system that I was using was working great bringing the temp to ambient during the Winter but it's summer now and I'm in Florida so that wasn't cutting it. I then changed it and added an additional radiator that I was submerged in cold water (being chilled by a water chiller that cools my other laser) and it was working great but it just wasn't convenient. So I came up with this solution.
Later down the road, I'm going to redesign it and build it out of 2020 and I'll add more bells and whistles.
01/18/22
These two last years were just a blur. I updated the water cooling system like previously stated and I just realized that post was almost 2 years ago with this build now almost being 3 years old. My brain can’t even…
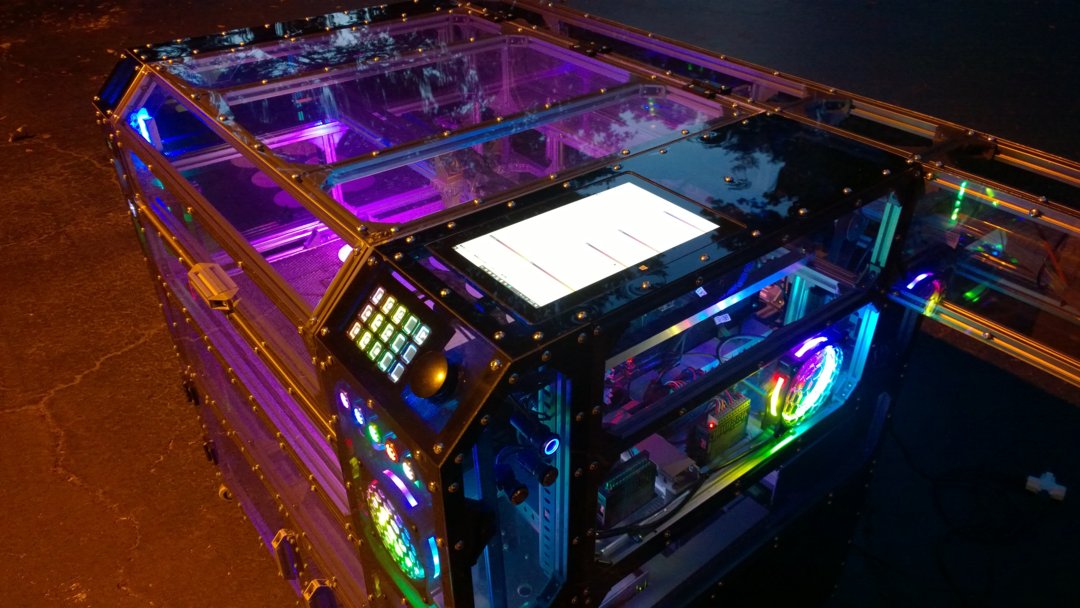
At any rate here is the new new updated water cooling system for the laser build. Last thing I’ll do is add a few more lights to it because why not at this point and it will be done as well.
Custom build 80w Co2 Laser Cutter
Build in 'Laser Cutter Builds' published by CChico, Jan 18, 2022.
Building a custom made 80W Co2 Laser cutter. Making it from scratch and it's a work in progress but I've learned a lot and I'll be sharing a bit of that knowledge with you guys since I've learned a lot from here.
-
-
Build Author CChico, Find all builds by CChico
-
- Loading...
-
Build Details
- Build License:
-
- CC - Attribution NonCommercial - CC BY NC
Reason for this Build
I decided to build this laser after trying to purchase a second 80w laser on eBay and the whole thing just turning out into one big two-month long ordeal just to get my money back. So I started searching online on ways to upgrade a K40 laser that I had laying around for years which led me to many different places including here and then I decided to just build one from scratch. It's been a journey but it's pretty cool seeing the project actually take shape and look more and more like what you originally had in your head.Inspired by
So this build was inspired by man made mayhem's LAYZOR build. I have a k40 chinese laser as well as an 80w 700x500 laser and I wanted to see if there was a way that I could upgrade my current k40 laser to be more useful and then I found his build. From there the project went a different direction but his work was definitely what inspired me to build this monster. He has his own website and blog. Here's the link for anyone who may be interested. LAYZOR website online! -
Attached Files:


