NOW AVAILABLE!
Since the inception of the xPRO line we have worked to provide the community with robust, reliably, and economical controllers that were simple to use and simple to setup up. Let's be honest, we are all here to make chips, not fuss with electronics. With the V4 we decided to take this concept a little further and nail down some specifics to include:
Well after a complete year in development, and beta testing, the V4 is now ready for release. Let's see how we did:
- An easily expandable ecosystem - let's make it easy to build, grow, and modify
- Less 5 minute setup using plug and play modules
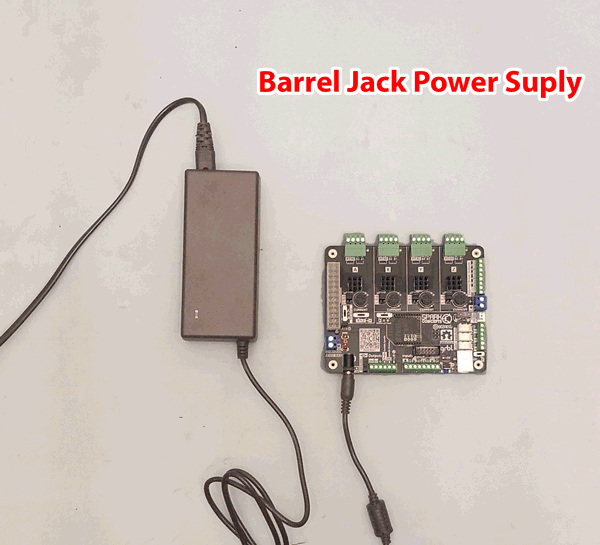
- More power options to avoid wiring mains power
- Smarter monitoring of driver state and failure responses
- Official cases with cooling
- Support for 0-10V Spindle, lasers and VFDs
- Reliability above all else
1) An expandable ecosystem
*Limit switches, PCB case, Z probe, and bluetooth link available now. The 3 axis probe and button expansion will be available for those willing to beta test in a few weeks - full availability slated for January '19.
Bam, done - next please!
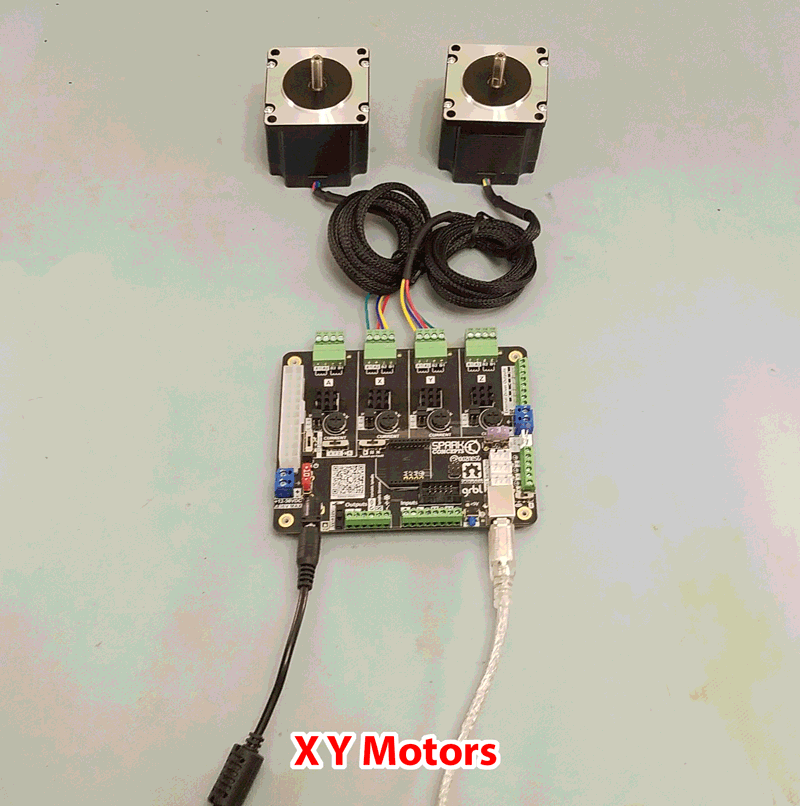
2) Less than 5 minute setup - the xPRO V4 is built to accept the Openbuilds xTension motors directly. Using the plug and play component from above we have our setup to less than 4 minute (4 motors, barrel jack psu, 3 limit switches, and USB cable). Pretty slick, pretty quick!
Bam, done - next please!
3) More power options to avoid wiring mains power - I'm not gonna call anyone out on this, but over the past 4 years we have seen some truly terrifying things with regard to wiring. Last count we are at 18 boards over-volted, 7 shorted across pins (we will circle back to this later), 1 plugged into mains
Let's circle back to the pin shorts here. You may notice a lack of components on the top side of the board - this leaves more room for user selectable setting like slide switches, current pots (these new ones can be finger turned), microstep etc. However, the main purpose was to avoid shorting, milling/routing is a dirty business for those without dust shoes and a lot of the boards that come back to the shop have loads of debris on the top. Simple solution move exposed pins to the back and let gravity help us out
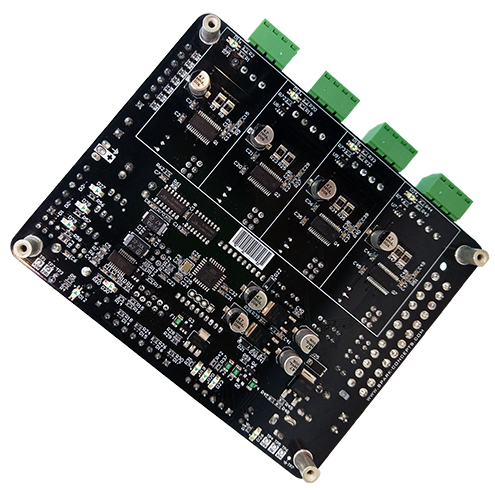
Last bit here - see those standoffs in the corners - yep those are baked on giving all those bottom side components ample clearance (i.e. no pin shorts by being set on metal surfaces). Bonus points, those standoffs are threaded all the way though making case assembly super simple!
Bam, done - next please!
4) Smarter monitoring of driver state and failure responses - we likely all know the mind numbing pain of babysitting a 3 hour cut. For me the breaking point was making 1/32" thick ploycarb screens with 15,000 holes in each... I had to make 12 for our customer
So enters the DriverMinder, this bit of circuitry monitors all the drivers for faults - Should a fault occur, your selected action will be taken, options are:
Pause - will initiate a system pause allowing you to safely troubleshoot and potentially save your workpiece
Stop - emergency abort, system stop immediately and reboots
Play - continue on as if nothing happened (AKA ignore fault).
Selection made via slide switch

Bam, done - next please!
5) Official cases with cooling -
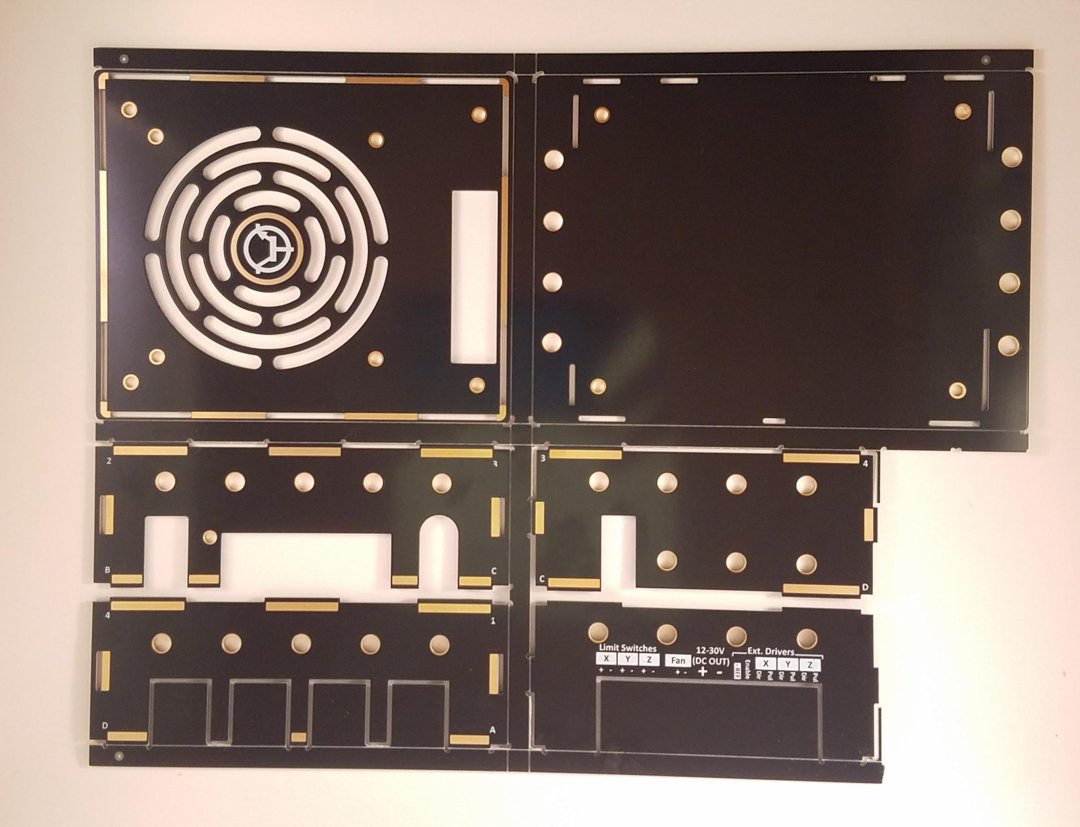
The V4 PCB case, a few easy snaps and 12 bolts (4 bolts to mount the V4, 4 bolts to mount the top (remember those fully threaded standoff?), and 4 bolts to mount the fan). Bolts and 24V fan included. So after a few minutes, and a few bolts you are left with this beaut!
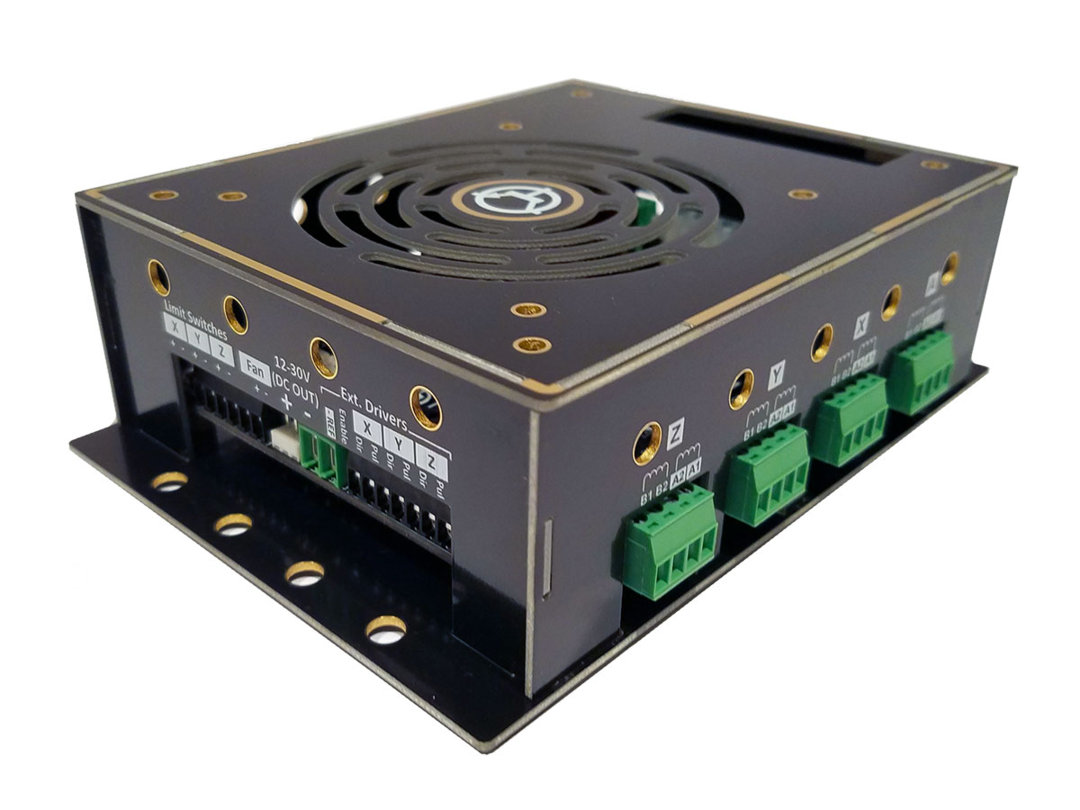
Also, the mounting holes on the base line up ever so nicely with V-slot spacing
Bam, done - next please!
6) Support for 0-10V Spindle, lasers and VFDs - this one turned out to be way easier than anticipated. Just a pinch of black magic from Circuits guru Bill and it was done. Simply select 0-5V or 0-10V using the slide switch and the V4 scales the spindle speed out.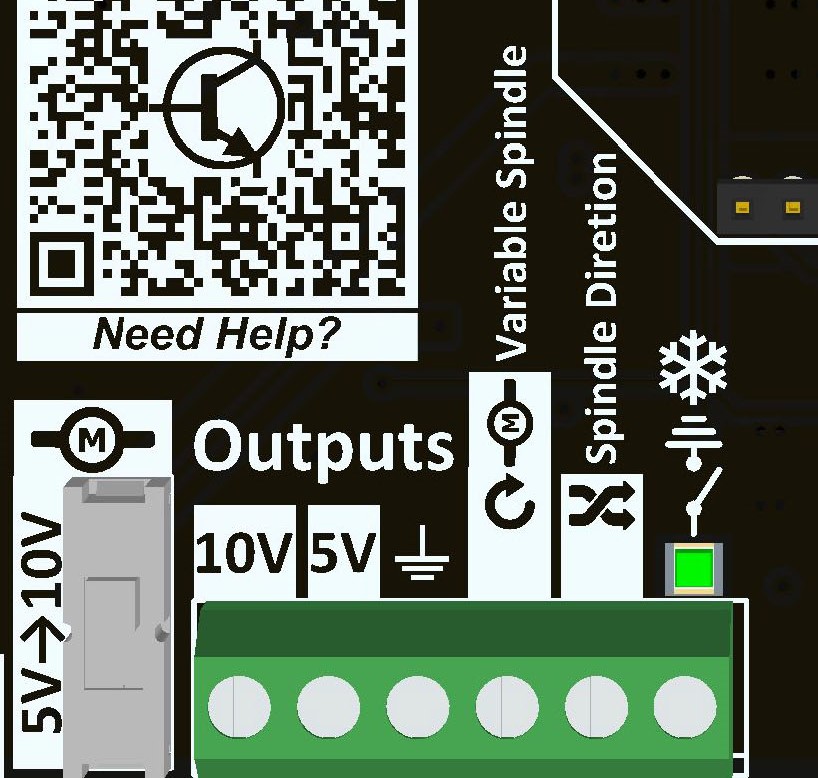
Bam, done - next please!
7) Reliability above all else
This was a big one for us, we put out almost 2,000 V3's this year alone - that's a lot, more than we ever dreamed of. It speaks volume of the trust you have placed in us and we won't disappoint! Few things we did to get even more reliability on the V4:
Bam done - more to come!
- Moved over to a 4-layer board allowing use to separate motor power and logic power. All driving signals are digitally isolated (like optical isolation but faster) and all that back-EMF will never touch the processor power rails!
- Integrated filtering and logic on the limit switches
- Replaceable fuse (that are available all over the world)
- Solder free setting - want to clone Z instead of Y - simply slide a switch. Want to use fast decay - slide the switch
- Transient suppression diodes on inputs for enhanced protection
- All SMD components on bottom side – reduced shorting with debris. Standoffs pre-assembled to elevate all contact points
- Video training series (coming as soon as I shake this cold and can record some audio
)
- Available USB sticks with known-good sender programs, troubleshooting guides, etc
Help resources:
Wiki (all docs available here): Spark-Concepts/xPro-V4
Case build: Assembling the xPRO V4 Case
Bluetooth Setup: Setting up the Bluetooth Link
Reflash firmware: How to Reflash GRBL to the CNC xPRO
CNC xPRO V4
Build in 'Circuit - Software Project' published by Spark Concepts, Dec 22, 2018.
Take your build to the next level with the CNC xPRO V4!
-
-
Build Author Spark Concepts, Find all builds by Spark Concepts
-
- Loading...
-
Build Details
- Build License:
-
- CC - Attribution NonCommercial - Share Alike - CC BY NC SA
-
Attached Files:

