
Hi all!
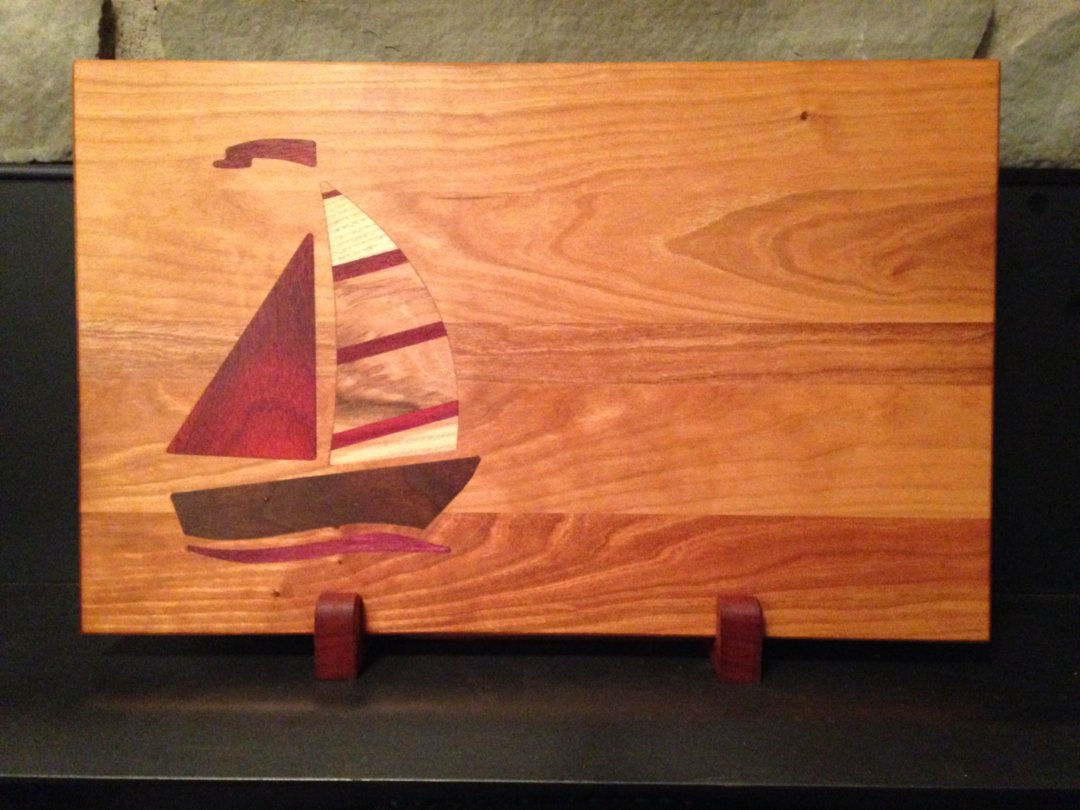
Last year I built a C-Beam and after about 6 months I realized what I knew from the beginning....I would be building a larger machine! My goal was to learn on the original C-Beam. My original goal was to use the machine to inlay my custom cutting boards as well as producing accurate parts and interlocking pieces such as puzzle shaped cutting boards.
I wanted to upgrade my C-Beam using as many parts from the original as possible. I studied sooo many designs from Open Builds, YouTube etc, and decided to go as simple as possible. I also wanted to figure out and install limit switches. Another issue I didn't take into account with the original model was being as square and accurate as possible. I am a Woodworker/Craftsman not a builder but with A LOT of research, YouTube and the forums I am really happy with what I have built and I hope it can help others!.

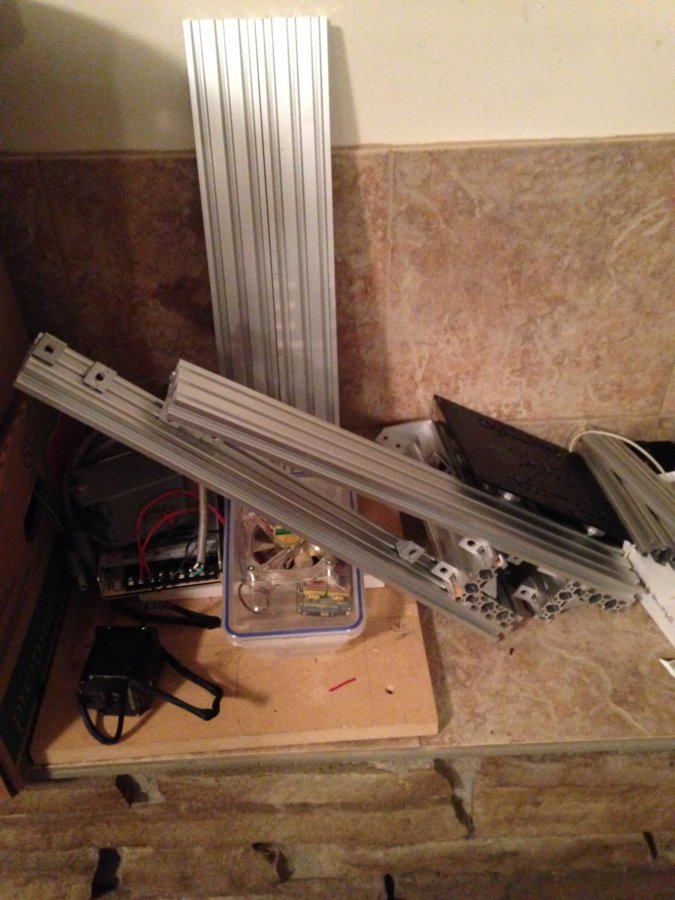
So I started with the original C-Beam.
Start the tear down!
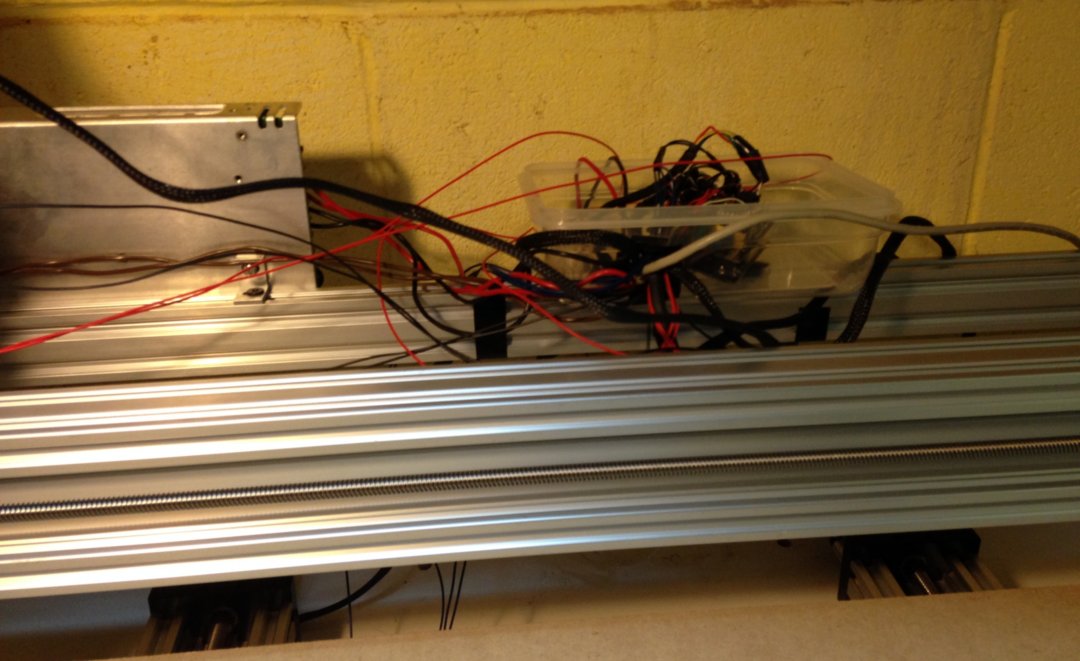
I used the Arduino Uno and the C-Shield! I need to work on my wire organization!

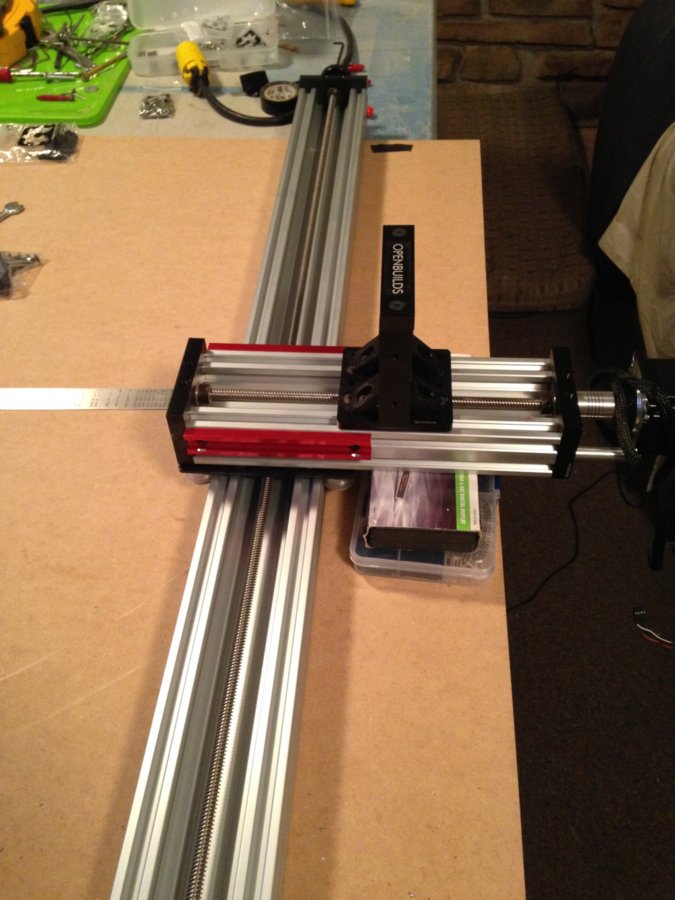
The Z Axis will be recycled as is and the X Axis will be used for the second Y Axis required!
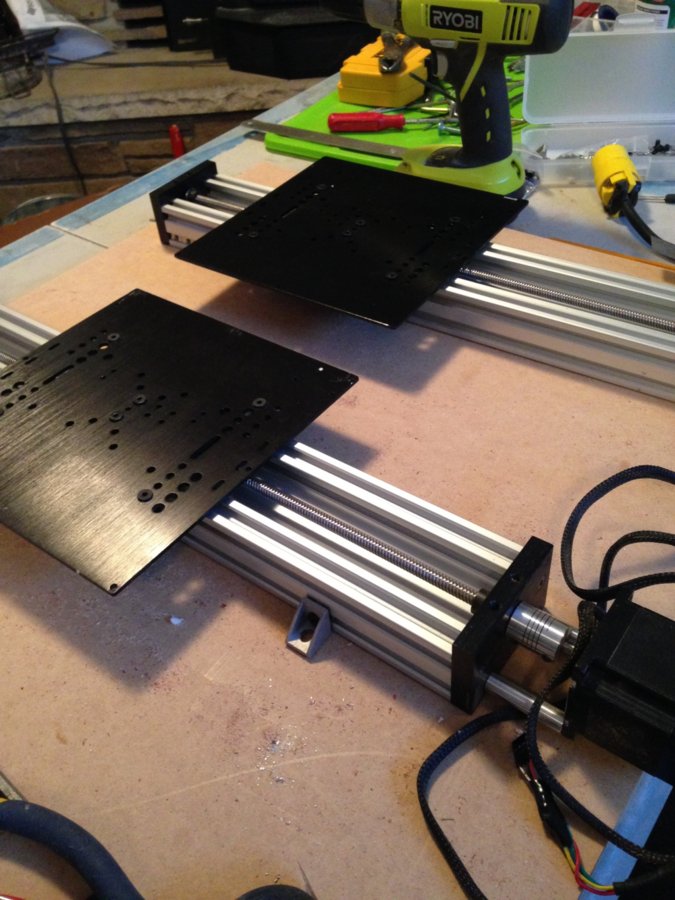
I reused the side rails and the Y Axis as well as the builder plate assembly!
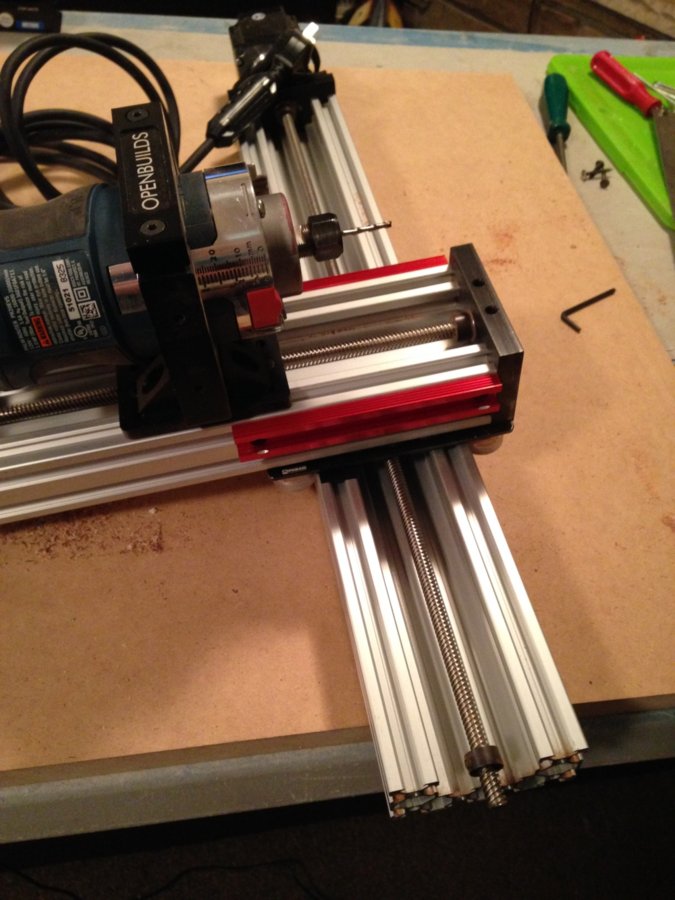
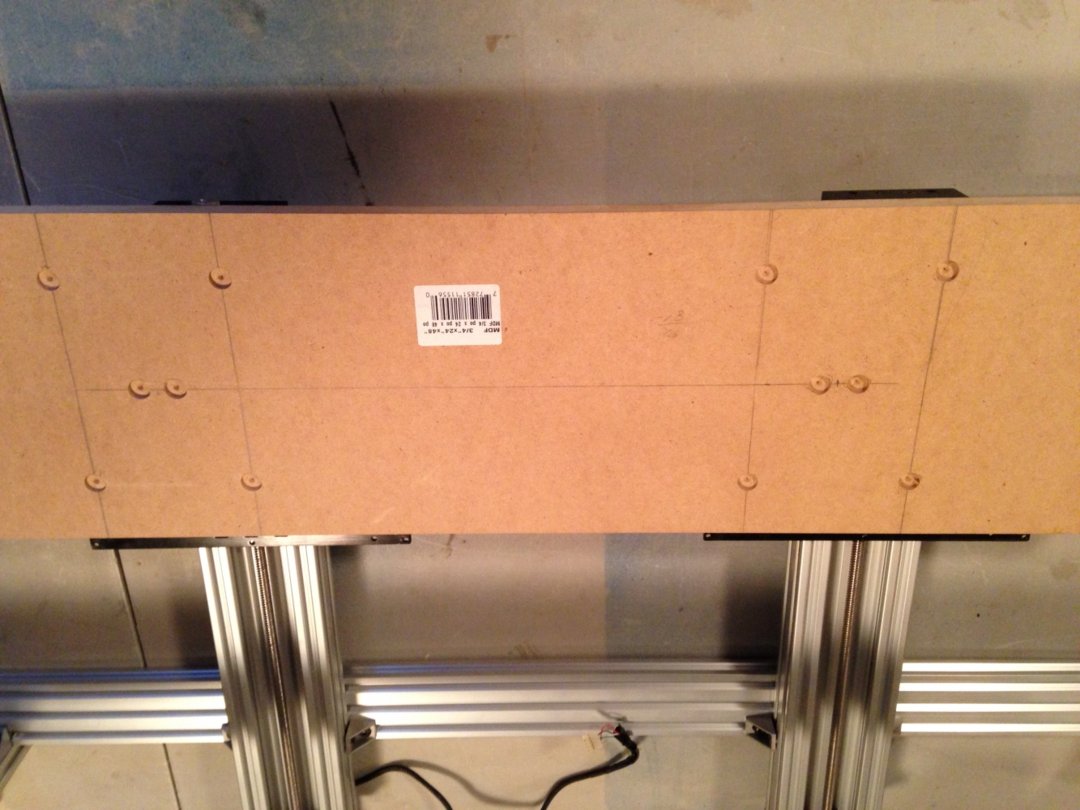
In all the designs I researched, especially the Open Builds C-Beam XL, the X Axis supports were changed from the 20 X 60 V-Slot rails and replaced with the C-Beam rail. Personally I found the double 20 X 60s to be really strong so I opted to keep them. I ordered 2 - 20 X 40 rails to beef up the supports if needed, I didn't need them! Also I couldn't understand why the build plate was replaced by the gantry plate in the XL design. I used another build plate in order to get the largest bearing surface for my spoiler board. The 2 build plates produced a solid base especially with the 3/4" Particle Board!
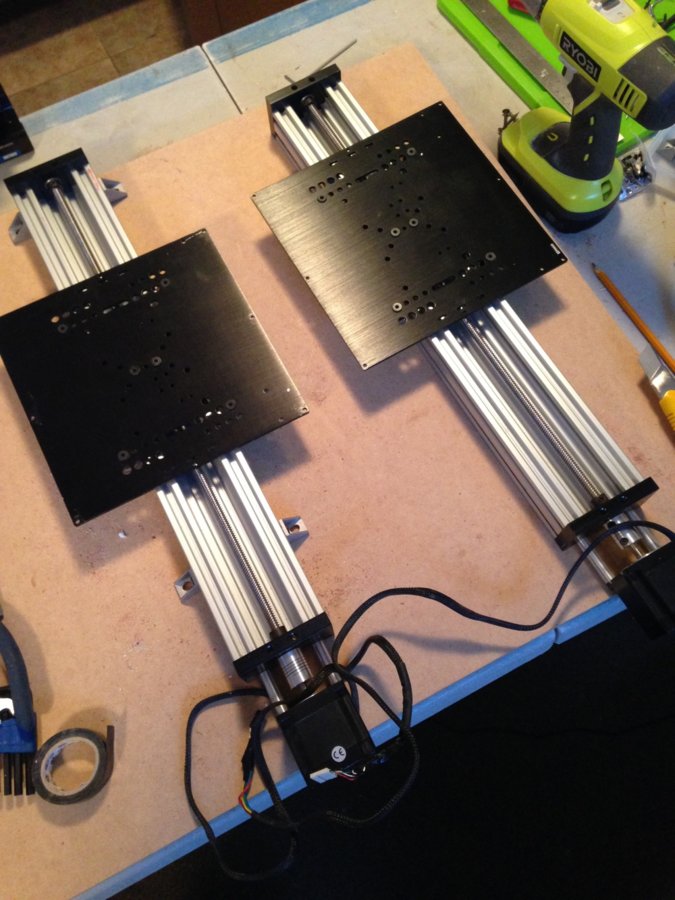
I ended up ordering the wrong spacers for the X Axis motor. I also ordered a Jog Knob and the spacers were to long so I used what I had left over 20 mm and 9 mm spacers! Worked just fine!

X Axis is ready to go, no issues!

Main assembly is complete (or so I thought)! I ended up purchasing a digital caliper as well as a dial indicator and I found out after many, many measurements my assembly was out of square. The original Y Axis was fairly easy to square to the machine but now two of them had to be perfect.
In the original C-Beam the spoiler board was placed on spacers to raise the board above the end plates. I found it to be a real pain to align the spacers with the spoiler board and I figured with two build plates it was going to be a nightmare. I elected to use a piece of 3/4" particle board that was the same width as the build plates. I counter-bored the particle board to allow board to sit flat on the build plates without any contact with the low profile screws. It made it a lot easier than lining up spacers!
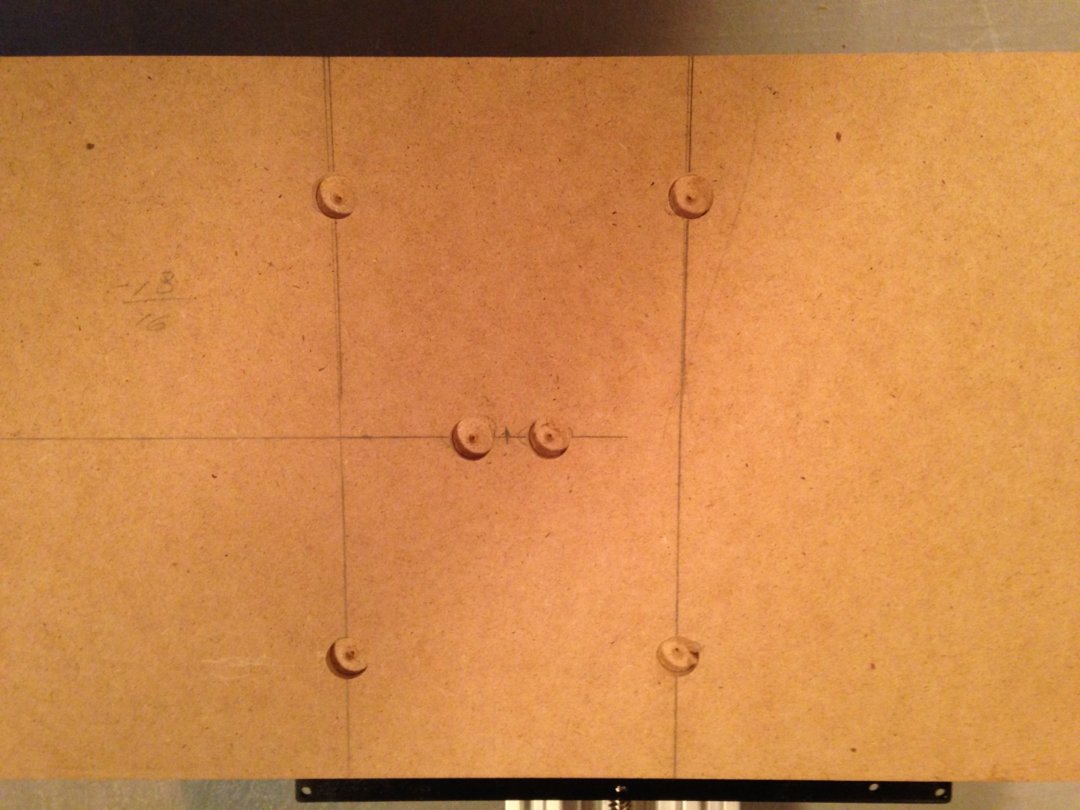
The spacer board screwed into place!
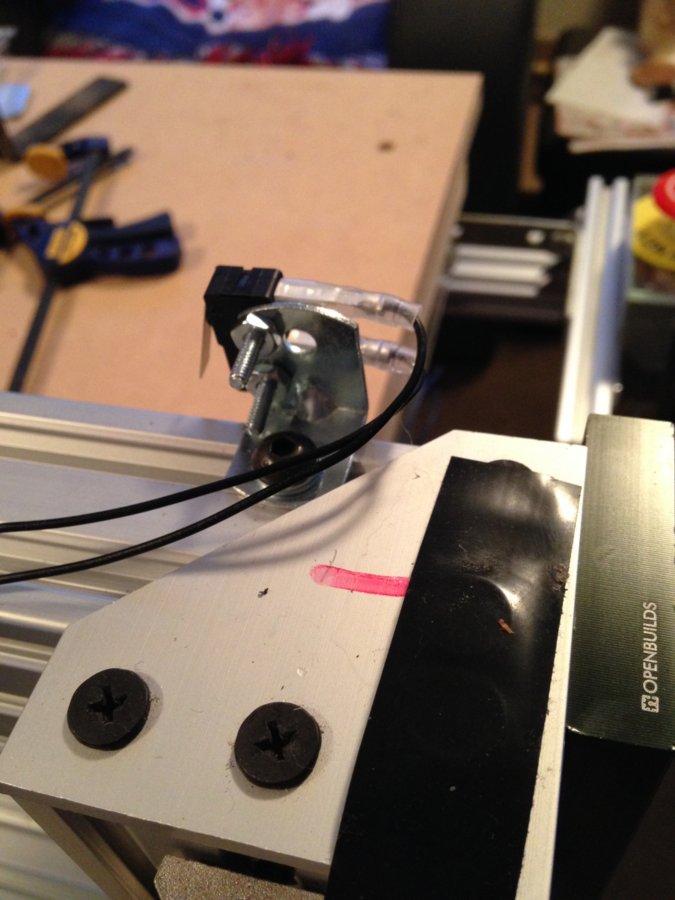
Limit switch installed on the left side of the X Axis. I used a simple 1 X 1 angle.
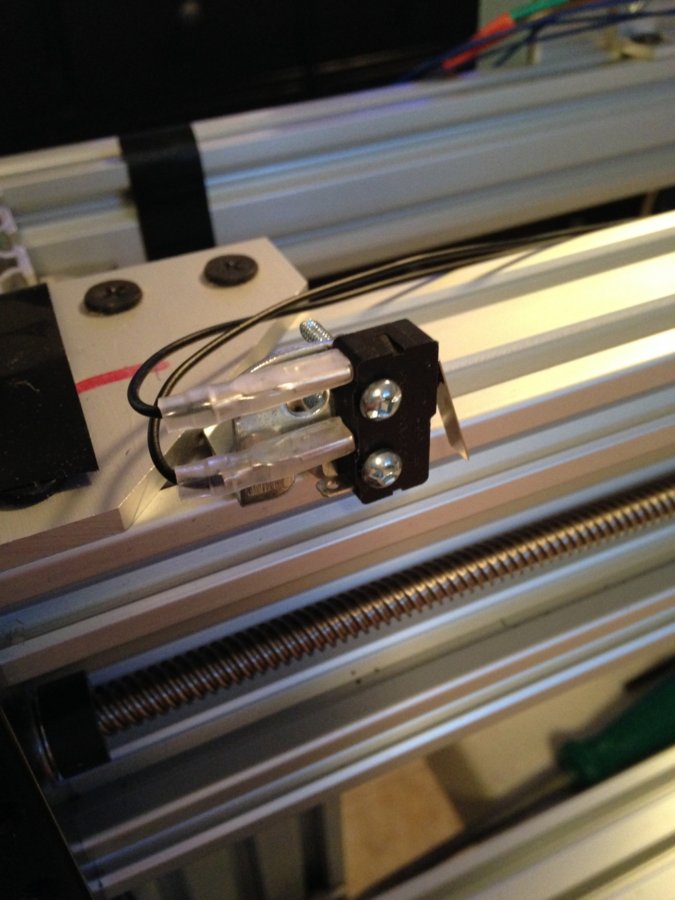
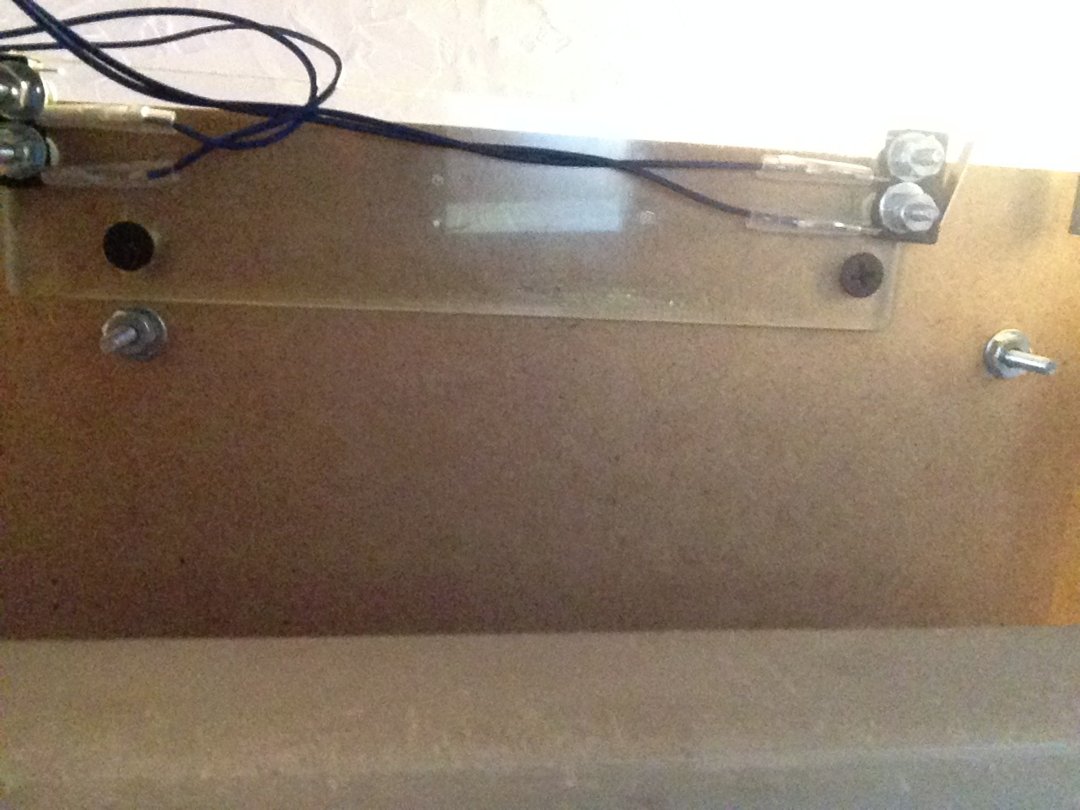
Again, I am a woodworker and trying to figure out placement of the Y Axis proved a little challenging for me! Thought of mounting the limit switches on the machine frame but I thought the amount of sawdust I generate would foul the switches so I decided to take advantage of the particle board spacer board and mount the switches to a piece of plexiglass and then mount the plexiglass to the spacer board. I was able to mount two pieces of angle connectors, one in the rear of the frame and one to the front side rail which could be adjusted easily.
I don't have access to a 3-D Printer so I needed to come up with an easy way for the Z Axis to move up and down and control the limit switches with one attachment. I came up with a solution using 90 degree plates. The plates were held together with low profile screws and a couple of T-Nuts WHICH HAVE BEEN REPLACED BY NEW NUTS! I used what I had in order to get the machine up and running! LOL
I used another piece of plexiglass, mounted the switches to it and the mounted it to the side og yhe v-slot
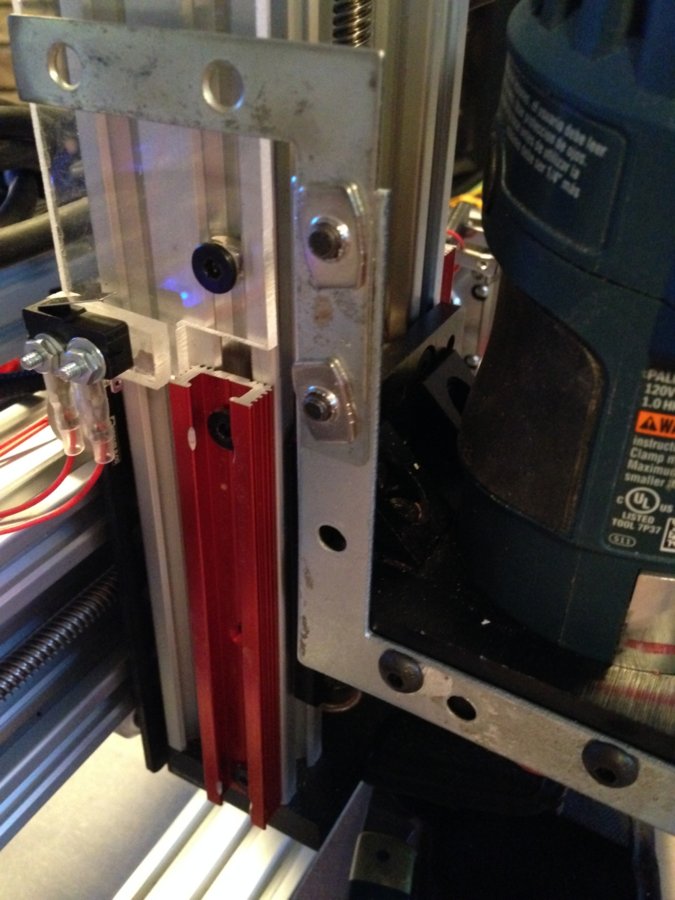
As well, the red T-slot mounted to the sides of the Z-Axis are for mounting the dust shoe.
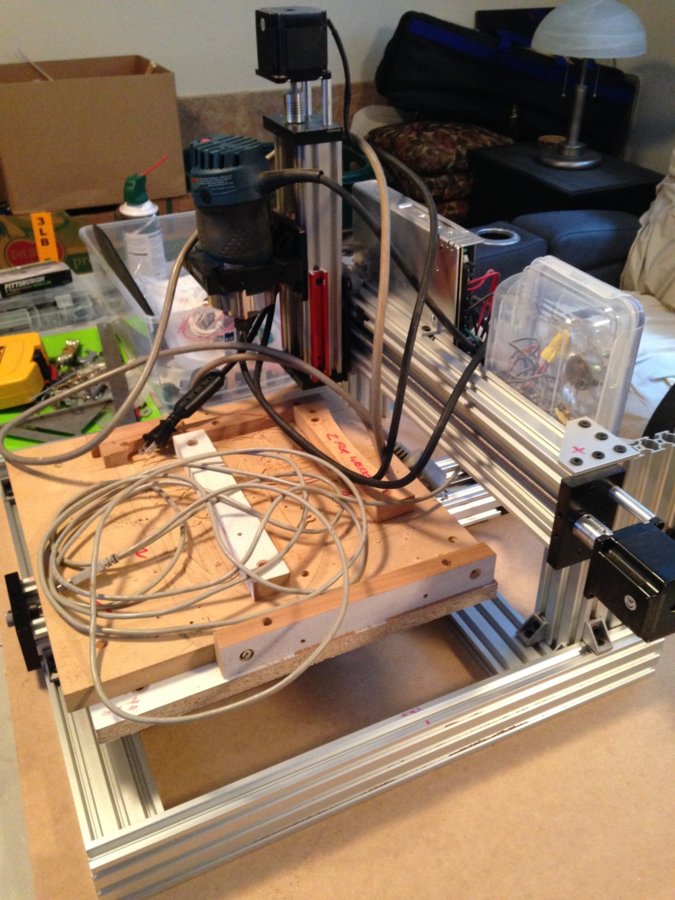
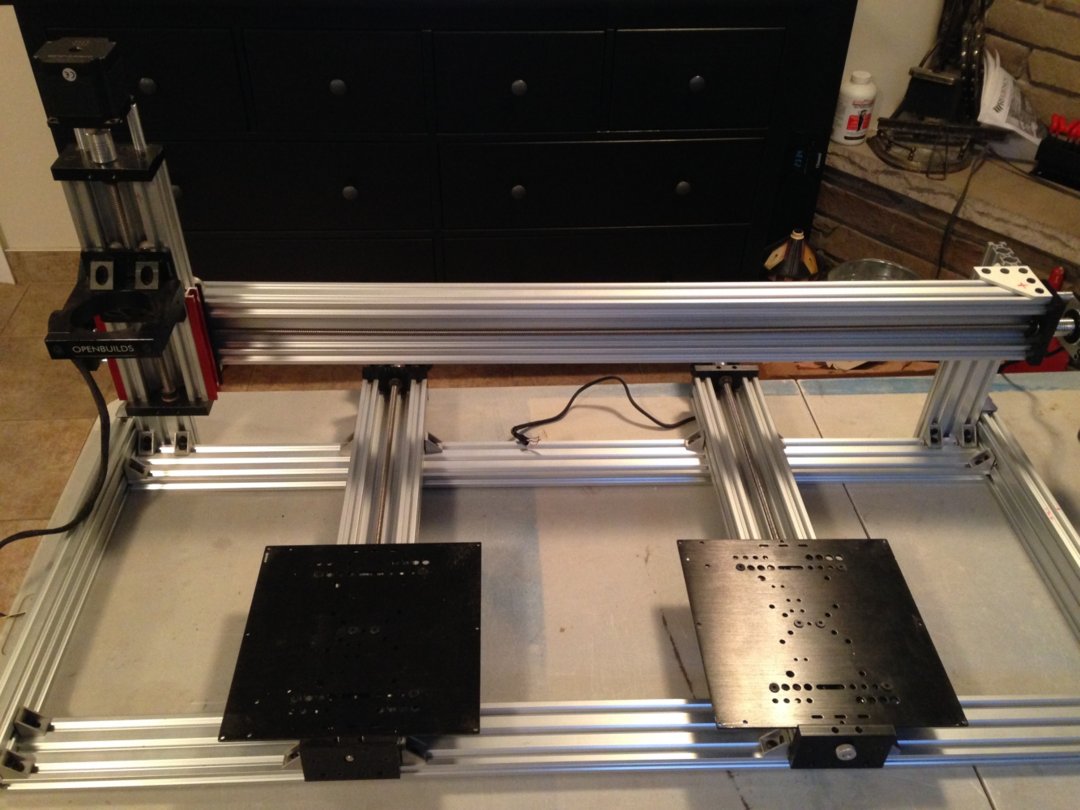
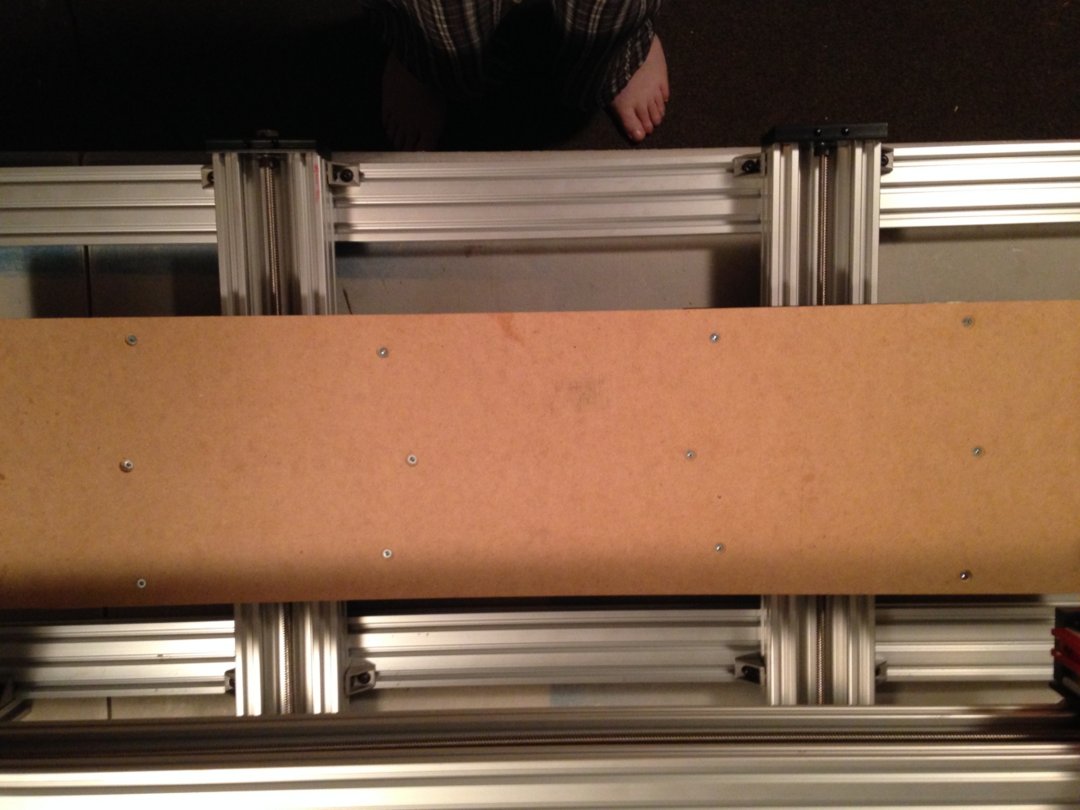
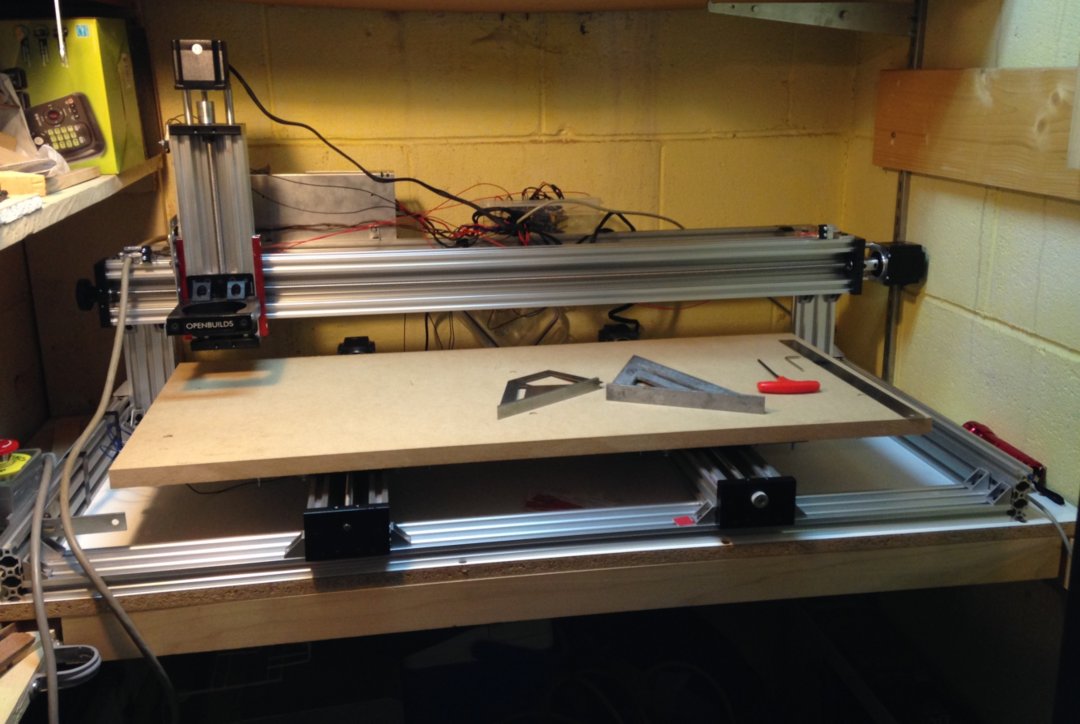
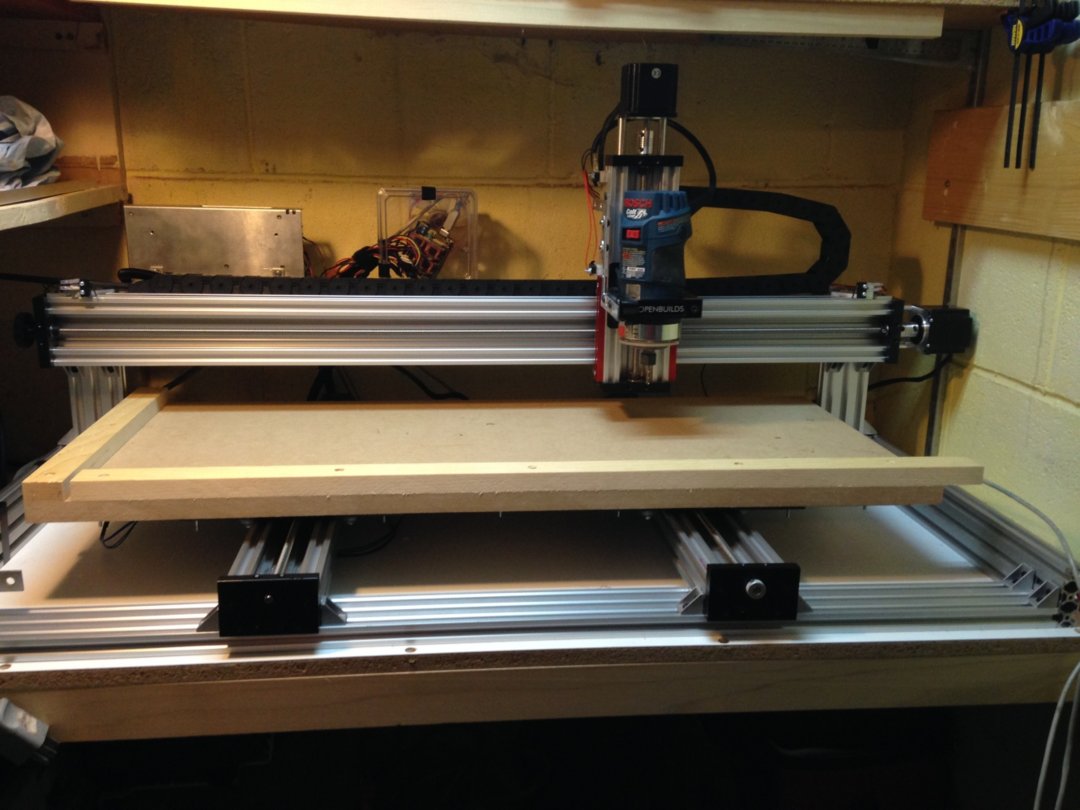
Getting there, the machine is in place and the main spoiler board bolted in place.
Now to tackle the wiring!
I don't have a big space for my machine. I went with 1000 mm rails and after the machine was assembled in my living room, it was a bit of a challenge to get it into the small space I have. I built the table for it to sit on and soon I realized I was going to have some issues. I measured the machine's squareness and I was in trouble. It may seem simplistic but I can't emphasize enough the need for everything to be level and square. I started by leveling the table with a digital leveling gauge, then I measured the machine frame for level and adjusted as necessary. Then I squared the axis's starting with the Z to the X axis and then the X to the Y axis. Although the components from Open Builds are great quality, you just can't take for granted they will all end up square when the whole of the machine is bolted together. There will be movement.
A bit of a mess. Time to get some wiring sleeves and drag chain!
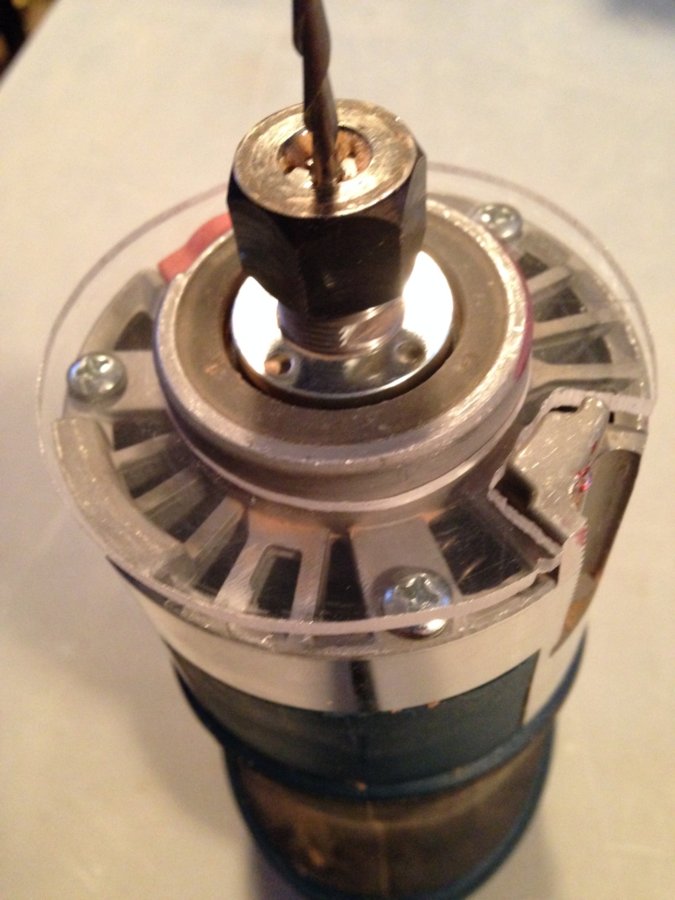
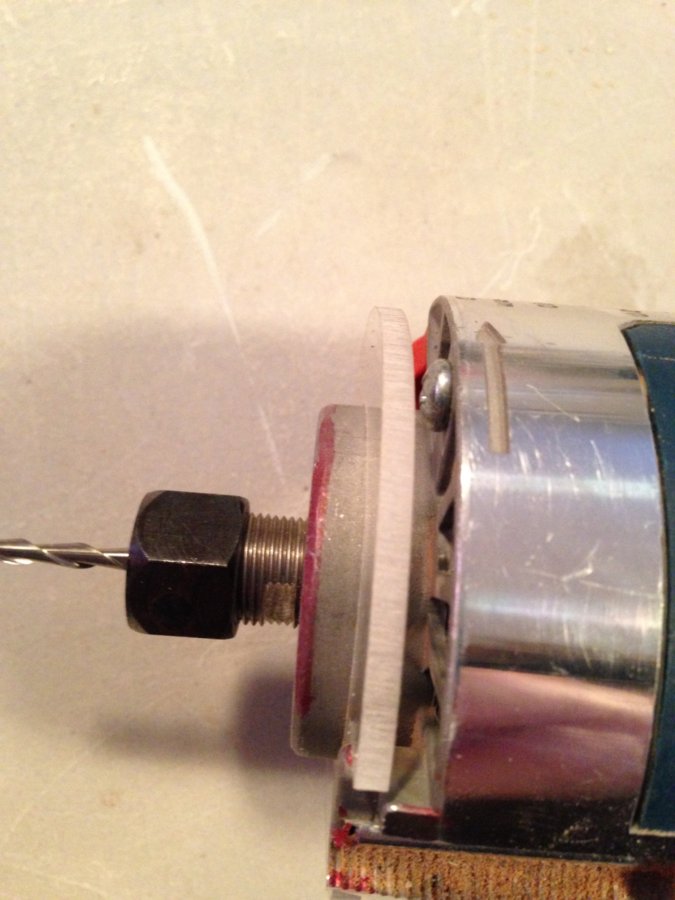
As a side note, my Bosch Colt router works pretty good. My only issue with the router (and I am not sure this is the same as with the Dewalt or Makita routers ) was that the exhaust vent is at the bottom of the router which blows the sawdust everywhere! I have to stand with my shop vac nozzle at the cutter and it still seems to miss about 50% of the dust. Even with the dust shoe the router seems to push the dust under the shoe. I made a small disk out of plexiglass with a friction fit and mounted to the spindle bottom leaving enough space for air movement. So far it seems to work well and the router is able to cool properly!
The wiring took longer than the actual machine build!
Wires cleaned up and fairly organized. First time using a drag chain! My front and side boards installed as well. Now to design a suitable hold down system!!
One of the other issues I had was finding a suitable box for the Arduino and C-Shiled. Dollar store to the rescue!! Simple but it works!

All in all I am really pleased with the build. I built it to be strong and I only plan to route wood on this machine so I believe it will work perfectly! The only extra parts I needed for the X Axis were the 1000 mm rails and lead screw, Nema 23 motor, end plates, washers nuts and jog wheel. I built the additional Y Axis like the C-Beam original!
The only issue I had was that the bearings for the lead screws are sloppy or the lead screws are under size??
Thanks!!

C-Beam Upgrade to Larger C-Beam
Build in 'Cartesian Style CNC' published by crnrstndes, Feb 28, 2018.
My goal was to be able to enlarge my C-Beam with as many original parts as possible. I was able to recycle almost all of them with a only the two 500 mm rails left over. I used 1000 mm rails for the X Axis and I added another complete Y Axis assembly. I chose to keep it simple and I am very happy with the result!
-
-
Build Author crnrstndes, Find all builds by crnrstndes
-
- Loading...
-
Build Details
- Build License:
-
- CC - Attribution - CC BY
Reason for this Build
I started with the C-Beam to learn on and after using it for about 6 months I realized I wanted t double the footprint to be able to work on larger cutting boards and projects!Inspired by
Open Builds C-Beam XL