WARNING!
I´d like to start saying I am not an engineer nor an electrician, CO2 Lasers are dangerous things to play around with. I´m learning as i do this build, and I have people near me with great experience and knowledge who i can ask for advices. If you have just a little doubt on your knowledge or are unsure, ask someone who knows this stuff! Don´t risk yours or others peoples lives!
PART 1 - Designing and scrapping items
So to start with i have been designing the frame in Autodesk inventor, and for now the design is not done to a 100%. I am still thinking of the Z-axis and the motion at the axises, im thinking of using LM12LUU bearings for the Y-axis and MGN15 bearing for the x-axis.
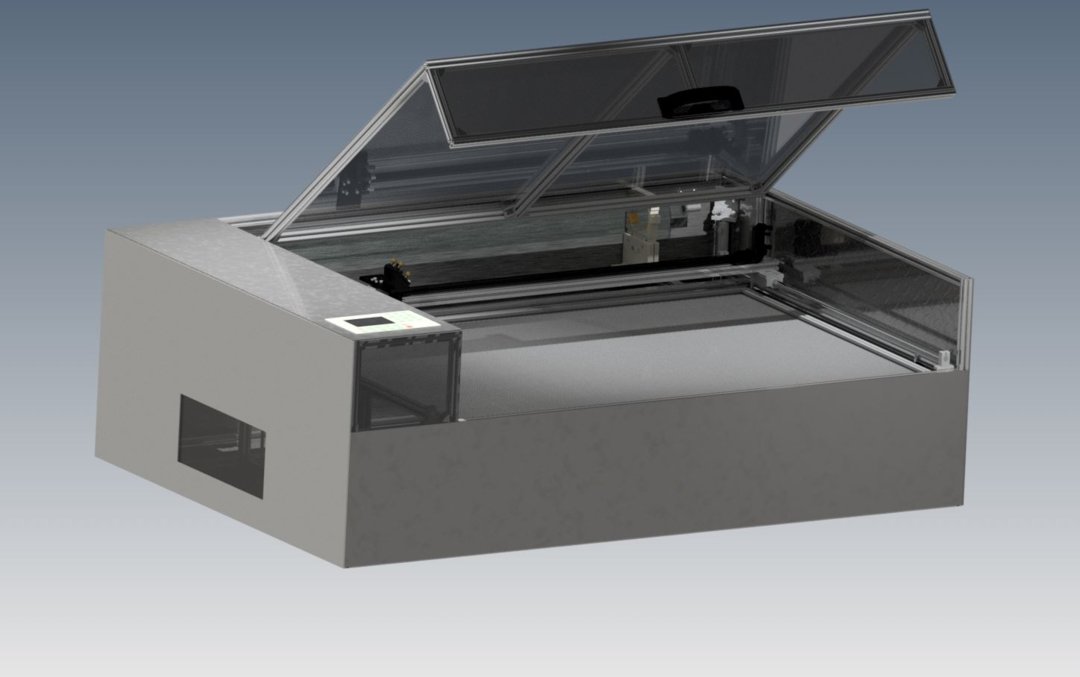
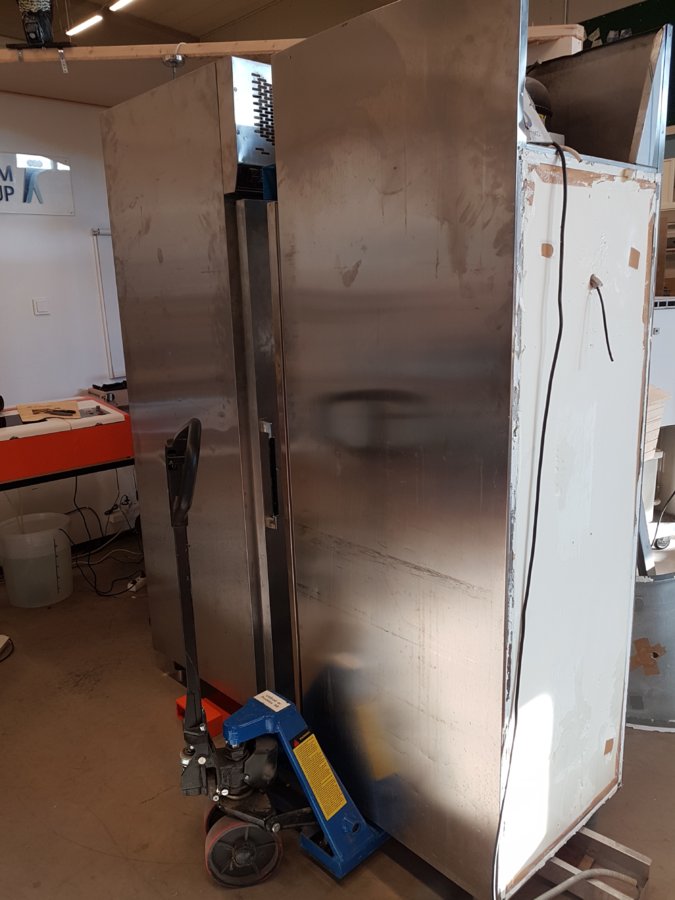
The goal is to have somewhere near 120x80 cm cutting area, and also to be able to replace the tube if i´d like more power without rebuild the whole thing. Today i got a hold of two refrigerators to source the steel frome for the enclosure, stainless steel so i belive i will have a good time cutting them to slice to fit the body. Maybe its possible to use the refridigator-element to cool the system as well.
Scrapping
Today i used an angle grinder to cut the refridgiator to pieces, man that was nasty, one of the fridges had not been cleaned and out in the sun for at least a month, it smelled of dead animal!
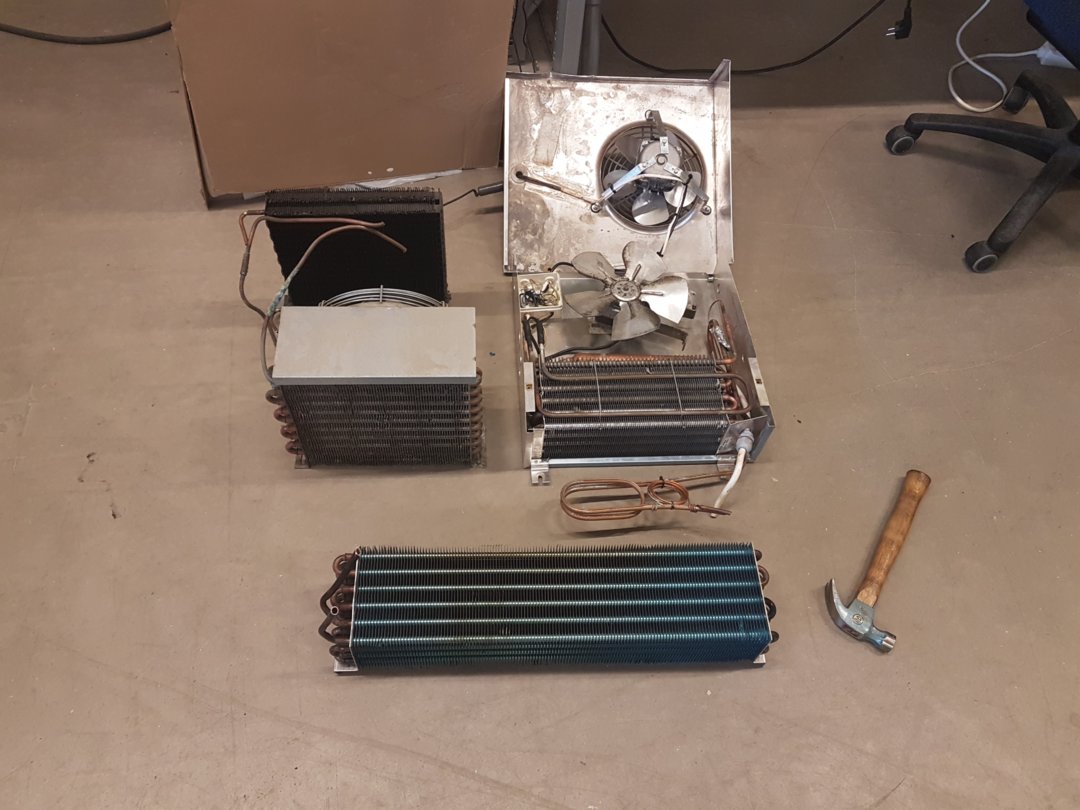
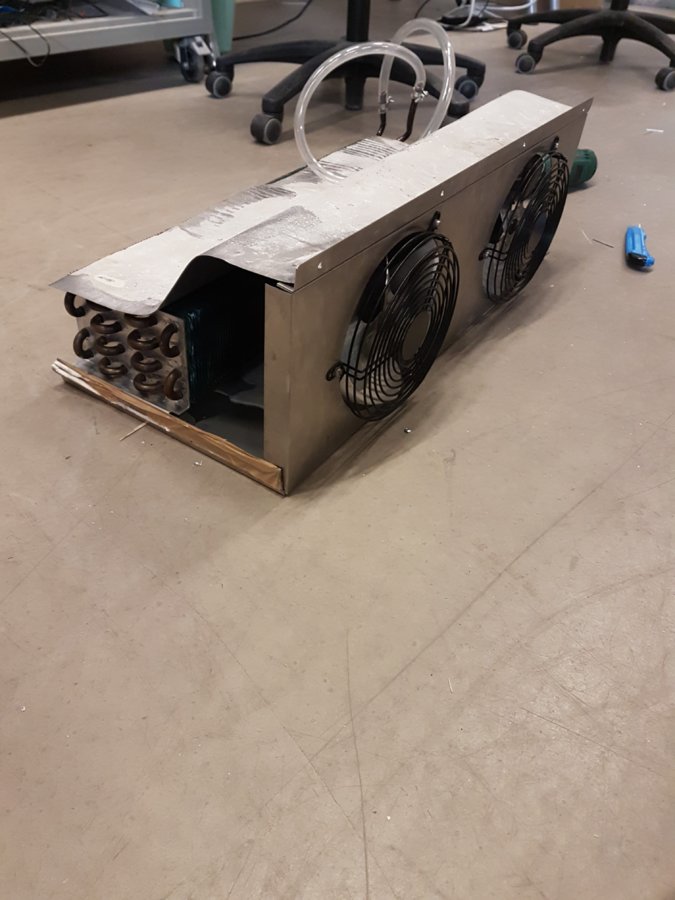
But i had some luck, i found lot of copper pipes and chilling blocks, anyone who have an idea of what i can make of these? would the "blue" block in the bottom be enought to chill a 80-100w tube with active fans blowing at it?
Ordering parts
I have been looking around and reading quite a bit at the internet for parts, the parts used can be found in the BOM in the file section. Im thinking about to get a 90-100W Reci-W2 tube. I will try to start ordering the parts for the frame and brackets next week, then i will have vaccation for 2 weeks, so hopefully the parts for the frame will have arrived when im back home again. Anyone have any experience in shopping at Wavetop sign, do you recomend them to get the laser parts from?
Have ordered the everything except the tube and PSU today, still not sure if i will go for the RECI W2 Tube or the EFR ZS 1250 80w. So now its just start waiting for the stuff to arrive. And then start the assambley!Will proberly turn the tube the other way to be able to get the full length of a 80-130W tube
Redesign
Yesterday I realized that i would not fit a regular standard board since the Z-axis bracket was taking space from the cutting area so i made the lid 50 mm wider, so total size of lid is now 1248 and the gap is 1250, i also decided to go with a ruida DSP 6442G controller, drivers and motors for it, and a linear rail on the X-axis to be able to get higher speed at that direction. I also have a friend that offered me to try his bruschless motor with the odrive chipset, that would be pretty cool as well, but i haven´t decided yet. Since i want to be able to access the tube and electronics i wish to be able to remove those panels easy,and plexi got to expensive so i went for the stainless sheets i scraped.
Back from Vaccation
So im back to my build again, i recieved most of the parts i ordered, im waiting for the laser tube and the aluminium profiles to arrive, proberly i get the profiles at friday. I decided to go with the Reci W2 Tube, so i hope i will get satisfied. I decided to try out if my water chiller would work today by assambleying the parts, since it will be a passive cooler i guess that it will not go bellow ambient temperature, but since i live in Sweden, 8 months of the year i will not have more than 20C inside.
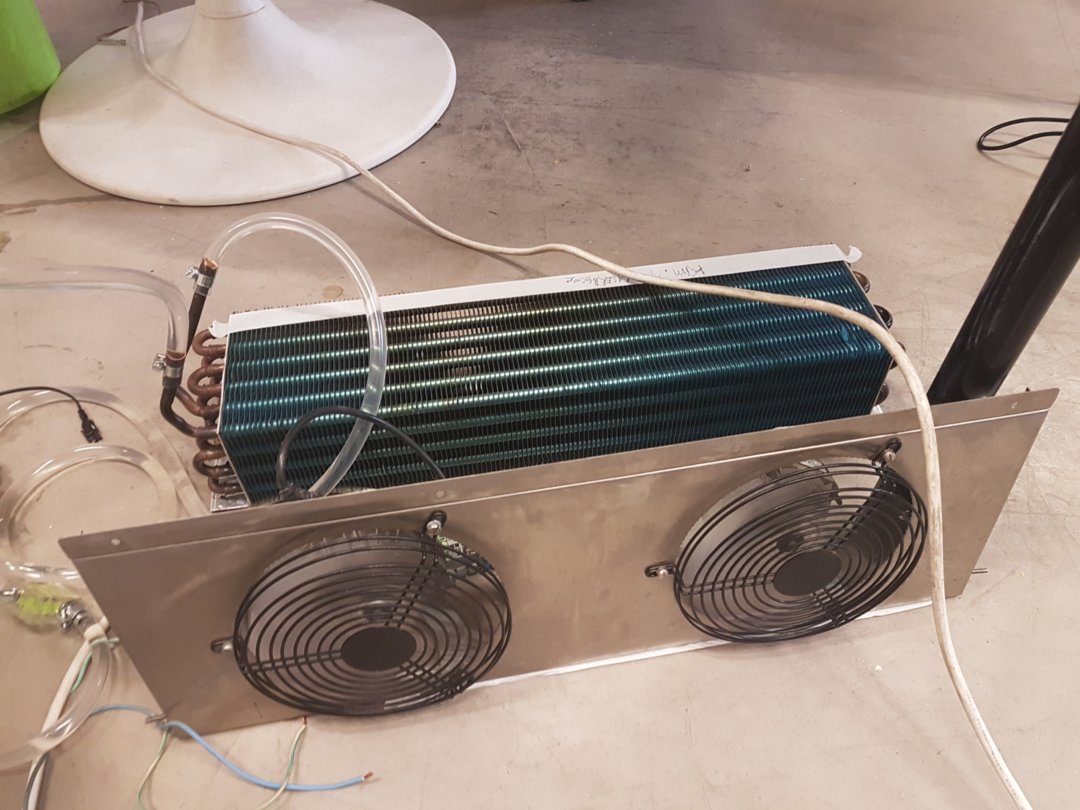
So I will give this a try. Seems okay thought fans and the cooling block will be optimized in a box so the fans only blow on the cooling block. The temperature went down with 0.5 C in a open room at 50 seconds so i have some belivee for this idea.
Check out the video below:
Though I made a mistake I hooked up the cooling block to the pump and started to pump water through it and within a few seconds i realized that the block was full of refrigerator oil, so now i have refrigerator oil in my bucket, water tubes and pump. Quite a mess, but i could have been worse i guess, it could have been hooked up to a laser tube
Part 2 - Assambley
Day 1
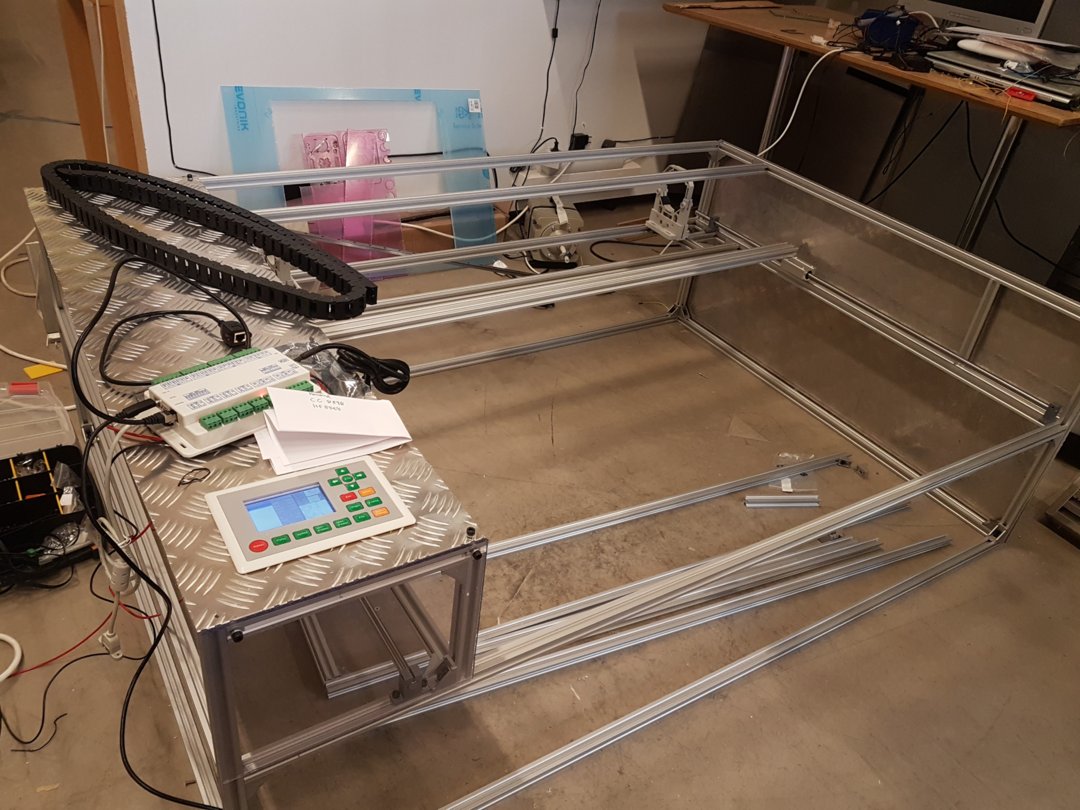
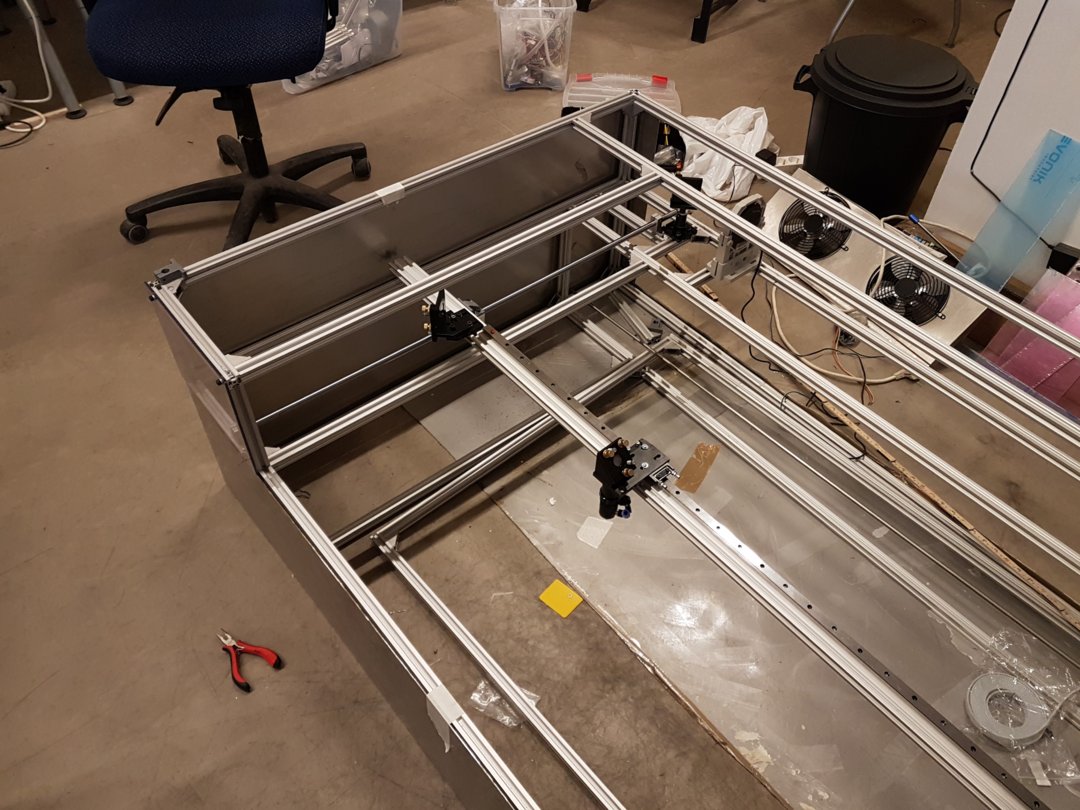
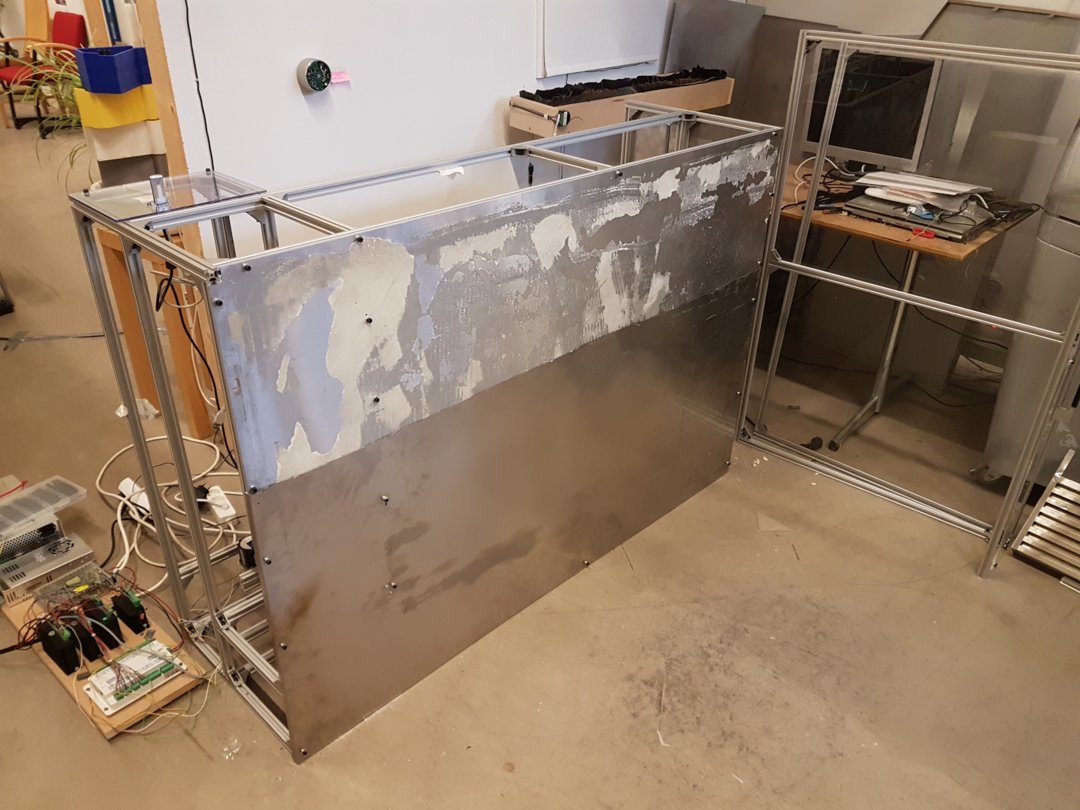
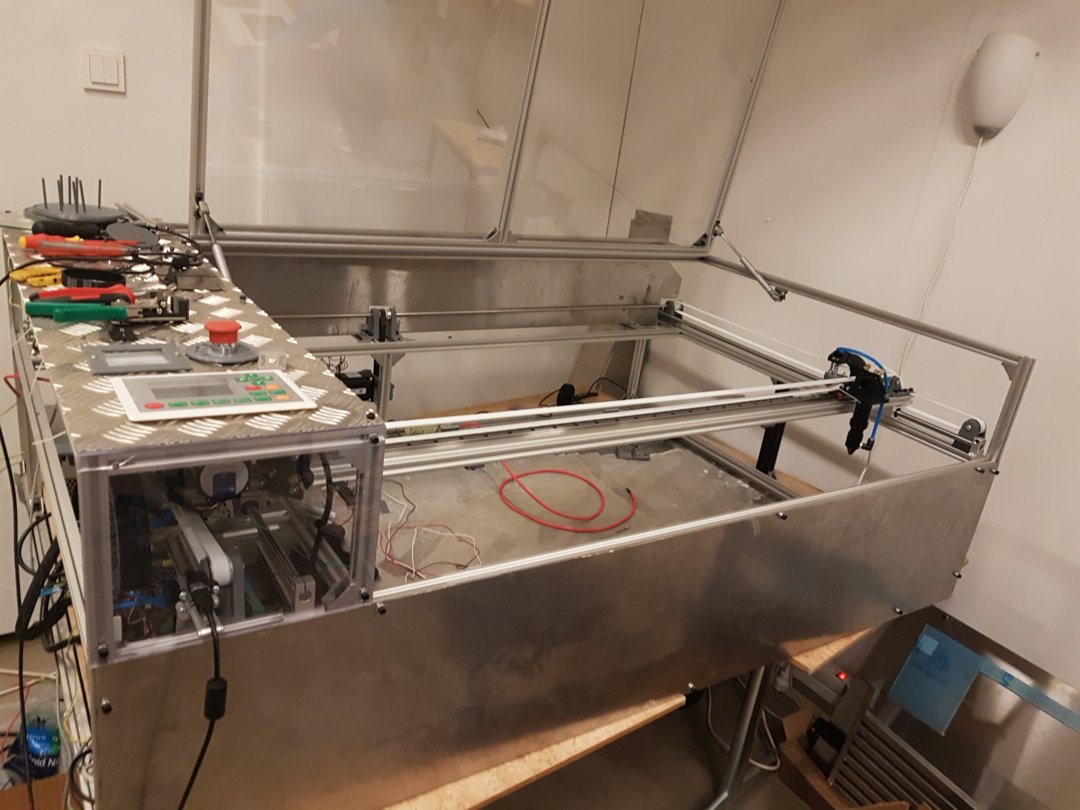
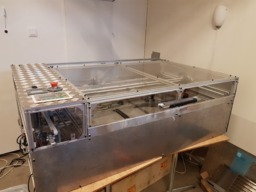
So today i recieved the profiles for the frame, so i started to assamble the frame for the laser. I didnt realize how big it would get i guess, but the bigger the better!
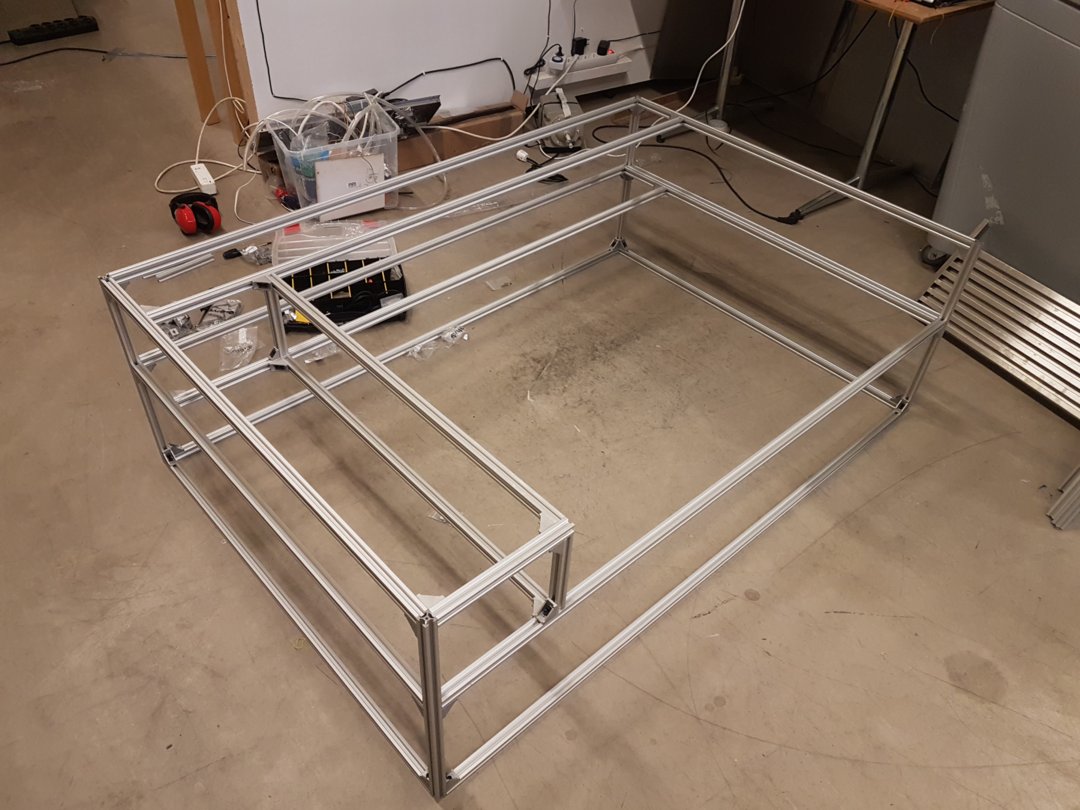
Im having problem to find Plexiglas for the lid in the right dimensions, hope i can find something next week for it. It´s pretty **** expensive, would like to have a 5mm sheet at least. Also i recieved some corner brackets with wrong dimension, so i hope i will get some more next week aswell. But now the build is on!
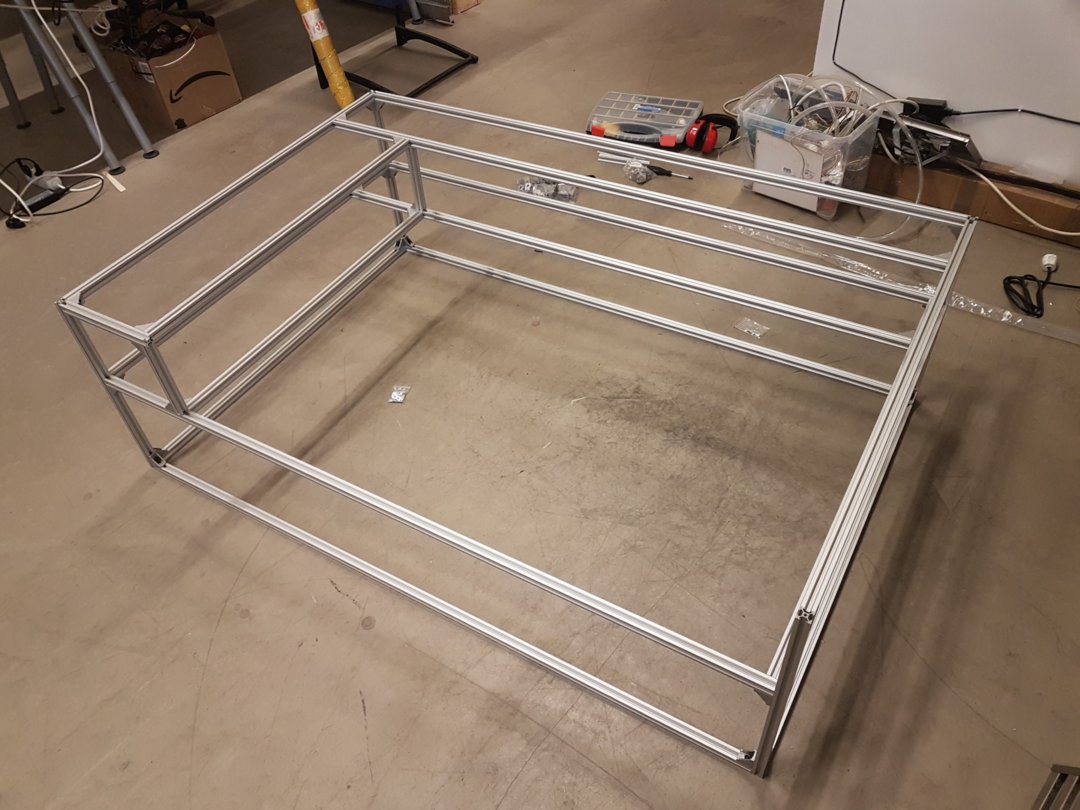
Day 2
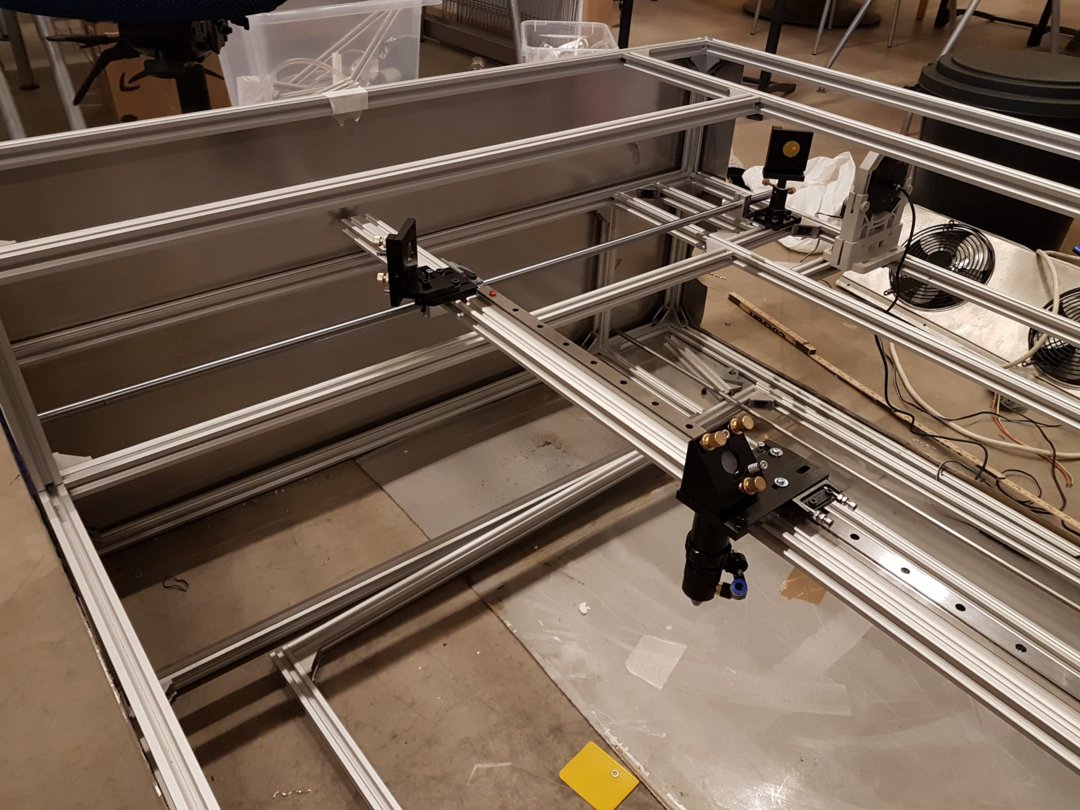
Today I got some panels cut out of some leftovers, got some of the profiles cut to length and put the lasertube mount in place, also did some measurements for the mirrors.
There are some things i will try to optimize before continue the assambley, also im short on the corner brackets. Hopefully they will arrive during next week and the tube and PSU will get here by the 13th of august. Tomorrow i guess i will try to cut out the bottom to the laser and continue mounting the mirrors
Day 3
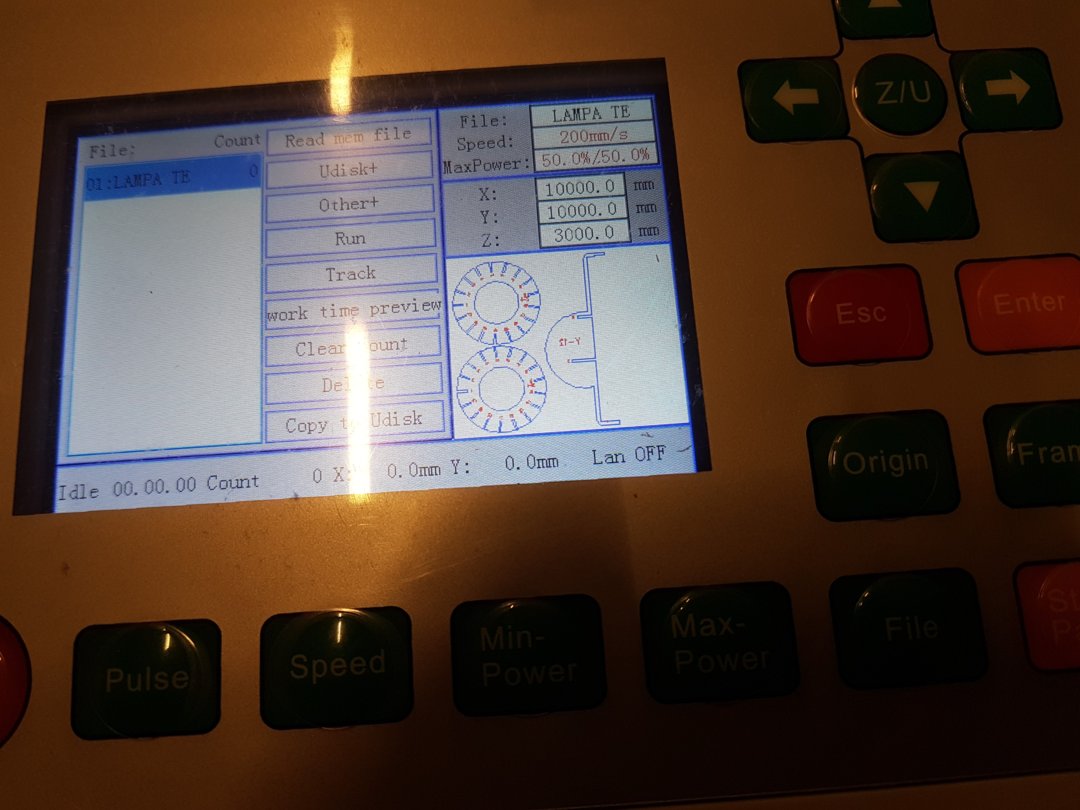
Did a test of the DSP-controller absolutly amazing workflow there! Useing Lightburn to send the files to the DSP. Having an exam on friday so if i can stay away from the build this week i will need to study :/ but its hard to stay away.
Day 4
Got the plexiglas for the lid today, assambled it, think its a little bit to shakey, so will get some extra aluminiumprofile there, need to update my assambley soon as well and figure out how to do the motion for the X and Y axis. Realized yesterday that i have ordered the wrong belts and pulleys as well.
Day 5
Had a conversation with a guy who is an flow and therodynamic engineer, he was willing to help me with my laser chiller build by giving my some lecture material and help with some temperature measurments, also had som inputs on how to design the box for the chiller.
Day 6
I have reinforced the lid by two extra aluminiumprofiles and i started to cut the stainless steel sheets to fit my enclosure, realized that the plexiglas would be to expensive for me, at least in sweden so i decided to go with stainless all over the place. Sick that i got the sheets for free, otherwise it would have been quite expensive.

Day 7
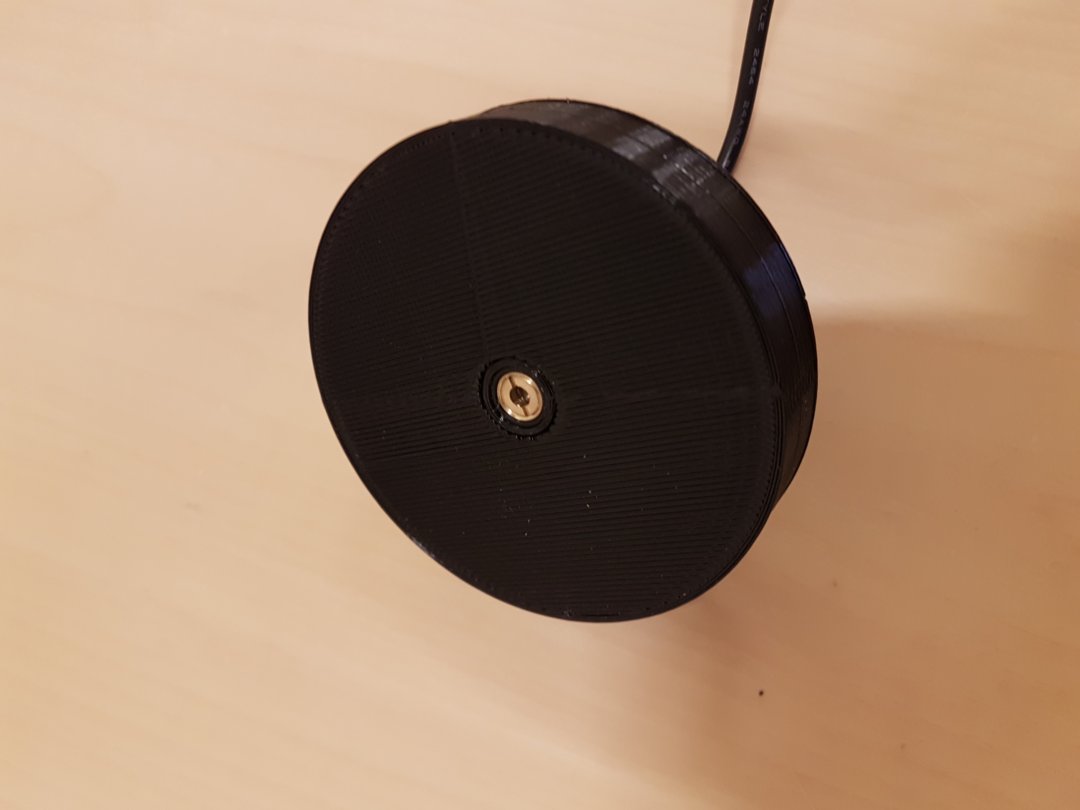
Today i started to try figuring out how to maximize the cutting area and how to do the laserpath. 3D-printed at cylinder with the same diameter as my tube and put a hole in the centrum for a laserpointer, and started this way. If i put the tube the other way i can have better cutting area since the mirror would take space if i put the mirror to the right in the machine.
Day 8
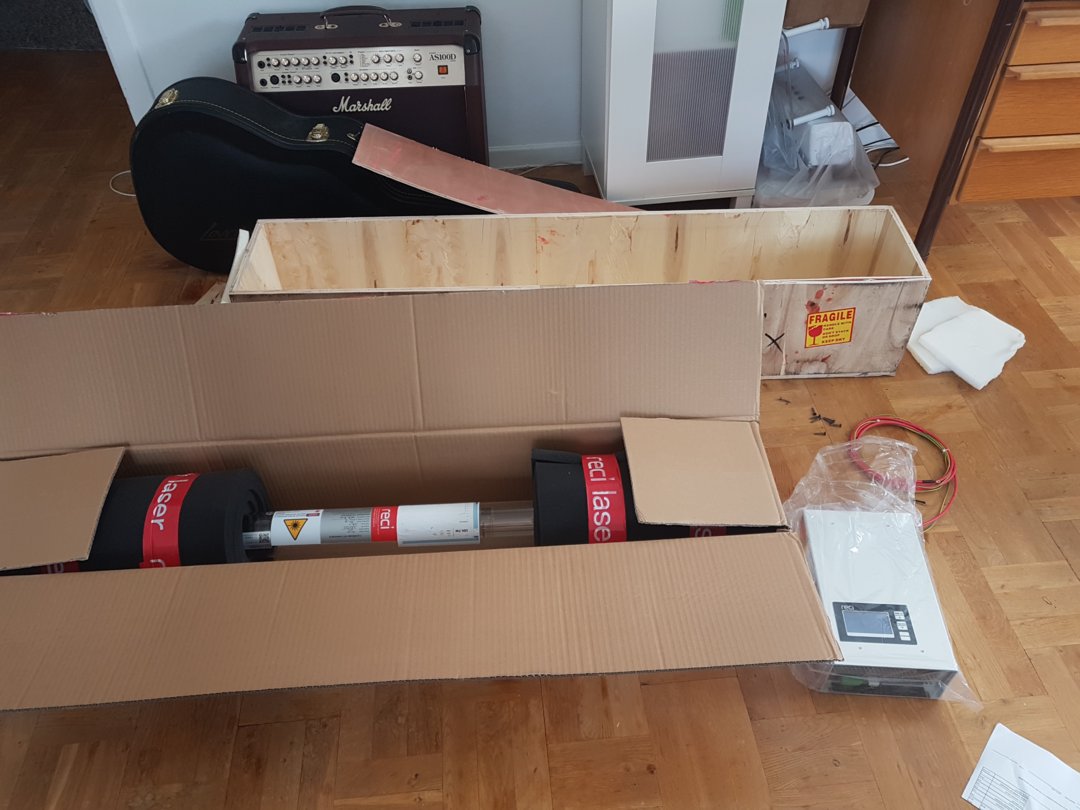
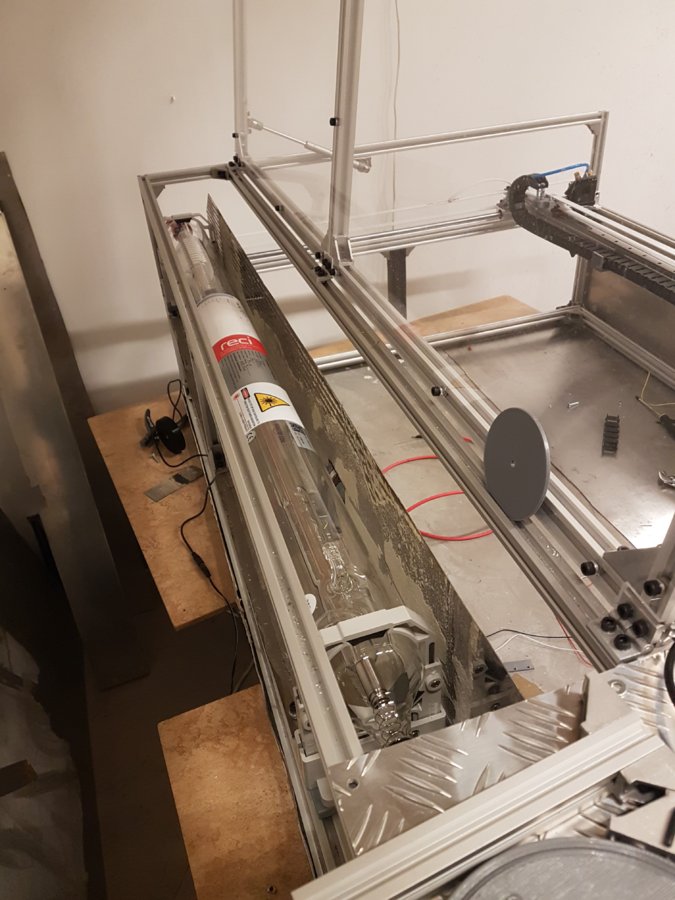
Recived the laser tube and the PSU today, but i only got one of the two stepper drivers :/ so there will be some more waiting until i can hook up everything but i have plenty of work with modeling the mounts for the motors and endstop and belt holders etc.
Here are the beasts!
Day 9
Made some adjustments for the laser cooler, will try to make some sides to the chilling block as well to do some measurements and try to calculate if it will be possible to use for my laser.
Day 10
Wired the X-motor today and assambled it to have it for a spin, are some more optimizations to be done with settings, but it seems to be working
Day 11-12
I have started to assamble all the electronics on a MDF-sheet to avoid get electrocutet, will also wire ground to all metal-sheets before i connect the laser PSU.
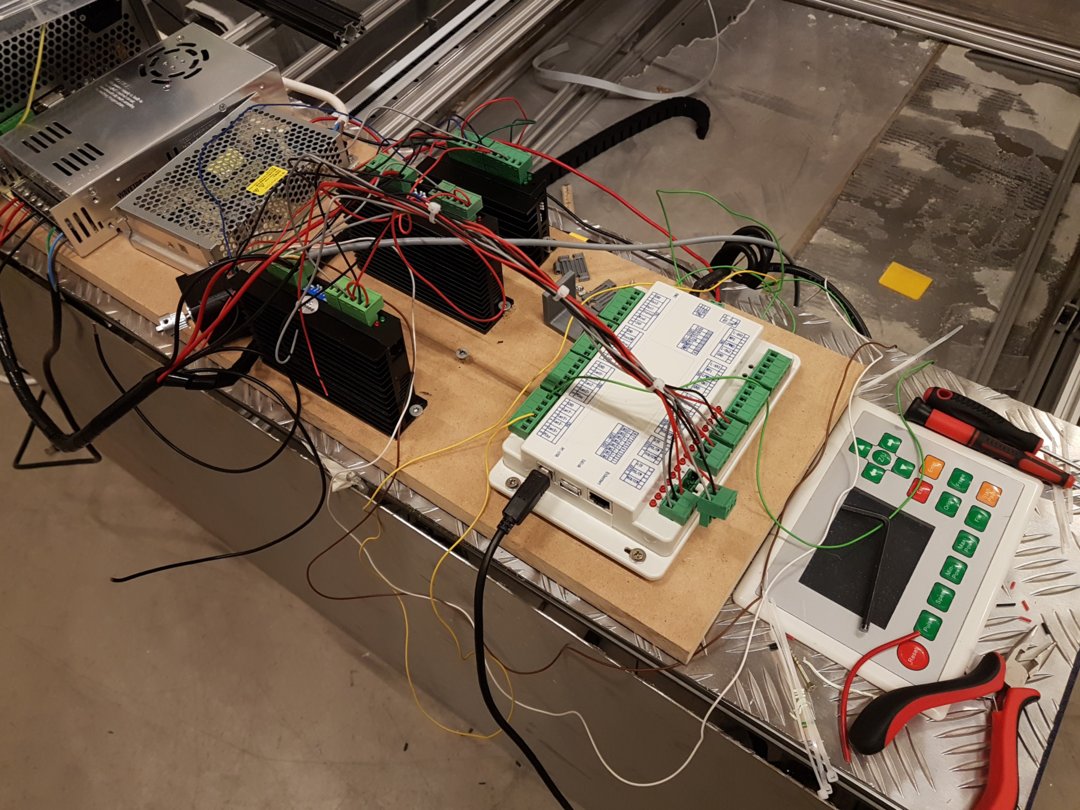
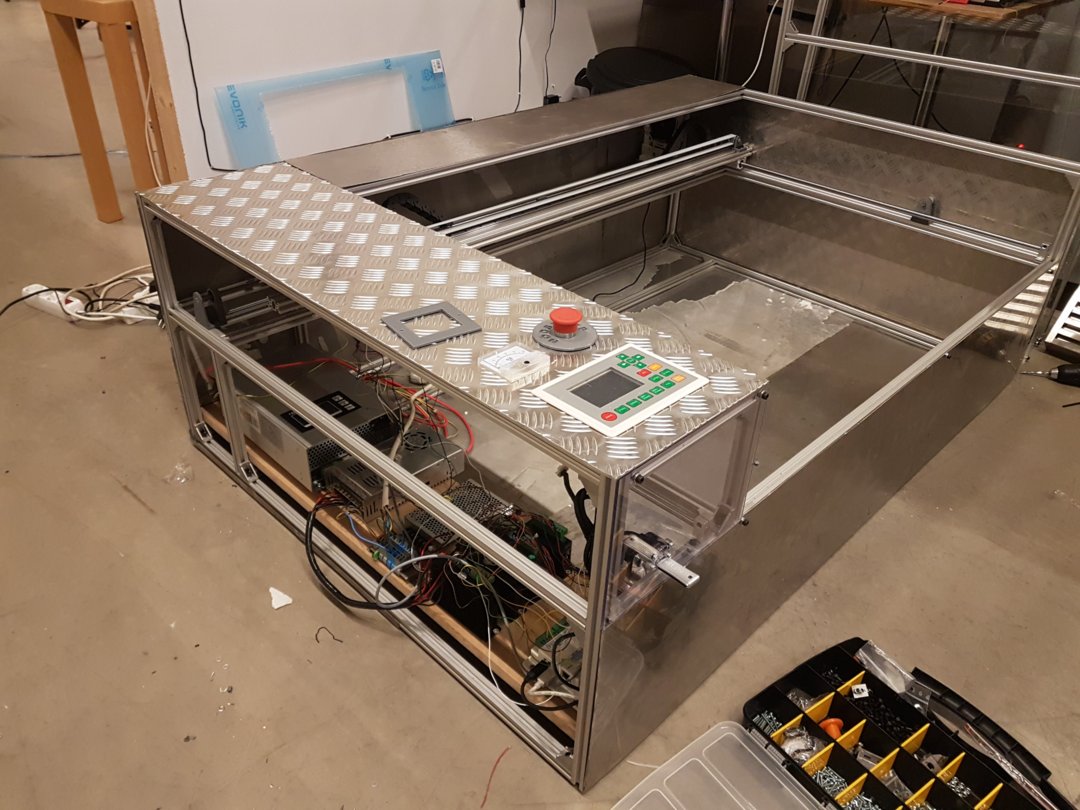
Today i took some steps back and cut of all corners on the sheets and grinded the corners to avoid cutting myself handling the sheets. This is a boring part of the build but it must be done, i also assambled the bottom sheets permanently, feels good to have it done.
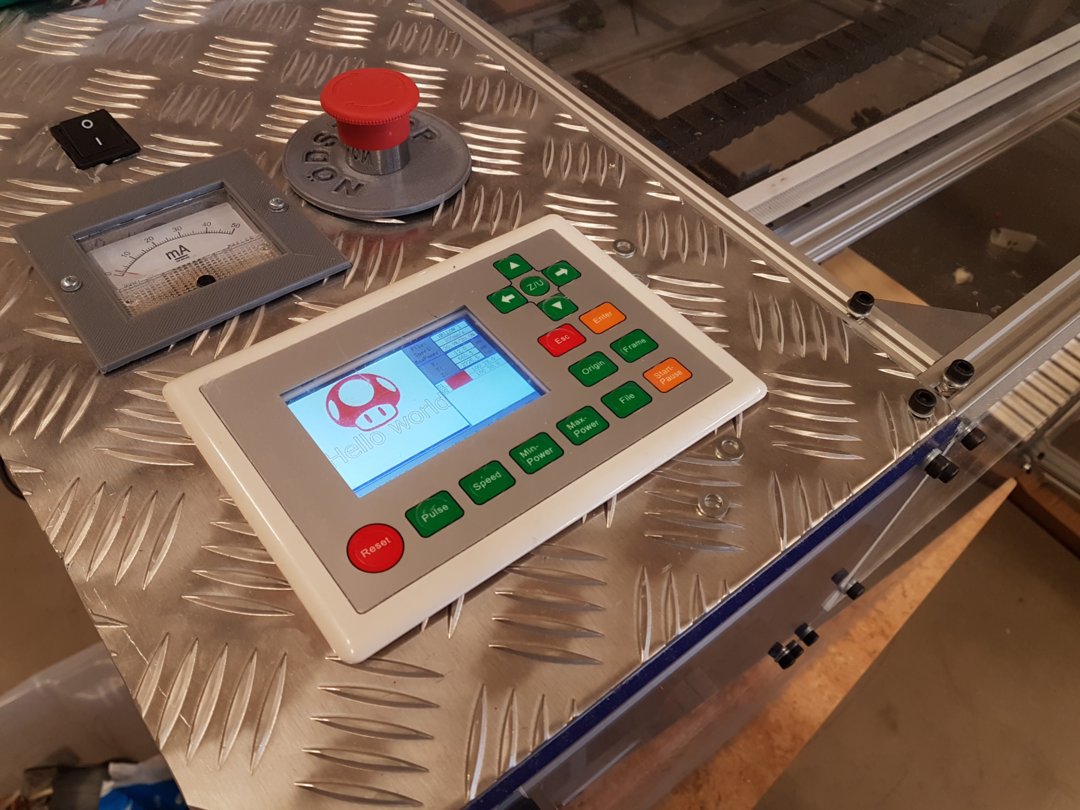
I also cut holes for the ampmeter and the emergency stop button, had to 3D-print some cover ups for my butcher-cutting as well.
So now im just waiting for the belts and pulleys to arrive from the custom, it kind of insane, it took 3 days to send it from China to Sweden, but it takes 2 weeks for the custom to declare and send it to my apartment.
Will try to measure some effect on my cooler tomorrow or at monday.
Day 13
Did some calculations today, hooked up the in side of the heat exchanger to hot water and just poured the outside to the drain, put some thermistors at in and out on the exchanger.
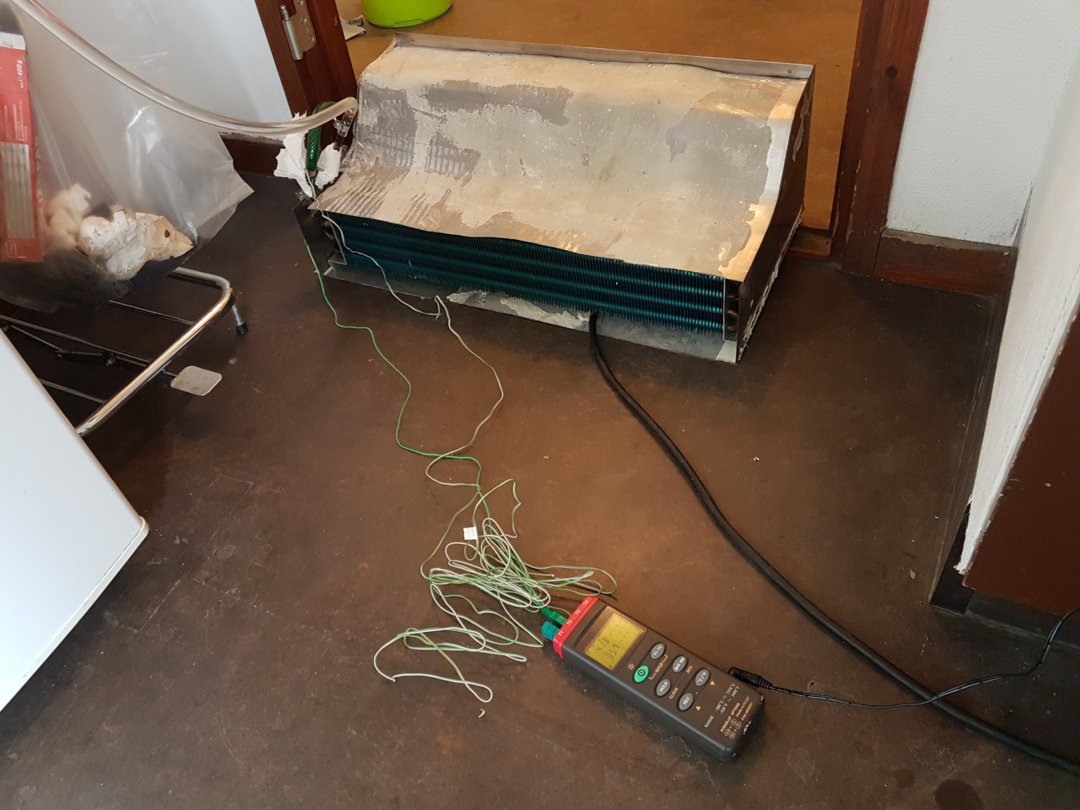
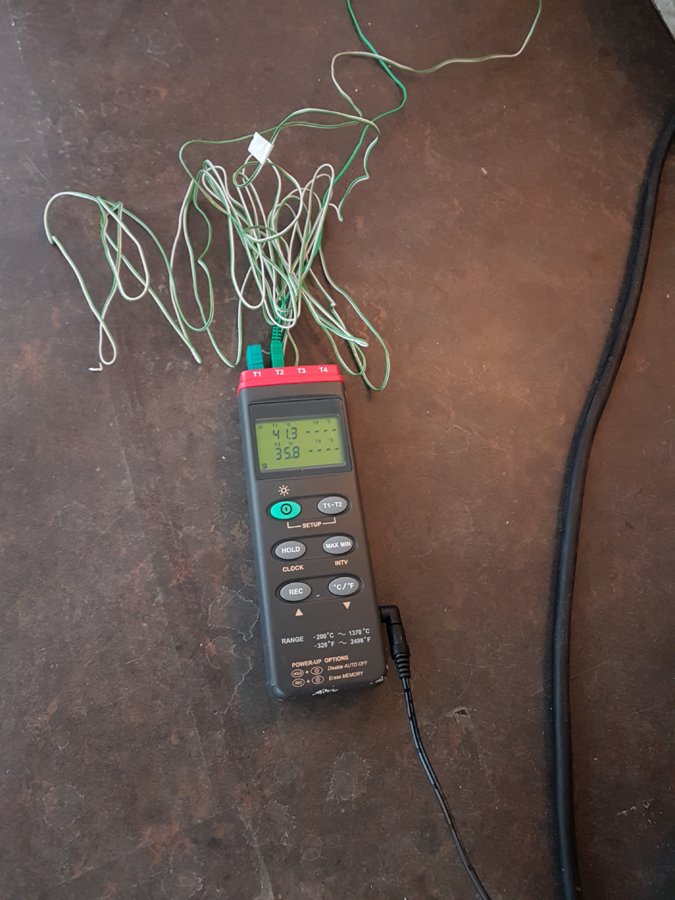
I got the formula from a guy who is currently teaching thermodynamics and flow calculation, and if everything is right it is Q_flow = volumeflow * 70 * (TempIn - TempOut). So at 35,4 temp in and 33.4 out as i was testing with a volymeflow at 7L/minute i got my calculations to:
7x70x(35,4-33,4)=980Watt.
Not sure how hot the outgoing water is going to be from the laser tube, so this is just a test, will do some better measurements when i try with the real laser tube. It was almost 28C in the kitchen where i did the test so it´s no fair results, proberly i will not have more than 20C where the laser will be for the winter and spring. And as i read on how much flow the CW5200 chiller have its almost 16L/minute and according to the guy who gave me the formulas, a bigger flow gives better cooling. We will see when i try with the real deal.
Day14-15
So i recieved the belts and pulleys at last, got the X and Y-axis moving. Got some gas struts to keep the lid open. School started last Monday and i have so much other stuff to do. If i dont have the flue i will try to get some more work tomorrow. Here is a video of the X-Y gantry moving at least, will keep you updated
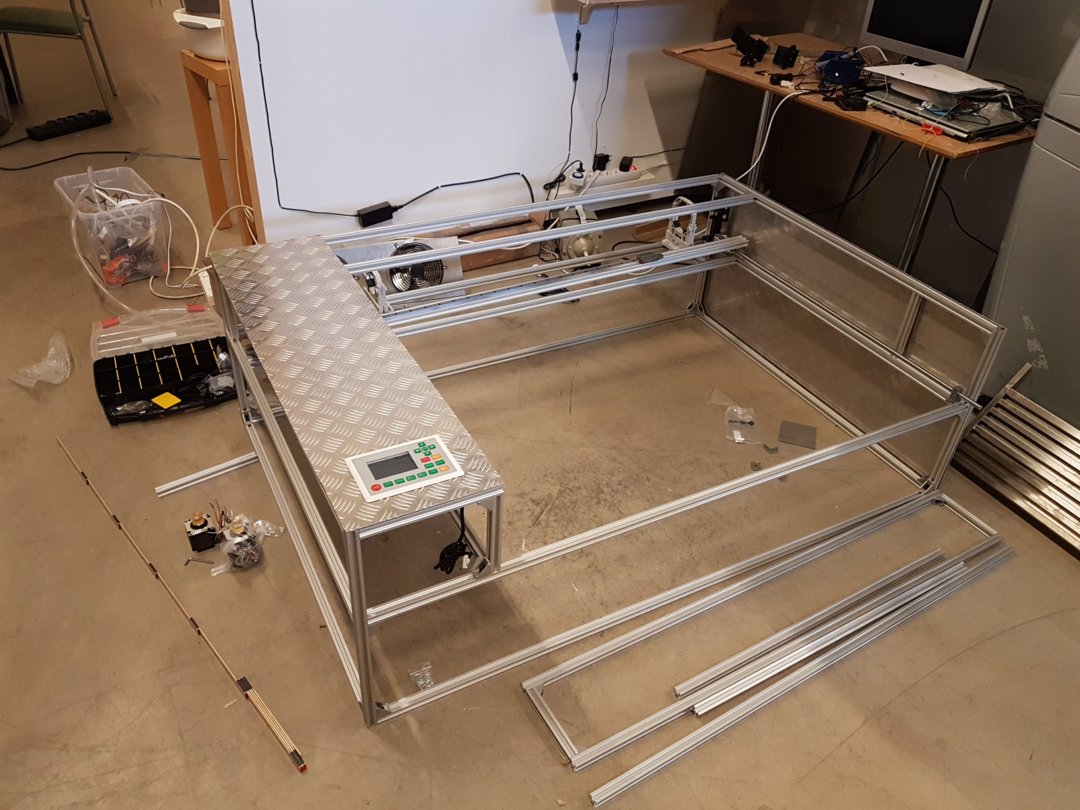
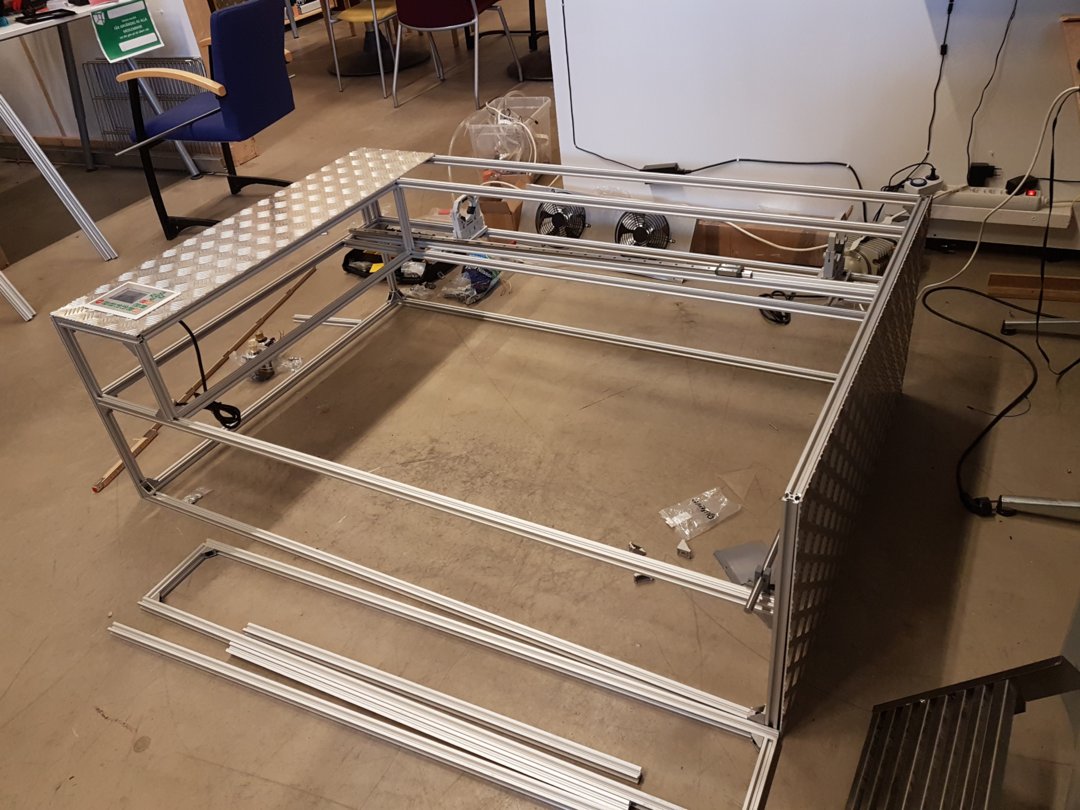
Day 16
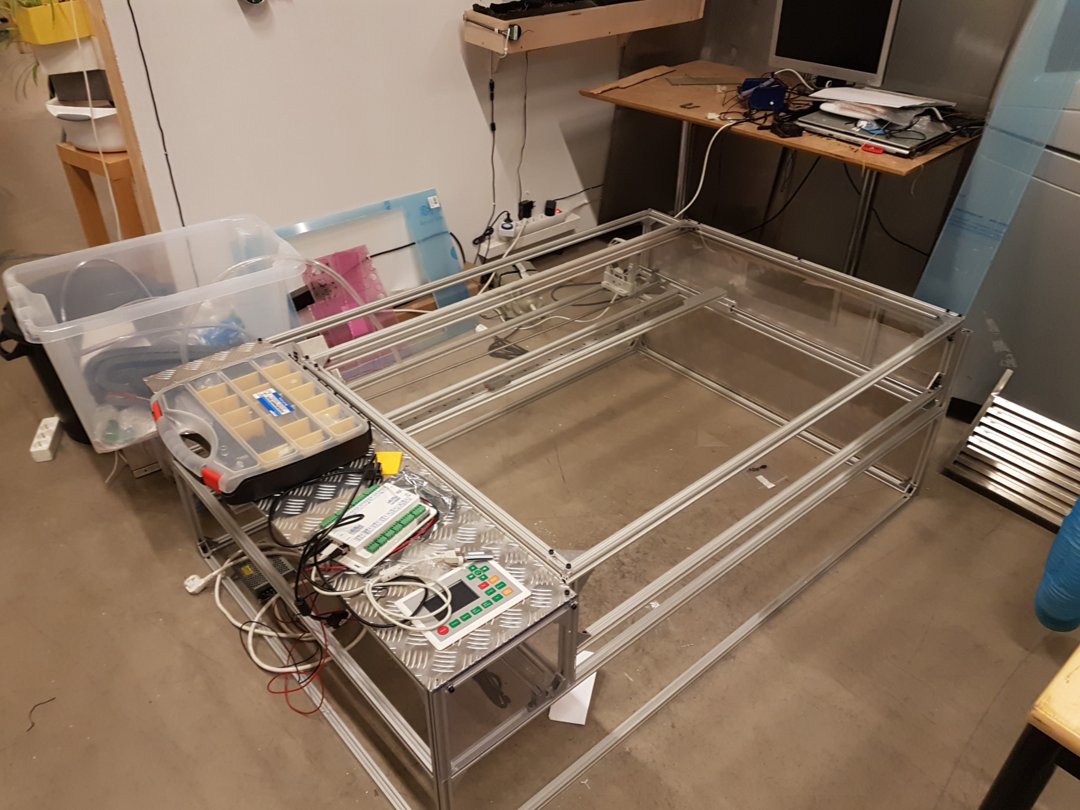
Had the flue for about a week and been in school since i got healthy again, but today i left the Lasertube at the workshop and recieved some better parts for my build, changed the endstops for better one, I also did a big cleanup and put the laser on a table for better work height, so i hope i will have time to mount the tube and do some test shooting soon. I have also made some electic wiring, will try to take some pictures tomorrow
Day 17
Been studing for an exam for almost two weeks, but today i hooked up the tube and did some wiring for the tube. So hopfully i will do some testfire this weekend.
Day 18-19
So i have wired and test my Z-axis table today
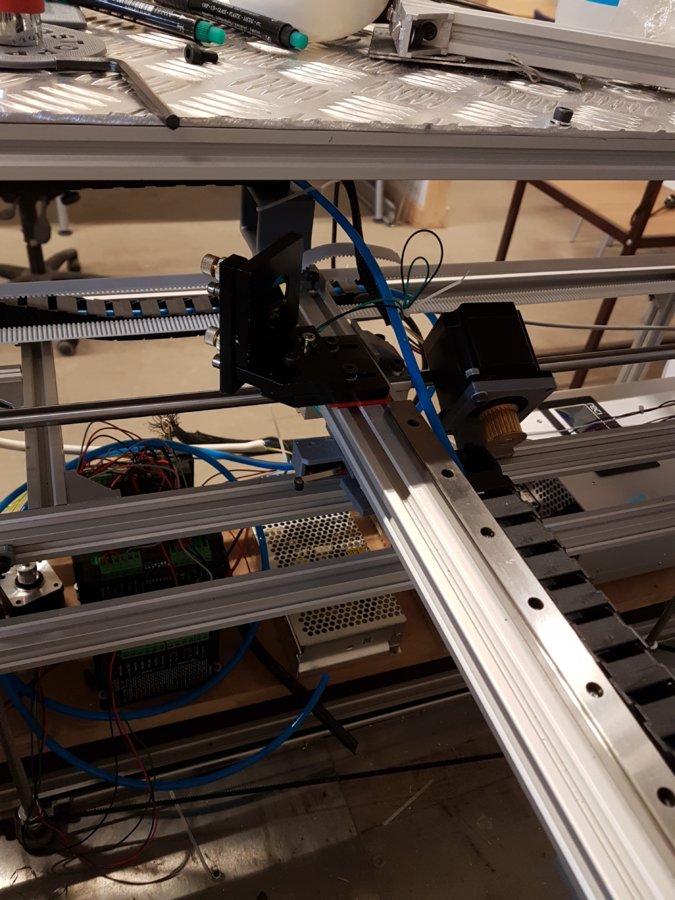
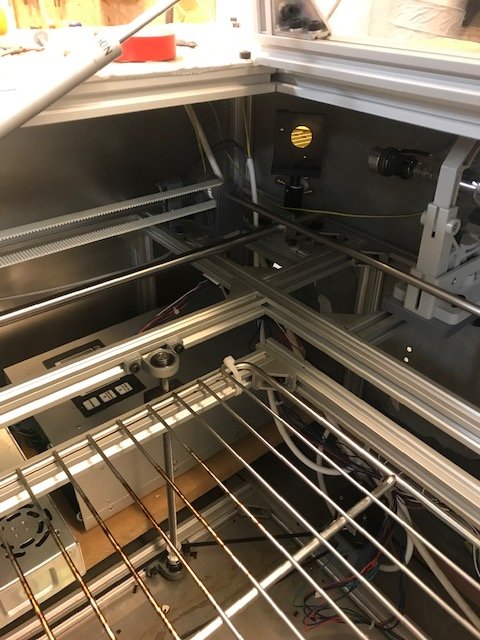
I also aligned the mirrors and tried to do a testjob, but i made a mistake in my planning, i thought my laser beam would go above the belt to the X-axis, i realized today that that was not possible, i could align mirror and testfire the laser all over the bed, but when i tried to cut a job, the vibrations in the belt made it shoot the belt, so now i will change place of the mirror and motor to have the beam to go "behind" the motor. So i made a new mount printing right now, so i will try to give it another shut tomorrow. This is the result of the first try
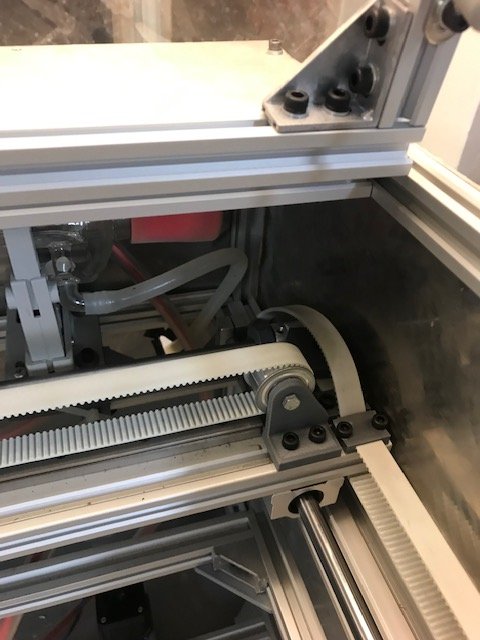
So i will put the mirror further to the right at the X-axis and the motor to the right of the second mirror, i thought of it already from the beginning, but i did it this way to have a shorter laser path. But that didn´t work out so will redo it the right way
Day 20
So today i switched place of the mirror and X-motor so now i cant hit the belt, now i got it to testfire well, but i need to get some tensioners for the Y-belt and do some redesign of the cable chain, proberly just lower the mount.
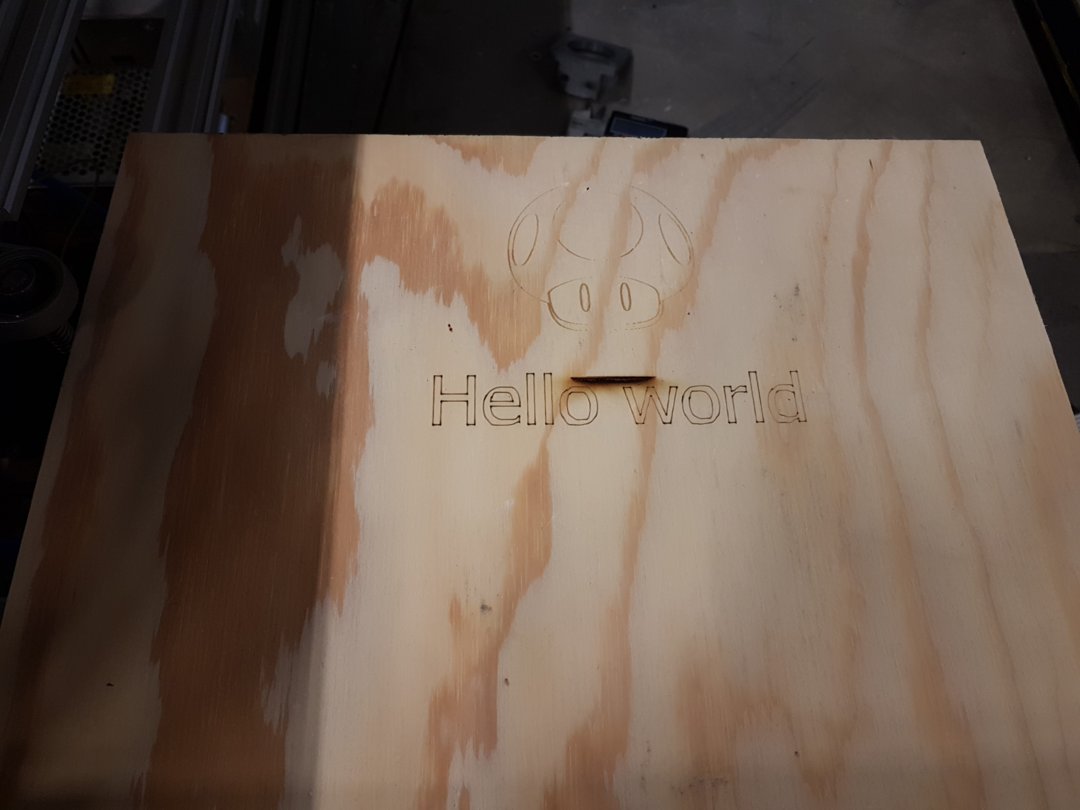
Need to tune the power a bit still,it doesnt fire bellow 14% so i need to edit the device settings for the Ruida controller i guess, but a okey first test except the belts tension as you can see on the letters.
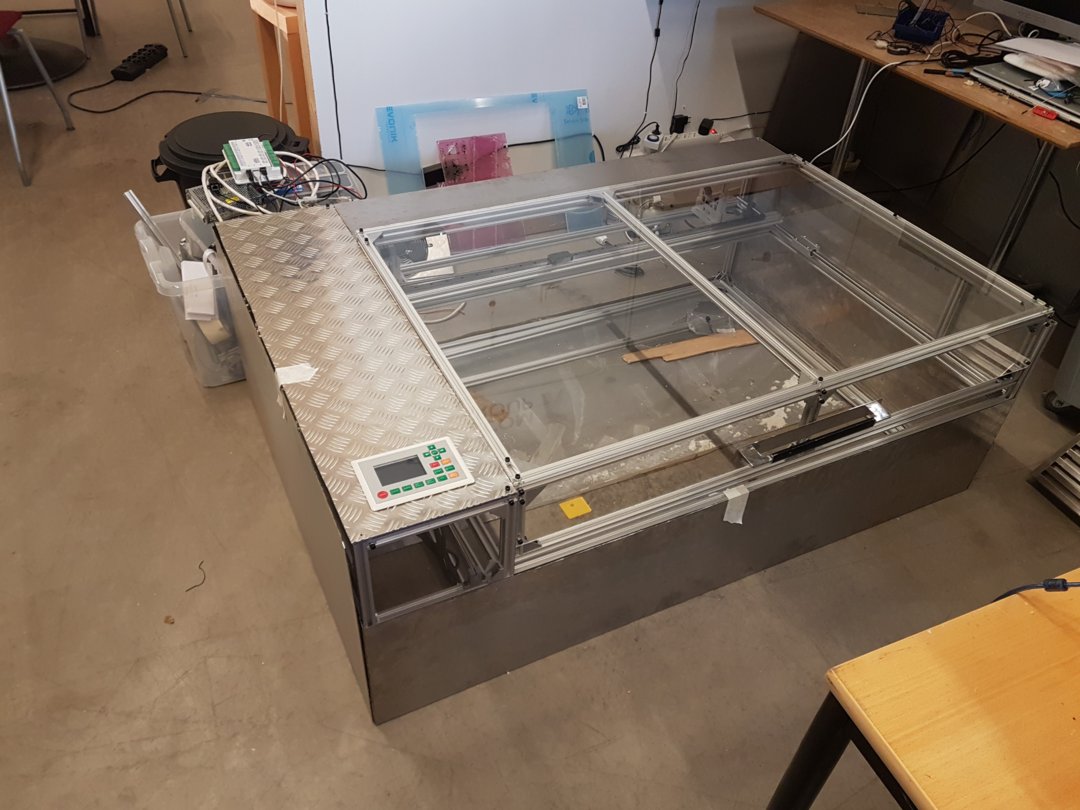
A long time have passed since the build started, i never got to finish the build. I have had a lot of other things to do. I have now finished my studies and moved to a house, the house has a big basement where i have built a workshop for myself and have room for the laser.
The first thing i had to do was make something for fume extraction, so i drilled a hole in the bottom of the enclosure and put a pipefan.

There is some missalignement in the Y-axis i have been struggling with to fix, but have kind of got sick of. Since I was a student when i started the build, i wanted to go with a low budget, but now when im working and have a wage I will replace the rods for MGN15 bearings instead. The mounts for the pulleys and motor brackets where 3D-printed, now I have ordered aluminium mounts instead and, a mechanical kit for the pulleys.
Another problem i had is that the tube got very dusty from the smoke when I am cutting. So Im thinking about extend the laser enclosure so it gets deeper, and that the tube gets its own box to keep the dust away from the tube. This will also give me room for the new Y-axis and it will also make adjusting the first mirror a lot, since its kind of hard now.
I have tested some cutting and though i have some problems with the y-axis, i guess it cuts okey.
Beamlazer Laser cutter CO2 100W
Build in 'Laser Cutter Builds' published by Kims3DIY, Jan 4, 2020.
Hi everyone, im new to the world of lasercutters but i have been granted access for a Trotec laser for a while with old firmware and only compability trought Windows XP. Then i decided to build my own laser, with some easier workflow and support for Windows 10. Since im still a student i have limited resources, so i will try too use scrap parts as much as possible. I will publish photos and updates during my build continously. Gladly taking advices from others.
-
-
Build Author Kims3DIY, Find all builds by Kims3DIY
-
- Loading...
-
Build Details
- Build License:
-
- CC - Attribution Share Alike - CC BY SA
-
Attached Files:
-


