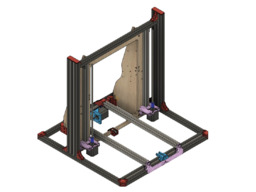
I have mostly been upgrading this machine slowly over the years to replace the wooden parts with plastic parts. Now after seeing some other ideas of the latest printers using more V-Slot, I decided to work on making this printer more sturdy. This should also cut out more vibration & make it less noisy. I am doing these upgrades in stages. I have already changed the front Y-axis endplate to use a 2020x250mm V-Slot with some plastic parts for connections to existing V-slot & Belt. I am currently in the process of changing the back plate to 2020x250mm V-slot with plastic connection parts. Both of these plates I had already converted them from wood to plastic so my dimensions for the new parts should work. I also started working on designing a V-slot frame to go around the whole machine to replace all the wood. I have some spare 2020, 2040 & 2060 V-slot & will design the structure with using these in mind. This build page will give me some better documentation of my updates.
The front & back Endplate design changes should also work for the 8" & 12" i3v. You will just need to use a different length 2020 V-Slot. The front one will not be a critical length, but the back one will need to be. Not having either of those machines, I can not say what length they will need to be. After I publish the back plate parts, you should be able to print the Wood_Connect_Elec_Side.stl file & Wood_Connect_PS_Side.stl. Put them on the 2 wood side panels & measure the length. After looking at my reference info for the 8" & 12" i3v, I believe the lengths for those 2020 back endplate should be 196mm for the 8" i3v & 286.1mm for the 12" (286mm is probably good enough). I am not positive that is correct, but you could cut that length for the front & test fit it for the back. If it is not correct, you could use that one for the front, then cut the back one based on your measurement corrections.
10/2/2019
After putting on the new backplate with 2020, it looked the y-axis belt was going to scrape the wood center section, so I have temporarily changed the front plate to shim the front belt idler part up a little to clear it. Not sure I can really raise the motor any, but should be able to fix the problem another way if I can not.
10/3/2019
Here are some before & after photos. of the front & back plate also showing the wood and all plastic versions before this change.


Here is my solution to keep the bottom of the Y belt from rubbing the wood that is shown in that last photo. This will make the belt rid on the smooth idler pulley instead of the scraping the wood. I may move the motor up 1 or 2mm, but it is at the same height as the original design.

10/4/2019
After several hours of test prints I am fairly happy with this update. I added the STL files to Files tab and all the files can be found on thingiverse at: Front & Back Y-Axis Endplate using V-Slot 2020 for Makerfarm 10" i3v by GeoDave . I also added the main parts needed to the parts list, but it is not a complete list since I need to research the other parts I have used. All the parts should be listed on the thingiverse web page. I am still getting some waves or ringing in my prints. The photo of sample print is oriented that the face of screw holes is along the X-axis. I get a little less waves if oriented 90 degrees. I have not found the magic solution to this yet. Here are some update photos.


See Discussion tab for more details.
Add more V-Slot to my Makerfarm 10" Prusa i3v
Build in '3D PRINTER BUILDS' published by David Bunch, Dec 9, 2019.
Upgrade my 5 year old Makerfarm printer to use more V-Slot
-
-
-
- Build Progress:
-
- Build in Progress...
Avory Kwok, Dinos and MaryD like this. -
-
Build Author David Bunch, Find all builds by David Bunch
-
- Loading...
-
Build Details
- Build License:
-
- CC - Attribution - CC BY
Reason for this Build
To make printer more sturdy. -
Parts list
Qty Part Name Part Link Comments 2 V-Slot 2020 Linear Rail https://openbuildspartstore.com/v-slot-20x20-linear-rail/ Link For 8" or 10" i3v, use 2x250mm lengths, for 12" you will need 2x 500mm lengths (8" & 12" will need to be Cut) 1 Smooth Idler Pulley Kit https://openbuildspartstore.com/smooth-idler-pulley-kit/ Link This is what I used, but you could use something different if you modify design part 2 Tee Nuts - M5 (10 Pack) https://openbuildspartstore.com/tee-nuts-m5-10-pack/ Link I used 16 of these in Stainless that I had on hand (7 in the Front & 9 in the Back) 2 M5x10mm screws (10 Pack) https://openbuildspartstore.com/low-profile-screws-m5-10-... Link I used 6 in the front & 6 in the back to connect plastic parts to top of 2020 1 M5x8mm screws (10 pack) https://openbuildspartstore.com/low-profile-screws-m5-10-... Link 2 for front end caps & 2 for the back wood connect mounts into ends of 2020 -
Attached Files:
-

