If you like what you see, you also can vote for my build from link below.
https://openbuilds.com/threads/poll-cast-your-vote-powerpack-contest.11919/#post-66007
My work goal is rigid and cheap gantry solution. Prepare yourself a lot of information.
So I decided to go with sheet metal, because it is cheapest way to manufacture parts. Laser cutting is much cheaper then milling.
To prove it, i can tell you the prices.
First version more wallet friendlier, belt driven version, and with no bends. I choose stainless and all laser cutt details costs me 40€ if you choose mild steel it will cost 30€.
Second version, lad screw, and more accurate endstops. It also contains 10 bends. this time I choose mild steel with bowder coating. And it costs 50€, so I belive evryone can say brices are bretty good.
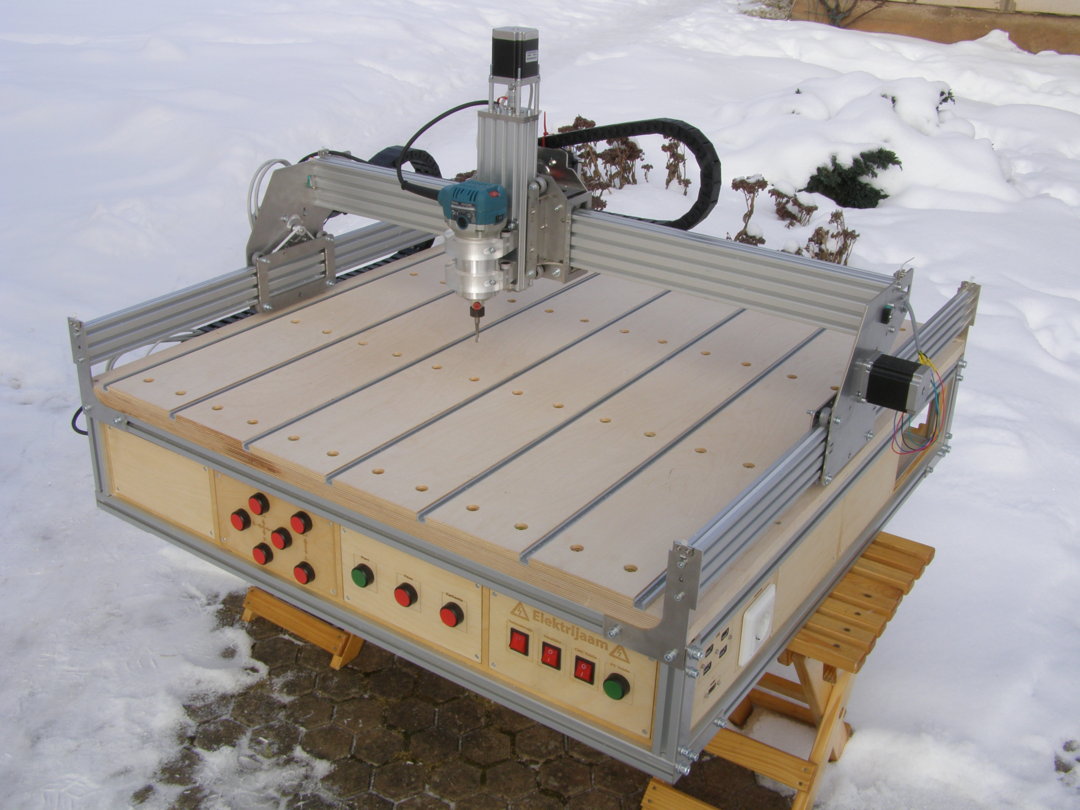
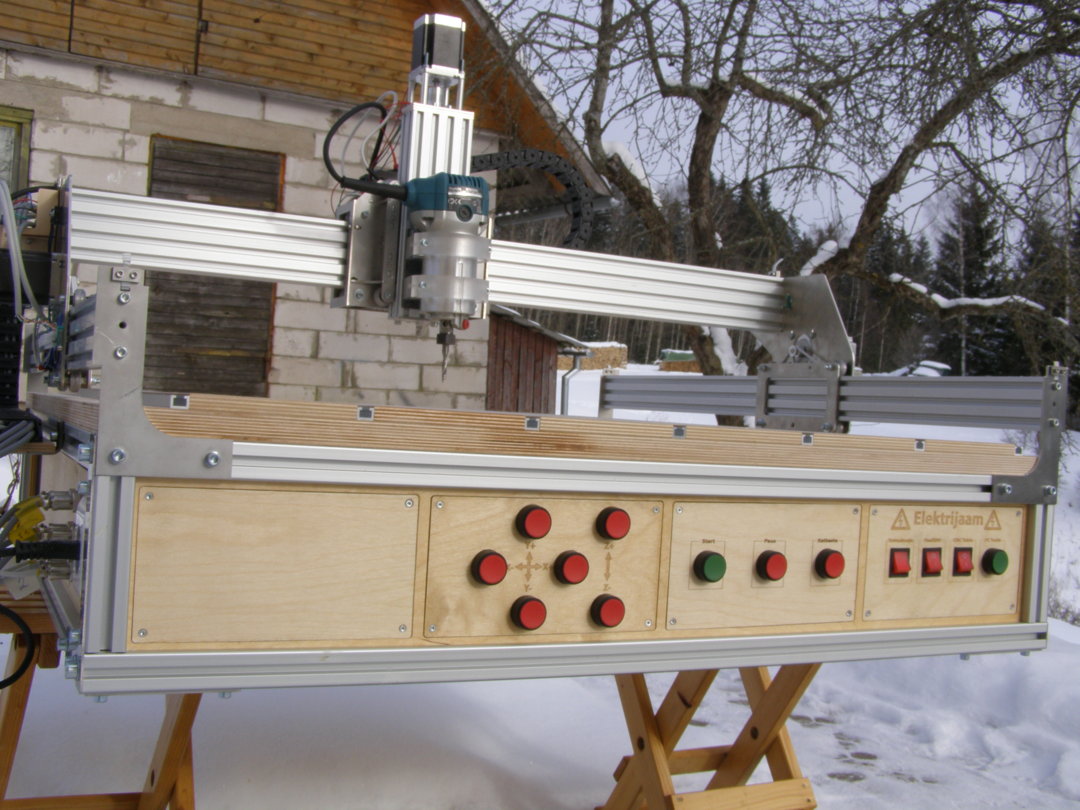
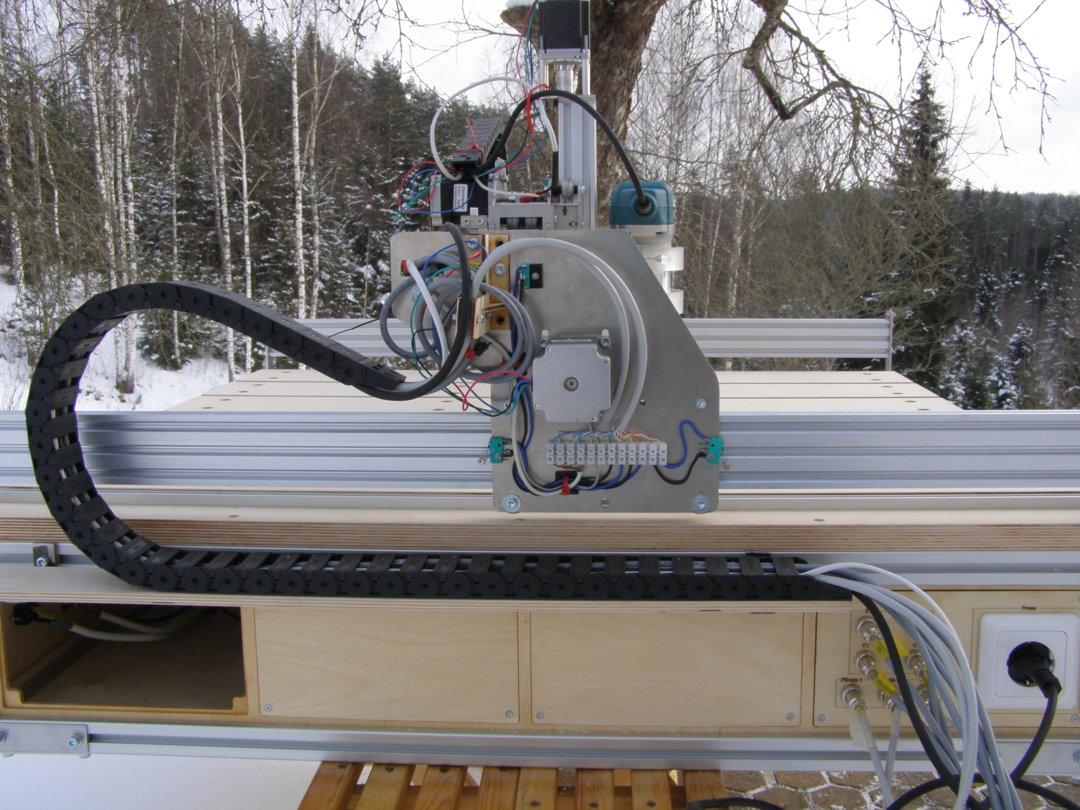
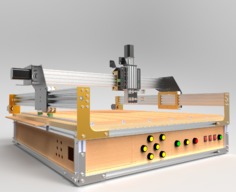
Machine state today. It is belt driven right now but not for long, building is in progress to get my upgrade for lead screws. Works is in progress.
Write down this building process is very hard, it is hard to split it into the chapters because it is more flowing progress. It seems never stopping, but I give my best.
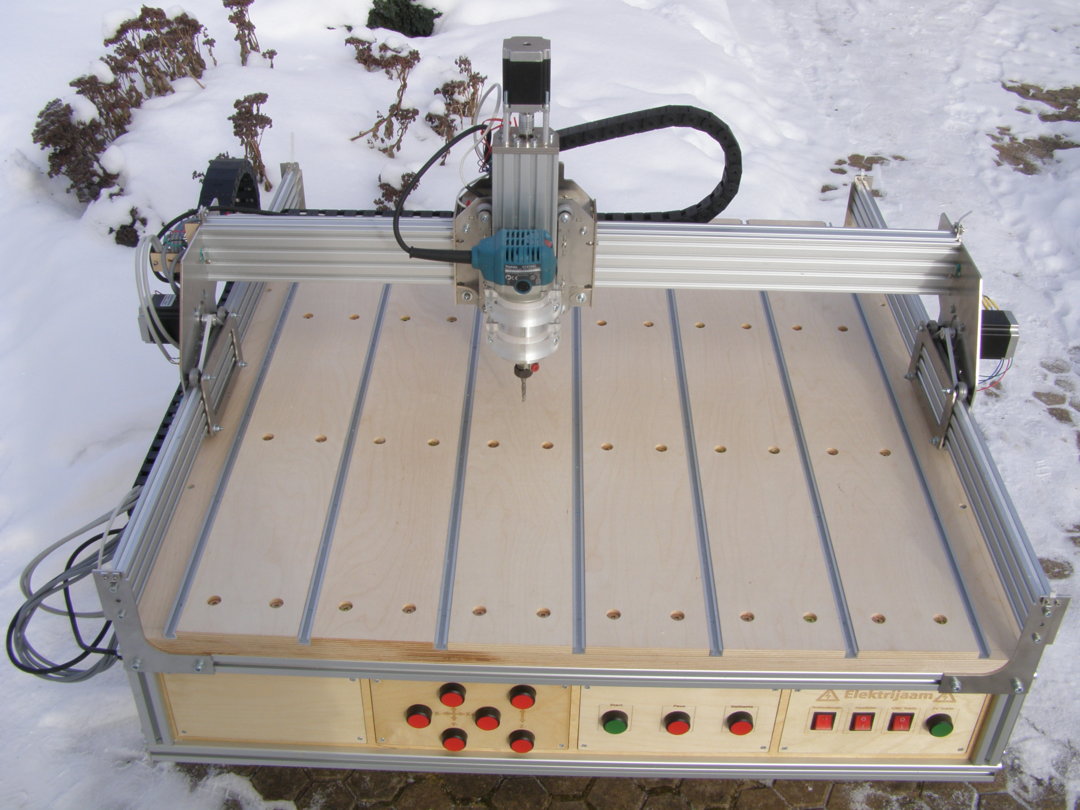
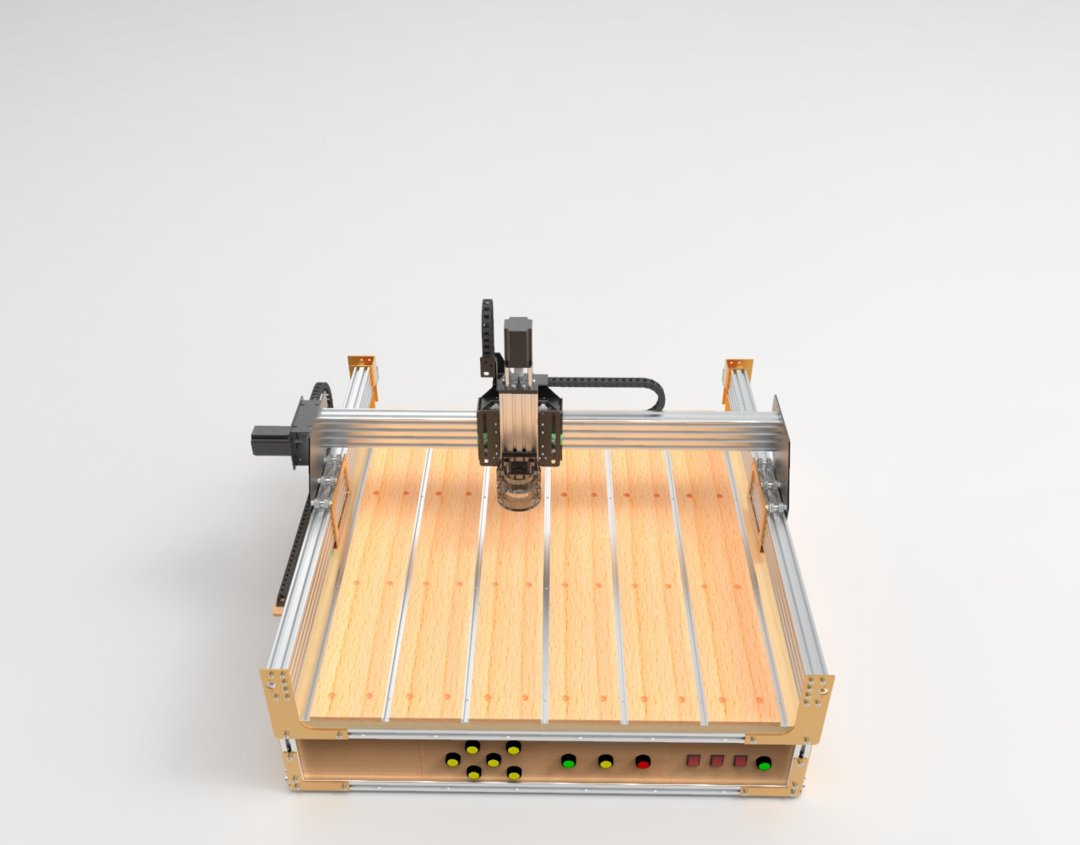
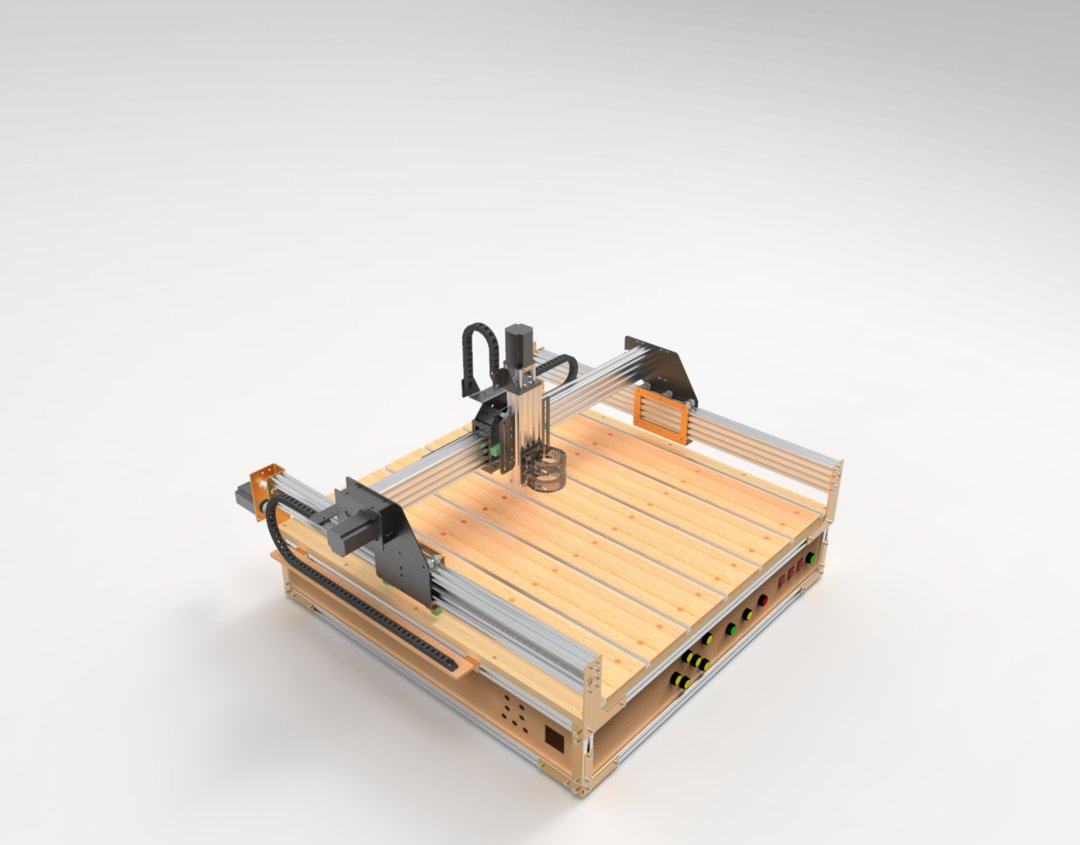
The machine footprint is 1000x1000. And active work area is about 770*700.
How this exciting journey started? With this package

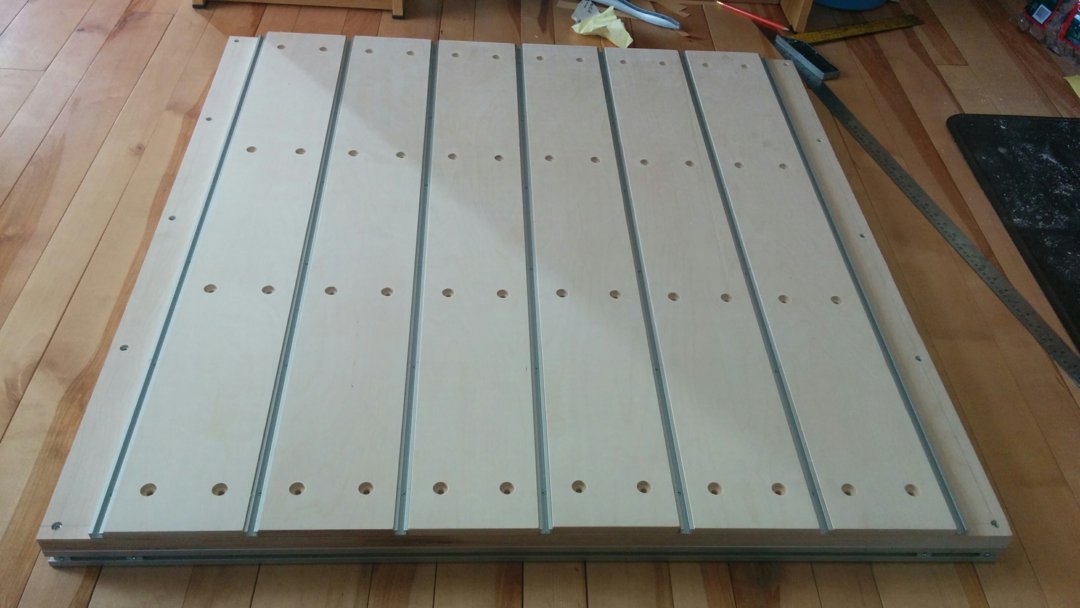
First Thing to build was waste board. I googled lot of time to find the most optimal solution. I decided to use aluminium C profiles to get most universal clamp spacing. to clamp material there it needs most support.
Waste board base is constructed with 30x30mm aluminium profile
2PCS 1000mm
3PCS 940mm
Wasteboard main board is made from 21mm calibrate sanded plywood. (1000mmx1000mm)
And tey are bolted togeder with hex socket M6x16mm bolts (19PCS)


Next thing is aluminium C profile mounting. I ordered without holes profile so I can choose where to put screws, important because middle profile lays exactly over middle line of bolts.
I used 7 aluminium rails exactly 1000mm.

With this profile I can use widely used M6 bolts with 10mm hex head.

Plywood plates are 133x1000 and 12mm thick because I dont want to hit aluminium profile so easily. I drilled 8 holes in every panel and then mounted plywood panels together with aluminium profiles.

When everything is mounted I drilled holes to the 21mm baseboard without moving top panels. so everything is as accurate as possible, and then I hammered in wood nuts to every hole. I used furniture bolts with big and flat heads 25mm long.


It turned out to nice
So today when I mill something and want to cut through then i butt some 3mm plywood between detail and wasteboard.
Next thing is building the acutal machine.
I started development with plywood do try different designings.It is much cheaper and faster because i have 40W co laser at home, and I can cut when I want, even (and mostly) midnight
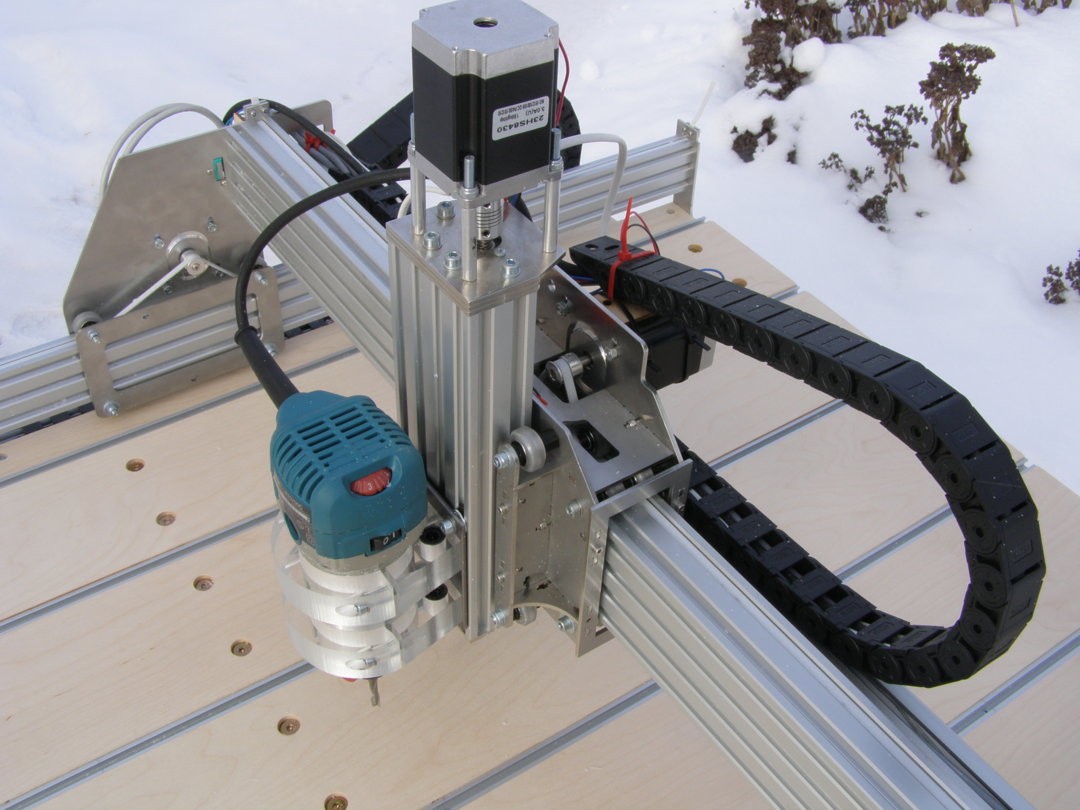
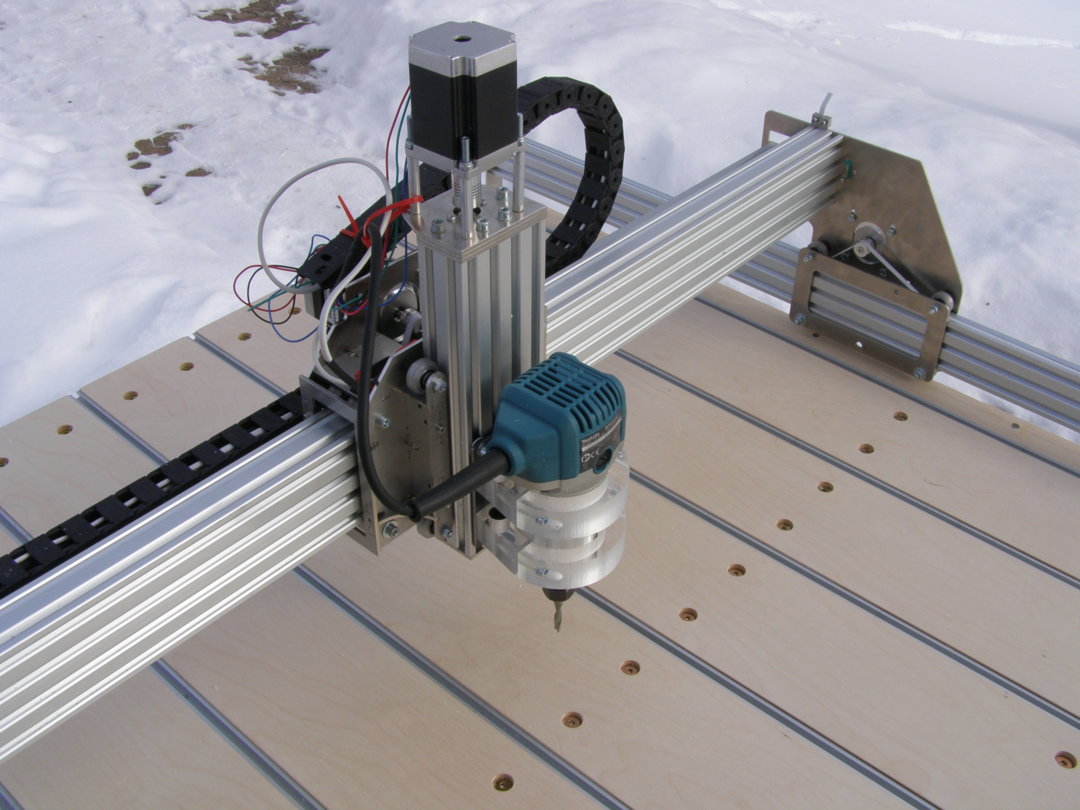
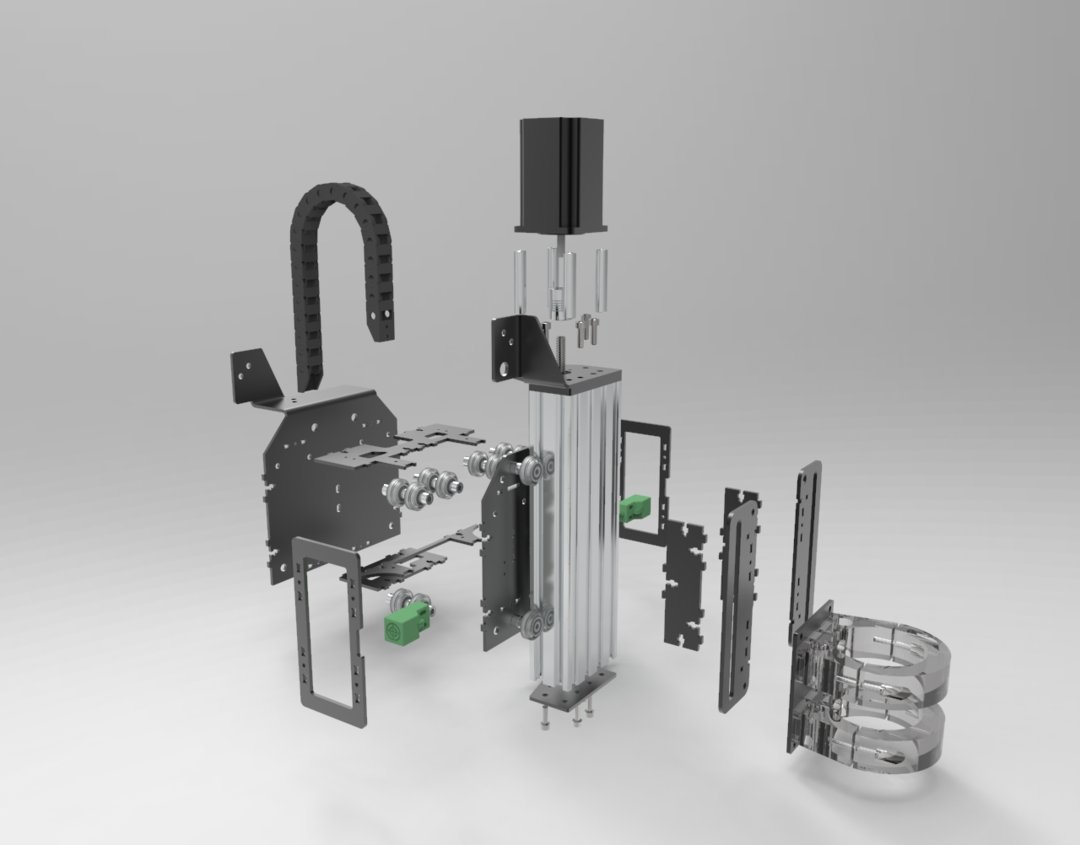
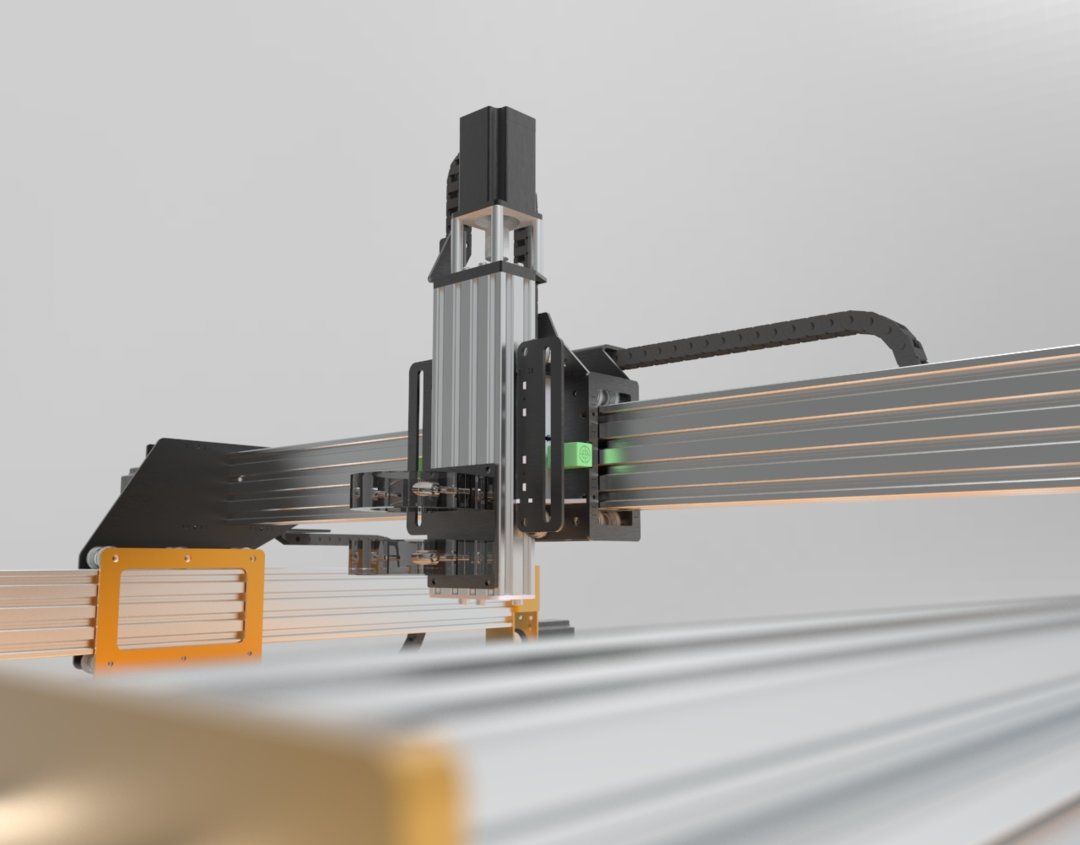
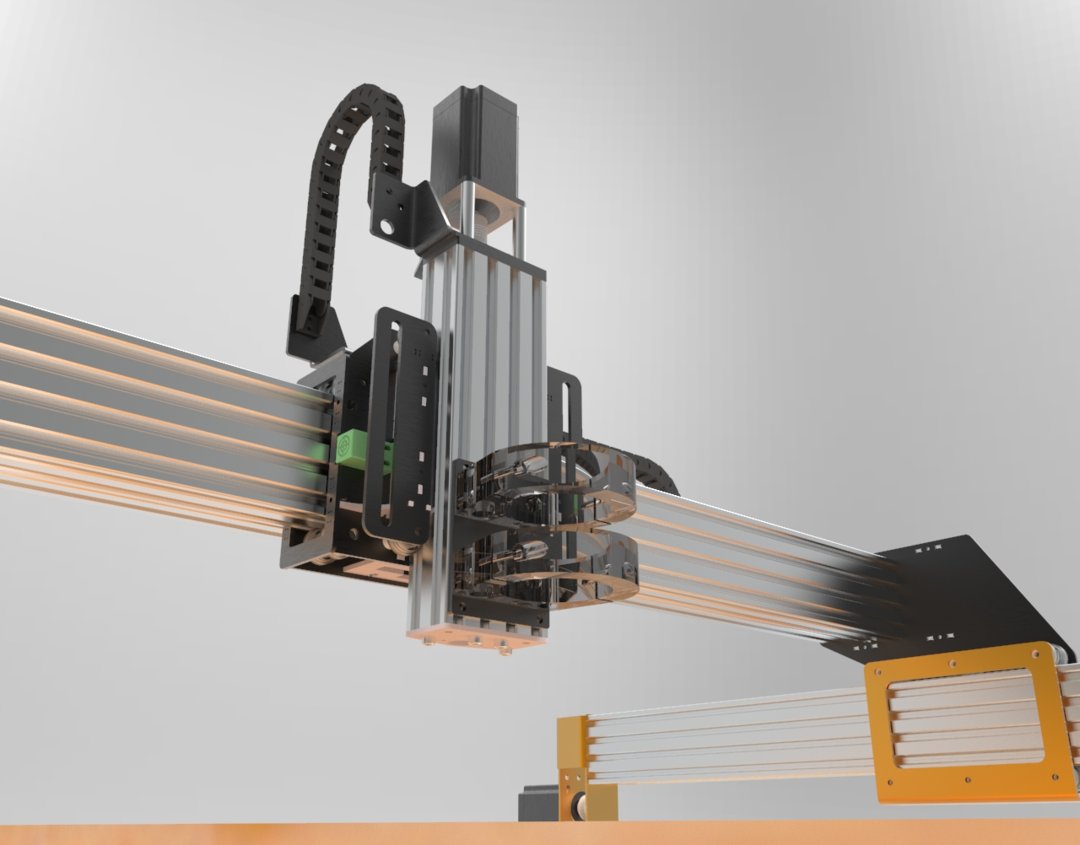
first version of most complex part about this machine X/Z gantry. But I didnt feel it can be very rigid Z-axis.

In final version I also lifted X axis little bit back to get spindle little back from front edge.
So I have done some development and testing and find out final solution. Really rigid!

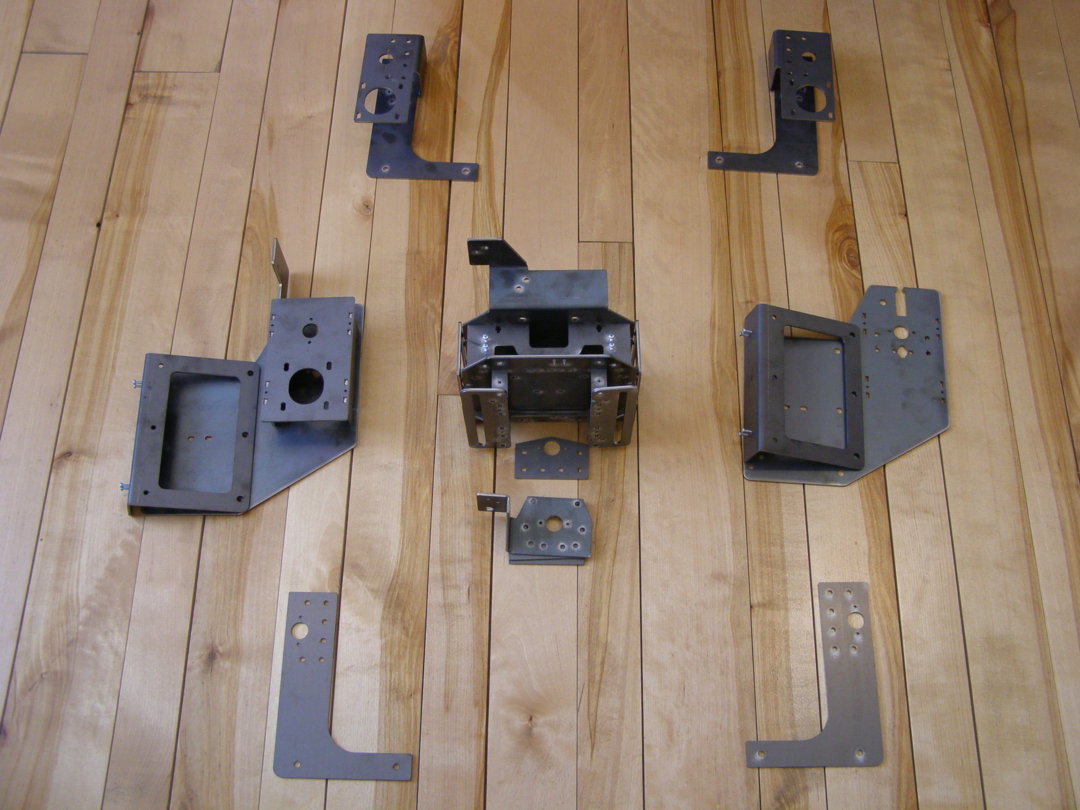
When everything is ready to cut then comes day to order real metal parts.


Really nice quality and accurate, I am very pleased.
Now it's time to assembly.
Everything is designed to go together with 12mm long M3 bolts and M3 Nylon lock nuts to prevent them open with vibration.

let pictures talk.


Here is X/Z gantry fully assembled. I was so hurry with assembling I cant wait my extreme v wheesl, so I used my own 3D printed v wheels. They roll but not very smoothly, but they to the only job their designed, testing purpose


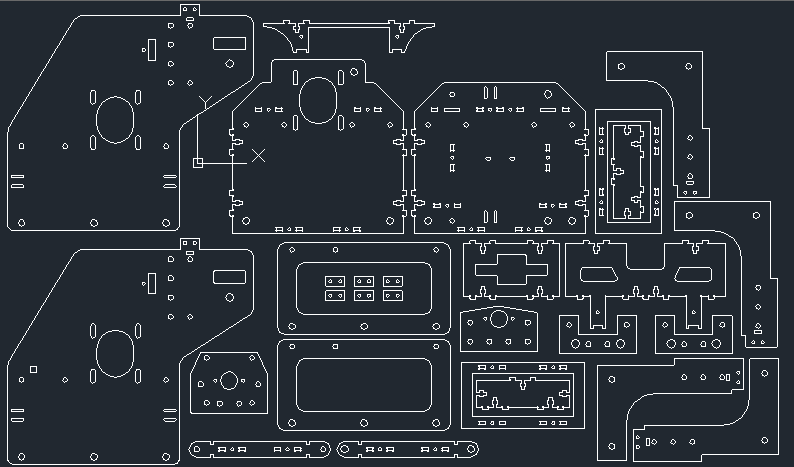
In files tab is DXF file which contains all laser cut parts so I would be very happy to see interest to use them. behind this development is lot of work.
Second big thing controller
Here i also have two different option. First is separated controller and second is built togeder with cnc and have pc in it, to edit machining programs and models.
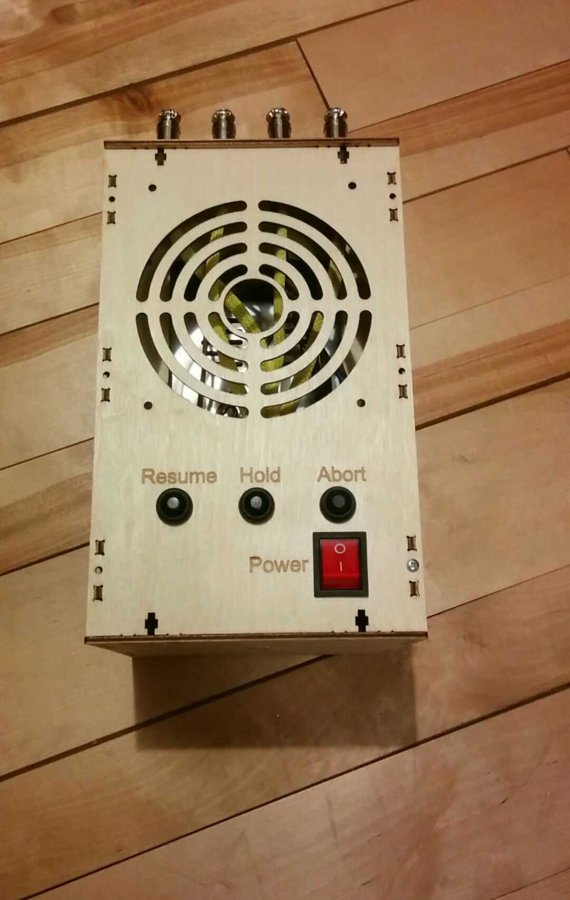
First version is little box with psu and motor controllers and arduino in it. I got my inspiration from X controller, but in later stage in this build I wanted simply more.
First I designed Plywood laser cut box for controller and engraved everything, so I have to tell I like how it turned out. Also I uploaded DXF files for free use. I used 3mm sanded plywood.


Now comes wiring. hardest part, hard is not to make right connection. Hard is make it looks clean.
I used Arduino with original GRBL shield. And drv8825 drives. Also I used 24V 400W power supply. I flashed arduino and tested some functions and everything worked fine soo wiring starts.
First I needed to complete GRBL shield. it comes in pcb and components so I have to solder also components.


Now I started to mount components to the box and started to make wires. with some cool yellow sleeving

And final unit is ready, ingluding 400W 24v power supplu for stepper motors and grbls shield and arduino and some comfortable connectors and buttons.
When build moves on the road I decided I would love to use cnc wath includes everything to work. Including pc, because it is work room where sometimes i want to edit some models and cam programs, and i also would not love to carry always my laptop.
PC what used in this build is with i5 CPU for some 3d model power and got also 8GB DDR3 ram, I got it with 140eur + 60 eur 128GB SSD. So it is not very expensive.
Also one key factor to choose this model is thin enclosure so I dont have to take components out.

To start secont version controller build I needed again some 30x30mm aluminium profile.
2PCS 1000mm
2PCS 940mm
4PCS 130mm
Controller sides are made with 8mm plywood and I milleed there 3mm panel sockets. To make it so universal as I can. if I want to change something in future it is really easy.


Controller bottom is also made from 8mm plywood (again sanded) and it fits exactly to aluminium profile groov. It measures 958x958mm
Controller corners are connected with some T nuts and sheetmetal brackets.
On picture is also demo board with new motor controllers.

In this controller I used some digital stepper drivers DM556D. really smooth and quiet motor drives.

Something simmilar but this bicture is illustrative.
Also I upgraded new controller with joging buttons. To do it I used teensy 3.2 what I programmed like it was keyboard. It is connected to the PC with USB cable and now I can jog router and can look it without looking monitor. I really like it.


Also I made panel with pc ports to connect flash drives and stuff , Also I can connect monitor HDMI and monitor powe connector here. Also back side I got outlet for dust collector.

Front is also panel for power managment.

One more cool thing, I made break out board for GRBL shield. It is realy handy. It makes easy to connect larger wires.


And this controller is also making whole cnc more rigid.


I also think what happen if I need to add something there or have to take look pc, I have also good news here. there is need to only remove 4 polts to lift top section off.

And finally it come out quite nice, I am happy.

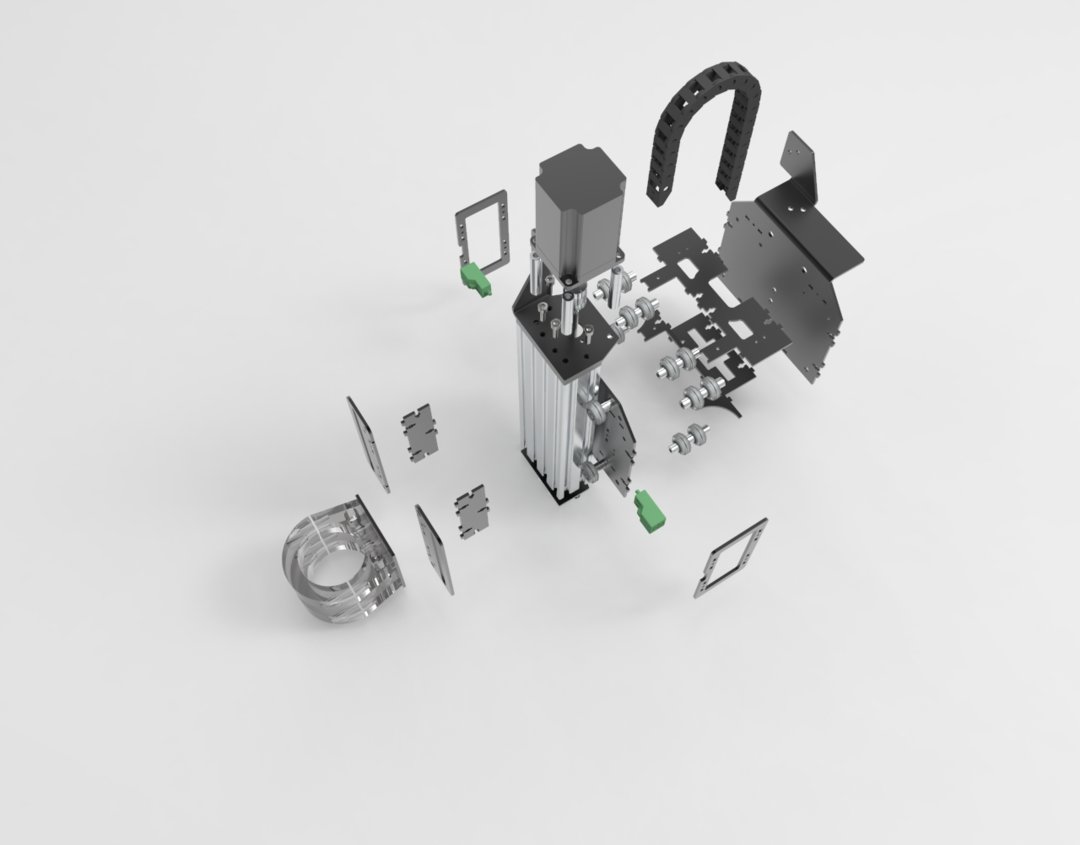
And finally SECOND version of cnc lead screw driven and more accurate endstops and more rigidity.
Now uses every axis C-beam, (belt version uses 20x60 on y axis) it gives more rigidity against side flex.
I already got all sheetmetal parts but 2 extra c-beams and leadscrews are on its way to me. Sheetmetal parts are going bowder coating tomorrow.
In this version everything got its own proper mounting position like a cable chain and port for connecting a probe. things what you dont think first when you start to build your cnc.

In this version I also think much more on nice cable managment to give more premium and professional look. but I also must use some rendering because I dont have all parts arrived yet.
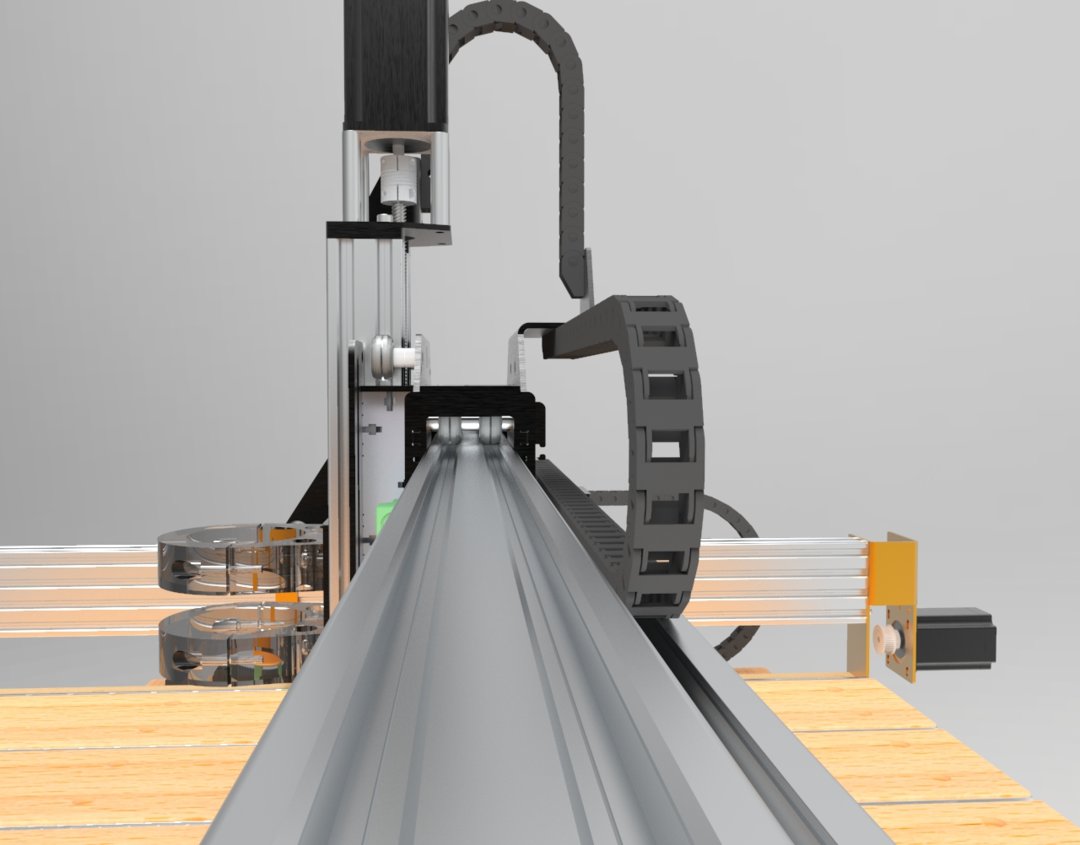
Probably most complex part is the x/z gantry so I attach some renders to give a better view.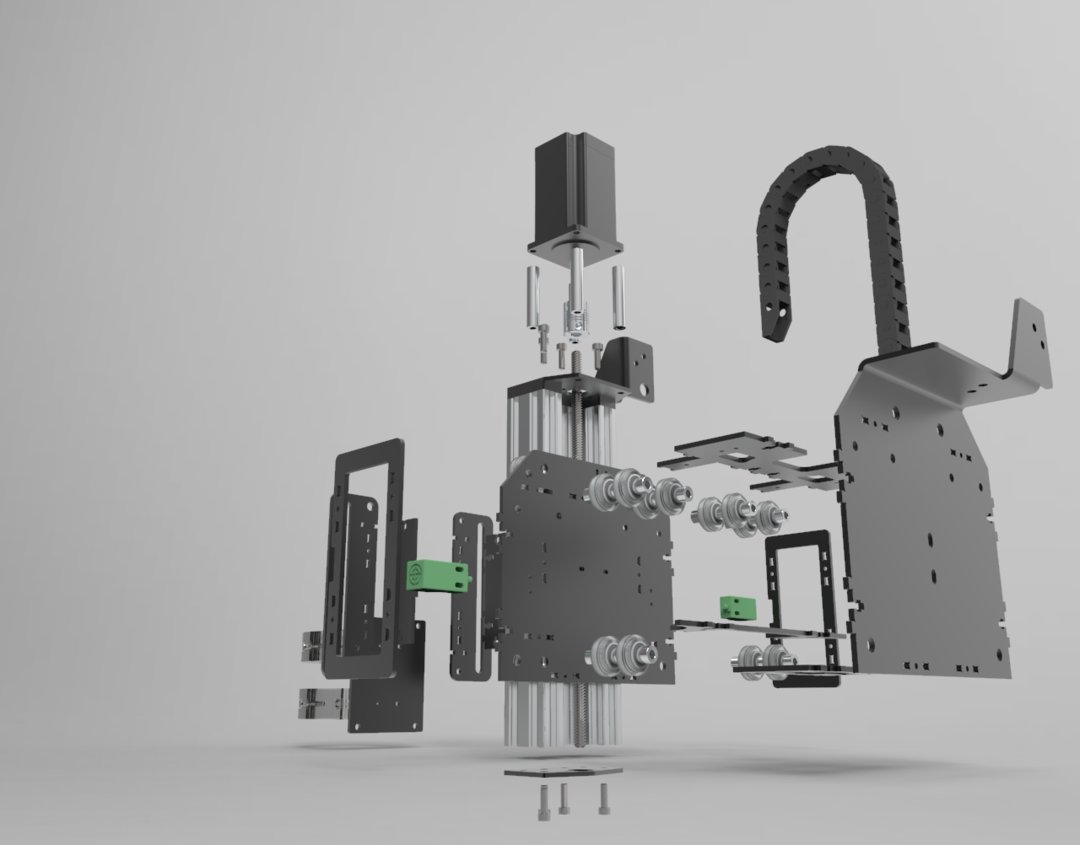
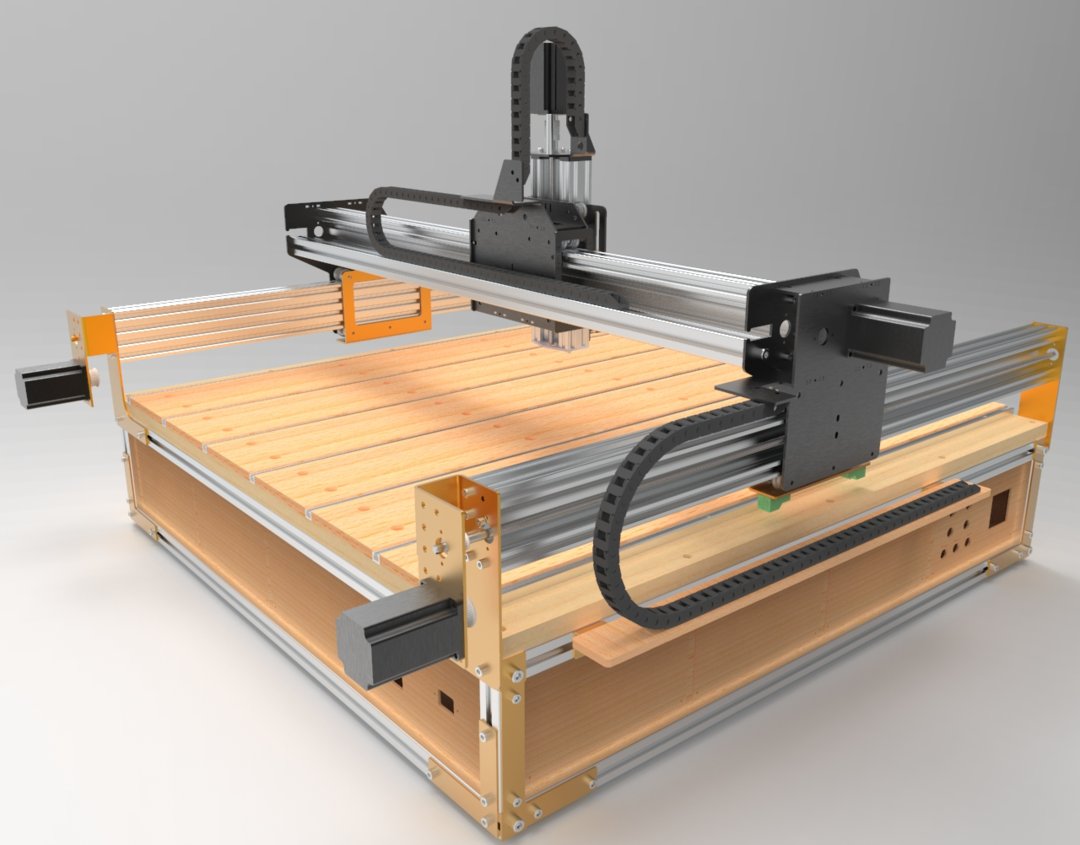
And some renders when I finish build.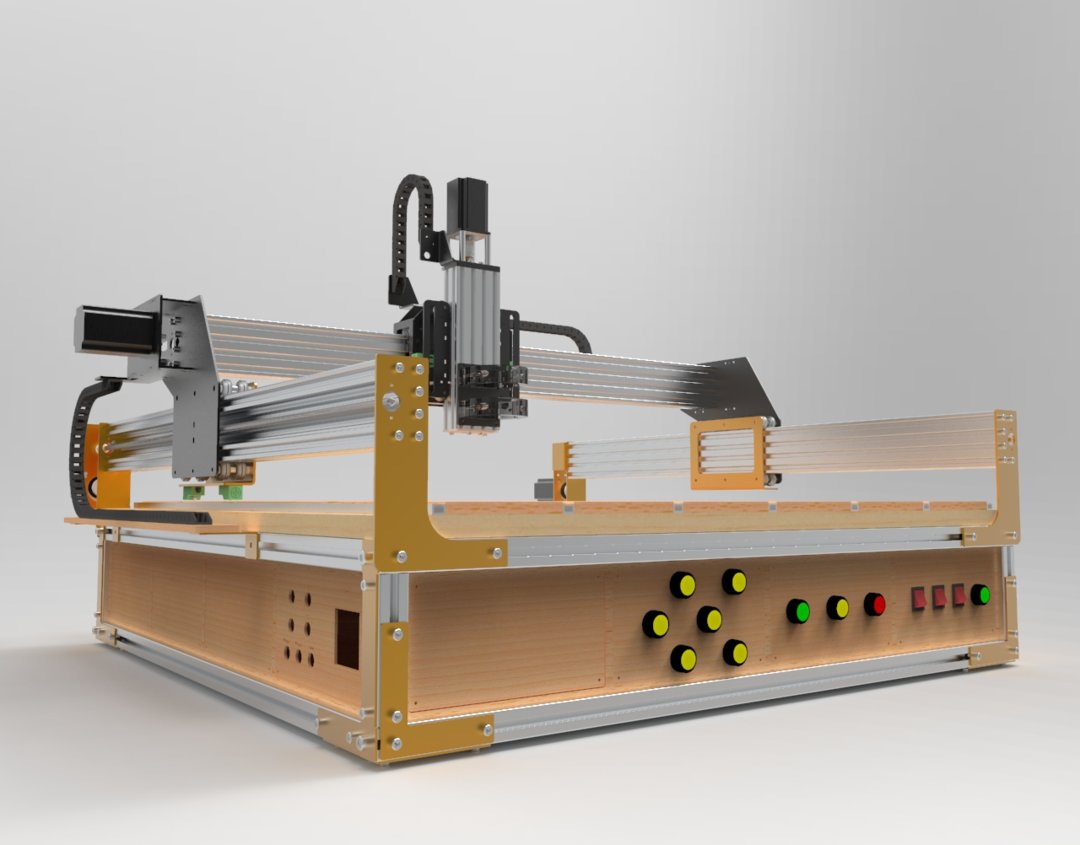
As you can see motors mounted on back of the macine and screws are driven on 2:1 belt systm to not lose speed.
Bowder coated parts finally araived.

Yellow and black combination is really nice I think.


And close look for mounting system.

Things fit together well.
If you like what you see, you also can vote for my build from link below.
https://openbuilds.com/threads/poll-cast-your-vote-powerpack-contest.11919/#post-66007
1000x1000 Two version of router Belt and Screw
Build in 'X/Y Table Style CNC Mill' published by Janis93, Mar 19, 2018.
Cheap sheet metal gantry solutions, for diy belt driven cnc and screw driven cnc.
-
-
Build Author Janis93, Find all builds by Janis93
-
- Loading...
-
Build Details
- Build License:
-
- CC - Attribution NonCommercial - Share Alike - CC BY NC SA
Reason for this Build
I choose sheet metal build, because I dont have mill to mill fancy endplates. And I wanted to give a community a bit different thoughts. -
Parts list
-
Attached Files:


