
This is an idea I had for a small laser engraver/cutter machine that would be simple and cheap to build. The concept uses all stock hardware from the OB store, with nothing custom or hand made. Its a pretty sturdy design, yet extremely simple.
There is a Caveat in that I haven't actually built this yet, so there may be some minor glitches in the design, but it all seems to work in SketchUp. All the images are SketchUp renderings.
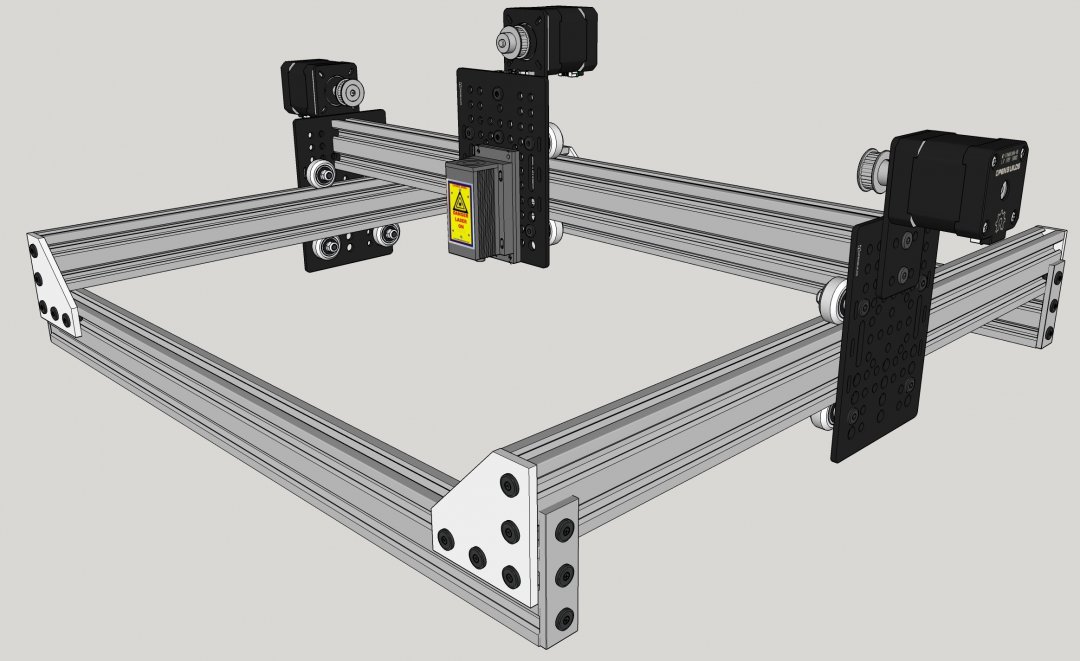
The base or frame is simply 4 pieces of 40x20 V-Slot all 500mm long. You could theoretically make them any length you want. This size would give you a bit over 400mm each way of engravable area.
Standard corner brackets and joiner plates are used at the corners.
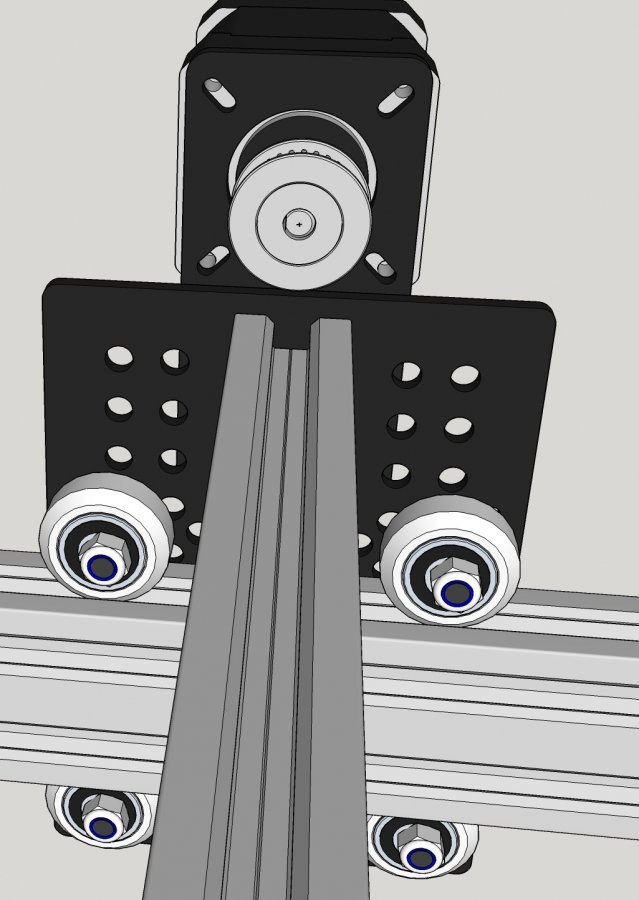
The gantry plates are all identical and use universal v-slot build plates. Each has 4 wheels mounted near one end at the proper distance for the 40mm v-slot.
A standard NEMA 17 motor mount plate is attached at the top of each gantry plate. For the Y Gantry plates, the build plate is sandwiched between the motor mount plate and the X Axis 40x20, and held in place by two screws threaded into the end of the 40x20mm beam as shown below:
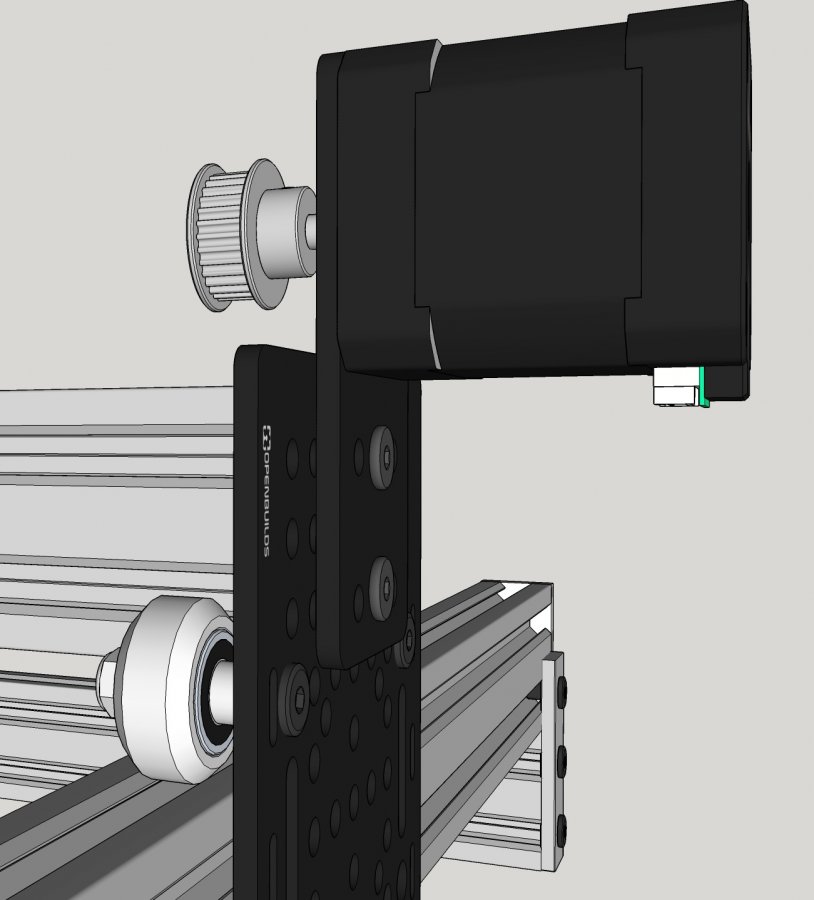
The inner side of the gantry has the motor pulley sitting above the X gantry beam. I used a 30T GT2 pulley, so the belt would clear the beam at the top and angle down to the wheels with enough clearance so the belt wouldn't rub on the beam. At least this is the concept, I haven't actually built this yet.
The belts will be anchored at each end using the standard Ox method of a screw and tee nut. Tension can be adjusted by leaving a long tail on one end to allow you to pull the belt tight and tighten the belt clamp. I don't have the belts shown in the model yet. Looks like I forgot the motor screws as well.
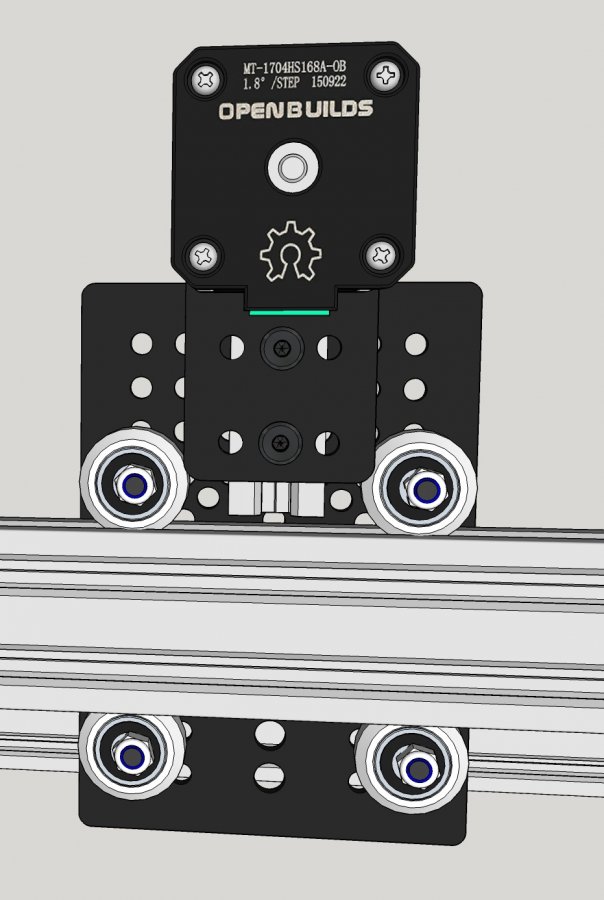
The X Axis uses all the same parts, but is slightly different. Since this mounting arrangement for the X axis beam leaves no way to adjust the belt tension from the end, I figured out a way to adjust belt tension using the motor mount. The universal build plate is set up the same way as the Y gantry plates as far as the wheels are concerned. However, in order to make the motor slide up and down to adjust belt tension, I bolted a small piece of 20x20 on the back of the build plate between the wheels, just using screws and T-nuts.
The motor mount plate bolts to this piece of 20x20 on the opposite side, also using two bolts and tee nuts. This allows the motor and mounting plate to be adjusted up and down to set the belt tension. Note that the GT3 pulley is reversed on the motor shaft to make the alignment better.
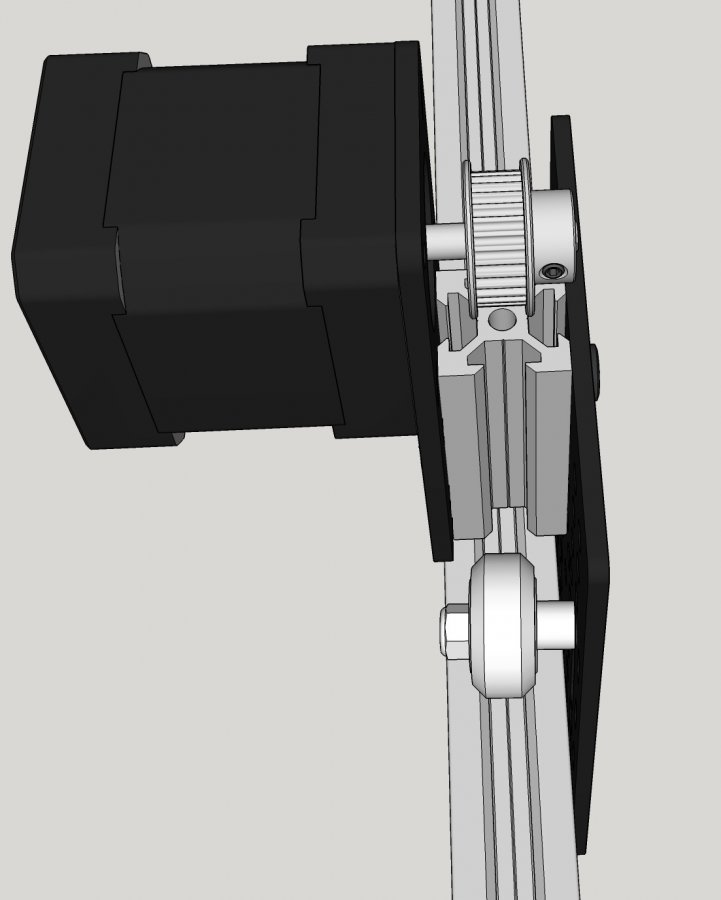
Again, this should allow clearance for the belt past the 20x20 mount, but it is less of an issue here because of the slots in the 20x20. The ends of the belt can be fastened in the X axis beam with belt clamps as well, but they will have no excess length.
So, that's about it. A very simple build using all off the shelf components. Should be pretty cheap as well. I estimate a bit over $300 worth of parts including motors, and another $60 or so for all the electronics. This would not include the laser module or it's accessories. I just saw a blue 2W laser module on Amazon for under $200.
Laser modules of 1-3W are readily available off Ebay, Amazon, and many other sources. A standard Arduino Uno with a CNC shield would work well for a controller for the NEMA 17's. A4988 or DRV8825 drivers would be more than adequate, you only need to populate 3 of the 4 driver slots. The Arduino can be mounted right on the back of the X axis beam to make wiring simple. The power supply can be any small unit of 150W or so.
The universal build plate has lots of holes to make mounting the laser module easy-peasy. I would definitely recommend some laser optical shielding around the business end of the laser module, as well as a safety laser driver module like the one sold by J-Tech Photonics with several safety interlocks.
High Current Laser Diode Driver | J Tech Photonics, Inc.
And, don't forget your laser goggles! Make sure the googles and laser shielding you use are suitable for the wavelength of the laser you are using!!!
Small Laser Engraver Concept
Build in 'Laser Cutter Builds' published by Metalguru, Nov 20, 2016.
Low cost Laser Engraver build using all off-the-shelf components.
-
-
Build Author Metalguru, Find all builds by Metalguru
-
- Loading...
-
Build Details
- Build License:
-
- CC - Attribution - CC BY
Reason for this Build
Lazy Sunday afternoon project
