
So I got this Origonal PhlatPrinter, PP1 and it needs to be used and I just happen to need to use it. Nothing is really true and it is tired. Lots of braces and more screws it has become fairly nice. My plan is to get it in good shape and keep it around to make foam airplane parts. I will later this year build a larger Router to do heavy wood cabmet type cuts.
Mark
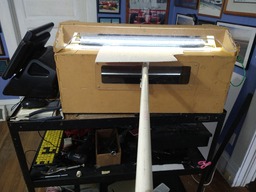
Reviving the Origonal PhlatPrinter with BlackBox
Build in 'Other Style CNC Mills' published by theracermark, Jun 29, 2021.
Reworked PhlatPrinter Gen1 Adding dual nema 17s to all 3 axis Supprot for carriage to insure even dept cuts Lighting for view of cutting area
-
-
Build Author theracermark, Find all builds by theracermark
-
- Loading...
-
Build Details
- Build License:
-
- CC - Attribution NonCommercial - Share Alike - CC BY NC SA
Inspired by
I attempted to use the BB4x on a Mill, Lathe combo maching but it did not lend itself to that project. Then this PhlatPrinter came available and it just made sense to build it up with the BB4x -
Parts list
Qty Part Name Part Link Comments 1 BlackBox 4x https://openbuildspartstore.com/blackbox-motion-control-s... Link this thing is really simple to use for Router type machines. 1 24V Meanwell Power Supply https://openbuildspartstore.com/24v-meanwell-power-supply... Link Very Nice unit 0 Link -
Attached Files:
-


