
While watching the videos of kram242's awesome OX build my little girl asked if she could have 1 someday to build things also
So with having interest in the build already with the idea of using aluminum plate for the gantry parts the OX-AI is born.
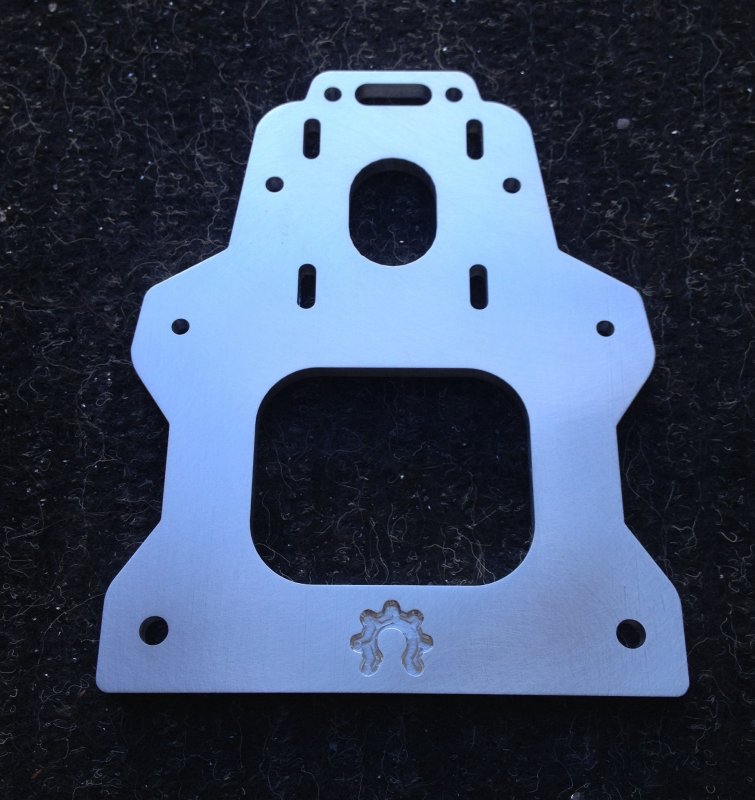
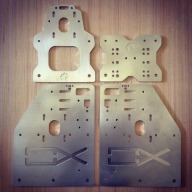
I will be using kram242's plate designs with little personal touches
Everything will be made in house when it comes to parts and by the end of this build the OX RC spindle build will link to this build as it will make its way onto the OX-AI.
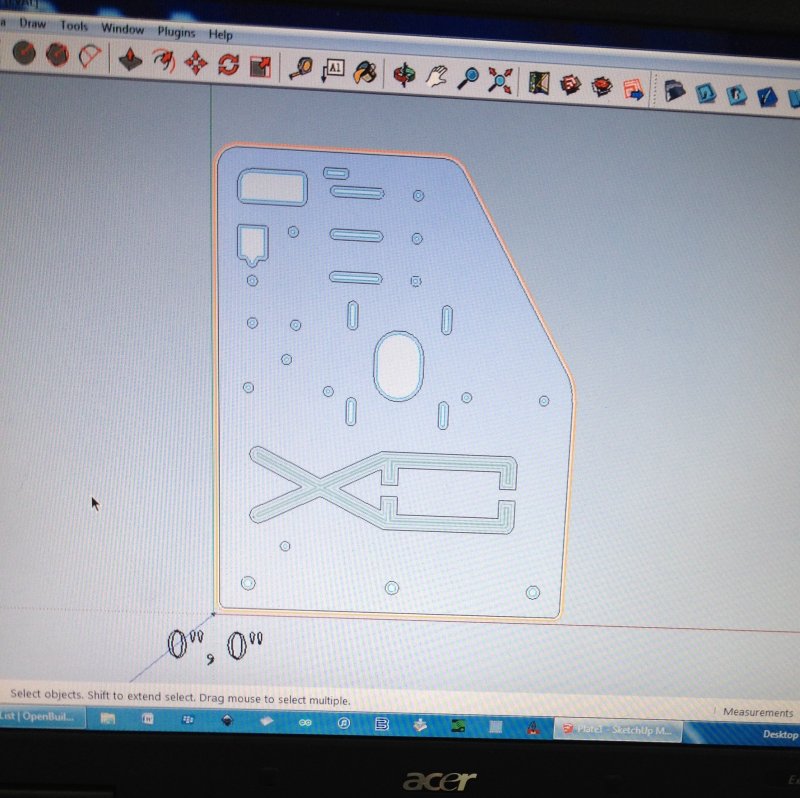
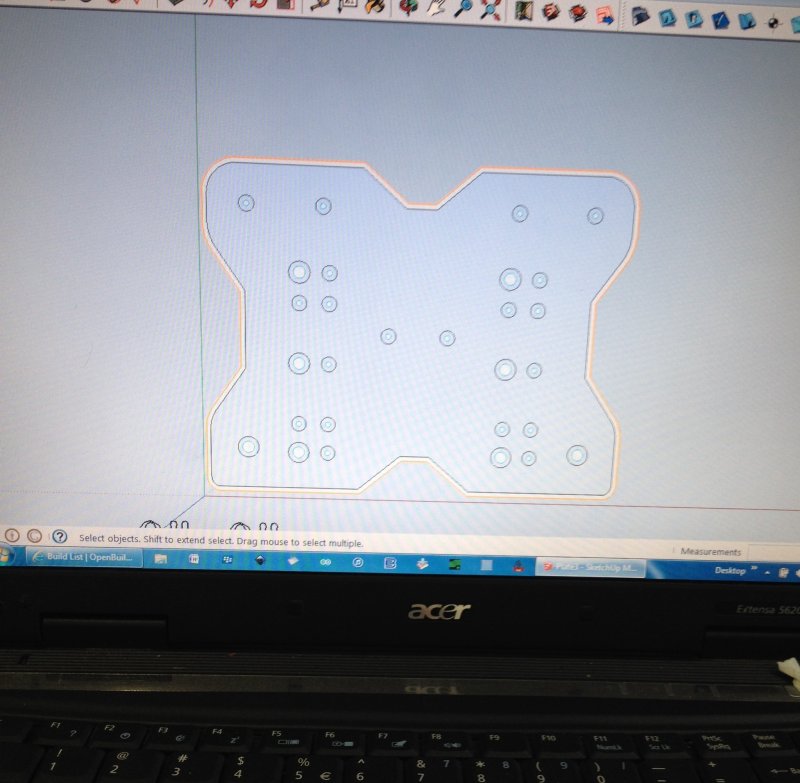
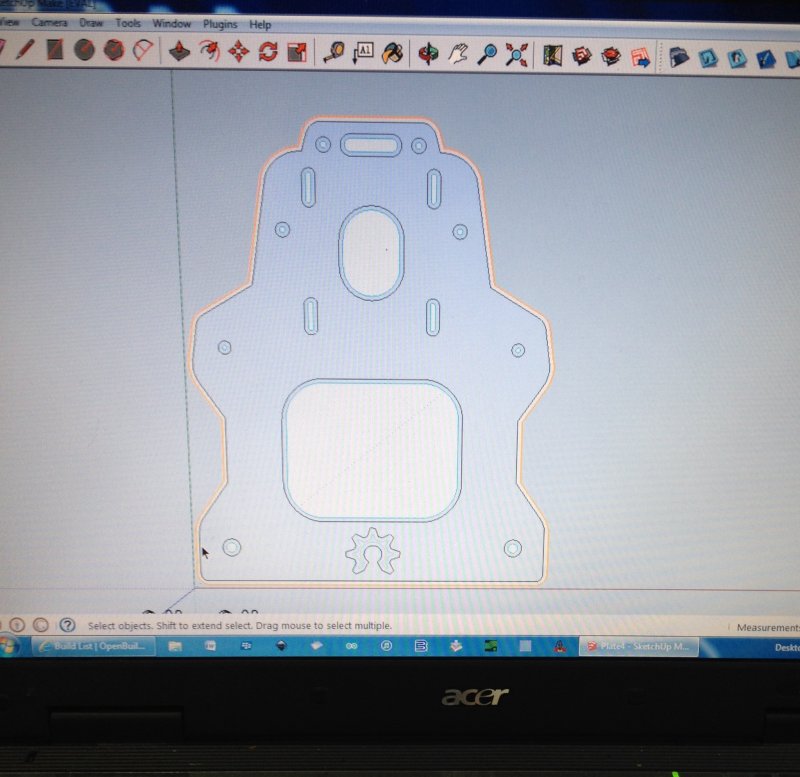
First thing was to get the g-code generated to mill all the plates required for the build.
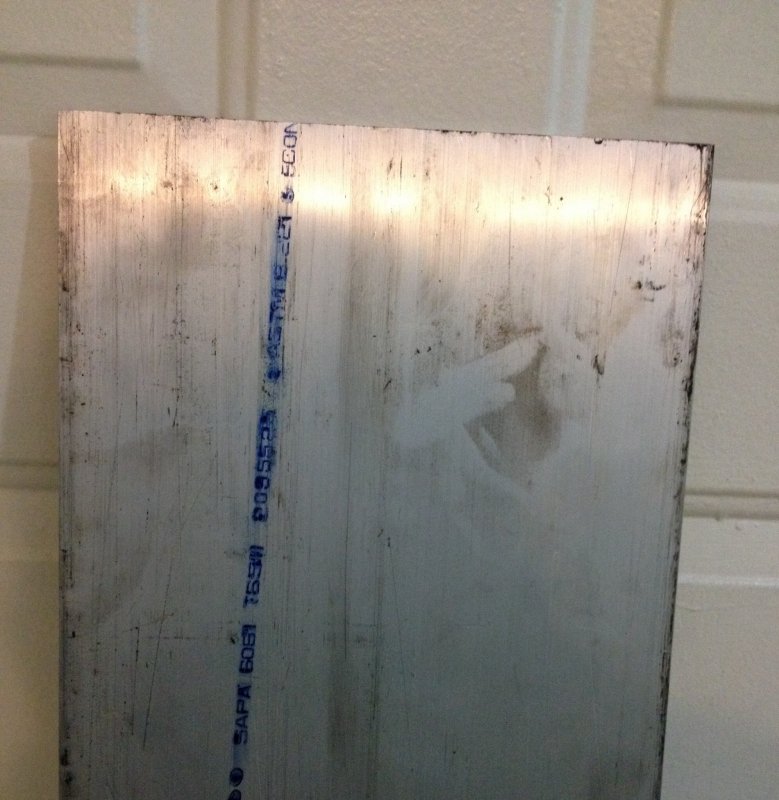
All metal are off cuts, so some hash scratches will show and leave me with two options, bead blast or paint.
Here you see me coding things up
And then here a little video clip of me milling away
The end results left me with a smile none the less and it was off to see just how well I could clean up the plates.
I would like to keep them with a brushed look but may paint them in the end.
In the first pic you can see the scratches I was talking about

After sanding things are looking up

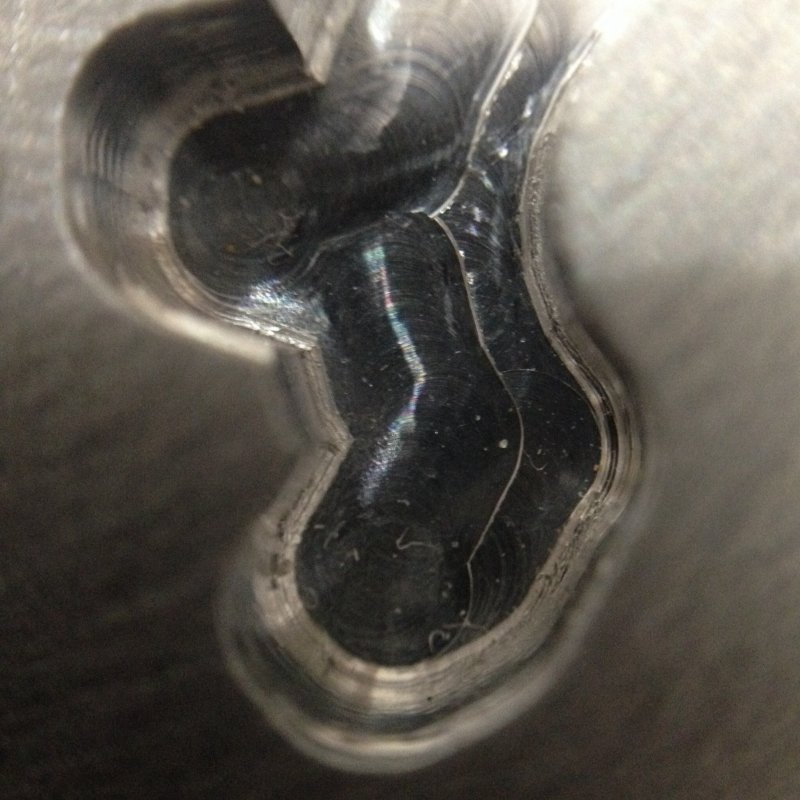
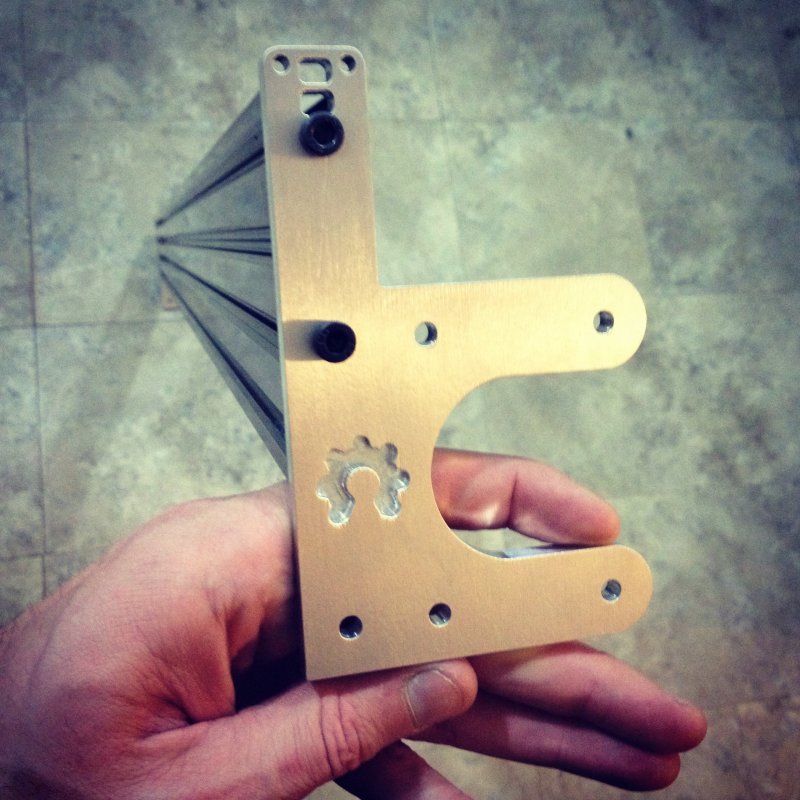
Little personal touch
Also opened up the center hole by 1/4"
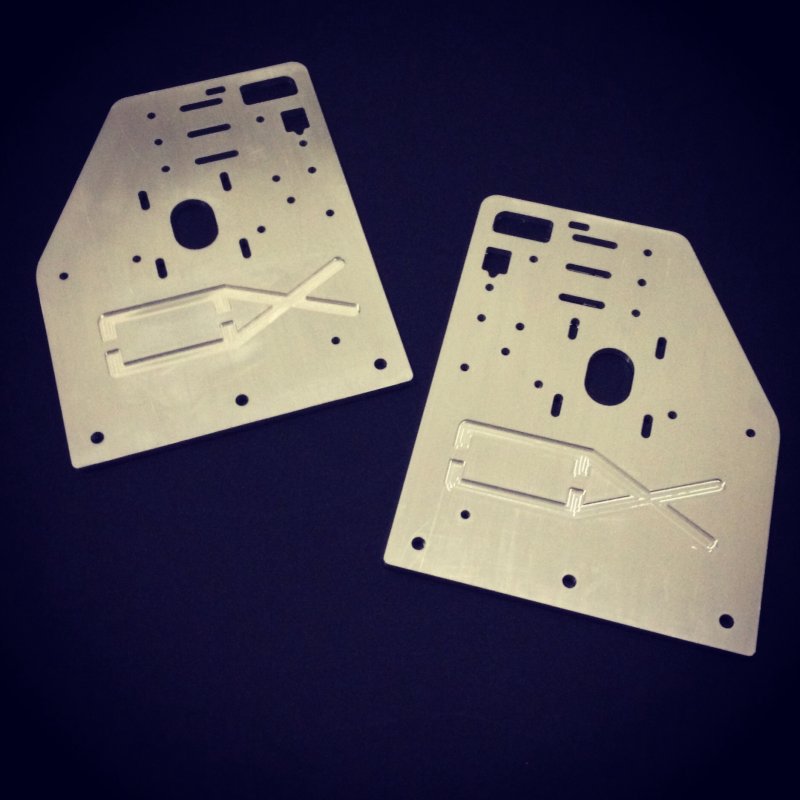
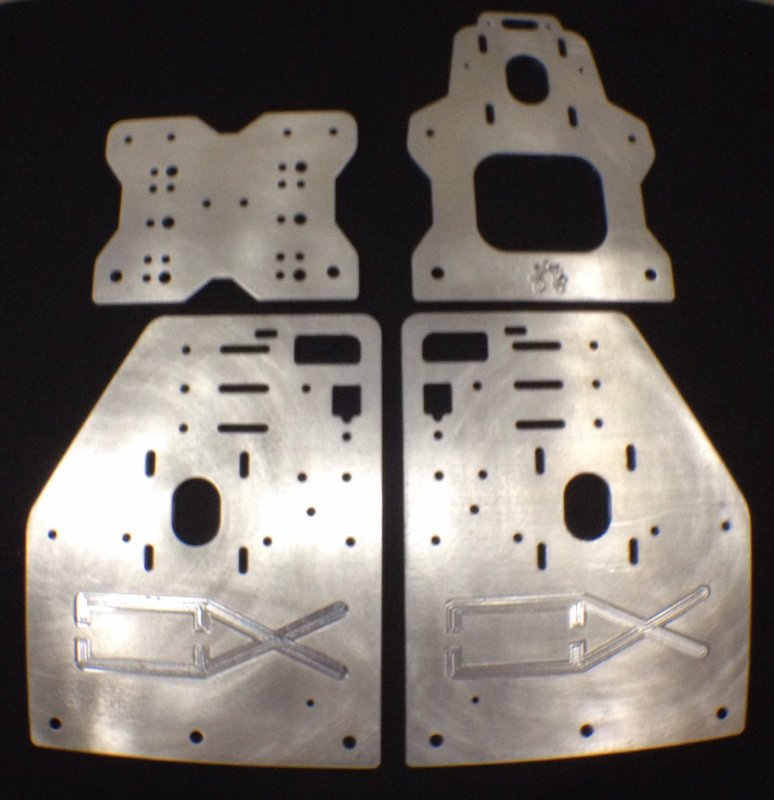
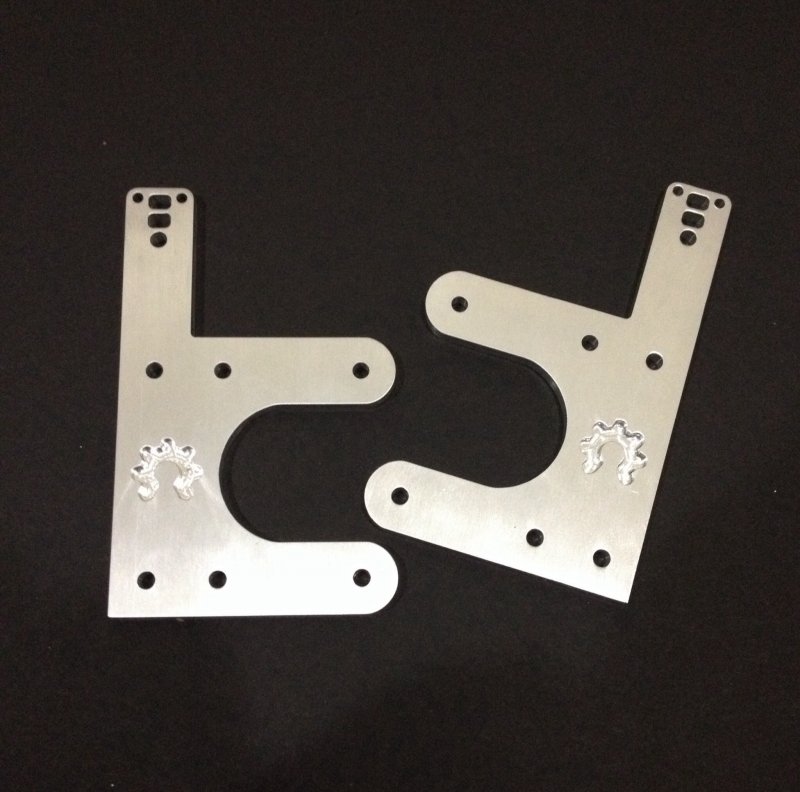
Pic of both side plates
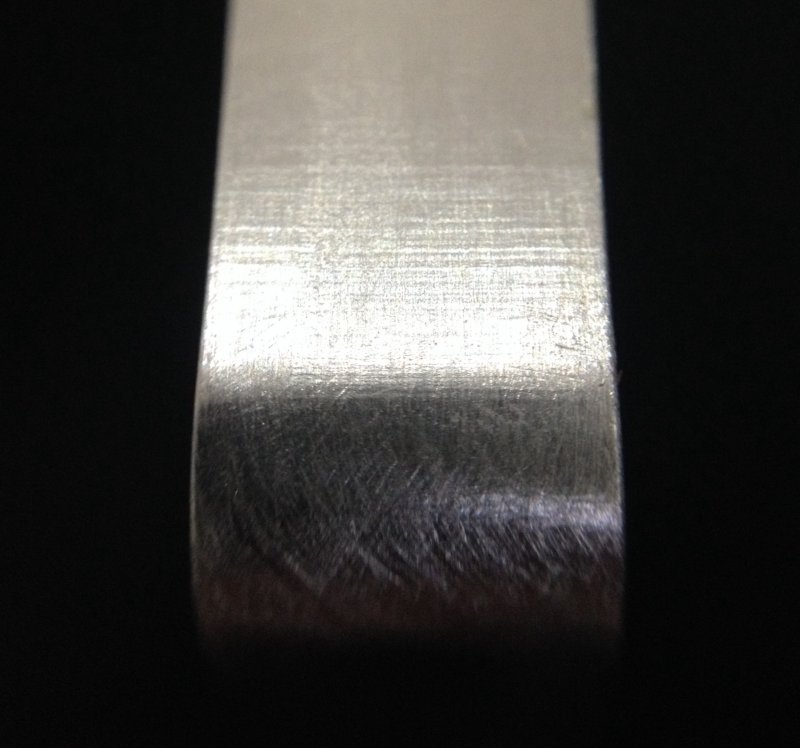
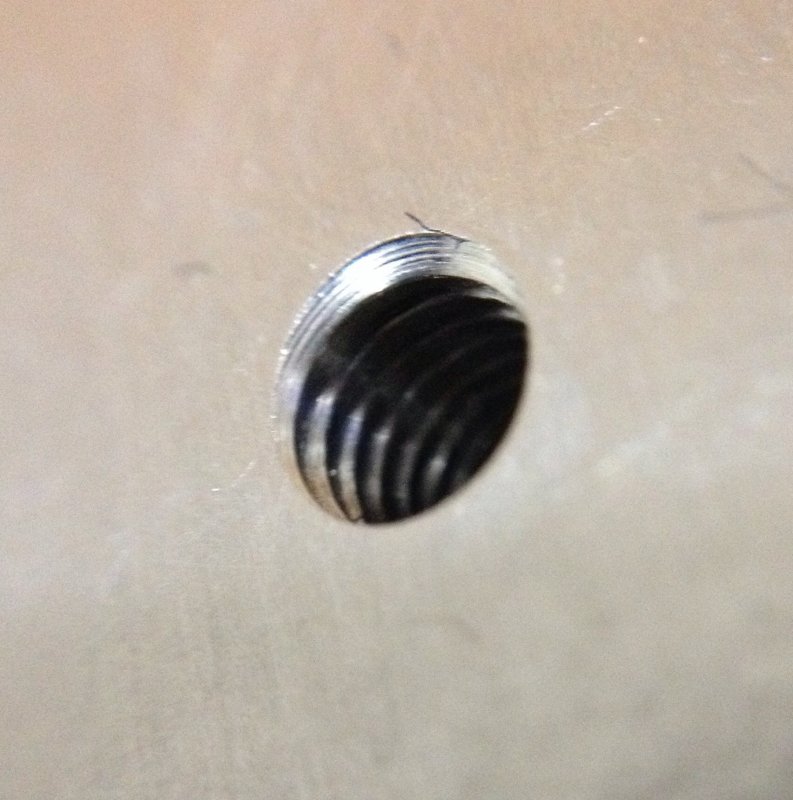
Here are some macro pics of the off mill finish I can achieve on my desk top and hope this gives you insentive to take the leap into building your own mill.
The mill in the video is what I used to mill the parts "not an OX" but hope to simulate the results with one
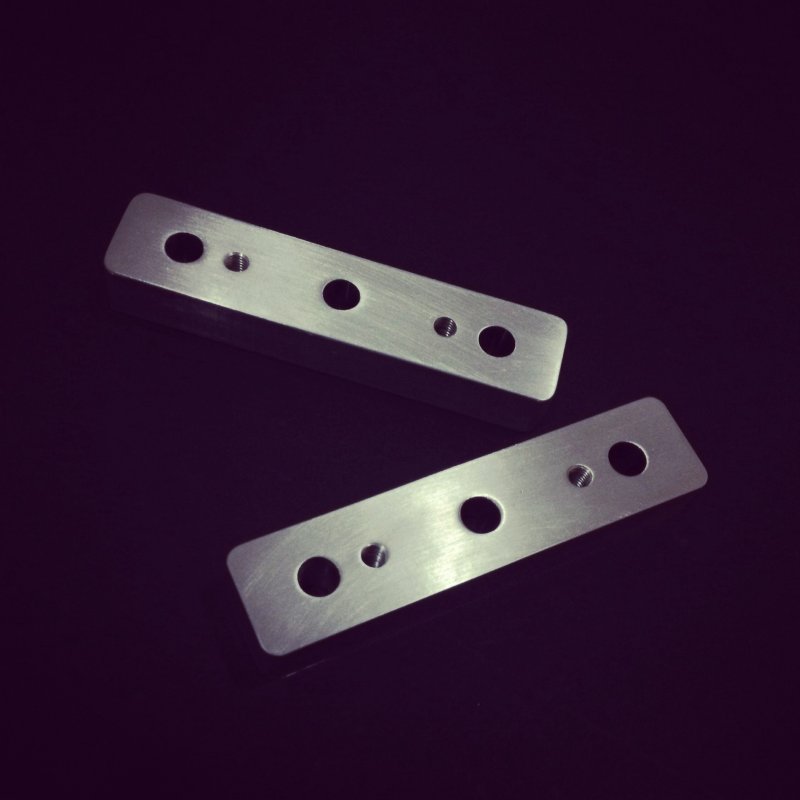
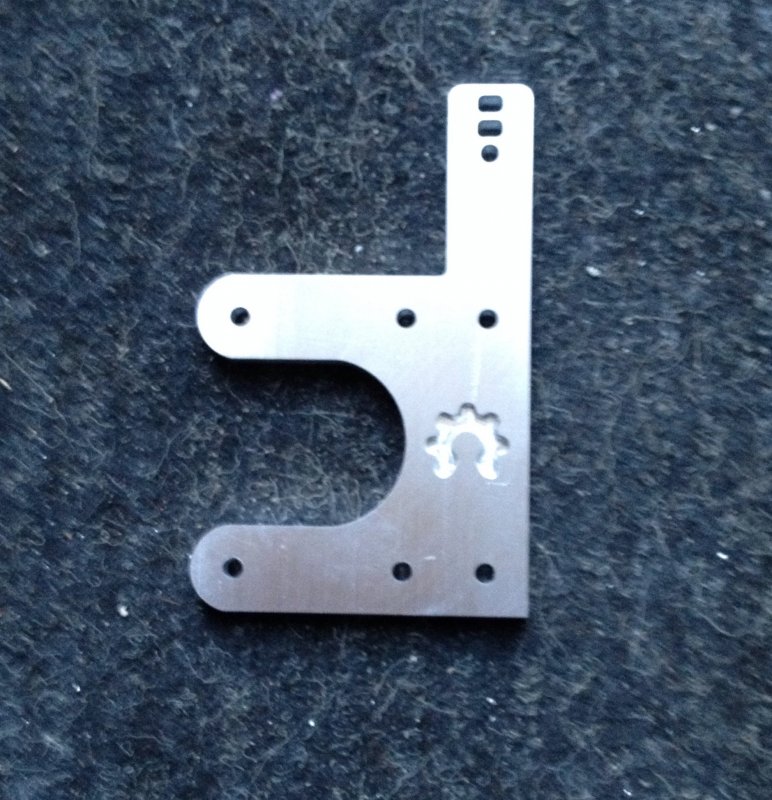
Finished plates
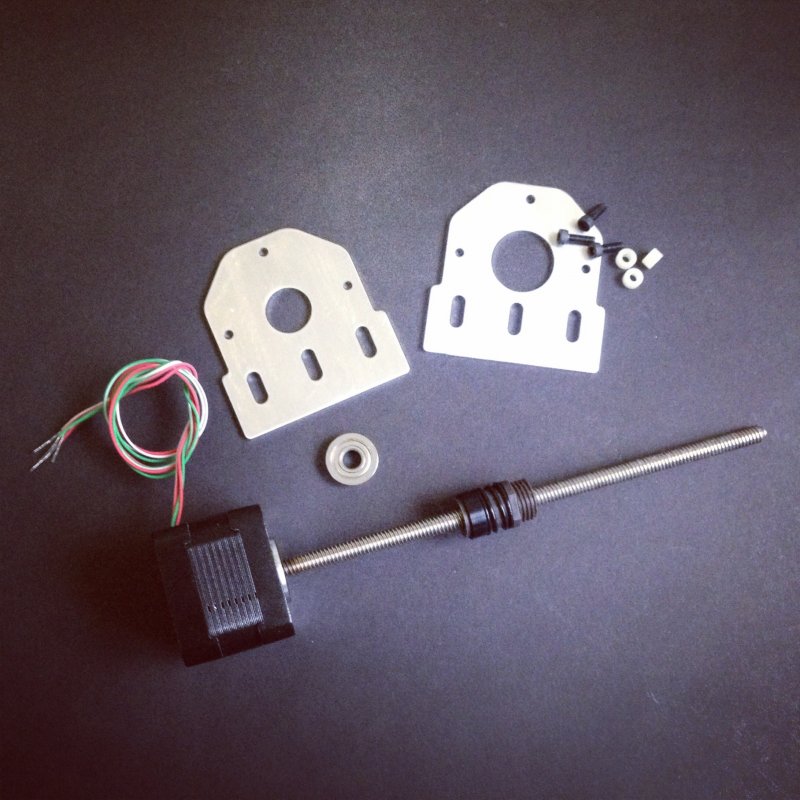
I tapped the holes on the z assembly plate for nutless wire straps
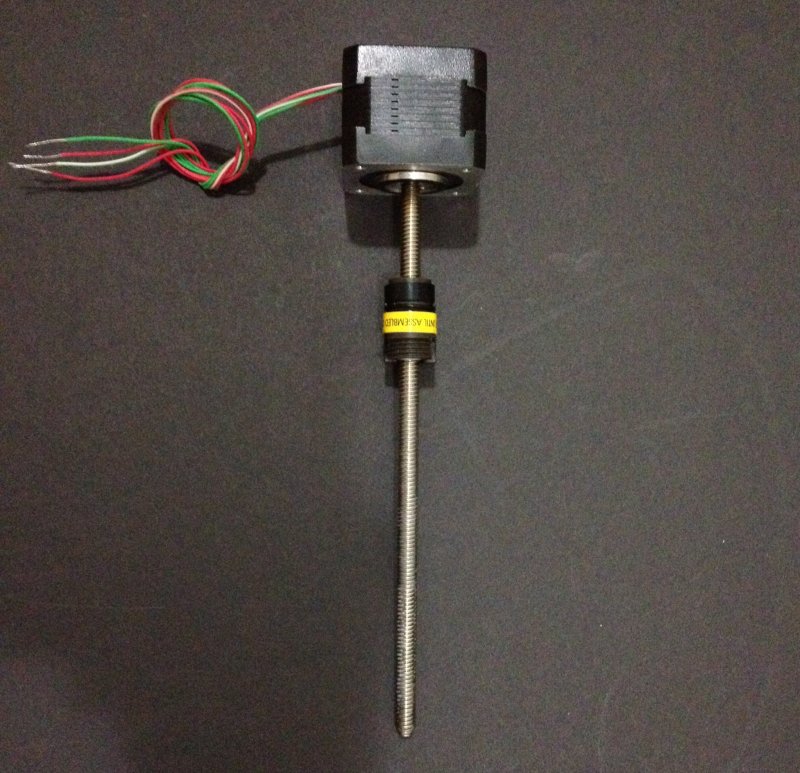
The Z axis stepper/leadscrew have crossed the boarder and in my hands
As for the 3 x NEMA23 motors and odd/ends I don't have from the original OX build, I will be ordering it all at one time to save on shipping
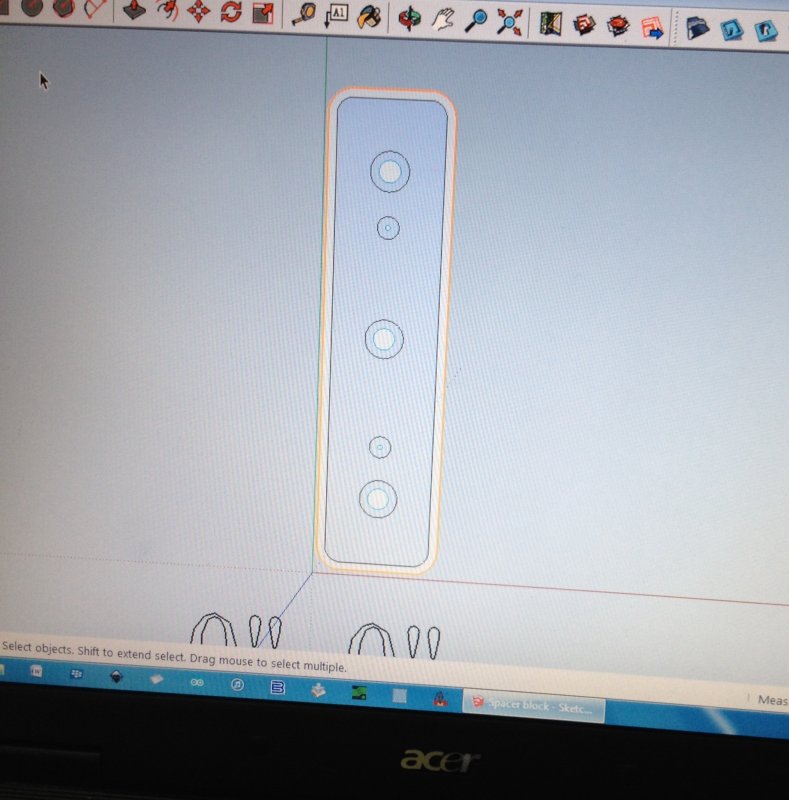
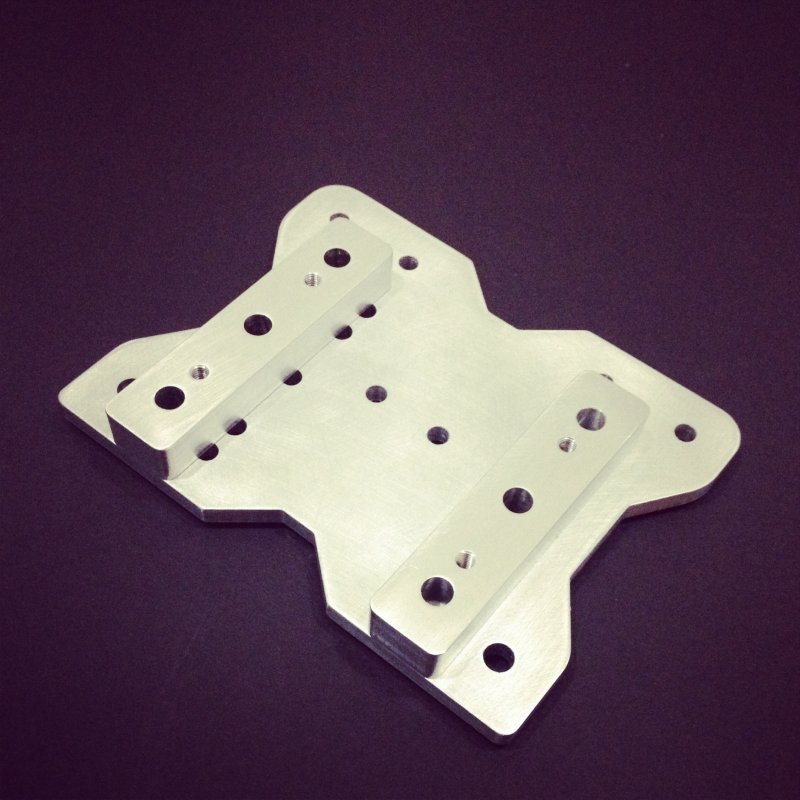
Next is to mill all the little stuff like, spacer blocks & plates for the Z axis.
Here I code up some 1/2" thick spacer blocks using the info provided on the openbuilds store.
They turned out awesome so I tapped and cleaned them up
Test fit
On to the anti backlash nut mount
While watching the OX videos I noticed Kram242 uses spacers on the motors, that's when it hit me I have the perfect thing
While designing my first mill I needed a way to protect the motors from flying chips but still have access to the couplers.
So here it is my first sketchup design coming in handy again
Since I'm waiting on parts I decided it would be a good time to test fit the motor and spacer on the plates
I then cut some extrusion to 900mm in length, tapped and assembled things

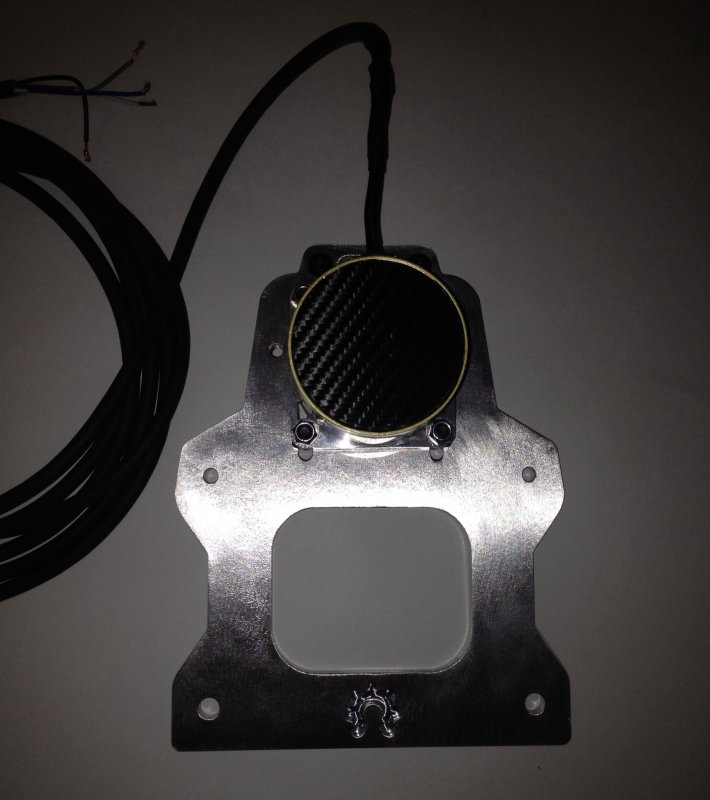
While working away I scuffed my 8mm wrench off the back of one stepper motor and didn't want to repaint it so I fired up Laser V and cut some carbon fiber style wrap

turned out nice so I'm going to do it for all 3 motors
Next comes some end plates for the main supports and table top.
Played around in sketchup and designed this, 1 for each side.
Fresh of the mill
Cleaned and ready for a test fit
Fits perfect!
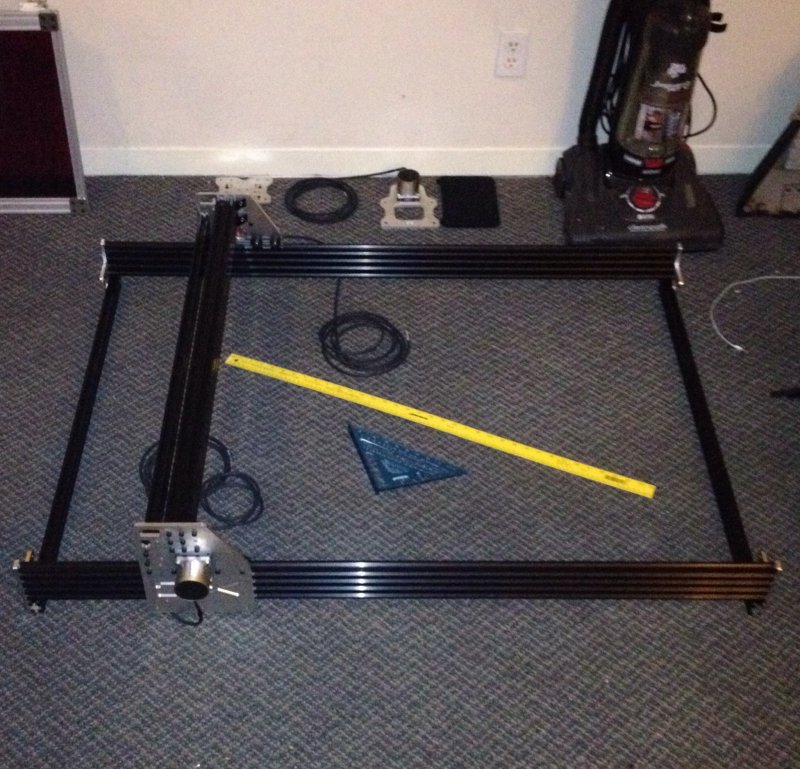
Next I cut some more extrusion @1250 mm and test assembled the main rail/table assembly.
I need to order some more extrusion as I didn't account for the raised bed design I have decided on.
None the less things are coming together nice
After assembling the base with all the extrusion I had on hand I decided to do a little more reinforcing and made a name plate to add some bling/join the two 20x40 in the center
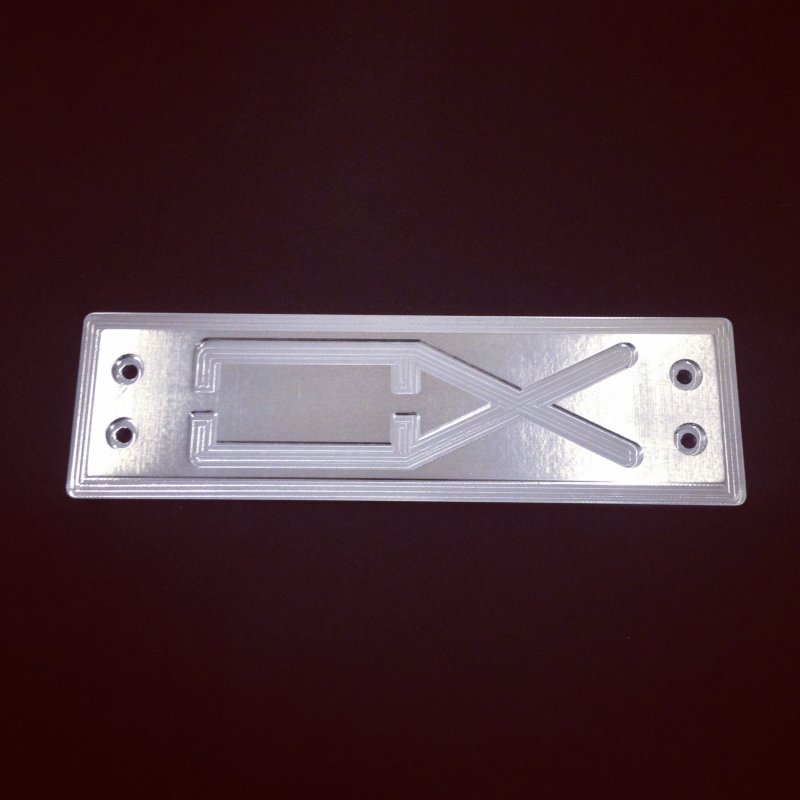
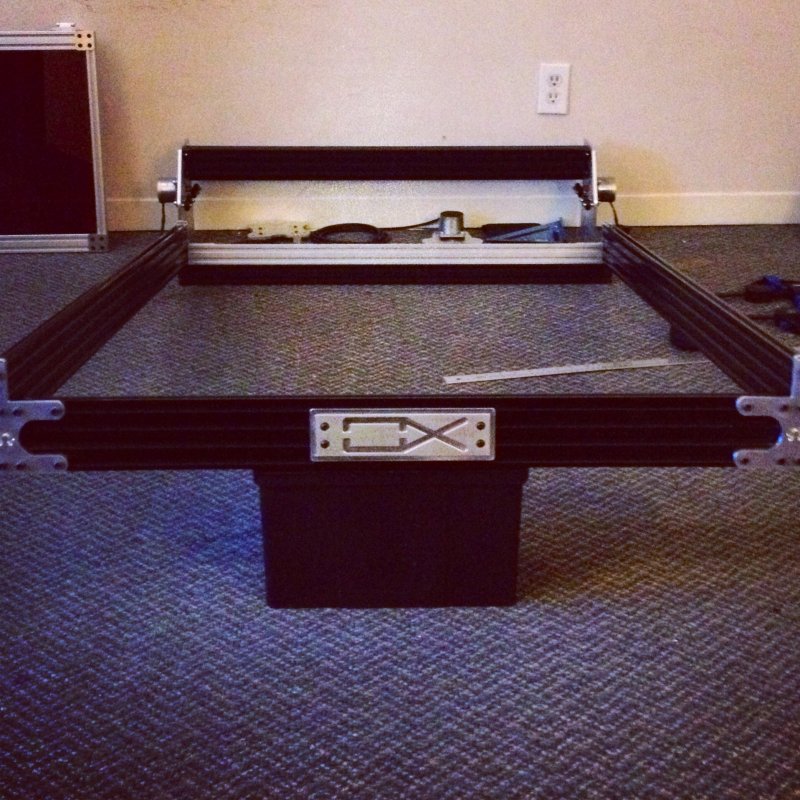
It really stiffened up the frame/pulled things square
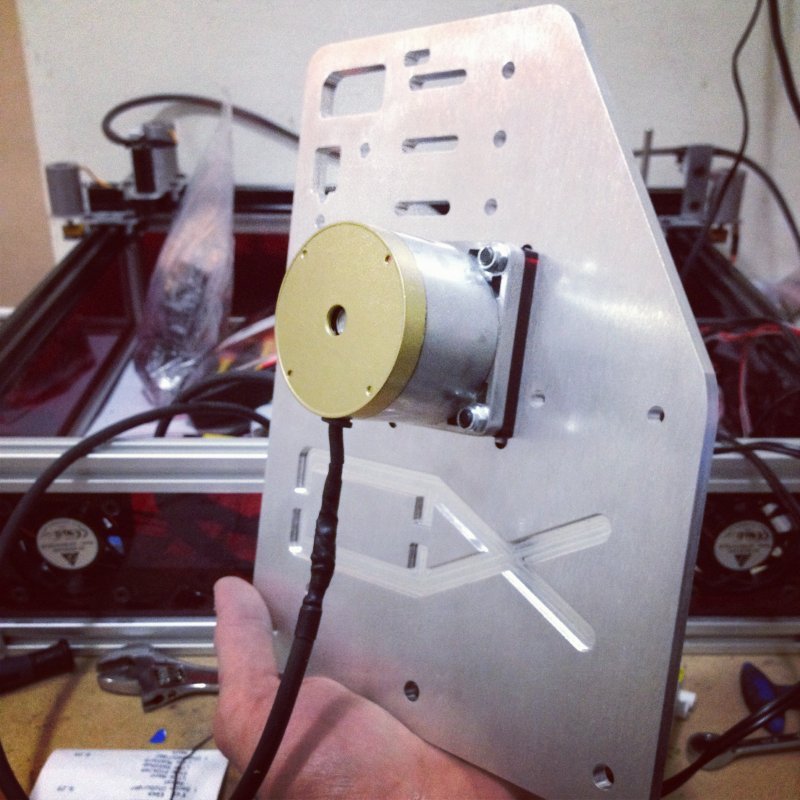
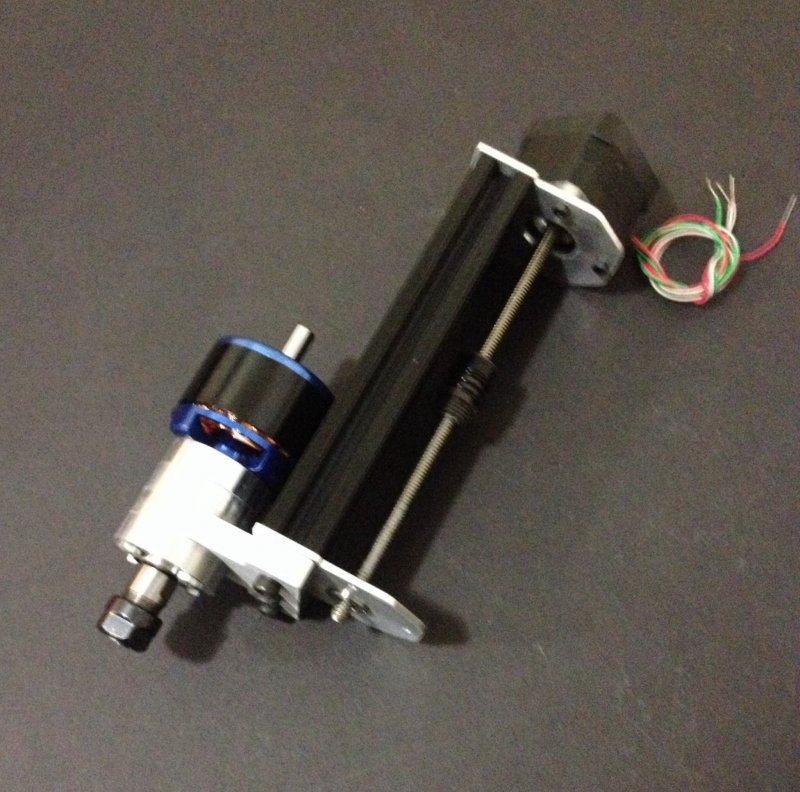
Next, the motor and leadscrew assembly.
I was going to use open builds plates but wanted no exposed extrusion so I modified the files to suit my needs then milled them.
Then I made 4mm spacers and found a flange 8mm ID bearing for the end support.
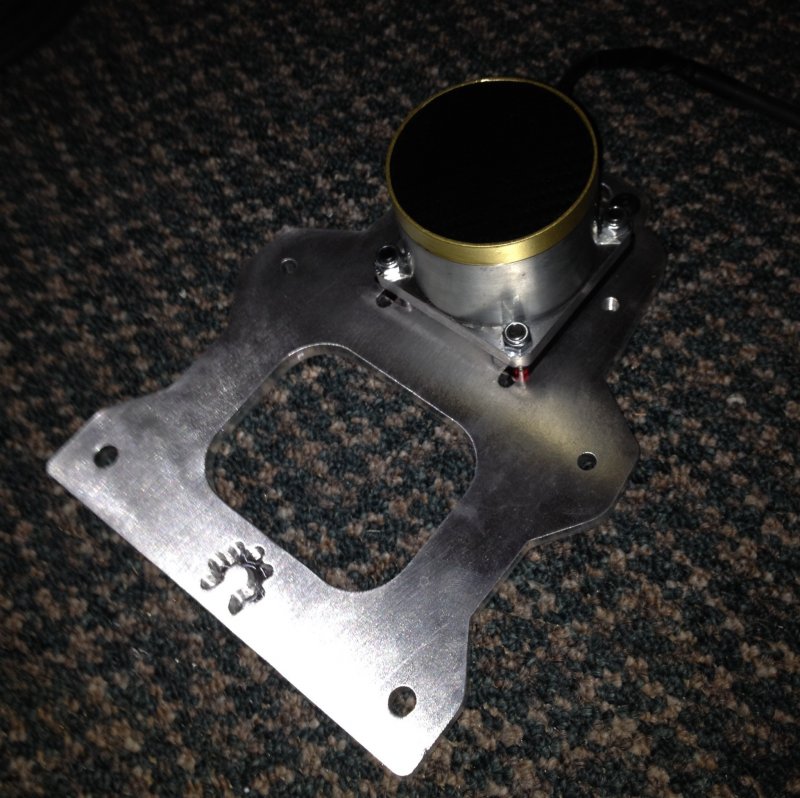
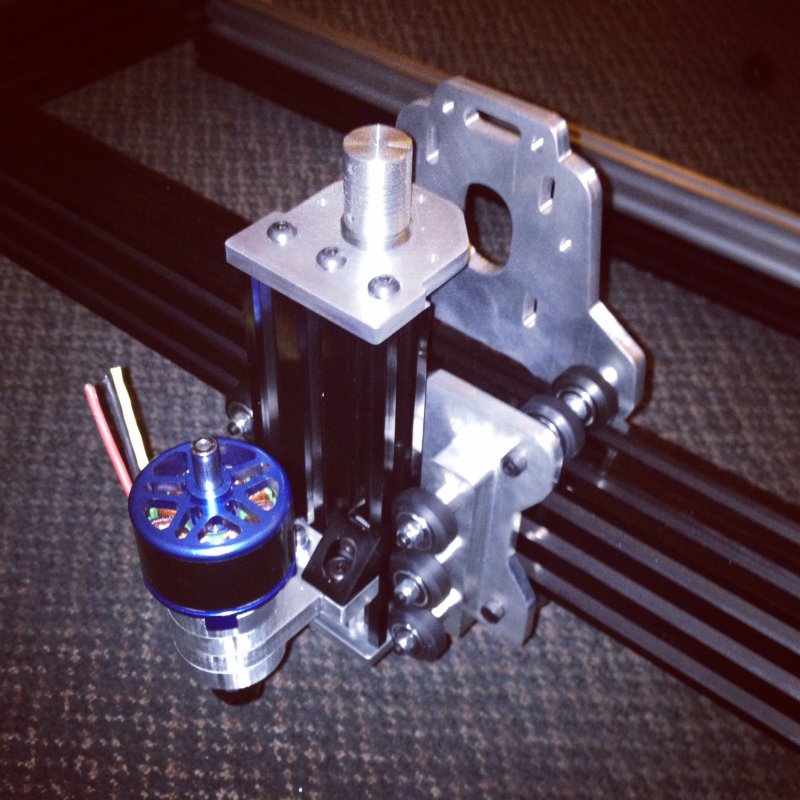
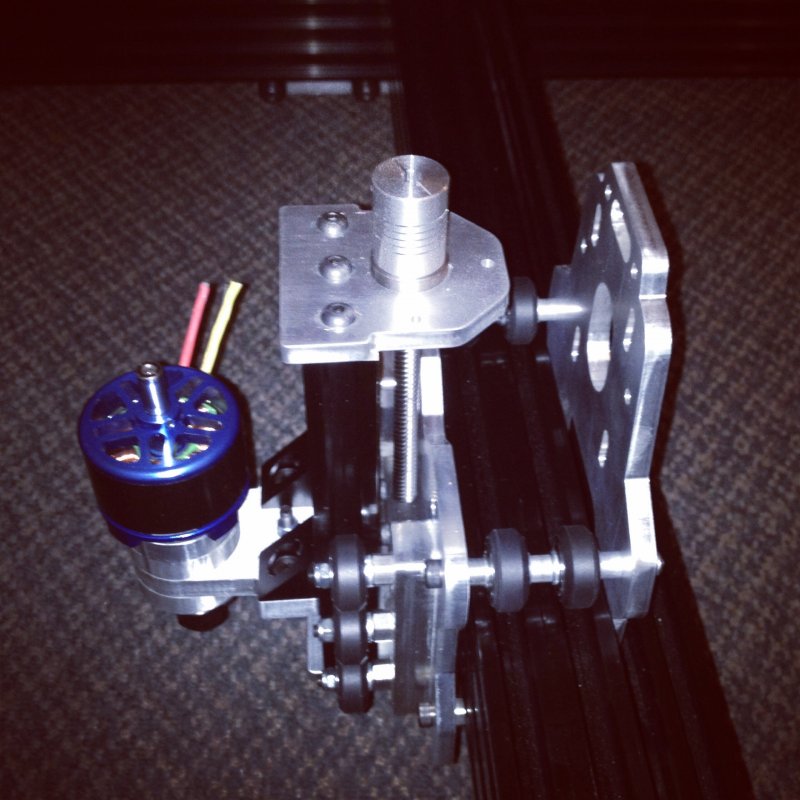
Here you can see a test fit for the OX RC spindle and now I can plan the nut design
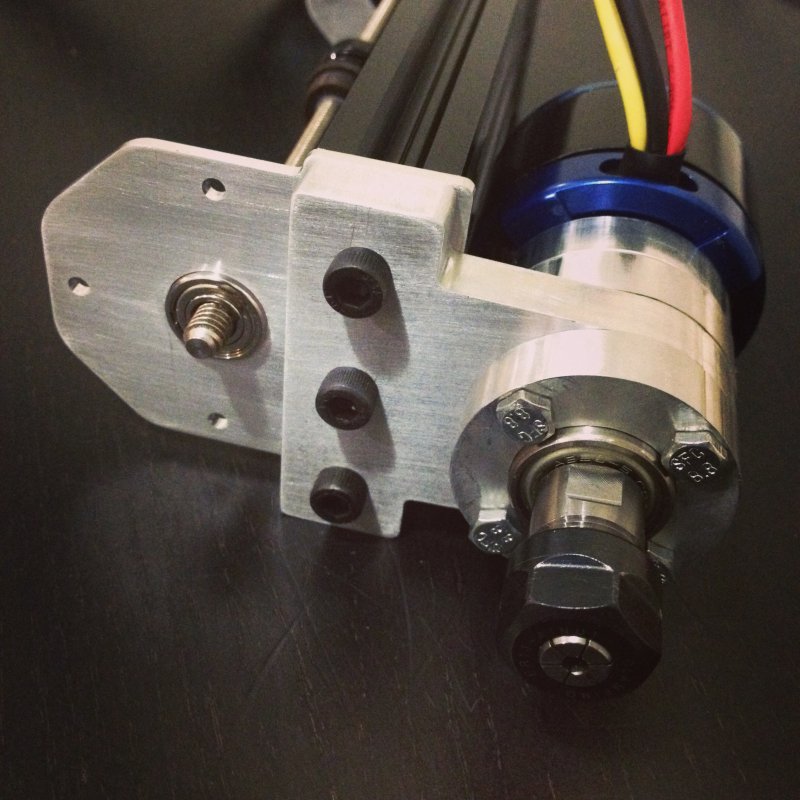
After some test fitting I decided to change up the Z axis and mount the RC spindle so it would be adjustable with a turn of some screws
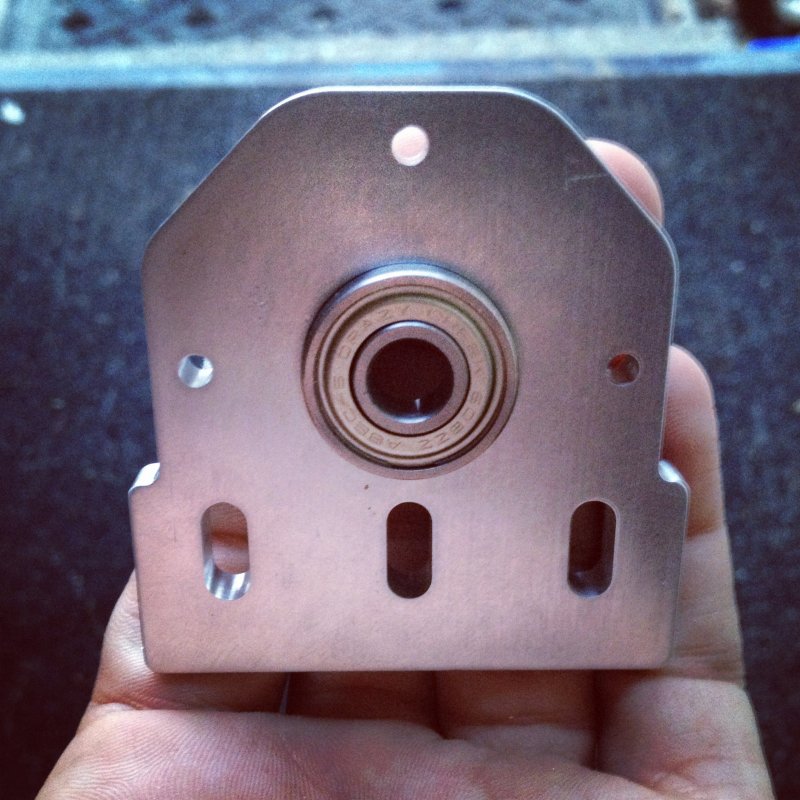
I then designed new top and bottom plates to hold some 608ZZ bearings
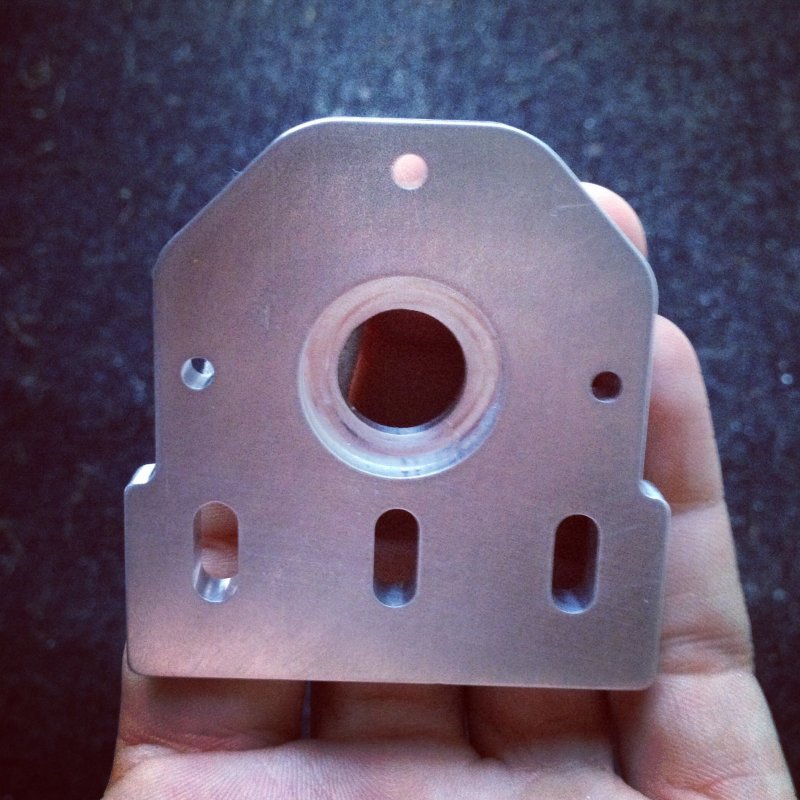
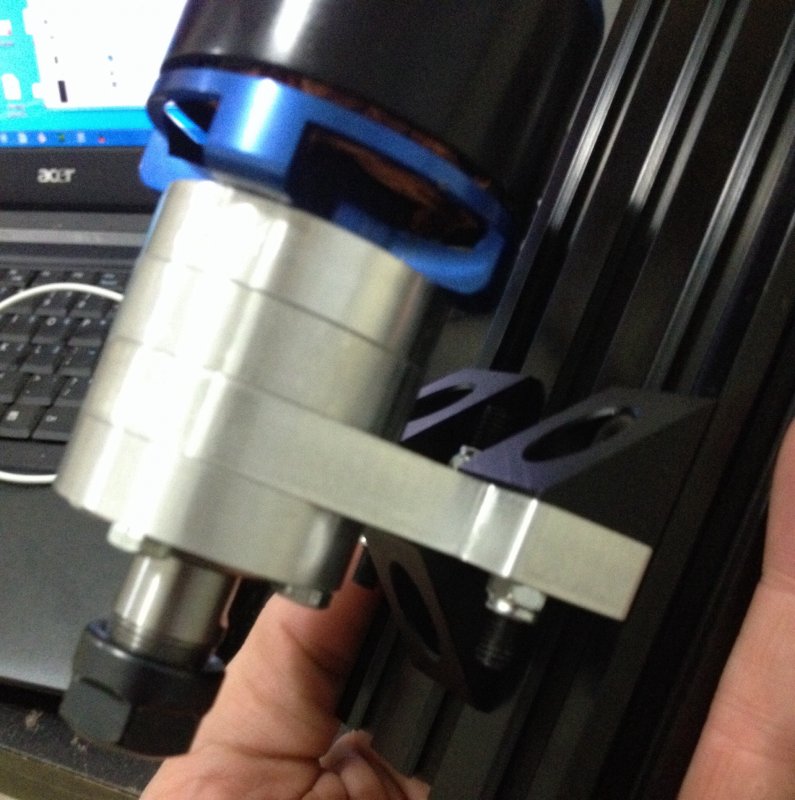
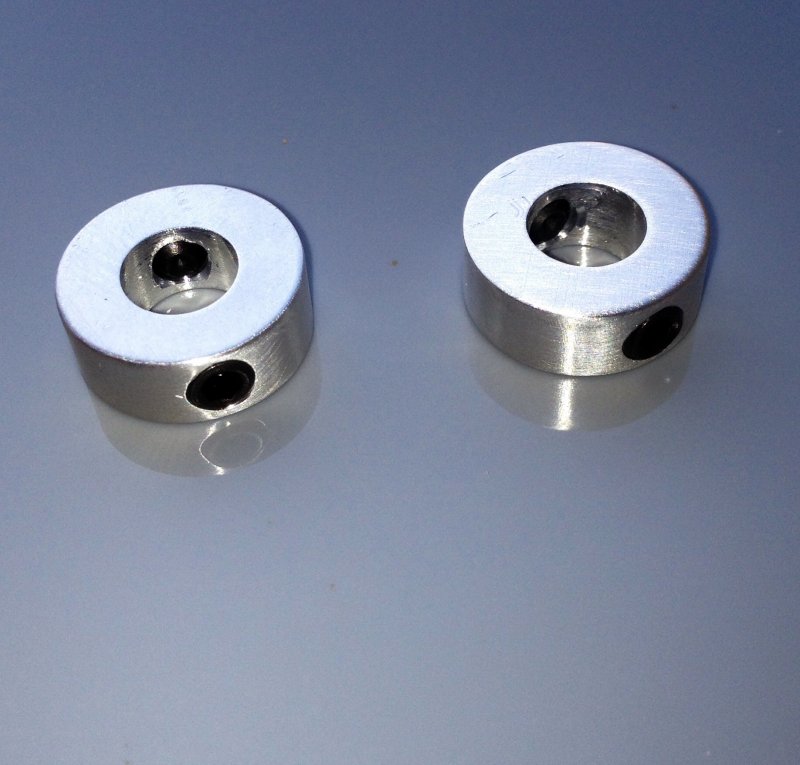
All I needed next was an 8mm lock collar but could not find it local so it was back to the mill to see if I could pull off the smallest part yet lol
It was now time to put all the parts together and test it out
I must say I'm really impressed with the way the OX is coming together and it is really smooth
Here it is powered by a NEMA Rob, last I checked I bench 190lbs
I had a little red 6mm acrylic left over and made up some spacers for the NEMA17 on the Z

I need one more to clear the coupler and then it's just odds/ends left.
Ran another batch of spacers with a new bit and really happy with the off mill finish.
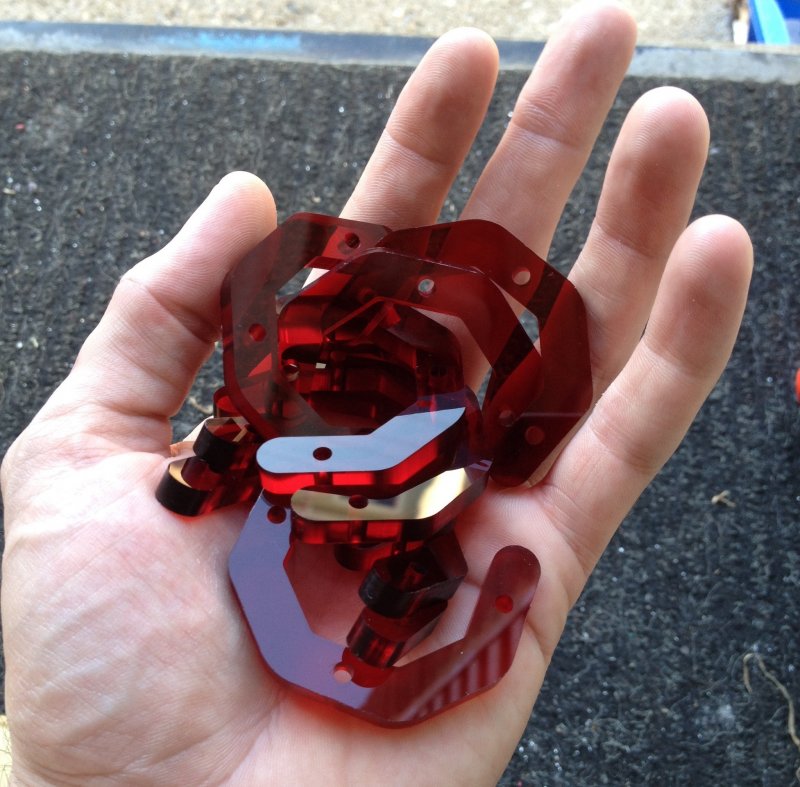
Six spacers give just the right amount of space for the coupler
Here it is fully assembled and waiting on electronics
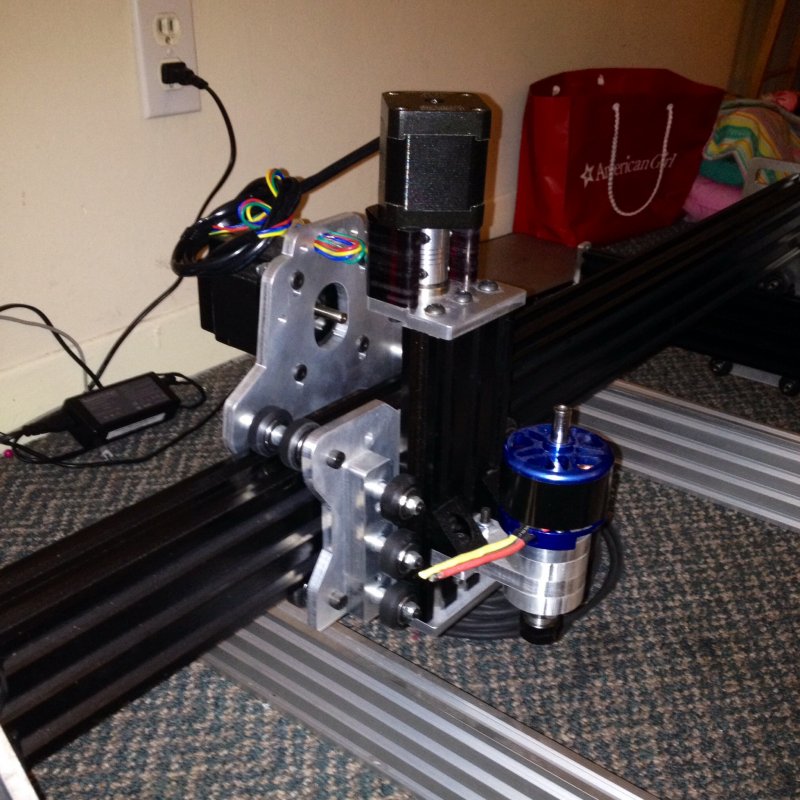
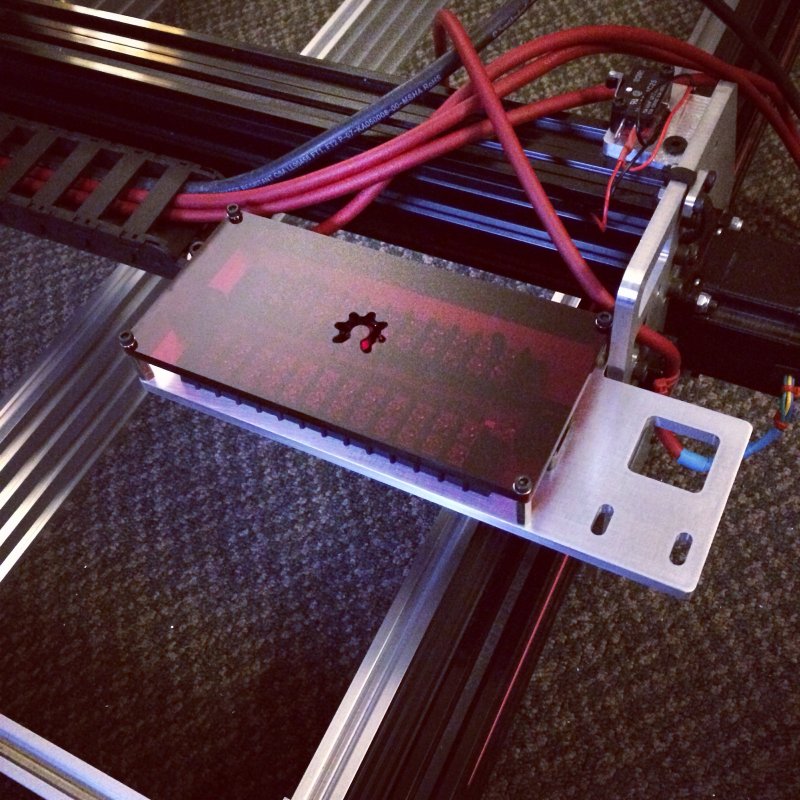
A lot of items have arrived and here you can see the RC Spindle test after wiring the machine
Also a pic of the drag chain installed
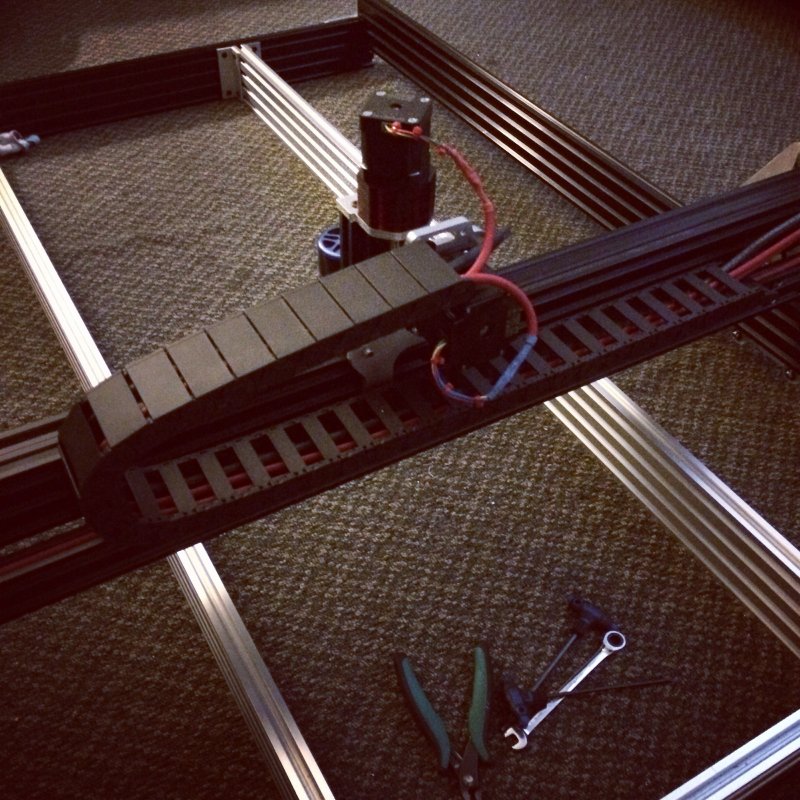
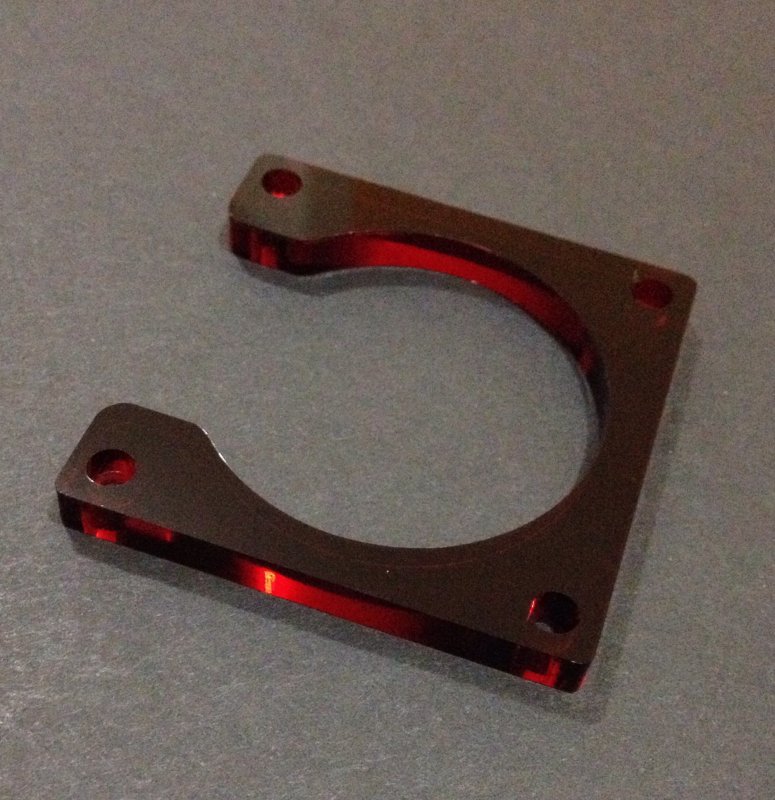
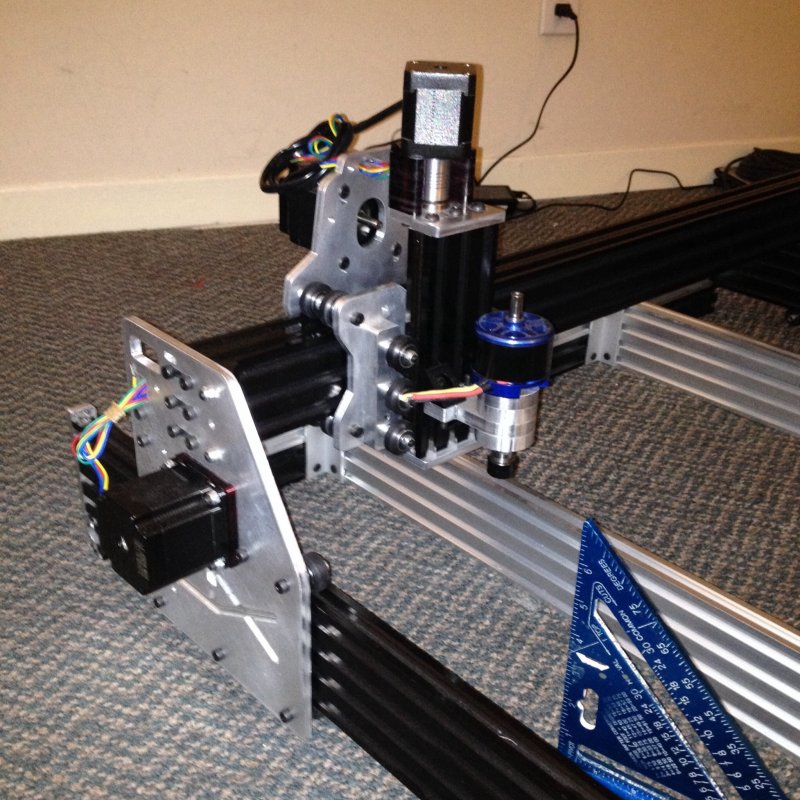
Here you can see some of the custom work I have done
Y Axis brace/guard
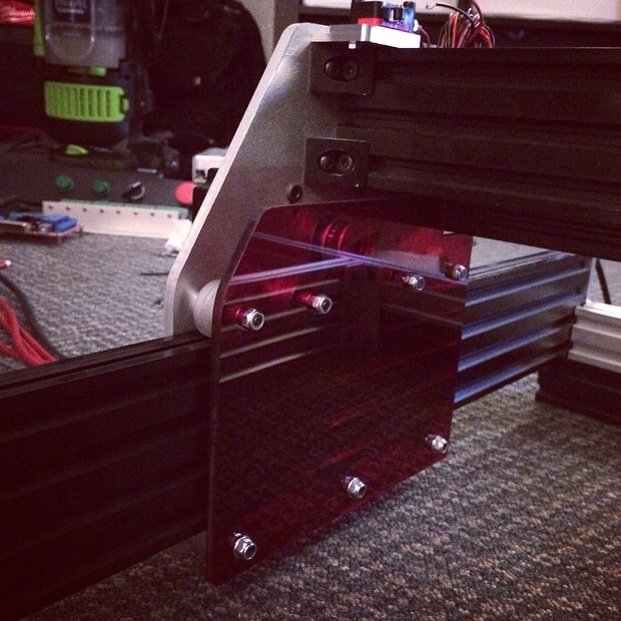
Terminal plate and guard
OX AI
Build in 'Cartesian Style CNC' published by Robert Hummel, Jan 24, 2015.
This will be an Aluminum OX build. Plates and all design credit goes to Mark from open builds. I may add my own touches but mainly this is to see how Aluminum plates perform
-
-
Build Author Robert Hummel, Find all builds by Robert Hummel
-
- Loading...
-
Build Details
- Build License:
-
- CC - Attribution - CC BY
Reason for this Build
To have a small cnc mill for my little girlInspired by
OX cnc router -
Attached Files:

