Hello,
I thought I would share my machine build with the community.

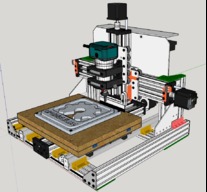
The machine is actually about three or four years old already, and has changed several times over that time period. Most of the modifications have been in adding metal, as you can see from the pictures, and in the X and Z axis plate. This is a common plate that you merely orient for the axis to be used on, placing the wheels in the appropriate holes as well. The plate can be pulled from the Sketchup file attached to this build.


I've also evolved the electronics and added a jogging control box. An overview follows.
Here is a back view, a bit busy with all the wires..

This is a shot of the main control board. You can see the small Arduino Nano, which is running a modified version of GRBL. I added an extra message to allow the Jogging box to know when the machine is Homing.

This is the jogging control box. It also contains an Arduino Nano. It has a full menu and control system to allow almost complete control of the machine. The push button switches interface to the various GRBL inputs on the main board controller. The rotary switch has several functions including Z axis up and down as well as changing coordinate system from machine to work when you are monitoring a cut.

Here's a close up view of the opto-isolator boards that plug into the main board. There are two versions of them. For the limit switch inputs I wanted an indicator light (green LED) when the switch is not activated, and another indicator light (red LED) when the switch has been engaged. This required an extra transistor in the design. For the other inputs like the probe, hold, cycle start etc, only one indicator light was required (with LED color dependent upon function). A small indicator panel that mounts above the machine was made for this - see the last picture.


As I mentioned the machine is GRBL controlled (although as I mentioned I did make one modification to that code base for my machine), which I have found to work very well - flawless. I use bCNC as the controller, again flawless.
This year (2020), I'm lengthening the machine to take it from a 500 mm base to a 1000mm base. For this new build I'll have more detailed pics as it goes along.
I'm open to comments and questions.
Thanks
rob
PS: I will add all my KICAD and Arduino code files to this build with the understanding that I cannot guarantee they will work for you (although I don't see why there would be an issue). If you choose to implement them, you do so as your own undertaking and risk. I will help whoever asks, but I take no responsibility nor liability if something goes wrong as a result of your use and implementation of them.
Jan 17 2020 note - all remaining files have now been added to this build.
Build complete
My C-Beam machine...
Build in 'Other Style CNC Mills' published by RobertCanthal, Jan 17, 2020.
A C-Beam machine design, strengthened with extra brackets and plates. GRBL controlled, opto-isolated inputs, jogging box.
-
-
Build Author RobertCanthal, Find all builds by RobertCanthal
-
- Loading...
-
Build Details
- Build License:
-
- CC - Attribution - CC BY
Reason for this Build
Well, I guess for the fun of it! -
Attached Files:


