
This is a two axis (X & Z) machine to drill adjustable shelf pin holes in the sides of the custom cabinets we build in our custom cabinet shop.
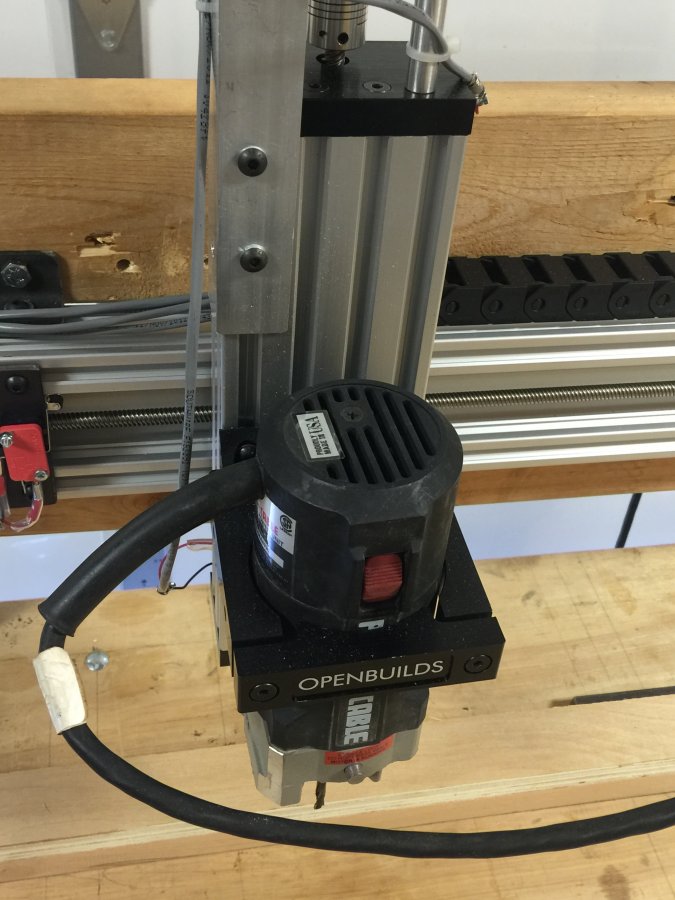
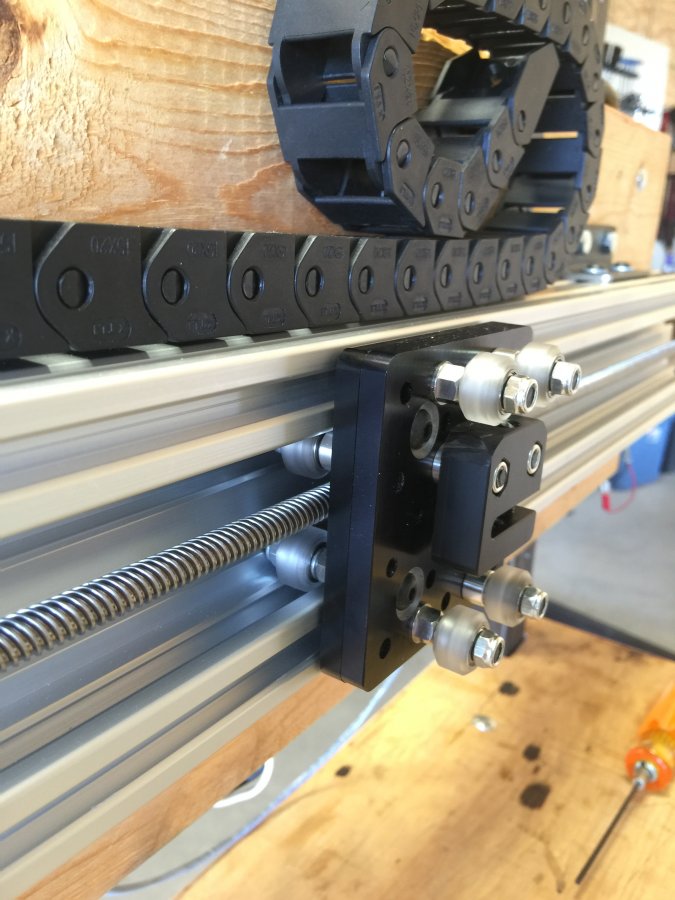
A Porter Cable Router "drills" the 5mm holes at a 32mm spacing. Also notice the gantry does not extend past the width of the C-Beam!

Up close of the gantry. Notice it does not extend past the C-Beam on either the X or Z axis. This gives me the fullest range of motion possible.
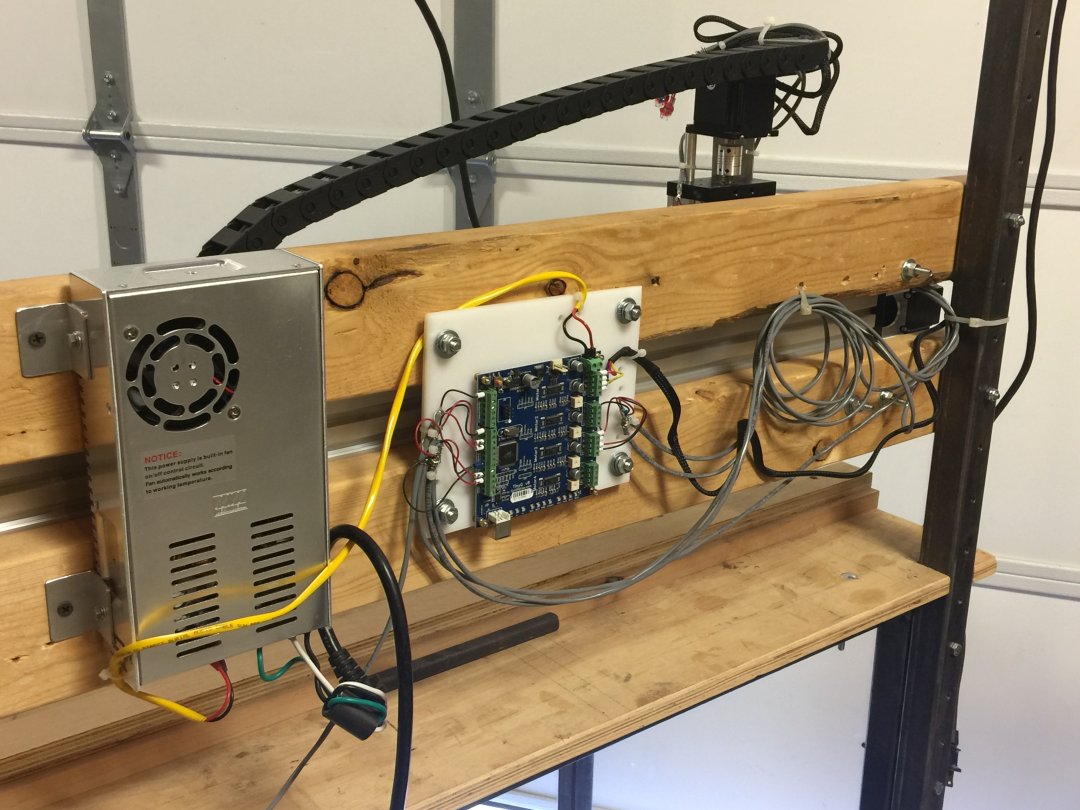
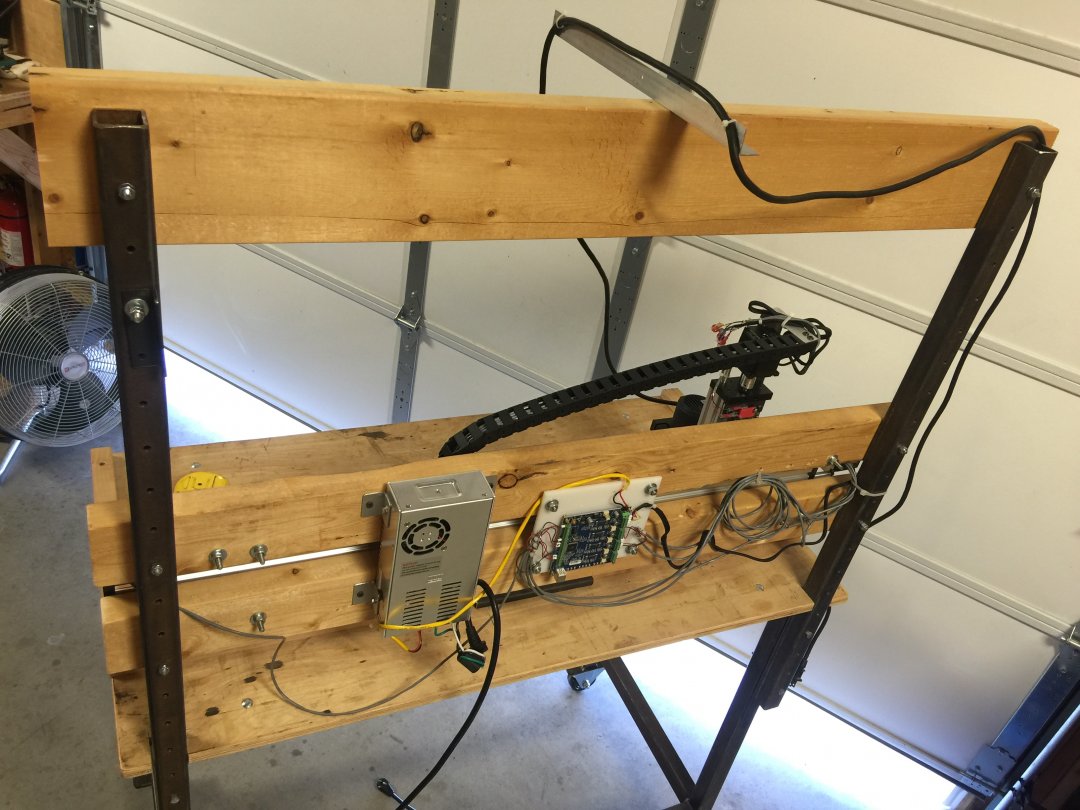
Backside. Mean Well Power Supply & TinyG Controller.
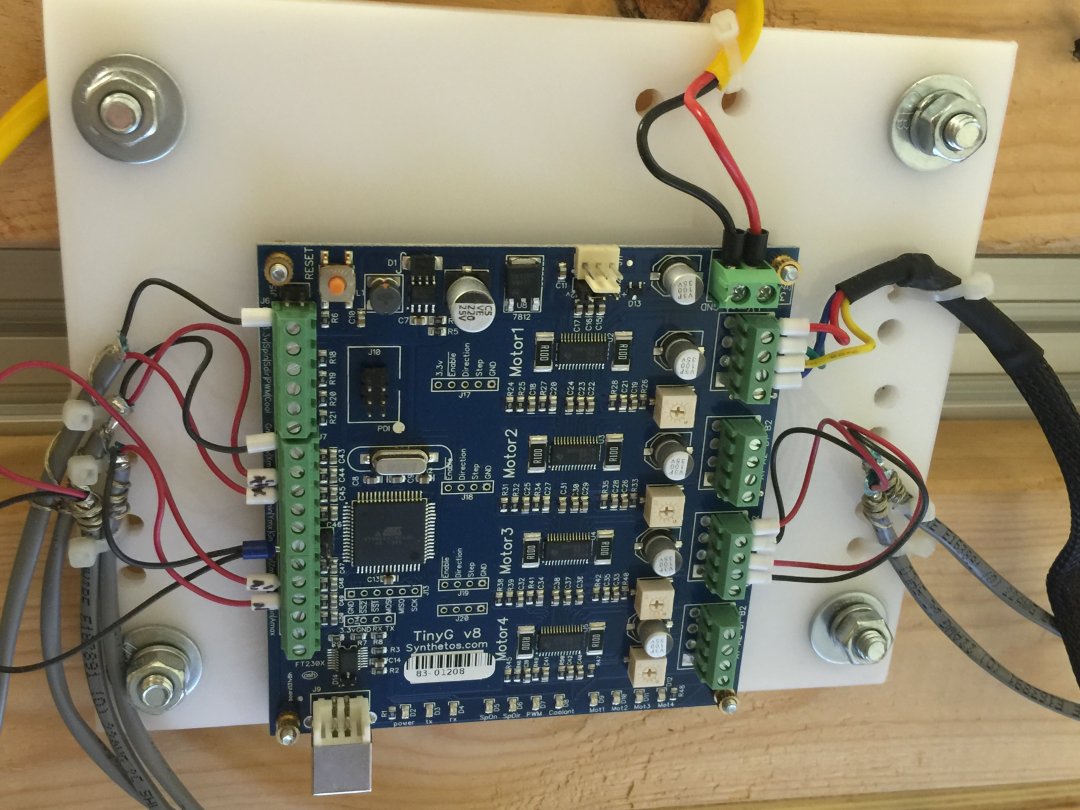
TinyG Controller up close.
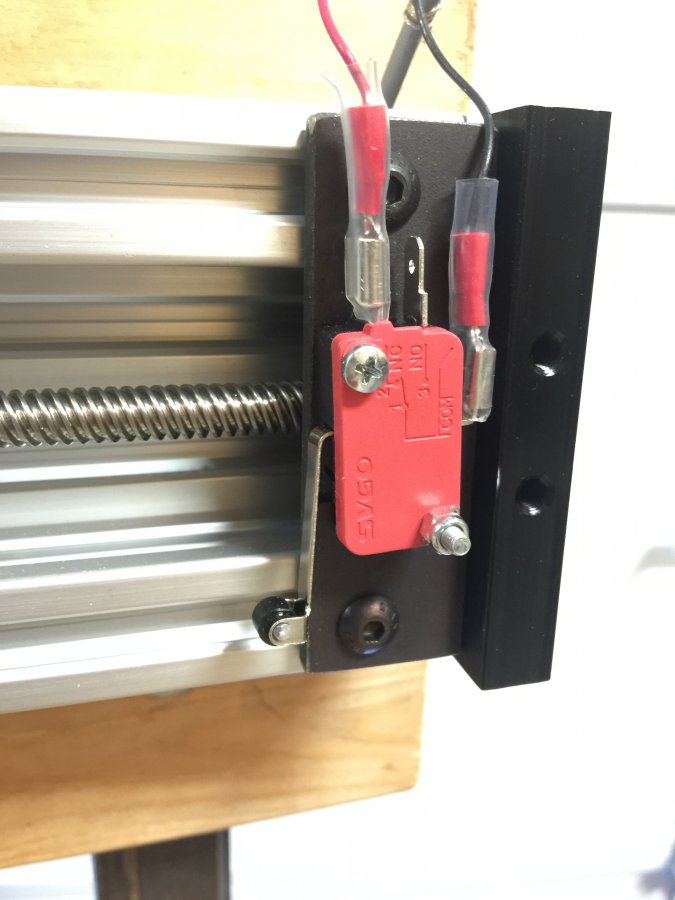
Limit Switches mounted to a 1/8" X 1" X 3" steel plate. Then it is mounted to the C-Beam. Heat Shrink is put over the spade contacts to keep them insulated. Wired in the NC (Normally Closed) position.
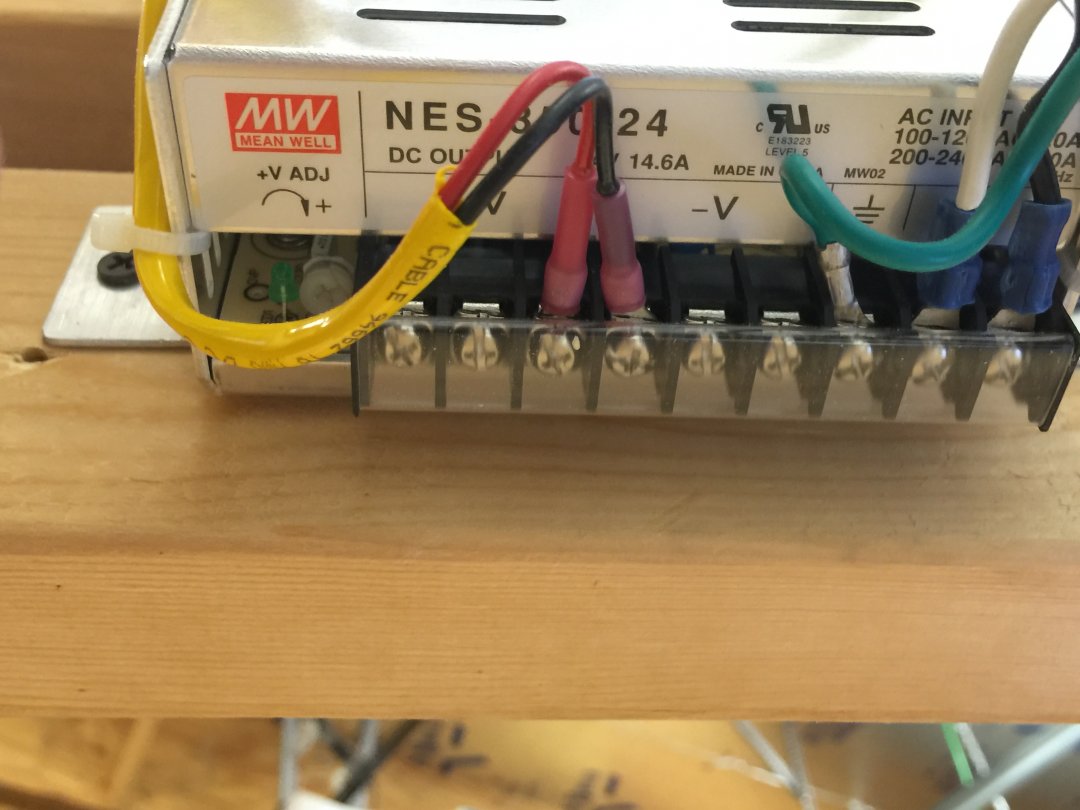
Mean Well Power Supply hookup.

Upper drag chain mounting bracket. The aluminum angle after trimmed & bent.
I used a 1"X1" aluminum angle to build the mount for my cable carrier (drag chain). This shows where I trimmed the piece with a hacksaw. I filed the rough edges off. And bent it using a hammer and a vise. Mounted it using 2 of those T-nuts from OpenBuilds.
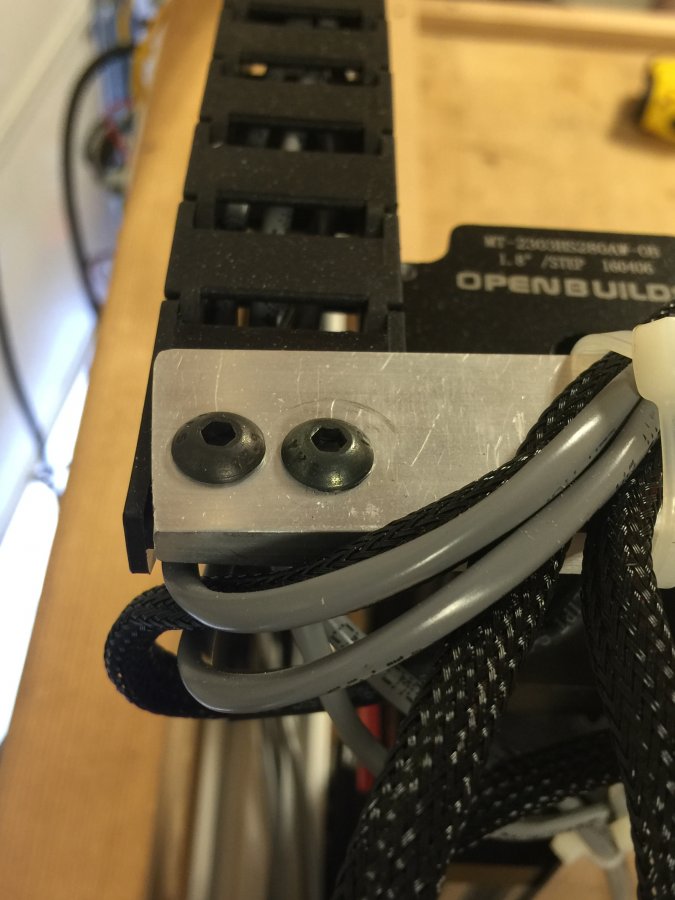
The above photo shows how the drag chain is mounted to the "trimmed & bent" aluminum angle. Drilled 2 holes in the angle and used two 5mm X 20mm pan head screws with OpenBuilds T-Nuts to secure.
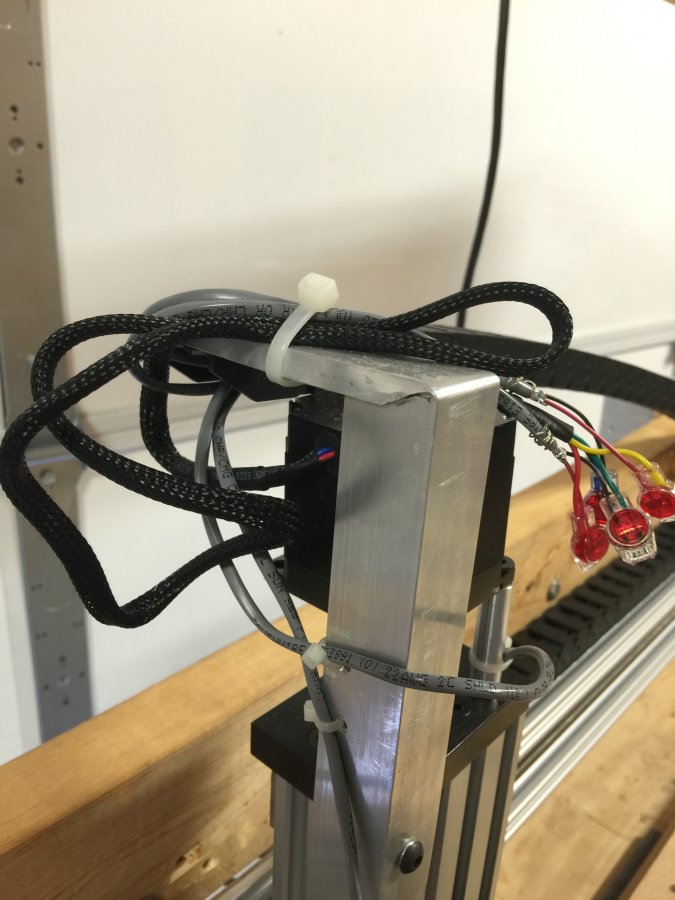
The lower mounting of the drag chain is just one T-Nut in the top of the C-Beam and thru 1 of the holes in the drag chain. Slick and easy. Plenty of space in the chain for the wires. The 4 Wires are are ran to the (2) Z-Axis Stepper Motor and the (2) Z-Axis Limit Switches.
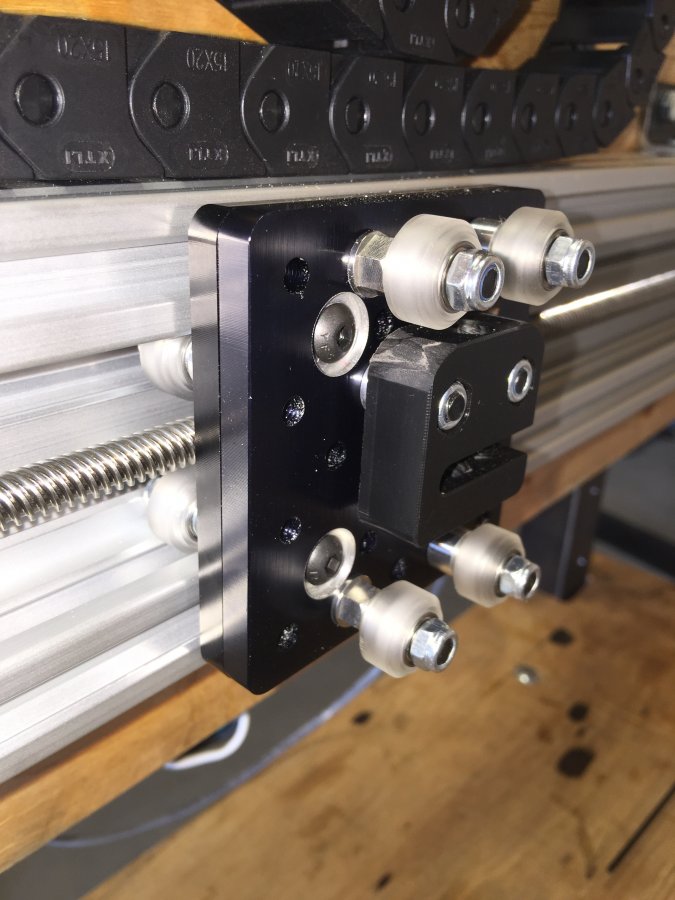
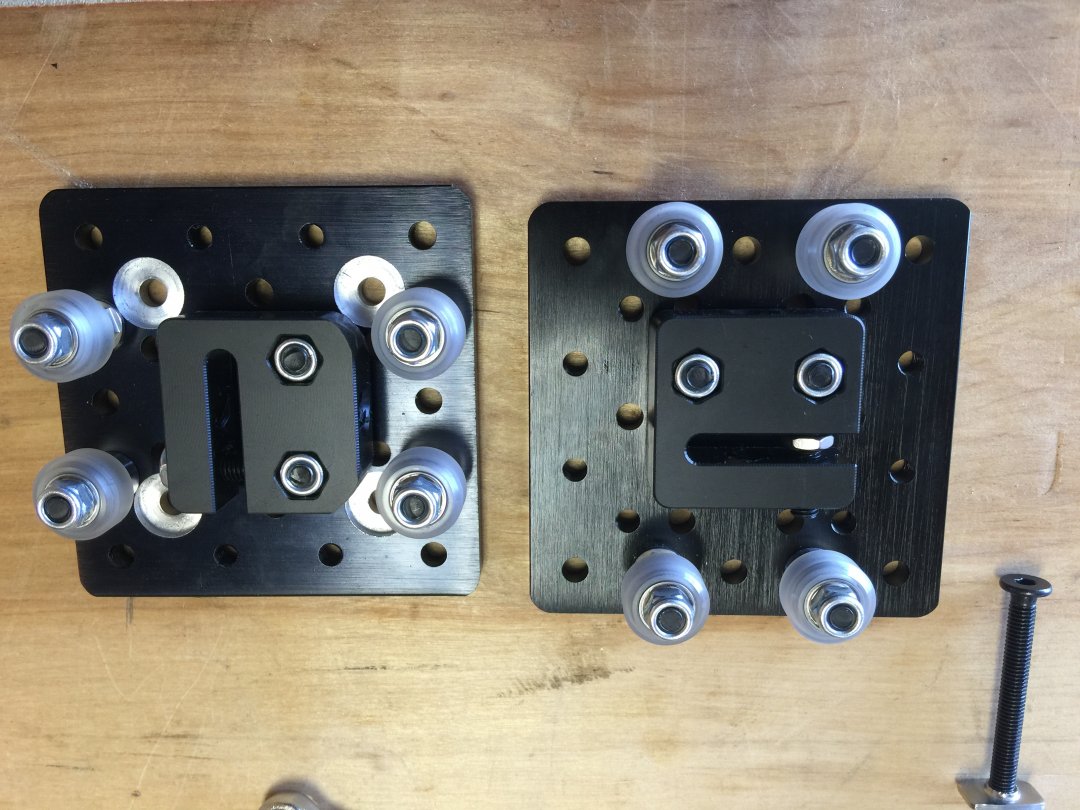
The above photo shows the milled gantry on the left. The silver circles show how it was milled down so the pan head screws would not interfere. Those same holes were also drilled out to remove the threads so the 2 pieces could be bolted together.
Above shows the 2 gantry plates bolted together.
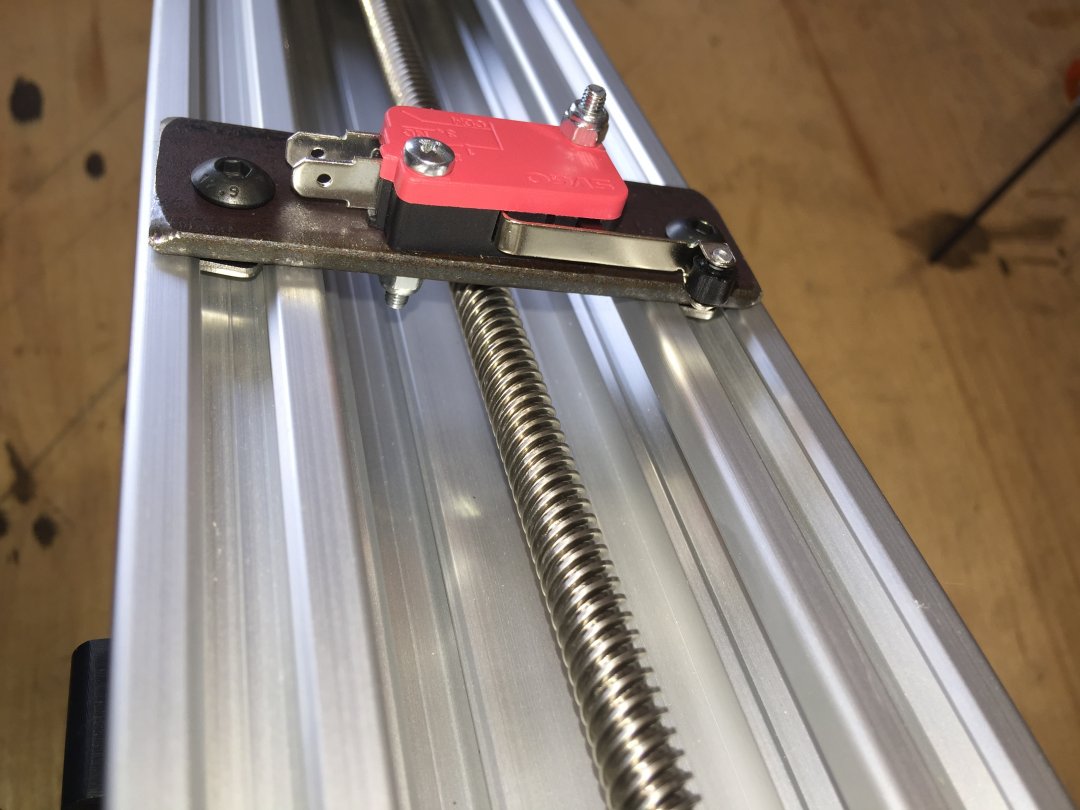
Shows how the limit switches are mounted. They can slide to where you want them and then the screws tightened to keep them where you want them.
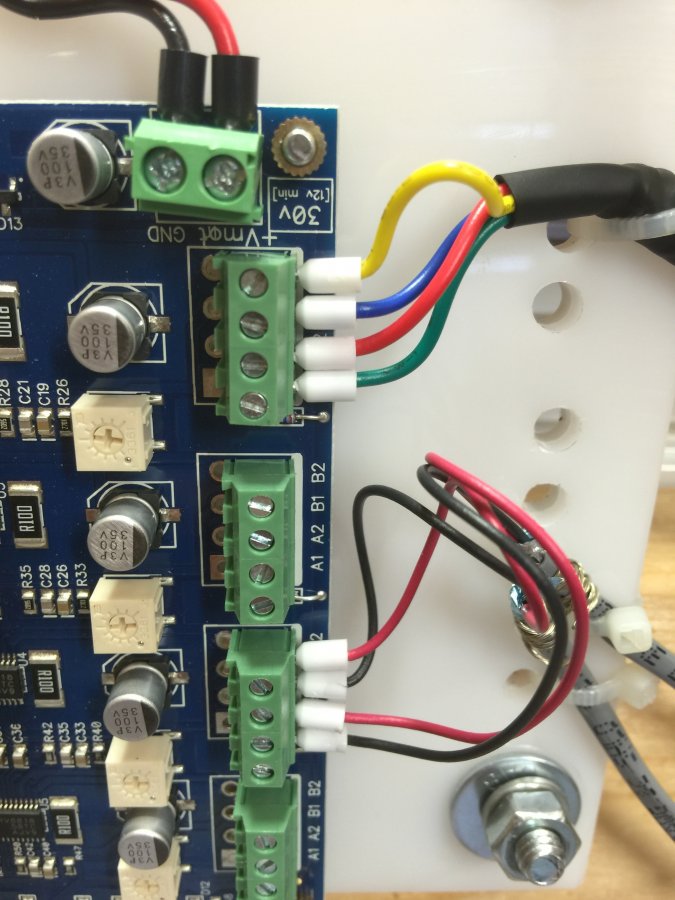
Shows where the 2 Stepper Motors are connected to the TinyG.
This shows the Porter Cable Router power cord held up out of the way by the aluminum angle that is mounted to the top board.

I cut 4 short pieces of the aluminum angle to use to mount the power supply. 4M bolts hold it to the power supply.
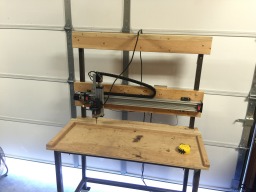
CNC Line Boring Machine
Build in 'Everything Else' published by Bridge Port, Aug 8, 2016.
This is a CNC Line Boring Machine for our cabinet shop. It drills the holes every 32 mm for the adjustable shelf pins in the cabinet side pieces. I chose this option over purchasing a multi-head boring machine that requires 11 drill bits - Left & Right hand twist - that also requires a lot of strength to plunge that many drill bits into the wood to be drilled.
-
-
Build Author Bridge Port, Find all builds by Bridge Port
-
- Loading...
-
Build Details
- Build License:
-
- CC - Attribution - CC BY
Reason for this Build
To drill adjustable shelf pin holes every 32mm in custom cabinets. We use it in our custom cabinet shop. -
Parts list
Qty Part Name Part Link Comments 1 C-Beam Linear Actuator Bundle - 250mm http://openbuildspartstore.com/c-beam-linear-actuator-bun... Link $122 1 C-Beam Linear Actuator Bundle - 1000mm http://openbuildspartstore.com/c-beam-linear-actuator-bun... Link $164 2 Nema 23 Stepper Motors from OpenBuilds http://openbuildspartstore.com/c-beam-linear-actuator-bun... Link I chose the include the motor option. So cost is included in the above bundles. 1 Mean Well Power Supply 24VDC https://www.amazon.com/gp/product/B00KTJE3L4/ref=oh_aui_s... Link $49 This put a stop to the EMI issues that were caused by my Porter Cable Router Motor. Don't buy the cheap power supply. 1 15 x 20mm 1.07M Open On Both Side Wire Carrier Cab https://www.amazon.com/gp/product/B00843VYGO/ref=oh_aui_s... Link $9 each. Bought 2 - only used 1 but I need to add some links to it from the second one I purchased to make it the perfect length. 4 Micro Limit Switch Long Hinge Roller Arm SPDT https://www.amazon.com/gp/product/B00H8TJOU8/ref=oh_aui_s... Link $7 for 20 switches. They work perfectly. Comes in a package of 20. I Configured them NC (Normally Closed). 1 Chilipeppr.com is free. It is a website. http://chilipeppr.com/ Link FREE. It allows you to Send G-Code to your TinyG Controller which is connected via USB cord from your computer 1 TinyG Controller v8 $130 as of 2016 0808 http://synthetos.myshopify.com/products/tinyg Link $130. Pretty amazing Controller. Check out it's website. It can control 4 axis. 1 C2G / Cables To Go 28102 USB 2.0 A/B Cable, Black https://www.amazon.com/gp/product/B000FW7L4Q/ref=oh_aui_s... Link $5.49 This is a Twisted Pair (TP) Shielded USB Cable. Connects TinyG Controller to Computer. 0 Link