
I'm going to try and keep this as short as possible without leaving out any critical details of our build. I want to note that I am not an expert in the field and my writing skills aren't the best. I made some mistakes along the way and I will try and make note so you don't make the same ones I did. I followed the C-Beam XL Build by Moag throughout the entire process. If you are going to be upgrading your machine, I suggest you take my tips and follow his build closely.
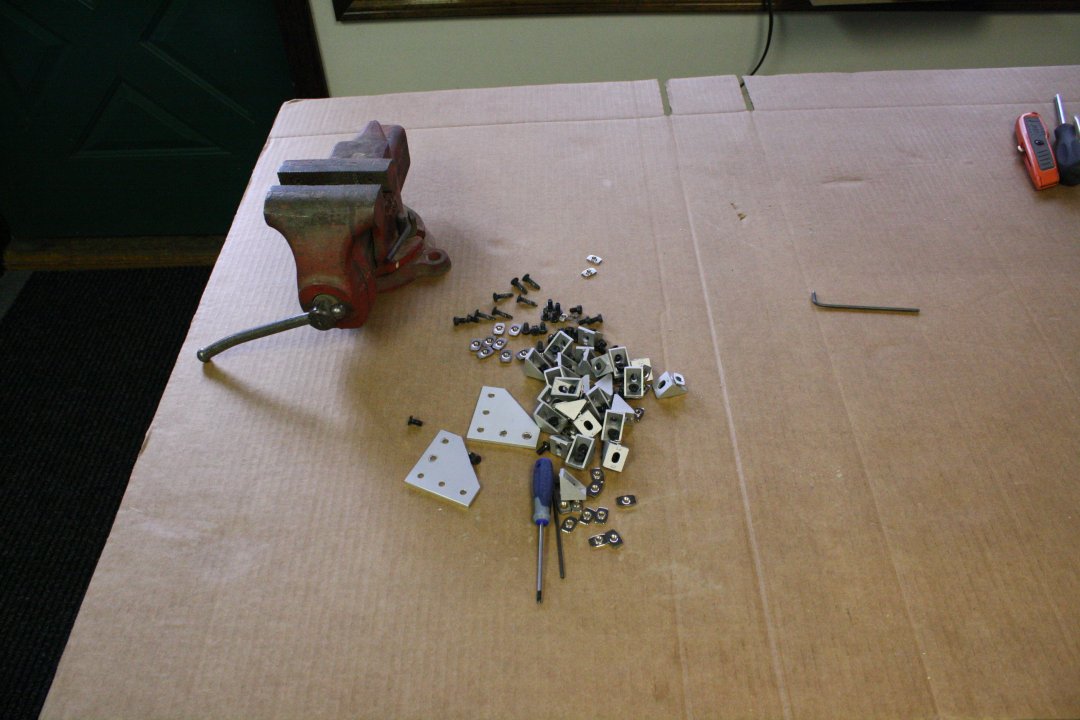
The disassembly process of the Original C-Beam is pretty straightforward. I took everything apart except the x, y, and z axis.
1. Remove all the electronics except for the stepper motors.
2. Remove the Z axis from the X axis by removing the end plate and top corner bracket. The lead screw can be manually turned to slide the z axis assembly off of the end. Do this carefully to avoid damaging the wheels.
3. The X axis can now be removed from the frame. Also remove all of the cast corner brackets from the X axis.
4. The build table can be slid off the Y axis the same way as the X/Z was done. Remove the end plate and manually turn the lead screw until it comes off. I set this aside and continued to work on the frame.
5. Remove the Y axis from the main frame and remove all of the cast corner brackets from there. I set the x and y axis aside and disassembled the rest of the frame. The X and Y axis will both become the Y axis on the XL build.
6. After the frame is apart, I took the gantry plate off the build table and separated everything.
7. At this part in the video I started working on the build. I recommend you finish taking apart the Z axis the way we did the X/Y and organizing all of your C Beam parts with your C Beam XL parts. You will see me do this step later on in the build.
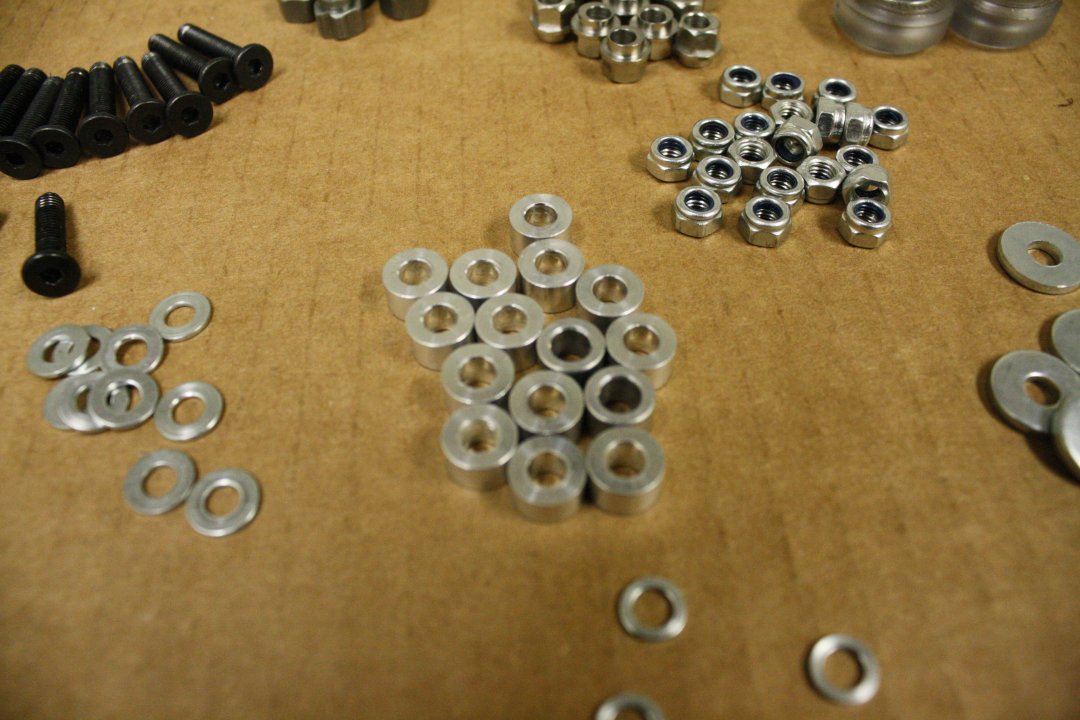
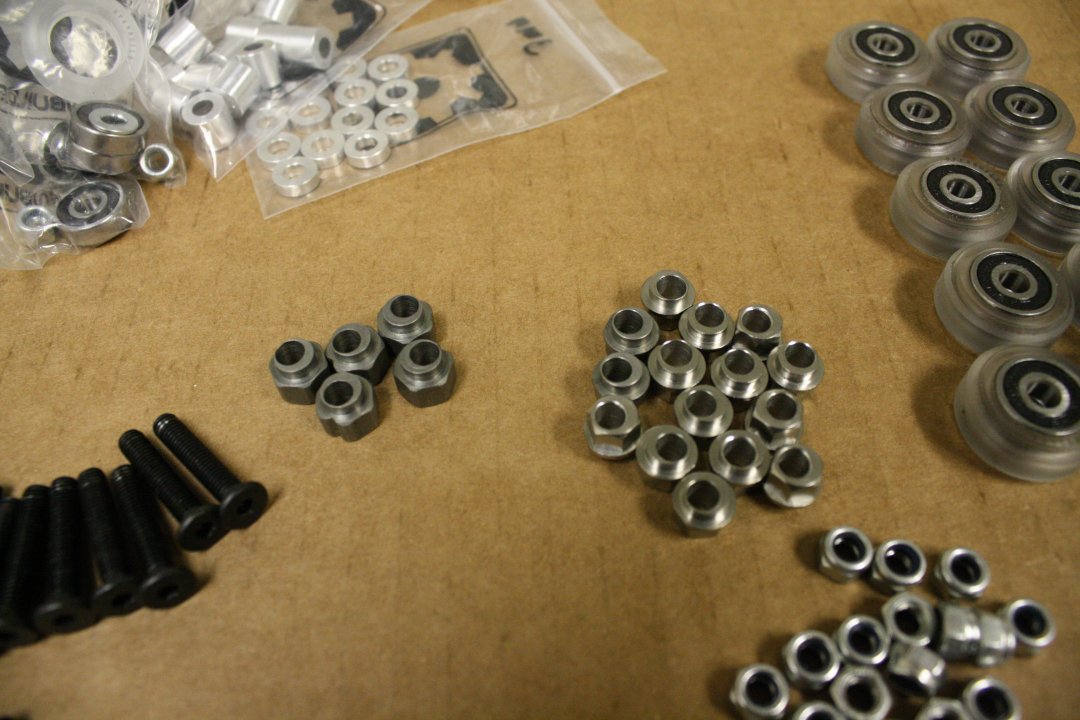
8. Notes: Two of our 6mm Aluminum Spacers on the Standard C-Beam looked a little off. We ordered these to make everything match. You may not need the additional ones. I can't remember why there are two different types of eccentric spacers on our C-Beam Build. We replaced all of the ones that didn’t match to have a cleaner build. You may not need to do this either.
Now onto the build. Like I mentioned before I am not going to repeat everything moag said and did. But will note how I did things along the way.
For the drillbits, I didn’t have a 5mm and 100mm Drillbit, I used a 3/8 and 13/64. I also found that countersinking the mdf with a forstner bit made much nicer holes. If you don’t have one, I recommend running the 13/64 bit it reverse to prevent going right through the mdf.
I used an orbital sander to remove the nubs from the cast corner brackets as directed. This was straightforward and simple.
IMPORTANT: The step of measuring and cutting the beams to match really came back to bite me in the end. I measured and matched everything up everything thinking I was good. I forgot to match the two 500mm c beams up to the old x and y axis. I had to take apart everything at the end of my build to cut the two 500mm beams down to fit. So don’t be like us and triple check the measurements of all the pieces.
Cutting the beams: Using a hacksaw like I did in the video is quite a pain. We have found it’s much easier to use a miter saw if you have one. The key here is to use a carbide tipped blade that has never been used on wood. One time on wood makes it not able to cut the aluminum. We used a diablo blade from Home Depot.
T-nuts: I know this sounds silly, but we had the T Nuts in the wrong way in the beginning of the build. The flat side goes toward the head of the bolt.
Tapping the Beams: I recommend using canned or compressed air to blow out all the little pieces left from cutting the threads.
IMPORTANT: Lock Collars on the Lead Screws: Whenever you build each axis, it is crucial that the locking screw on the lock collar be flush with the collar itself whenever it is tightened all the way in. There is little to no clearance for this to be hanging out. We had to take apart the machine to fix this at the end. I just used a dremel tool with a grinding bit to flatten a spot on the lead screw. (I believe moag recommended this and I didn’t do it. I learned my lesson, lol).
Main Build Table: We sealed our main build table with regular satin polyurethane. The first few coats I mixed 50/50 with mineral spirits. Then 25/75 for the next few coats until I got to straight poly. I think I ended up applying 15-20 coats all said and done. I just used paper towels to do this.
Main Build Table Note 2: Whenever the build was near completion we noticed the table was not square with the frame. We loosened the bolts mounting the table to the gantry plates and gave it a twist and re-tightened. We found that we still had to tweak by manually turning the motors to get everything perfect before powering on the machine.
Video of the build: The actual build time took somewhere around 10-12 hours with all the polyurethane sealing etc. I put everything in fast forward to cut the video time down to 4 hours. If there is something you would like to see or have questions about, please let me know. There is no sound on the video.
Photos of the build: If there is a specific photo of something you would like to see or know about, please let me know.
Here's a few:
C-Beam Before
C-Beam Before Backside with Electronics
Taking things apart...
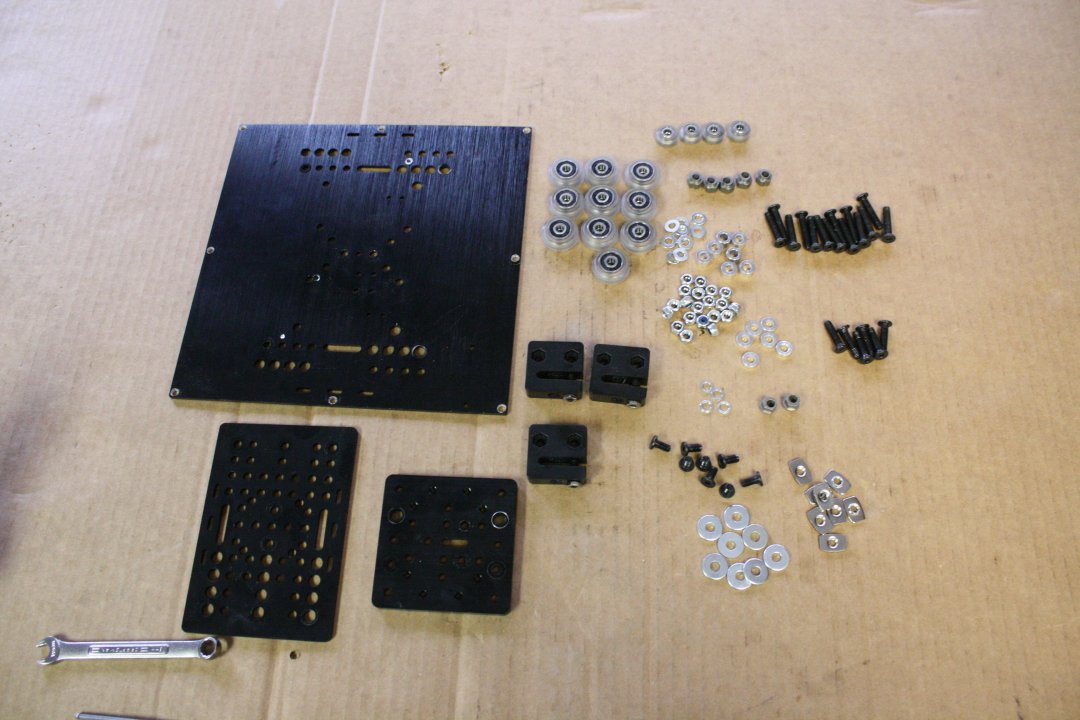
Parts piles from C-Beam
You can see the difference in the two 6mm spacers in this photo as to why I ordered replacements (likely wouldn't have made a difference, just a little ocd).
This photo shows the different eccentric spacers and I replaced them to make everything the same.
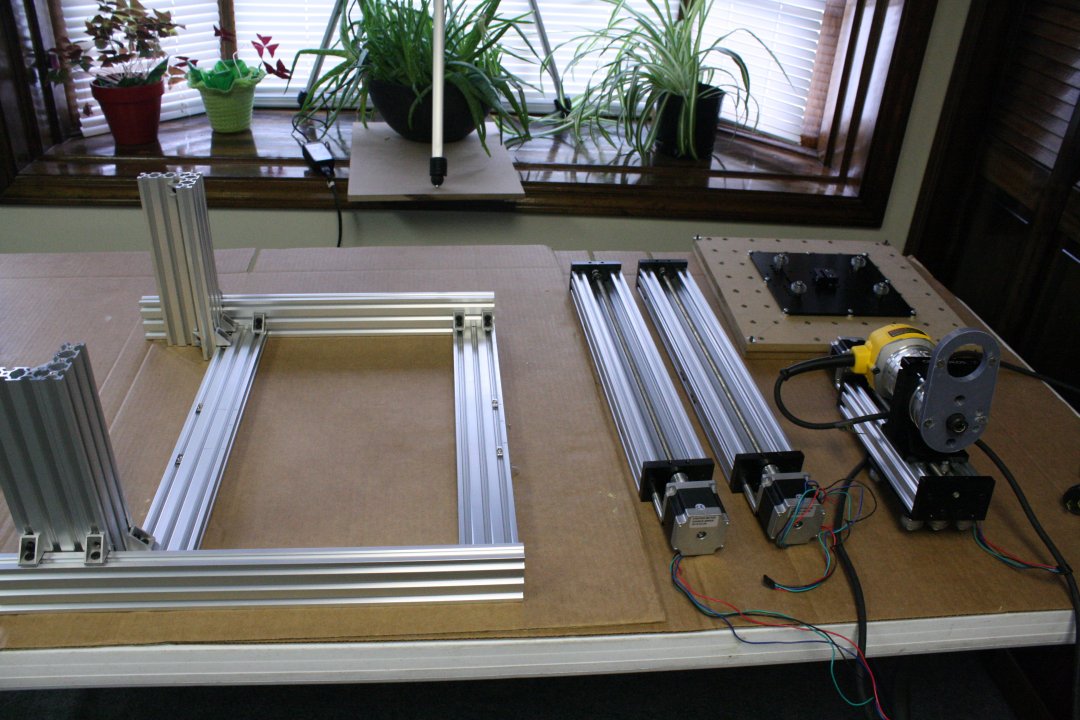
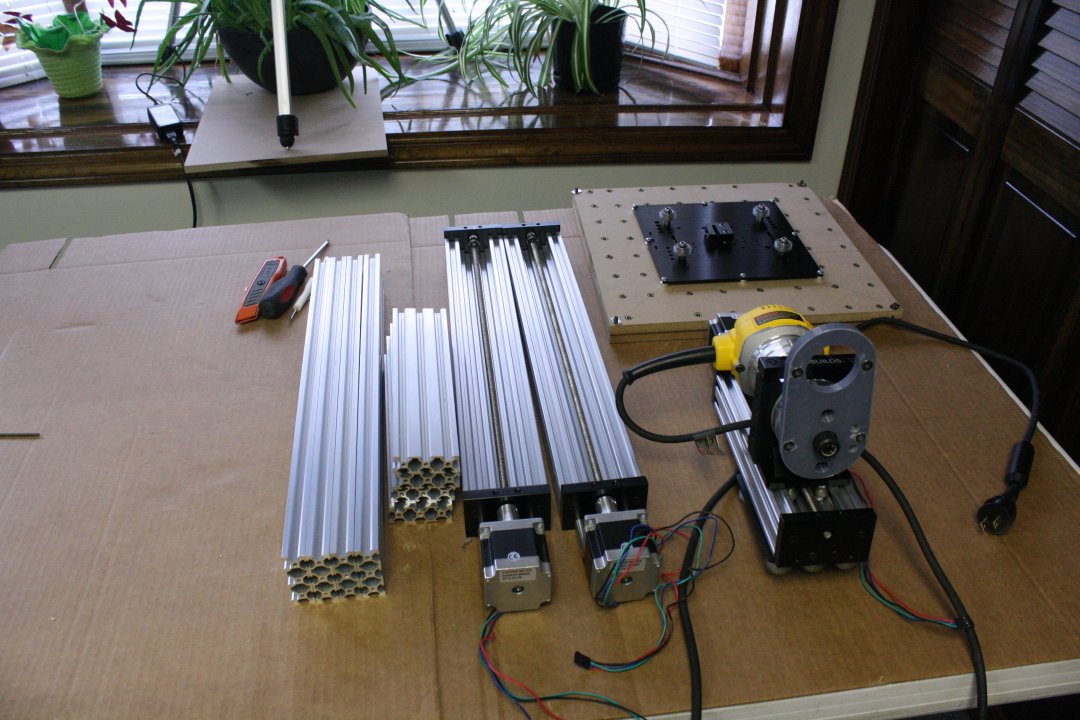
Parts Pile before and after C-Beam Parts were included:


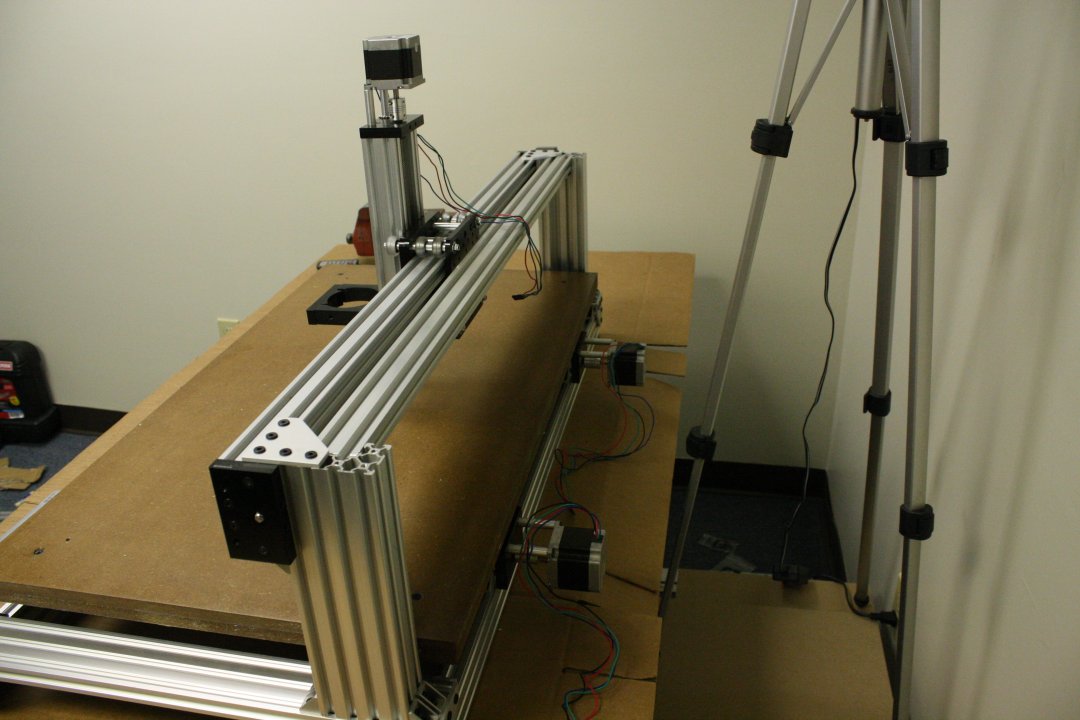
Mid Build:

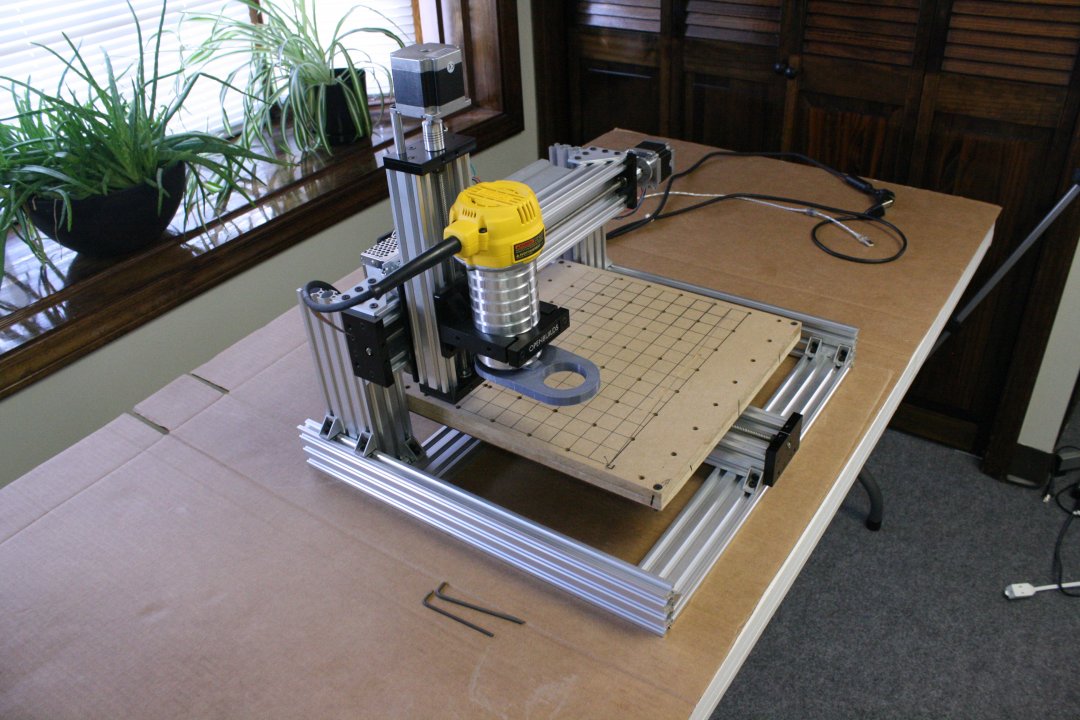
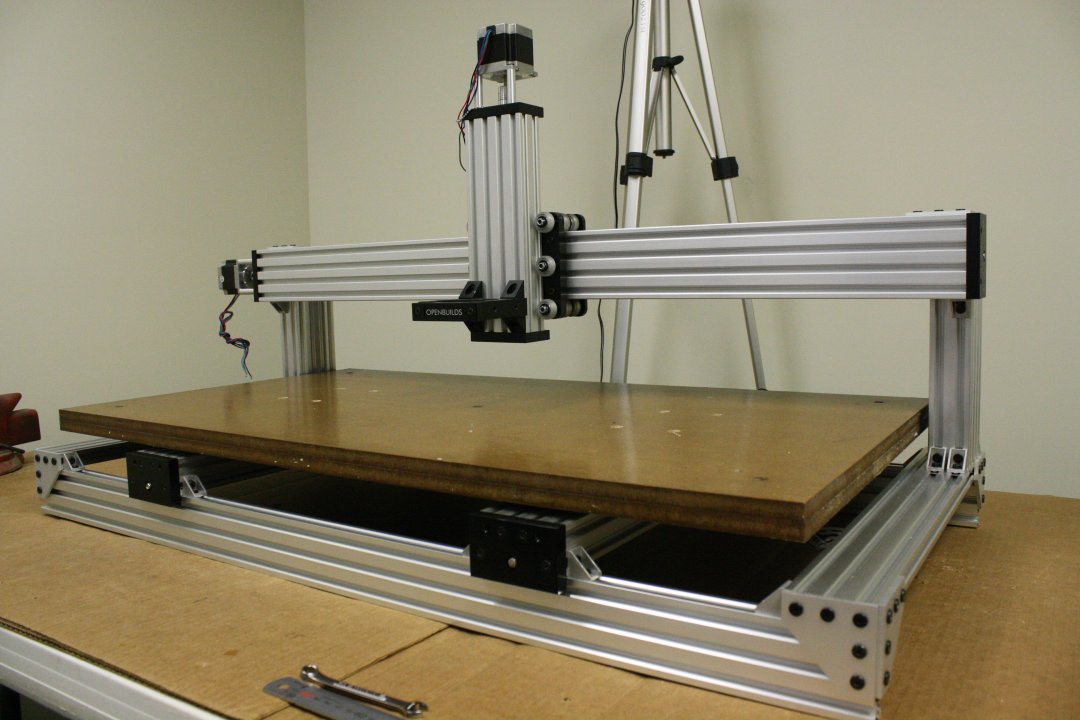
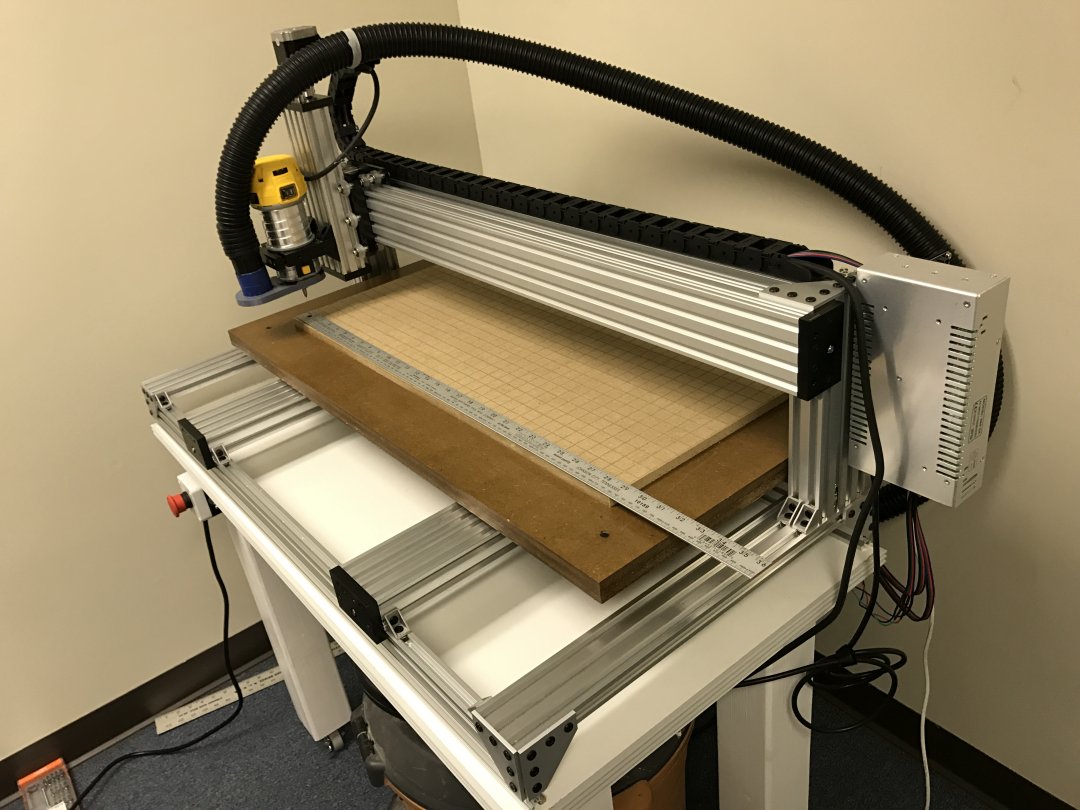
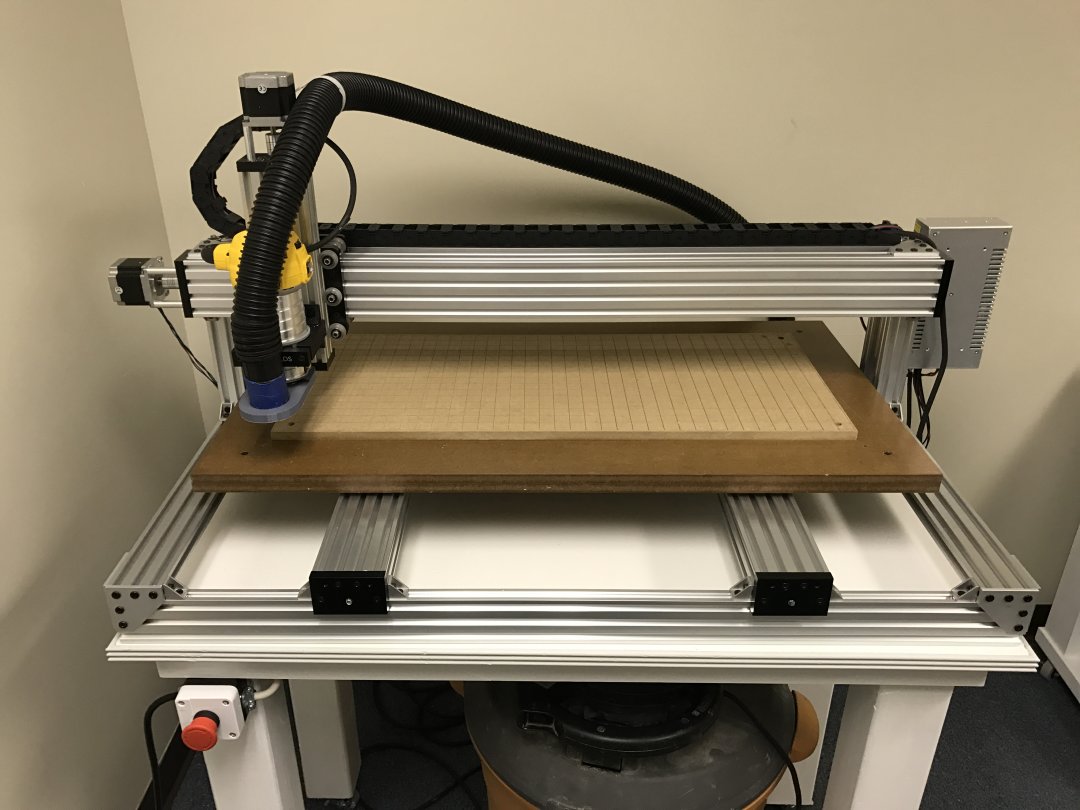
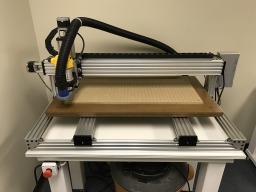
Completed C-Beam XL:
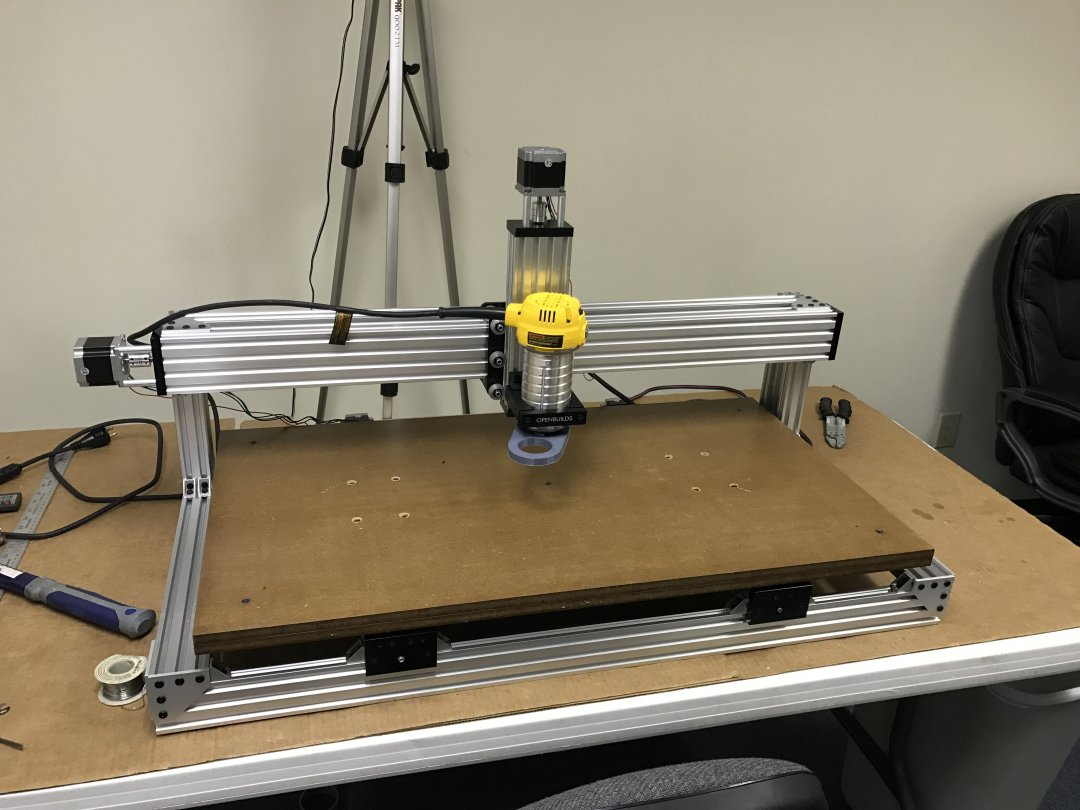
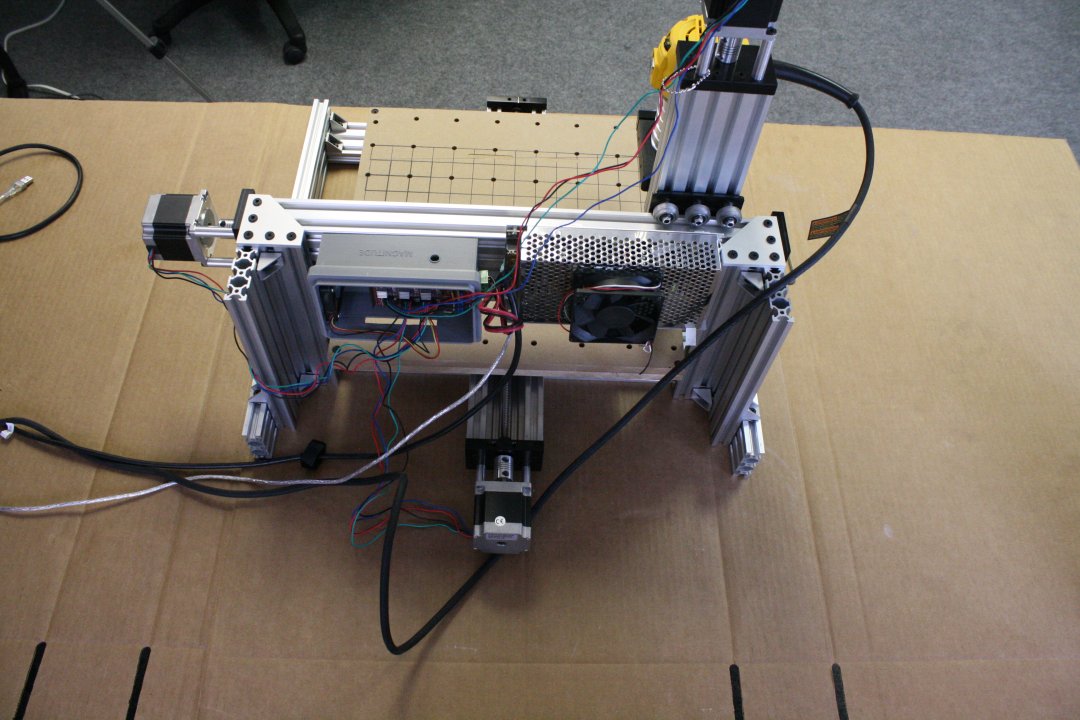
Upgraded power supply, added emergency stop, built a stand:
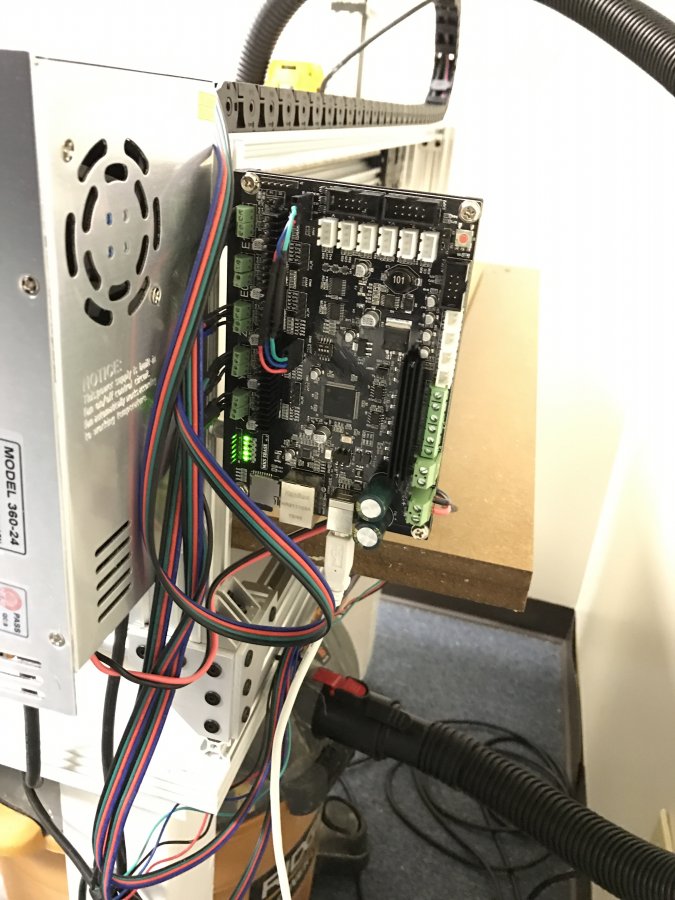
Electronics Close Up (Jumper used for Y Axis):
Update 12/27/2016
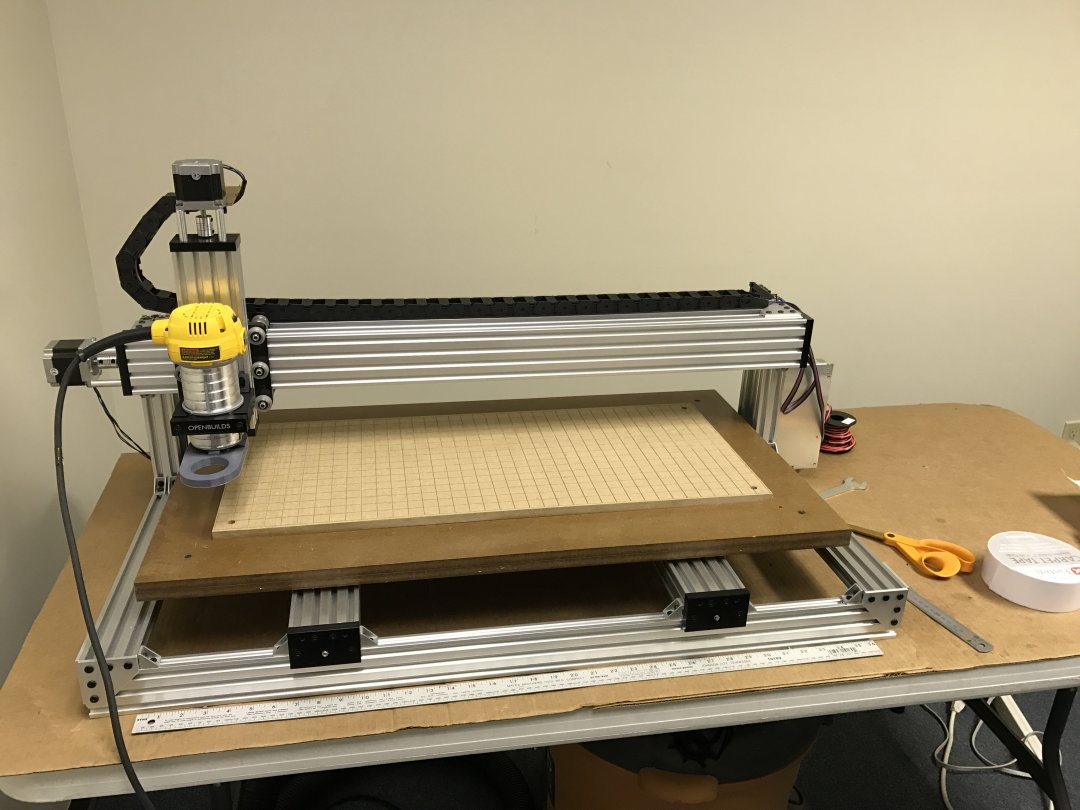
We added oak strips on the front and back of the spoil board. This really helps for mounting wood boards that are twisted.
C-Beam to C-Beam XL Upgrade
Build in 'X/Y Table Style CNC Mill' published by SBLabs, Dec 27, 2016.
This is my first public build. Please be kind. We upgraded our C-Beam to the C-Cbeam X-Large. I want to give special thanks to Moag and the OpenBuilds team for making this happen.
-
-
Build Author SBLabs, Find all builds by SBLabs
-
- Loading...
-
Build Details
- Build License:
-
- CC - Attribution - CC BY
Reason for this Build
We loved the functionality of the C-Beam Machine and wanted something larger and more stable.Inspired by
Moag's (C-Beam Machine XLarge) -
Parts list
Qty Part Name Part Link Comments 1 C-Beam Machine Mechanical Bundle http://openbuildspartstore.com/c-beam-machine-mechanical-... Link This is the existing machine we started with. 2 Aluminum Spacers (Size: 6mm) http://openbuildspartstore.com/aluminum-spacers/ Link Two of our 6mm Aluminum Spacers on the Standard C-Beam looked a little off, so these are to replaced the ones that didn't match. 13 Eccentric Spacer (Size: 6mm) http://openbuildspartstore.com/eccentric-spacer/ Link I can't remember why there are two different types of eccentric spacers on our C-Beam Build. 5 of these were to replace existing ones and make them match. 8 Aluminum Spacers (Size: 20mm) http://openbuildspartstore.com/aluminum-spacers/ Link 12 Aluminum Spacers (Size: 9mm) http://openbuildspartstore.com/aluminum-spacers/ Link 2 Aluminum Spacers (Size: 40mm) http://openbuildspartstore.com/aluminum-spacers/ Link 8 Aluminum Spacers (Size: 3mm) http://openbuildspartstore.com/aluminum-spacers/ Link 2 L Bracket (Size: Double) http://openbuildspartstore.com/l-bracket/ Link 1 Low Profile Screws M5 (Length 20mm, Qty. 25) http://openbuildspartstore.com/low-profile-screws-m5/ Link 1 Low Profile Screws M5 (Length 6mm, Qty. 25) http://openbuildspartstore.com/low-profile-screws-m5/ Link 1 Low Profile Screws M5 (Length 40mm, Qty. 25) http://openbuildspartstore.com/low-profile-screws-m5/ Link 1 Low Profile Screws M5 (Length 60mm, Qty. 25) http://openbuildspartstore.com/low-profile-screws-m5/ Link 1 Low Profile Screws M5 (Length 15mm, Qty. 25) http://openbuildspartstore.com/low-profile-screws-m5/ Link 1 Low Profile Screws M5 (Length 55mm, Qty. 25) http://openbuildspartstore.com/low-profile-screws-m5/ Link 2 Low Profile Screws M5 (Length 8mm, Qty. 25) http://openbuildspartstore.com/low-profile-screws-m5/ Link Note: Two packages of 25 for a total of 50 ordered. 1 Low Profile Screws M5 (Length 30mm, Qty. 25) http://openbuildspartstore.com/low-profile-screws-m5/ Link 2 Tee Nuts (25 Pack) http://openbuildspartstore.com/tee-nuts-25-pack/ Link Note: Two packages of 25 for a total of 50 ordered. 1 V- Slot Linear Rail (Size: 20mm x 40mm x 1000mm) http://openbuildspartstore.com/v-slot-linear-rail/ Link Color Ordered: Silver 2 V Slot Linear Rail (Size: 20mm x 60mm x 1000mm) http://openbuildspartstore.com/v-slot-linear-rail/ Link Color Ordered: Silver Quantity Ordered: 2 2 C-Beam Linear Rail (Length: 250mm) http://openbuildspartstore.com/c-beam-linear-rail/ Link 1 C-Beam Linear Rail (Length: 1000mm) http://openbuildspartstore.com/c-beam-linear-rail/ Link 8 90 Degree Joining Plate http://openbuildspartstore.com/90-degree-joining-plate/ Link 7 C-Beam Gantry Plate (X-Large) http://openbuildspartstore.com/c-beam-gantry-plate-xlarge/ Link 4 Slot Washer (15x5x2mm) http://openbuildspartstore.com/slot-washer-15x5x2mm/ Link 2 Lock Collar (I.D.:8mm) http://openbuildspartstore.com/lock-collar/ Link 1 1/4" x 8mm Flexible Coupling http://openbuildspartstore.com/1-4-x-8mm-flexible-coupling/ Link 2 Ball Bearing 688Z 8x16x5 http://openbuildspartstore.com/ball-bearing-688z-8x16x5/ Link 2 8mm Shim http://openbuildspartstore.com/8mm-shim/ Link 1 8mm Metric Acme Lead Screw (Length: 1000mm) http://openbuildspartstore.com/8mm-metric-acme-lead-screw/ Link 6 Nut Block for 8mm Metric Acme Lead Screw http://openbuildspartstore.com/nut-block-for-8mm-metric-a... Link 20 Xtreme Solid V Wheel Kit http://openbuildspartstore.com/xtreme-solid-v-wheel-kit/ Link 2 C-Beam End Mount http://openbuildspartstore.com/c-beam-end-mount/ Link 1 Nema 23 Stepper Motor http://openbuildspartstore.com/nema-23-stepper-motor/ Link We ordered ours from Amazon to match the existing motors from the C Beam Build. We suggest matching what you had before. 1 MKS S Base Controller Board https://www.amazon.com/gp/product/B01FVT5VA8/ Link We chose this board to balance cost and effectiveness. (Update: seems to be working good with our setup). 1 PCB Screw Terminal Block, 2p https://www.amazon.com/gp/product/B018ORUVTU/ Link We replaced the terminals for the X Y and Z axis on the controller board. 1 24V Power Supply https://www.amazon.com/gp/product/B0146IAXYO/ref=oh_aui_d... Link 1 Emergency Stop Button https://www.amazon.com/gp/product/B008ZY8G5O/ref=oh_aui_d... Link Only the Router and Electronics are connected via stop switch, shop vac is not. 0 Link