Welcome to Our Community

Some features disabled for guests. Register Today.

ooznest OX CNC Machine

Discussion in 'CNC Mills/Routers' started by Ryan Lock, Apr 28, 2015.
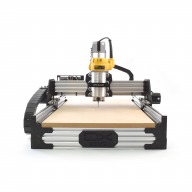
  1. Ronald4418

    Ronald4418 Well-Known
    Builder

    Joined:
    Nov 4, 2015
    Messages:
    218
    Likes Received:
    33
    I just finished the construction of the x and z axis and it went together rather well. The y axis will be my next build, but I have a question about belt tensioners as I have noticed that there is too much slop in the 3GT Belt. Should I be adding smooth pulleys to the inside of the x axis to take up this slop or am I missing something?
    I assembled everything according to the drawings included and I didn't see any mention of belt Idlers or tensioners in the notation.
     
  2. killRMODZ

    killRMODZ New
    Builder

    Joined:
    May 25, 2016
    Messages:
    19
    Likes Received:
    15
    Finished my build a week a ago. Made a custom mounting plat for my spindle. Would like to recommend making the gantry plates and Z axis plate to utilize 80/40 single piece extrusion for support of slightly heavier spindles, along with higher rated nema motors. But besides that, i'm extremely please with the build. Currently putting together a custom control box. I'll let the pics to the talking. And a big thanks to ooznests for accommodating my want for two 20/10 extrusions for the waste board platform. You guys are johnny and the spot and would like to see a deluxe version using all ball screws and some stainless parts.

     
    crispin, Kyo, Ryan Lock and 1 other person like this.
  3. Ryan Lock

    Ryan Lock Veteran
    Builder

    Joined:
    Oct 12, 2014
    Messages:
    530
    Likes Received:
    292
    @Ronald4418 There is two ways you can tension the belt, the first is that with the belt secured at both ends, undo the bolts holding the stepper motor, and lift it up in the slotted holes, and re-tigthen.

    The second way, is have one end of the belt secured and the motor secured. Have a second person pull on the loose end of the belt with pliers, while the other secures it. Either of these methods will give enough tension in the belt.

    @killRMODZ Glad you like the machine and thanks for the suggestions. That is looking very slick!
     
    killRMODZ likes this.
  4. killRMODZ

    killRMODZ New
    Builder

    Joined:
    May 25, 2016
    Messages:
    19
    Likes Received:
    15
    Thanks all, here is some more work on my control box... have some aviation connectors I will be using, just haven't mounted those yet. Deconstructed my VFD and bought an extension. Had to repin/rewire so that it is a straight through cable. PITA!!! LOL I also have the controller for the VFD side mounted on the PSU. I also have a buck converter to power 5 80mm fans to cool the internals while running. More to come!!! Oh, and Ryan, I guess there was a mistake of adding an extra 20/10 extrusion. It didn't measure up to anything on the build... but as you can see I put it to good use as my ESS and C32 BoB carraige. I might just throw some led's in the control box for bling!!!?? LOL Nah JK...
     

    Attached Files:

    Kyo likes this.
  5. GrayUK

    GrayUK Openbuilds Team Elder
    Staff Member Moderator Builder

    Joined:
    May 5, 2014
    Messages:
    1,668
    Likes Received:
    627
    It is looking really good, but, sooo much work! :jawdrop:
    Well Done! :thumbsup::thumbsup:
     
  6. killRMODZ

    killRMODZ New
    Builder

    Joined:
    May 25, 2016
    Messages:
    19
    Likes Received:
    15
    Thank you!!! If there wasn't a ton of work to be done, it wouldn't make it fun... or such a great learning experience. This is rehashing my electrical training and other things i've done but never touched when I was doing automotive projects. So this is a complete blast!! I can't wait to get it up and cutting!
     
    #276 killRMODZ, May 26, 2016
    Last edited: May 26, 2016
    GrayUK and Ryan Lock like this.
  7. Tam Findlay

    Builder

    Joined:
    May 15, 2016
    Messages:
    1
    Likes Received:
    3
    Hi all, first post ...

    I recently finished the majority of my OX router's mechanical build and though I should share how things have gone so far. The build itself was an almost pure delight, with the exception of just a few minor issues for which I would have preferred, either a different sequence of build, or where I have found that a few extra holes in the axes side mounting plates would have been really handy to have; they remain unaltered, however. In summary, I've had a superb time during this build, my first of a serious machine of any sort, and I sincerely thank Oooznest for their service in making this brilliant piece of kit available to the masses. The actual hardware in the kit is nothing short of A1 first class, as well. I wish I had kept a detailed log of what I have gone through to produce what you will see below as a not quite finished mechanical build, but I just didn't do that so, this is where my record of events will just have to start ... the electrics (the control box) are also quite advanced, but still require a good bit of work; I intend to post pictures in the future ...

    Top down ...

    [​IMG]

    Front on ... (with embossing paint melted into the logo plate channelling) ...

    [​IMG]

    With spindle mount ... (manufactured by an expert machinist, who is also a good friend) ...

    [​IMG]

    With spindle in place ...

    [​IMG]

    Onward and upward ...

    TomF.
     
    #277 Tam Findlay, May 27, 2016
    Last edited: May 28, 2016
    crispin, Kyo and GrayUK like this.
  8. killRMODZ

    killRMODZ New
    Builder

    Joined:
    May 25, 2016
    Messages:
    19
    Likes Received:
    15
    Very NICE, love the red on the ox... stands out a lot!!!
     
  9. killRMODZ

    killRMODZ New
    Builder

    Joined:
    May 25, 2016
    Messages:
    19
    Likes Received:
    15
    Hey everyone, i've done more work on the control box. Added 5 80mm Apevia Fans. 3 push and 2 pull to keep the fresh air intake up. Received some 18awg fully shielded wire to run to all of the steppers and inside the control box. Also got 12/3 sooj power cord for my 220-250v needs. Please be easy on me with my make shift epoxied brackets to throw the spindle power on... LOL Each switch is going to carry 120 from the 240v cable and run to the vfd. Should be ok as each power source has it's own fuse inline...
     

    Attached Files:

  10. Ryan Lock

    Ryan Lock Veteran
    Builder

    Joined:
    Oct 12, 2014
    Messages:
    530
    Likes Received:
    292
    @Tam Findlay Thanks for the kind words, the machine is looking great! The spindle mount looks rocks solid.

    Loving the case @killRMODZ
     
  11. killRMODZ

    killRMODZ New
    Builder

    Joined:
    May 25, 2016
    Messages:
    19
    Likes Received:
    15
    Thanks Ryan!! Got some more work done on the controller box. Hooked up the fans to the buck, mind the wiring... LOL Then did a dry run. Added the bracket panel to hold the aviation connections.
     

    Attached Files:

    GrayUK likes this.
  12. Pops

    Pops New
    Builder

    Joined:
    Nov 24, 2015
    Messages:
    15
    Likes Received:
    3
    I have a question for the ooznest ox people. What is the trick for fastening down the waste board? Would a couple of bolts into drop in t-nuts at each end be sufficient? are there other methods for fastening it down?

    Thanks
    Ivan
     
  13. Ryan Lock

    Ryan Lock Veteran
    Builder

    Joined:
    Oct 12, 2014
    Messages:
    530
    Likes Received:
    292
    @Pops Yes some bolts and nuts at each end would do the job fine.
     
  14. killRMODZ

    killRMODZ New
    Builder

    Joined:
    May 25, 2016
    Messages:
    19
    Likes Received:
    15
    Question, what controllers and drivers are people using? I have a 32 bob with an ESS. Was wondering if anyone knows the accurate pin out for the ethernet ports to the drivers...
     
  15. killRMODZ

    killRMODZ New
    Builder

    Joined:
    May 25, 2016
    Messages:
    19
    Likes Received:
    15
    More wire work. Shielded twisted pair and some CAT7...
     

    Attached Files:

  16. mel earp

    mel earp New
    Builder

    Joined:
    Oct 12, 2015
    Messages:
    30
    Likes Received:
    17
    Well everything was going fine until.....

    Yesterday I was trying out some text engraving to make a fancy box lid. I had tried a few letters on a piece of scrap and went for lunch, leaving everything turned on but idle, spindle not running. Came back from lunch an hour later and couldn't jog the machine (using Chilipeppr). Tried a reset and still no joy. (Using the xPro controller V2)

    So I went for the everything off (yesterday), sleep on it and then back on (this morning). Not good.

    The symptoms are roughly as follows:
    1. When attached only to the computer USB (no main power applied 24V) the xPro is powered via the usb. The green power LED is on and another green LED central on the board is flashing.
    2. No response to a $$ command, or any other command for that matter.
    3. In the Chilipeppr Port section there is a counter which is incrementing. I have not seen this before. I can't find what it signified, but I guess this might be an indication of some failure to communicate.
    4. If I apply the 24V power then the steppers lock as they would normally do.
    5. No jogs work or any other movement command.

    I am supposing that there is some kind of controller software problem. Before going the whole hog and reflashing the controller, can anyone suggest a less drastic diagnostic for me to perform to figure out what is wrong? Power and wiring all seems to be in place.

    Mel.
     
  17. killRMODZ

    killRMODZ New
    Builder

    Joined:
    May 25, 2016
    Messages:
    19
    Likes Received:
    15
    Ryan, I have a question. The motors you sent me, they have different markings on them. I'm assuming they are all the same? I've found some site depicting the identity of the wires, but... was wondering if you have those on hand. Basically which color wire is which polarity. A+ A- B+ B- etc... Thanks!
     
  18. Ryan Lock

    Ryan Lock Veteran
    Builder

    Joined:
    Oct 12, 2014
    Messages:
    530
    Likes Received:
    292
  19. killRMODZ

    killRMODZ New
    Builder

    Joined:
    May 25, 2016
    Messages:
    19
    Likes Received:
    15
    No, they all don't have the open builds logo but the wiring is the same and from what I've researched, the black wire 4 wire model is the lesser of the one I have now... Thanks for the info!!

    Oh, and for those that want to purchase the spindle mount I have, it's actually a 65mm fuel pump mount, here you go... BLACK Fuel Pump Mounting Bracket Single Filter Clamp Cradle BOSCH 044 60mm
     
    Joe Santarsiero likes this.
  20. killRMODZ

    killRMODZ New
    Builder

    Joined:
    May 25, 2016
    Messages:
    19
    Likes Received:
    15
    Here is an excellent reference....

    [​IMG]
     
    GrayUK likes this.
  21. Ryan Lock

    Ryan Lock Veteran
    Builder

    Joined:
    Oct 12, 2014
    Messages:
    530
    Likes Received:
    292
    Thanks for the info.

    Does that mount fit directly to the 20x60 extrusion without any mods?

    Edit: Sorry just looked at your pictures and saw you have added a plate inbetween
     
  22. killRMODZ

    killRMODZ New
    Builder

    Joined:
    May 25, 2016
    Messages:
    19
    Likes Received:
    15
    Yeah, wasn't bad at all. Kept it under the 3 kilo limitation also!! Have other pics to post up today to... I do think I will go with the 280oz nema 23 for Z axis... pretty soon.
     
  23. killRMODZ

    killRMODZ New
    Builder

    Joined:
    May 25, 2016
    Messages:
    19
    Likes Received:
    15
    Mixed bag of pics... Ill let you figure out what they could be LOL
     

    Attached Files:

    Ryan Lock likes this.
  24. killRMODZ

    killRMODZ New
    Builder

    Joined:
    May 25, 2016
    Messages:
    19
    Likes Received:
    15
    Almost there...
     

    Attached Files:

  25. Mika Köpberg

    Builder

    Joined:
    Jun 9, 2016
    Messages:
    5
    Likes Received:
    0
    Hi! After a long time looking for the right CNC-router, I have decided to go for the CNC OX. This is my first router and i don't have any experience in this "world". But i have picked up some things and I just wanted to check with you guys if its correct.

    1. What do i need?
    The CNC OX ofcourse, then I am thinking of going for this spindle, PSU and speed controller: CNC 400W Brushless Spindle Motor ER11 & Mach3 PWM speed controller & Mount + PSU
    Would you upgrade the 400w spindle to an 800w? I couldnt find a kit that had 800w spindle, psu and controller.

    Do I need to buy this controller board too?: CNC xPro V2 GRBL Controller Board – From Ooznest
    If I go with a cheaper one, what will it affect?

    Do i need to buy cables and "cable-management-chains" or does it come with the OX?

    Is there anything more I should remember to buy to get it to work?

    2. Software?
    Does the the software i can use for the router depend on the controller board i buy?

    Can i go with any CNC-software? What do you guys use?

    I need i software that can cut 2.5d, any suggestions? I am going to cut out a small rounded bowl in a piece of wood if it is possible.

    Thats everything for now :)
    Mika
     
  26. killRMODZ

    killRMODZ New
    Builder

    Joined:
    May 25, 2016
    Messages:
    19
    Likes Received:
    15
    Welcome to the world of precision machining!!!

    That 400w spindle is ok for wood and plastics/polymers. The 800w will be a good start for aluminum and lite steel work.

    I would look into this...

    DEWALT DNP611 Compact Router Replacement Variable Speed Motor - Power Router Accessories - Amazon.com

    As this is just 120v and will plug into the wall. If you want control over the speed of the spindle you will have to get a PID of some sort.

    www.SuperPID.com - Super-PID Closed-loop Router Speed Controller

    Or, if you feel froggy... this:

    Konmison DIY 800W Air Cooled Spindle Motor CNC Spindle Motor 65MM 0.8KW + 13pcs ER11 Collet + Clamp + Converter - - Amazon.com

    Controller boards are up to you. There is not set standard as there are plenty of boards out there. Some have run with Arduino and GRBL BoB's. So just do research and figure out what you want to do and if you want to grow per se.

    Drag Chains do not come with the OX. Amazon is your best friend!!

    https://www.amazon.com/s/ref=nb_sb_noss_2?url=search-alias=aps&field-keywords=drag+chains

    controller
    drivers
    steppers
    PSU(s)...
    Box to put all that **** in...
    cabling (shielded preferably) reference my build pics that i've posted here
    spindle (if you go with a custo spindle outside of the dwalt/colt, you will have to make your own mounting bracket)
    extra drop in t nuts (essential!!!)
    limit switches (amazon, or I have extras if you need some)
    e-stop (amazon)
    A nice flat table/surface to build this badass piece of equipment!! LOL

    PATIENCE!!!!!!!!!! <--- the true investment into this build and after when cutting parts. The learning curve is quite large at first.

    Software.. well anything that can effectively communicate with your controller. I have a buddy of mine who recommended high end boards, such as an ethernet smooth stepper and a c32 bob. It's compatible with mach3/4 and a lot of others. So software will be a project in it of itself with proper research and what not.

    I hope this help... because you have undertaken a project that will determine the craftsmanship and quality of future projects. Take the time and effort to do it right the first time. I know I have changed things on the fly, so plan things out as best as you can and source your parts accordingly.

    Respect!!! And again, welcome!!

    killRMODZ
     
    GrayUK likes this.
  27. killRMODZ

    killRMODZ New
    Builder

    Joined:
    May 25, 2016
    Messages:
    19
    Likes Received:
    15
  28. Mika Köpberg

    Builder

    Joined:
    Jun 9, 2016
    Messages:
    5
    Likes Received:
    0
    Thanks a lot @killRMODZ ! Unfortunately I'm living in Sweden so Amazon is my enemie... If i buy the Dewalt i can't control the speed in my software? I will do a bit more research on everything and then i will order the OX on sunday :) Does @Ryan Lock know if you are ready to ship on monday and approximately how much time it will take til it arrives in Sweden?

    Think this is going to be great, thanks for the help! :)
    Mika
     
  29. killRMODZ

    killRMODZ New
    Builder

    Joined:
    May 25, 2016
    Messages:
    19
    Likes Received:
    15
    No you can... you will have to open up the top and modify the wiring that goes to the potentiometer and wire it to a PID, or speed controller (www.SuperPID.com - Super-PID Closed-loop Router Speed Controller). I posted a link for one in my LONG post for you... LOL For delivery... I got in under two weeks to the US... So for you should be under a week. I don't know the status of inventory, Ryan would have to answer that. Any other information, please don't hesitate to contact here or us, we are here to help each other build this machine to build GREATER things!!!!
     
  30. killRMODZ

    killRMODZ New
    Builder

    Joined:
    May 25, 2016
    Messages:
    19
    Likes Received:
    15
    Finished everything up, mounted my control box, ran the water lines and powered everything up. Getting an error on my A Axis that is connected to my secondary X Axis stepper. So I will have to look into that... Ordered the 287 oz nema 23. I don't want the 178 oz Z axis stepper to struggle, giving my self a safety and reliability margin.
     

    Attached Files:

    swohnrade and GrayUK like this.

Share This Page

  1. This site uses cookies to help personalise content, tailor your experience and to keep you logged in if you register.
    By continuing to use this site, you are consenting to our use of cookies.
    Dismiss Notice