Welcome to Our Community

Some features disabled for guests. Register Today.

C-Beam™ Machine - Plate Maker

Discussion in 'CNC Mills/Routers' started by Mark Carew, Jul 16, 2015.
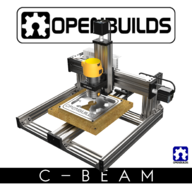
  1. Peter Van Der Walt

    Peter Van Der Walt OpenBuilds Team
    Staff Member Moderator Builder Resident Builder

    Joined:
    Mar 1, 2017
    Messages:
    13,986
    Likes Received:
    4,105
    Checkout Lasers - OpenBuilds Part Store for our recommendations.

    A diode laser cannot cut metal though - that needs hundreds of watts more power, and also fiber (not diode) tech
     
  2. Bruce Fenstermacher

    Builder

    Joined:
    Dec 28, 2014
    Messages:
    75
    Likes Received:
    5
    6 years since I built my C-Beam, back when this thread first started 55 pages ago. I've done a few minor modifications to it but most of the machine including the Z height has remained the same as originally introduced. I have the standard waste board set up of 2 layers of 3/4" MDF board. Most every cut is made on a 3rd 3/4" MDF waste board clamped to the first 2. I may make a few cuts then remove that waste board and save it for the next time I want to repeat the job and then I reinstall it and run more cuts. The issue is clearance under the Z beam of only about 5/8". Not much room for the clamps to hold the actual material (.032 sheet aluminum) being cut. I need more Z clearance. If I could find 1/2" MDF I could use that and gain back 3/4 of an inch but 1/2" MDF is not available that I can find. I'd like to raise the Z height 2" by replacing the Y V-slot side columns which are 10" with 12" pieces. I will then extend my router mount lower in the holder, currently it is set at about 1/3 of the router and it would end up about in the middle. I realize both these mods might effect rigidity of the machine. But I wonder if it would even be noticed. Has anyone done this before and how did it work out. Cam you point me to some fo these modes on this forum so I can see how they were accomplished. Thanks
     
  3. Stwspoon

    Stwspoon New
    Builder

    Joined:
    Jan 16, 2018
    Messages:
    14
    Likes Received:
    9
    I raised my x axis by 20 mm with the stock hw by putting the bottoms of the vertical 20x60s on top of the rear bottom crossbar instead of behind it. See my earlier posts. It seemed sturdy but I had electrical gremlins due to cheap knockoff “Toshiba” drivers. I since have done other mods to lower the table and make the zaxis more rigid.
    Then life intervened ….
    I have only recently been able to work on it again.
     
  4. Bruce Fenstermacher

    Builder

    Joined:
    Dec 28, 2014
    Messages:
    75
    Likes Received:
    5
    I see how you might have done that Stwspoon. Thanks for the idea, I like it. There is 20mm under the z column I can get.
    Attached is a picture of how my router is currently clamped. I'd like to move it down in the holder say 20mm but of course that won't do anything for rigidity. Or will it make a difference? Where on on the router are most people clamping the router and how high on the router can you get away with? Thanks

    Bruce
     

    Attached Files:

  5. David the swarfer

    David the swarfer OpenBuilds Team
    Staff Member Moderator Builder Resident Builder

    Joined:
    Aug 6, 2013
    Messages:
    3,275
    Likes Received:
    1,833
    if you want rigidity then I believe you need 2 clamps holding that router.
    I ran mine for a while with a single clamp (holding a Dremel) and could easily detect flex there.
    When I replaced the Dremel with a Makita I made 2 clamps and it is much stiffer.
     
  6. Peter Van Der Walt

    Peter Van Der Walt OpenBuilds Team
    Staff Member Moderator Builder Resident Builder

    Joined:
    Mar 1, 2017
    Messages:
    13,986
    Likes Received:
    4,105
    Or a set of Black Corner Connectors underneath or on top. I run a single on my Minimill and machine steel occationally.
     
  7. Bruce Fenstermacher

    Builder

    Joined:
    Dec 28, 2014
    Messages:
    75
    Likes Received:
    5
    Not seen in the photo, my current router clamp, is that there are 4 black corner connectors holding it, 2 on the top and 2 on the bottom. Would 2 clamps make it more rigid?
     
  8. David the swarfer

    David the swarfer OpenBuilds Team
    Staff Member Moderator Builder Resident Builder

    Joined:
    Aug 6, 2013
    Messages:
    3,275
    Likes Received:
    1,833
    Yes, I believe so, since the clamp itself can flex (everything flexes, I can measure flex in my cast iron lathe with just fingertip pressure, 1950's British iron, not a wet noodle from the bargain bin :)
     
  9. Bruce Fenstermacher

    Builder

    Joined:
    Dec 28, 2014
    Messages:
    75
    Likes Received:
    5
    Yes my 50's era Atlas 10" has flex, I understand. I should have phrased my question better. Considering the rest of my C-Beam is basically stock, would it be necessary to add another clamp to eliminate flex caused by extending the router down an inch. Or would adding a second clamp be one thinin a list of thins that could be done to tighten up the C-Beam?
    I'm not asking for an absolute answer, just an opinion from folks who might have already gone there. The only why I'll really know is to try it and see if I notice any ill effects.
    Thanks
     
  10. Rick 2.0

    Rick 2.0 OpenBuilds Team
    Staff Member Moderator Builder Resident Builder

    Joined:
    Dec 20, 2013
    Messages:
    2,859
    Likes Received:
    1,526
    Honestly, if I was looking to stiffen a C-Beam Machine, the first thing I would do is replace the Z gantry plate with an XL gantry plate due to the substantially wider grip it provides on the Z-axis rail. I'd also replace the X-axis gantry plate at the same time. While the XL gantry plate is only about an inch and a half wider, the thicker plate offers a stiffness upgrade on the original 3mm plate. The original C-Beam design predates the XL Gantry plate and it's a beneficial update that should have been made years ago.

    As for the second mount bracket adding stiffness, yes and no. It all comes down to how much you tighten the bracket to the router. The main reason I like the second mount is the ease in which you can drop in the router and not have to worry about it being stable or square to the work surface. You drop it in, snug it up and you know it's good. I use the center and bottom rows of holes on the XL gantry plate. I don't even mess with the black angle corner connectors. (Note, you will have to drill out the two threaded holes on the bottom row of the plate to get full attachment.) This is one of those upgrades that once you've done it, you'll wonder why you didn't do it years ago.
     

Share This Page

  1. This site uses cookies to help personalise content, tailor your experience and to keep you logged in if you register.
    By continuing to use this site, you are consenting to our use of cookies.
    Dismiss Notice