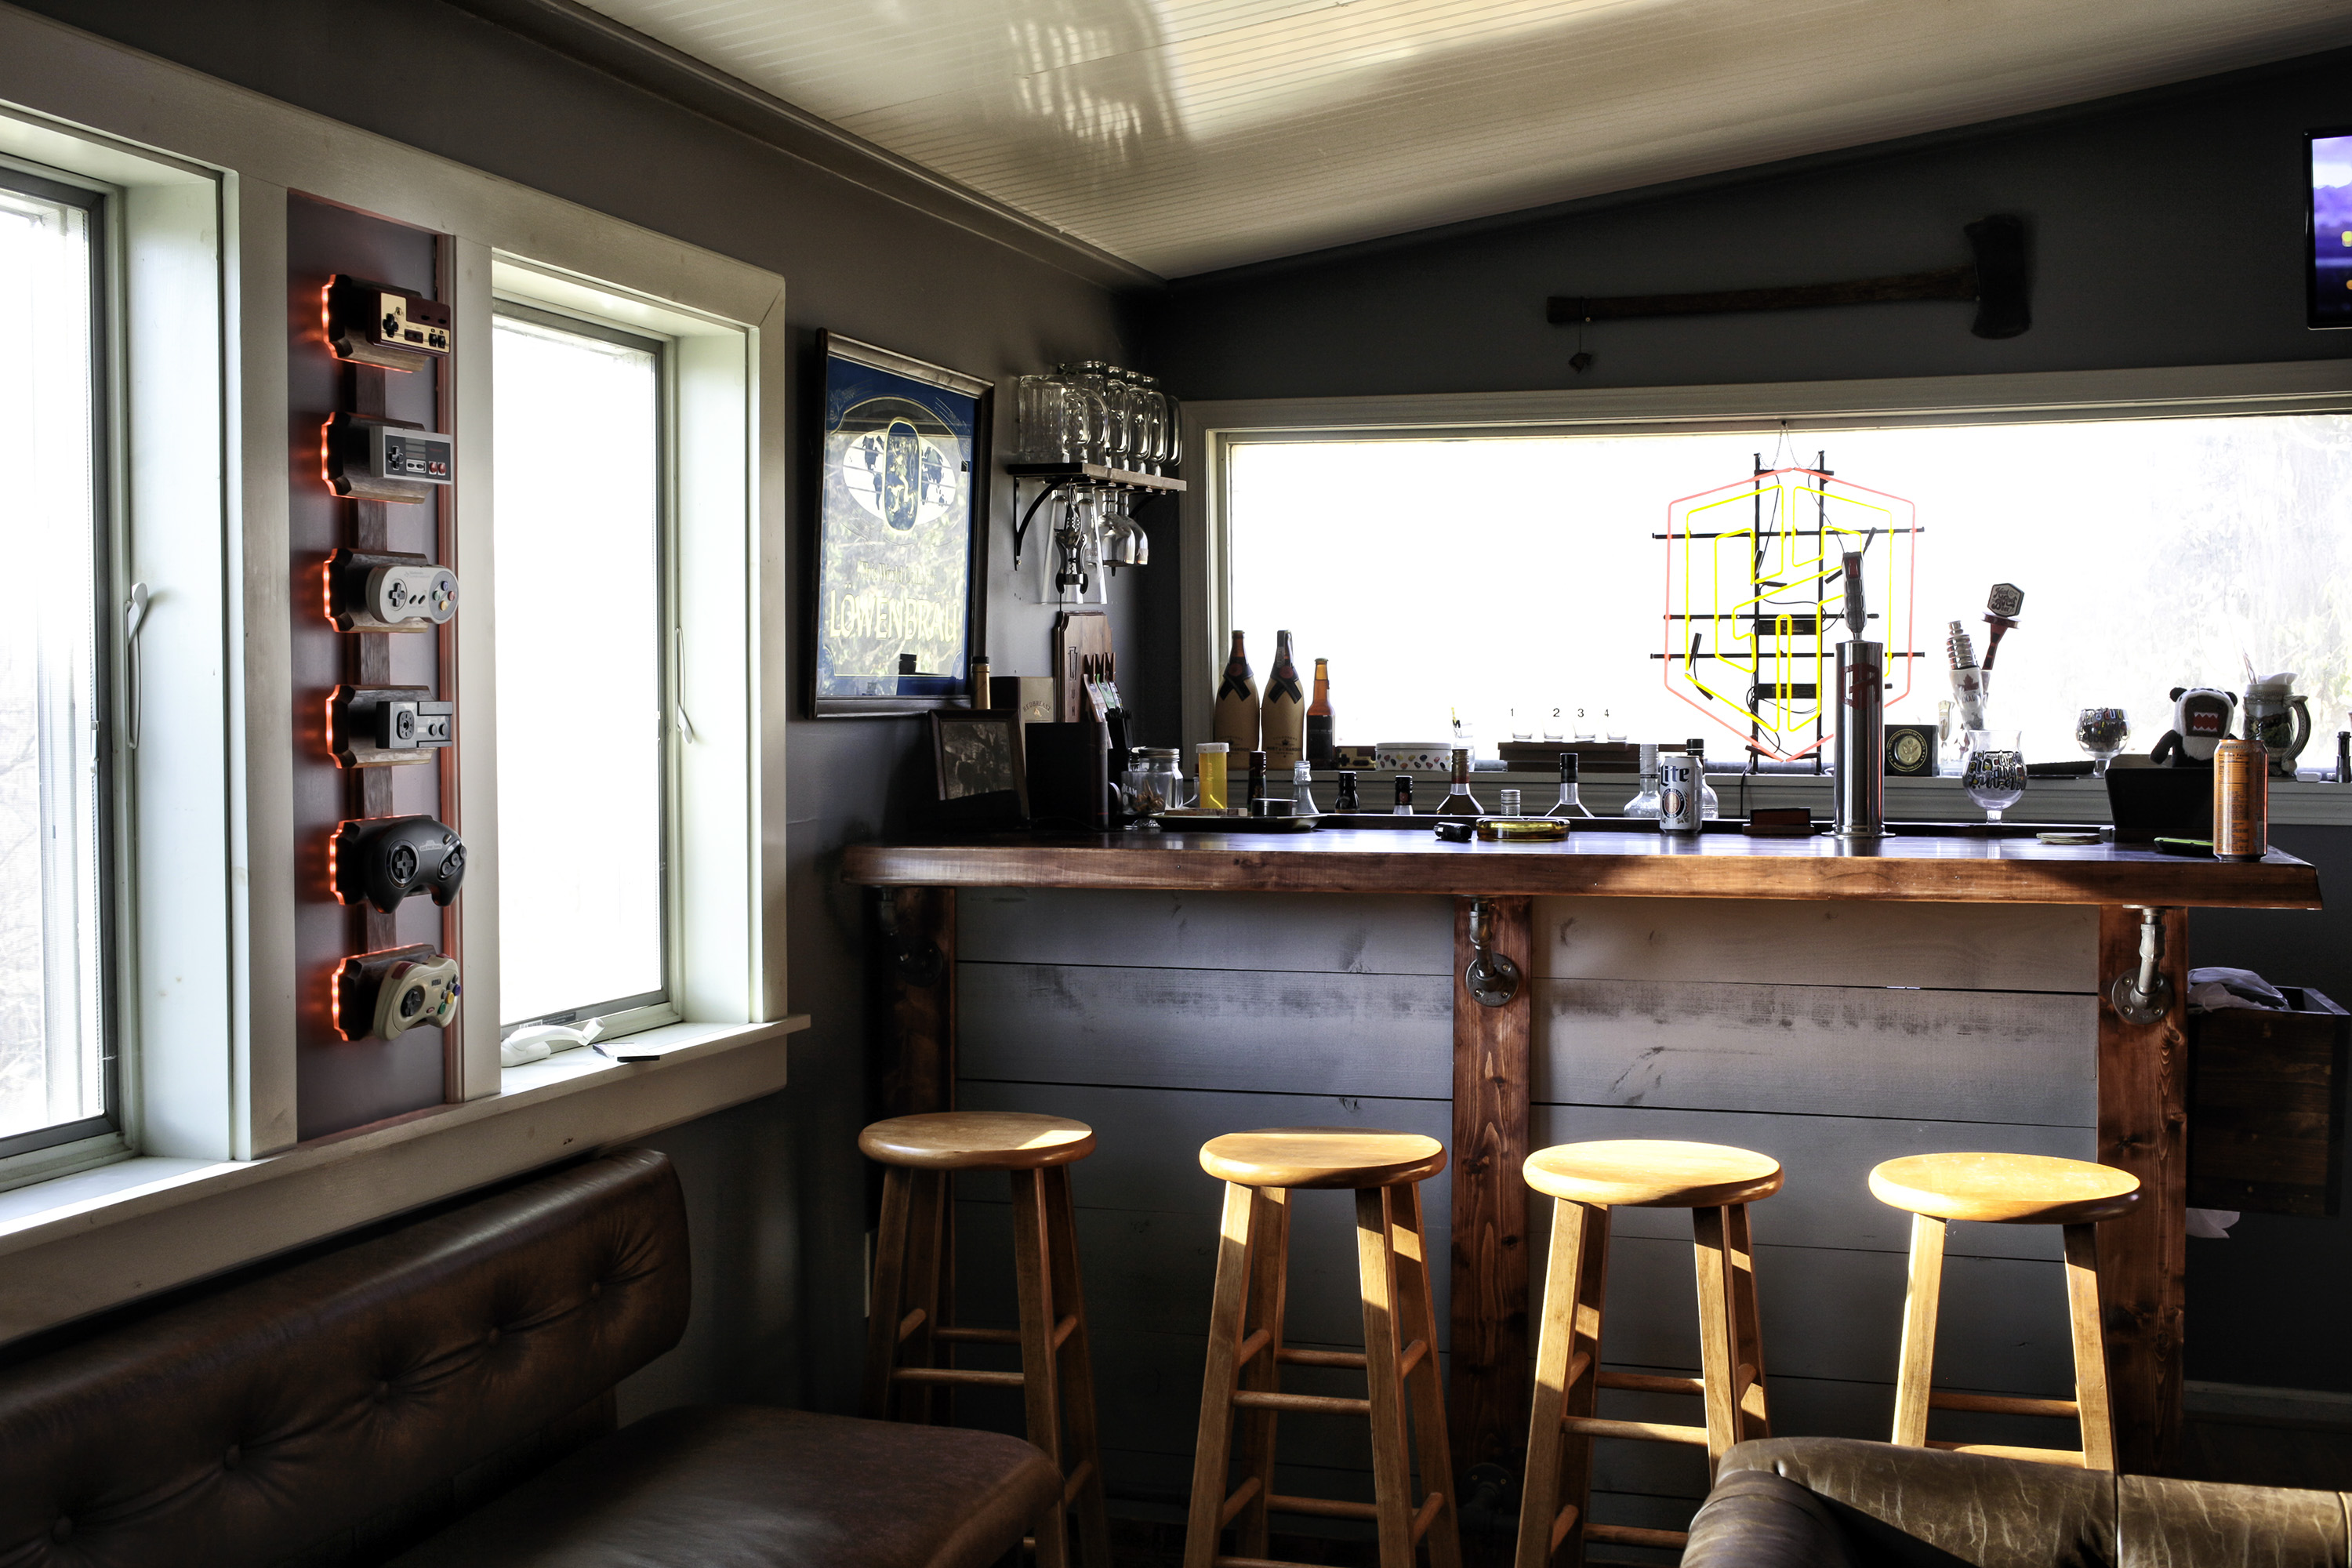
Here is the design and build process I followed to create this display for 6 gaming controllers from my childhood. I wanted to spruce up an awkward window framing gap in my home bar/arcade, and this is what I came up with - I've always had a love for video games, so I thought this would be a great fit for the space. This is the first project I've completed on my new OpenBuilds Lead CNC 1010, and so far I have been loving every minute of using this hulk of a machine. As it is a pretty new build, I would be happy to talk about my experience with this machine for anybody who might have questions about it. But for now, on to the build!
- Software:
- Adobe Illustrator, Openbuilds CAM, Openbuilds Control
- Machine Time:
- 2.5 hours
- Bit or Laser Size:
- 1/8th Upcut/Fishtail
- Feeds & Speeds:
- Walnut: 40 in/min feed, 12 in/min plunge, .06 depth/pass
Plexiglass: 40/12/.04
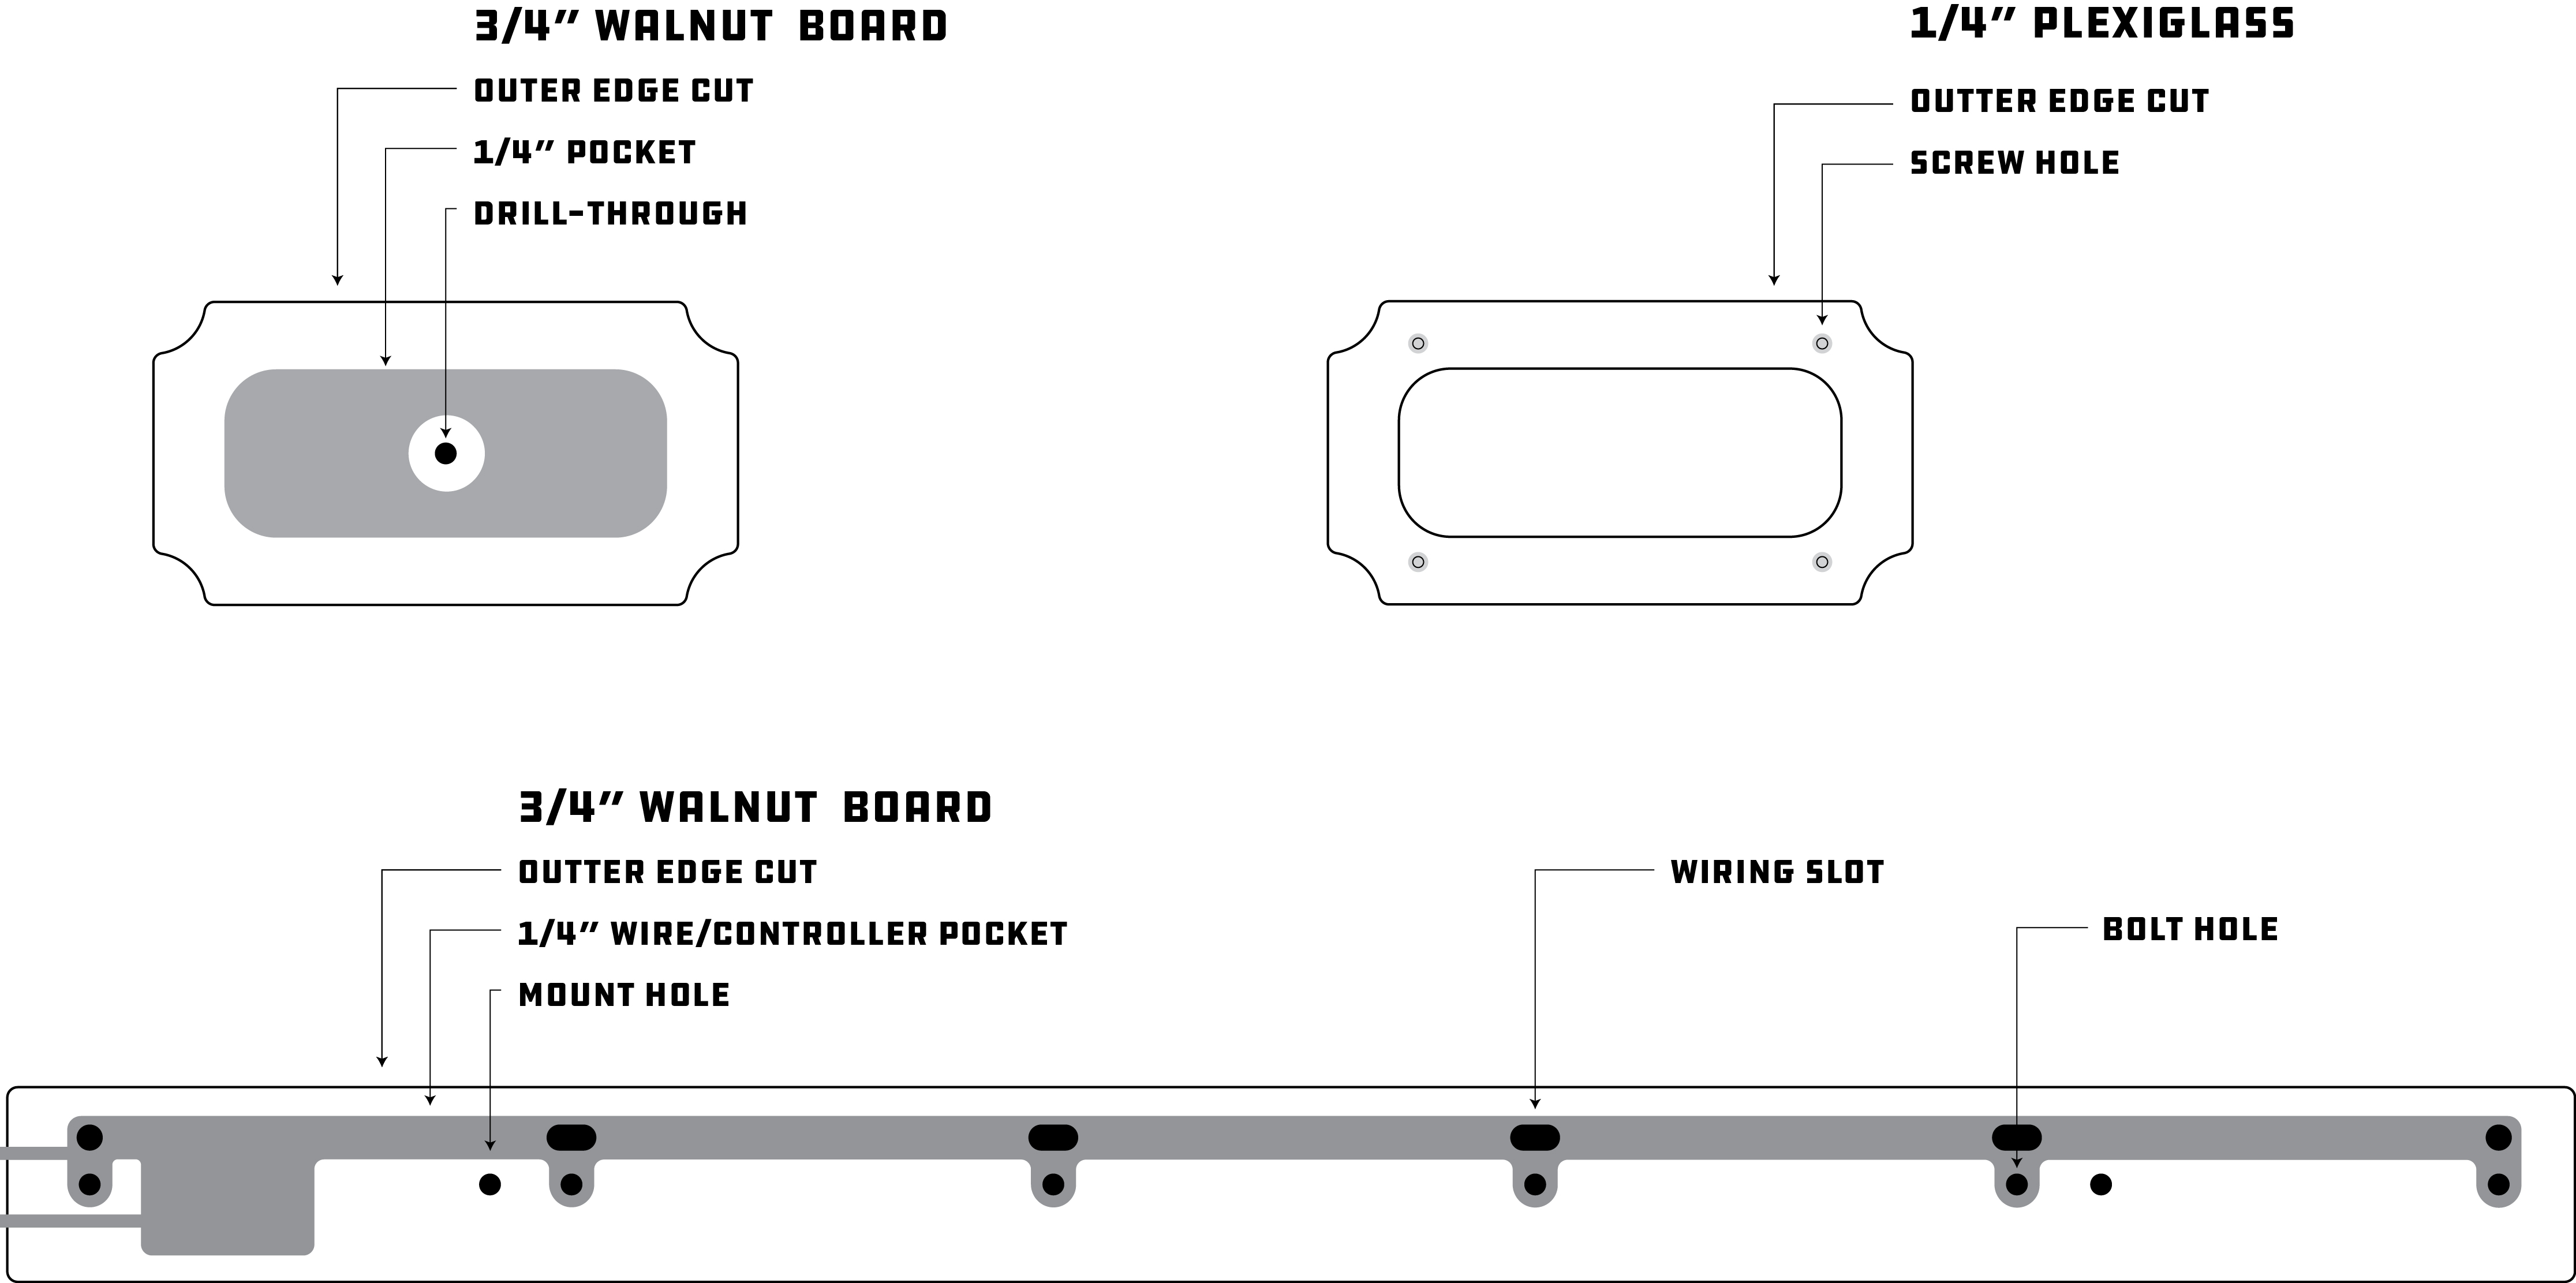
- Materials:
- 3/4" Walnut board, 1/4" Plexiglass
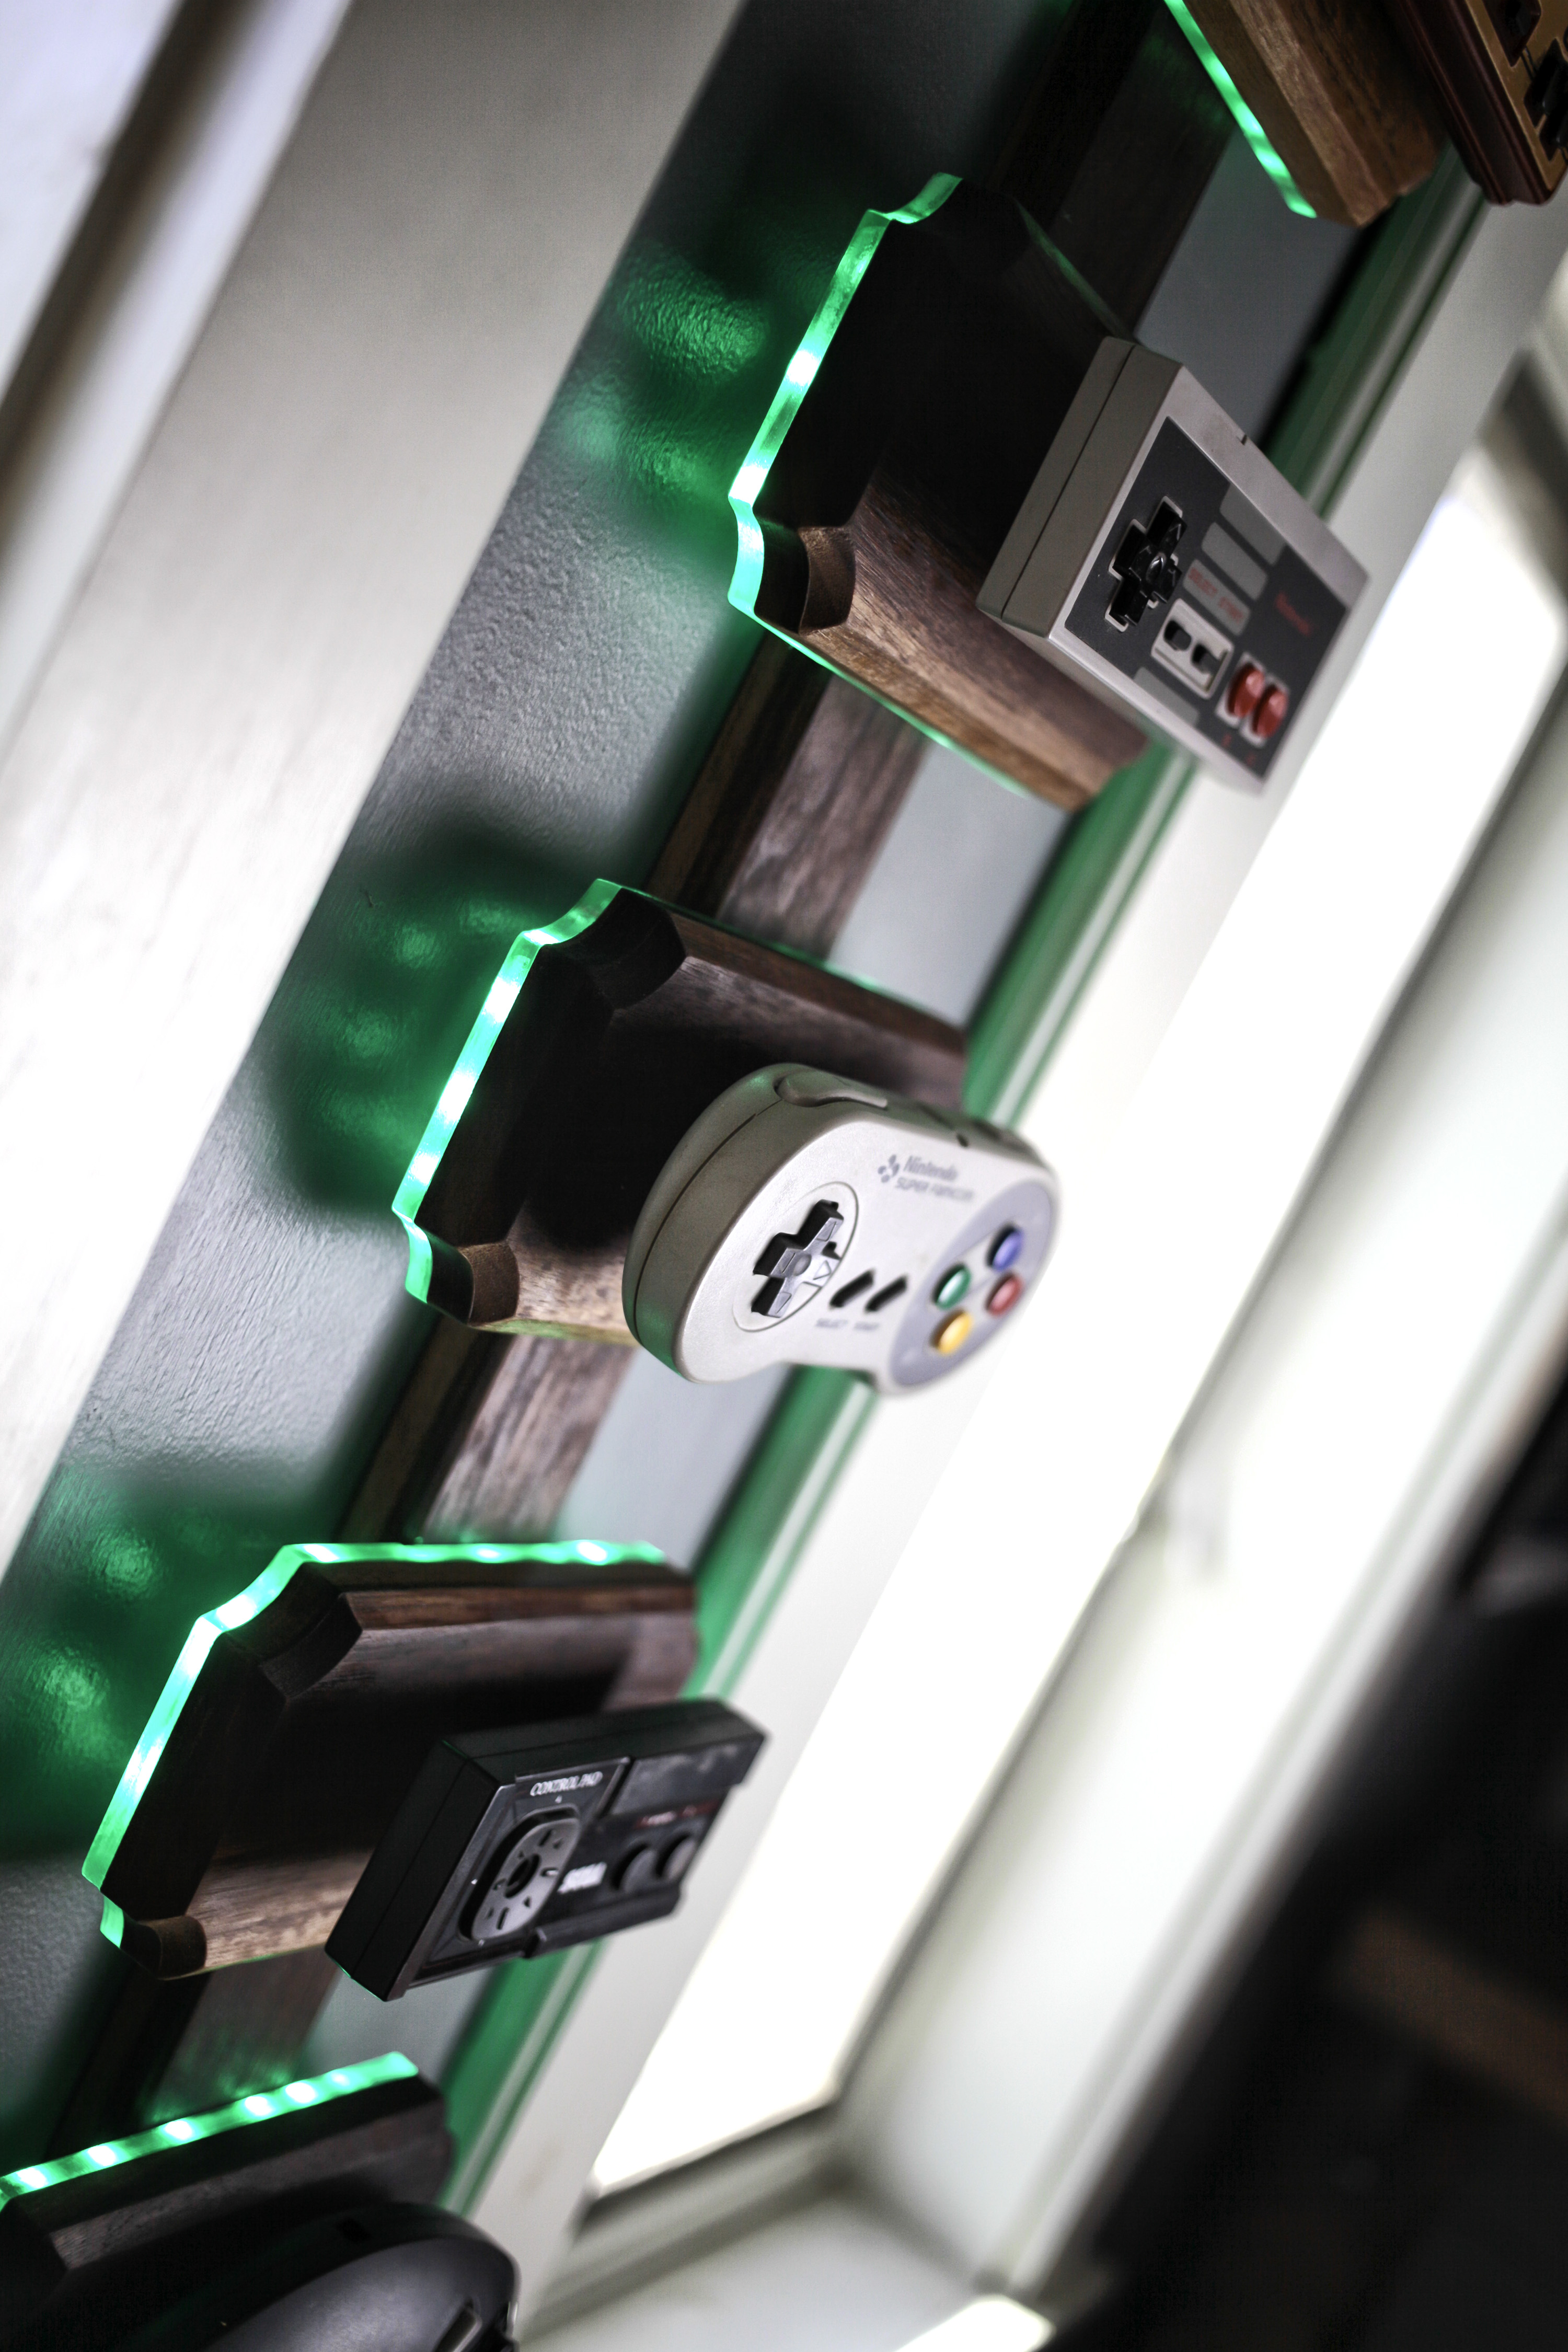
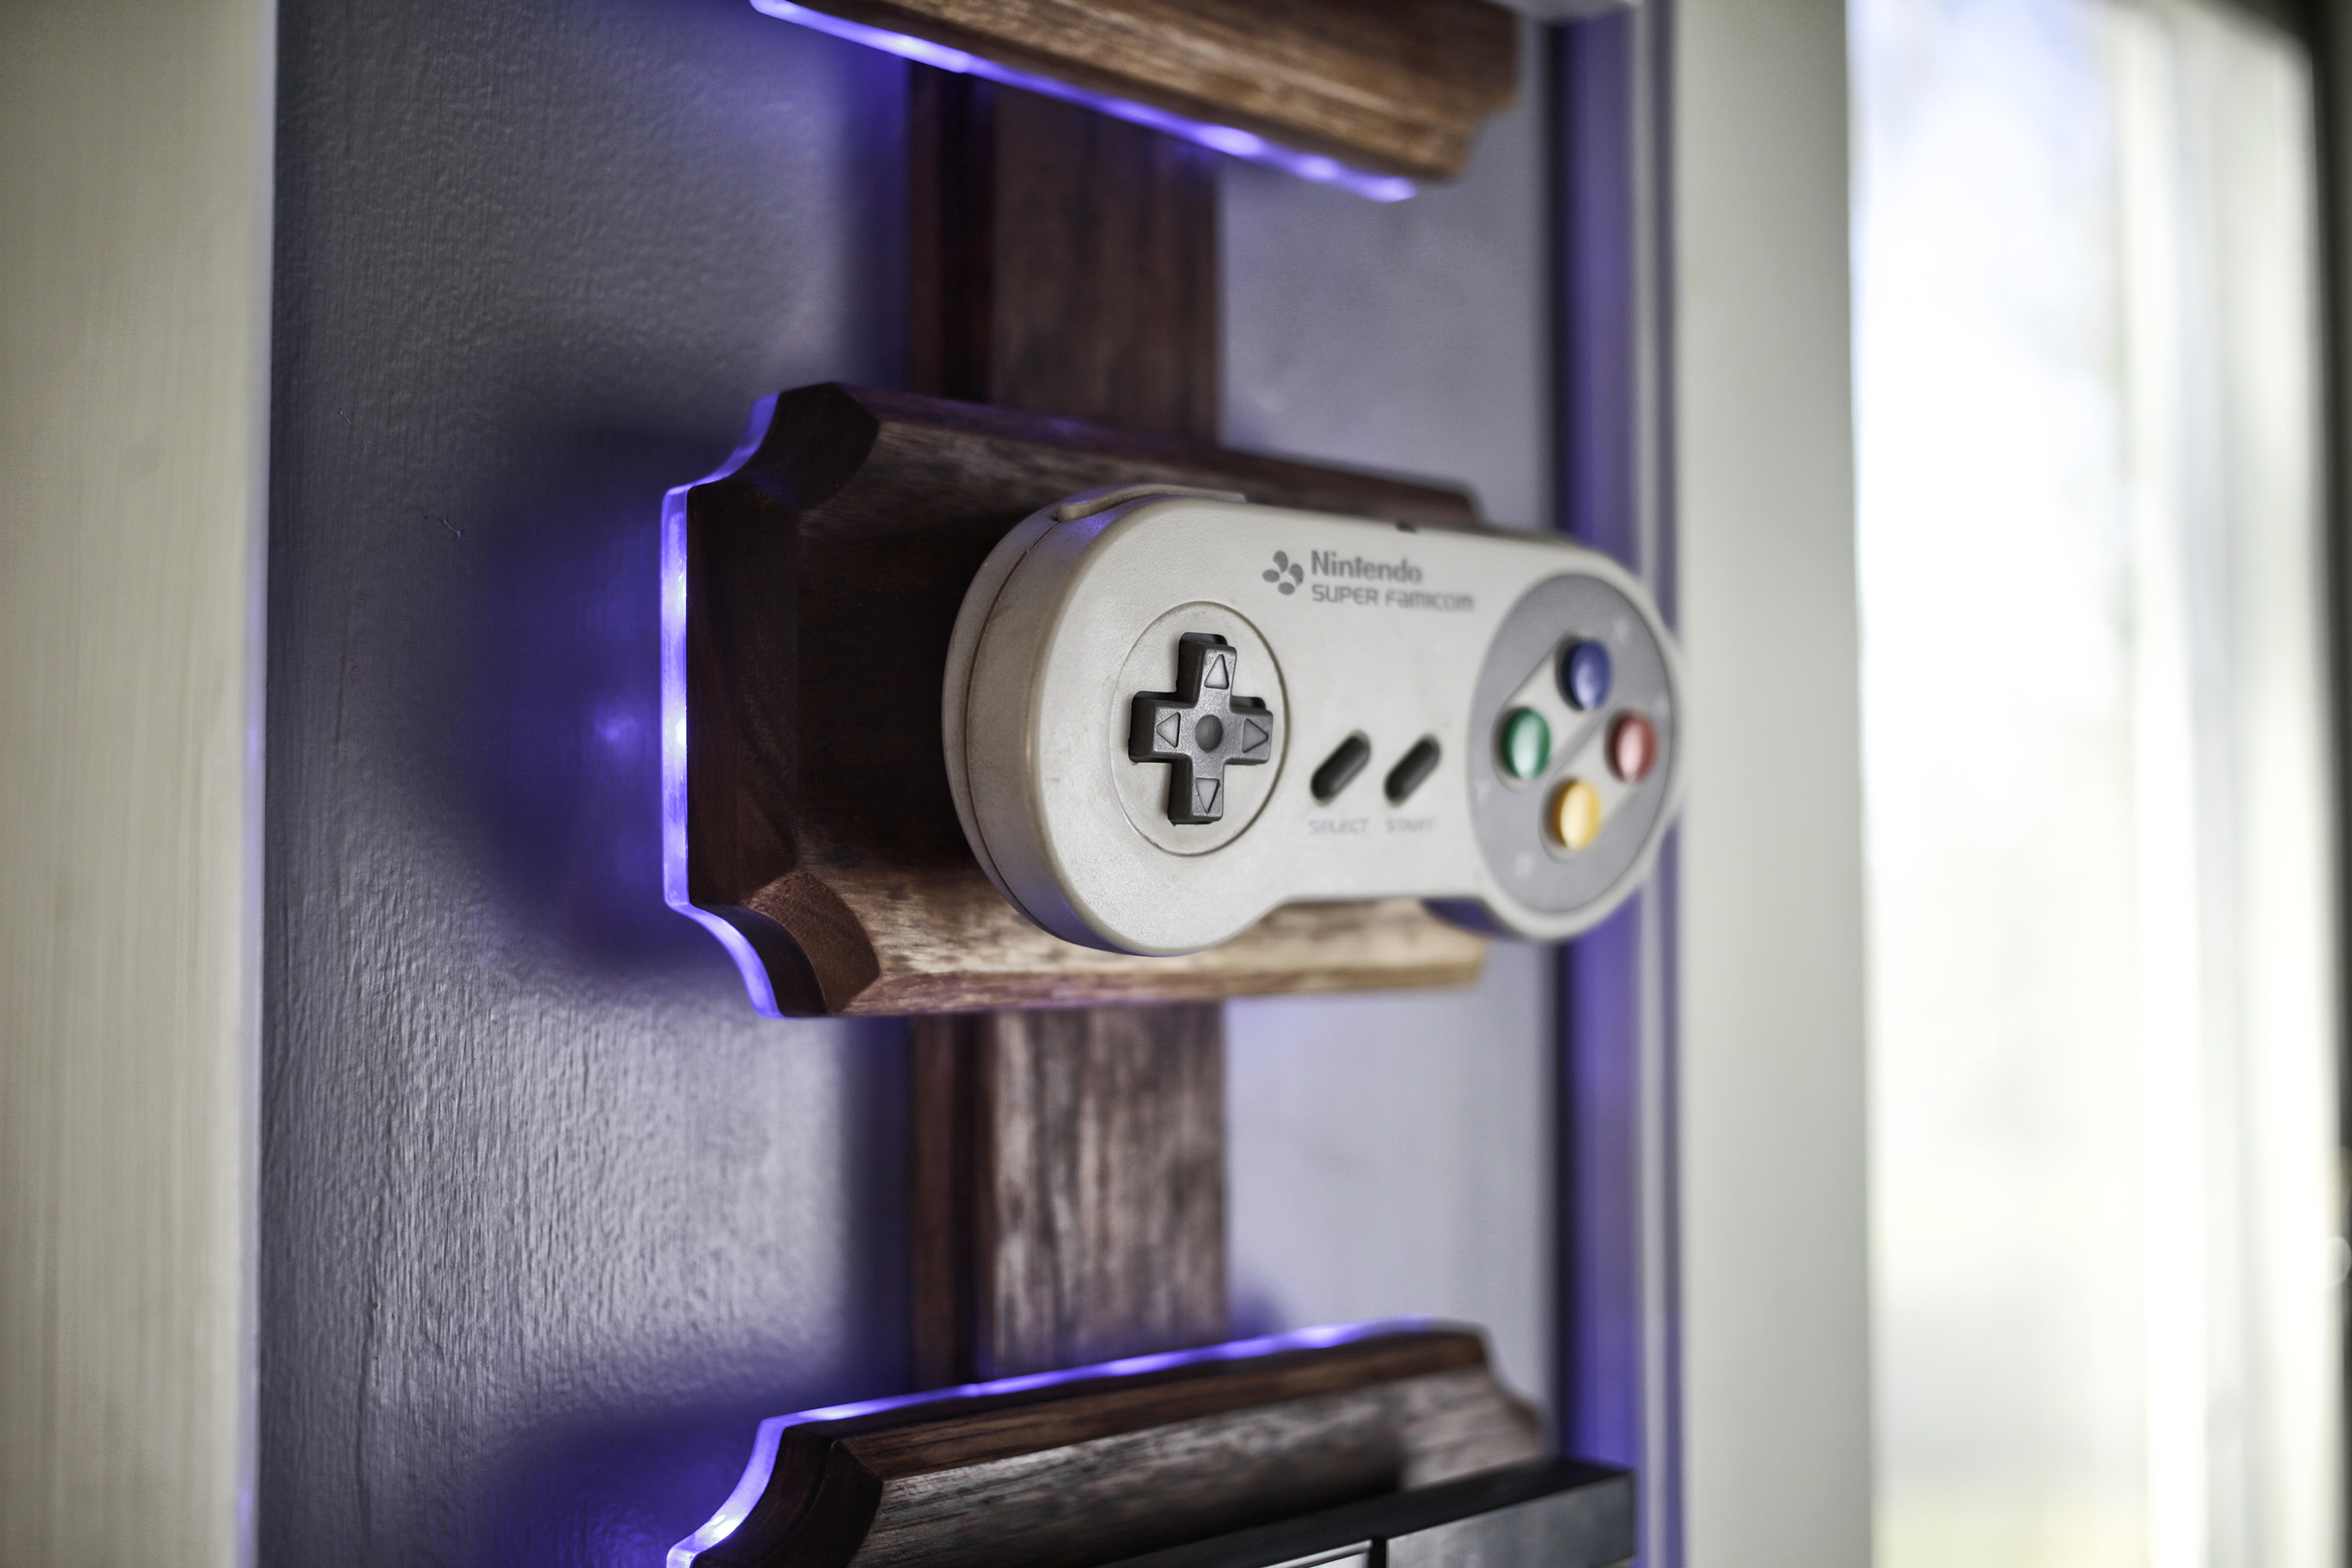
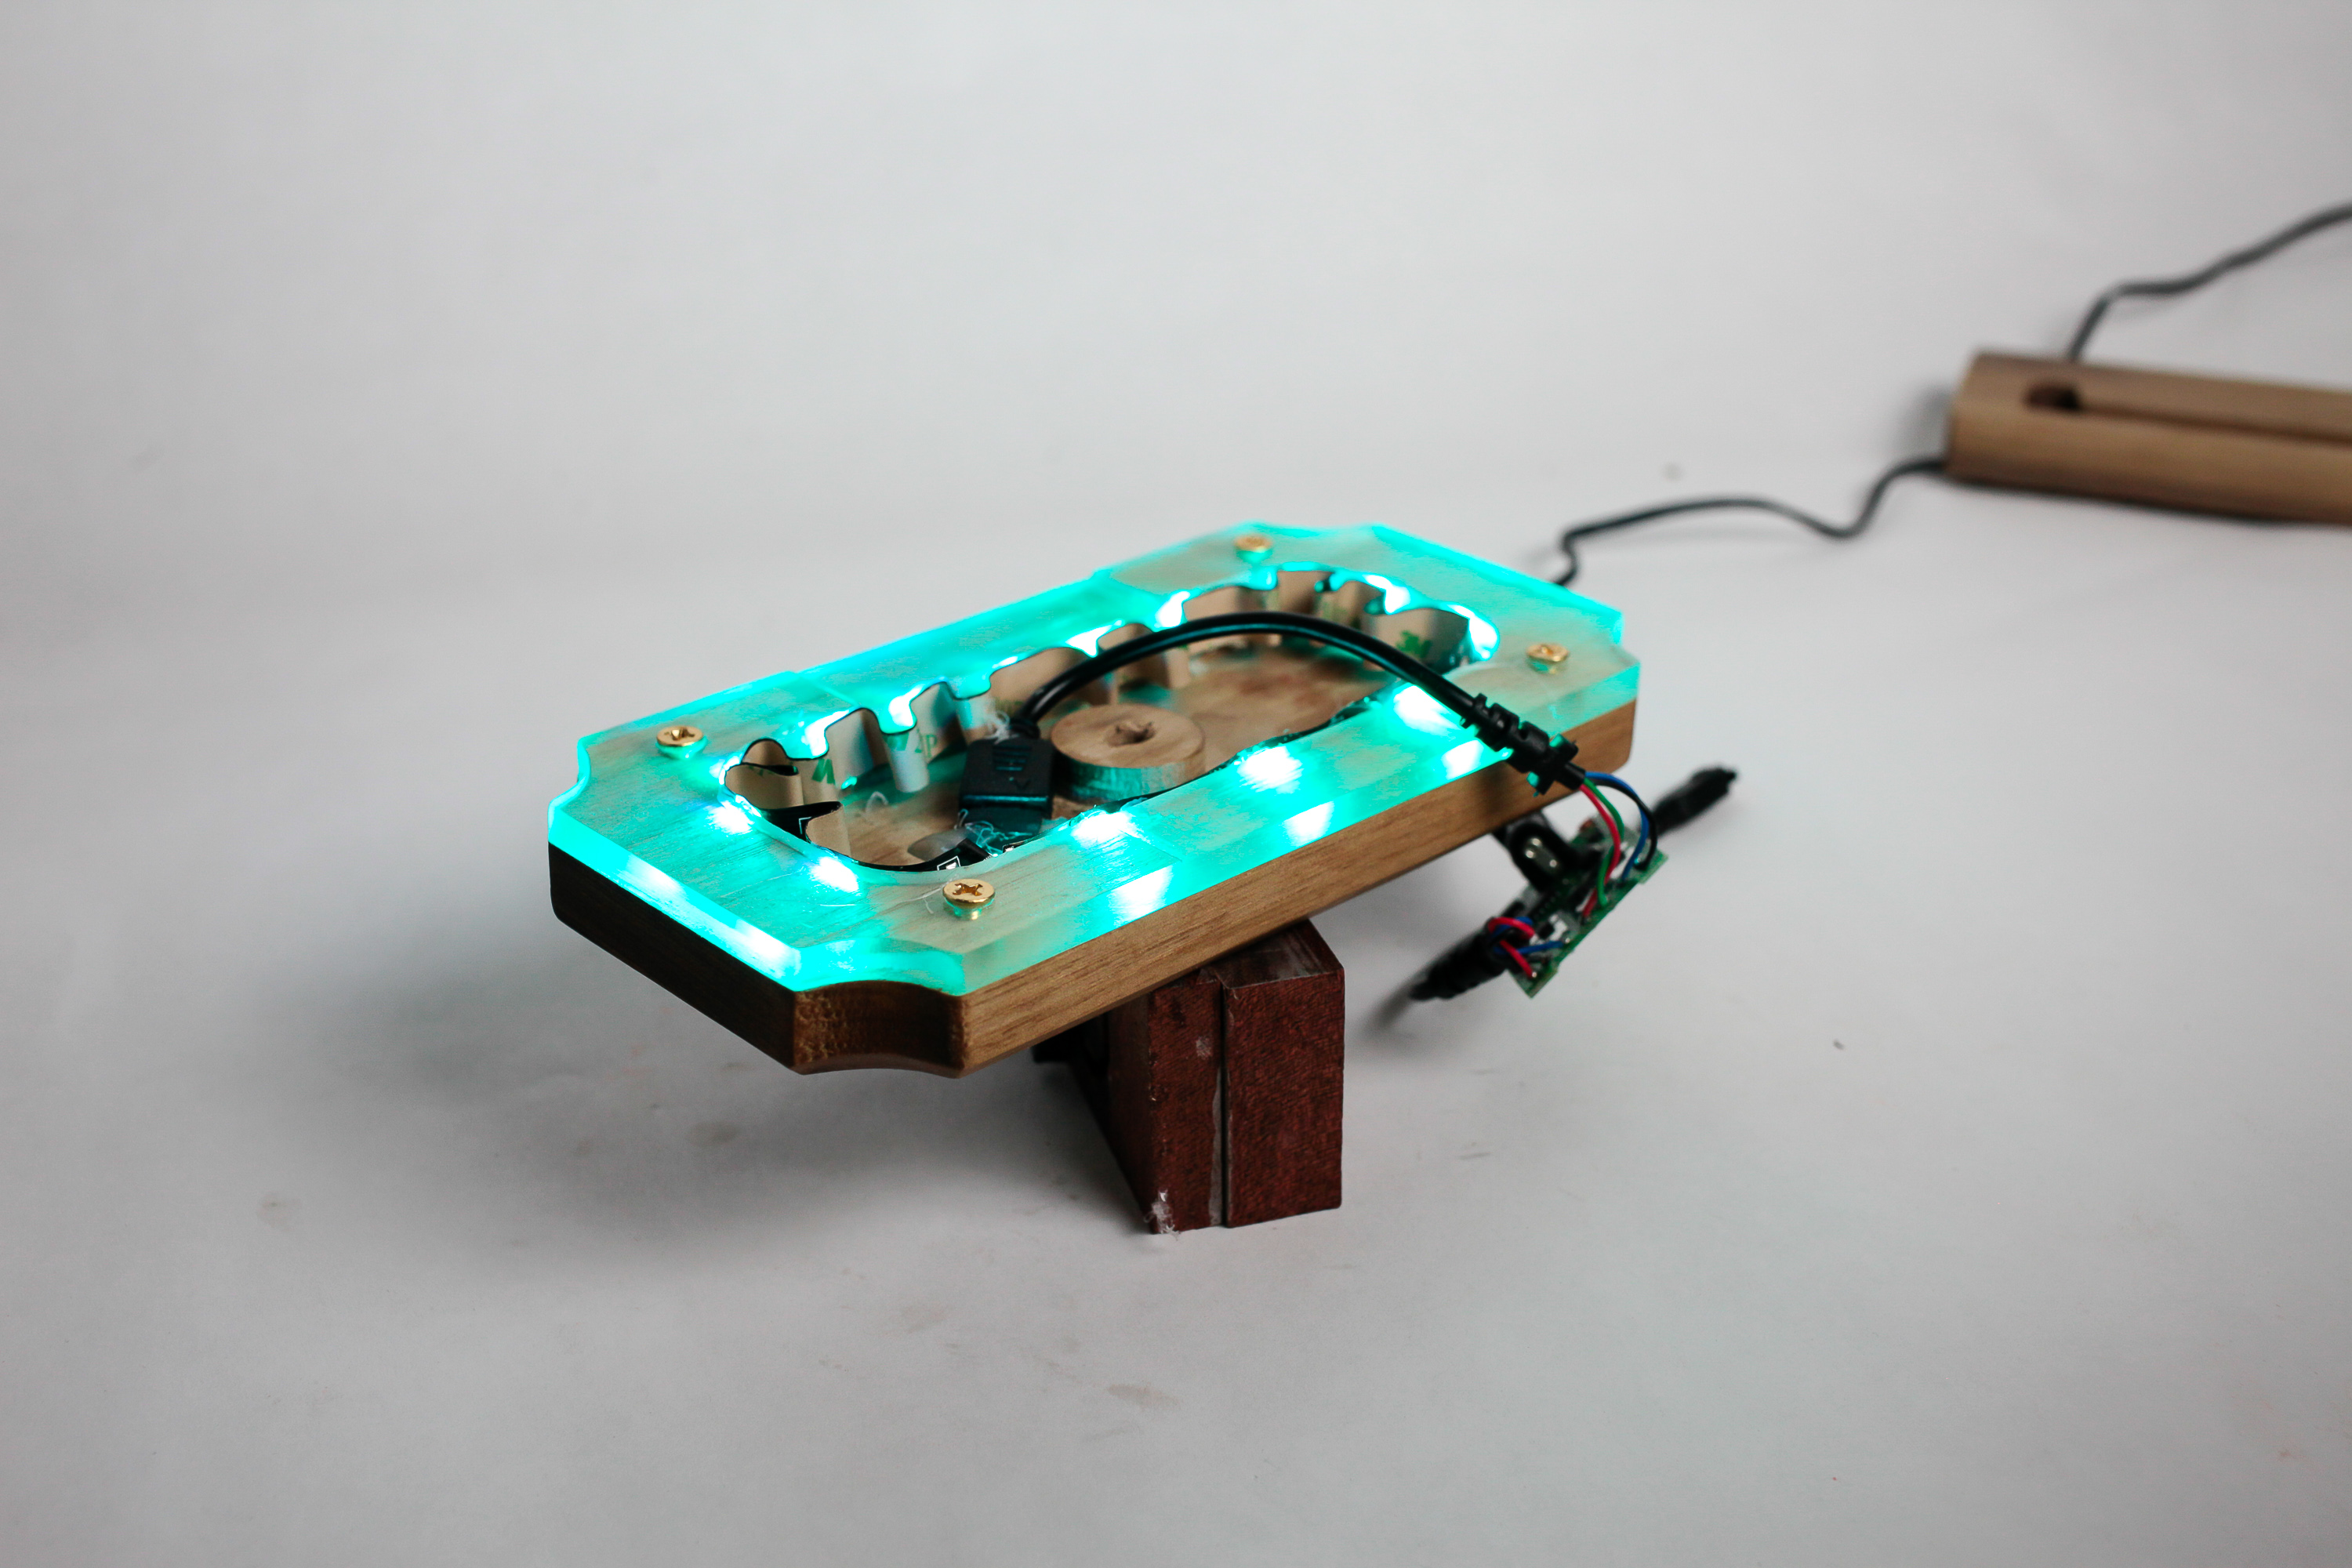
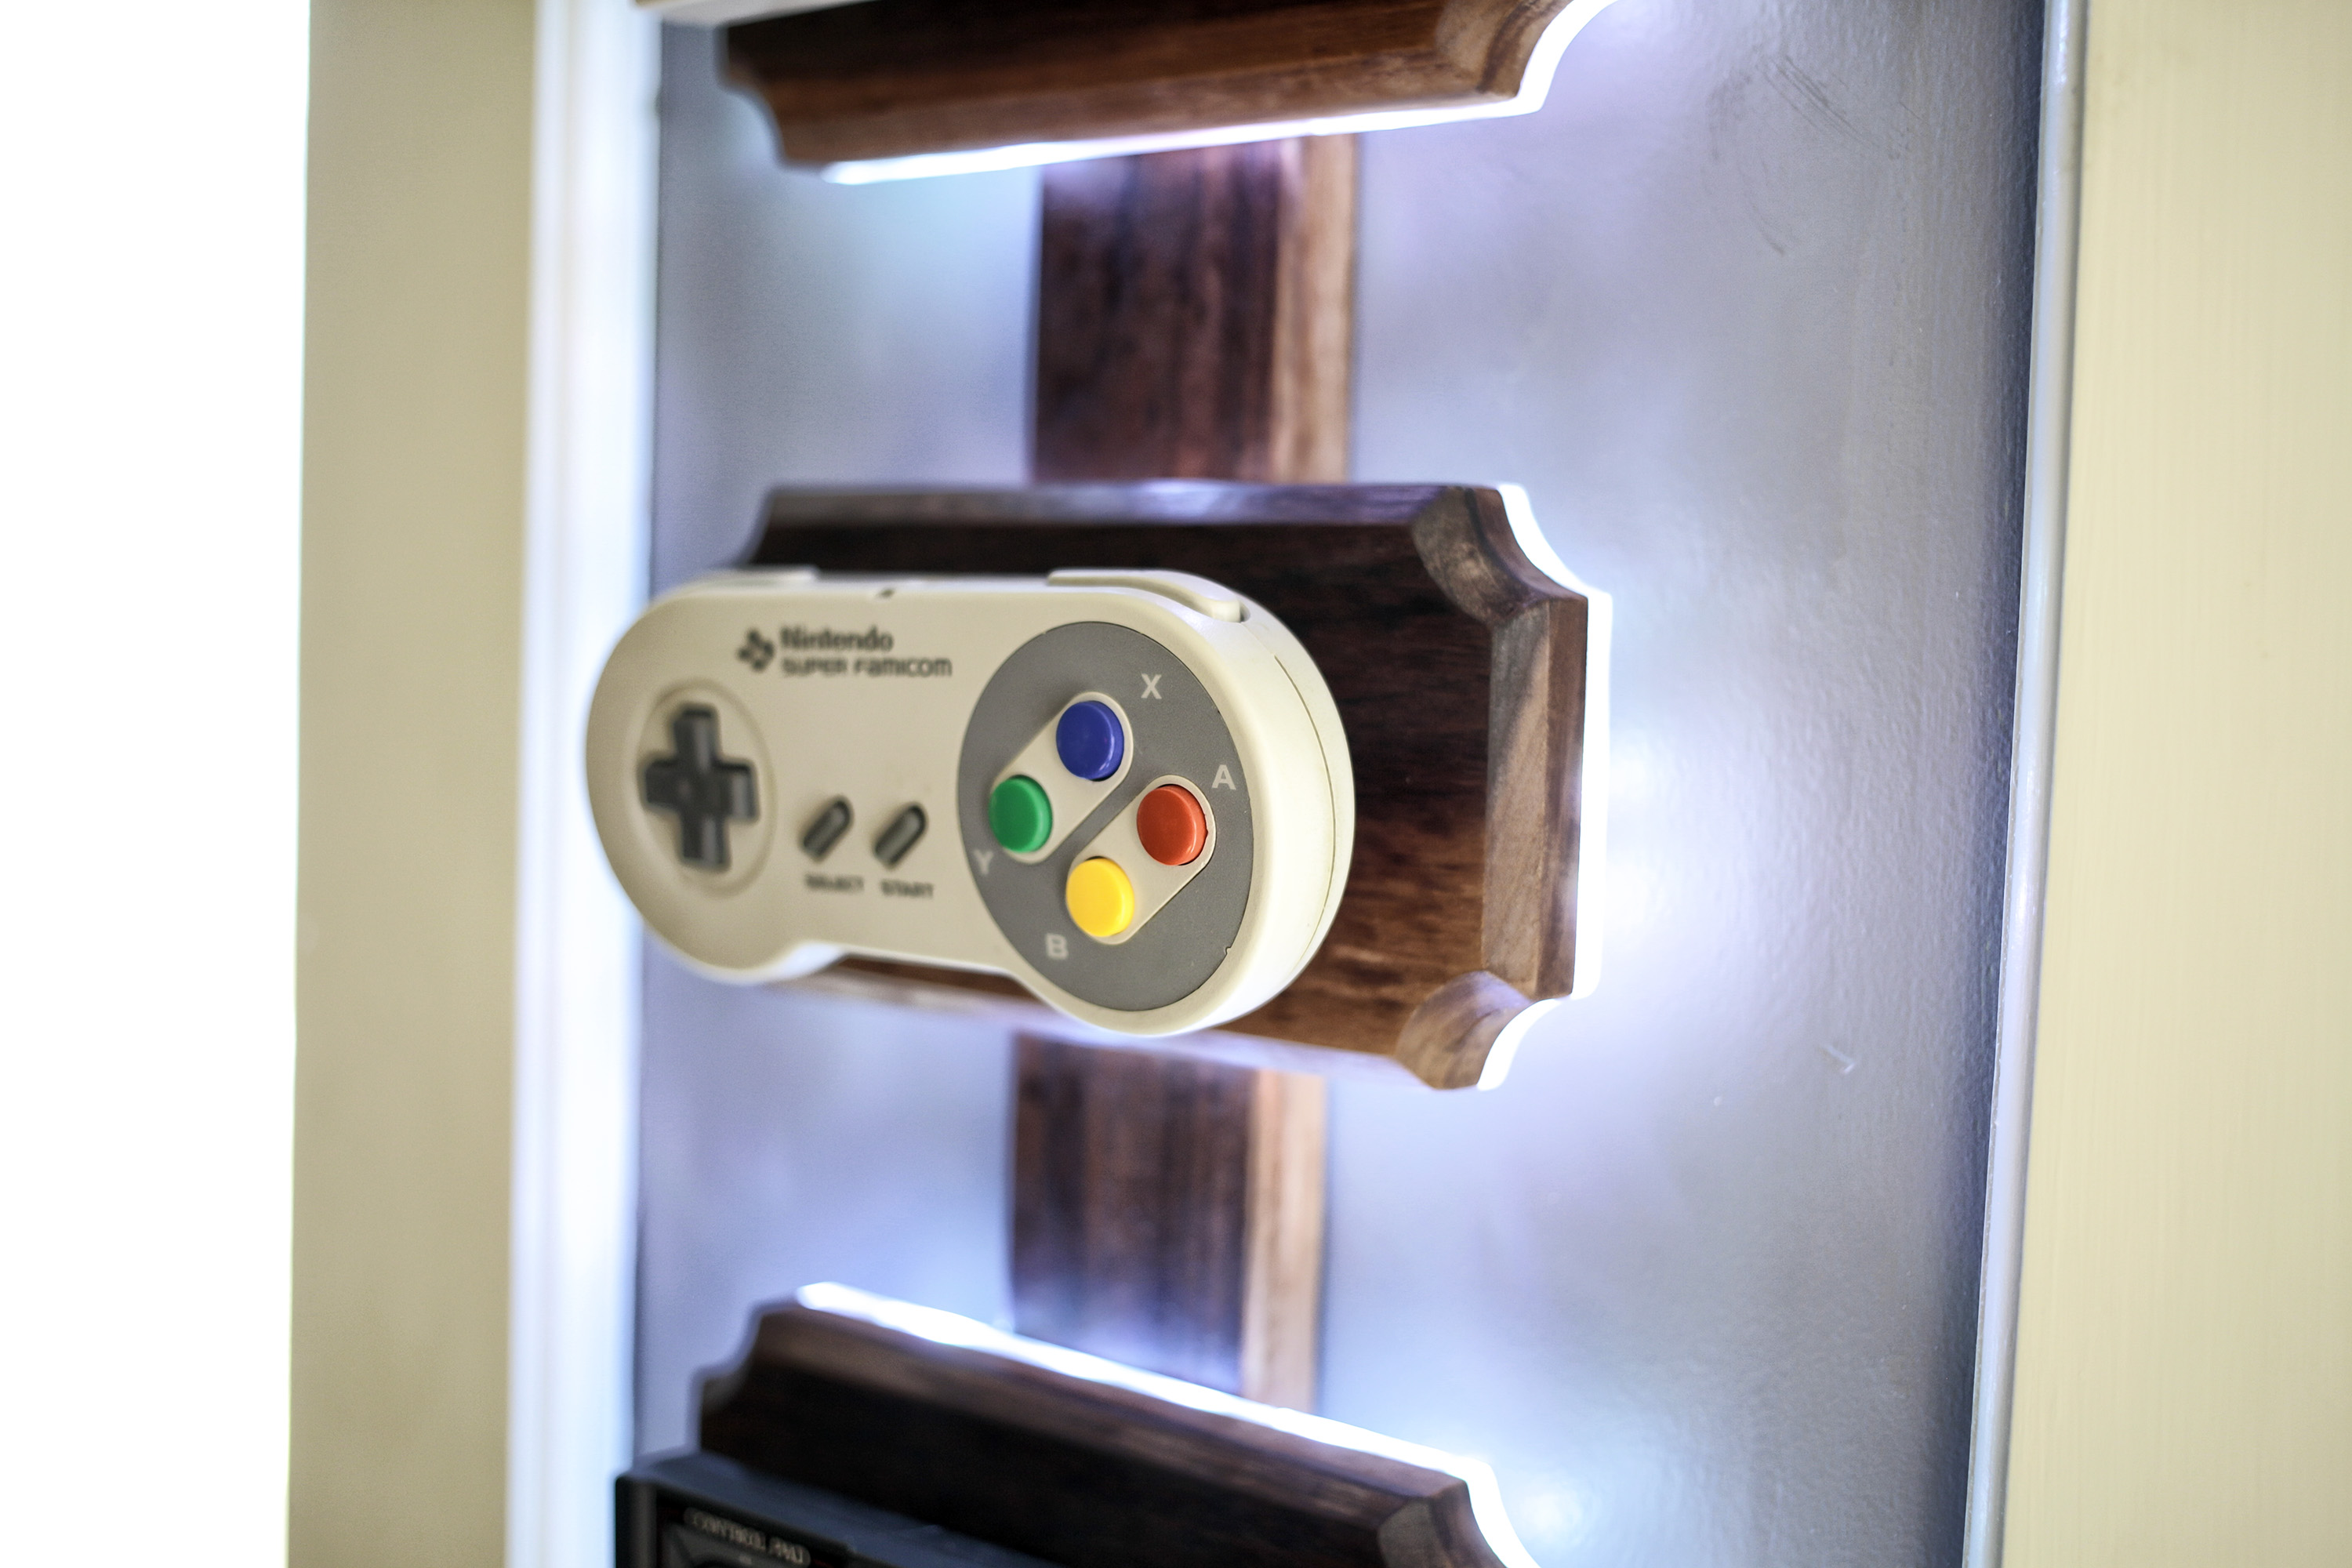
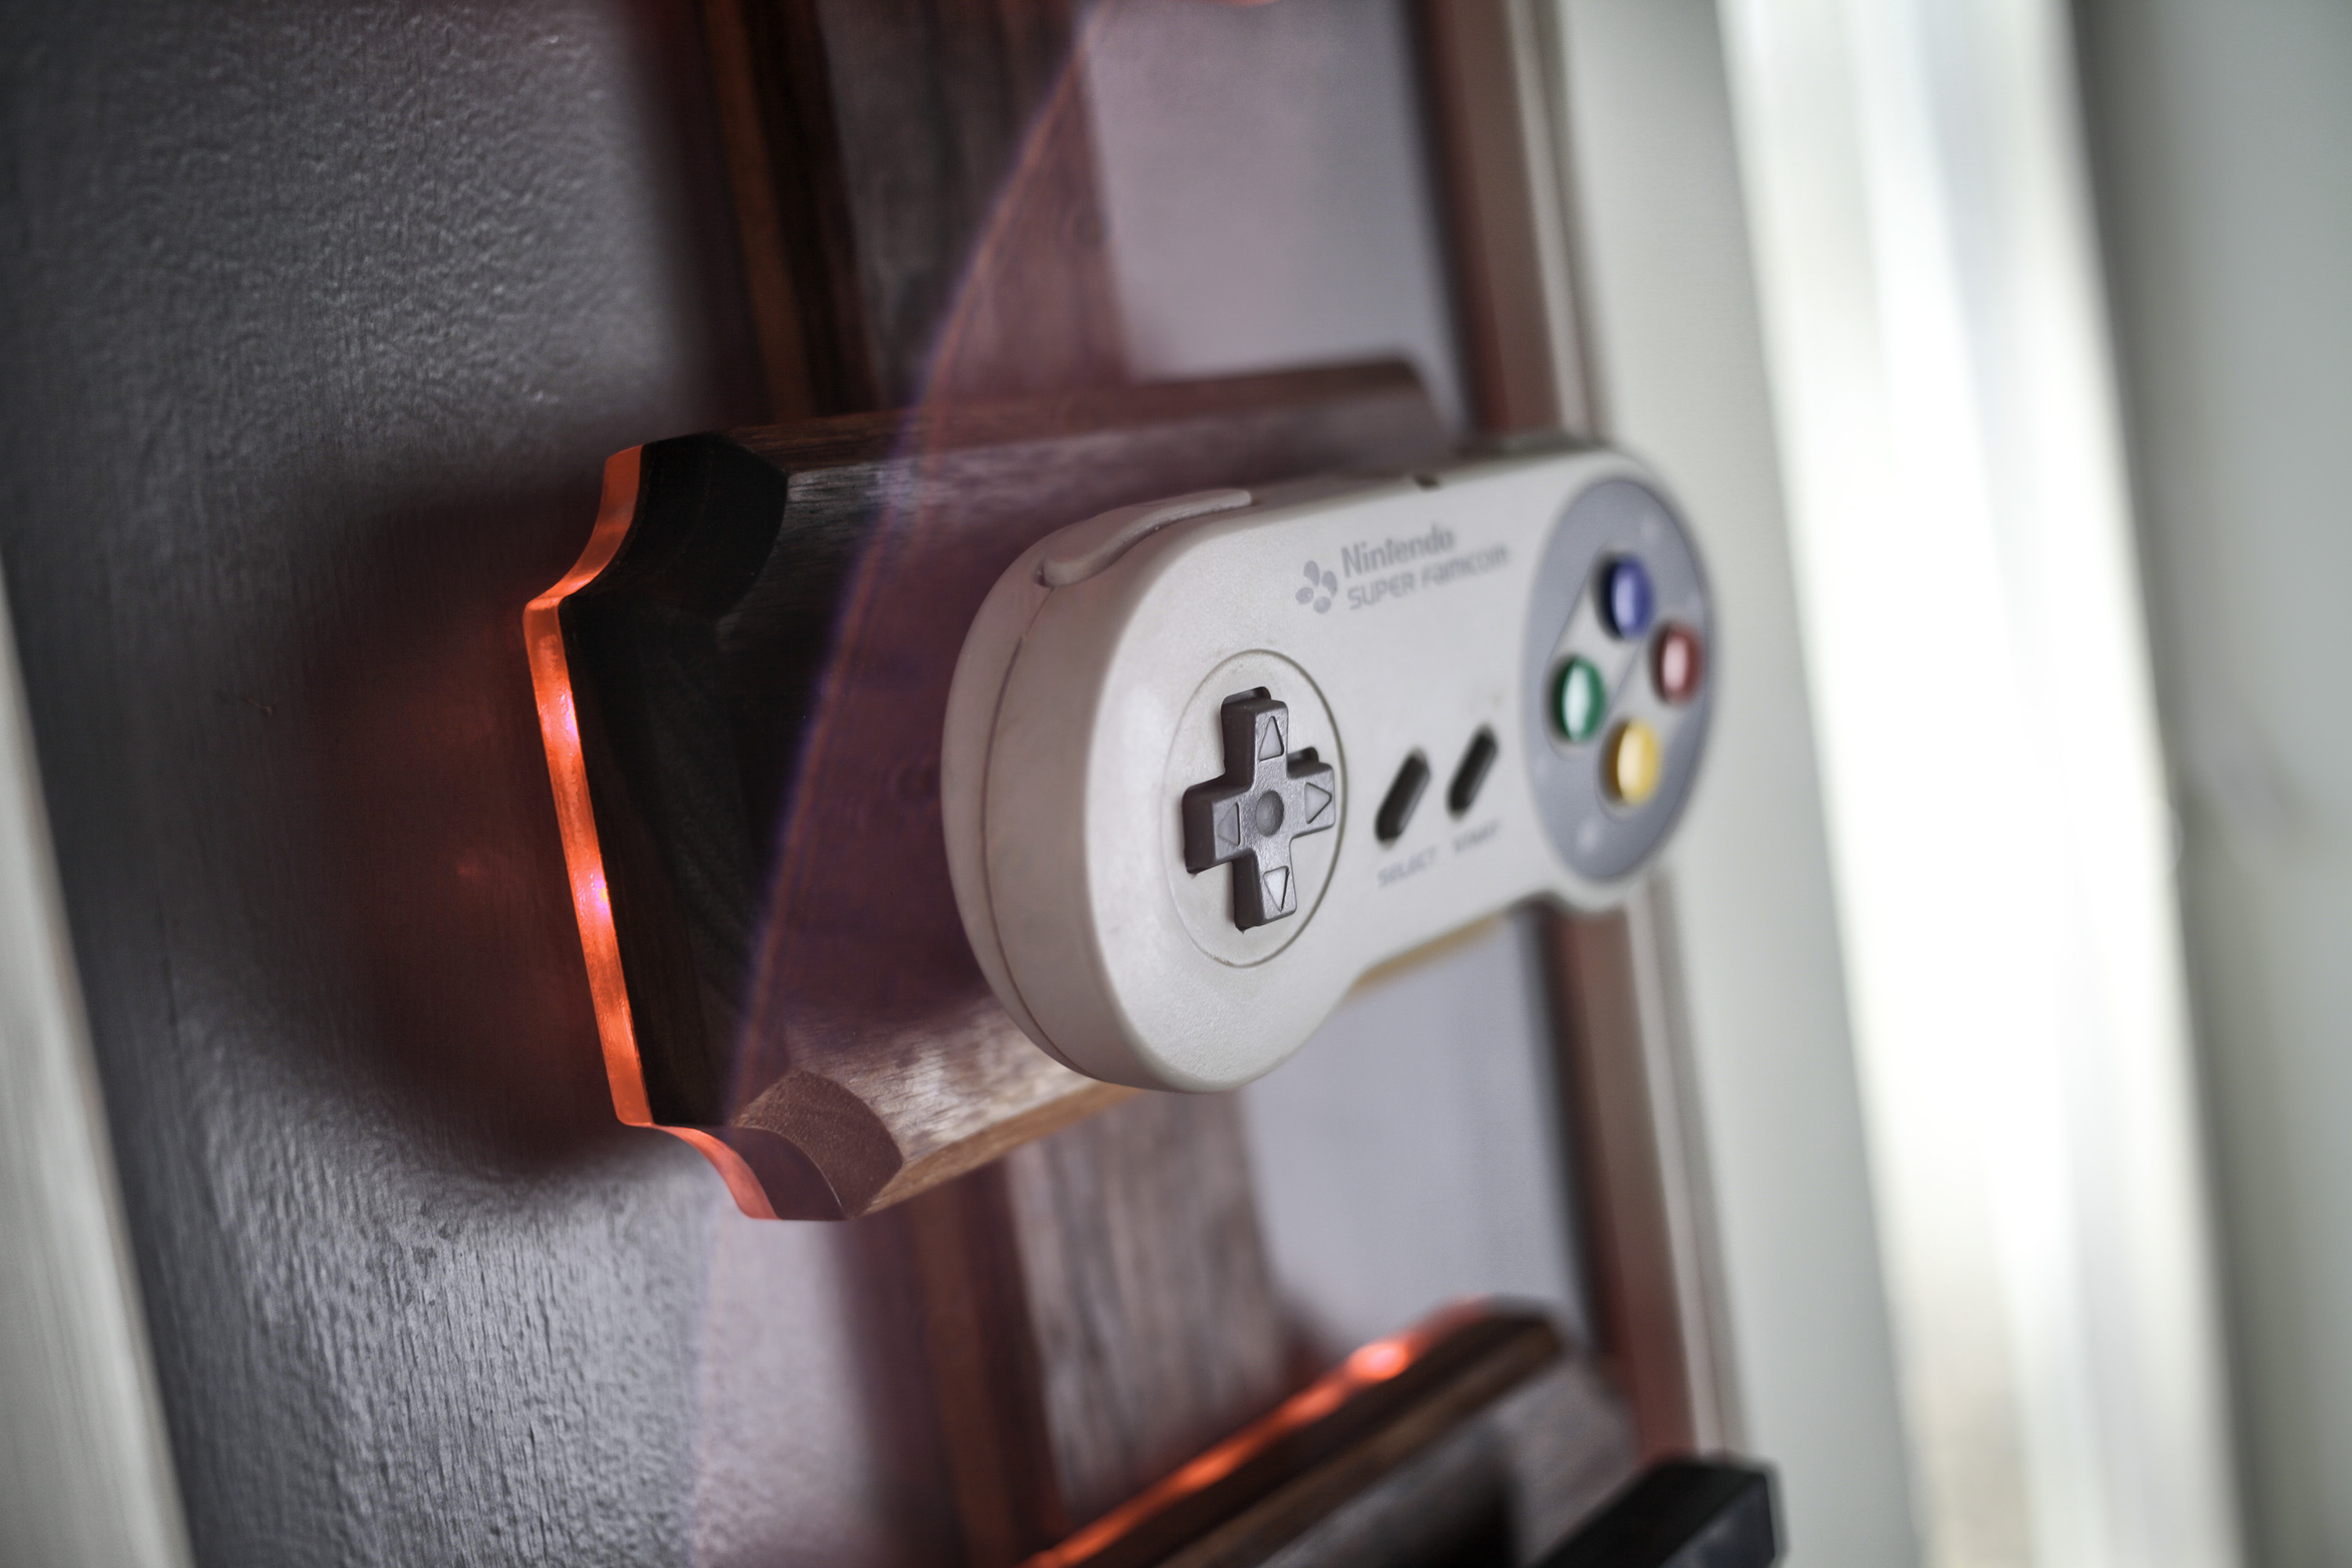
The display is made of walnut with RGB LED edge-lit acrylic backing.
Here is the finished display, fitting into the space pretty nicely I'd say!
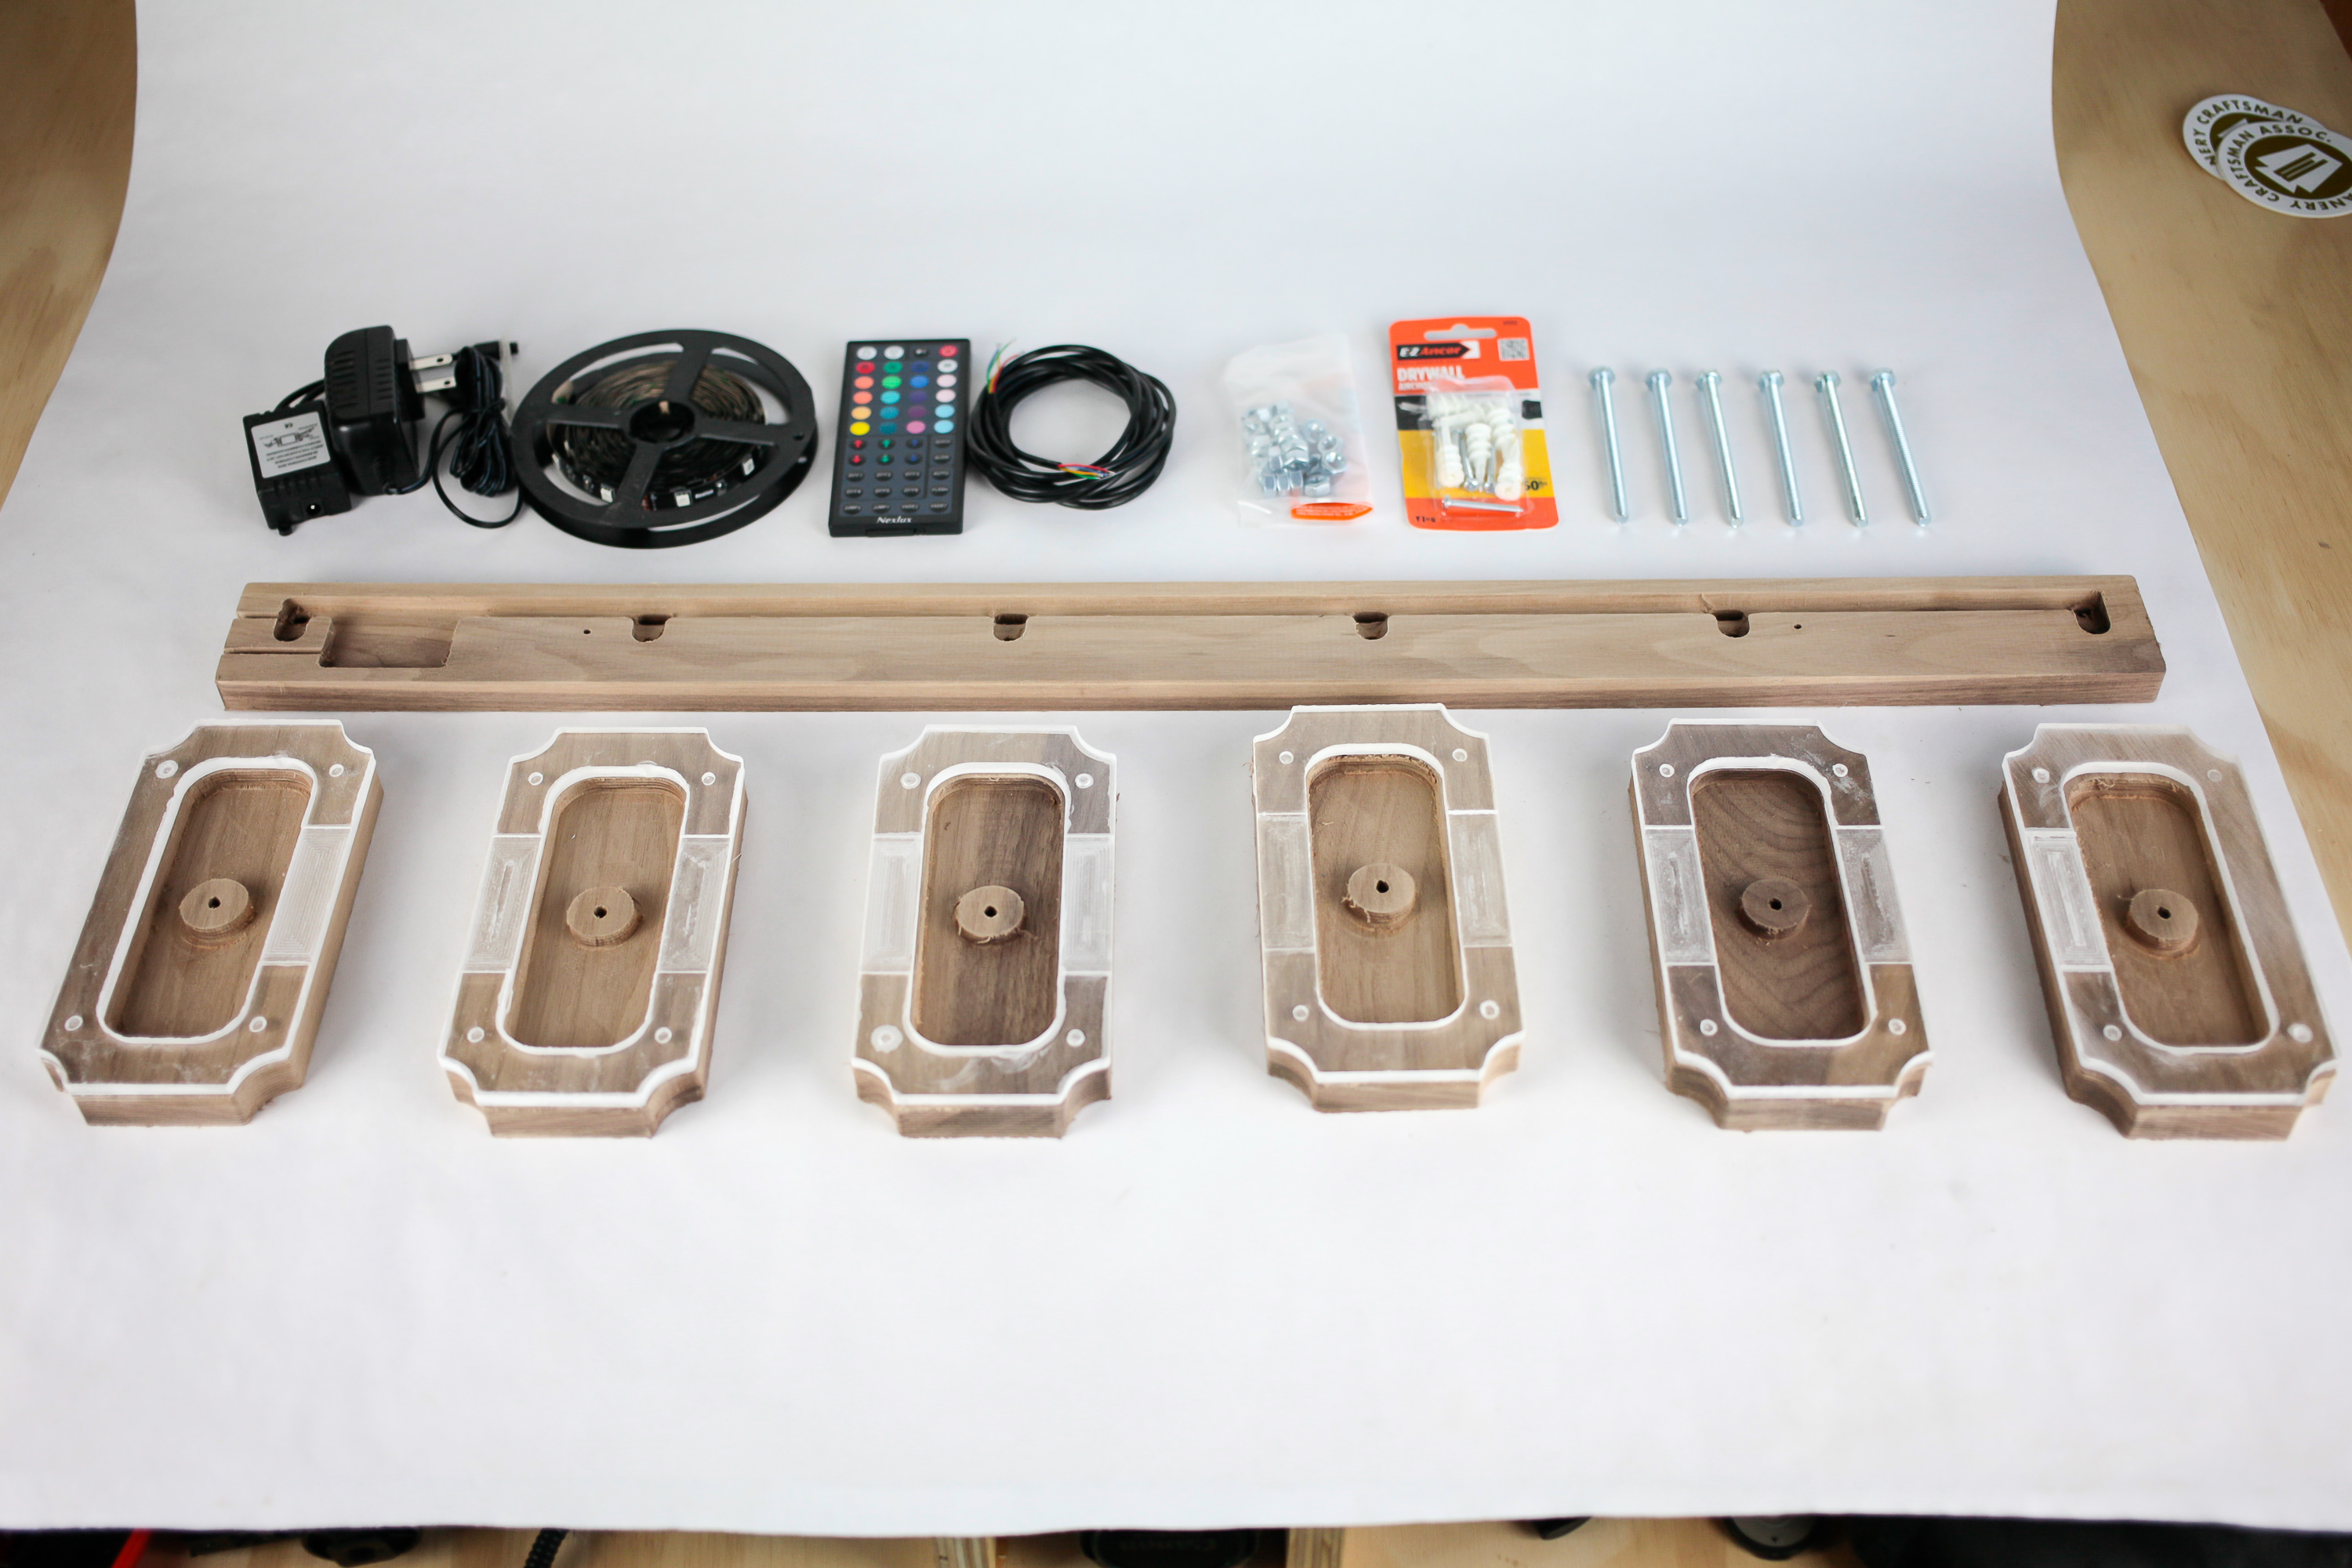
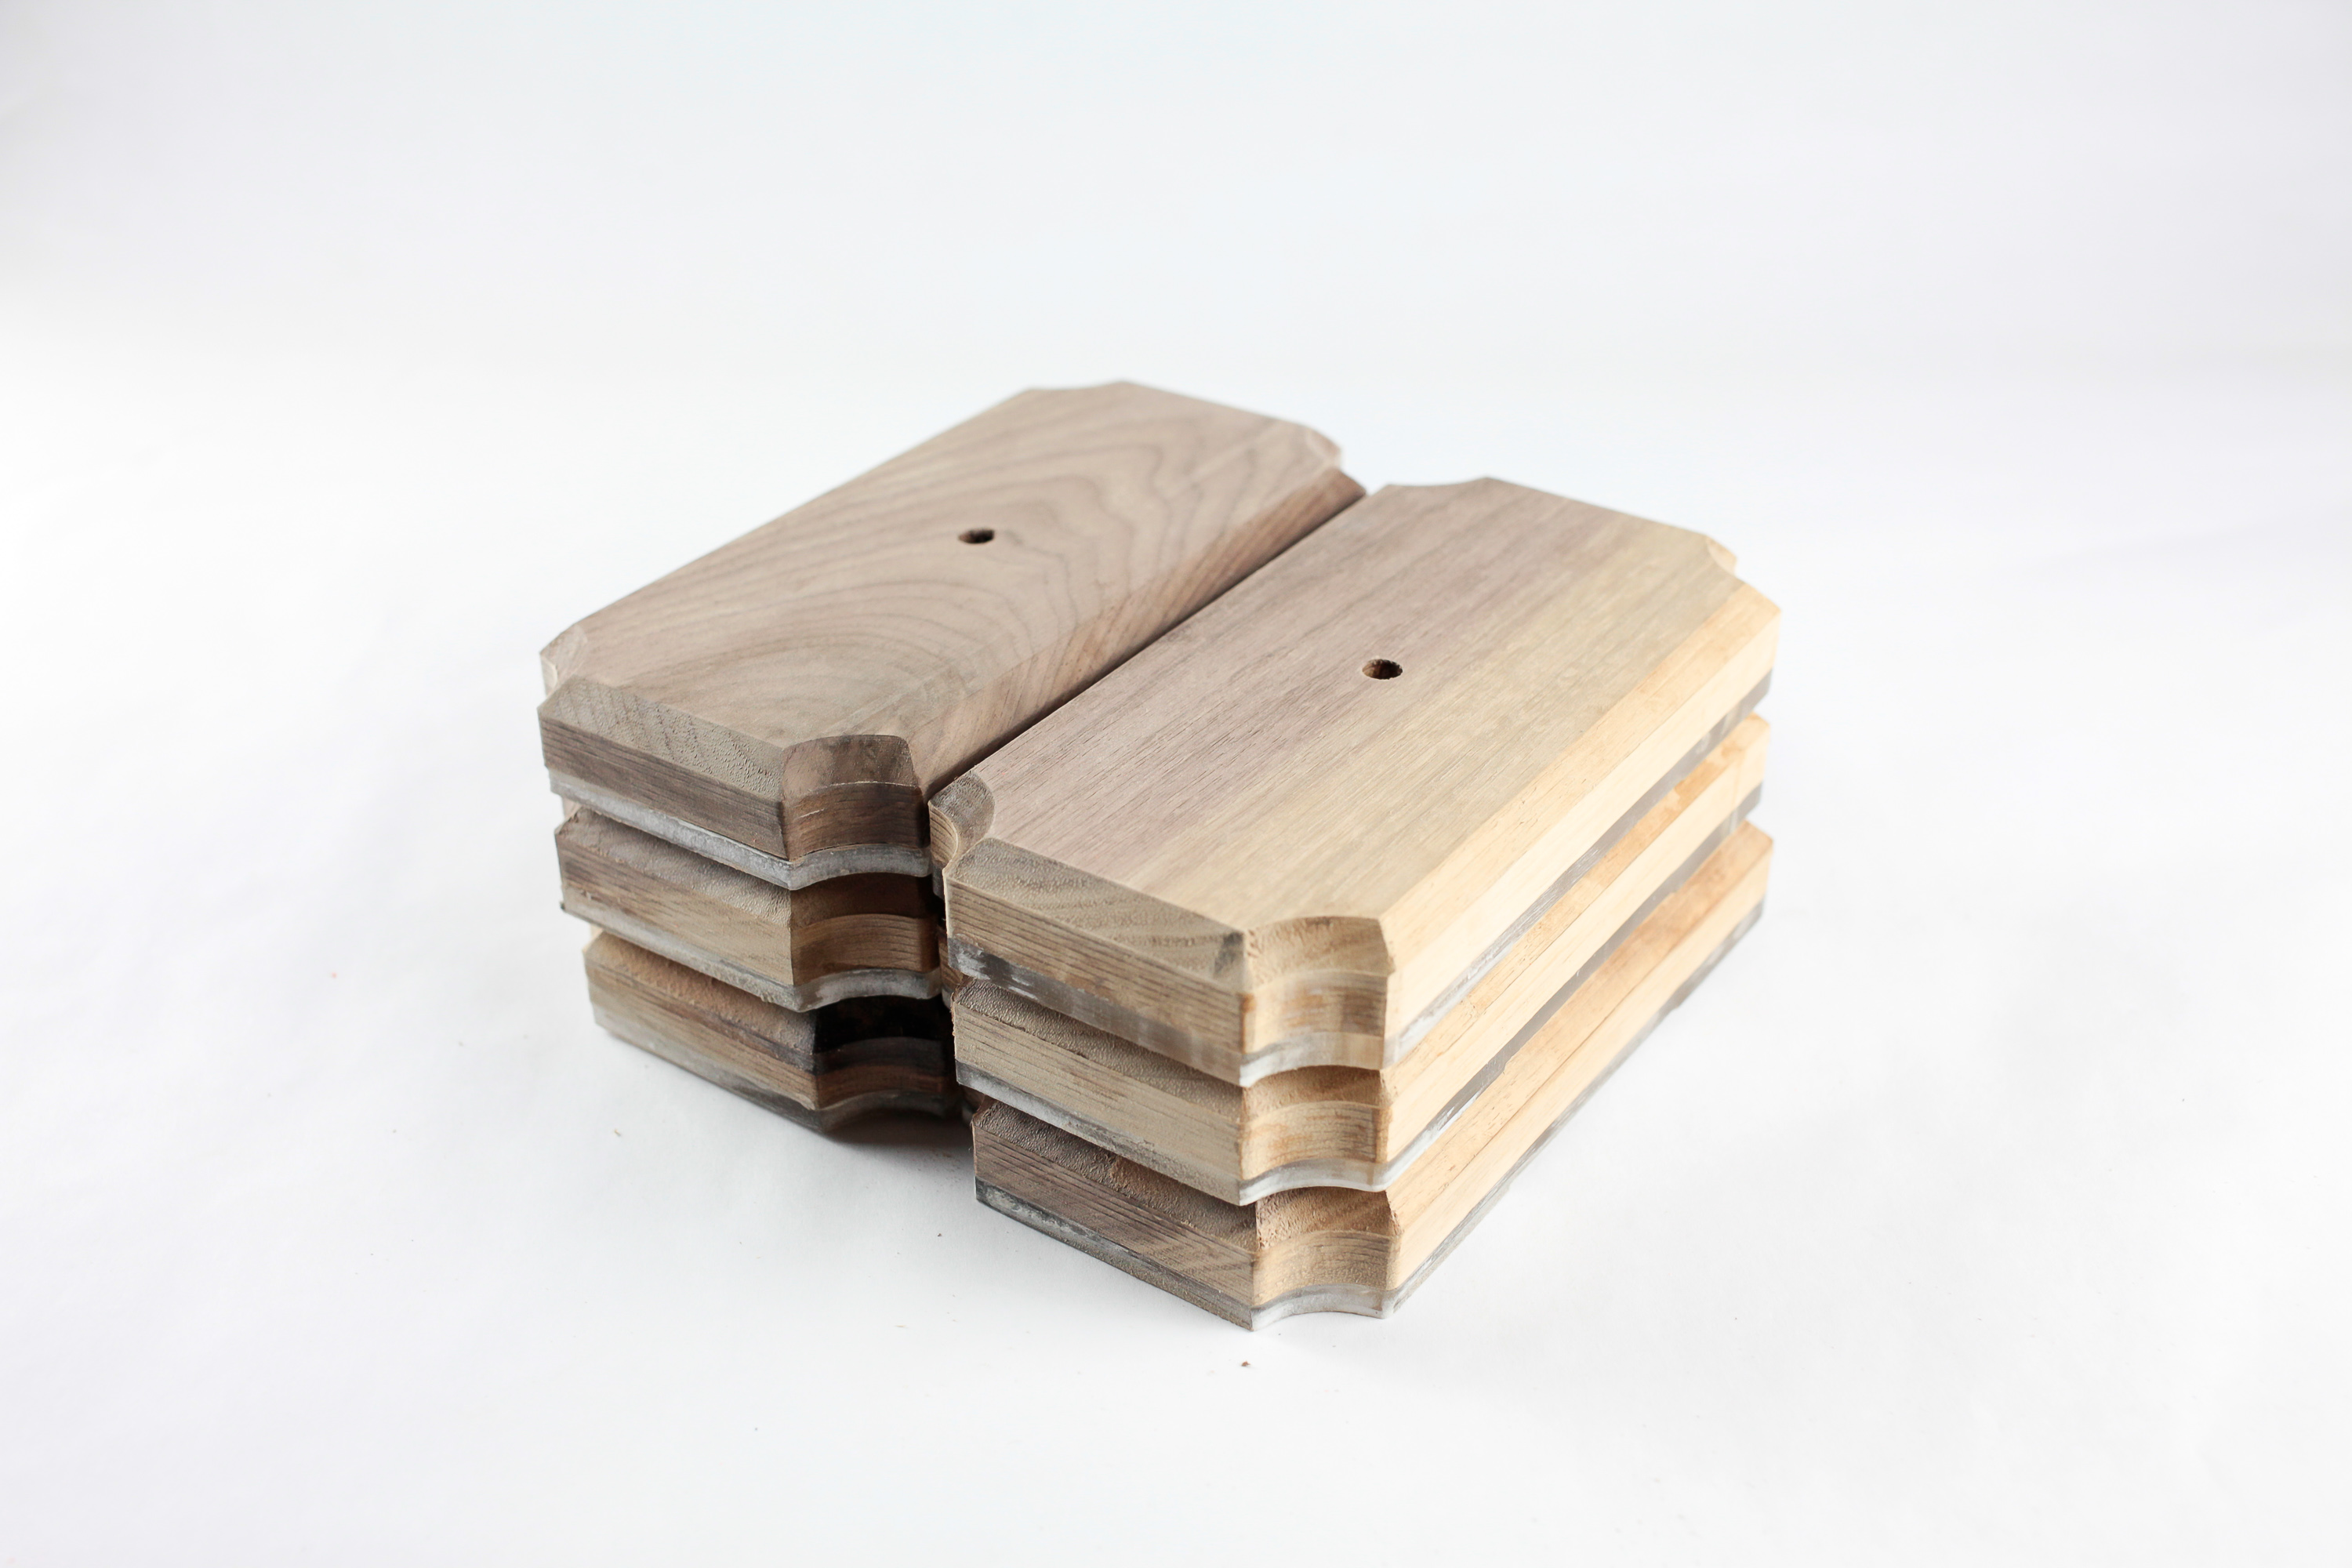
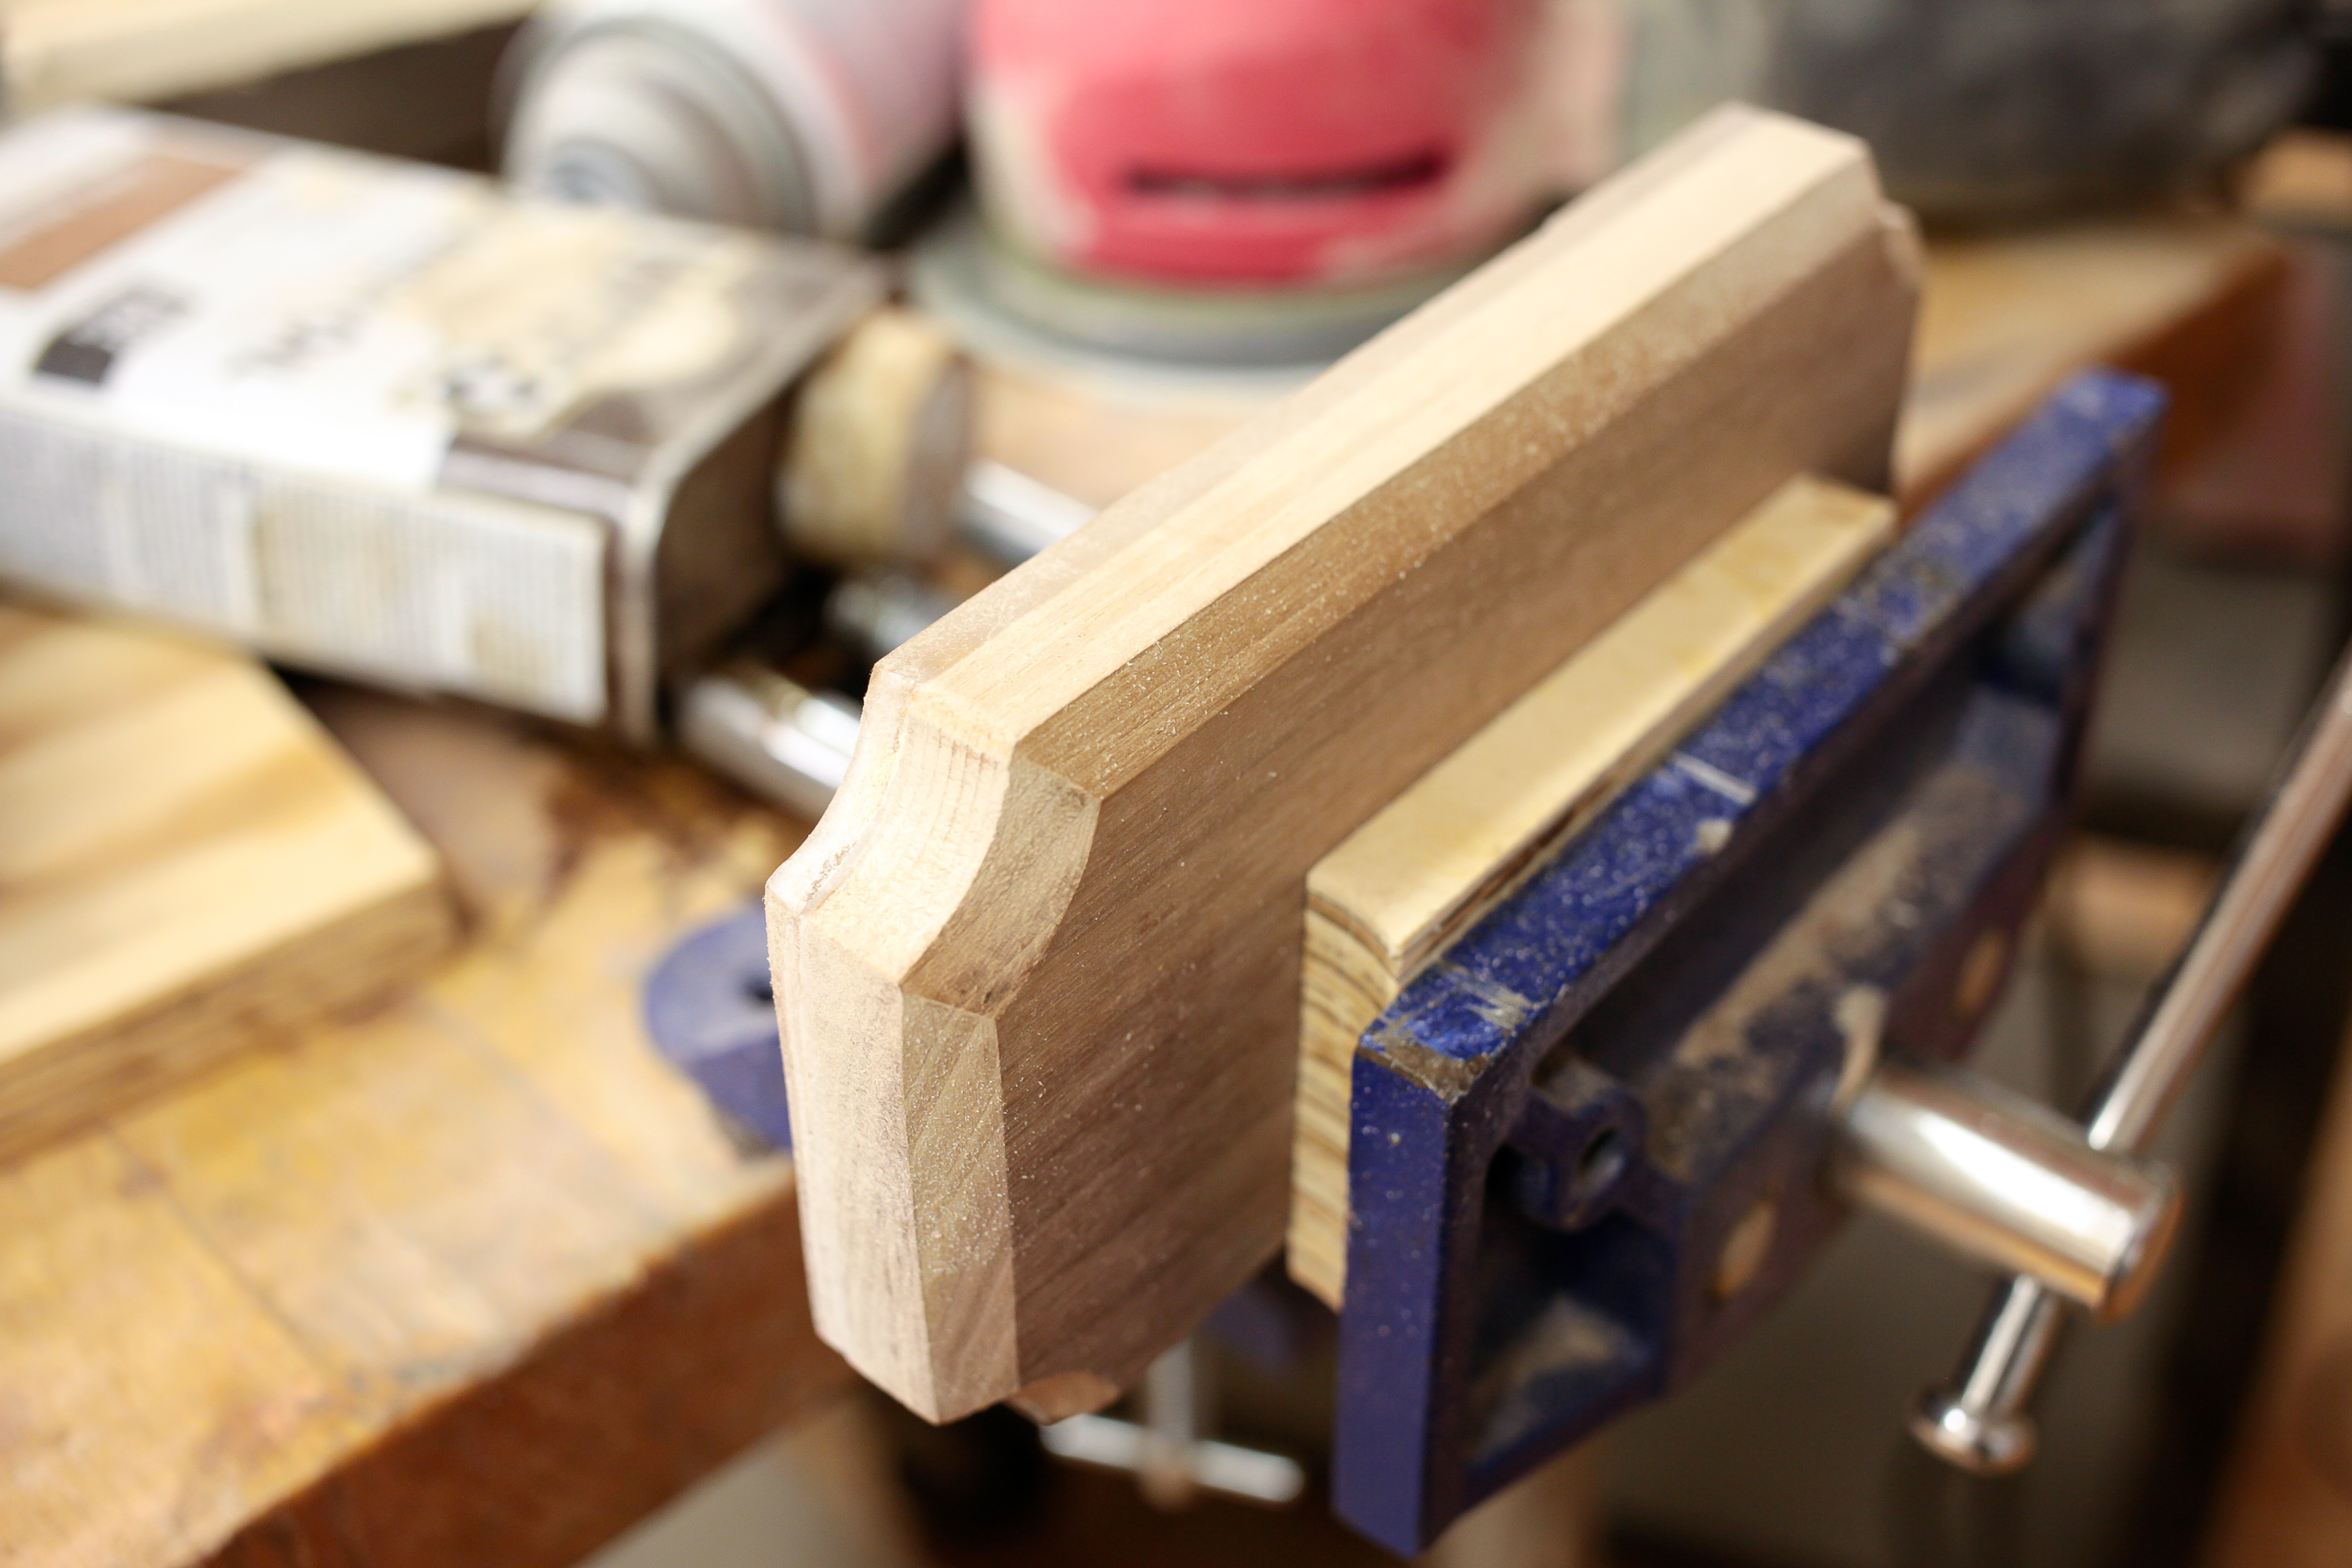
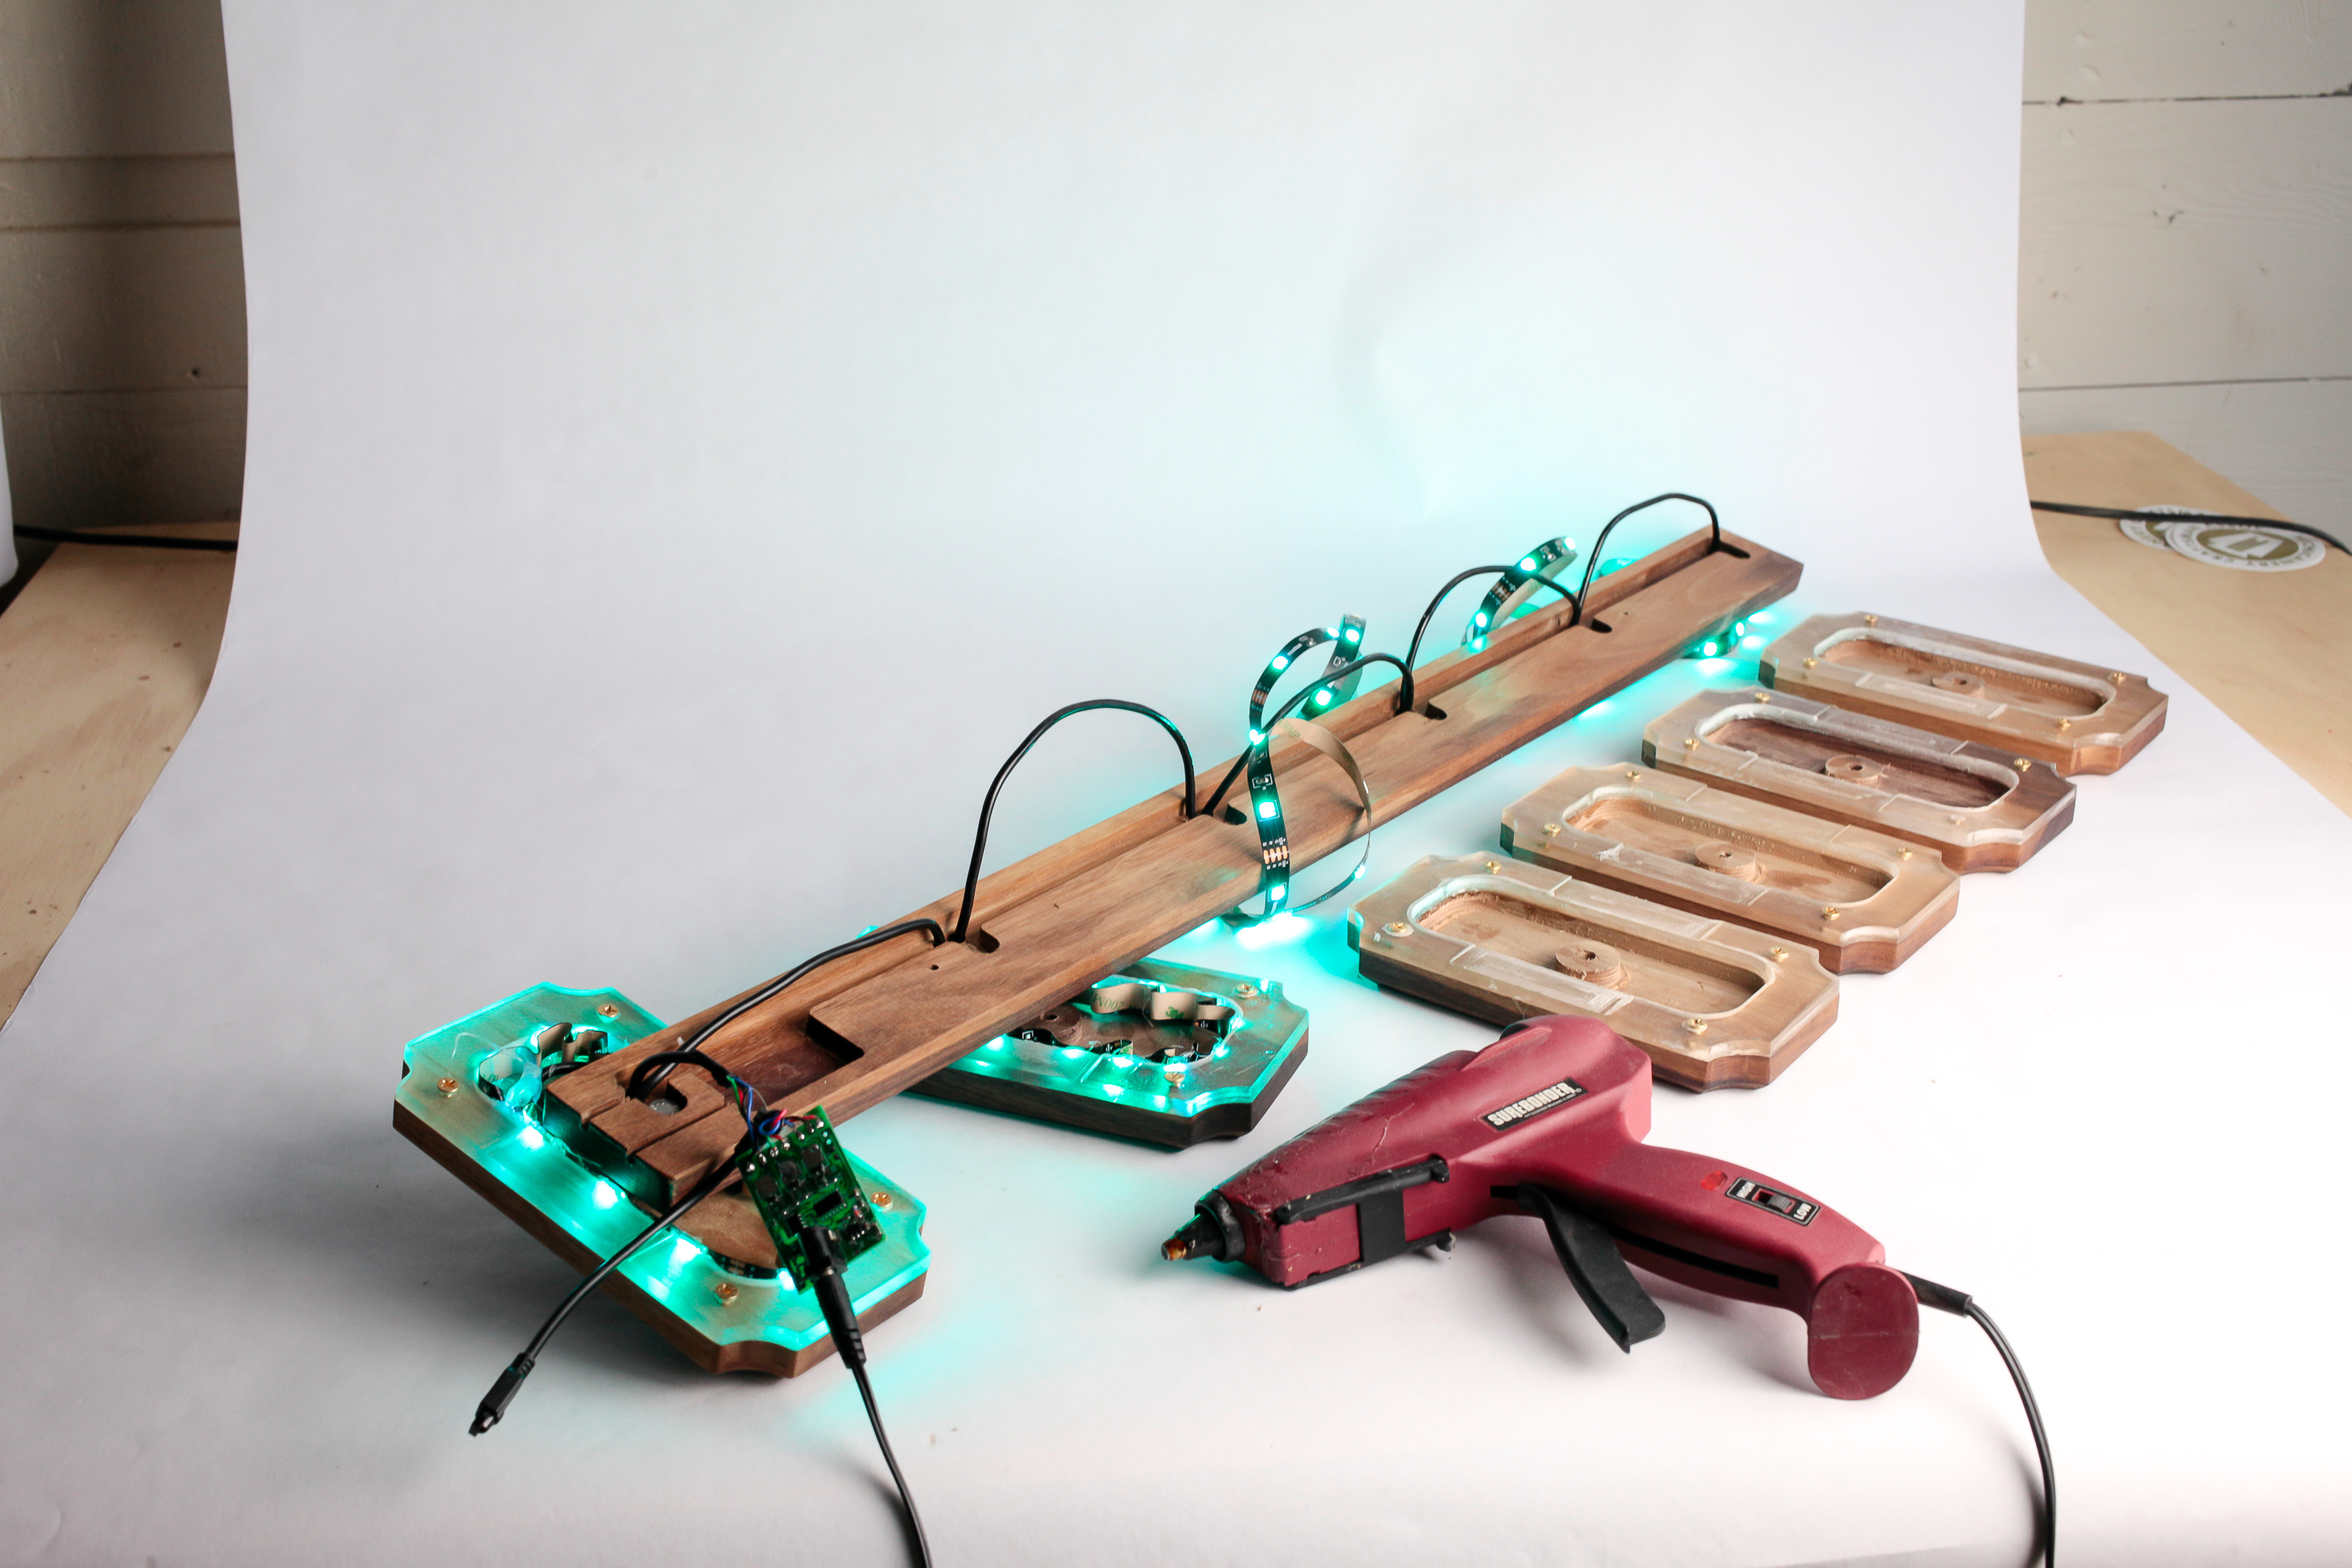
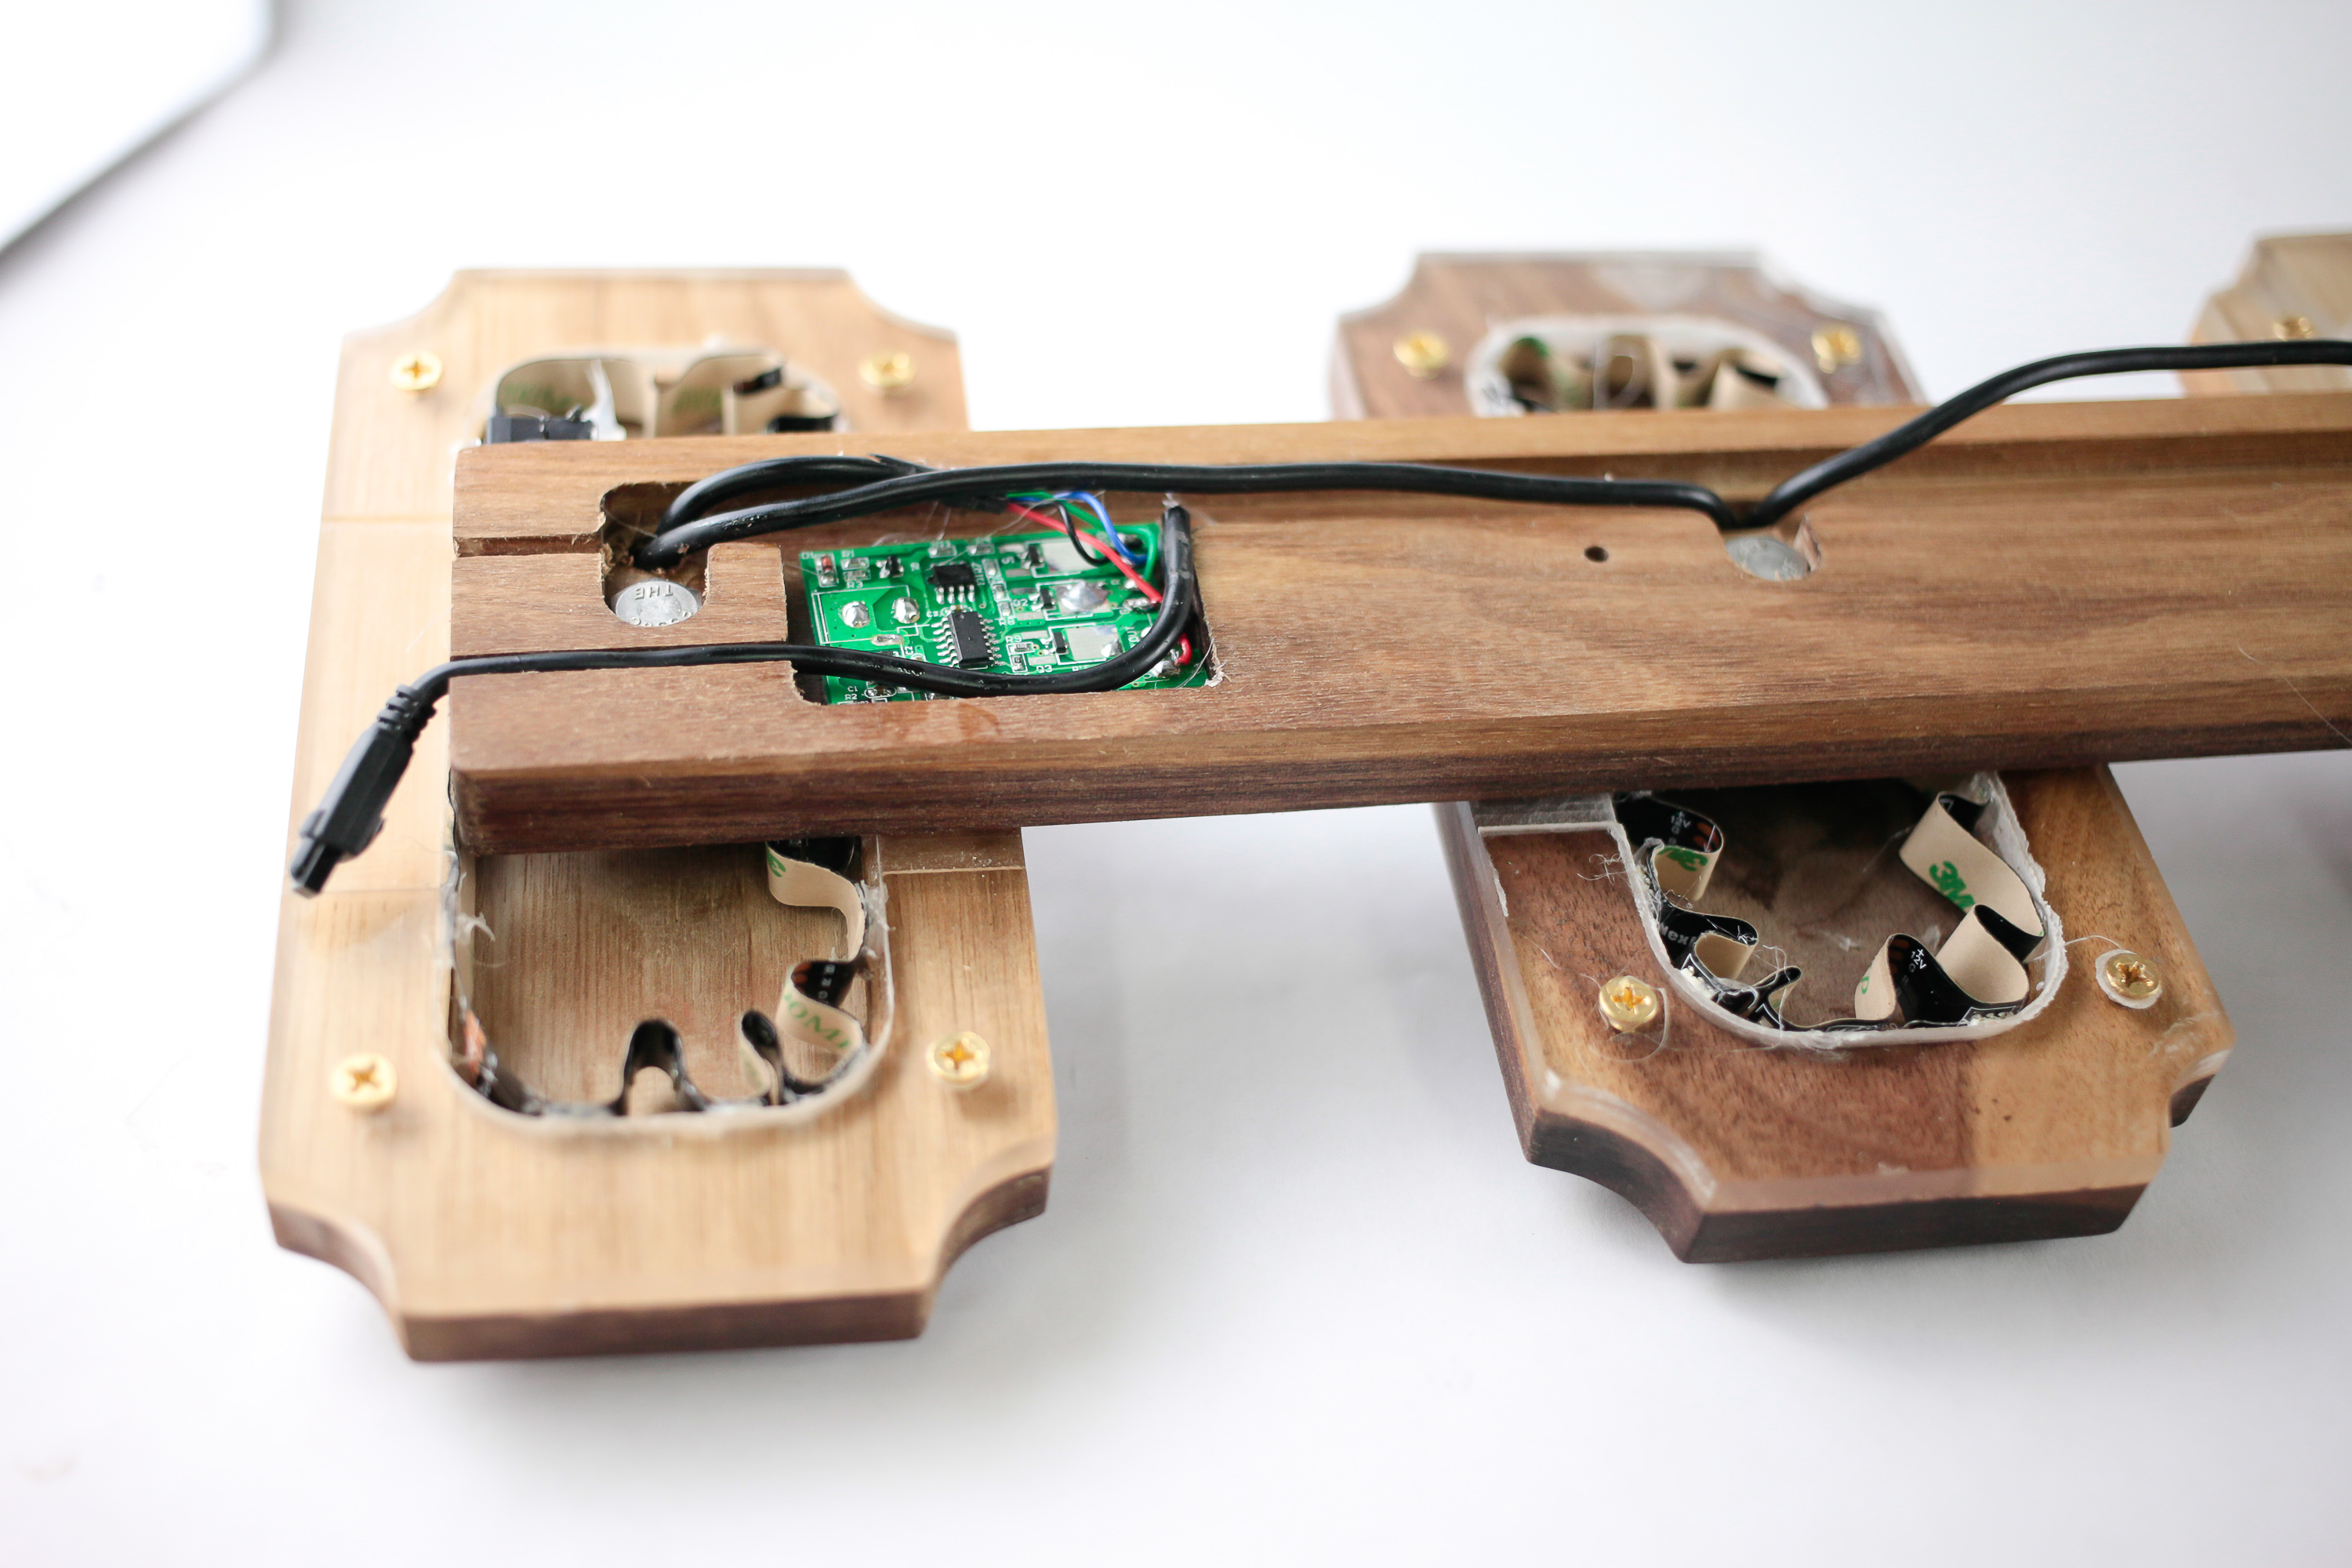
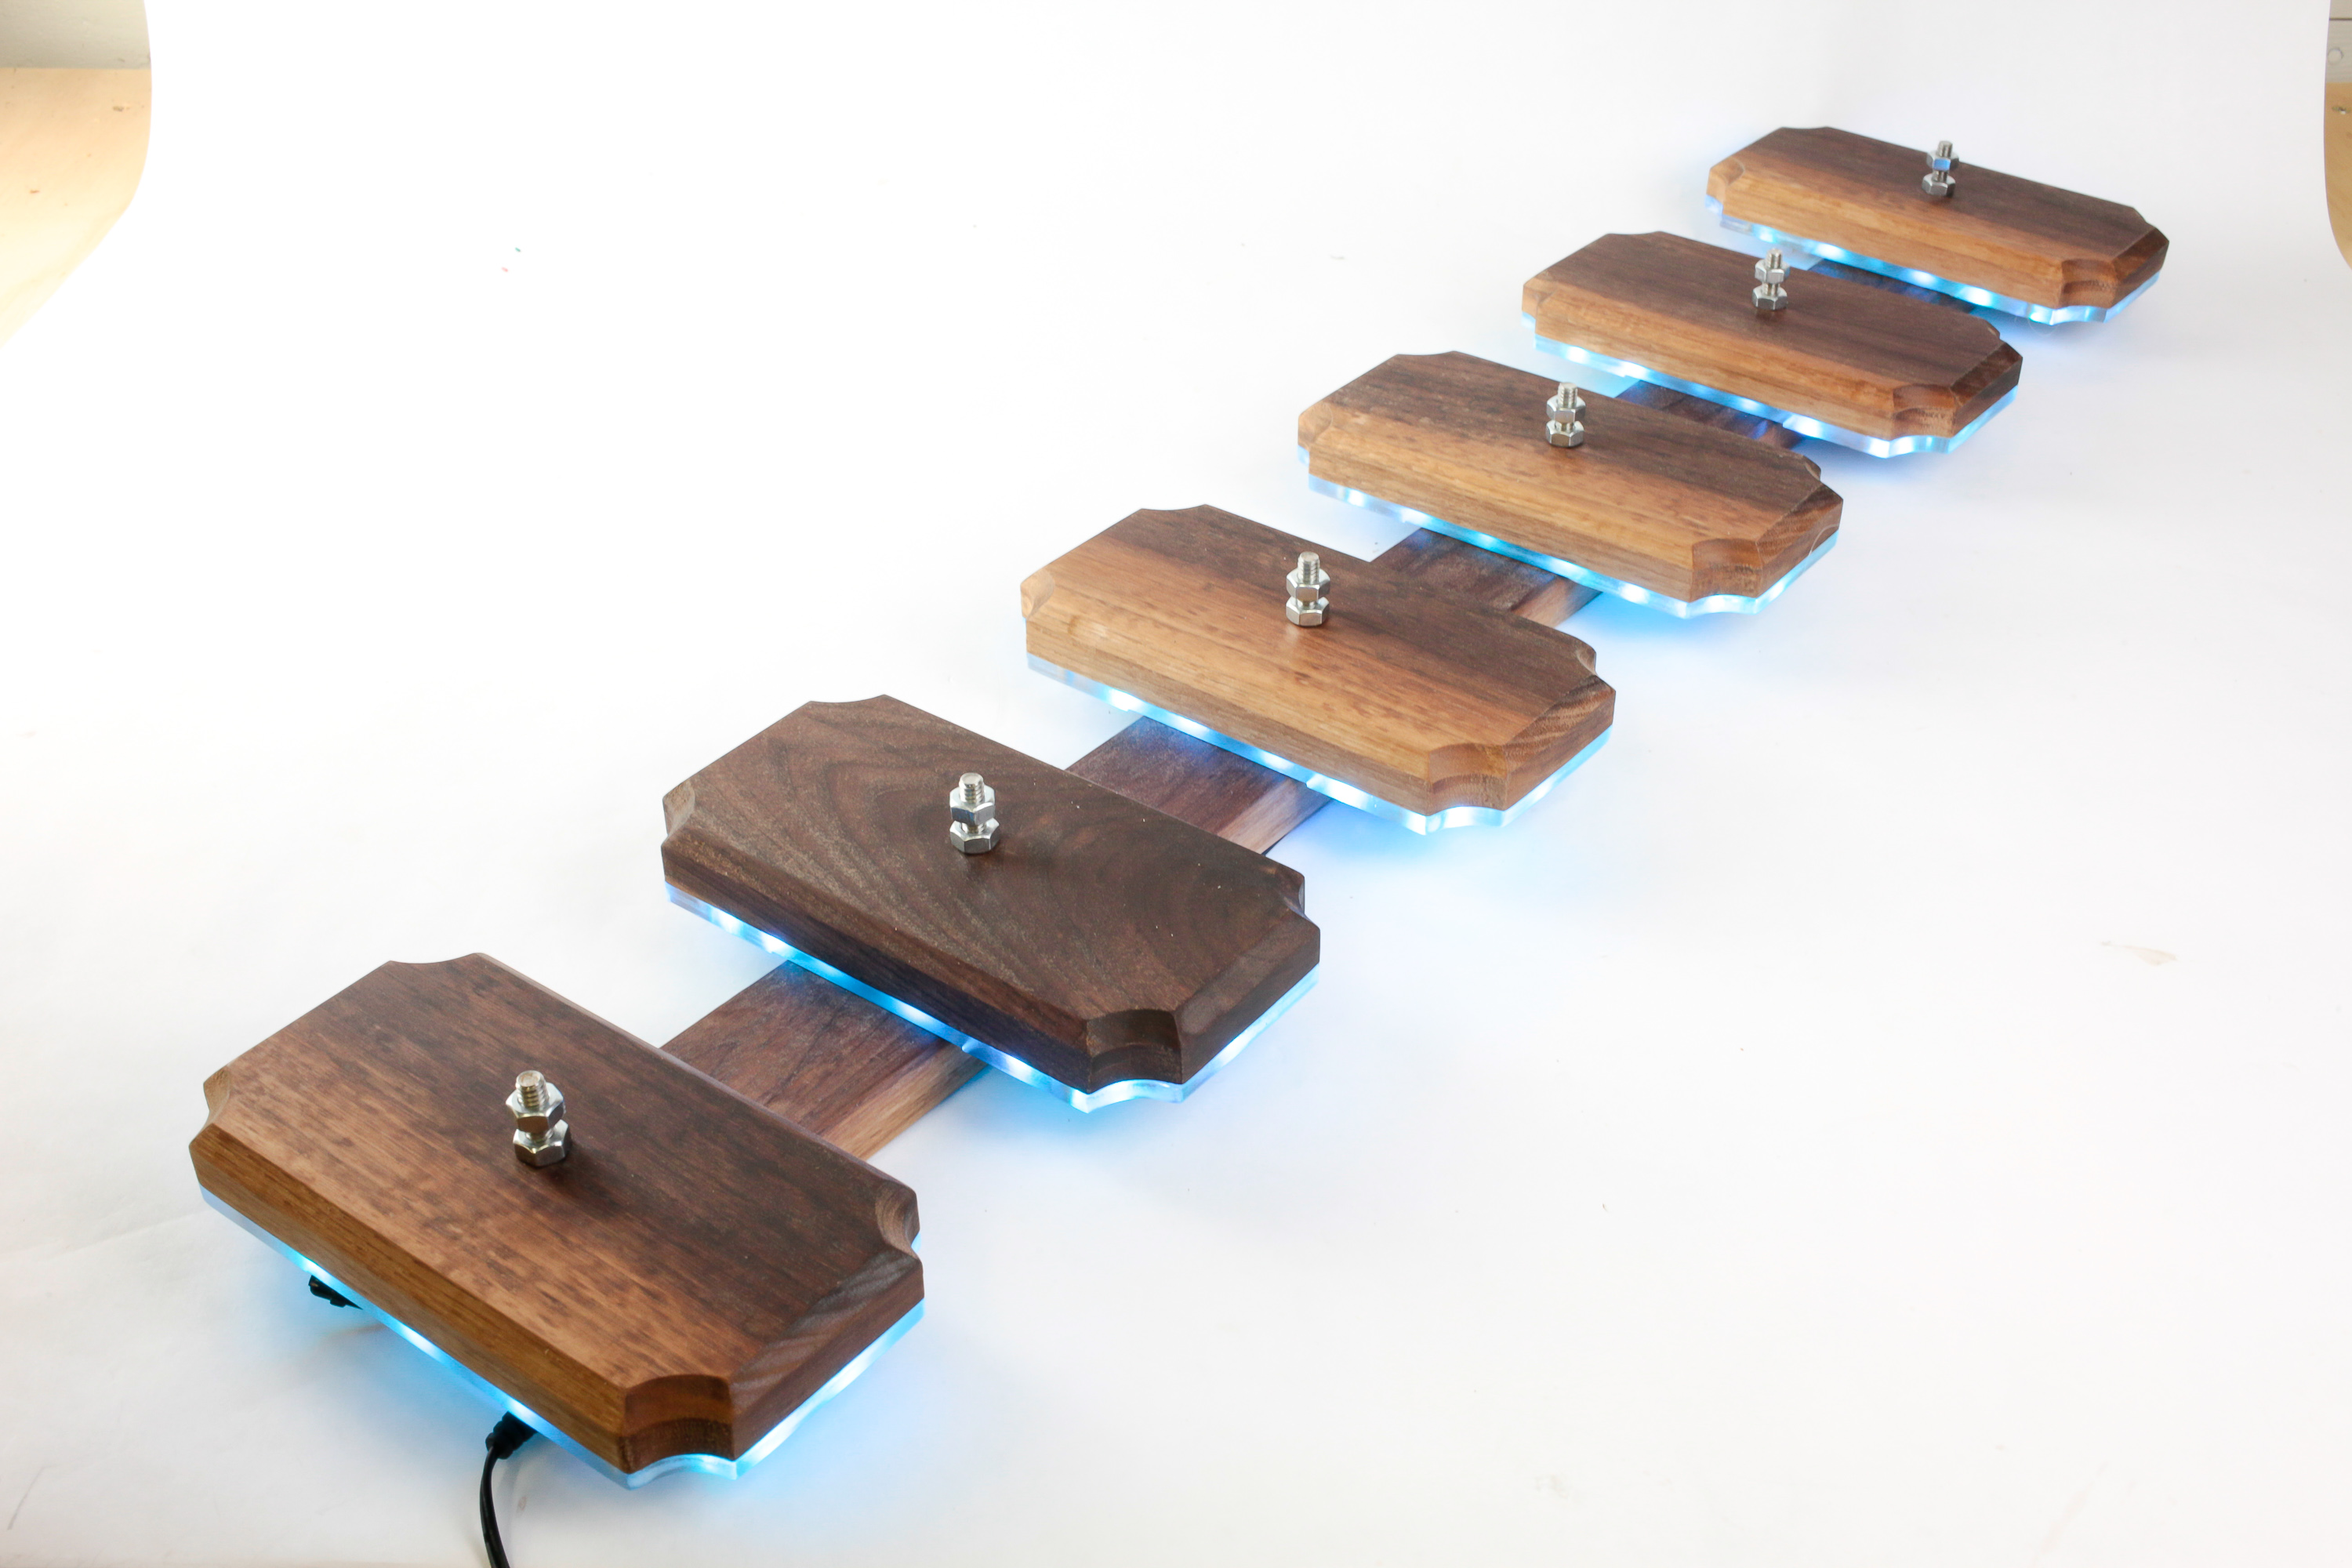
Here are the three parts of the display I carved on the Lead CNC. The design is very simple, with a single bolt pushed through the rear of the display back holding on each lighted panel piece with a lock nut. All wiring to the led strips and the controller run through a pocket channel in the rear.
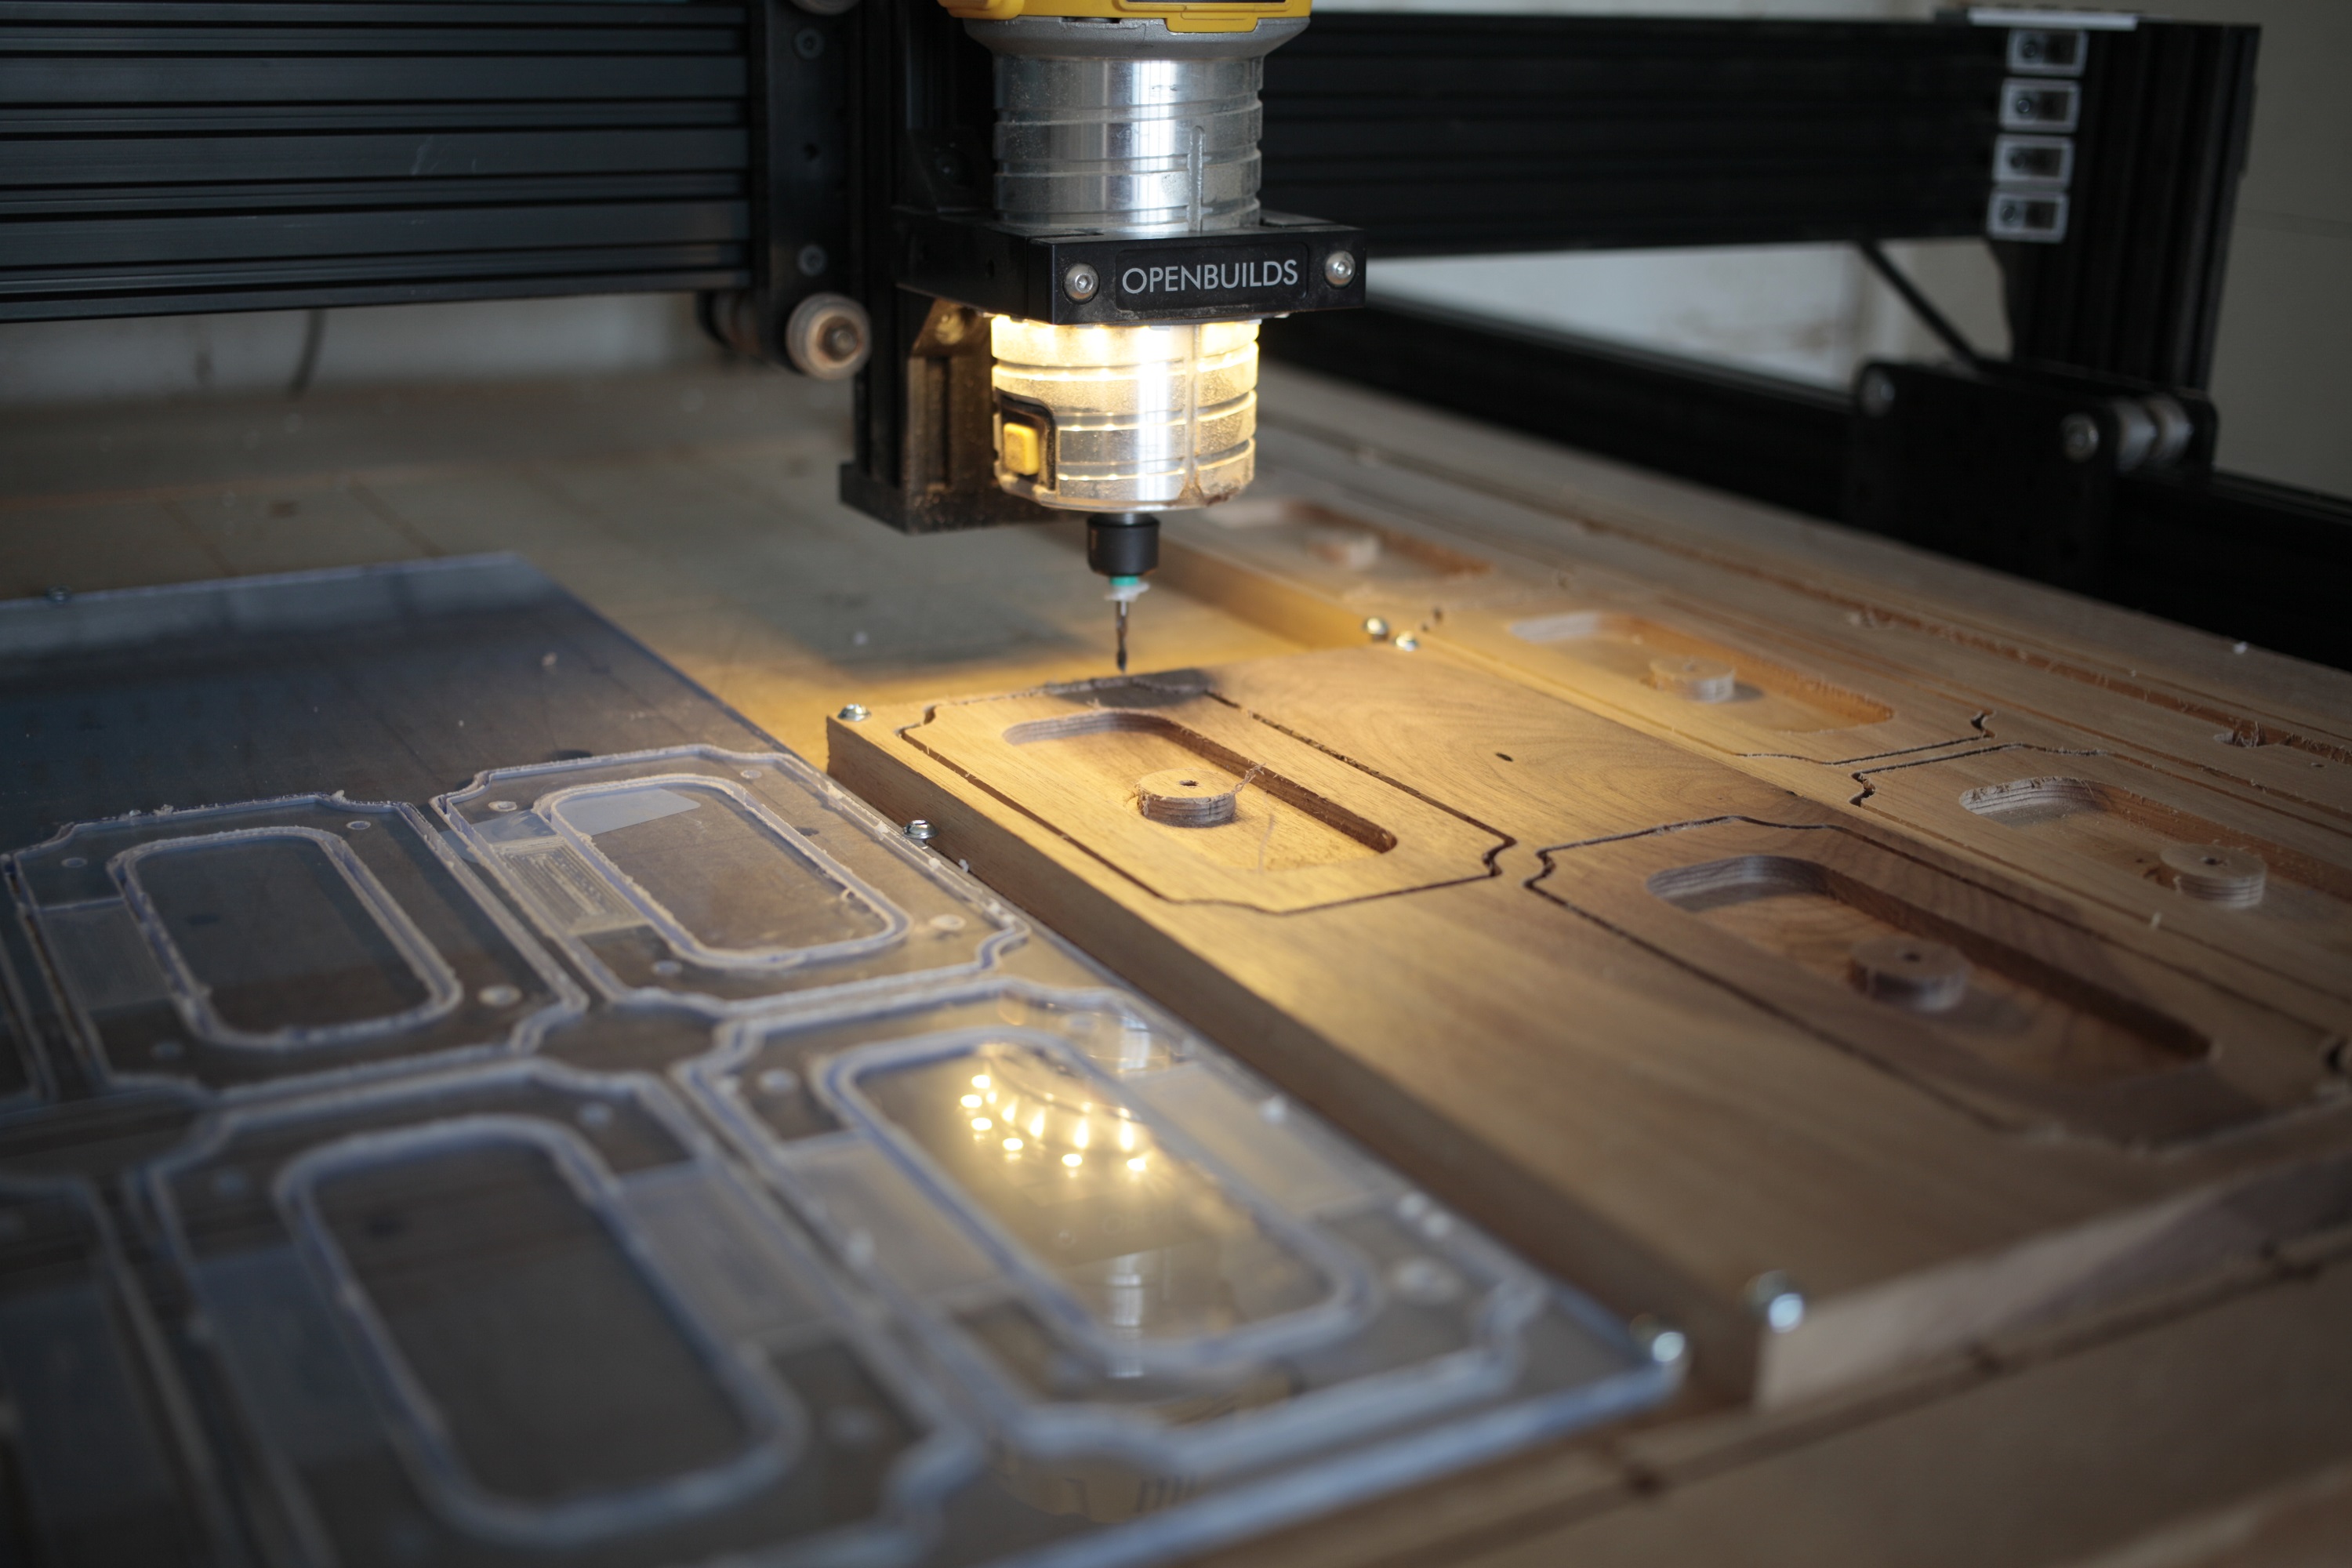
The walnut and acrylic were both carved with a 1/8" upcut bit. I was still figuring out my wasteboard design when I carved these, so the situation in these photos is a little rough. I've since got a more proper setup going.
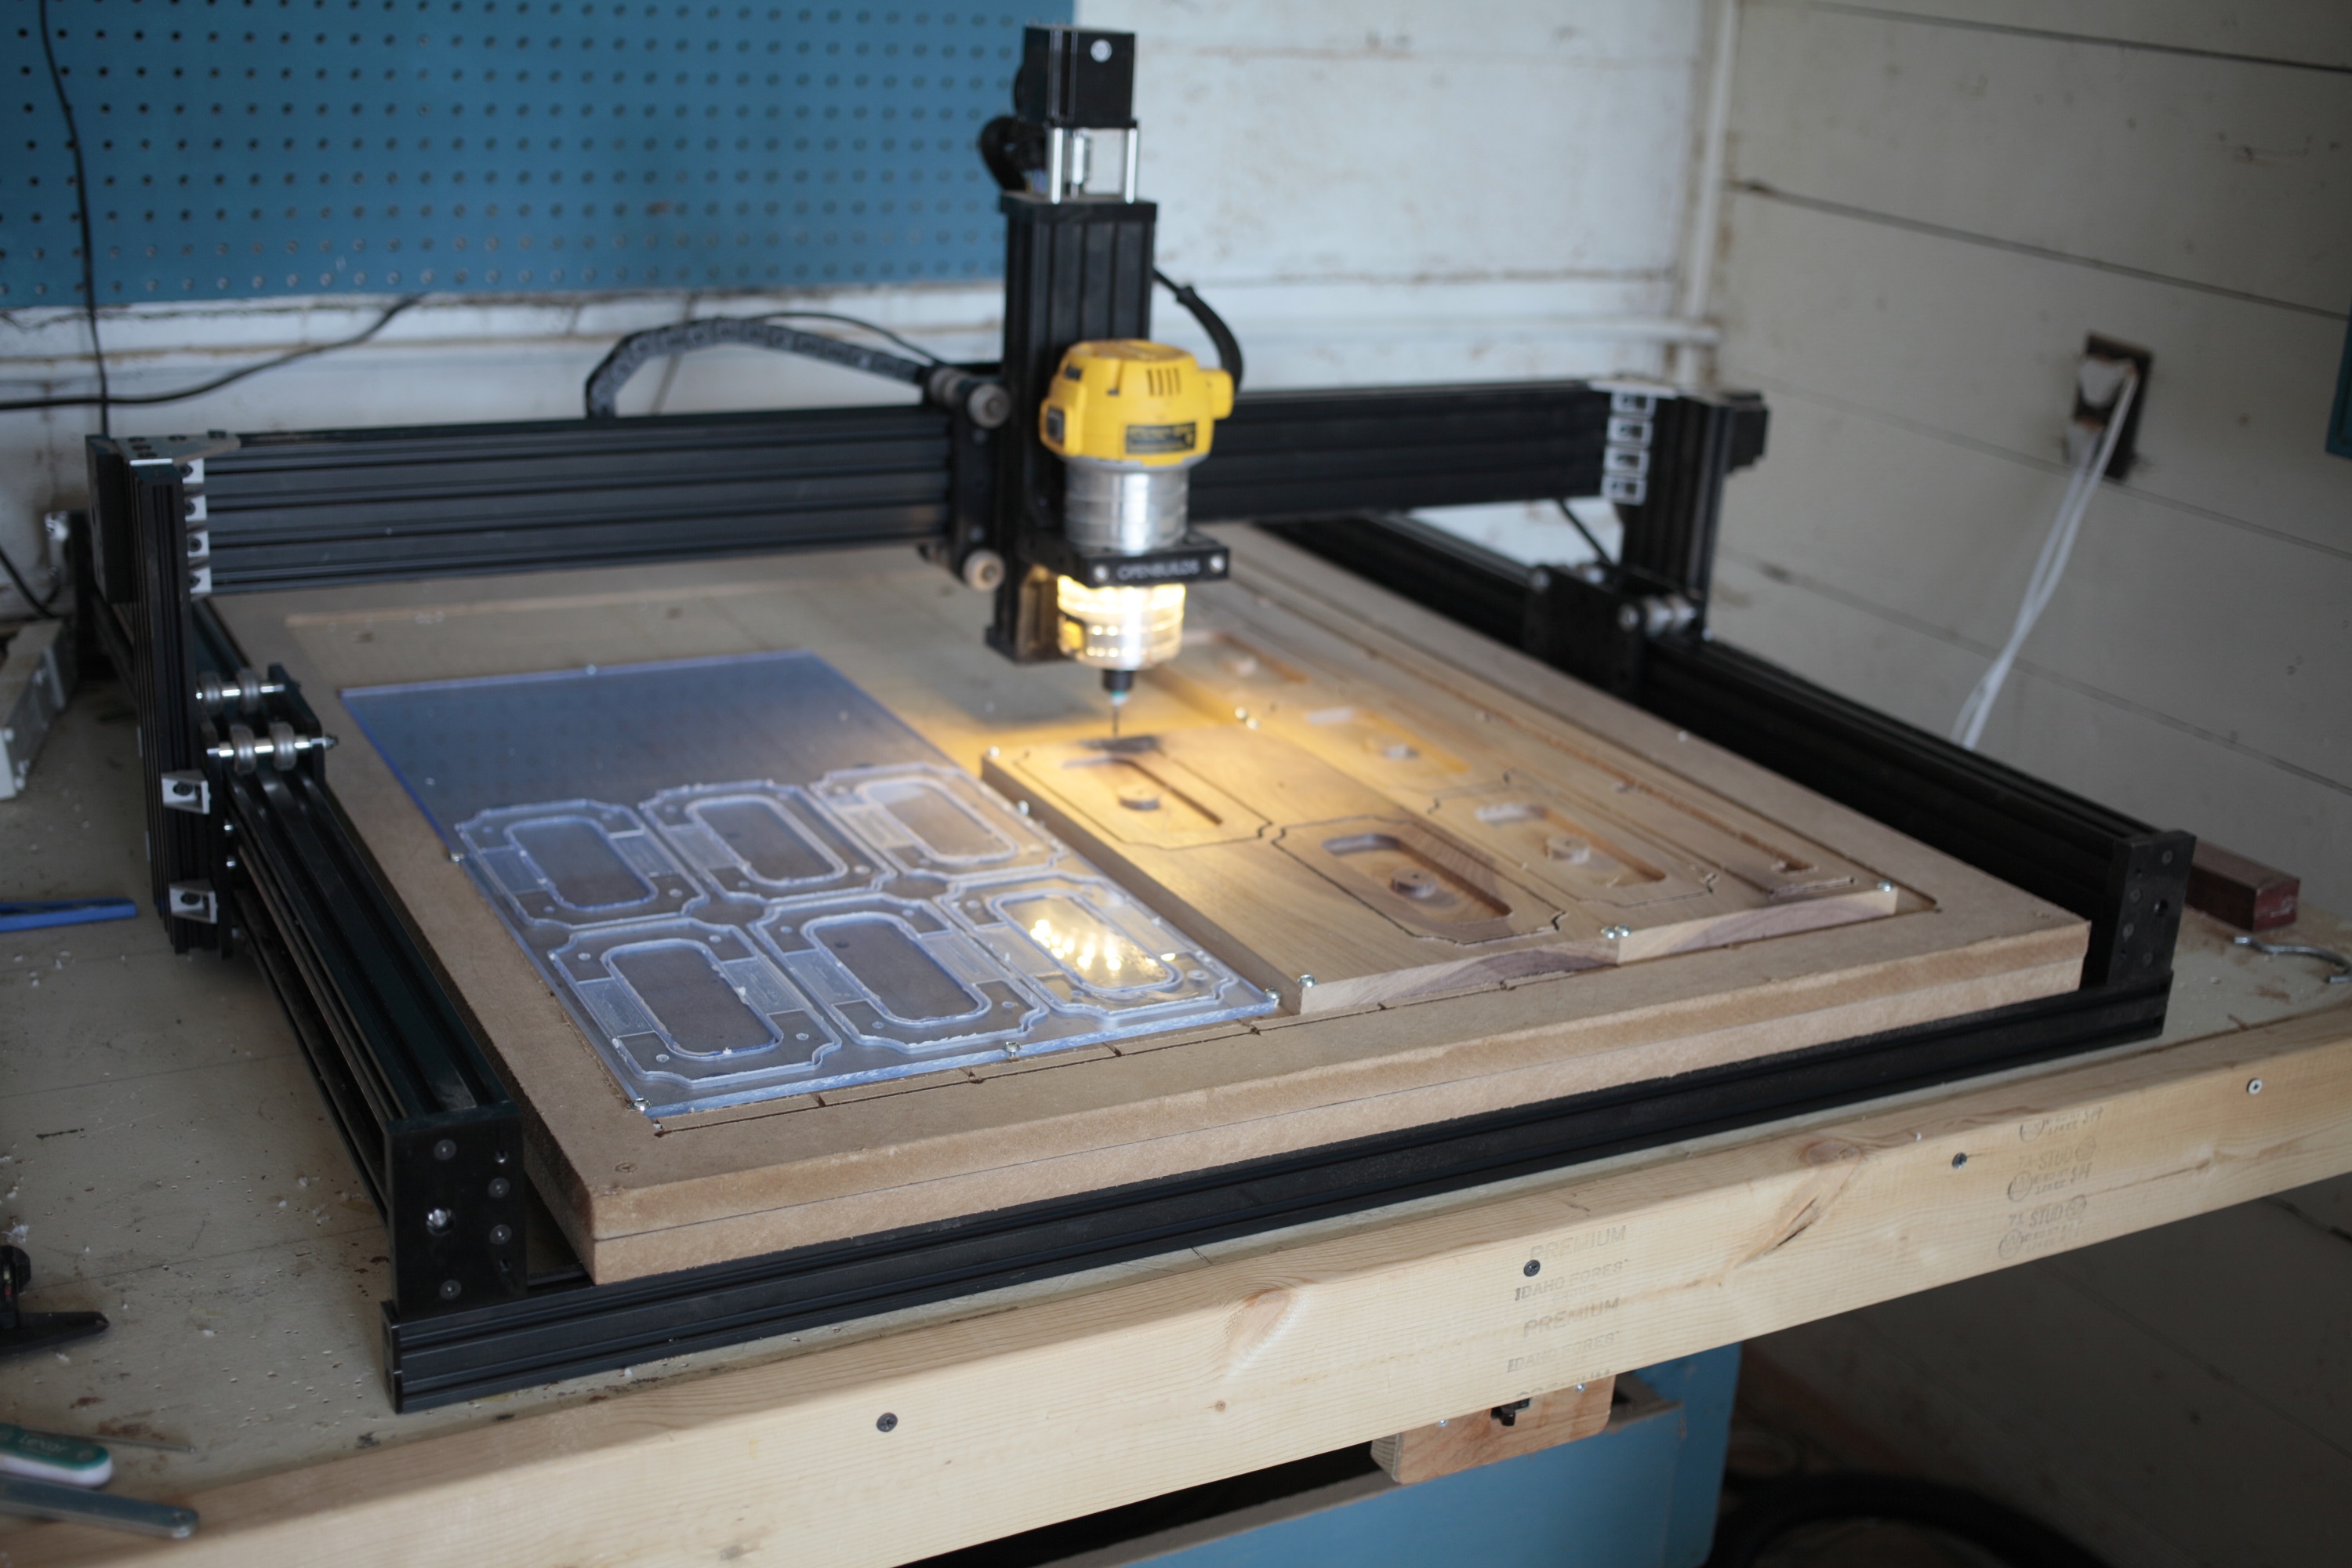
The large work surface was able to hold all my materials at once, which saved me a little bit of setup time.
With the carves completed, I had all the parts that I needed for the build including an RGB LED strip with controller, 4 strand wire, 1/4" bolts and nuts, and drywall mounting hardware.
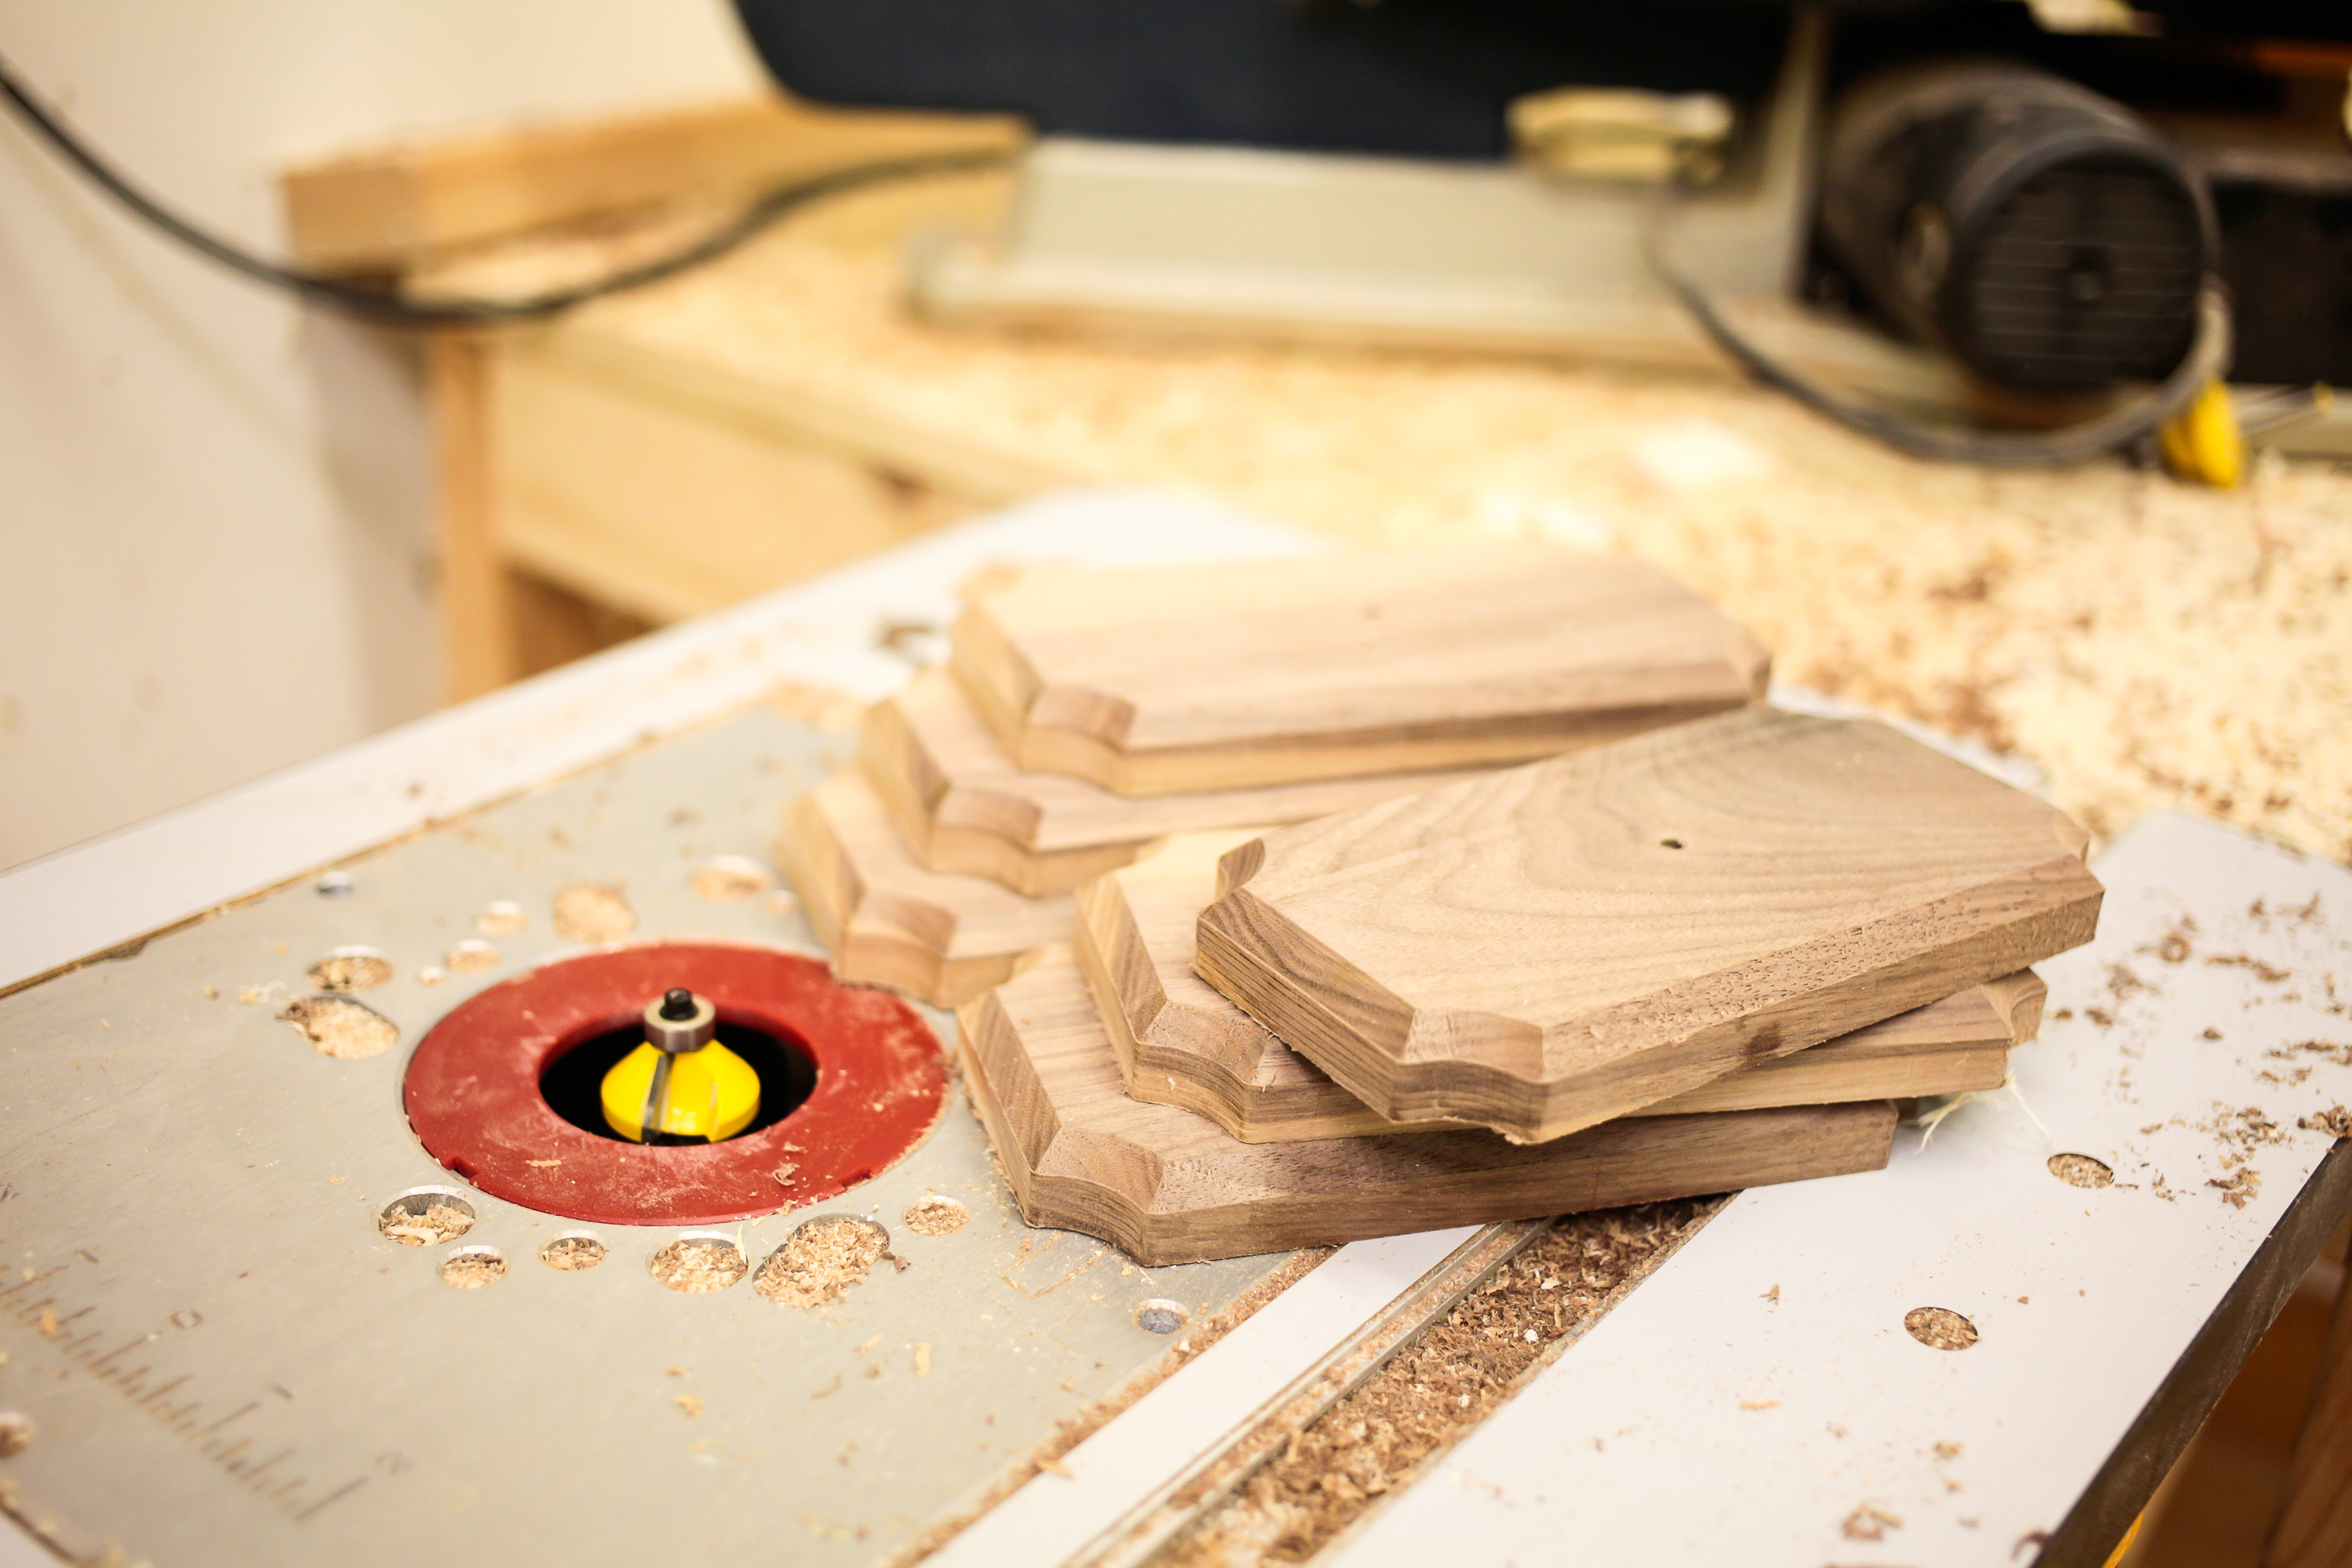
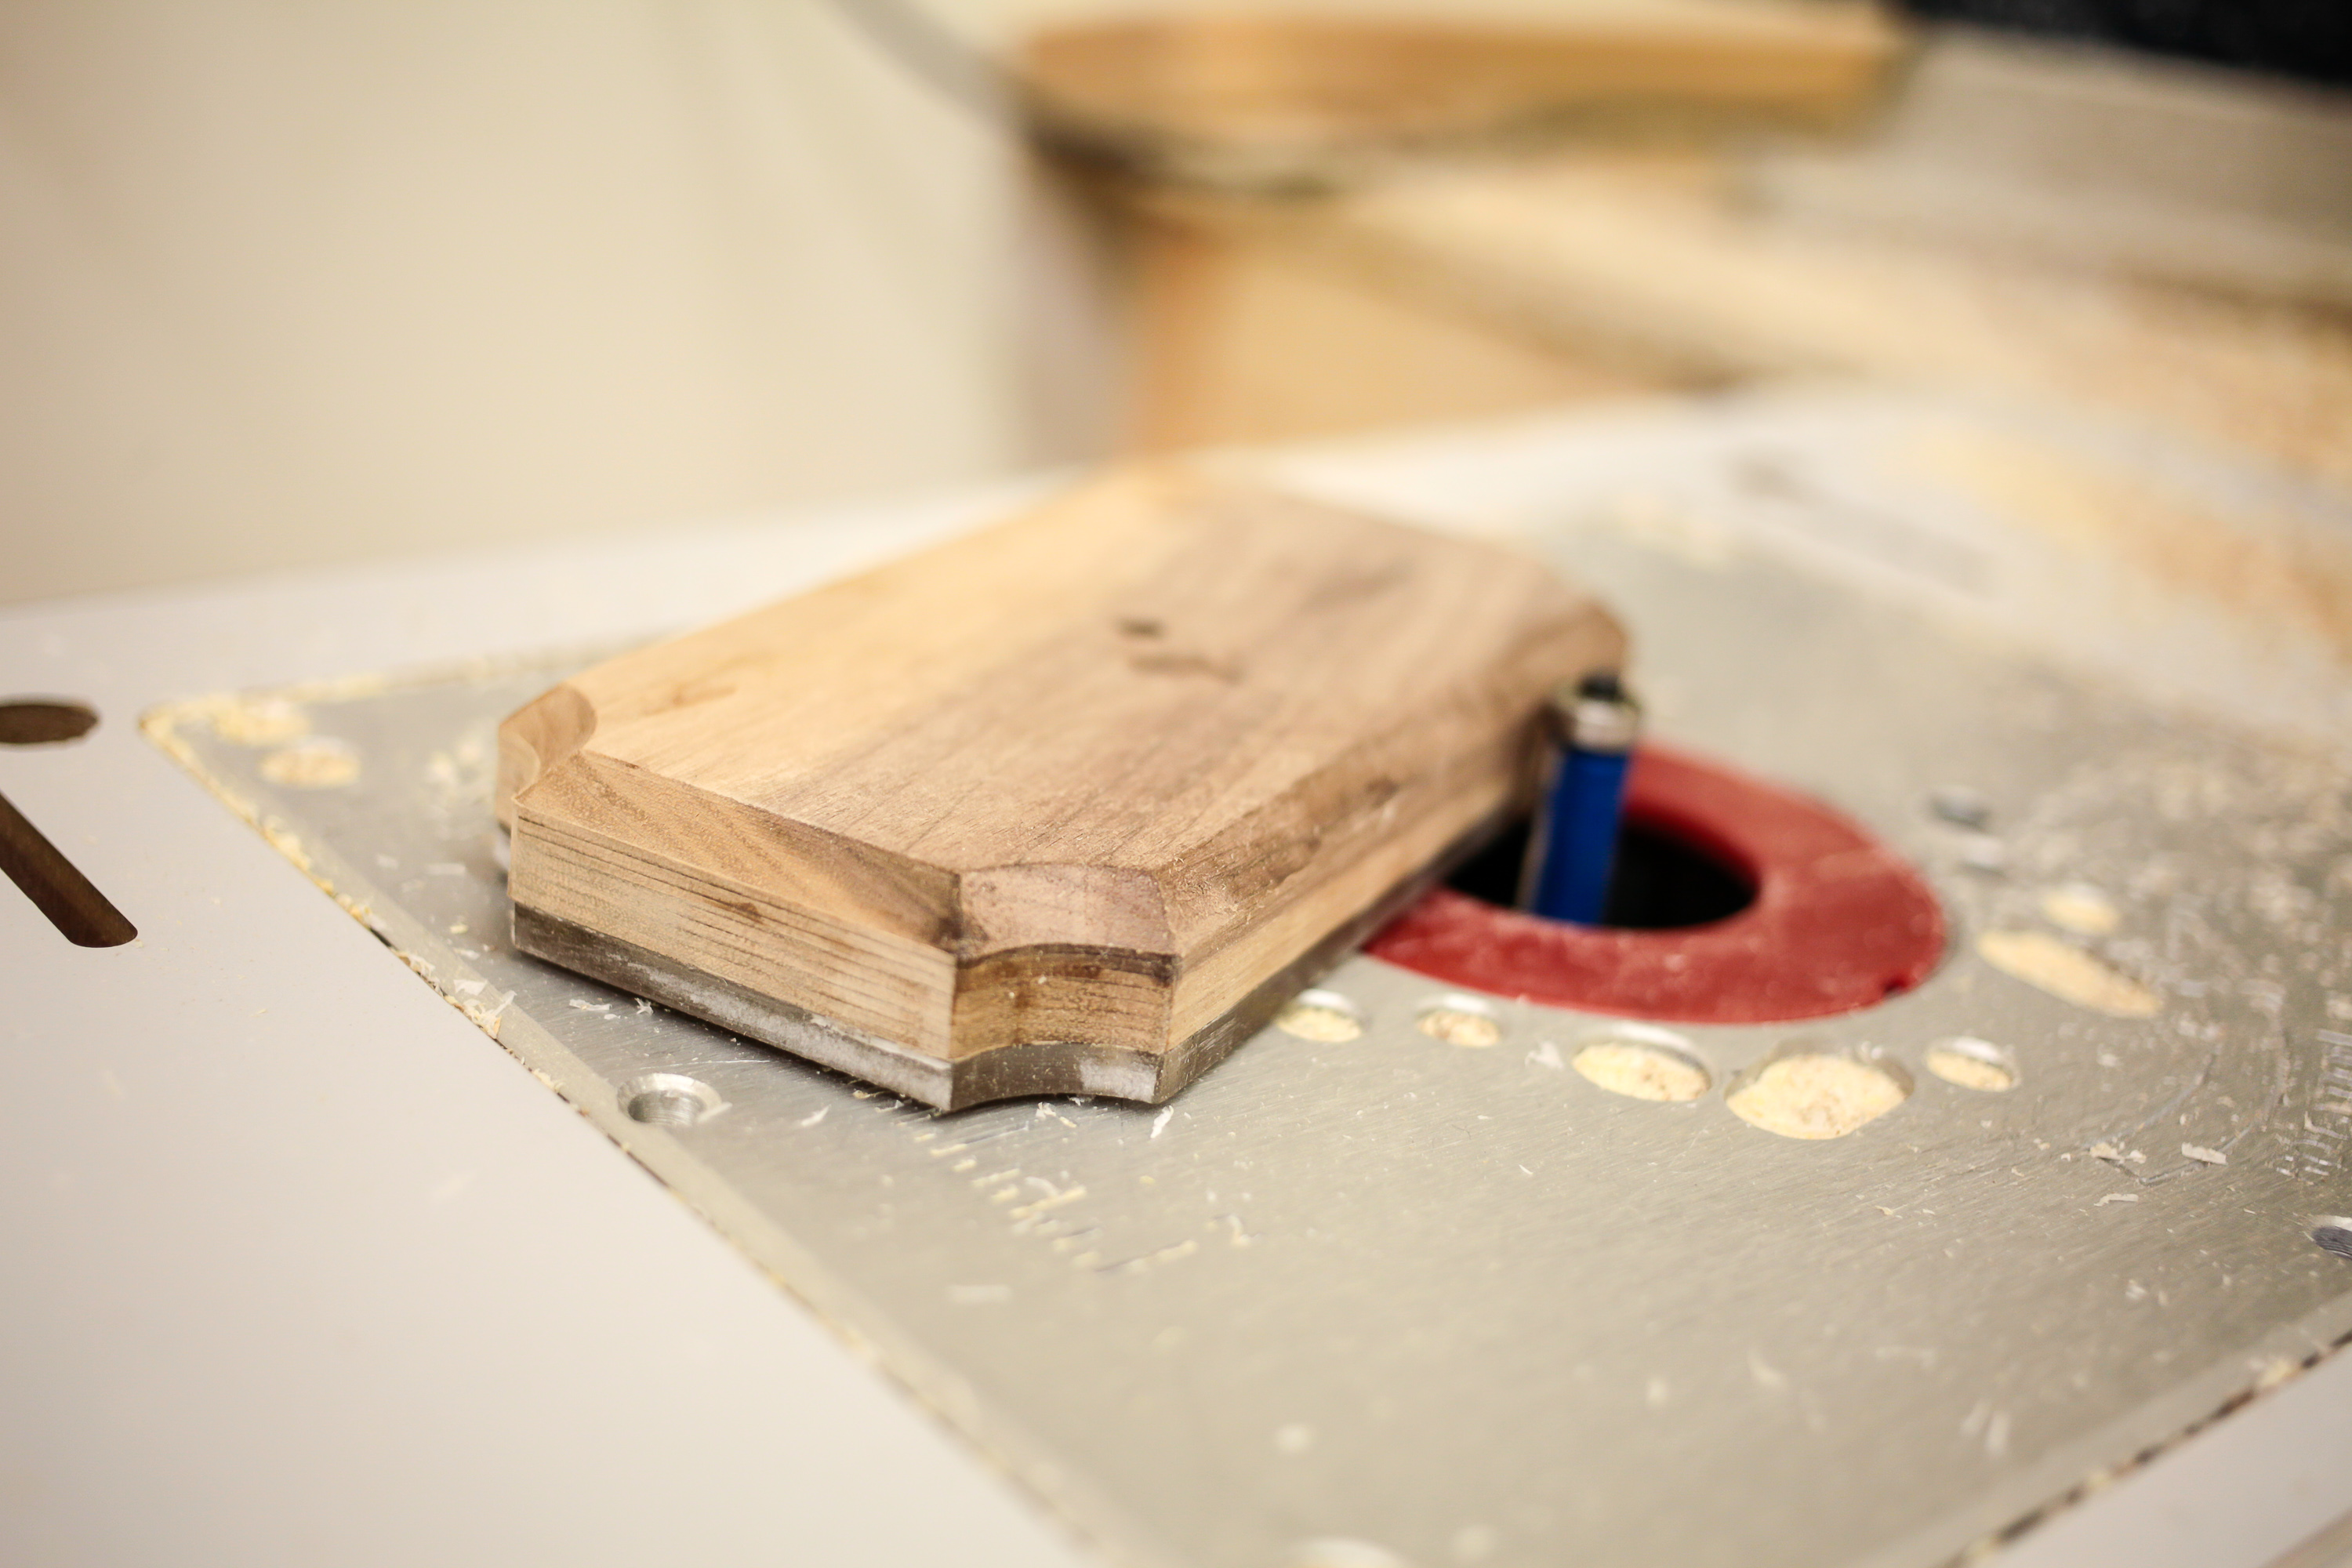
I started by adding a 45 degree chamfer to each of the walnut backplates on my router table.
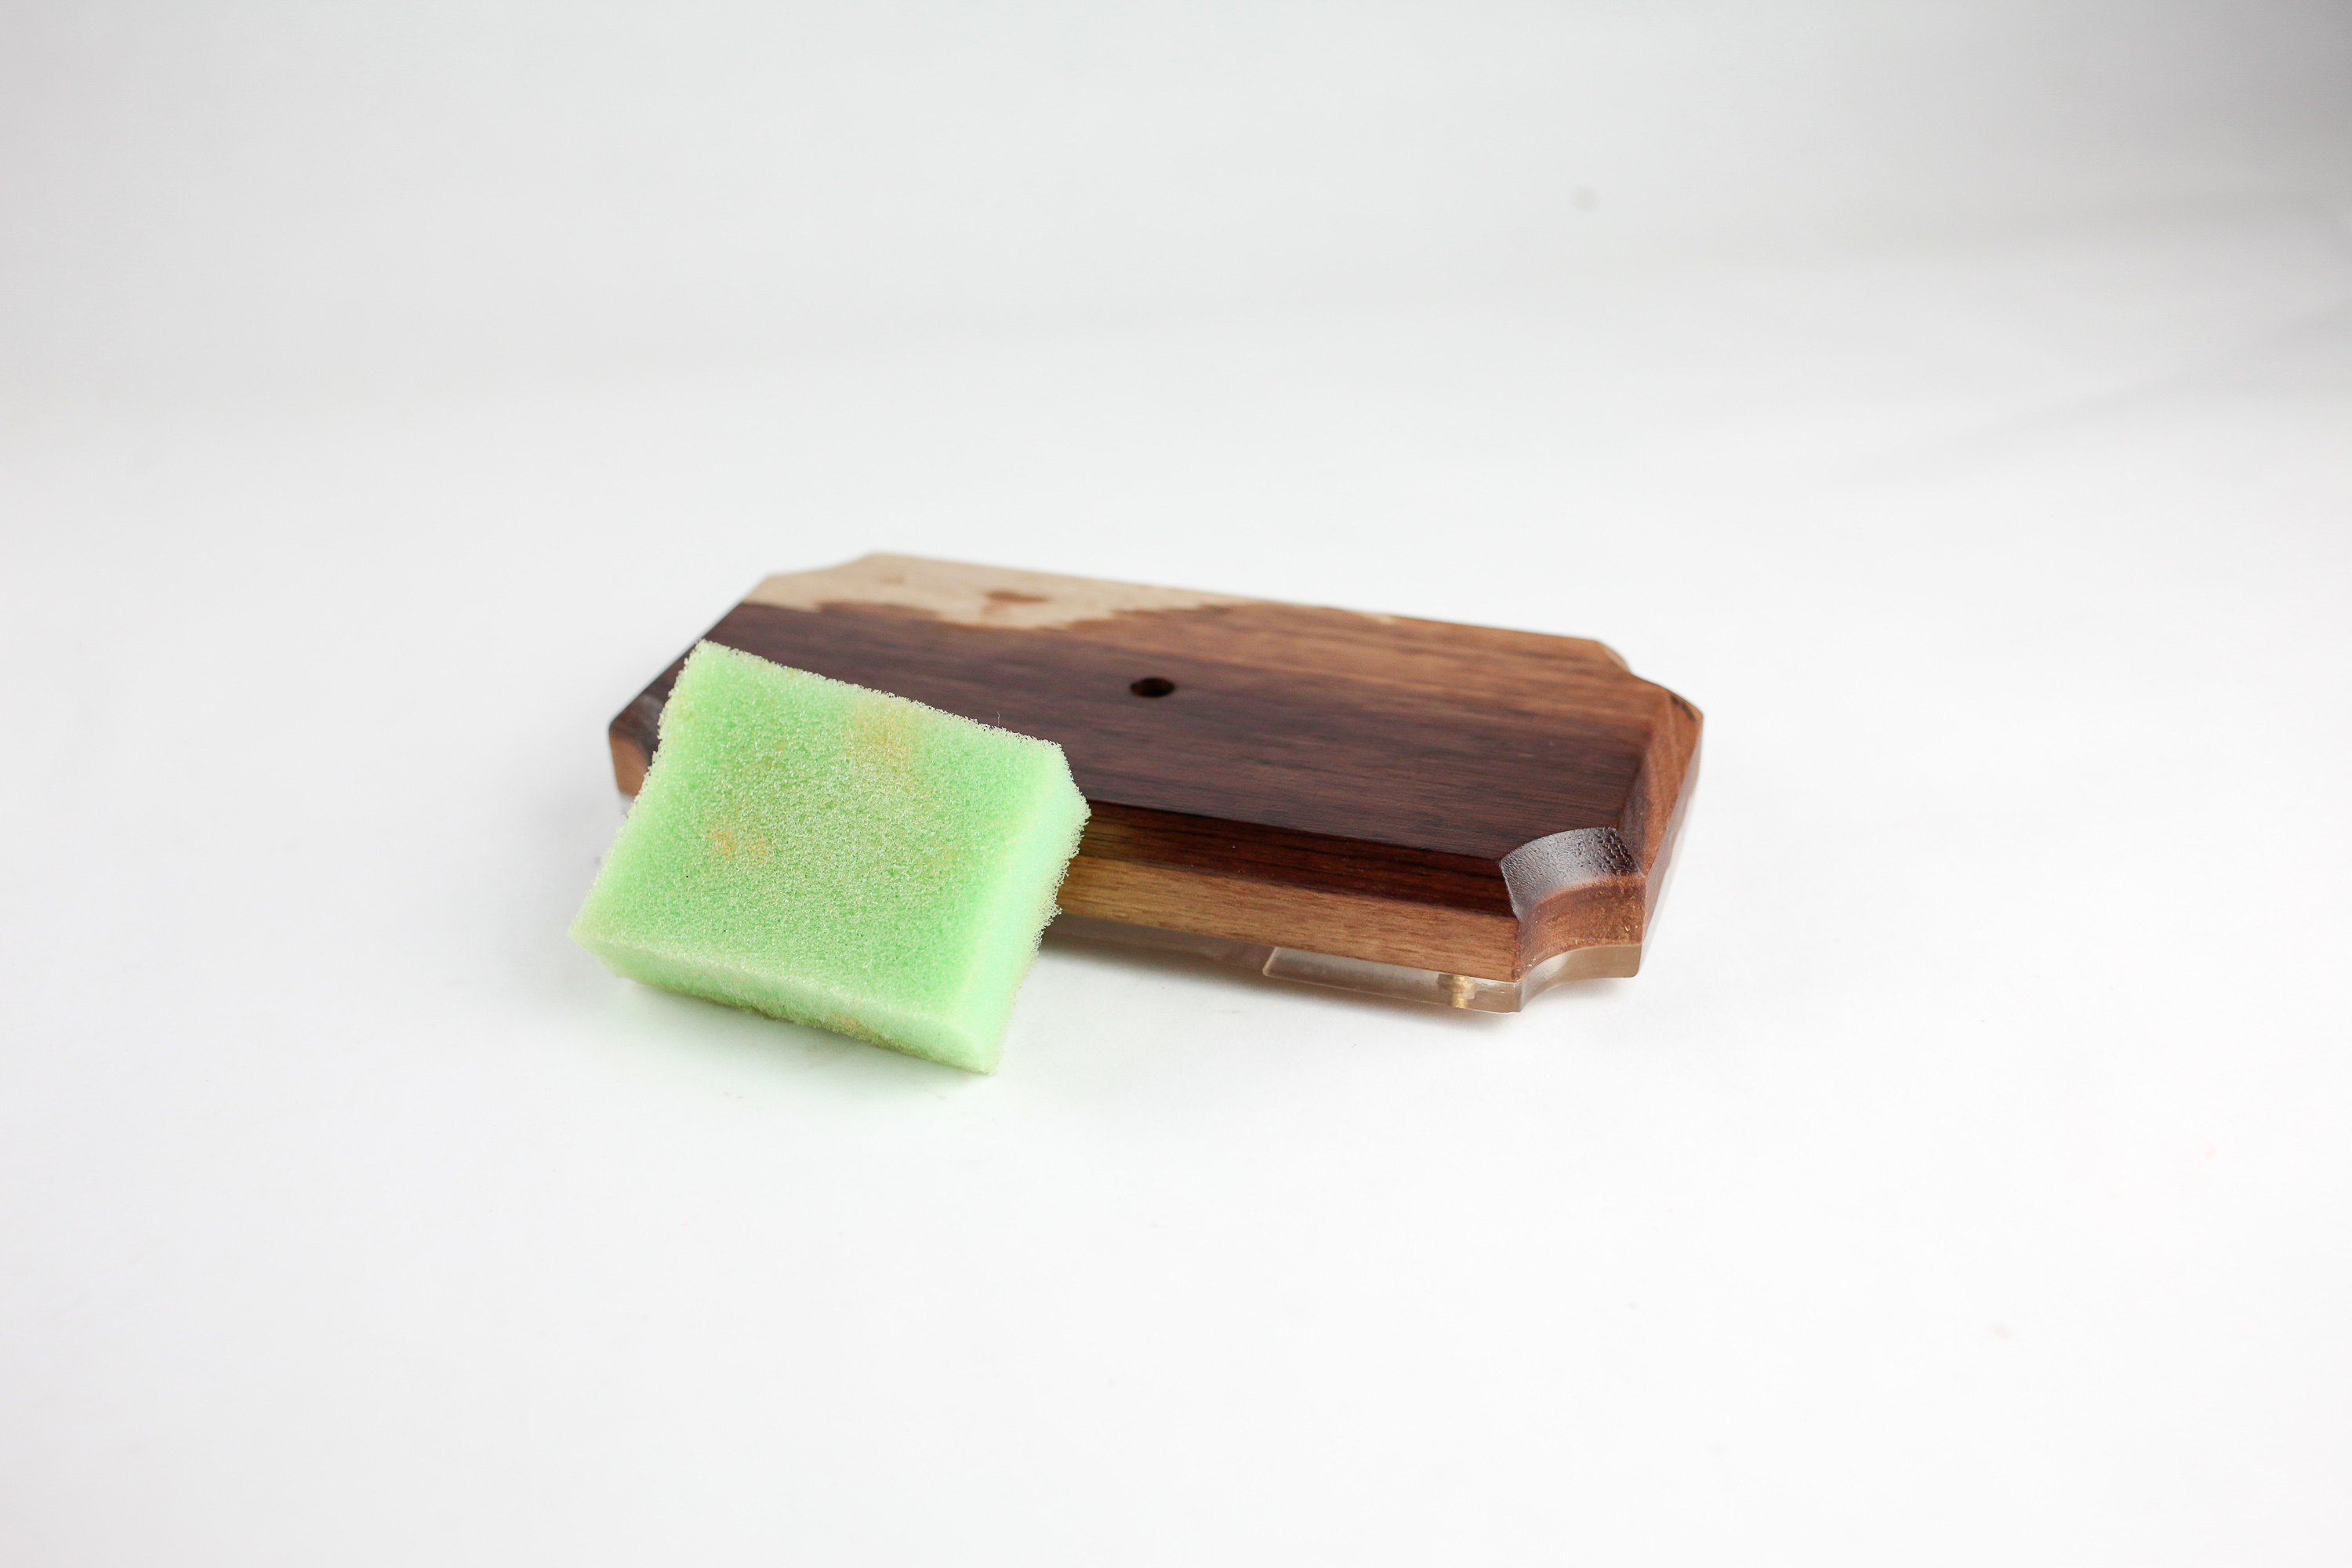
Next I attached the acrylic to each piece with epoxy and small wood screws. The wood screws were probably unnecessary in retrospect, but they didn't hurt anything.
I used an edge trimming bit to clean off the epoxy and any overhanging acrylic. I could have made life a little easier on myself by offseting the acrylic cutting path outwork slightly, thus avoiding the worry of any parts of the acrylic being narrower than the wood. The result was still good enough that I was satisfied though.
Next I cut 6 equal lengths of LED strips.
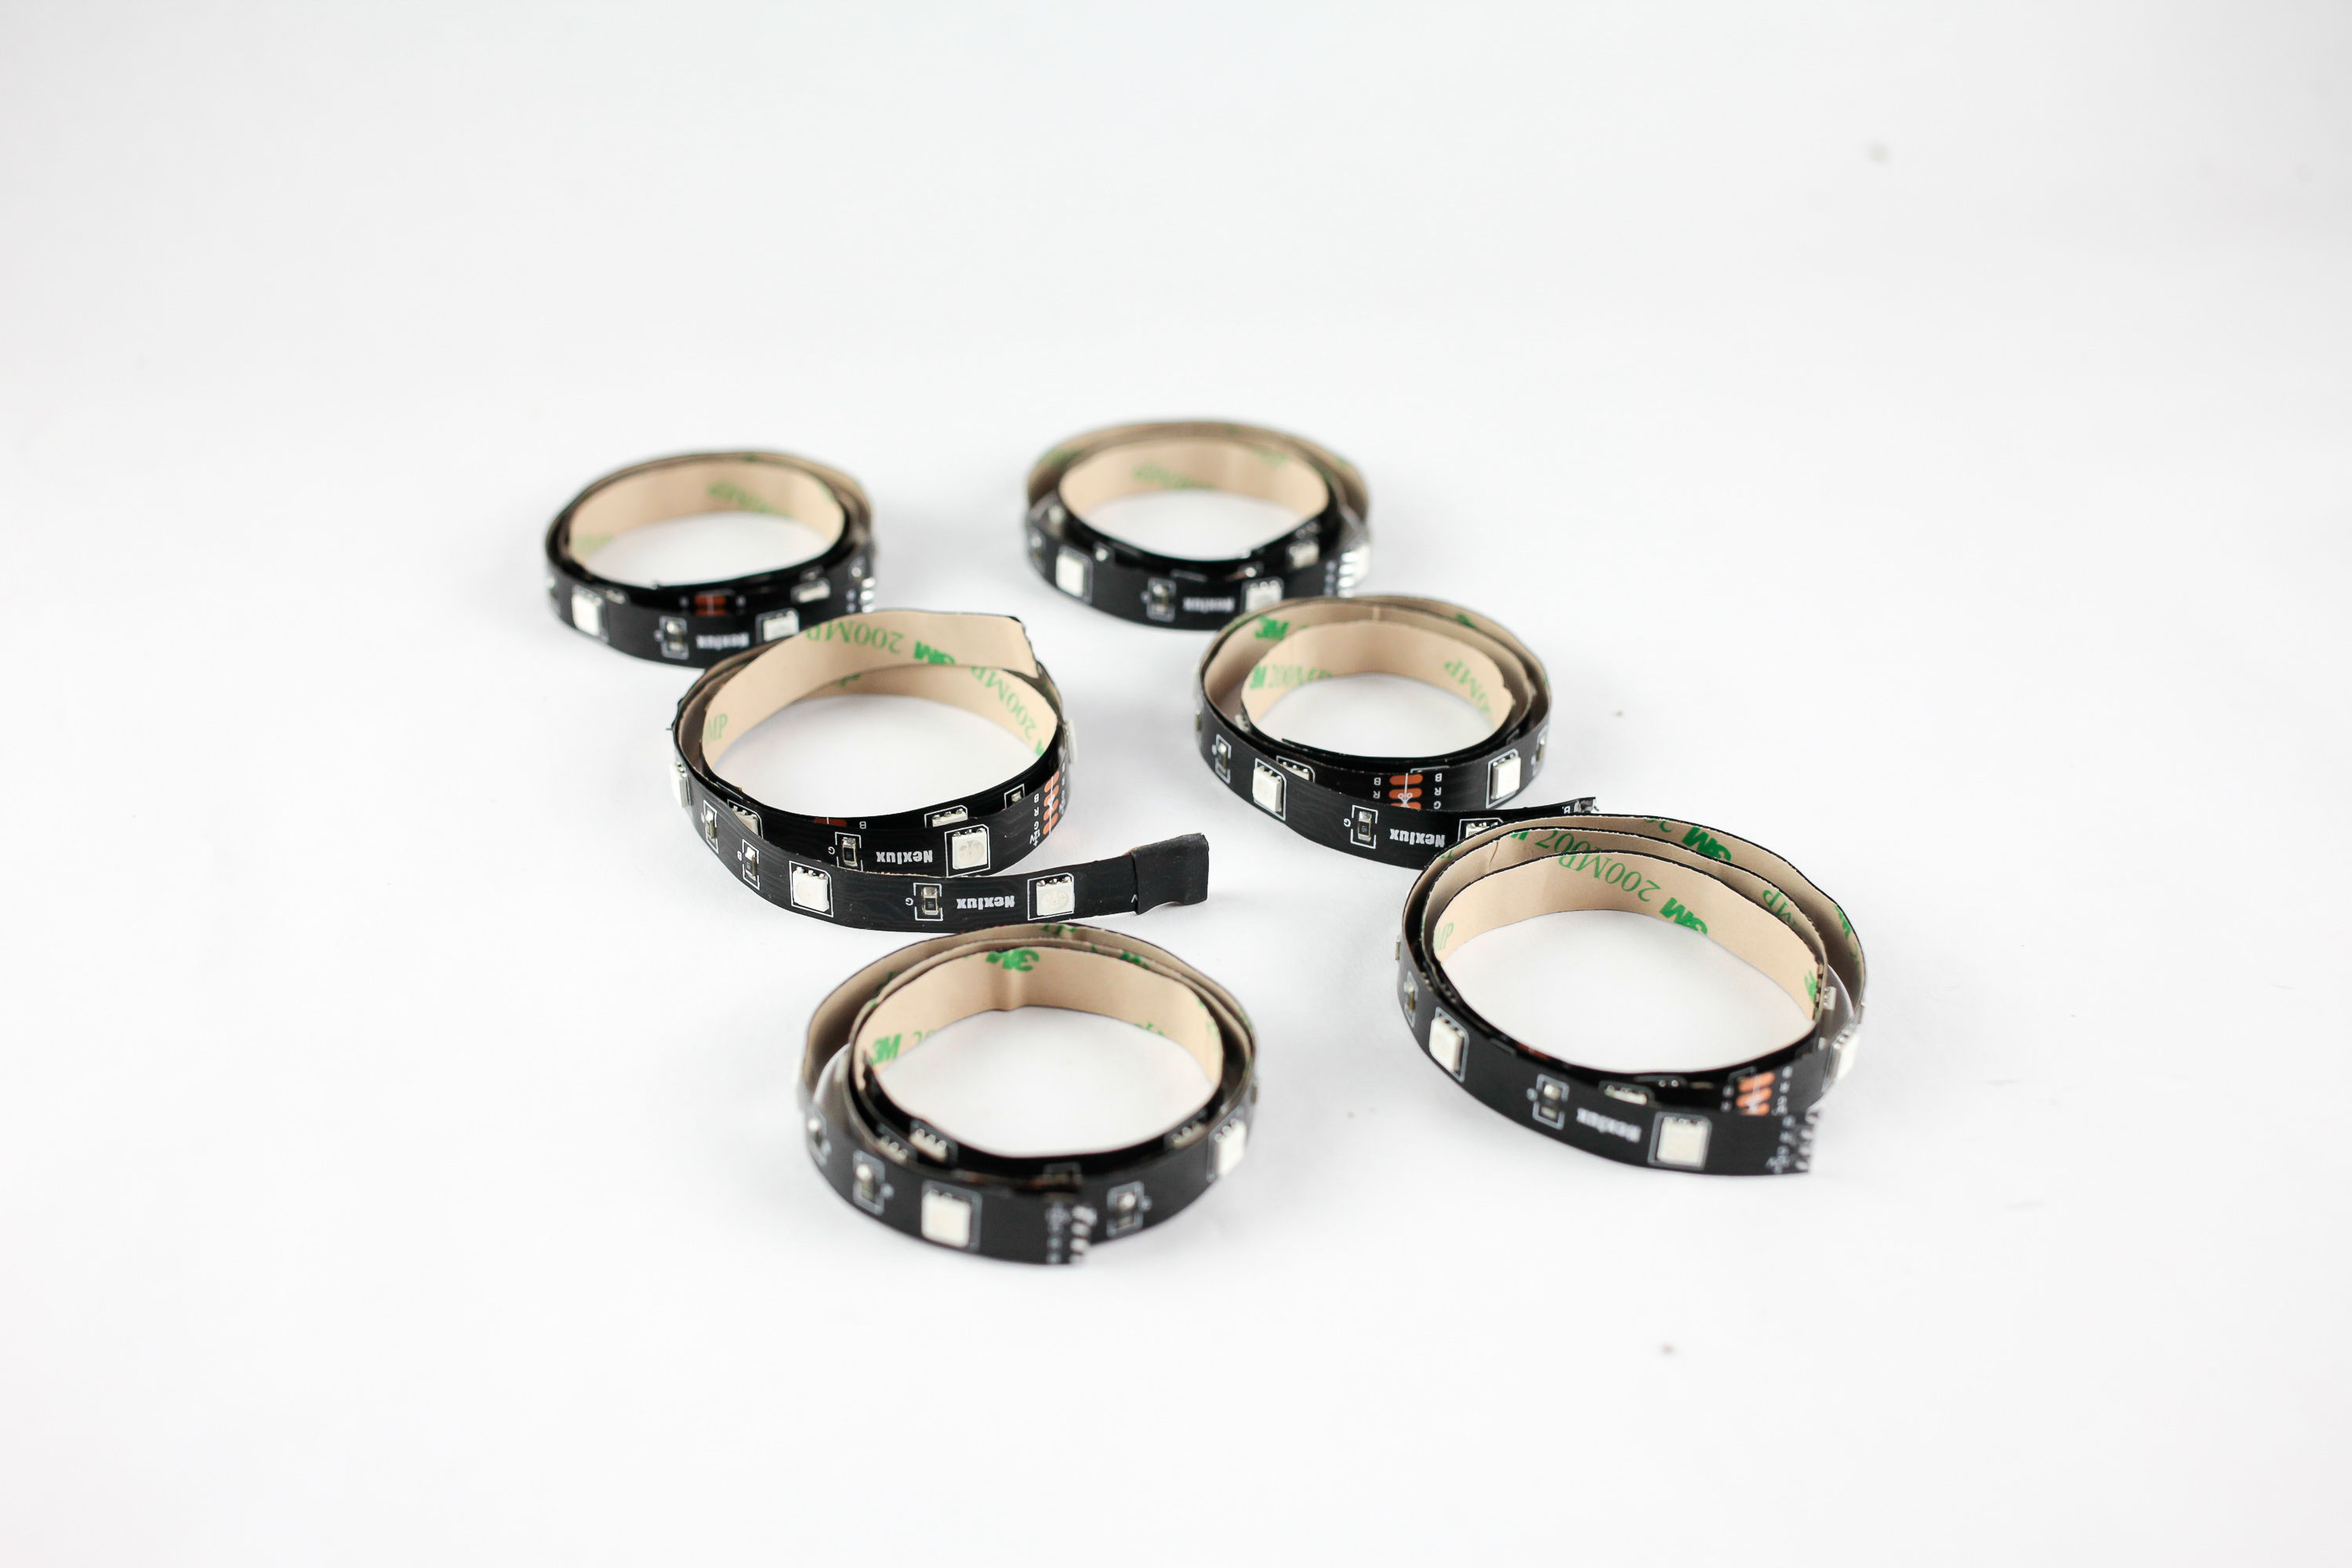
I cut the strips at each of these soldered connections. This gave me solder pads to start with, which saved me a tiny bit of extra effort.
While working on the electronics, I decided to roughly finish one of the pieces to get an idea of how everything was going to look while assembled. This was just a process of block sanding and a little patience.
I covered the whole piece including the acrylic in danish oil. Aside from protecting and giving the walnut a nice finish, it helped clear up the acrylic so that the light shone through stronger.
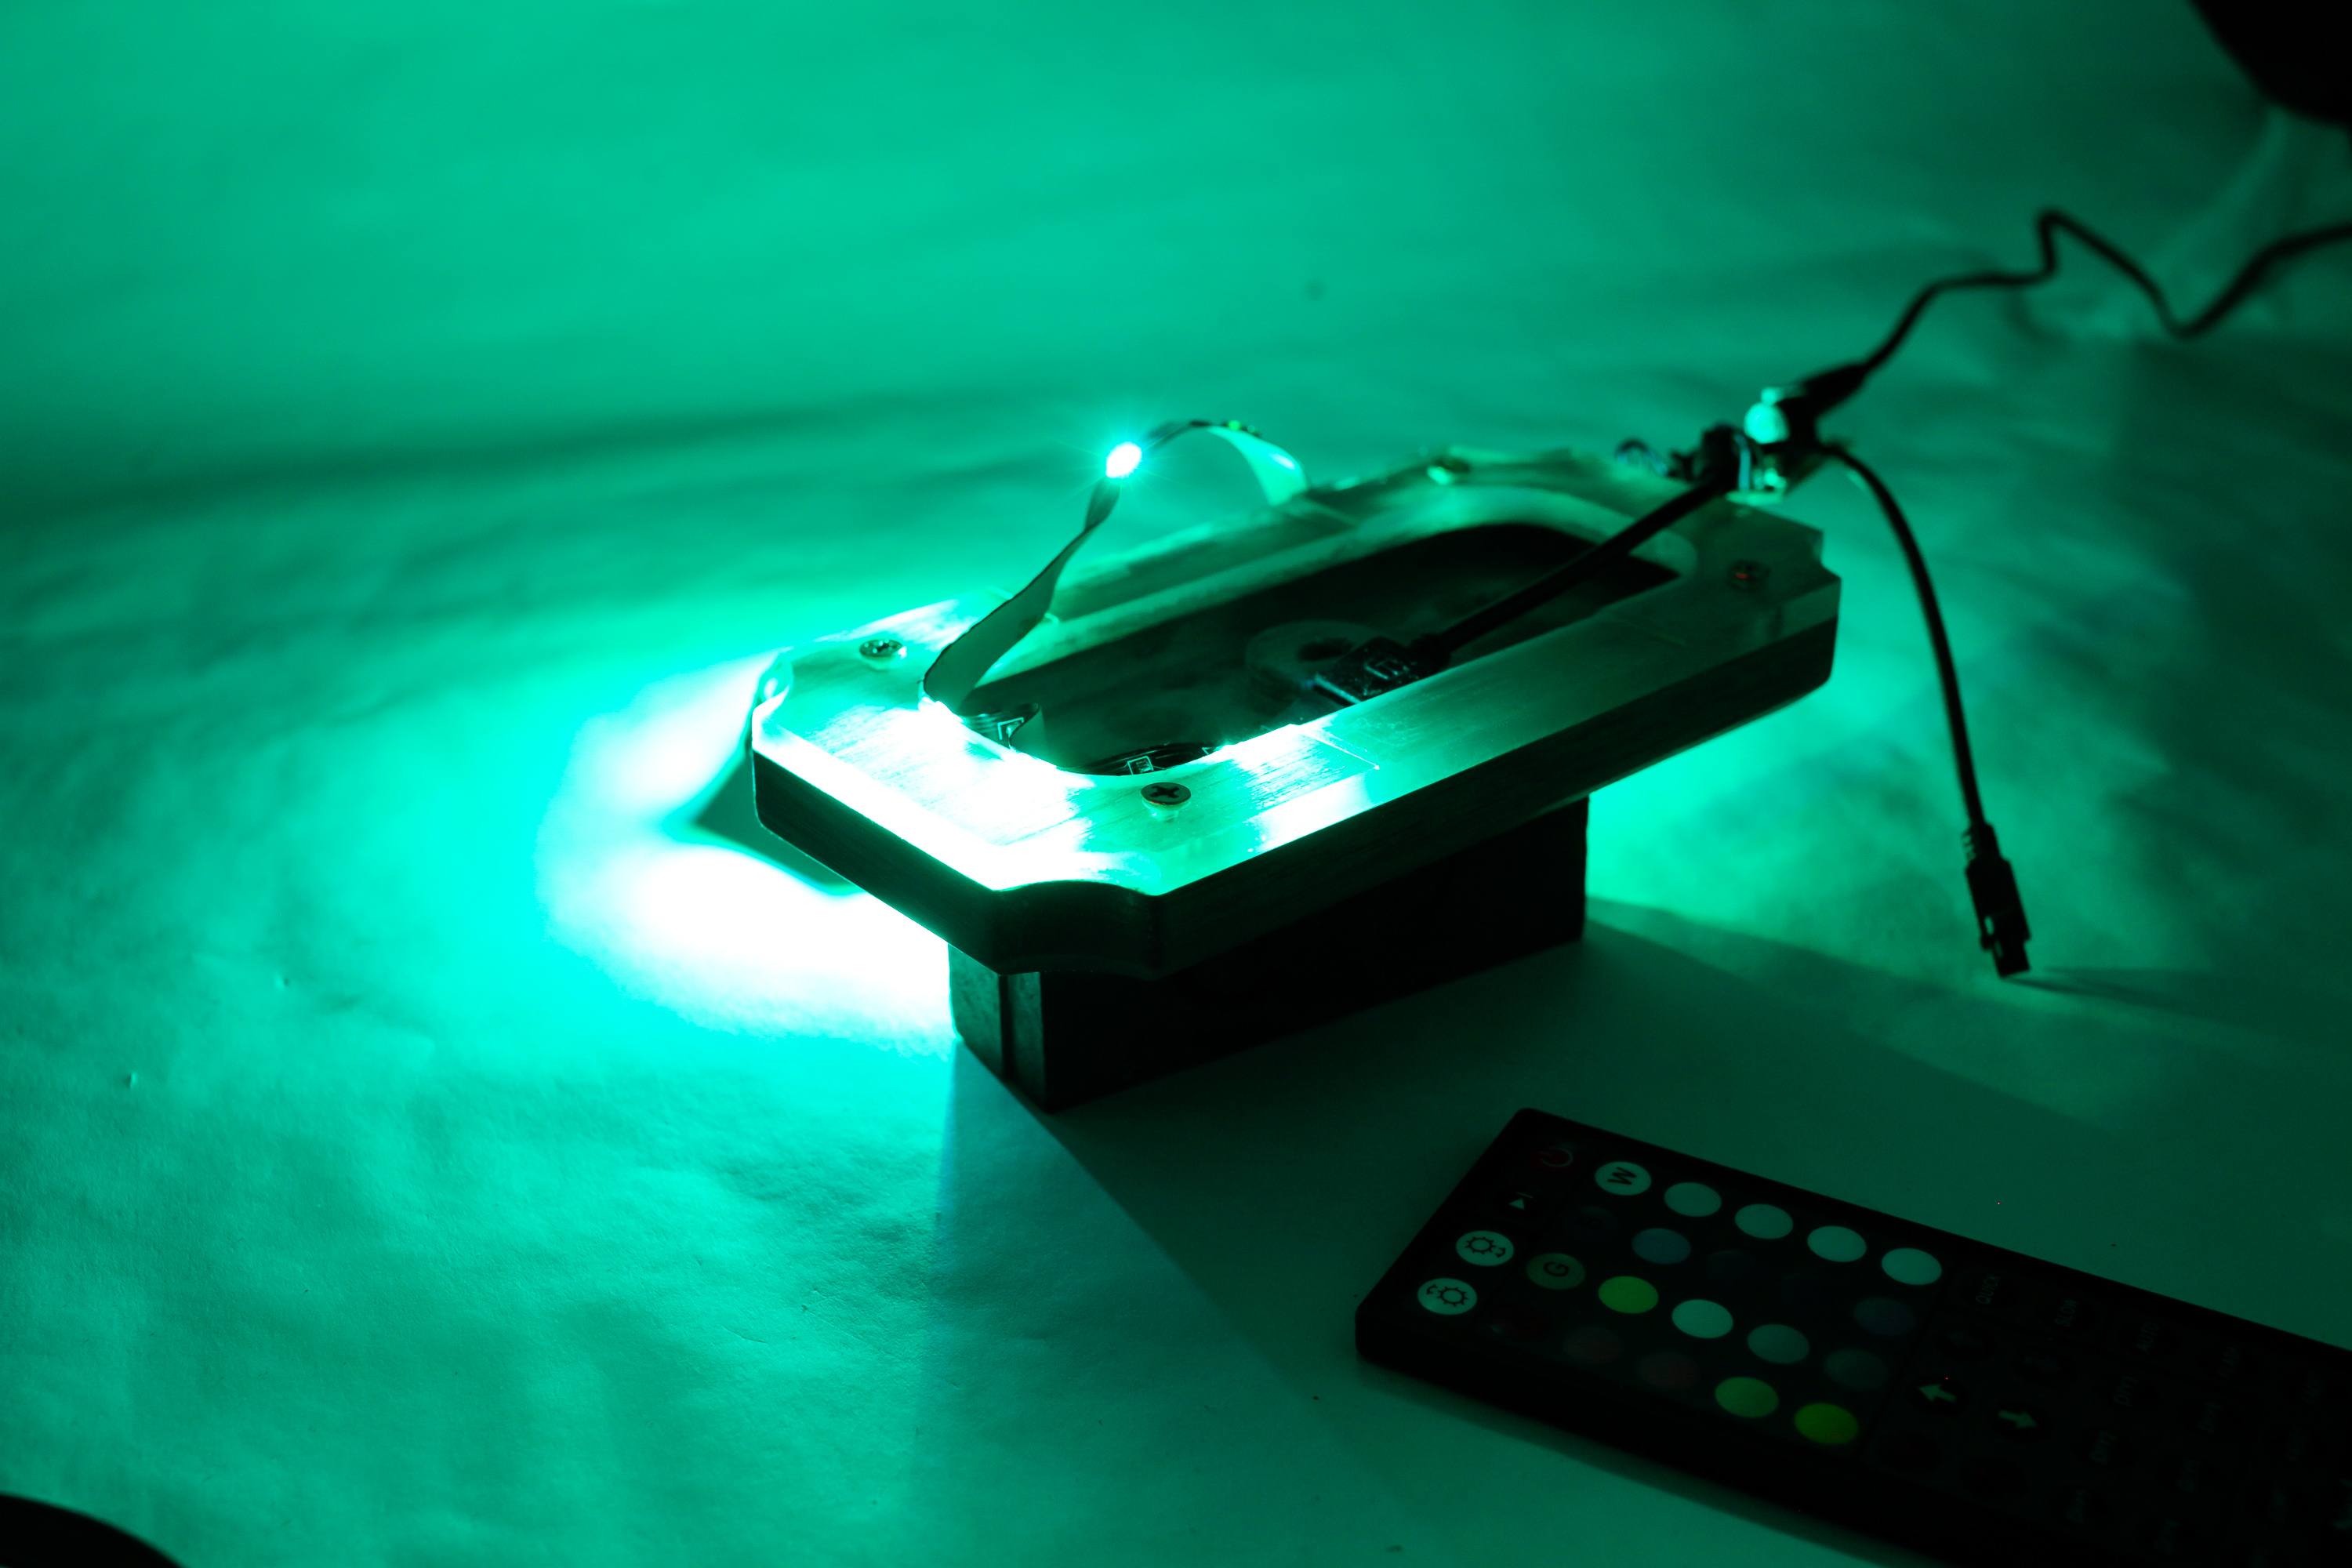
At this point I started gluing in the first LED strip. I hate using hot glue for permanent application, but I could not think of an easier way to attach the light strips. Since the final piece will never move around, this shouldn't cause any issues in the future though.
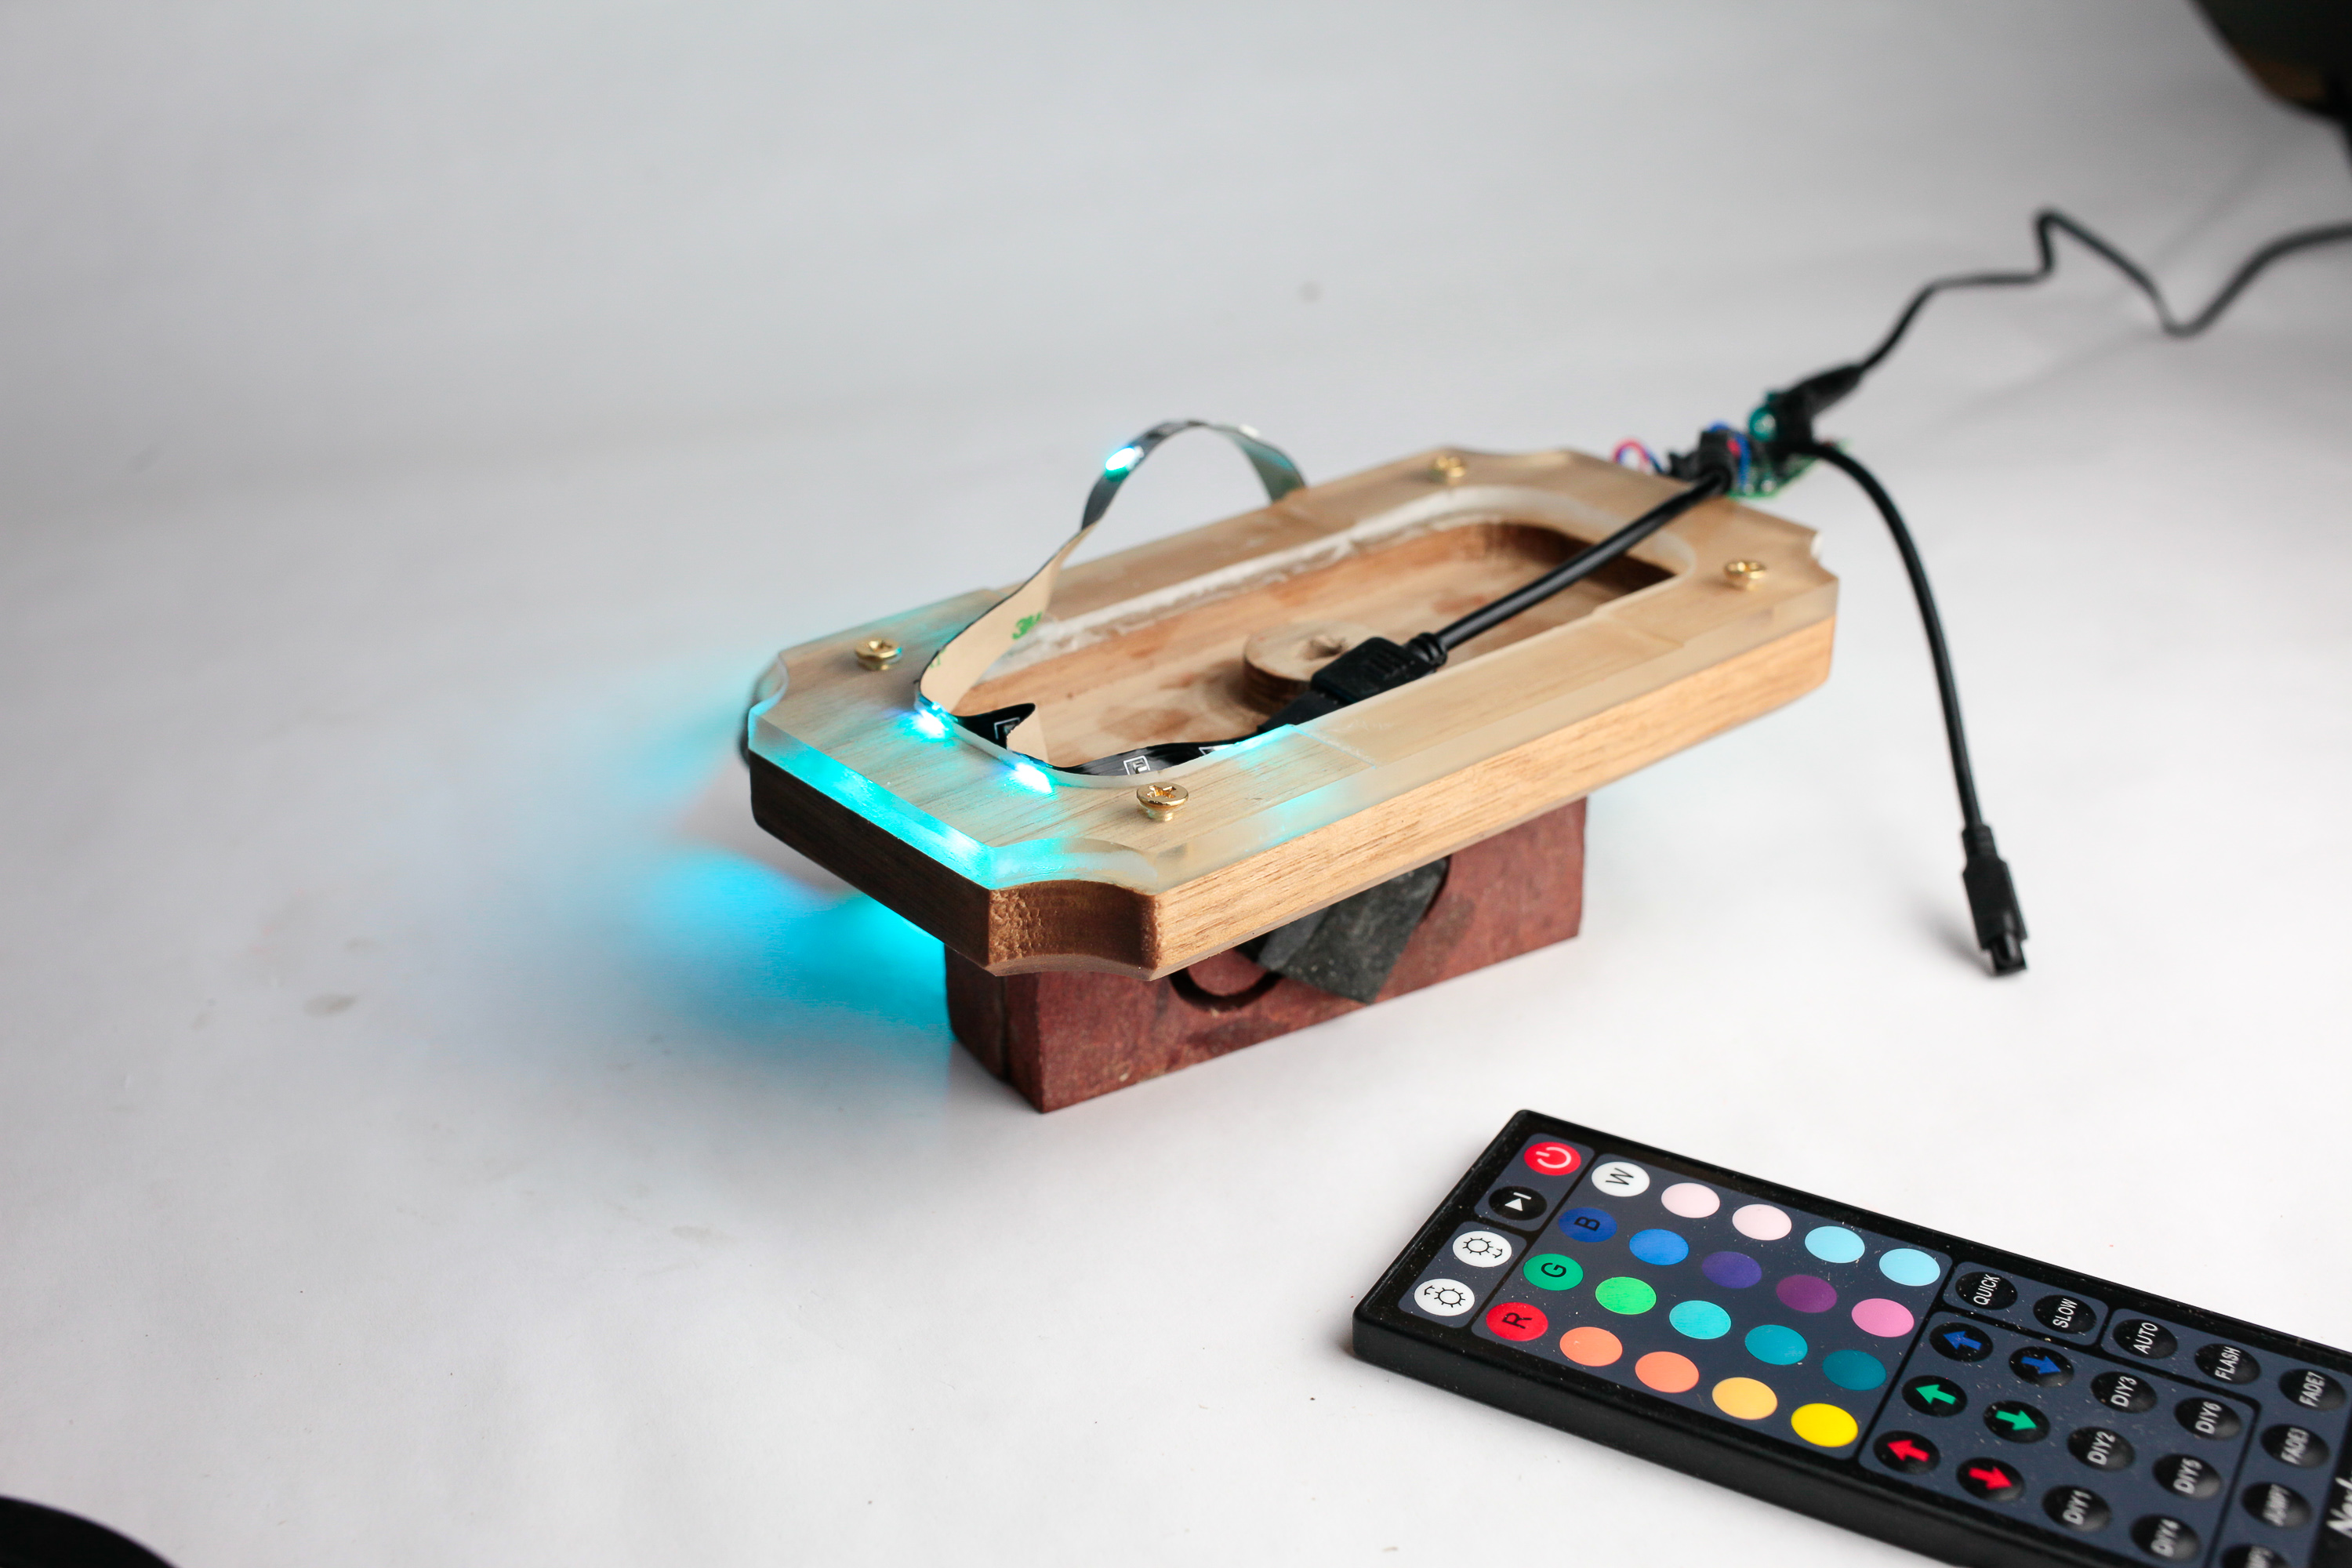
I could now start to get an idea of how it would look. So far, so good!
Each strip had 14ish LEDs, so the hot gluing process got old pretty quickly. But the result was looking great!
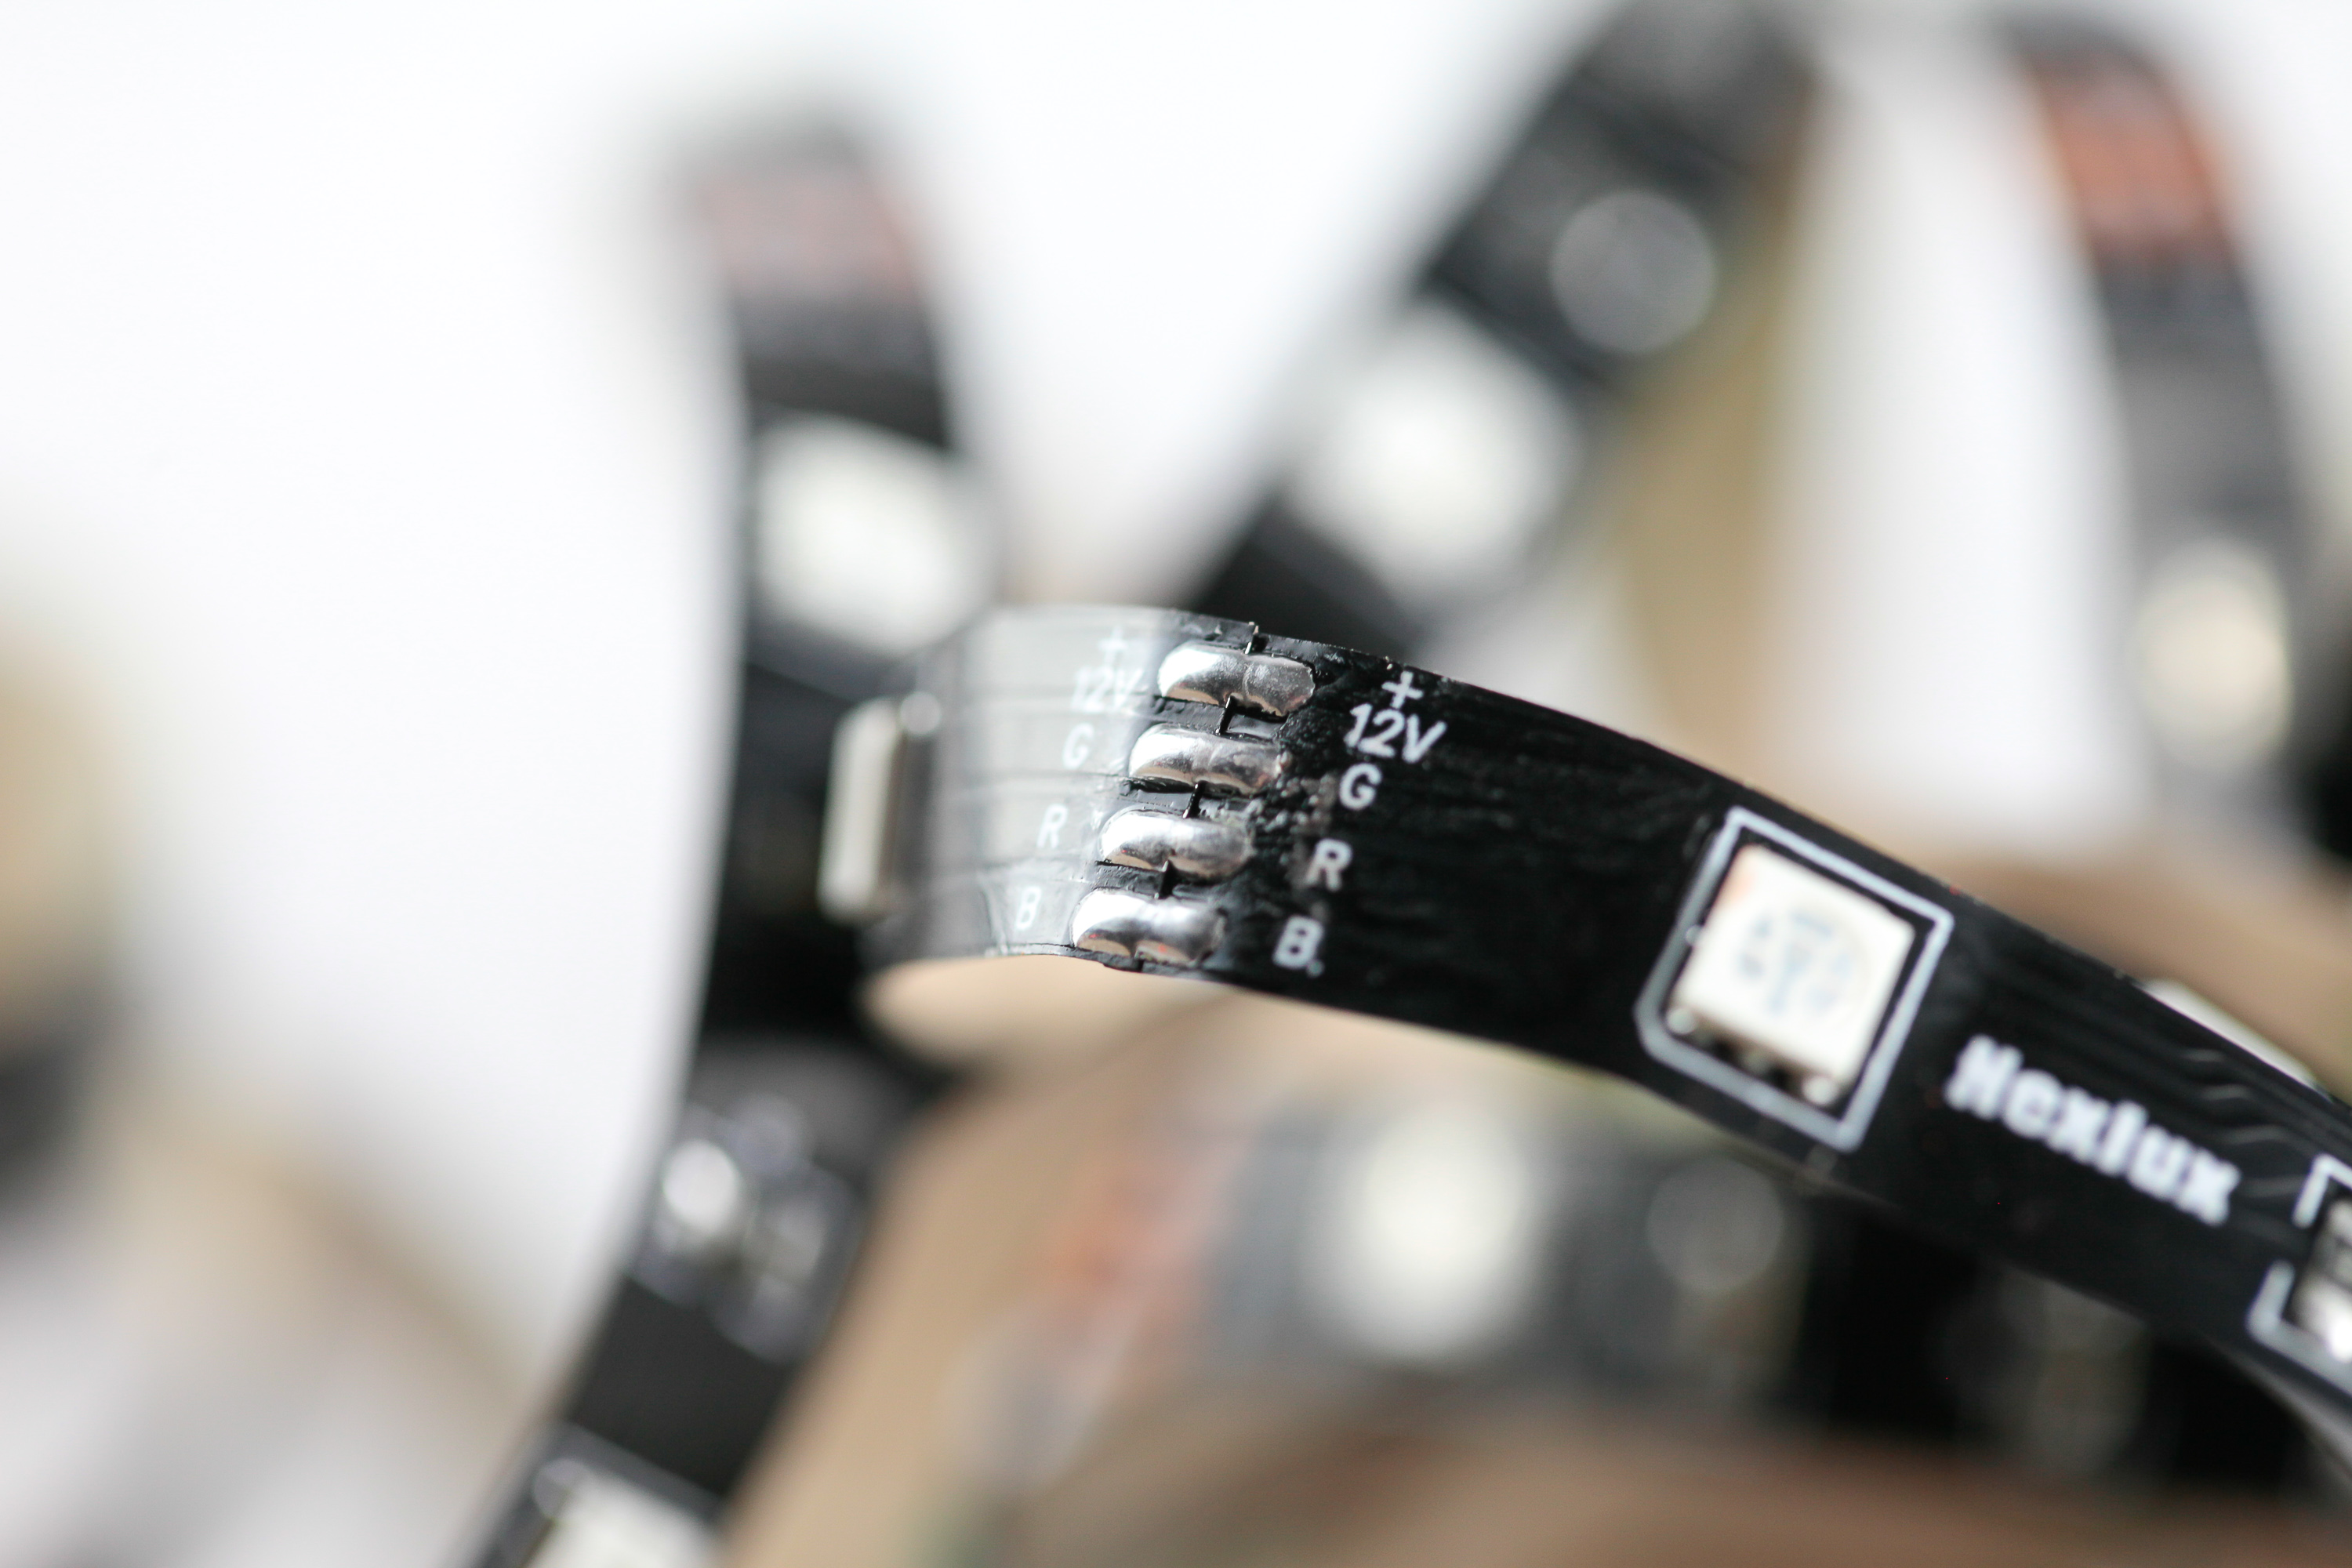
Each LED strip now needed to be soldered to an 8" length of 4-strand wire. The labels on the LED strips were super handy here.
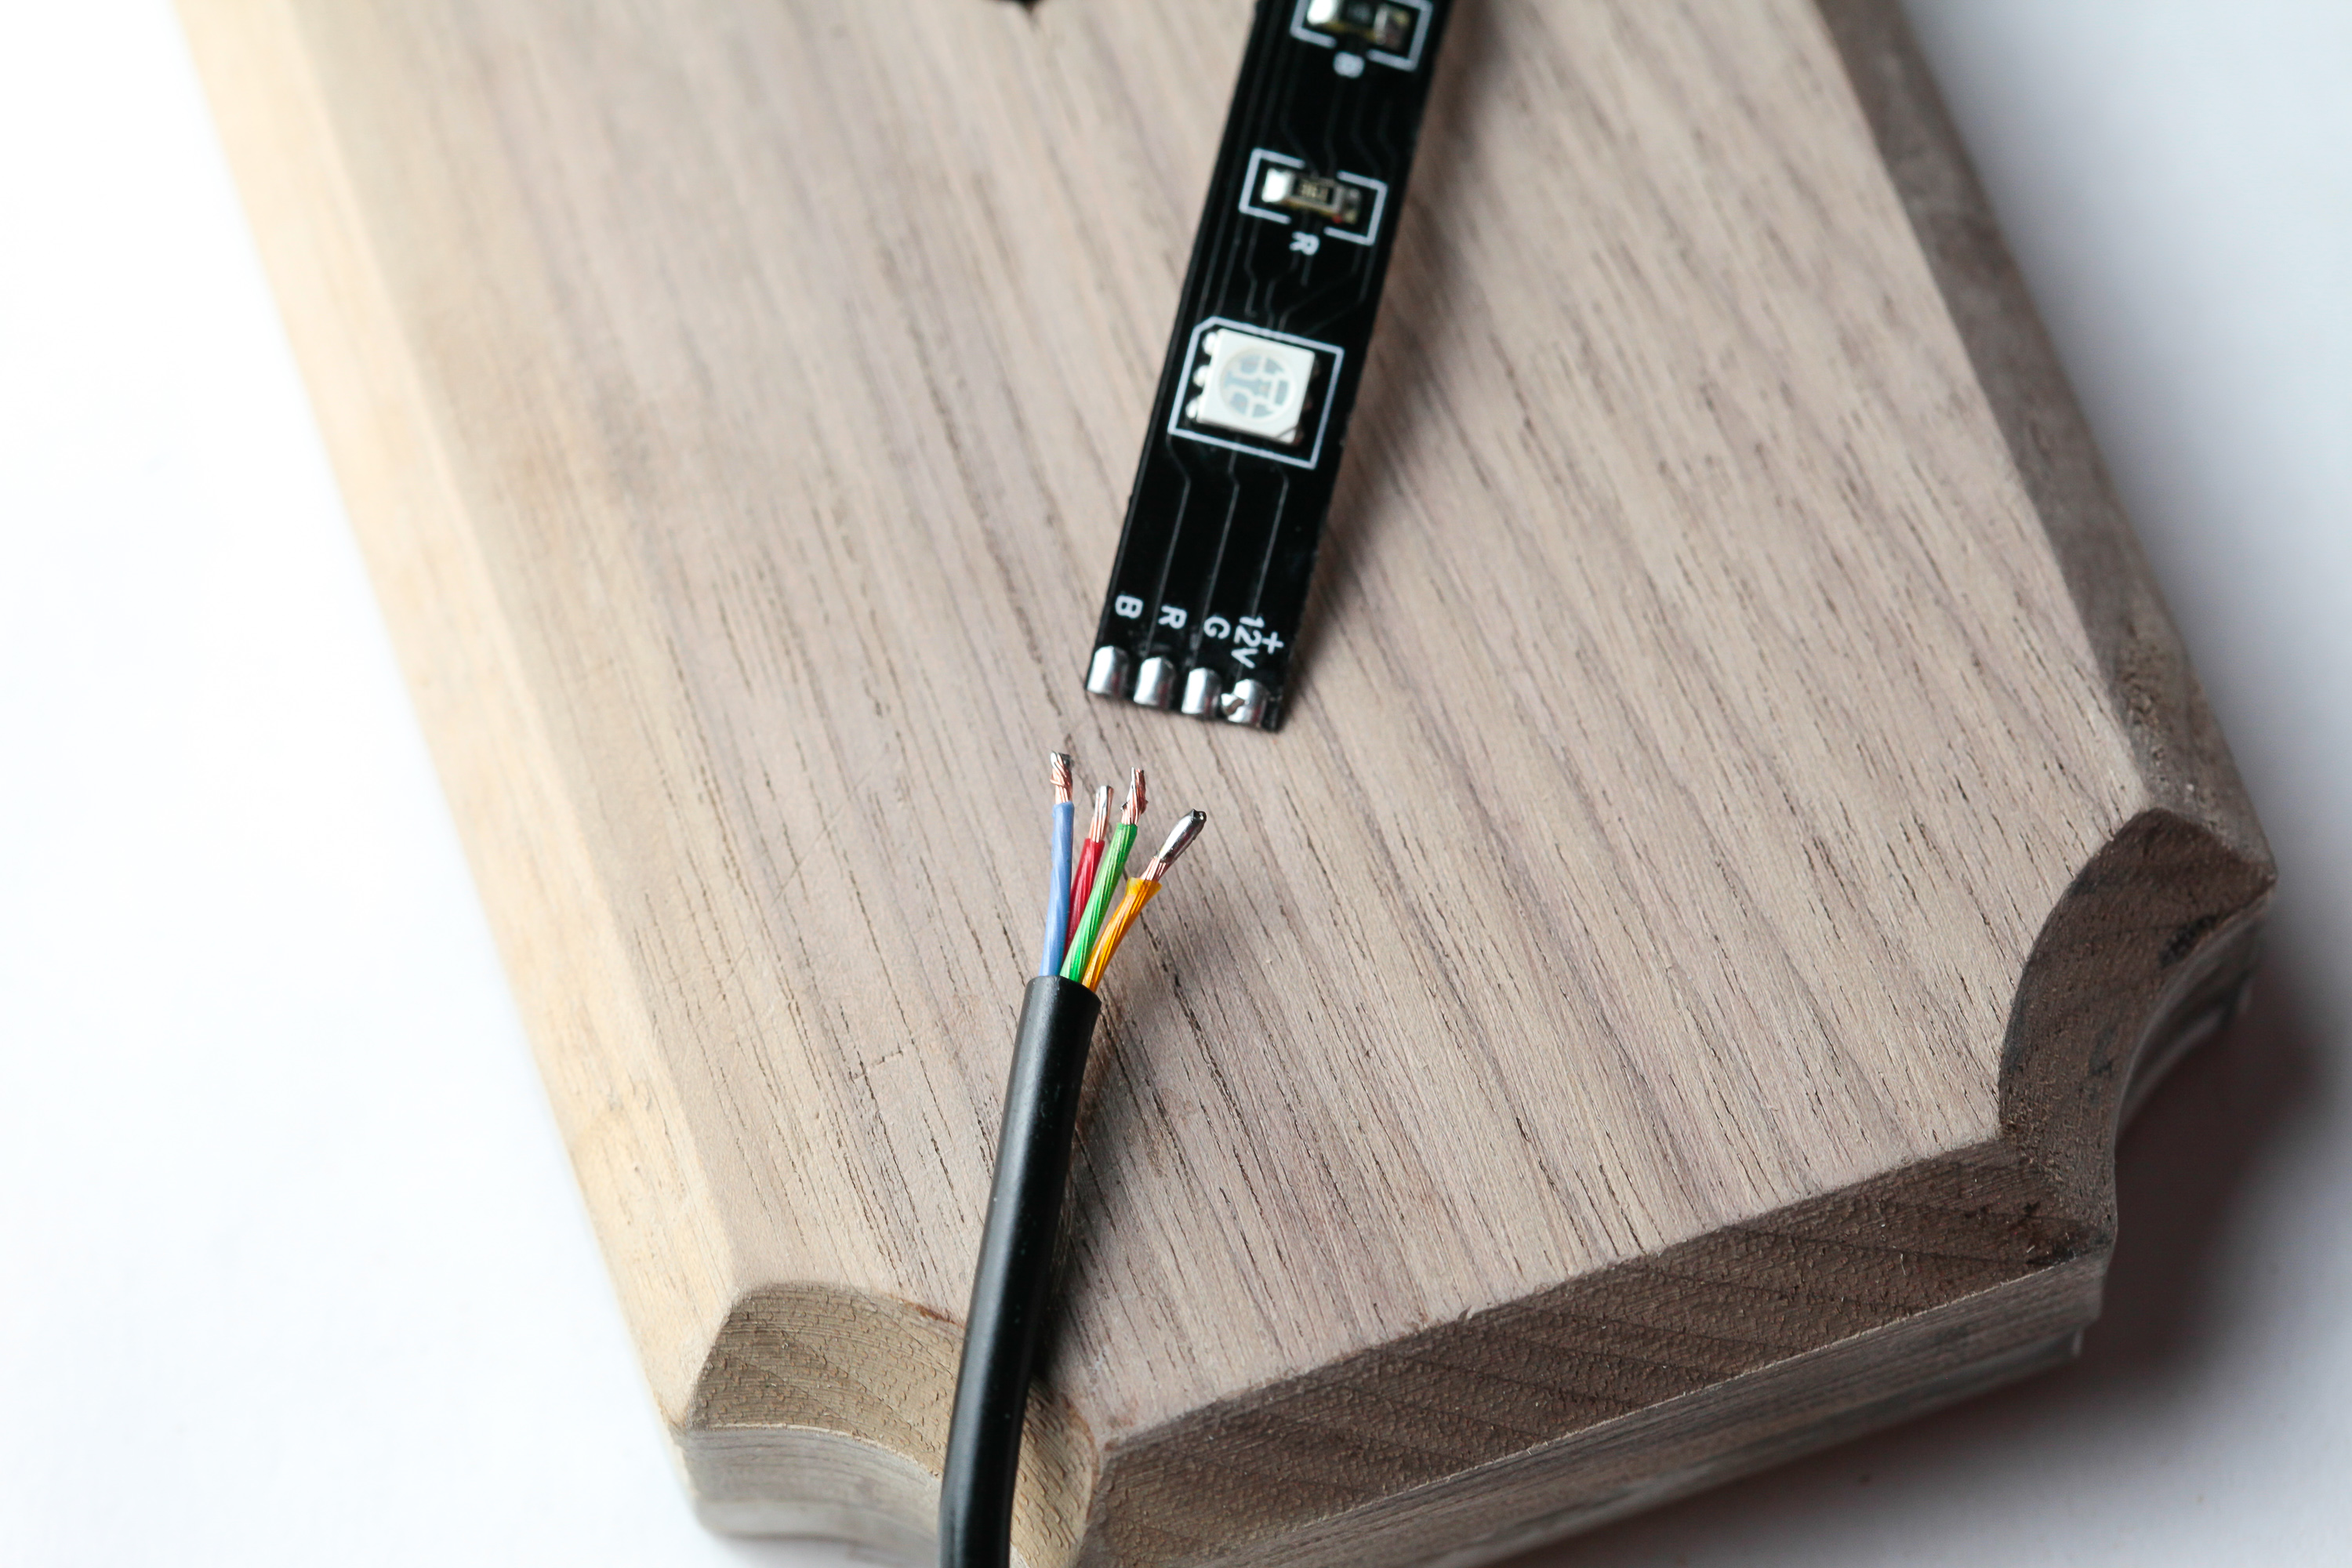
Here is how the wires were run from the bottom controller up through each strip.
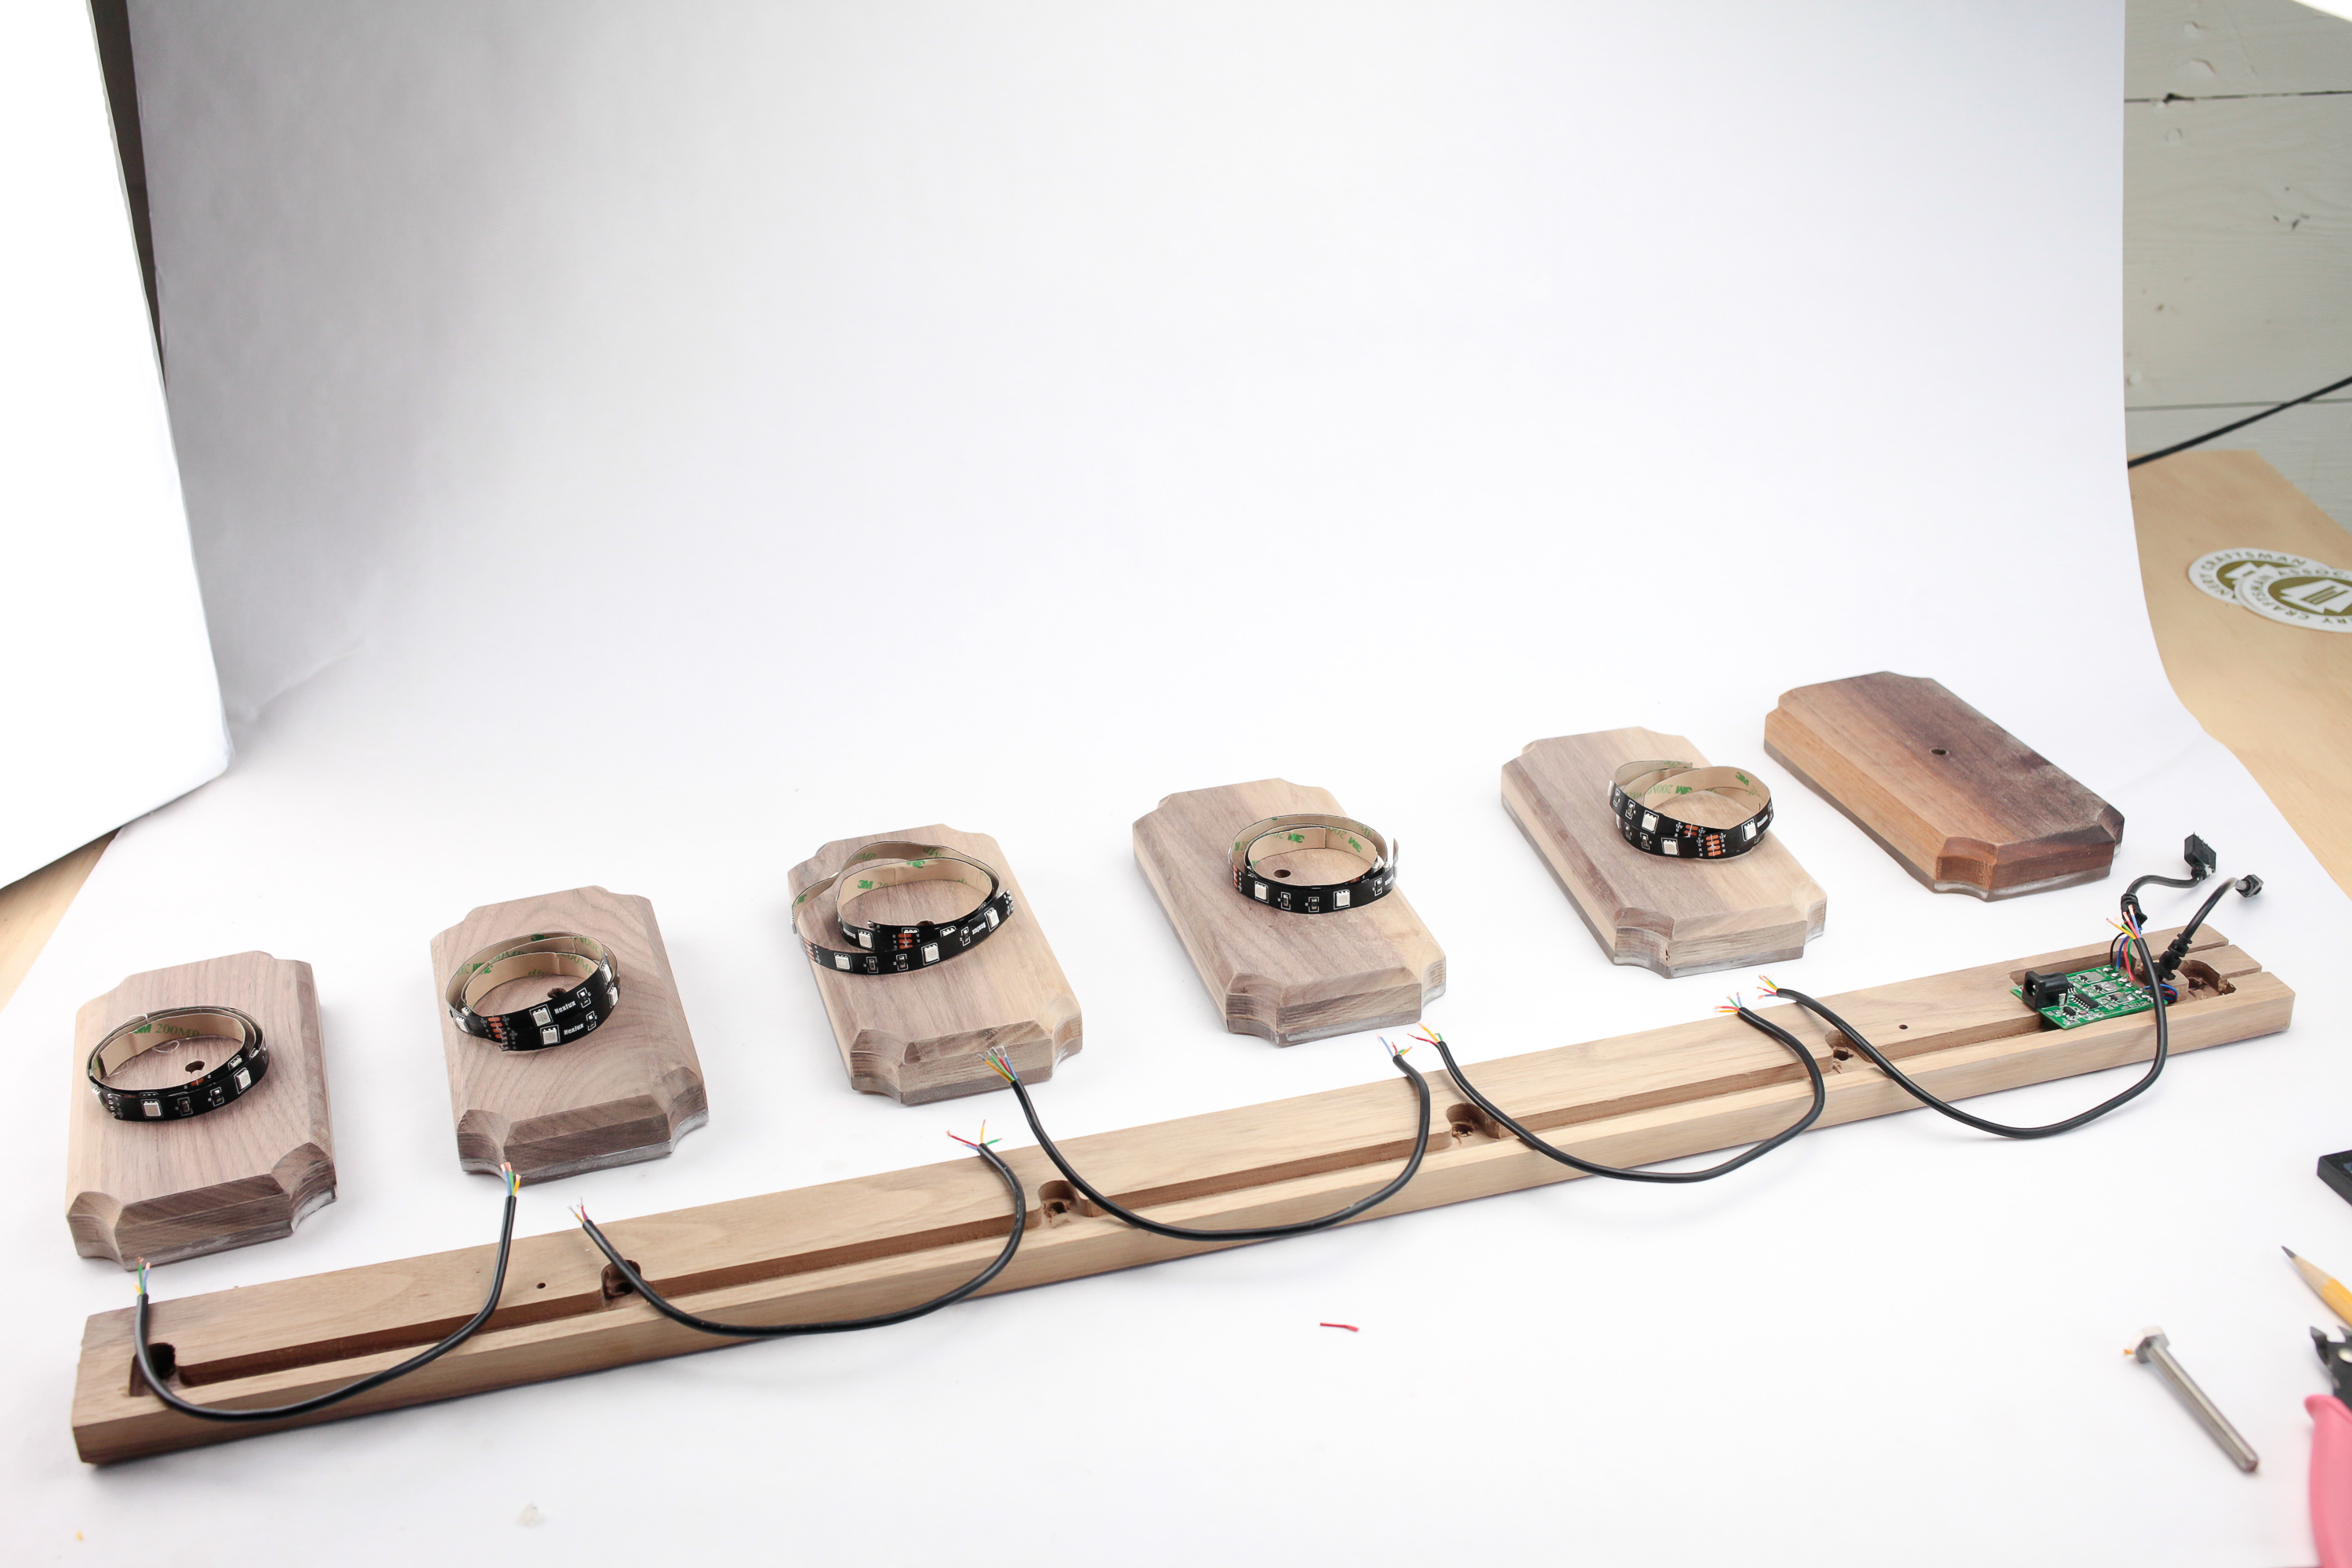
I soldered each strip to a length of the 4-strand wire and then fed each through one of the wiring slots.
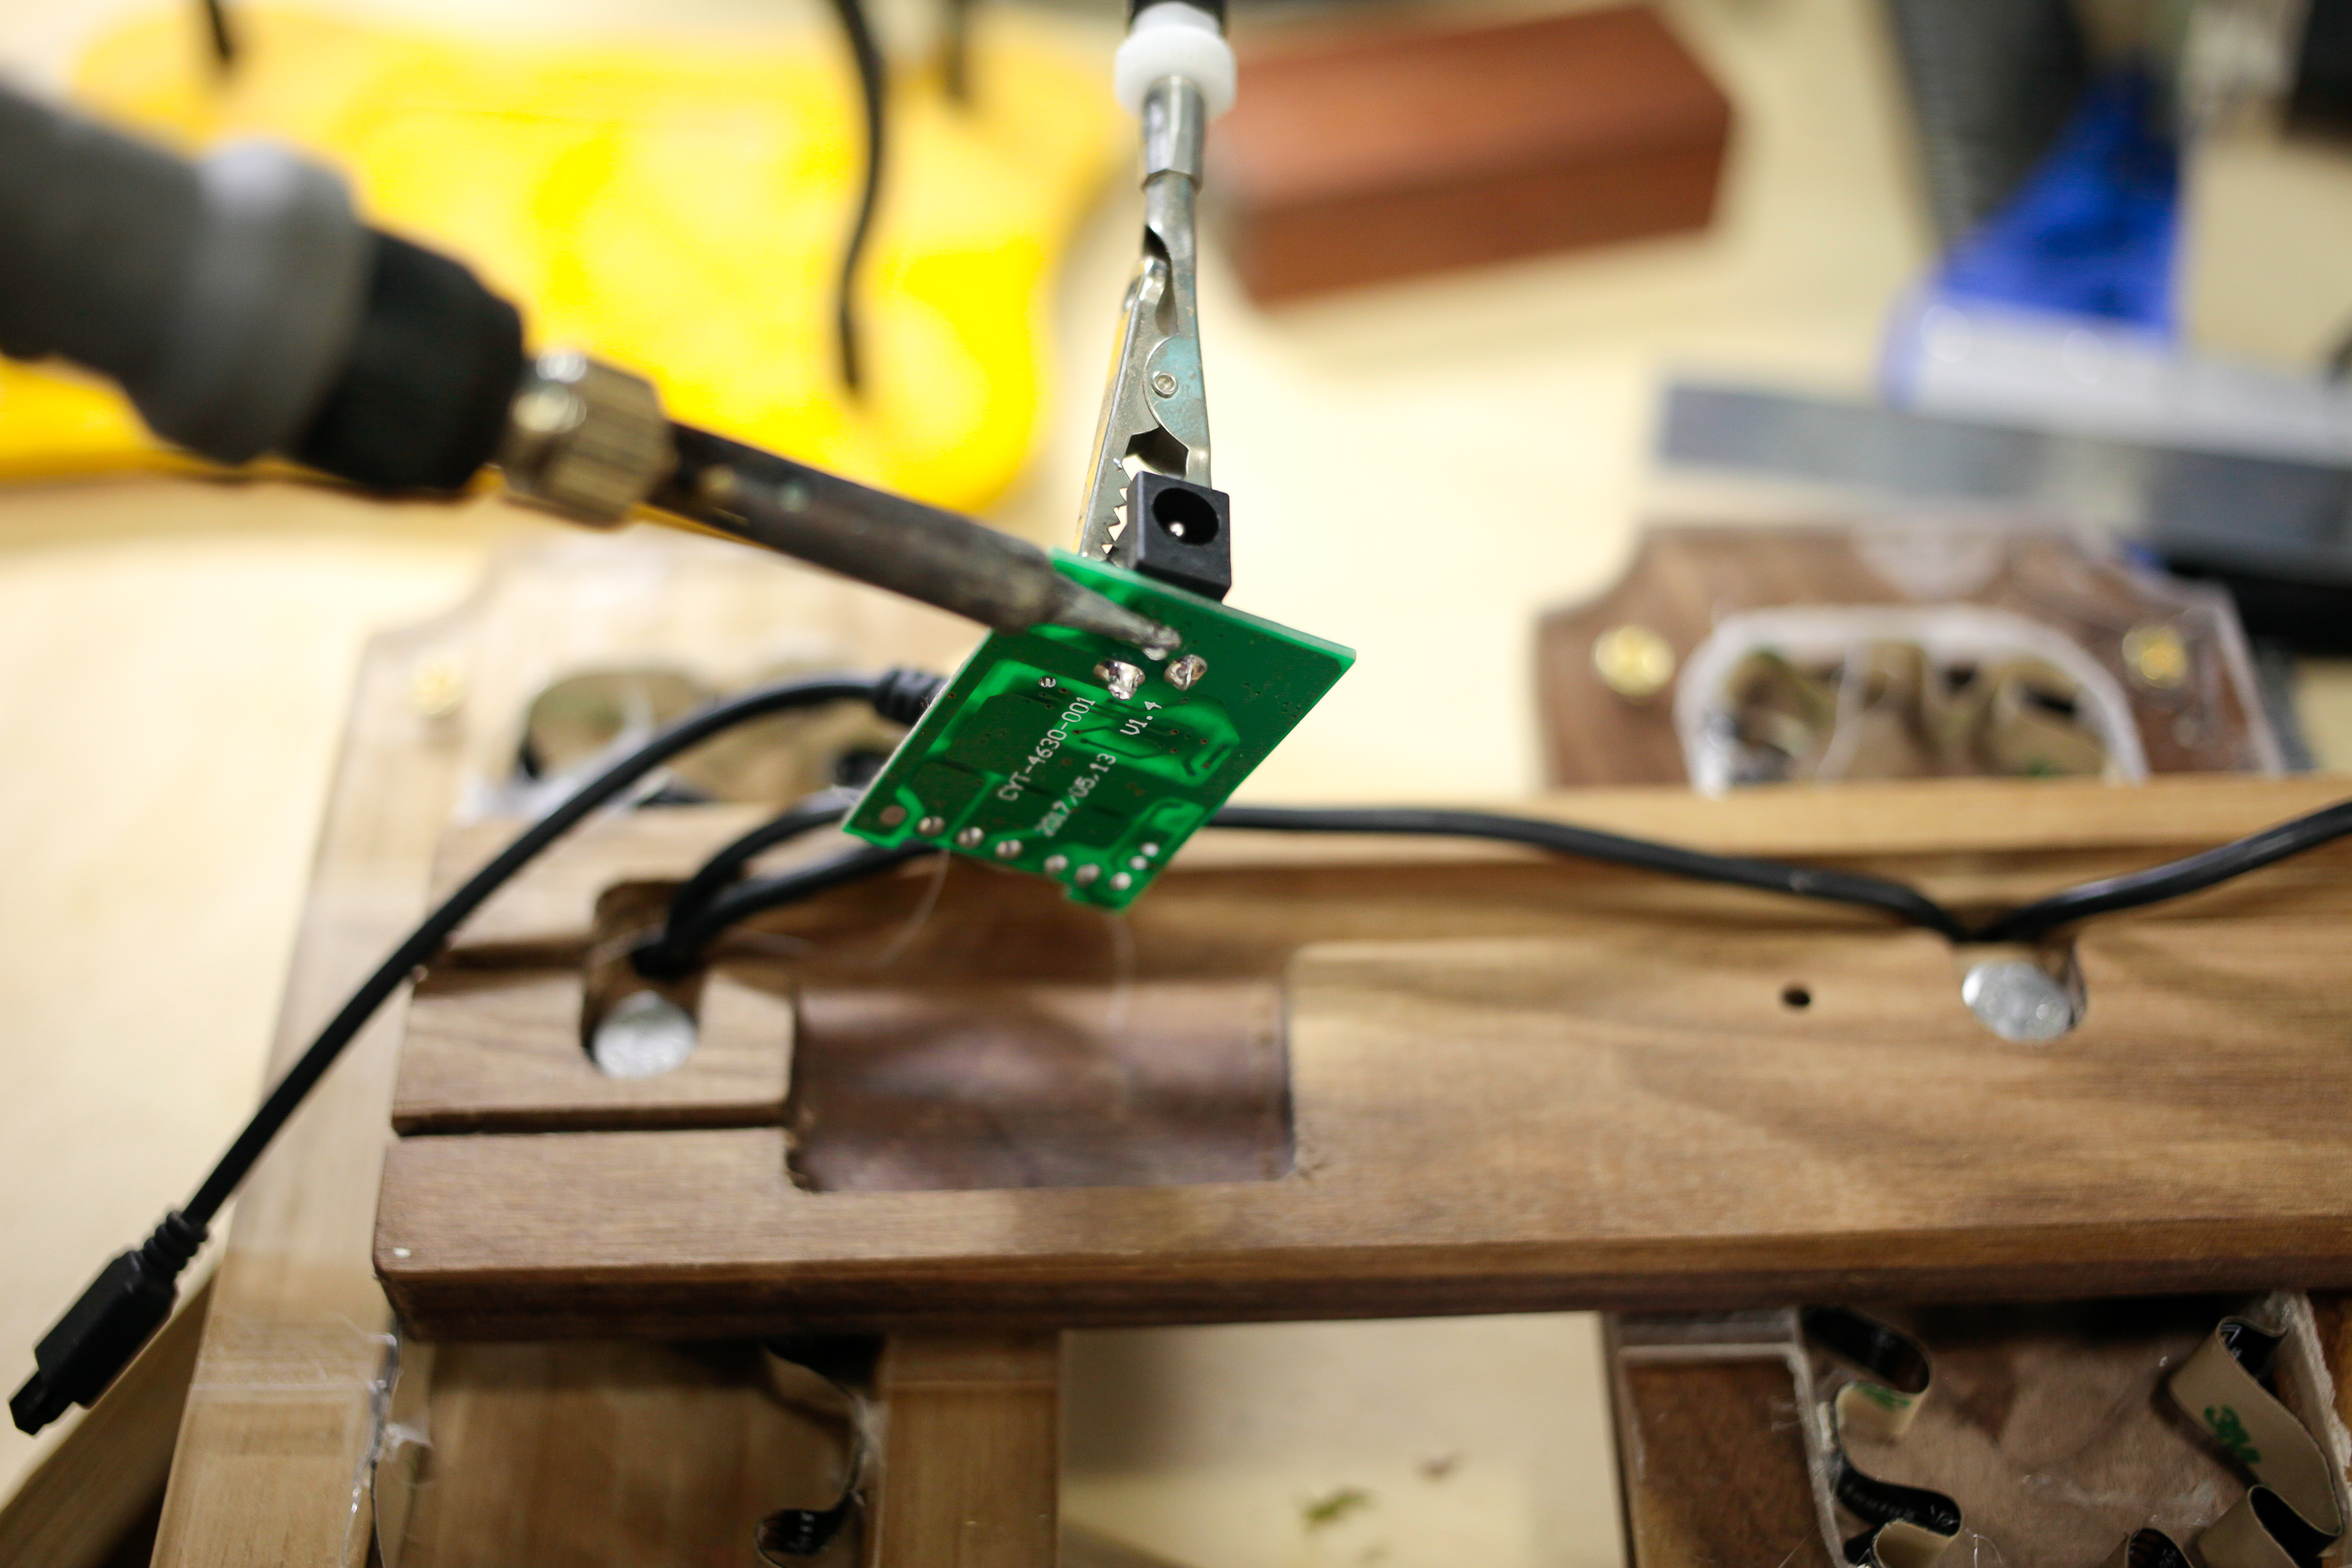
I was originally going to solder the power cable directly to the board, but decided it would be better to keep a detachable cable. So I desoldered the power connector from the board to be relocated.
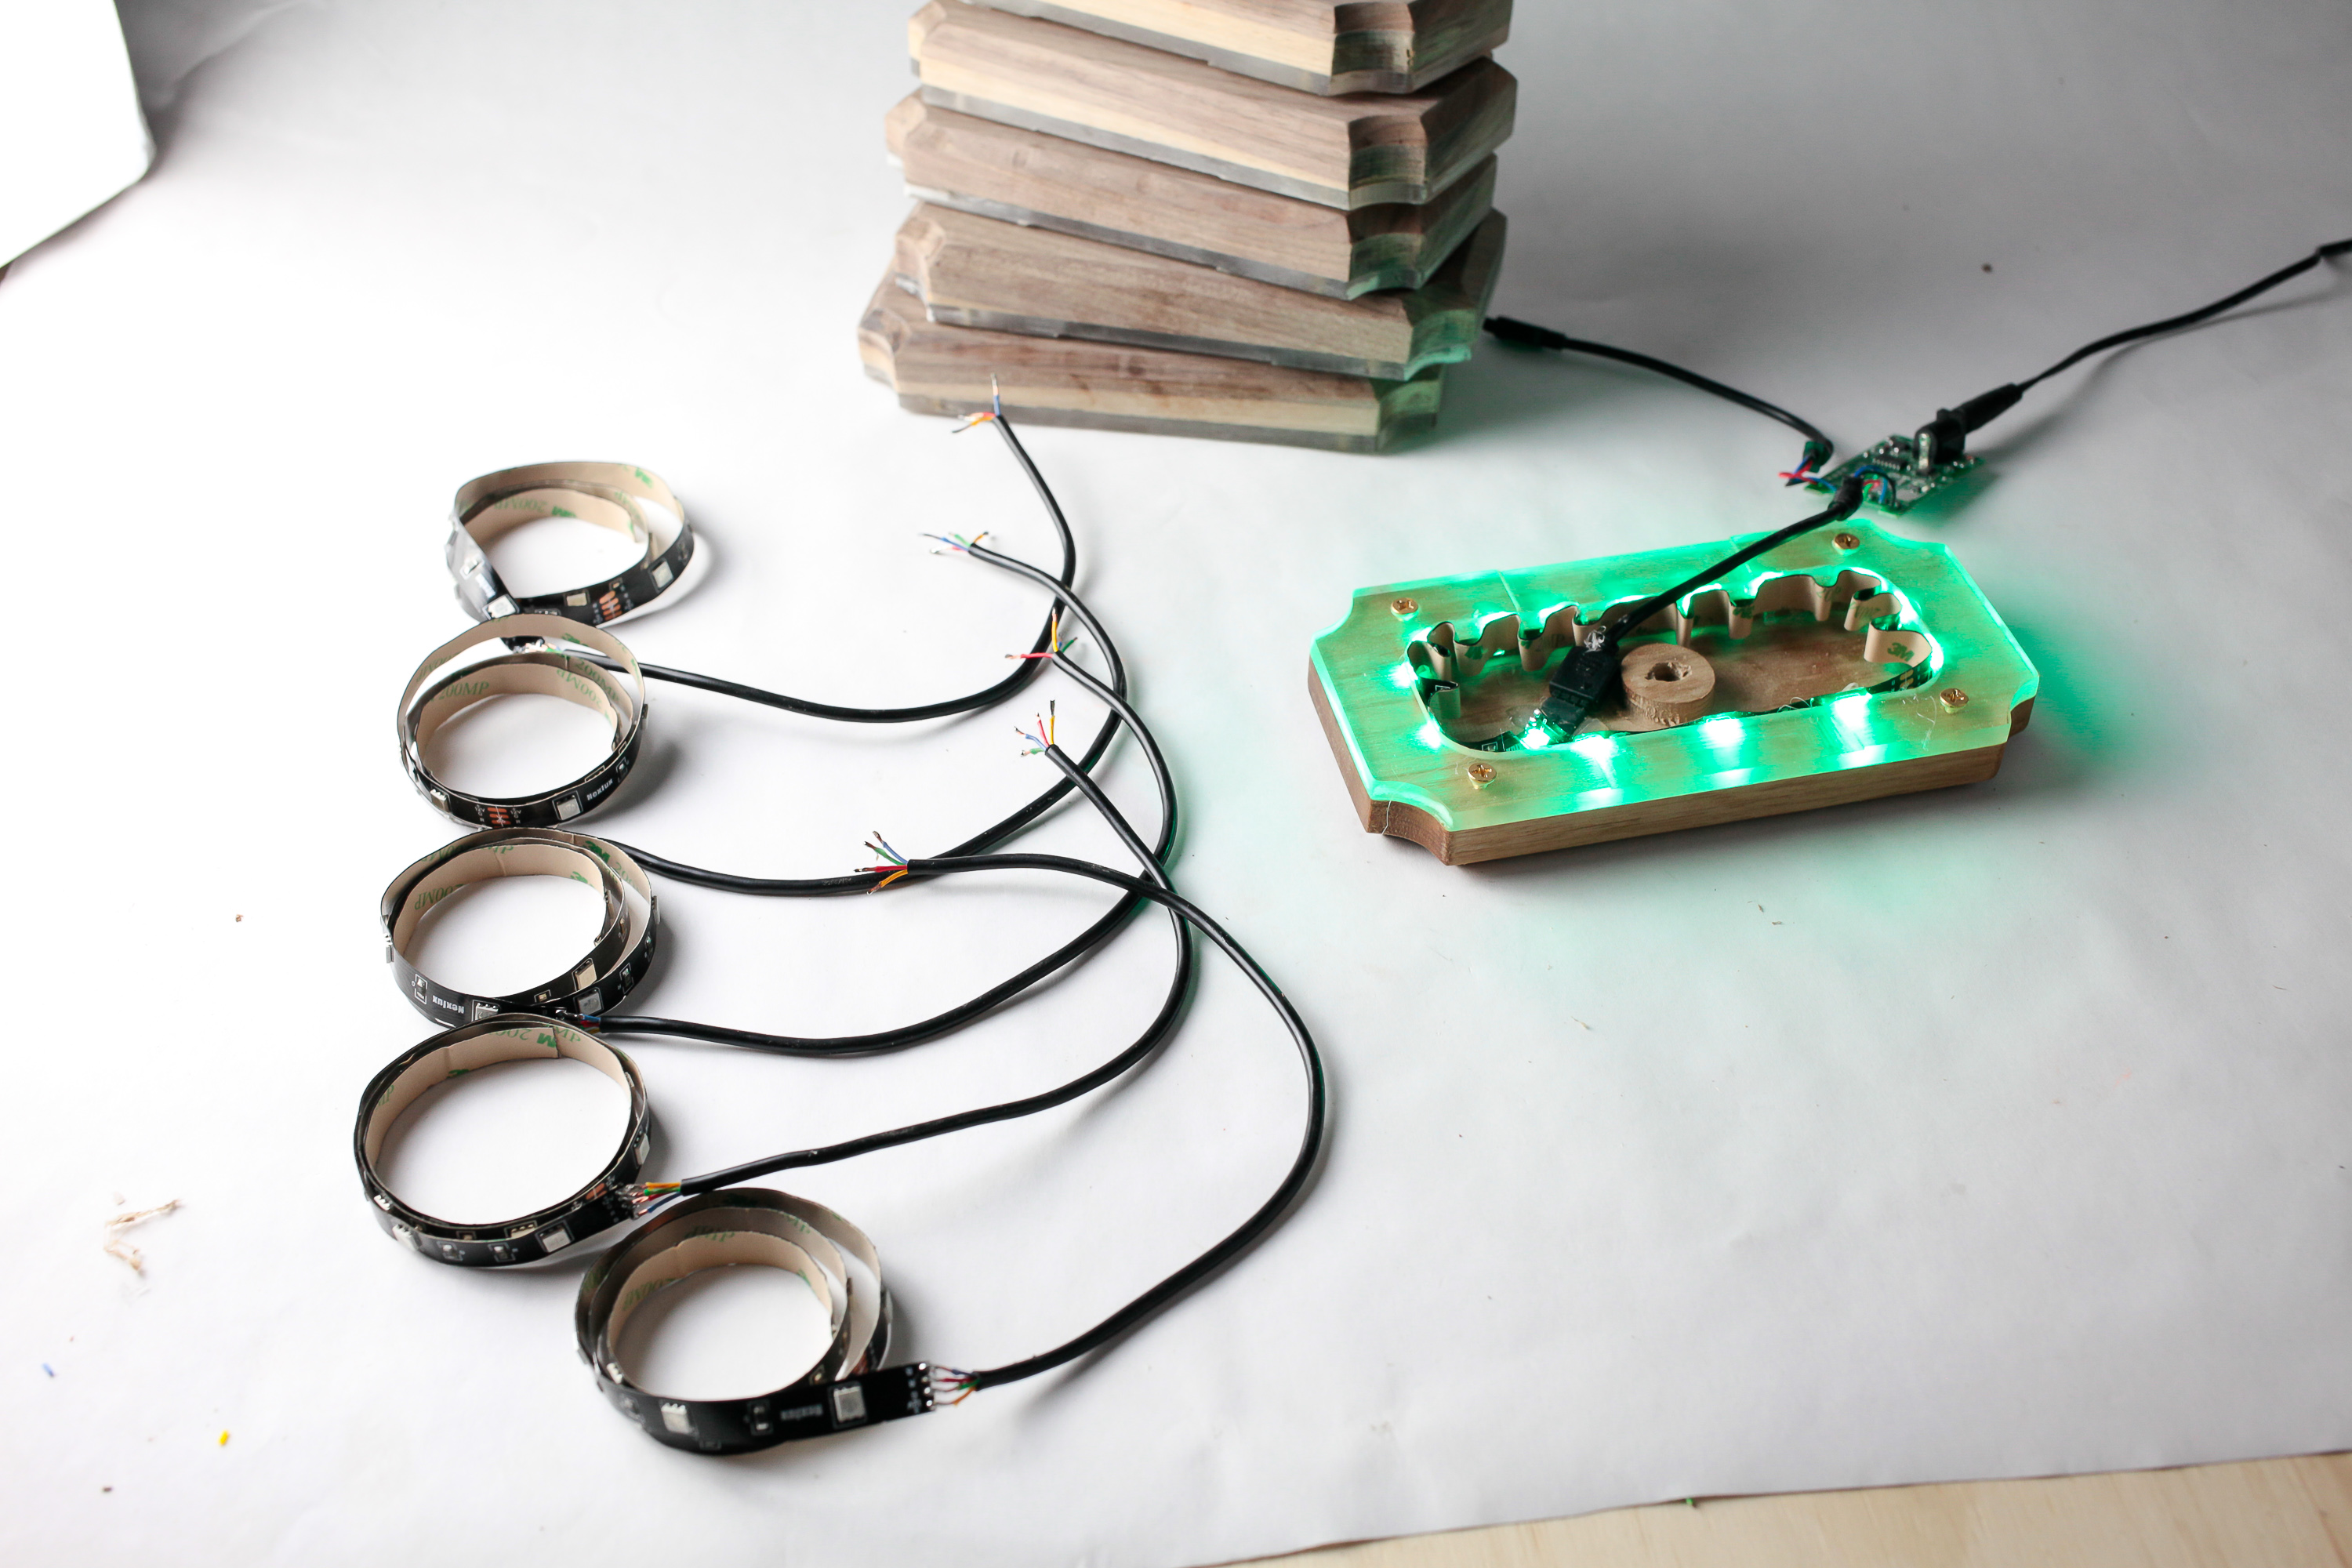
At this point I wanted to mount the first section to make sure that everything was going to fit nicely and look nice. I had a constant worry of breaking a tiny solder joint while moving everything around, but they happily held up just fine.
Hot gluing all the LED strips was by far the least fun part of this project. I had to go relatively slowly so that each led on each strip was spaced correctly, and there were a few obligatory hot glue gun finger burns.
I left the original remote receiver attached the board, and pulled it through the bottom channel. This kept it out of sight while still being able to pick up the remote signal.
Because I had not originally planned to have a detachable cable, I had to improvise the wiring here. I attached the port on the outside with hot glue and ran 2 wires up to the board. Not pretty, but it will hopefully never have to be seen again.

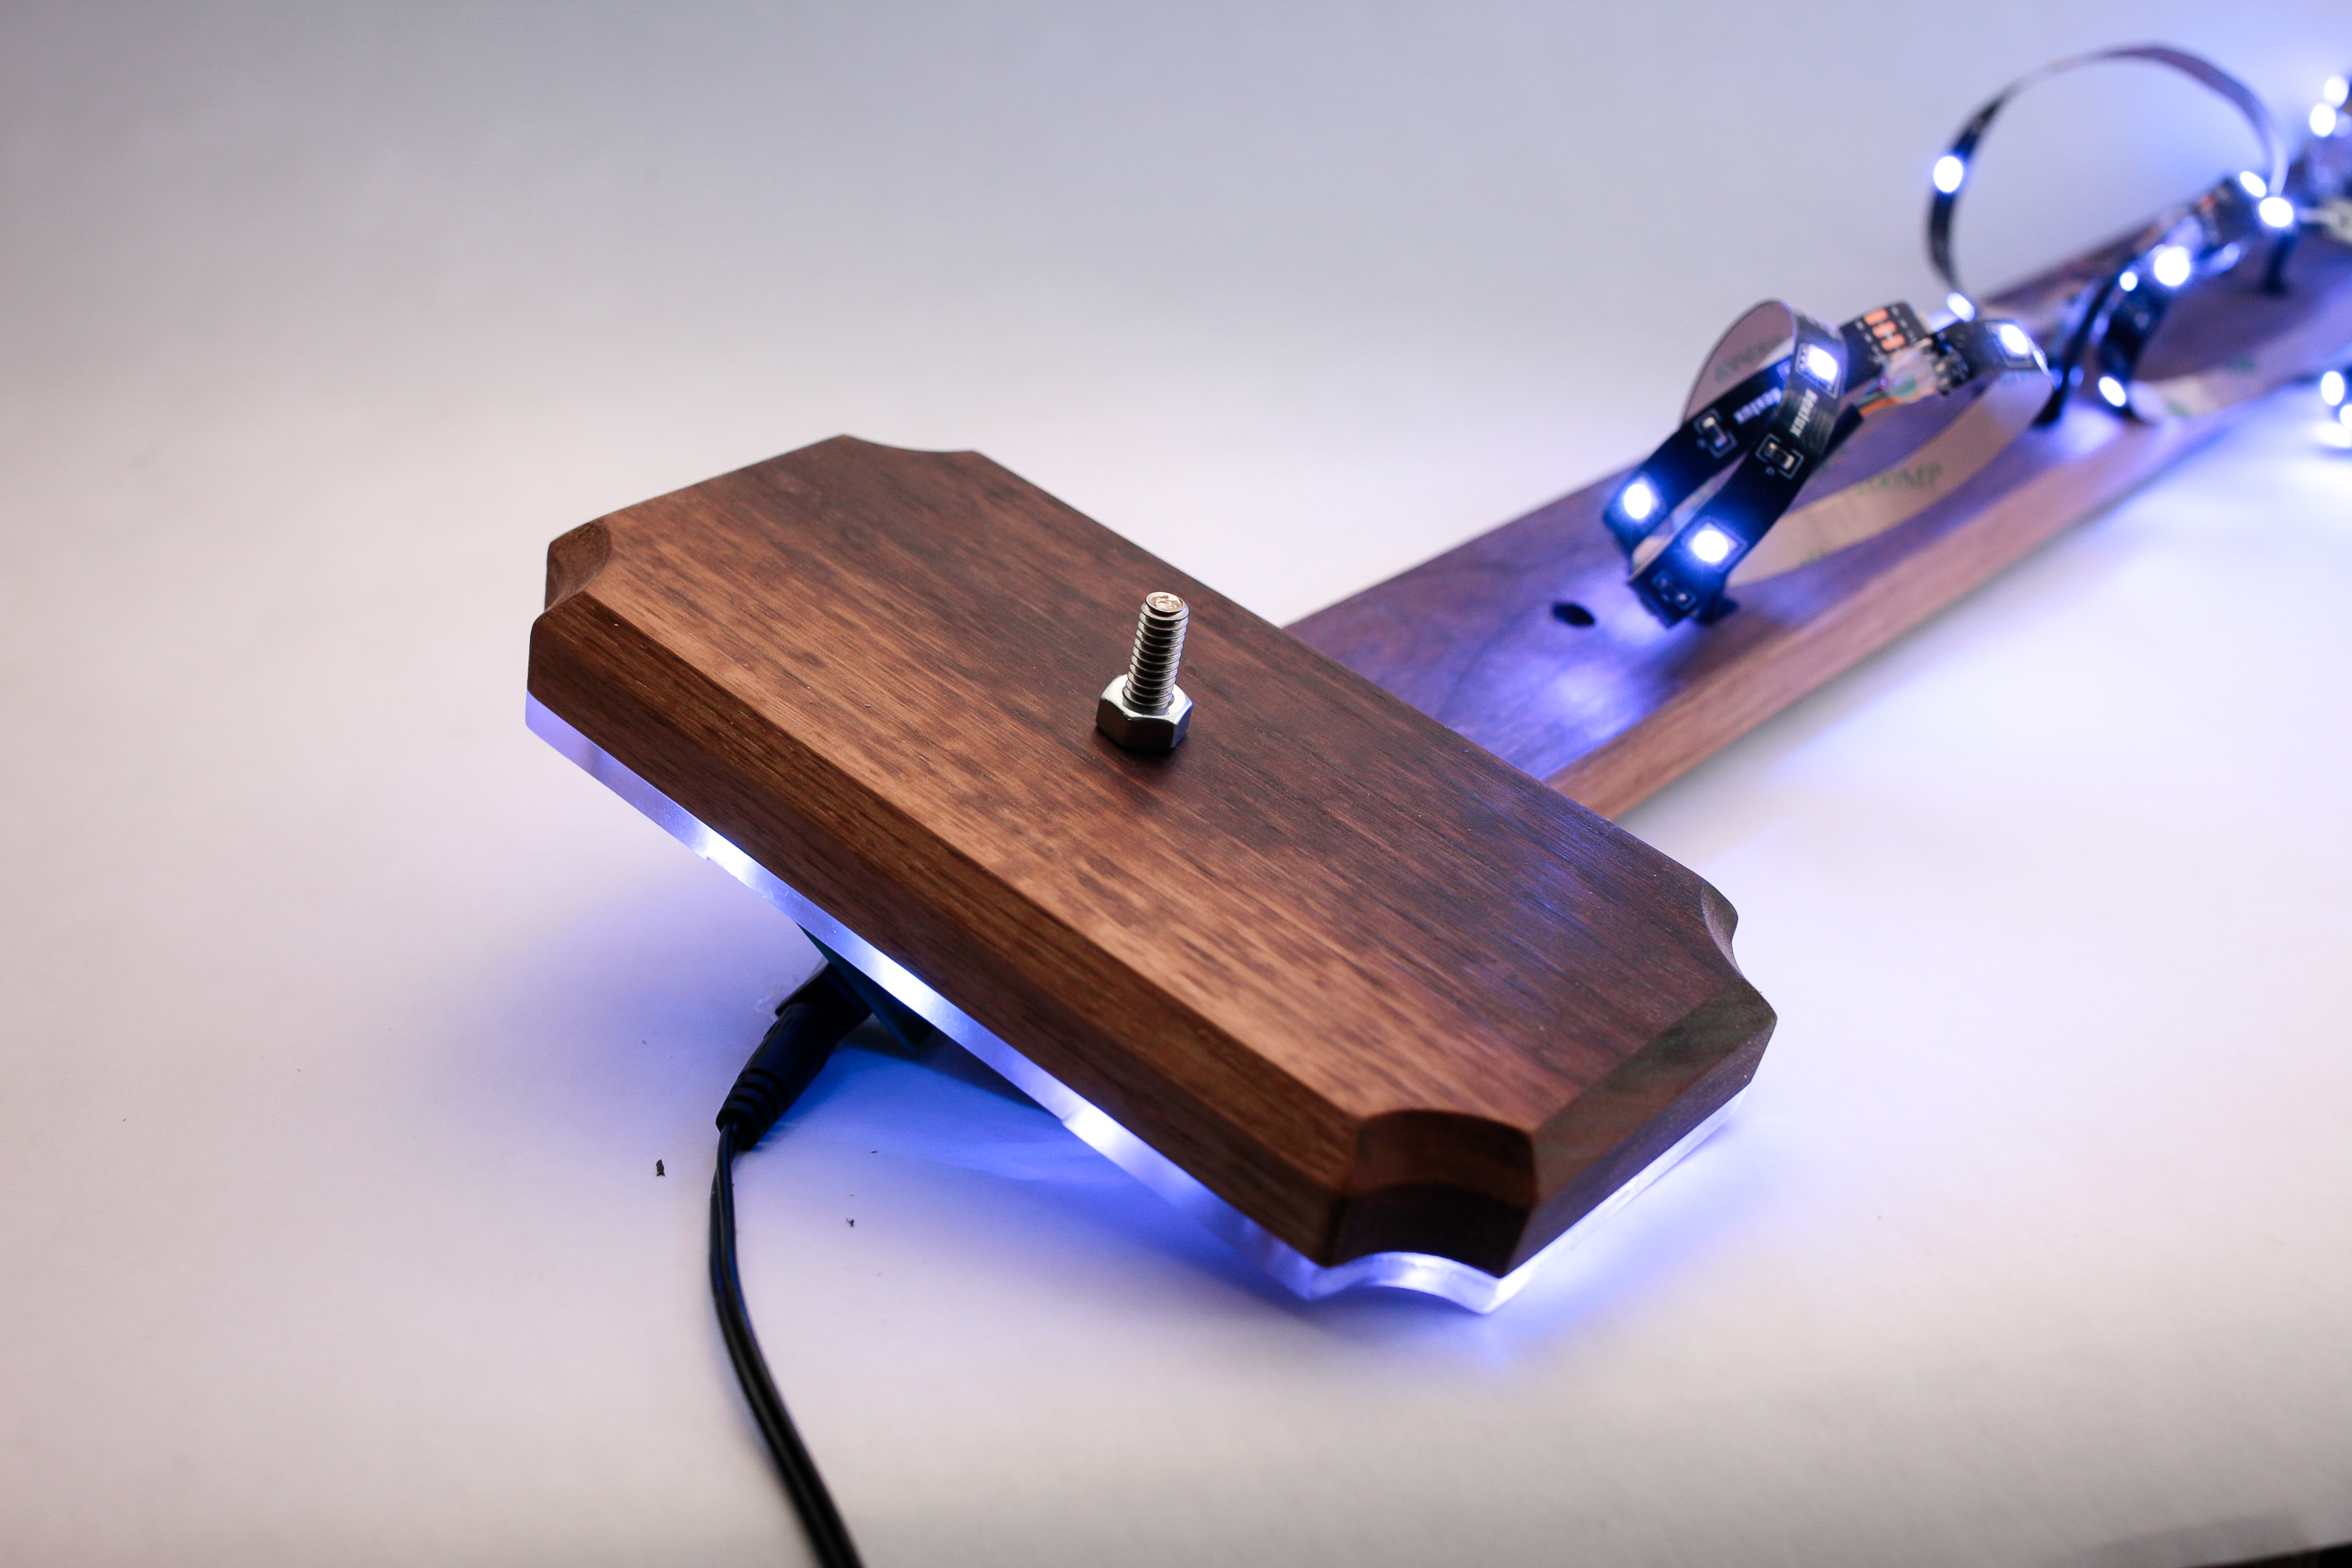
Finally, I could attach everything together with the 1/4" bolts and nuts. I was very happy with how it was looking at this point. The only thing left to do was to attach some controllers and then mount the whole display to the wall.
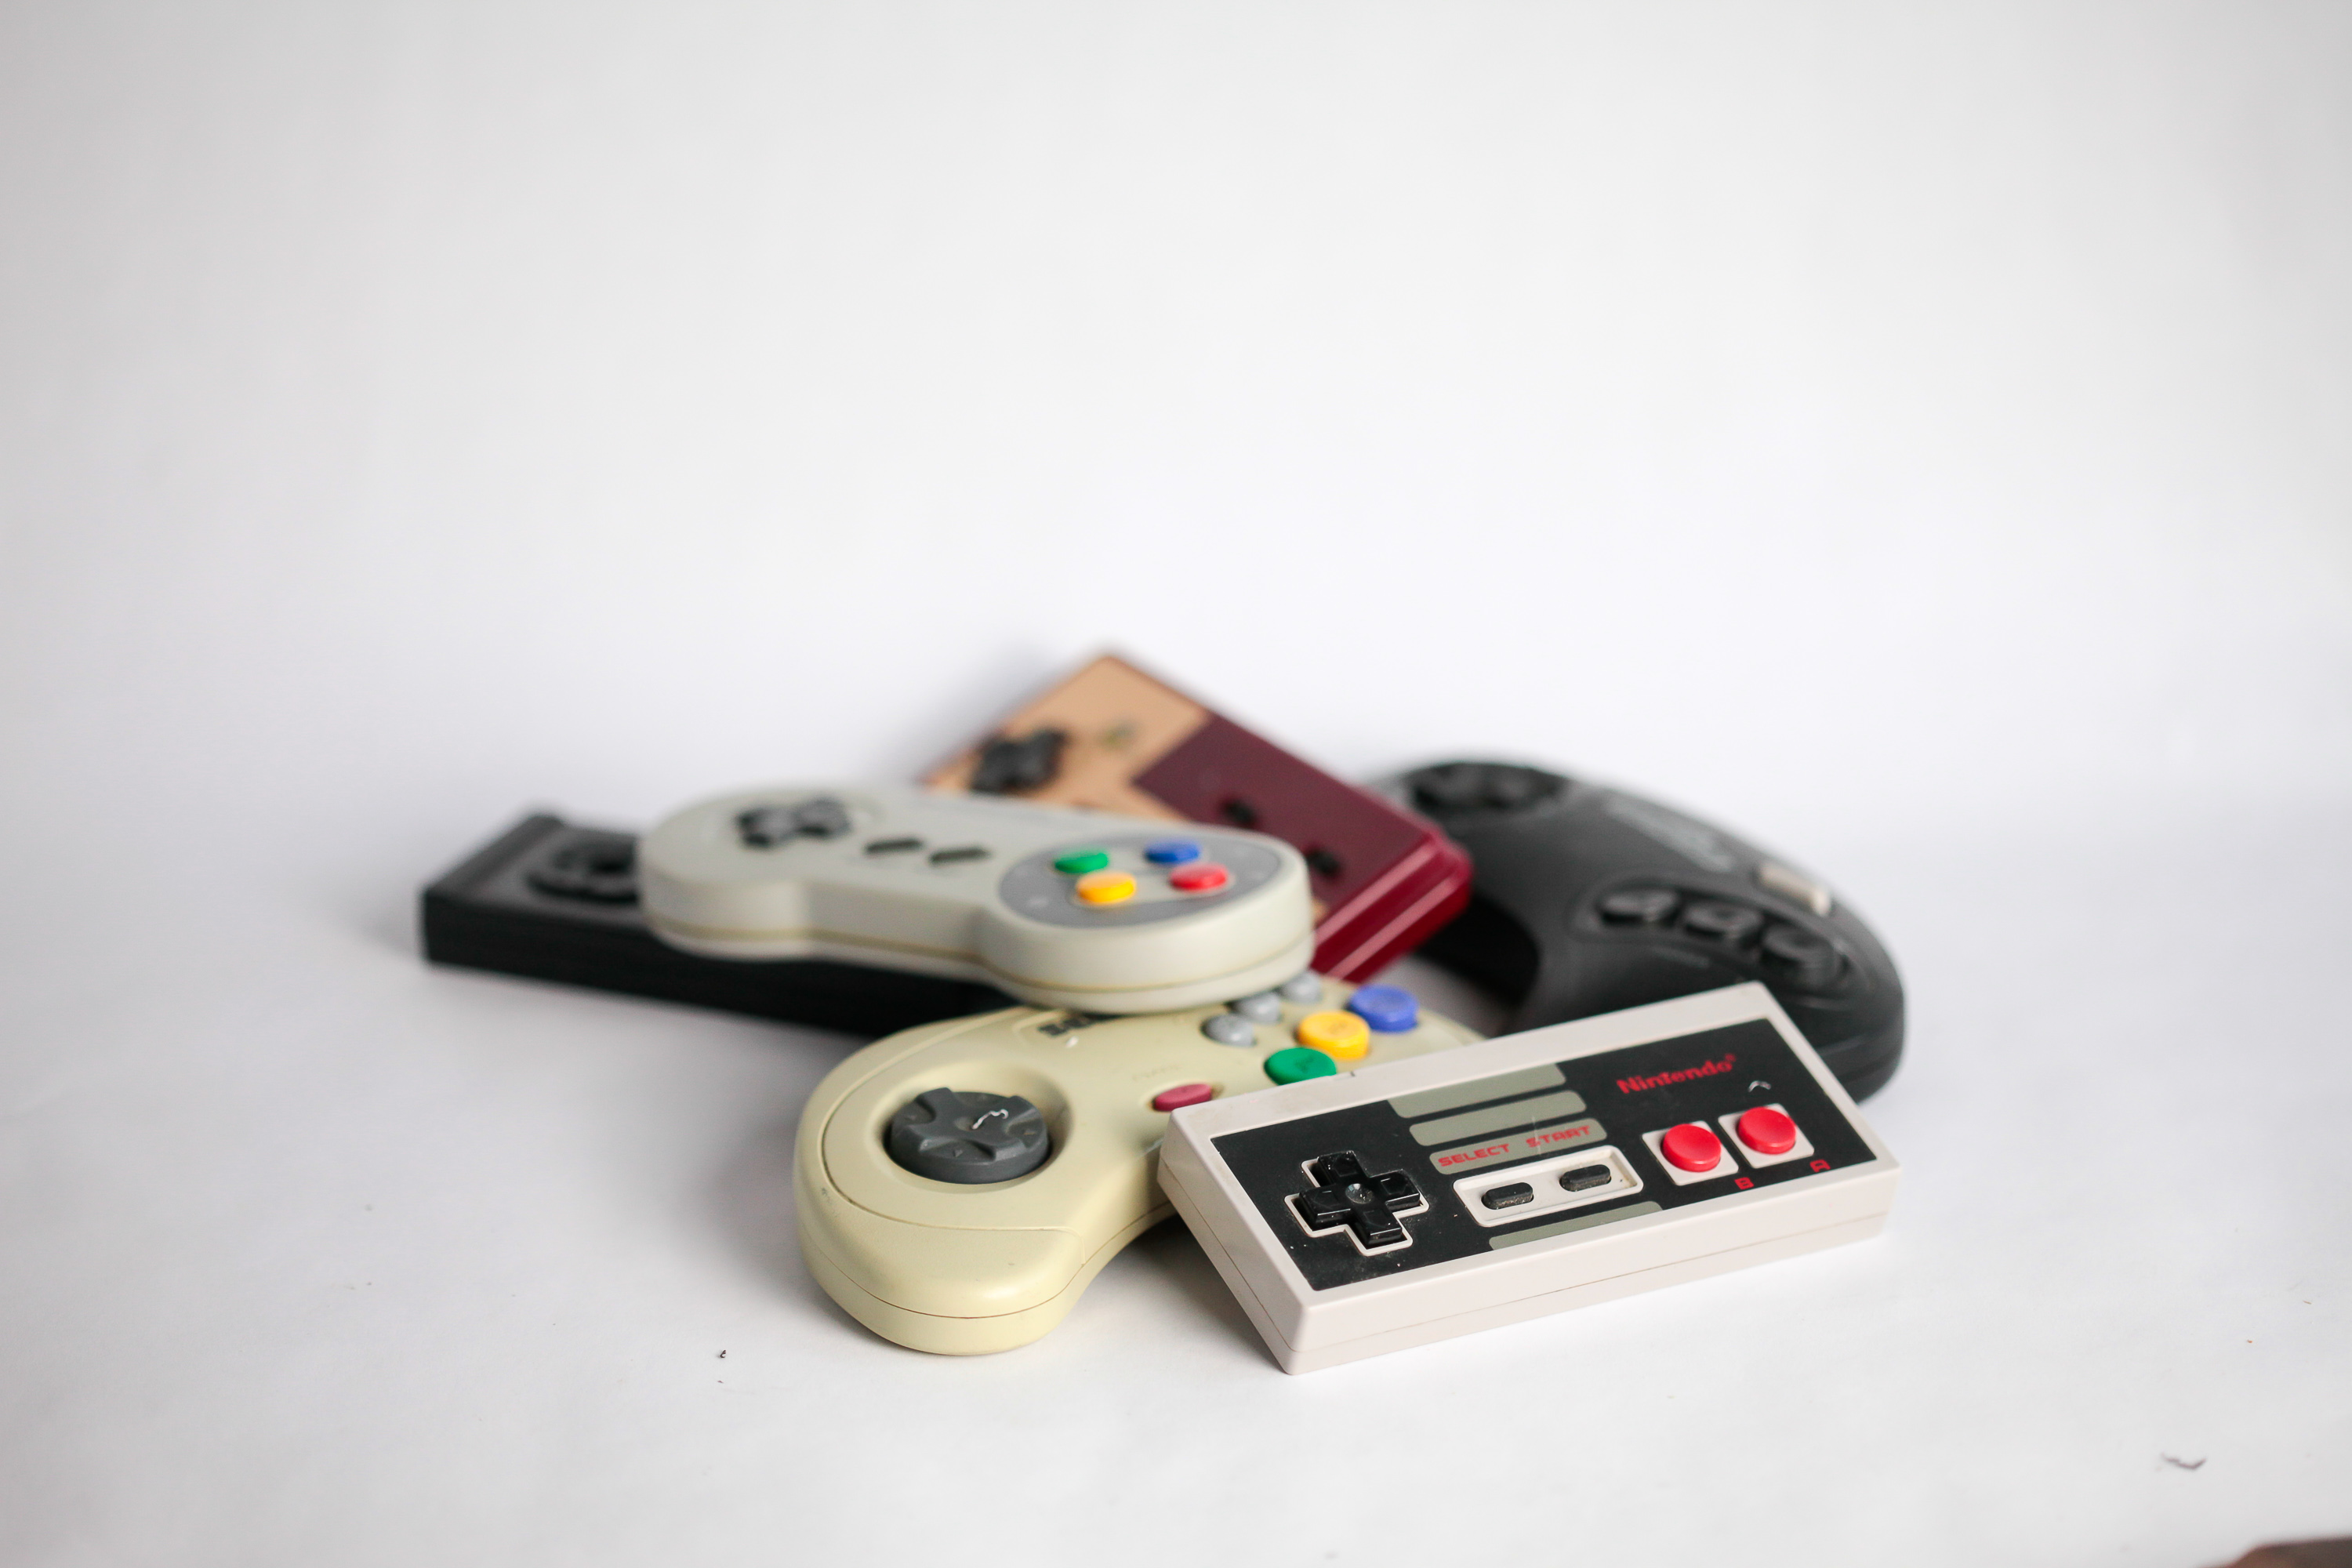
Not wanting to destroy good, working controllers, I ordered some broken ones off of ebay.
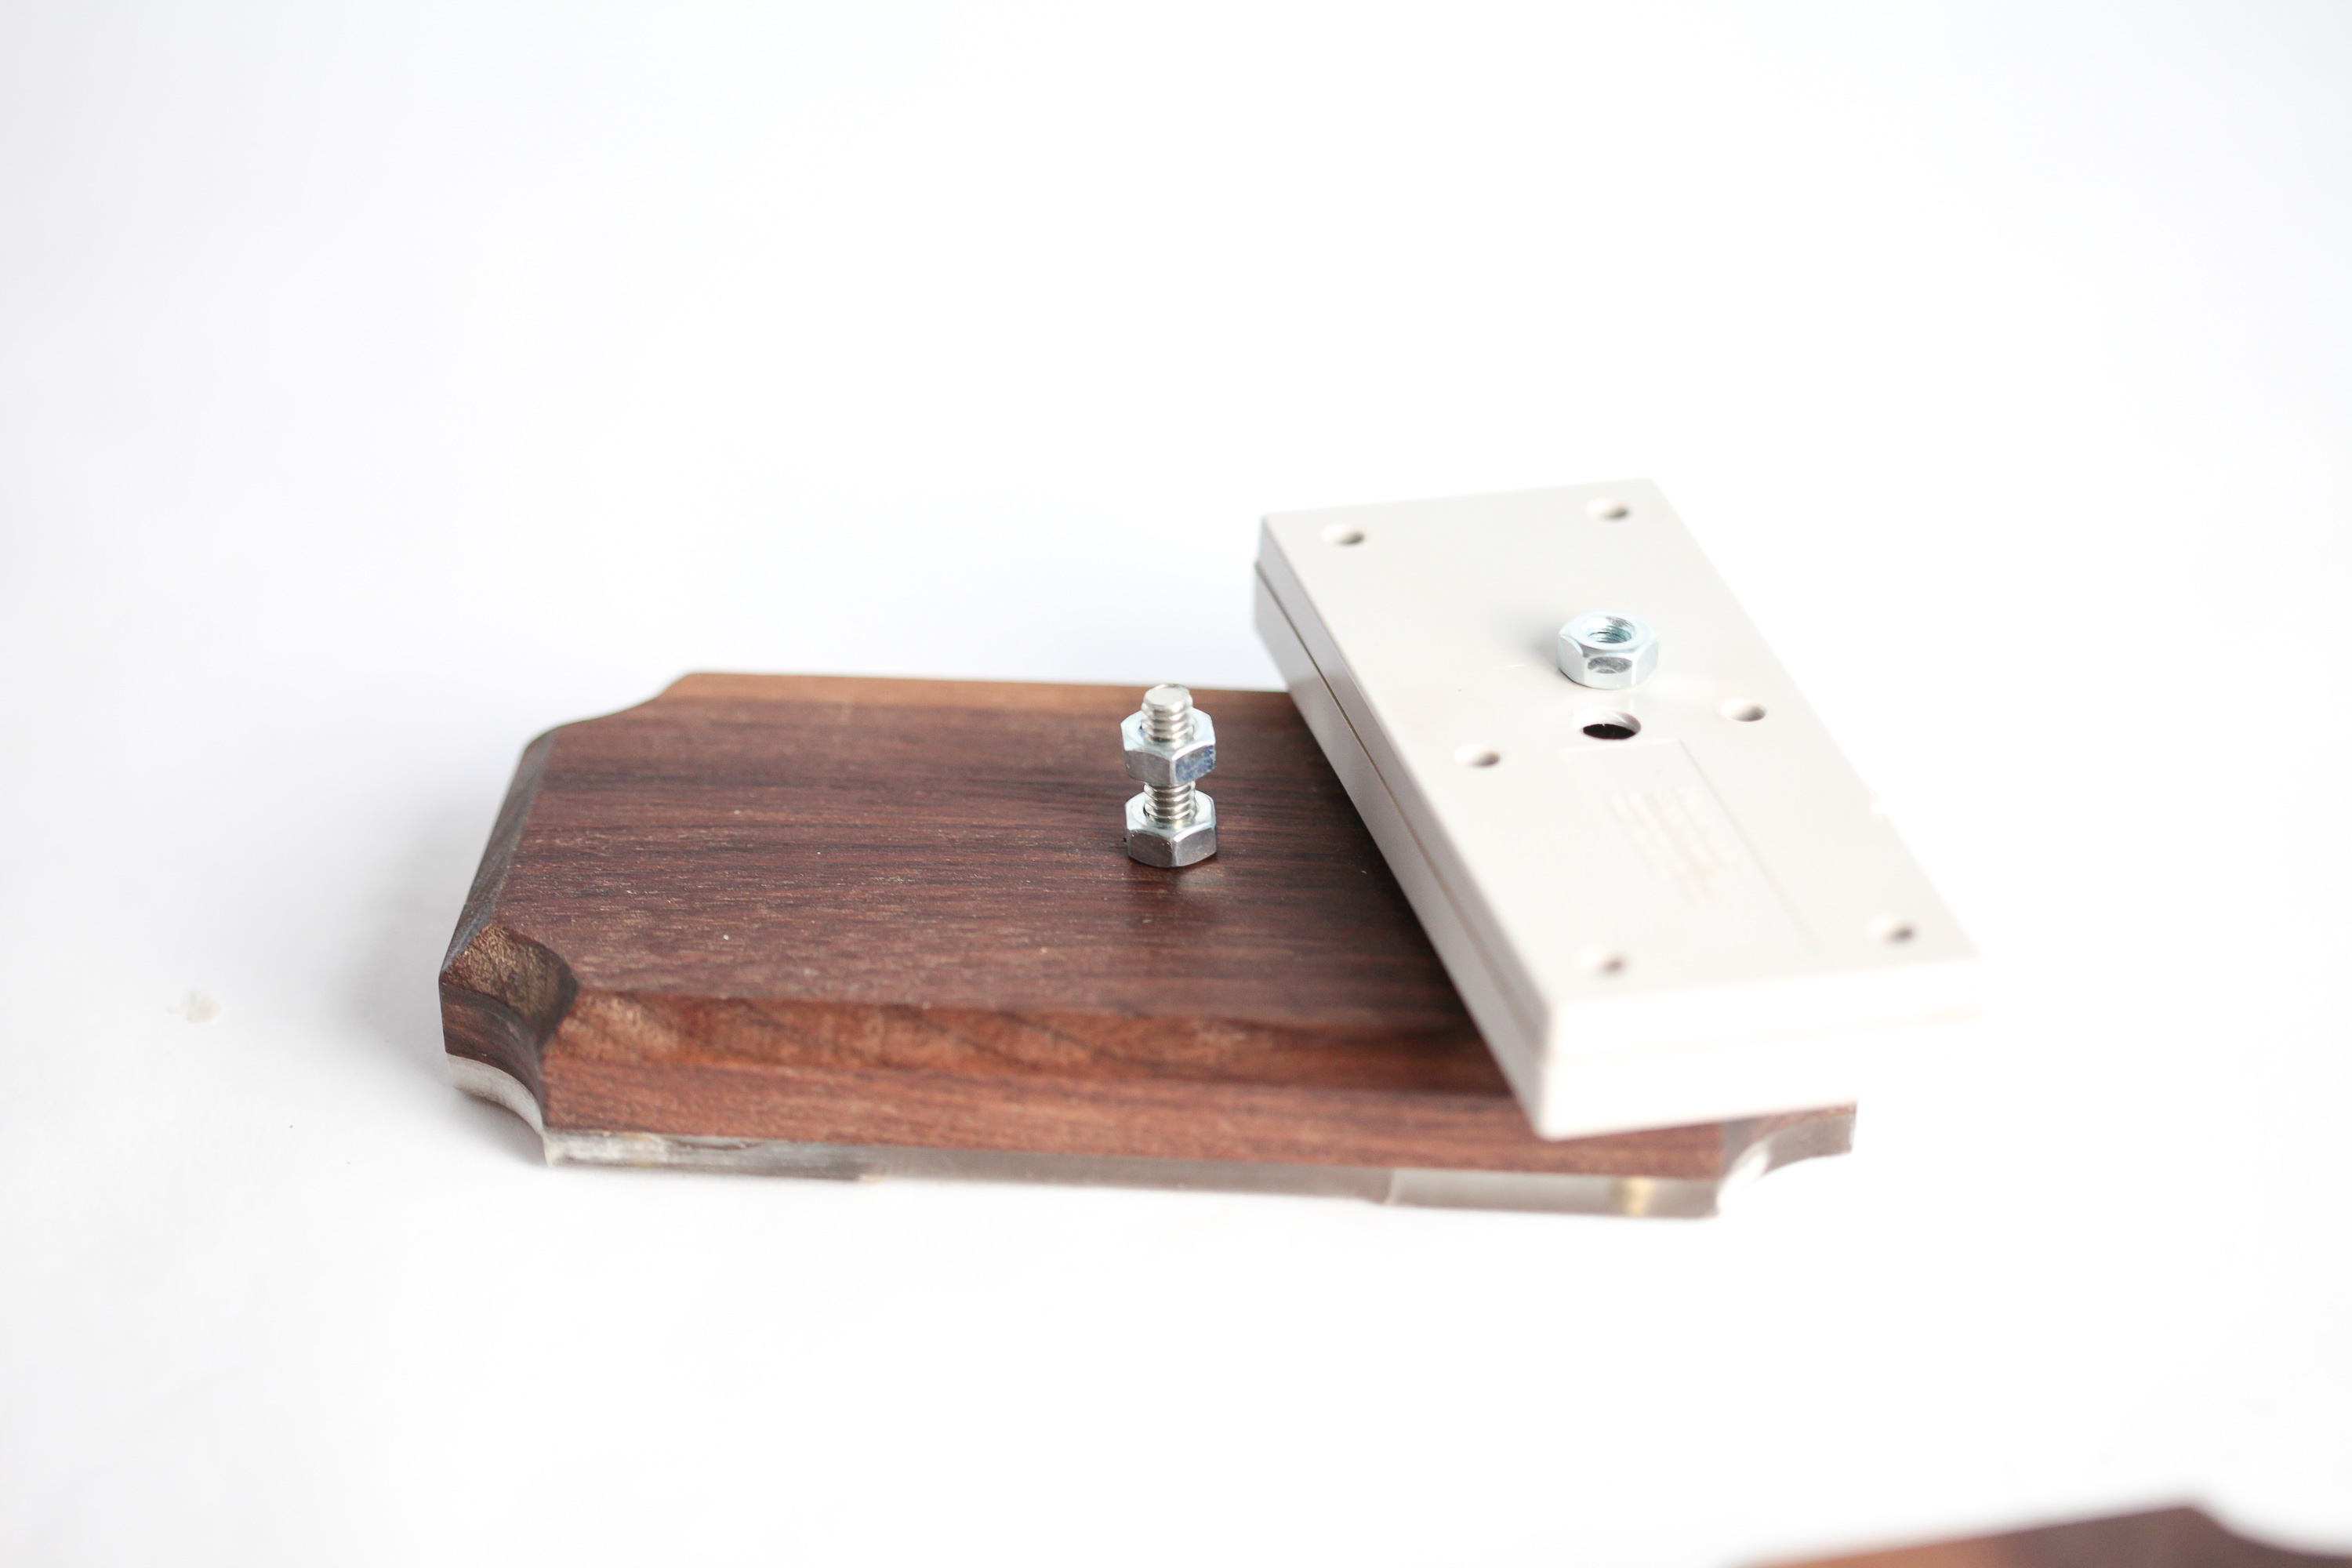
After removing the cable from each controller, I drilled a hole in the back of it and then epoxied a nut over the hole and clamped to dry. This is the one part of the piece that I really wish I had come up with a better solution for. I don't trust the strength of the epoxy against the plastic and nut, but so far they all seem to be holding up well.
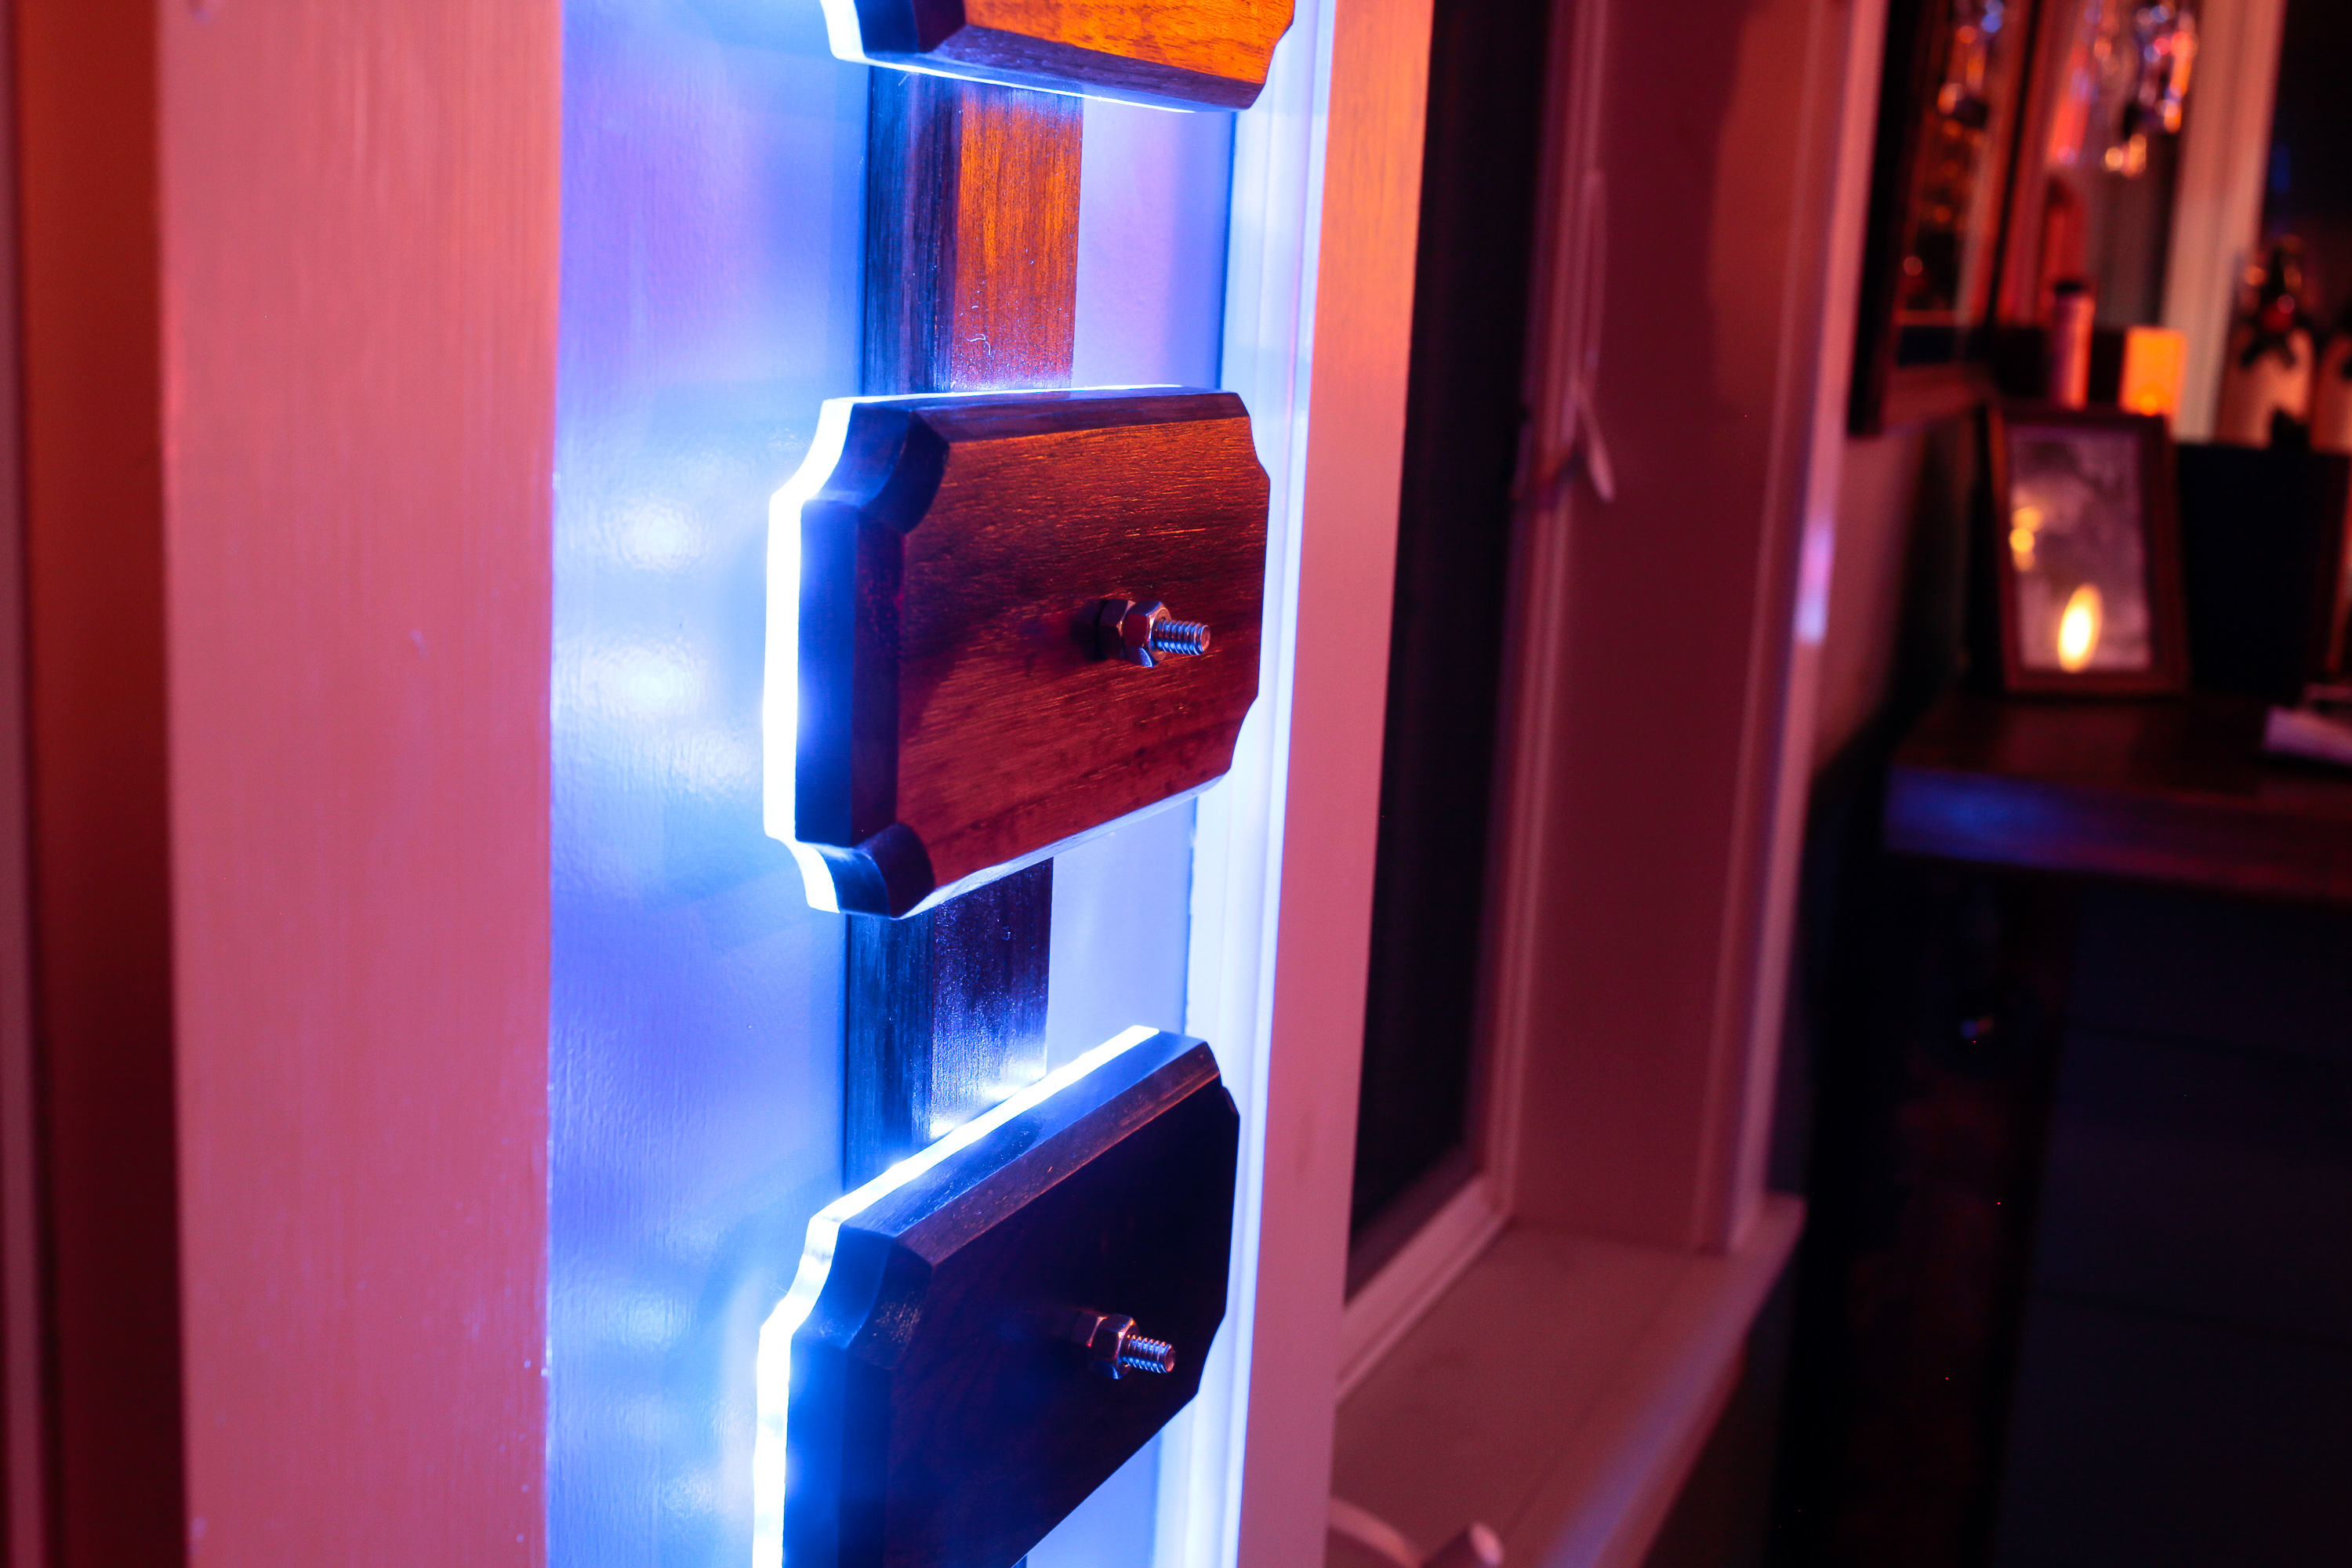
While waiting for the epoxy to dry, I could finally mount the completed display to the wall for the first time. The 2 mounting holes are hidden behind the 2nd and 5th panel. I removed the panels to access the holes and then replaced them after screwing the display to the wall.
I finished up the installation after a couple of late-night sessions.
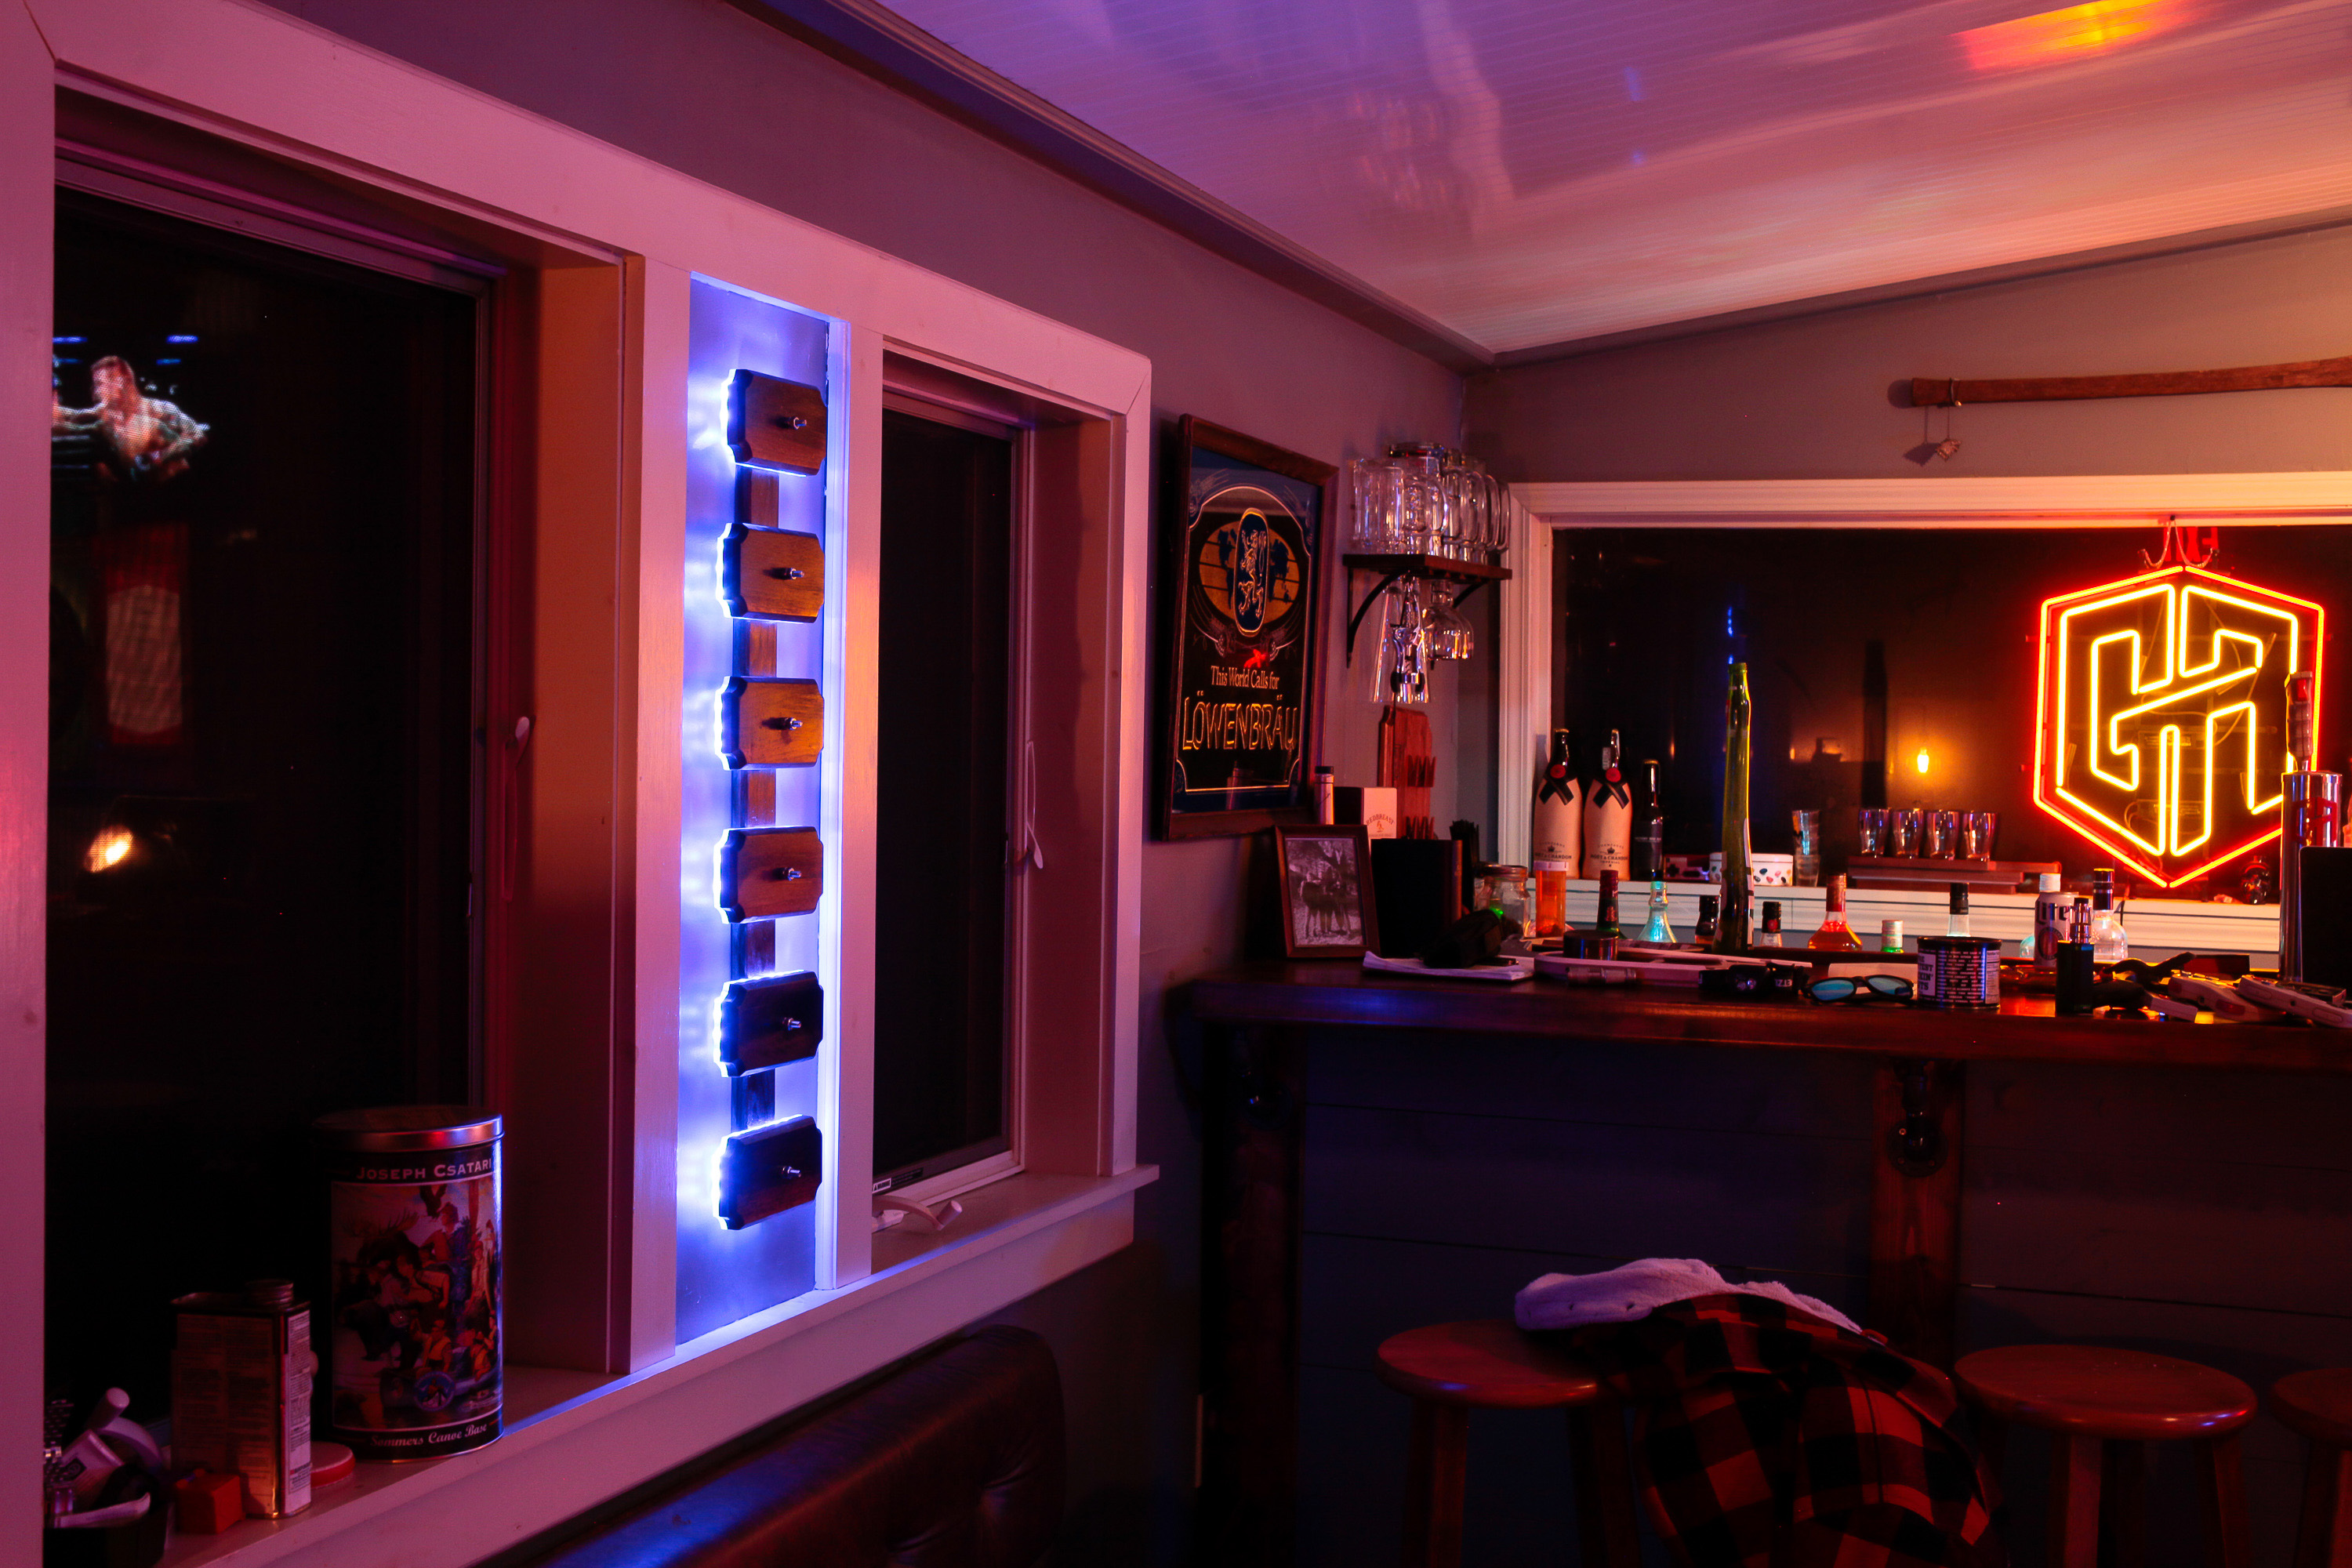
I'm very happy with the final look, . It really fit the rustic vibe I have going in my bar while still have a fun retro vibe. Best of all, this awkward gap between the windows finally has a purpose.
Thanks for checking my project out!
Share this Project
Semper Why, NotAClue, y2j514 and 8 others like this.
User Comments
Sort Comments By