My wife is a big Dr. Who fan so I made her a Tardis themed laptop tray. I have made these trays for myself and 3 kids but without any decoration. I wanted to give an epoxy inlay a try so I thought this would be a good project to try it on. I found the .svg file on Etsy at Tardis in the Vortex SVG | Etsy .
- Machine Type:
- Other Machine
- Software:
- Fusion 360 for CAD, Estlcam for CAM and control
- Electronics:
- Other Controller
- Machine Time:
- 20 minutes-ish
- Bit or Laser Size:
- 60 degree 1/2" V-bit
- Feeds & Speeds:
- Feeds 3000mm/min 18000 rpm
- Materials:
- Plywood, Alumalite Epoxy Resin, acrylic paint, graphite powder to darken the blue, Rust-oleum 2x Gloss clear-coat.

Originally I had planned to do this with Vcarve Desktop, but the .svg had issues and extra lines when opened with that software. So, since I had previously created the .dxf file for the tray in Fusion 360, I just imported the .svg to that model and created a new .dxf file:
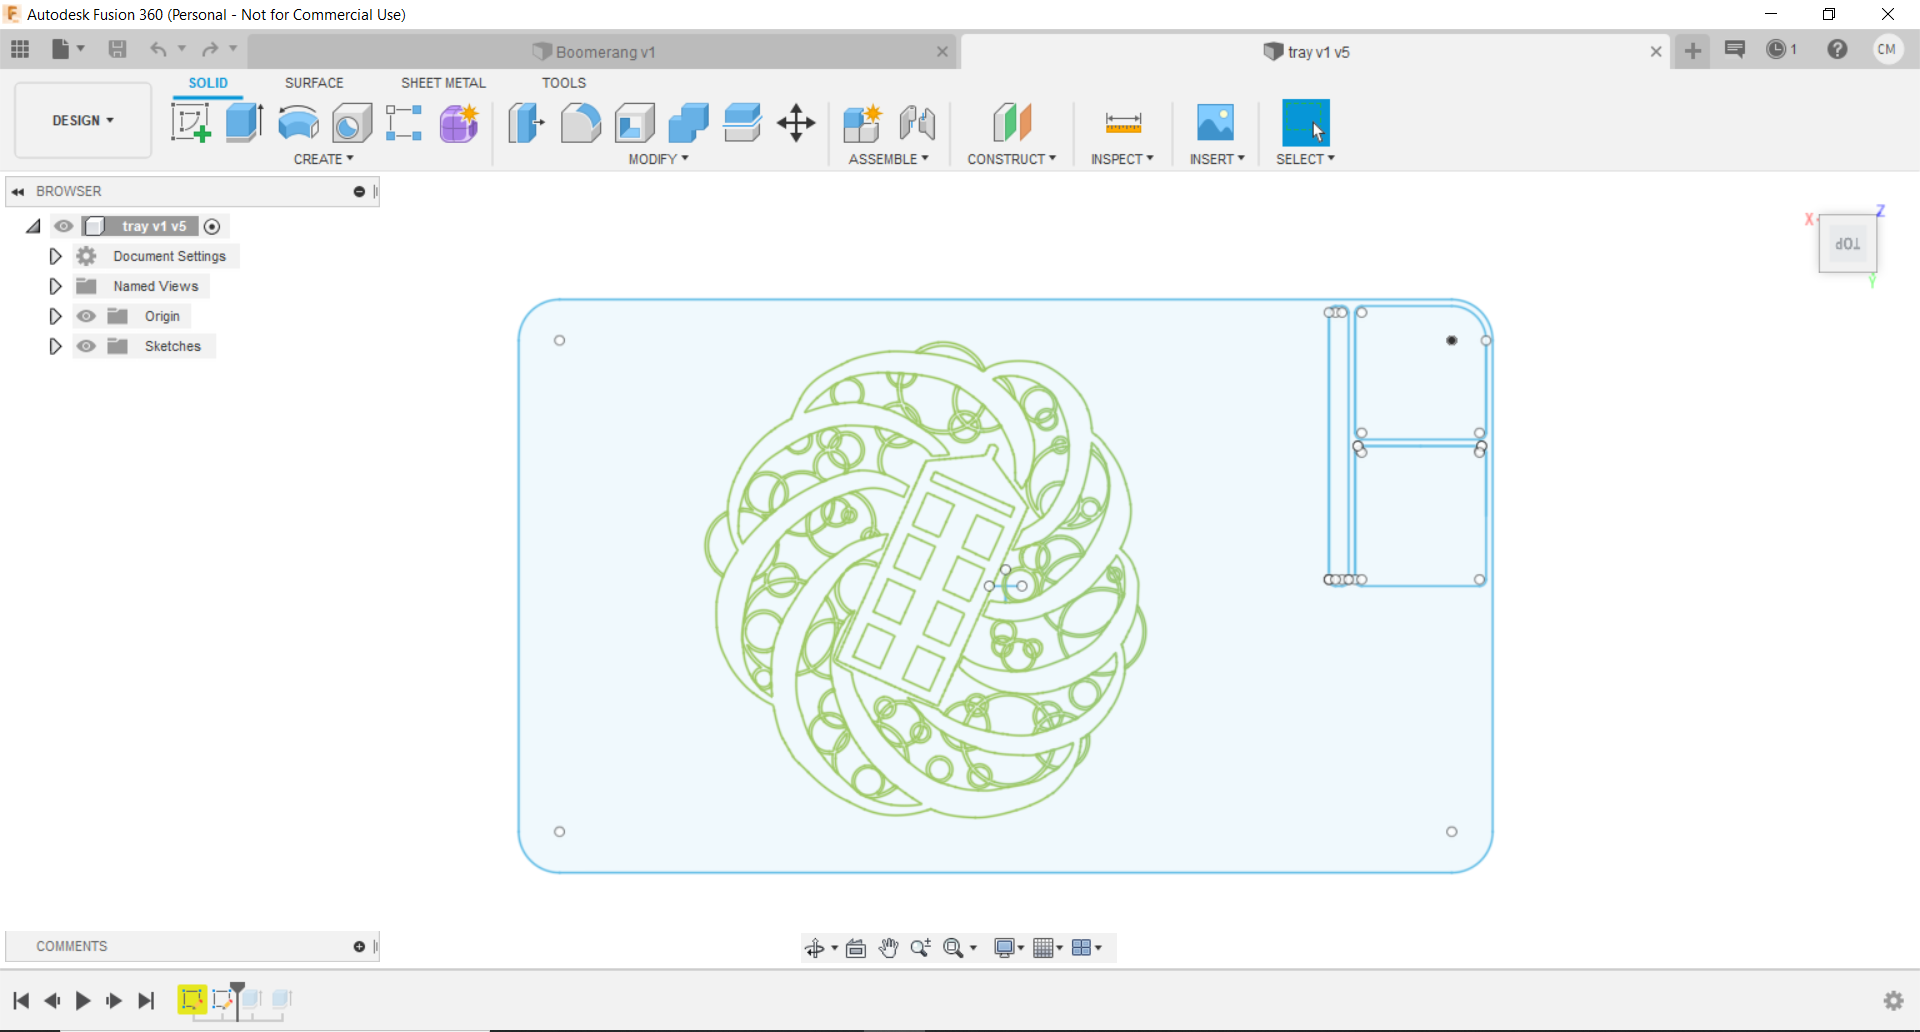
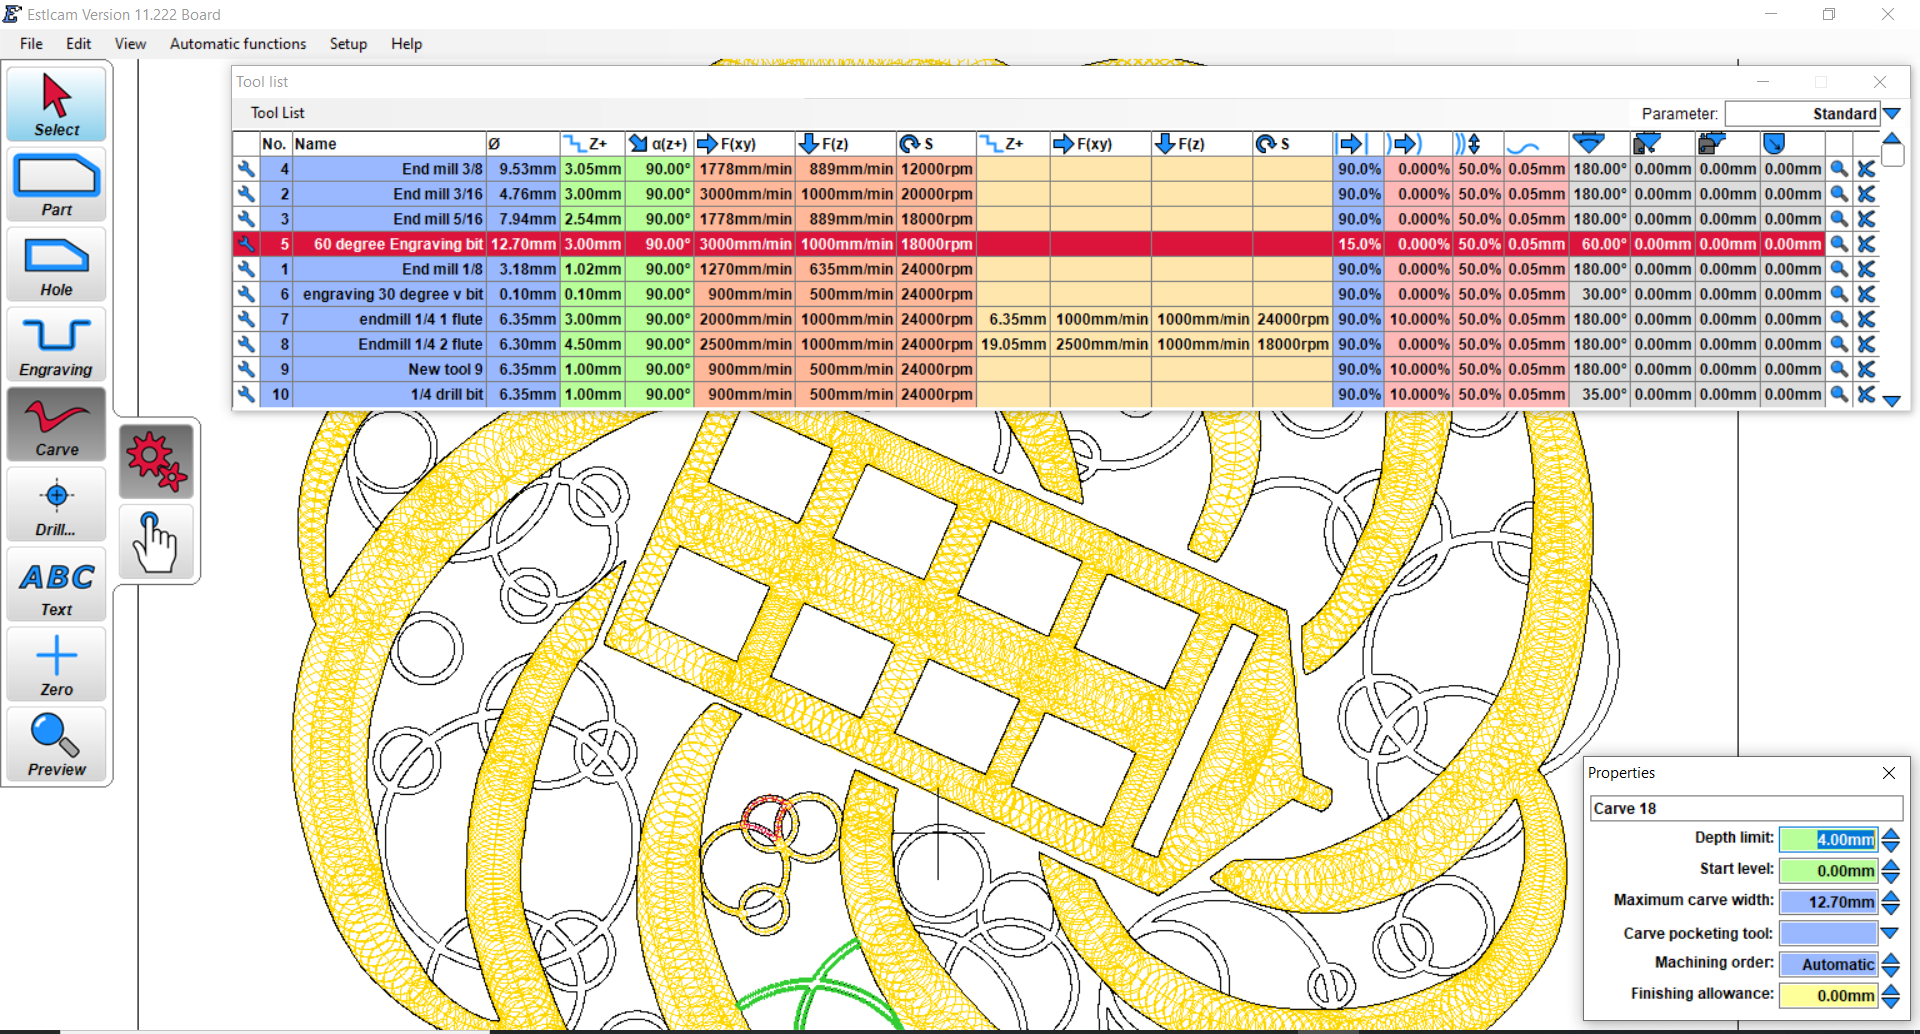
Then I saved it to my Onedrive and went out and opened in on the garage computer and generated the toolpaths with Estlcam:
After cutting, I tinted some Alumalite casting epoxy resin with blue acrylic paint and graphite powder. The graphite powder was what I had on hand that was black and compatible. I use graphite powder mixed with epoxy for fill coats on the bottom of canoes and kayaks. Once cured, I sand it exposing the graphite and in the water it is super slippery for getting over rocks and logs with the kayak/canoe. But I digress...
I picked this resin up locally at Michael's Crafts because there is always at least a 20% off coupon for purchases there. Alumilite Amazing Clear Cast, 16oz.
Once mixed, I poured it into the carved swirl area. It was explained to me this is the "time vortex." Two miracles happened on this project. The first is I mixed exactly the amount I needed. There was very little waste.
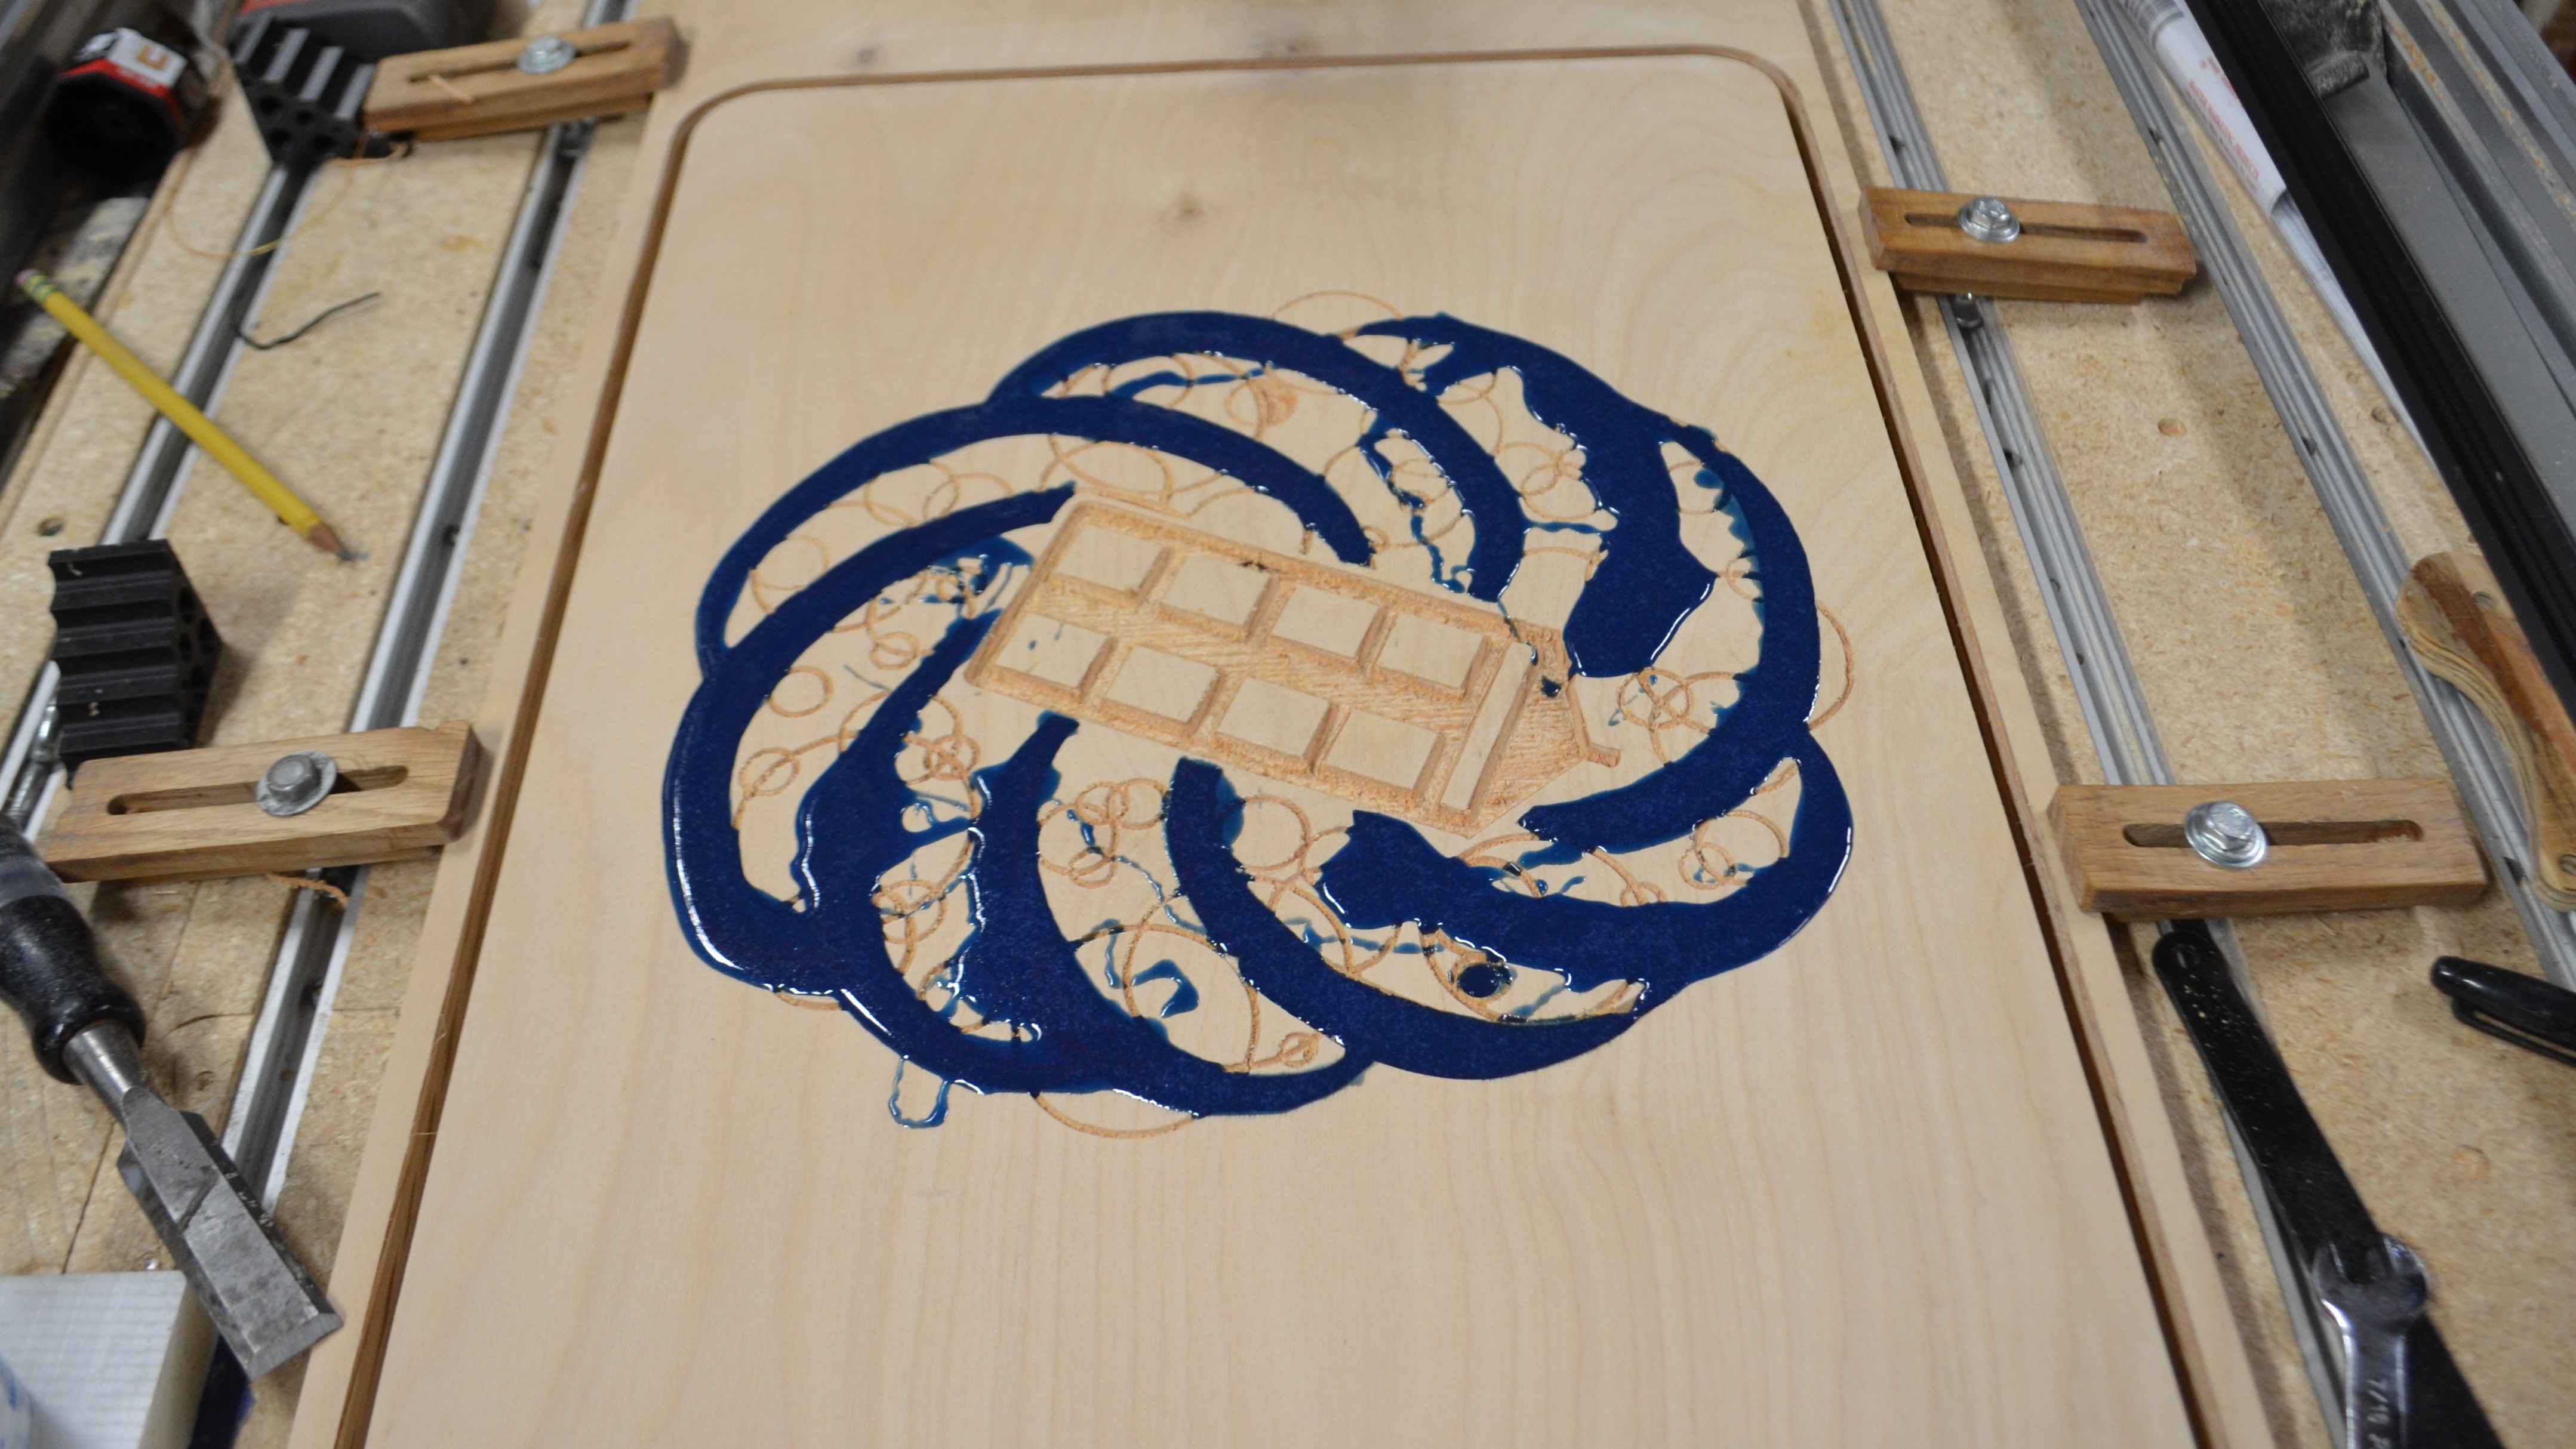
I spread it around with an old credit card. Credit cards and gift/rewards cards make great squeegees. I have not bought a squeegee in years. I also smeared it all over the board like a stain so the rest of the board would match the areas around the pour in case I could not sand it all off.
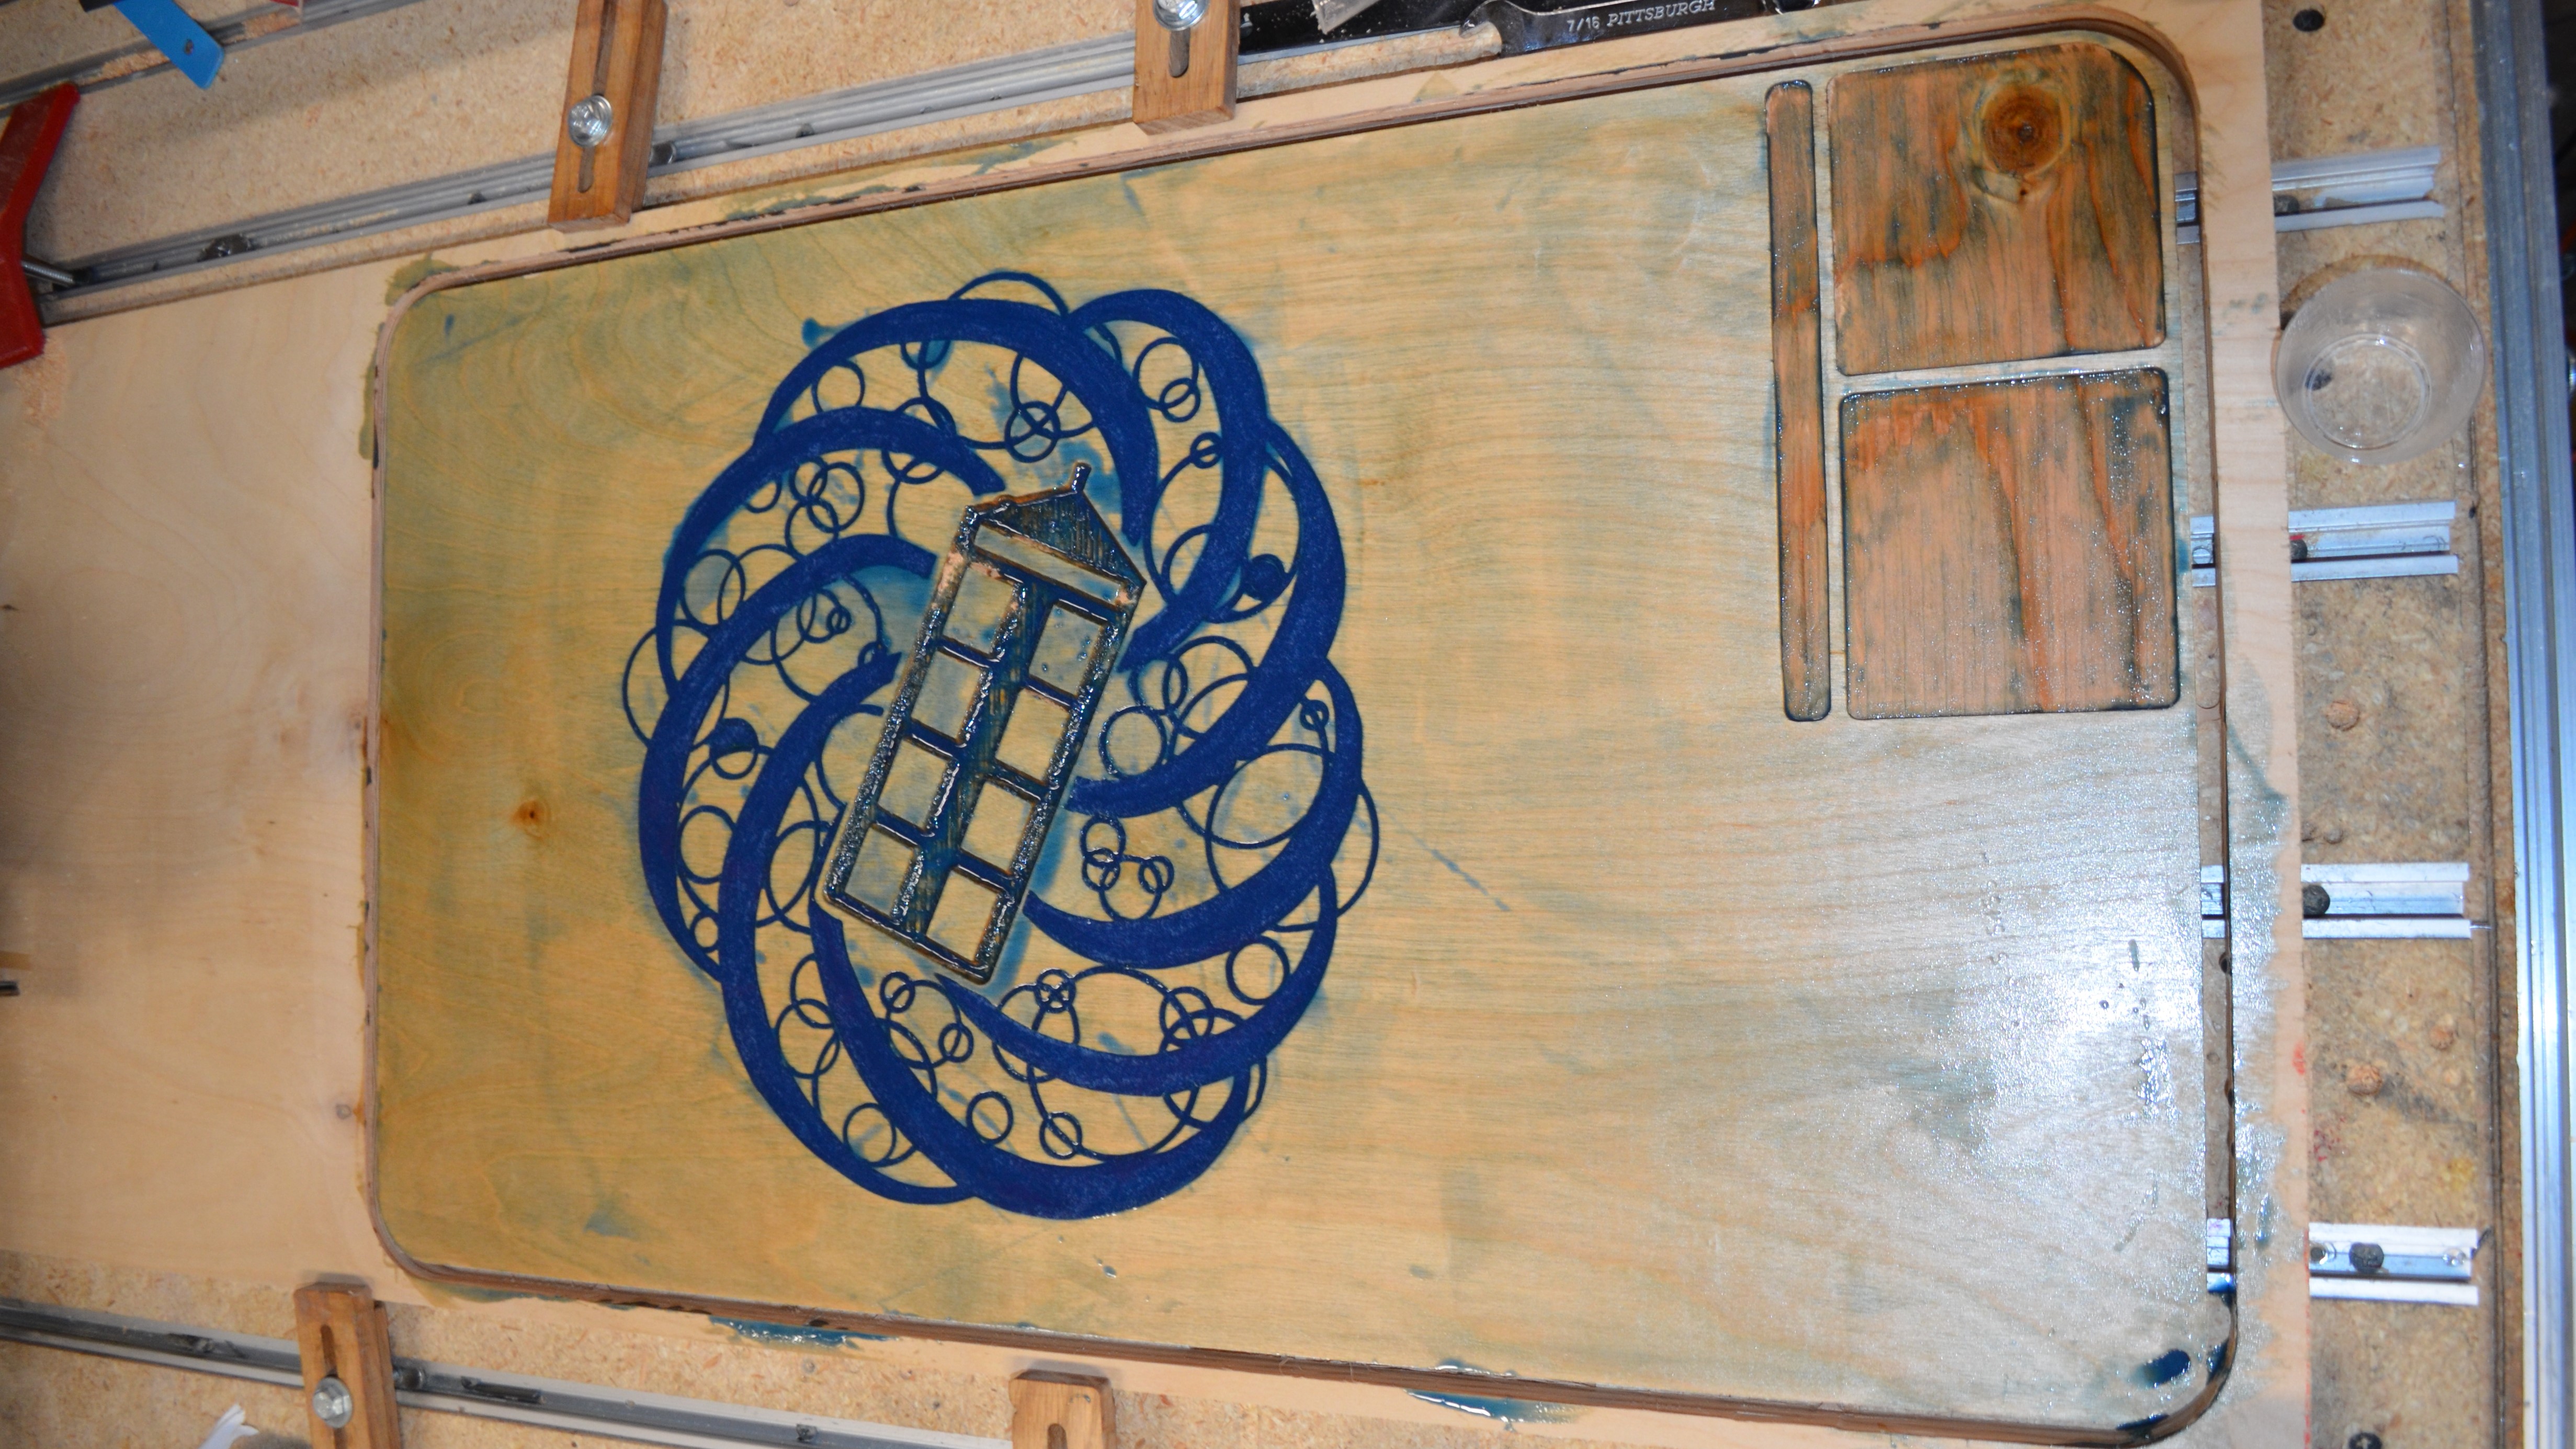
The second pour was mixed in the first pour's mixing cup so it would be a little darker than the acrylic color but not too much darker. Then the second miracle occurred. I mixed exactly the amount I needed for the Tardis portion plus a little more for the pockets which were cut for a pen and for other things like SD cards. The camera flash made this second pour look really light blue. You can also see where I spilled my acrylic paint all over the CNC machine on the left.
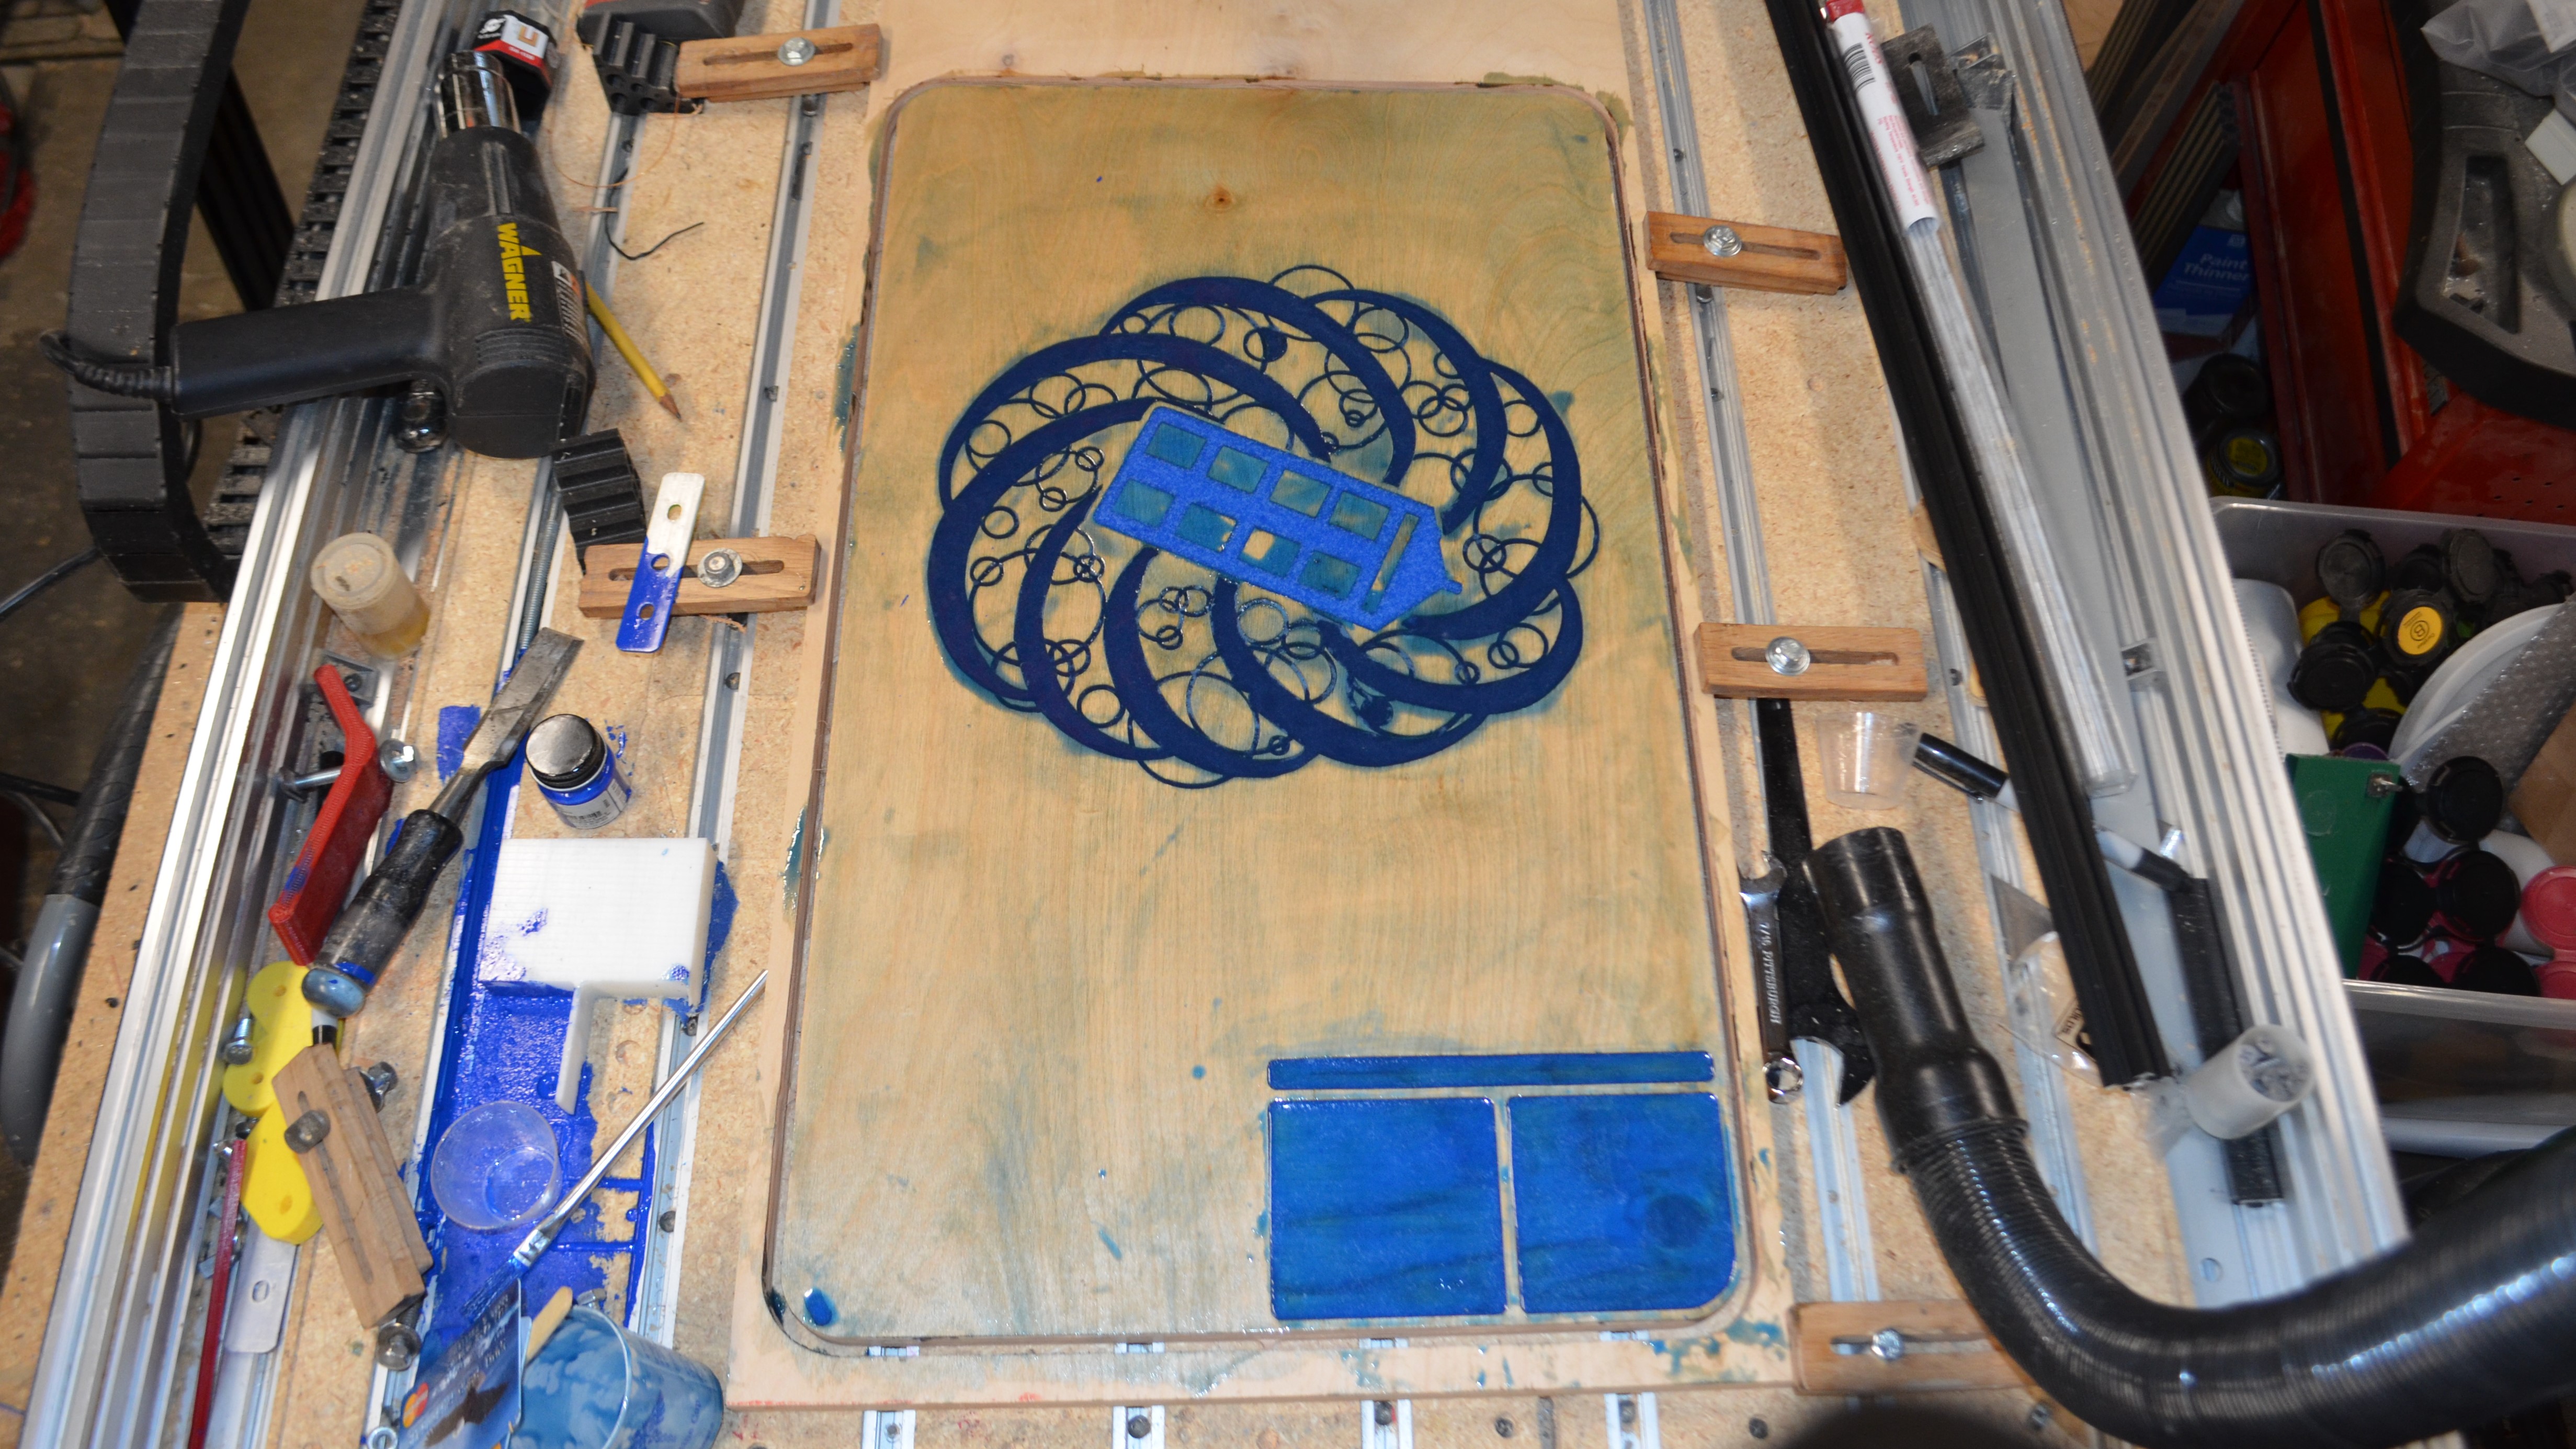
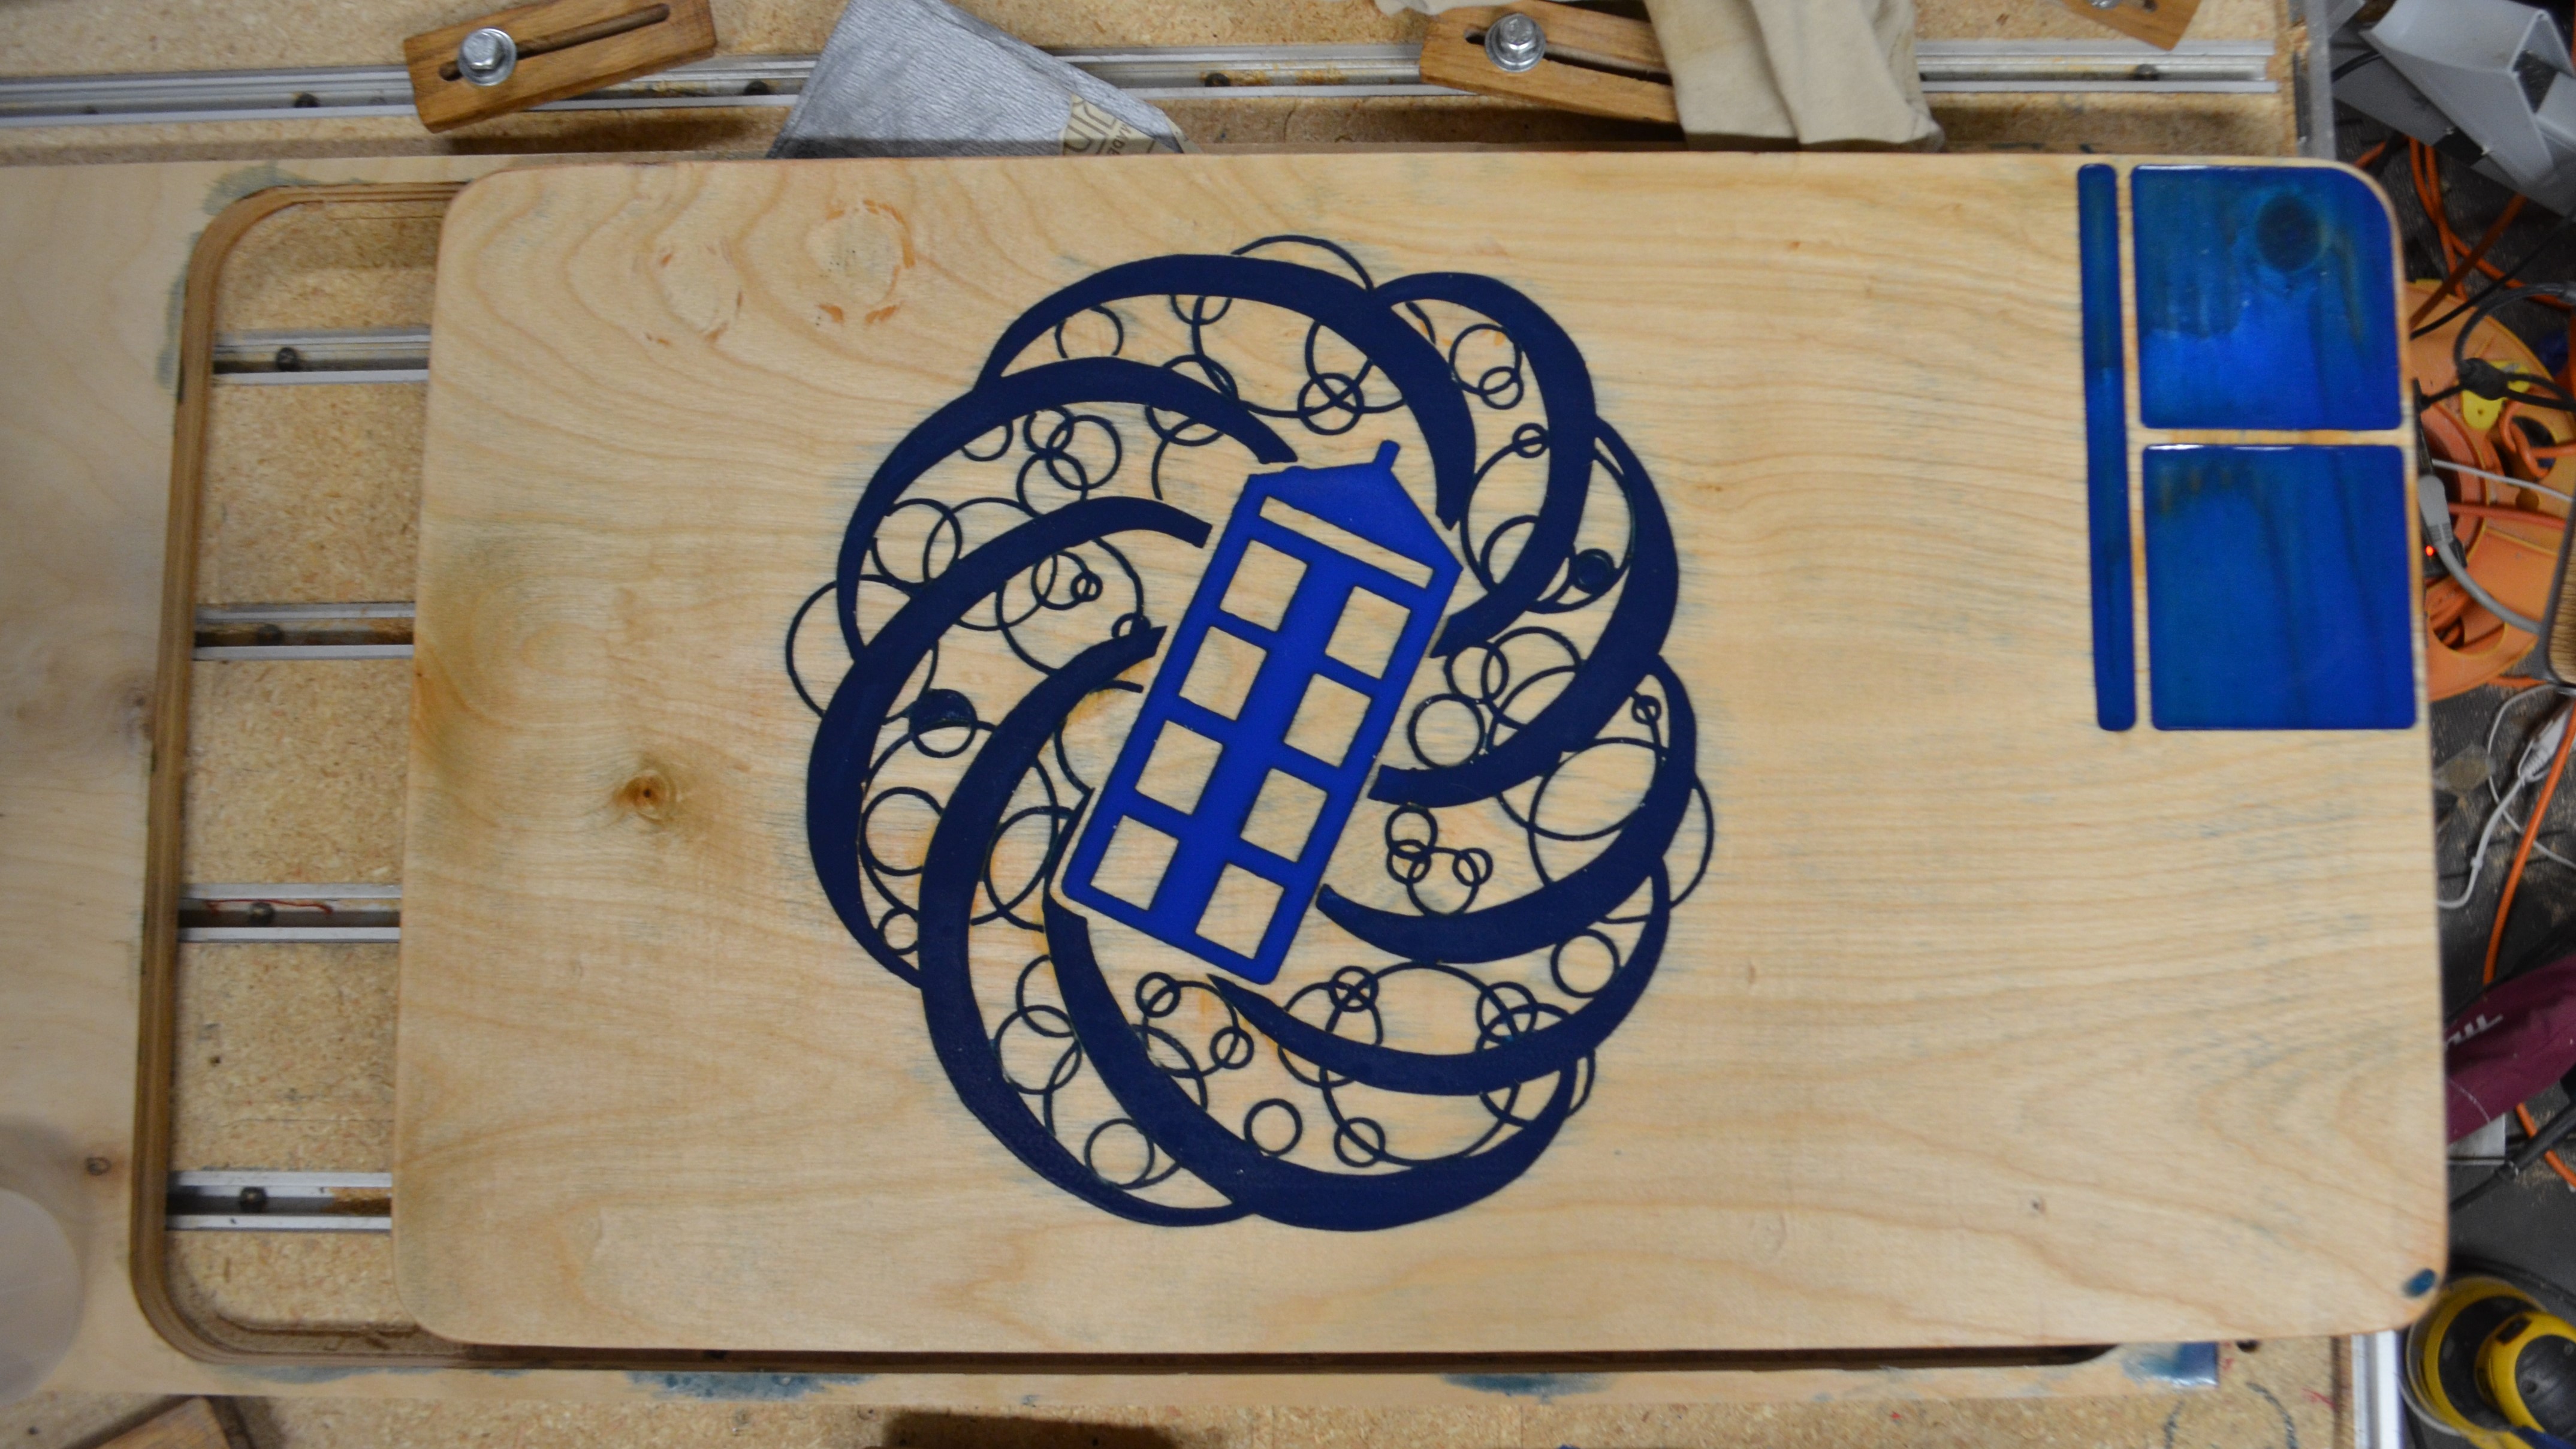
After pouring, I used a heat gun to blow on the surface to pop bubbles. I left it overnight to cure. However, in a garage close to freezing, it was not happening fast enough. So, the next day I let the heat gun blow across it for probably close to 8 hours. This did the job and last night (12/24 - yeah I know I am a horrible husband for waiting until the last minute) I was able to sand it all down and flush. Then I sprayed 3 coats of Rust-Oleum 2x Clear coat on both sides and edges. You can still see the wood grain on the pockets on the right due to it being a thin coat of resin.
The following is a quick 2:22 video showing the process. You can see that the bottom of the carve is very rough. I did a 15% stepover (I think) with the V-bit. This was intentional for two reasons: the resin would have extra material to bite into, and it made the machining much faster. This was also the first time I v-carved that fast (3000mm/min). The one mistake I made was I put the depth limit at 4 mm, but my v-bit DOC settings was 3mm. This caused the CNC to have to do two passes. I should have just set the depth for 3mm, but then those two aforementioned miracles would not have happened and resin would have been wasted.
If I were to do something like this again, I would purchase higher quality plywood that has thicker top plies than the Home Depot crap I used. That gives you more margin of error for sanding the surface down.
For those interested, I downloaded the Dr. Who Font used in the video here: Doctor Who Font Download

Share this Project
Semper Why and Mark Carew like this.
User Comments
Sort Comments By