Welcome to Our Community

Some features disabled for guests. Register Today.

OpenBuilds WorkBee 1510

Discussion in 'CNC Mills/Routers' started by Mark Carew, Jun 15, 2018.

  1. SeriousCaller

    Builder

    Joined:
    Mar 29, 2020
    Messages:
    8
    Likes Received:
    6
    Are you sure? Cause I followed the instruction video showing him inserting one mini-v precision shim on one of the sides of the wheel.


    Look at 1:24 in the video. Looks wierd I agree, but I suppose that one bearing is offset 1 mm because of the shim.

    Imgur

    Took additional pictures of the mounted wheel. I also tried flipping the wheel to see if it helped, but it didnt.
     
    #121 SeriousCaller, Mar 29, 2020
    Last edited: Mar 29, 2020
  2. Alex Chambers

    Alex Chambers Master
    Moderator Builder

    Joined:
    Nov 1, 2018
    Messages:
    2,695
    Likes Received:
    1,326
    No, I'm not sure - I don't have a belt drive machine, but looking at your pic it looks as though there is more space below the wheel than I would expect - probably just a trick of perspective, but I can't see anything else that could be wrong.
    Alex.
     
  3. Alex Chambers

    Alex Chambers Master
    Moderator Builder

    Joined:
    Nov 1, 2018
    Messages:
    2,695
    Likes Received:
    1,326
    If you look at 5:12 on the video the bearings do seem to be flush with the outside of the wheel.
    Alex.
     
  4. Rick 2.0

    Rick 2.0 OpenBuilds Team
    Staff Member Moderator Builder Resident Builder

    Joined:
    Dec 20, 2013
    Messages:
    2,861
    Likes Received:
    1,528
    First question, do you have a spacer in the middle of the wheel between the bearings? It doesn’t appear that way in the photos.

    Next, If you press hard enough can you seat both bearings well enough to where the wheel assembly is only 9mm thick?

    Finally, where did you get this kit?
     
    Mark Carew likes this.
  5. SeriousCaller

    Builder

    Joined:
    Mar 29, 2020
    Messages:
    8
    Likes Received:
    6
    Ooookay. Solved.

    A little bit embarrased I'll admit. I had accidentally put the bigger shim in between the bearings, not the precision one. So now it's flush and spins even when the nut is tightened. New thickness of the wheel 9mm, old 10 mm :).

    The kit is from your official store. Order #102129.

    Thank you guys for "bearing" with me. ;)
     
  6. Alex Chambers

    Alex Chambers Master
    Moderator Builder

    Joined:
    Nov 1, 2018
    Messages:
    2,695
    Likes Received:
    1,326
    :) Thanks for letting us know what the problem was - useful for anyone else making the same mistake!
    Alex:thumbsup:
     
  7. Marc-Olivier Blanc

    Builder

    Joined:
    Jun 6, 2015
    Messages:
    7
    Likes Received:
    1
    Hi Guys !

    Recevied my Workbee 1510 kit this week and started the assembly and guess what ? I have a question !!! :D

    When assembling the mini V wheels it is asked to insert a mini V precision shim in it. So far so good !!

    When assembling the Y right plate it is asked to add 2 mini V precision shims on each screws. So far so good !! wait for it ... it's coming right up :p

    When Assembling the Y Left plate it is asked to add 2 mini V precision shims on each screw. So far so .... wait what ?

    If my count is correct that would make 12 mini V precision shims and only 8 are listed (and delivered) !

    What did I do wrong ? or read wrong ? or understand wrong ? I french so it can only be one of these three !! :cool:

    Many thanks to anyone willing to help a noob ;)

    take care and stay safe.
     
  8. Peter Van Der Walt

    Peter Van Der Walt OpenBuilds Team
    Staff Member Moderator Builder Resident Builder

    Joined:
    Mar 1, 2017
    Messages:
    14,000
    Likes Received:
    4,112
    I am not sure off the top of my head, sadly, but I would suggest grabbing the sketchup file from the Build Page and exploding/zooming your way in to check it closely :)

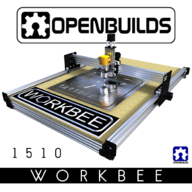
    OpenBuilds Workbee 1510 (60" x 40") > files and drawings tab
    If you need sketchup, use Sketchup Make 2017 Download All | SketchUp
     
  9. Marc-Olivier Blanc

    Builder

    Joined:
    Jun 6, 2015
    Messages:
    7
    Likes Received:
    1
    Hi Guys,

    I'm a bit lost cause in the Sketchup model the miniwheels have no shim inserted :
    Mini V Delrin  Wheels.png

    But in the video at 1:28 it is said put in the precision shim ...

    If I don't put the precision shim in the mini V wheels I have enough shims if I put them I don't have enough shims ...

    I know truth is out there (SF fans will recognize ;)) but where is it exactly ?

    Thanks guys for your help :)
     
  10. Peter Van Der Walt

    Peter Van Der Walt OpenBuilds Team
    Staff Member Moderator Builder Resident Builder

    Joined:
    Mar 1, 2017
    Messages:
    14,000
    Likes Received:
    4,112
    Mark Carew likes this.
  11. Rick 2.0

    Rick 2.0 OpenBuilds Team
    Staff Member Moderator Builder Resident Builder

    Joined:
    Dec 20, 2013
    Messages:
    2,861
    Likes Received:
    1,528
    If you’re only short 4 I would probably eliminate the 4 up against the inside gantry plate. As far as I can tell they don’t serve much of a purpose.
     
    Giarc and Peter Van Der Walt like this.
  12. SeriousCaller

    Builder

    Joined:
    Mar 29, 2020
    Messages:
    8
    Likes Received:
    6
    Does anyone have any experience with tensioning of the y-axis belts (the long ones) on the 1510?

    After I achive tension on both sides of the carriage, I move the gantry back and forth by hand, and after one or two runs, the belt is completely slack again...

    Im starting to regret I went with the belt version, instead of the ones with leadscrew. :(.
     
  13. Alex Chambers

    Alex Chambers Master
    Moderator Builder

    Joined:
    Nov 1, 2018
    Messages:
    2,695
    Likes Received:
    1,326
    I can't help much with the belt tension problem, but please be aware that if you move the axis around by hand with the motors connected to your stepper drivers you are turning the motors into generators and could damage your electronics.
    On the belt tension problem - is the belt stretching or coming loose? Where did you get the machine from?
    Alex.
     
    Peter Van Der Walt likes this.
  14. SeriousCaller

    Builder

    Joined:
    Mar 29, 2020
    Messages:
    8
    Likes Received:
    6
    Right now the motors aren't connected to the steppermotors.

    I have adjusted the belt so that it almost vibrate when I push it down. Then I move the gantry back and fourth a couple of times to simultate how the machine would operate, the belts come loose. Or atleast the become really slack. It might be that the tensioner isn't able to hold the belt inplace. Maybe I need to modify the L-blacket.

    Imgur

    Oh, and the machine is bought from OpenBuilds website.
     
  15. Peter Van Der Walt

    Peter Van Der Walt OpenBuilds Team
    Staff Member Moderator Builder Resident Builder

    Joined:
    Mar 1, 2017
    Messages:
    14,000
    Likes Received:
    4,112
    Is it slipping out of the belt clip?

    Check your assembly


    Check (timetamp 1:14:50 onwards) against the assembly video again, the Imgur link it looks kinda loose. Also check the Ooznest docs 8. Timing Belts & Finishing Details the tensioner is originally from there


    Also see

     
  16. SeriousCaller

    Builder

    Joined:
    Mar 29, 2020
    Messages:
    8
    Likes Received:
    6
    I think I found what I did wrong. In the youtube-video it doesn't show that you should use a "zip-tie small" to secure the end of the belt to itself. But in the documentation it does.


    Imgur

    Also the official workbee video never mentions the ziptie, but I think I can spot it on one of the ends of the belt.

    Sweet! I'll give this a try tomorrow. Will let you guys know how it went. Thanks!
     
    Peter Van Der Walt likes this.
  17. SeriousCaller

    Builder

    Joined:
    Mar 29, 2020
    Messages:
    8
    Likes Received:
    6
    Alright. I've ziptied the belts at both ends. Done on the x-belt, aswell on both y-belts. From my first tests, it seems to be working.

    Images attached.


    IMG_20200506_141950.jpg
    IMG_20200506_142007.jpg
    IMG_20200506_143541.jpg
    [​IMG]
     
  18. Mark Carew

    Mark Carew OpenBuilds Team
    Staff Member Moderator Builder Resident Builder

    Joined:
    Jun 28, 2013
    Messages:
    2,745
    Likes Received:
    2,410
    Great to hear.
    The video displays the use of the belt tensioner only. We added the zip ties in the tips and tricks for the actual build (after the build video was released) as Peter mentioned its a lot tougher to change the main video and all its links so we added it in as a Mod and Upgrade
    Hope this helps
    Mods and Upgrades

    Hey guys, the community has found these tricks and tips that are very helpful when building your 1510 belt driven WorkBee. Please take time to check them out.

      • Make sure that all timing pulleys are tightened down completely to the motor shaft of all axis's. (You really want the pulley and motor shaft to be one.) NOTE: You can also use M3 x 6mm screws in place of the grub screws.
      • Add zip ties to all ends of the belt overlaps once tension is properly accessed to the belt. (This will insure that the belt cannot come loose in time)
        [​IMG]
      • M5 x 12mm screws are provided for the belt tensioning process, so it's easier to add tension to your belt drive system.
      • #8 ½” wood screws work great for the mounting of the spoiler board.
     
    Rick 2.0 likes this.
  19. Marc-Olivier Blanc

    Builder

    Joined:
    Jun 6, 2015
    Messages:
    7
    Likes Received:
    1
    Hi guys !

    thanks for your help earlier got it sorted, the reseller sent additional shims with the second package .

    now I’m facing a very weird problem : the C-Beams for the Y-Axis do not fit in the gantry assemblies !! The pulley blocks the C-Beam.

    like this :
    906CED9F-013E-4D2A-93A7-031B5AB595BC.jpeg
    Any hints what could be wrong ?

    take care and stay safe.
    Marco.
     
  20. Peter Van Der Walt

    Peter Van Der Walt OpenBuilds Team
    Staff Member Moderator Builder Resident Builder

    Joined:
    Mar 1, 2017
    Messages:
    14,000
    Likes Received:
    4,112
    Sorry just to clarify, but from which reseller is your setup?
     
  21. Marc-Olivier Blanc

    Builder

    Joined:
    Jun 6, 2015
    Messages:
    7
    Likes Received:
    1
    Hi It is a french reseller called PCCNC shop.

    I finally found out that the axis of the NEMA engine is not centered and the assembly matters. Not sure if it is a caracteristic of the engine or the plate but anyways. It work now !! :)

    Many htanks.
     
    Peter Van Der Walt likes this.
  22. 343nm

    343nm New
    Builder

    Joined:
    May 18, 2020
    Messages:
    1
    Likes Received:
    0
    Hello,

    I've been looking into using this WorkBee 1510 machine in a system I'm building and was hoping someone here might have some long term usage experience with the machine to answer some questions. I wouldn't be using this as an actual mill, but just as an X-Y gantry to hold tooling to follow along a process that's being run. This would be run at a fairly low speed along the Y axis mostly, but it would be in a production machine so expected 8+ hours a day running.

    How often do the belts that drive the gantry need the tension adjusted to remain in tolerance or keep from going slack? How often do the belts need replacing due to wear and tear?

    If anyone has enough hours on one of these machines to answer this it would be appreciated. I feel the 1010 model is better suited for my needs being driven by lead screws, but the extra travel on the 1510 could be useful.
     
  23. JustinTime

    JustinTime Veteran
    Builder

    Joined:
    Dec 18, 2013
    Messages:
    759
    Likes Received:
    253
    My machine has lead screws on all axie. X has 1400mm long screws and Y has two 1500mm long. I got them off AliExpress.

    That said, on my PhlatPrinter I had 6mm belts and I never had to tighten them in 8 years but to be honest I never really checked to slack since it ran fine all these years and never skipped a tooth.
     

Share This Page

  1. This site uses cookies to help personalise content, tailor your experience and to keep you logged in if you register.
    By continuing to use this site, you are consenting to our use of cookies.
    Dismiss Notice