Welcome to Our Community

Some features disabled for guests. Register Today.

The BEE and ME

Discussion in 'CNC Mills/Routers' started by Colin Mccourt, Feb 11, 2019.
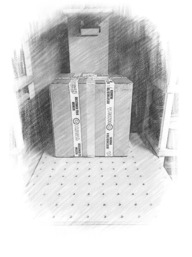
  1. Colin Mccourt

    Colin Mccourt Journeyman
    Builder

    Joined:
    Jan 23, 2019
    Messages:
    354
    Likes Received:
    184
    Thanks for that Alex, I was going to do it anyway but just wanted it confirmed, I see what you mean by getting the plates orientated correctly too...I did make a boo boo myself this evening, nothing tragic more stupidity than anything else, all corrected now
    Regards
    C
     
  2. Alex Chambers

    Alex Chambers Master
    Moderator Builder

    Joined:
    Nov 1, 2018
    Messages:
    2,694
    Likes Received:
    1,325
    Colin - have you fitted your Z axis limit switch? I can't see it's wire in your pics. It really needs to be fitted before you fully assemble the X plates and the Z axis
     
  3. Colin Mccourt

    Colin Mccourt Journeyman
    Builder

    Joined:
    Jan 23, 2019
    Messages:
    354
    Likes Received:
    184
    :banghead:
    :banghead:
    :banghead:
    I will have to back track a little as I totally forgot what you told me previously in my haste...Well I remembered after the event and swore quite a bit :mad::mad:....lol...I will address this tomorrow. Did I speed read the (Hard Copy) manual and miss this point?? I will take your advice though and see what the craic is this evening when I get in. Hopefully I wont have to disassemble too much. Is there a video showing this installation and wire routing anywhere other than the online manual diagrams. Can you send me a few pics @Alex Chambers ??
    Thanks again mate.
     
    #33 Colin Mccourt, Feb 14, 2019
    Last edited: Feb 15, 2019
  4. Colin Mccourt

    Colin Mccourt Journeyman
    Builder

    Joined:
    Jan 23, 2019
    Messages:
    354
    Likes Received:
    184
    Thinking (well) ahead (possibly light years) lol
    I would like to see the Workbee in action, specifically the movement of router cable and the dust extraction tube for to give me some indication of how much piping I will require and the travel...There are plenty of close-up vids on milling and not many of the actual overhead movement of wire and pipework. I'm trying to keep this neat and tidy yet functional with the aid of swivels and retractable pulleys...but need to gauge how I can achieve this...so if any kind soul could help me out on this aspect it would be greatly appreciated
    Regards
    C
     
    GrayUK likes this.
  5. Colin Mccourt

    Colin Mccourt Journeyman
    Builder

    Joined:
    Jan 23, 2019
    Messages:
    354
    Likes Received:
    184
    Hi Guys,
    I'm struggling a bit with this "Z" limit switch having to be installed prior to finishing the mechanics.
    OK this is where I'm at
    limit switch.jpg
    Is this the correct position, if so the C Beam wont pass over those wires (am I getting something wrong)
    and also can I remove the wires so as to route them through a hole in the side of the plate...because there is a connector on the other end
    connector.jpg
     
  6. Alex Chambers

    Alex Chambers Master
    Moderator Builder

    Joined:
    Nov 1, 2018
    Messages:
    2,694
    Likes Received:
    1,325
    Take the white connector in your second picture off by carefully pushing down the springy metal tab (thin screwdriver) you can see through the slot in the white plastic and gently pulling on the wire at the same time (do both wires). Thread the wire through the hole in the X plate which should be immediately opposite your limit switch. You will probably have to bend down the wires attached to the limit switch so that the wire crosses between the two X plate below the surface of the wheels. The C beam will then go in. Slide the connectors back into the white plastic receptacle so that the springy tab pops up into the slot -it doesn't actually matter which way round those wires go, but, if you are feeling fussy, you could make a note of which side the red and black wires are before pulling them out.
    Alex
     
  7. Colin Mccourt

    Colin Mccourt Journeyman
    Builder

    Joined:
    Jan 23, 2019
    Messages:
    354
    Likes Received:
    184
    PHEW what an evening I've had :)....So all in all it's in the correct spot then?
     
  8. Alex Chambers

    Alex Chambers Master
    Moderator Builder

    Joined:
    Nov 1, 2018
    Messages:
    2,694
    Likes Received:
    1,325
    Must be - theres only one place it can go. The only mistake you might have made (I can't see from your pictures) is putting the X axis plate with the hole for the wire the wrong way round (like I did). There should be a small hole in the X plate immediately opposite the limit switch.
    Alex.
     
  9. Colin Mccourt

    Colin Mccourt Journeyman
    Builder

    Joined:
    Jan 23, 2019
    Messages:
    354
    Likes Received:
    184
    :thumbsup: @Alex Chambers remind me to buy you a pint when I'm over lol
    and yeah I did mark which side the wires came out on the connector :ROFL:

    Limited.jpg
     
    Alex Chambers likes this.
  10. Alex Chambers

    Alex Chambers Master
    Moderator Builder

    Joined:
    Nov 1, 2018
    Messages:
    2,694
    Likes Received:
    1,325
    You need to pull the wires fairly tight to stop them snagging on the wheels and fix in place with a cable tie or two using the holes on the right hand side (when looking at it from the side where the wire comes out) - The online manual shows which holes to use.
    Alex.
     
    Colin Mccourt likes this.
  11. Colin Mccourt

    Colin Mccourt Journeyman
    Builder

    Joined:
    Jan 23, 2019
    Messages:
    354
    Likes Received:
    184
    Champion buddy thats the easy bit hahahahaha
     
  12. Colin Mccourt

    Colin Mccourt Journeyman
    Builder

    Joined:
    Jan 23, 2019
    Messages:
    354
    Likes Received:
    184
    Well....I've done all I can Mechanically. Breathing LIFE into her may be a whole different ball game ;)
     
    GrayUK likes this.
  13. Colin Mccourt

    Colin Mccourt Journeyman
    Builder

    Joined:
    Jan 23, 2019
    Messages:
    354
    Likes Received:
    184
    Earth Magnets:- YES NO
    I want to eventually fasten down the whole base of this machine via small "L" Brackets with drop in Tee Nuts and bolts fastened to the spoilerboard stretchers, then screwed to the workbench.
    I also need to tie down the spoilerboard.in some way..I cant do both because of accessibility
    Now because Alu. will not attract a magnet I will need to attach steel plated objects ("L" brackets again. or similar) to the stretchers at the top fastened with Tee Nuts and 8mm M5 bolts to the rail...
    The idea is to use powerful yet small earth magnets (see image and video below)
    It wont move with these babies recessed into the base of the board corresponding to the attached rail plates.
    Question is will these magnets have any adverse effects on the machine in any which way or form...can I safely use a method such as this to hold down a spoilerboard. Would you advise me to go ahead with this of desist due to possible adverse effects.

    plate and mag.jpg

    Just watch this baby snap....


    Regards
    C
     
    #43 Colin Mccourt, Feb 16, 2019
    Last edited: Feb 16, 2019
  14. Alex Chambers

    Alex Chambers Master
    Moderator Builder

    Joined:
    Nov 1, 2018
    Messages:
    2,694
    Likes Received:
    1,325
    I think you are underestimating the ability of MDF to change shape when it absorbs moisture (as it will) and the forces it can exert when it does so. Before I modified my machine I was using drop in T nuts into the slots on top of the spoiler board supports. It was a pain getting all the drop in T nuts facing the right way to go into the slots on the V rail, but it did work. Now I have rails mounted on top of the end frames I can use ordinary T nuts and line them up with the slots as I slide the spoiler board on from one end. The only other thought I had was to bolt angle to the sides of the spoiler board supports with a threaded hole in the top surface, mark out and drill the spoiler board very accurately to line up with them (and drill slightly oversized holes to give a little play). Like you I didn't want to lift the machine up to get at the underside every time I needed to change the spoiler board. I wonder if anyone else on here has come up with a clever idea for this?:confused:
    Alex
     
    Colin Mccourt likes this.
  15. Colin Mccourt

    Colin Mccourt Journeyman
    Builder

    Joined:
    Jan 23, 2019
    Messages:
    354
    Likes Received:
    184
    Yes @Alex Chambers it is a conundrum unless you have partial sub baseboard access...at least its thought provoking discussion..I had a look at what you are doing and it all seems pretty good to me...The only reason I mention magnets is because I have enough to complete a job like this...so maybe I could use them...Owt for Nowt hahahahaha
     
  16. Alex Chambers

    Alex Chambers Master
    Moderator Builder

    Joined:
    Nov 1, 2018
    Messages:
    2,694
    Likes Received:
    1,325
    Just a thought - if you have strategically placed holes in your spoiler board you could (using a magnetised screwdriver to hold the screw) fasten your machine down after fixing the spoiler board on.:thumbsup:
    Alex.
     
    Colin Mccourt likes this.
  17. Alex Chambers

    Alex Chambers Master
    Moderator Builder

    Joined:
    Nov 1, 2018
    Messages:
    2,694
    Likes Received:
    1,325
    Another thought - the wheels are going to "bed in" eventually and you will have to adjust the eccentrics - from below!:cry:
    Alex
     
  18. Colin Mccourt

    Colin Mccourt Journeyman
    Builder

    Joined:
    Jan 23, 2019
    Messages:
    354
    Likes Received:
    184
    Hahahaha Beginning to sound like we need a floating platform if this be so. I think I'll go ahead with the magnets for now.
     
  19. Colin Hart

    Colin Hart Well-Known
    Builder

    Joined:
    Feb 9, 2019
    Messages:
    68
    Likes Received:
    29
    Hey @Colin Mccourt

    Your machine is looking good!!! I think I have got to a similar stage. I managed to get the Duet powered, and I did the firmware update but have not moved and axis yet.
     
  20. Colin Mccourt

    Colin Mccourt Journeyman
    Builder

    Joined:
    Jan 23, 2019
    Messages:
    354
    Likes Received:
    184
    Thats great news, good to hear from you again. I kinda knew you'd be holed up with your hex keys hahahaha did you have any issues with the construction.....
    I dont have the Duet connected yet...not a wire near it ....
    Take note of all you do with the DUET...thats the bit I fear the most....so I may be asking some questions...
    Hope everything goes smoothly for you and keep us updated on how your getting on
    Regards
    C.
     
  21. Colin Mccourt

    Colin Mccourt Journeyman
    Builder

    Joined:
    Jan 23, 2019
    Messages:
    354
    Likes Received:
    184
    This evening I plugged in my Duet controller board into the computer via USB cable. I previously downloaded the drivers and installed those..I have the new Firmware ver. also at hand ready to flash and I also downloaded YAT as per instructions. but my computer wont install the program...Its only an old recommissioned laptop drawn to be used for this job alone 32bit running WIN8.1...any suggestions guys???
     
  22. Alex Chambers

    Alex Chambers Master
    Moderator Builder

    Joined:
    Nov 1, 2018
    Messages:
    2,694
    Likes Received:
    1,325
    Not sure what the problem is there Colin - I'm using a machine running Win7!
    Alex.
     
  23. Colin Mccourt

    Colin Mccourt Journeyman
    Builder

    Joined:
    Jan 23, 2019
    Messages:
    354
    Likes Received:
    184
    32 or 64 bit??
    Ah hold on....in my haste I may have downloaded the 64bit ver :banghead:....I see there is a 32bit ver down the list, perhaps this will work........
     
    #53 Colin Mccourt, Feb 19, 2019
    Last edited: Feb 19, 2019
  24. Alex Chambers

    Alex Chambers Master
    Moderator Builder

    Joined:
    Nov 1, 2018
    Messages:
    2,694
    Likes Received:
    1,325
    Oozenest learning portal is running - apparently some users did have problems with YAT and Win8, but they were it would not connect to Duet, not that it wouldn't install. It might be possible to set up and configure your Duet on another computer, then re-install on your workbee. If you have the WiFi version I can't help much - I have the ethernet version.
    Good luck, Alex.
     
    Colin Mccourt likes this.
  25. Colin Mccourt

    Colin Mccourt Journeyman
    Builder

    Joined:
    Jan 23, 2019
    Messages:
    354
    Likes Received:
    184
    I may have downloaded the wrong ver. Alex.. :banghead:. I'll give it another go tomorrow evening
     
  26. Alex Chambers

    Alex Chambers Master
    Moderator Builder

    Joined:
    Nov 1, 2018
    Messages:
    2,694
    Likes Received:
    1,325
    Which version of the Duet do you have?
    Alex.
     
  27. Colin Mccourt

    Colin Mccourt Journeyman
    Builder

    Joined:
    Jan 23, 2019
    Messages:
    354
    Likes Received:
    184
    WIFi
     
  28. Alex Chambers

    Alex Chambers Master
    Moderator Builder

    Joined:
    Nov 1, 2018
    Messages:
    2,694
    Likes Received:
    1,325
    Pity, you don't need YAT to set up the ethernet version.
    Alex.
     
    Colin Mccourt likes this.
  29. Colin Mccourt

    Colin Mccourt Journeyman
    Builder

    Joined:
    Jan 23, 2019
    Messages:
    354
    Likes Received:
    184
    All this aside @Alex Chambers...I think I read on your thread about max working area sizes...I think you stated that if you followed setting up your limit switches via the manual then you had to reduce the size from 770 to 760mm in setting up is this correct??
     
  30. Alex Chambers

    Alex Chambers Master
    Moderator Builder

    Joined:
    Nov 1, 2018
    Messages:
    2,694
    Likes Received:
    1,325
    Two things: once you have everything running you need to change a setting in the Duet Web Control. My machine is not running at the moment but I'll post the exact location tomorrow - there is a setting to "allow movement without homing" - you must UNTICK this otherwise your soft limits won't work. Then home all axes. Your machine co-ordinates will then read 0, 0, 0. Carefully jog your machine until it is as close as you dare go to the frames on the X and Y axes. Make a note of the machine co-ordinates - these are the values that you need to put in to config.g (Z doesn't matter - you can leave this as Oozenest have set it)
    Alex.
    PS once you have done this a) you can't drive your machine into the framework, b) you have to home all axes whenever you turn on your machine otherwise it won't move.
     
    Colin Mccourt likes this.

Share This Page

  1. This site uses cookies to help personalise content, tailor your experience and to keep you logged in if you register.
    By continuing to use this site, you are consenting to our use of cookies.
    Dismiss Notice