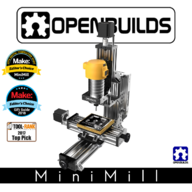
Welcome to Our Community

Some features disabled for guests. Register Today.

OpenBuilds MiniMill

Discussion in 'CNC Mills/Routers' started by Mark Carew, May 26, 2017.

  1. Stewart McMillan

    Builder

    Joined:
    Feb 6, 2018
    Messages:
    29
    Likes Received:
    12
    Ok so have decided to just build the standard configuration to get me started. But with the bundle, the step motors are Bollinger available. Will they be available anytime soon? Or is there a recommendation on other motors to use.

    What else will I need for the build. I have included the 24v power supply, I will source the router and collets/ cutters and fixing local.

    Thanks for your help on this.
     
  2. Paul4d

    Paul4d New
    Builder

    Joined:
    Feb 17, 2015
    Messages:
    15
    Likes Received:
    3
    Where can I find four pin connectors (24 AWG) for the 23 stepper motors? The wire for the motors that comes with the build are way too short to mount the controller on the upper section of the Z axis.
     
    #212 Paul4d, Feb 18, 2018
    Last edited: Feb 18, 2018
  3. Paul4d

    Paul4d New
    Builder

    Joined:
    Feb 17, 2015
    Messages:
    15
    Likes Received:
    3
    Is that a Standard Z axis height? Also, looks like a 4th axis? Where did you find one small enough?
     
  4. Stewart McMillan

    Builder

    Joined:
    Feb 6, 2018
    Messages:
    29
    Likes Received:
    12
    Any feedback on this question?
     
  5. Peter Van Der Walt

    Peter Van Der Walt OpenBuilds Team
    Staff Member Moderator Builder Resident Builder

    Joined:
    Mar 1, 2017
    Messages:
    14,038
    Likes Received:
    4,122
    Contact the part store via the contact-us link / chat box on the store page, to check stock availability / lead time issues
     
  6. Stewart McMillan

    Builder

    Joined:
    Feb 6, 2018
    Messages:
    29
    Likes Received:
    12
    Thanks Peter, I did find the motors will be available on the 1st of March.

    Is there anything else I should look at purchasing for this build?
     
    Peter Van Der Walt likes this.
  7. Peter Van Der Walt

    Peter Van Der Walt OpenBuilds Team
    Staff Member Moderator Builder Resident Builder

    Joined:
    Mar 1, 2017
    Messages:
    14,038
    Likes Received:
    4,122
    A controller of some sorts? XPRO or Smoothieboard (XPRO will be fine here). Or the USBCNC
    If you are going with High Torque motors, 3 x DQ542MAs make a sweet upgrade:DQ542MA Stepper Motor Driver. For the standard NEMA23s the XPRO's onboard drivers is fine
    Power supply is needed, think you already mentioned having that. (24v Meanwell)
    Wiring, Limit switches, etc - Limits are optional (I dont use them - I zero stock manually)
    If you don't have Ball-end drivers, get a set of Balldriver Screw Driver Set - my personal favourite tool, even before I worked for OB (; - beats using Alan keys by miles. And they last! Havent stripped one yet...
    A couple extra precision shims (Check higher up / previous pages in this thread - someone mentioned adding extra shims to the nut/wheels to help with an alignment issue)

    And (obligatory sales pitch) - why not some OpenBuilds Gear - OpenBuilds Part Store (;
     
  8. khalid tubail

    Builder

    Joined:
    May 13, 2014
    Messages:
    6
    Likes Received:
    1
    dear Mark
    I ordered OpenBuilds MiniMill with Nema 23 and 24v power supply.
    I installed, its look very nice.
    I had CNC xPRO Driver v2.
    when I connect the stepper motor to the driver, it's become overheat.
    as I checked later the CNC xPRO Driver v2 is peak current 2.5 A, and the Nema 23 is 28 A.
    is this setup is ok or I need to change the driver of the motors.

    regards
     
  9. Peter Van Der Walt

    Peter Van Der Walt OpenBuilds Team
    Staff Member Moderator Builder Resident Builder

    Joined:
    Mar 1, 2017
    Messages:
    14,038
    Likes Received:
    4,122
    Adjust your current potentiometers until you get a balance between enough torque, but not overheating. In warm climates a fan pointed at the board helps too (cooler electronics live longer).

    Other than that, many happy Xpro+NEMA23 users on here, you should be fine after setting the current appropriately. You dont need max amps / max torque as the leadscrews efficiently convert the torque
     
  10. Stewart McMillan

    Builder

    Joined:
    Feb 6, 2018
    Messages:
    29
    Likes Received:
    12
    Ok just about to hit order and these are the options I went with:
    6 ft. Power Cord
    1 A$6.77 A$6.77
    OpenBuilds MiniMill (Add 3 NEMA 23 Stepper Motors? No, Add 24V Power Supply? Yes)
    1 A$575.58 A$575.58
    Smoothieboard 5xC v1.1
    1 A$217.43 A$217.43
    DQ542MA Stepper Motor Driver
    1 A$51.15 A$51.15
    NEMA 23 Stepper Motor - High Torque Series
    3 A$56.27 A$168.80
    Micro Limit Switch Kit with Mounting Plate
    6 A$6.38 A$38.30

    now the question i have is with the stepper motor driver... will i need 3 of these? one for each motor?
     
  11. Rick 2.0

    Rick 2.0 OpenBuilds Team
    Staff Member Moderator Builder Resident Builder

    Joined:
    Dec 20, 2013
    Messages:
    2,862
    Likes Received:
    1,528
    If you want to use the steppers to their fullest capacity, yes. Technically the Smoothieboard will run them without the drivers but it can only provide a fraction of the power they need to get them up their maximum potential.
     
    Stewart McMillan likes this.
  12. Stewart McMillan

    Builder

    Joined:
    Feb 6, 2018
    Messages:
    29
    Likes Received:
    12
    Great! Thanks for that. I was going to use the machine to demo CNC technology in my industry, which is Aluminum extruded windows and doors. So that’s why I tried to get some more powerful drivers so I can demo it machining extrusions. That or chocolate... (chocolate might be quite to machine and a good hand out at the events)
     
  13. Stewart McMillan

    Builder

    Joined:
    Feb 6, 2018
    Messages:
    29
    Likes Received:
    12
    So if I have 3 motor drivers will the standard power supply still suit?
     
  14. Stewart McMillan

    Builder

    Joined:
    Feb 6, 2018
    Messages:
    29
    Likes Received:
    12
    Just need a reply on the last piece of the puzzle (well until I start to build it).
    The power supply has 3 out puts. One for each motor driver. But I also need 24v power supplied to the smoothieboard. So do I just use one output from the power supply for both the driver and smoothieboard?
     
  15. Giarc

    Giarc OpenBuilds Team
    Staff Member Moderator Builder Resident Builder

    Joined:
    Jan 24, 2015
    Messages:
    2,921
    Likes Received:
    1,620
    cnc-mill-guide [Smoothieware]
     
  16. Stewart McMillan

    Builder

    Joined:
    Feb 6, 2018
    Messages:
    29
    Likes Received:
    12
    Yeah I read that, which shows the smoothie with a supply from the power supply. My question is the power supply has 3 out puts. Do I need 4? 1 for the smoothie board and the 3 (1 each for the motor drivers).

    Or do I just double up from one driver to the smoothie (which splits the power between them)
     
  17. Rick 2.0

    Rick 2.0 OpenBuilds Team
    Staff Member Moderator Builder Resident Builder

    Joined:
    Dec 20, 2013
    Messages:
    2,862
    Likes Received:
    1,528
    Yes, you can attach more than one driver to each power supply connection.
     
  18. Stewart McMillan

    Builder

    Joined:
    Feb 6, 2018
    Messages:
    29
    Likes Received:
    12
    Killer!!

    Check out here I come.
     
  19. Gilsegev

    Gilsegev Well-Known
    Builder

    Joined:
    Feb 28, 2018
    Messages:
    48
    Likes Received:
    27
    Hi All, I have a Mini Mill kit I am planning on putting together soon.
    How much of a difference do the high torque nema 23 motors make as compared with the regular ones? Will this be a noticeable difference in the performance of my CNC?
     
  20. Mark Carew

    Mark Carew OpenBuilds Team
    Staff Member Moderator Builder Resident Builder

    Joined:
    Jun 28, 2013
    Messages:
    2,746
    Likes Received:
    2,412
    I would say that honestly for the MiniMill its not a necessity. Its great to have the extra torque on any machine but for the MiniMill usually the work be done is more fine detailed with lots of passes and step downs so I would suggest the standard Nema 23's and you will be fine.
     
  21. Gilsegev

    Gilsegev Well-Known
    Builder

    Joined:
    Feb 28, 2018
    Messages:
    48
    Likes Received:
    27
    Thanks!
     
    Mark Carew likes this.
  22. Stewart McMillan

    Builder

    Joined:
    Feb 6, 2018
    Messages:
    29
    Likes Received:
    12
    Great little kit! No issues with the mechanical side of the build. Now the hard part of setting up the electrical side of things
     

    Attached Files:

    Kyo and Mark Carew like this.
  23. Stewart McMillan

    Builder

    Joined:
    Feb 6, 2018
    Messages:
    29
    Likes Received:
    12
    So what other software options do i have to run the smoothieboard? I have seen Pronterface but that's about it.

    Can I use Mach3 or LinuxCNCor is there anything else that is more CNC orientated
     
  24. Techvette

    Techvette New
    Builder

    Joined:
    Oct 1, 2017
    Messages:
    63
    Likes Received:
    23
    Apologies if this has been asked before, but:

    I've just finished assembling the MiniMill kit. (BTW, team: awesome video. Once I moved my wireless mouse over to my assembly table so I could pause without having to run across the room to my desktop, I zipped through the assembly in about two hours. I didn't have to rewind more than once or twice. Great work.)

    The only issues I had with the kit were

    1. A very odd 10mm bolt that was a) plastic, and b) had no threads. The head had the recessed hex spot for a tool, though. Shrug. I happen to have 500x 10mm M5 bolts here, so no big deal for me.

    2. Y'all are really, really serious about your packaging. That's awesome, but I couldn't get it all to fit back in the box it came in - much like refolding a map - so it took a couple of trips to the recycle bin to clear out the refuse. (Much better than having dinged up parts due to apathetic delivery guy.)

    3. I don't really understand the use of self-tapping screws vs. a tap and a bolt. I went ahead and tapped the c-beam where necessary and used some bolts I had lying around, as it makes it easier to take things apart later. Also, unless you're very careful, it's easy to strip the hole with the self-tapping screws.

    4. I found it easier to install the handles and motors last. That makes it easier to lay things flat and provides less opportunity for stressing the motor mounts.

    I'm planning to mount my xPro to the back of the Z axis as was shown at the end of the assembly video, but I'm wondering what y'all would recommend to insulate / isolate the back of the board from the c-beam. (Having all of the pins short against the c-beam would be a very entertaining experience, no doubt, but I'd rather keep my $120 and spend it on beer than on a replacement board.)

    Suggestions? I've considered just cutting a piece of thin MDF and mounting that to the c-beam with t-nuts, but that'll be kind an ugly addition to an otherwise very-pretty machine.

    Cheers
     
    #234 Techvette, Apr 10, 2018
    Last edited: Apr 10, 2018
  25. Brian Knight

    Builder

    Joined:
    Jan 24, 2018
    Messages:
    3
    Likes Received:
    3
    I
    I 3D printed a back plate (PLA) and held this in place with x2 T-Nuts in the slots - the xPro board screws onto this (3mm csk screws) .. then printed a cover to keep the dust off (it just rests on without clips). There's slots in the side of the cover for the cables etc, but I haven't provided any additional cooling. So far, no problems ...

    Links to files here (Fusion360)
    https://a360.co/2GR5dsf
    A360
     

    Attached Files:

    Techvette likes this.
  26. Techvette

    Techvette New
    Builder

    Joined:
    Oct 1, 2017
    Messages:
    63
    Likes Received:
    23
    @BrianKnight

    Sweet! Thanks for sharing the CAD files. I don't have a 3D printer, but I can use my (diy, pretty crappy) CNC router to make a few.

    In the mean time, I cut a piece from a 1/2" plastic Walmart cutting board to mount the xPro. Works fine, but I want an enclosure. I can easily imagine some AL chips flying up or around the Z axis and shorting a voltage regulator. I swear - some of the debris that comes off of these things are like Kennedy bullets in training.

    Thanks again!
     
  27. Techvette

    Techvette New
    Builder

    Joined:
    Oct 1, 2017
    Messages:
    63
    Likes Received:
    23

    I like your cable clips that fit into the c-beam slots. Got a link?
     
  28. Brian Knight

    Builder

    Joined:
    Jan 24, 2018
    Messages:
    3
    Likes Received:
    3
    These were brilliant .. I stole the design from Thingiverse ..

    With thanks from:
    V-Slot Cable Clips by pekcitron
    V-Slot Cable Clips by pekcitron

    I printed them in ABS (0.2mm). Thought I'd print about x6 but ended up with about x20 .. used them everywhere !!
     

    Attached Files:

    Techvette and GrayUK like this.
  29. Kevin Brewer

    Builder

    Joined:
    Apr 13, 2018
    Messages:
    13
    Likes Received:
    0
    Hello, this is my first post so likely in the wrong place.. I am just putting together my C-Beam machine and bought the LED ring with it. The spindle mount has four right angle brackets, two top and two bottom. To use your LED ring, I can't use the supplied bottom brackets as the thickness of the ring PCB offsets the holes. I saw the video for the LED bracket on the smaller version of the C-Beam, it only uses the top brackets - it this OK? make me nervous to remove 50% of the support structure for lighting...


    thanks

    KB
     
  30. Techvette

    Techvette New
    Builder

    Joined:
    Oct 1, 2017
    Messages:
    63
    Likes Received:
    23
    Unless you're plowing through aluminum at warp speed, it should be fine. On the MiniMill, it's held in place with two bolts through the back plate into the bracket, and two of those corner connectors. If you're cutting fast enough to bend that joint, just slow it down.
     

Share This Page

  1. This site uses cookies to help personalise content, tailor your experience and to keep you logged in if you register.
    By continuing to use this site, you are consenting to our use of cookies.
    Dismiss Notice