Welcome to Our Community

Some features disabled for guests. Register Today.

OpenBuilds ACRO Laser System

Discussion in 'Laser Cutters' started by Mark Carew, Sep 12, 2017.
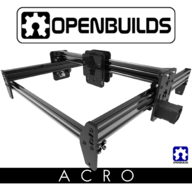
  1. Mark Carew

    Mark Carew OpenBuilds Team
    Staff Member Moderator Builder Resident Builder

    Joined:
    Jun 28, 2013
    Messages:
    2,745
    Likes Received:
    2,410
    Ahh I see, not a problem here are the plate files in DXF format that should help with the import.
     

    Attached Files:

  2. Brianc

    Brianc New
    Builder

    Joined:
    Dec 16, 2014
    Messages:
    8
    Likes Received:
    0
    New to this whole laser thing, with lots of questions. I have built a TinyG powered OX and a Azteeq based Hadron printer, so not a total newbie. My Acro is coming in later this week and I think I have most of the bits to make it go. I have a surplus Sparkfun Stepoko controller I am hoping to use, but still looking at laser diodes.

    There is an almost overwhelming amount of options out there in a variety of price points. My intial plans for the system seem fairly simple, cutting cardboard and foam core panels, along with cutting amd engraving acrylic for an edge lighting project I have in mind. What sort of power will this require? Im hoping to get an inexpensive option to get my feet wet, and then step up as needed. I looked at the three options mentioned above, as well as higher powered diodes offered on Aliexpress. The Aliexpress prices are certainly attractive, but not sure about quality and lack of support if needed.


    Any thoughts or suggestions much appreciated.


    Brian
     
  3. chuckd

    chuckd New
    Builder

    Joined:
    Sep 18, 2017
    Messages:
    10
    Likes Received:
    0
    Acro team: Can anyone identify if any of this extra hardware is mandatory for proper operation of the Acro? I followed the video instructions step by step and the system appears to be complete (haven't powered it up yet). I guessing the L brackets are to mount the legs to a fixed surface? Also two of the small set screws that came with the timing pulleys were not a true hex (some flaw in manufacturing) and could not fasten them with a standard tool. Is there any way to get these online? Home depot didn't carry them that small.
     

    Attached Files:

  4. Mark Carew

    Mark Carew OpenBuilds Team
    Staff Member Moderator Builder Resident Builder

    Joined:
    Jun 28, 2013
    Messages:
    2,745
    Likes Received:
    2,410
    The M3 screw and nuts are for mounting any tool or accessory to the mounting plate.
    The L brackets are for feet in case you want to mount too a wall or mount to your table just want to make sure the machine does not move around.
     
  5. chuckd

    chuckd New
    Builder

    Joined:
    Sep 18, 2017
    Messages:
    10
    Likes Received:
    0
    Thanks again to the Acro team for being active in support! I am experiencing issues with one of my stepper motors (x axis). I noticed before firing up the system that it has a strange notch effect when manually jogging the motor slowly down the rail, every revolution it hits a spot where it locks and requires a small amount of force to continue moving the motor down the track. Once powering up the system, only that motor is giving off considerable noise and at one certain point in the revolution of motor, makes a much louder noise. Is this evident of a bad motor? I have made no adjustments to grbl config or any other components, simply plugged it in and connected to Universal GCode sender with manual control in the UI.


    IMG_20171006_153259.jpg
     
    #65 chuckd, Oct 6, 2017
    Last edited: Oct 6, 2017
  6. Jonathon Duerig

    Jonathon Duerig Journeyman
    Builder

    Joined:
    Nov 25, 2015
    Messages:
    261
    Likes Received:
    156
    @chuckd When this happened to me on a project, it turned out to be a malformed wheel. Every revolution of that wheel, it would get to the part that was malformed and require extra force to squeeze it past that point. Double check to make sure that the wheels aren't the problem.

    If you are sure that it isn't the wheels, maybe swap that motor with another motor. If the problem follows the motor, then you are sure that it is really the motor and can contact support.
     
  7. WildBill

    WildBill Well-Known
    Builder

    Joined:
    Feb 4, 2017
    Messages:
    52
    Likes Received:
    40
    Well I ordered the 510 package today.
    I plan on using a 2W TTL diode laser from BangGood, grbl-shield for the control
    and probably put homing switches on it (because I already have them all).
    Another thing I an considering is a light weigth Z axis.

    I was looking and it will go next the the C-Beam LX with the same foot print.
     
  8. chuckd

    chuckd New
    Builder

    Joined:
    Sep 18, 2017
    Messages:
    10
    Likes Received:
    0
    @Jonathon Duerig - Thanks for feedback. I think the motor is defective. I'm noticing now on the XPRO that even stopped, the motor seems to be drawing current (led is dim yellow). Think swapping the motor is easiest option at the moment. I might try to swap them on the board first to see if it might be the controller.

     
  9. WildBill

    WildBill Well-Known
    Builder

    Joined:
    Feb 4, 2017
    Messages:
    52
    Likes Received:
    40
    I received the kit yesterday and took a few hours last night and put it together. I did watch the video and followed the steps and it was a VERY easy build - no problems at all.

    Hooked up the 3 motors to the CNC Shield - NOTE: running on 12 volts not 24 - and all the motors worked find and all the motions were very smooth. So happy with the kit and will have pictures after I mount the laser.

    Next step set proper step value in GRBL because it previous use was with a 20 tooth system and then wire and mount the laser. Only bad thing is I don't have time to work with it for the next 2 days.
     
    GrayUK and Peter Van Der Walt like this.
  10. cataylor

    cataylor New
    Builder

    Joined:
    Sep 25, 2017
    Messages:
    1
    Likes Received:
    0
    Has anyone mounted a 5.6 endurance laser? My first build and im having trouble figuring out how to mount it to the plate
     
  11. Kaure Martins

    Builder

    Joined:
    Oct 5, 2017
    Messages:
    8
    Likes Received:
    0
    How long should be the stepper motors wiring for the 1000x1500mm frame? anyone could help me?...I wanna buy them crimped and was wondering if 1.5m would be too short if the board is laying on one of the short axis.
     
  12. Kaure Martins

    Builder

    Joined:
    Oct 5, 2017
    Messages:
    8
    Likes Received:
    0
    Hi Guys, I'm planning to built an Acro system 1000x1500mm running on Arduino board and 2500w (12V) Diode (chinese)...Do I need an 24V PSU or 12V would be the choice (I'm really noob in electronics, you probably can tell)?
     
  13. WildBill

    WildBill Well-Known
    Builder

    Joined:
    Feb 4, 2017
    Messages:
    52
    Likes Received:
    40
    That laser is not heavy so my I think you could use 12V for the motors. I am using a 2.0W laser which is the same size and I am using 12 volts because that is what you need for the laser. So far it is working fine.
     
  14. Kaure Martins

    Builder

    Joined:
    Oct 5, 2017
    Messages:
    8
    Likes Received:
    0
    But, if i'm using 24v, the output from the board to the laser would be 12v, or I will need some additional component to convert it?

    Question 2: normally the laser is connected to the PWM output of the board right? both for power and engraving input.
     
  15. WildBill

    WildBill Well-Known
    Builder

    Joined:
    Feb 4, 2017
    Messages:
    52
    Likes Received:
    40
    You need to look at the details of your board (you didn't say what kind it is) but if you are putting 24V in you are probably getting 24V out. There are dozens of different boards that can drive the laser and they are all different - so its not safe to assume anything about the board, you need to learn the details of the board you are using. There are two different ways that diode laser use PWM. One method is to use PWM on the 12V power line meaning you only have two wires to the laser. This method needs an on board MOSFET to feed the laser (because the signal out of the arduino is only 5 volts) and you should double check to make sure that its not more than 12V. The second method is TTL laser (which is the one that I am using) and it requires 12V power and a separate TTL (meaning 5V) PWM signal to control the output of the laser. This method uses 3 or 4 wires to the laser. I like the second method because you get finer control of the laser which gets better gray scale images. If all you want to do is cut the first method is fine.

    The controller that I am using is a CNC Shield and it has the stepper controllers for the motors at what ever voltage you put into the board, and 5 volt signal's from the UNO processor. I am using 12V to power the shield because I am using the same power supply to power the laser. I have used these shields at 24V on a different project where I was moving a small spindle with more mass, but with NEMA 17 motors and diode laser I have been very happy running the motors at 12V.
     
  16. WildBill

    WildBill Well-Known
    Builder

    Joined:
    Feb 4, 2017
    Messages:
    52
    Likes Received:
    40
    I also want to share how I test the different laser configurations without taking the chance of blowing one because they can get expensive. I have a 12V bulb wired with the same connector that the 2 wire laser's use and a 6 V bulb for testing TTL signals. The bulbs will get brighter and dimmer with different PWM settings.

    If you make a mistake its a lot cheaper to replace the small bulbs and a lot safer than firing a laser when you don't expect to.
     
  17. David Sheets

    Builder

    Joined:
    Oct 16, 2017
    Messages:
    28
    Likes Received:
    1
    Can I mount my bosch colt router to this I was thinking of getting the 40x40
     
  18. Mark Glotzbach

    Builder

    Joined:
    Oct 16, 2017
    Messages:
    2
    Likes Received:
    0
    Same question as David. Was looking to add the V-Slot® NEMA 17 Linear Actuator Bundle (Lead Screw) for vertical positioning. Any advice is appreciated.
     
  19. David Sheets

    Builder

    Joined:
    Oct 16, 2017
    Messages:
    28
    Likes Received:
    1
    I know they have a bracket for the bosch colt that is what I have and its very strong router granted its not a full sized one
     
  20. WildBill

    WildBill Well-Known
    Builder

    Joined:
    Feb 4, 2017
    Messages:
    52
    Likes Received:
    40
    While I like the idea of having an adjustable Z-axis I am not sure that the 2040 beam can take the torque, and I am sure I would not put a router on it.
    I actually ordered a "SMALL light weight" Z-axis unit today to try out that I think will work well because I have one on another laser system that is not as well designed as the ACRO. I will attach a picture with the one on the other system.

    IMG_0436-resizedM.jpg

    It is more than enough for a laser but is not heavy enough to take much more.
     
  21. David Sheets

    Builder

    Joined:
    Oct 16, 2017
    Messages:
    28
    Likes Received:
    1
     
  22. David Sheets

    Builder

    Joined:
    Oct 16, 2017
    Messages:
    28
    Likes Received:
    1
    Or am I thinking of building the ox
     
  23. WildBill

    WildBill Well-Known
    Builder

    Joined:
    Feb 4, 2017
    Messages:
    52
    Likes Received:
    40
    Not a bad idea, I have the C-Beam XL which fits my needs. It's easy to add a laser onto a good CNC build
    but its is not easy to add CNC functions to the average laser system - they are usually not rigid enough.
     
  24. David Sheets

    Builder

    Joined:
    Oct 16, 2017
    Messages:
    28
    Likes Received:
    1
    So you think the Acro isn’t strong enough for the Bosch colt router?
     
  25. WildBill

    WildBill Well-Known
    Builder

    Joined:
    Feb 4, 2017
    Messages:
    52
    Likes Received:
    40
    OK - I got first light on the ACRO system tonight and am happy with the the system is working.
    IMG_0496-resizedM.jpg

    I bumped inot a few issues along the way and figured I would give some feed back for the design. The first is the laser that I am using has a rather long focal distance and with the laser as high as I could get it I was just barely able to get if focused. I would be nice is the front plate of the Z-axis had as much height adjustment above the rail as it has below. In the future I might design a new front plate or even just make longer feet.

    The second thing that I hit, I am not a fan of self taping screws, and on the X axis I had one screw that would not tighten up os I tapped both ends of the X axis 2040 rail and put 5mm hex screw's in and they tightened up well.

    Overall I am very happy, this is the 3rd diode laser system that I have build and on first light was smother than any of the previous ones. There were no signs of jitter any where. Also very quiet - the two things I heard the most were the laser actually firing, and the fan on top of the laser.
     

    Attached Files:

    tonkajeep34 and Mark Carew like this.
  26. WildBill

    WildBill Well-Known
    Builder

    Joined:
    Feb 4, 2017
    Messages:
    52
    Likes Received:
    40
    I just started using mine tonight, but from past experience its not something I would try but I could be wrong.
    Take a look at the mass of the good CNC systems - there is a reason for that. I would not expect 1/4" acrylic gantry's to be as stiff as 1/4" aluminum gantrys.

    I had a light weight CNC with a 500W spindle and was never happy because the C-Beam XL was far superior so I took it apart to use the motors and controller on the ACRO. I should let some of the other jump in because there are people in this group and know far more about the CNC systems than I do.
     
    Mark Carew likes this.
  27. David Sheets

    Builder

    Joined:
    Oct 16, 2017
    Messages:
    28
    Likes Received:
    1
    Yeah I have nothing yet just getting a plan together
     
  28. Mark Glotzbach

    Builder

    Joined:
    Oct 16, 2017
    Messages:
    2
    Likes Received:
    0
    Thanks for the input WildBill. My main goal is to have a laser, so I'm going to move ahead. I think I'll buy the additional parts to add the z-axis and experiment a bit with it. It'll be a few weeks, but I'll post back if I find success, or not.
     
  29. WildBill

    WildBill Well-Known
    Builder

    Joined:
    Feb 4, 2017
    Messages:
    52
    Likes Received:
    40
    Spent some more time today trying things out with the ACRO system and did my first gray scale image on cardboard.

    IMG_0500-resizedM.jpg
     
  30. Opt Lasers

    Builder

    Joined:
    May 4, 2017
    Messages:
    6
    Likes Received:
    9
    Hello Guys! I got a permission to get into this thread. If you have any questions about laser engraving head which would help you solve the problem please let me know!
     

Share This Page

  1. This site uses cookies to help personalise content, tailor your experience and to keep you logged in if you register.
    By continuing to use this site, you are consenting to our use of cookies.
    Dismiss Notice