Welcome to Our Community

Some features disabled for guests. Register Today.

BlackBox X32

Discussion in 'Other Builds' started by OpenBuilds, Nov 23, 2022.
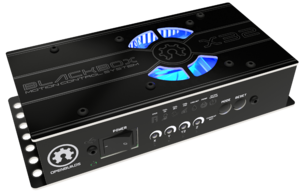
  1. huckthe1

    huckthe1 New
    Builder

    Joined:
    Jun 6, 2023
    Messages:
    4
    Likes Received:
    1
    Just got my Blackbox and love the easy wiring. I do have two issues that I hope someone can help me. My Y axis is erratic and does not always go the correct direction. This is just jogging.

    What can be causing this erratic behavior? I checked and there is not much pull on drive belts and even does it with very little load on the motor. X has no issue

    The other thing is I am using this with only the X and Y axis. I know I changed something in a config file to do this. How can I access this now?

    Thanks Peter
     
  2. Peter Van Der Walt

    Peter Van Der Walt OpenBuilds Team
    Staff Member Moderator Builder Resident Builder

    Joined:
    Mar 1, 2017
    Messages:
    14,734
    Likes Received:
    4,261
    Checkout docs:blackbox-x32:faq-identify-motor-coils [OpenBuilds Documentation]

    If its a Blackbox X32: set $44=3 and $45=0
    If its a Blackbox 4X: flash 2-axes firmware from Wizards and Tools > Firmware Flashing tool
     
  3. huckthe1

    huckthe1 New
    Builder

    Joined:
    Jun 6, 2023
    Messages:
    4
    Likes Received:
    1
    Thank you, thank you. It is running much better but still goes in the wrong direction like 30-50% of the time. I did check for coil wiring and verified they were correct. When I try to use the wizard for calibrating the Y axis it just makes noise and does not move. It seems the slower I go the worst the travel errors are. I am using nema23's but only one per drive.

    The $44=3 was a big help in it skips Z homing but now get an alarm 8 as soon as Y drive starts to move.
     
  4. Peter Van Der Walt

    Peter Van Der Walt OpenBuilds Team
    Staff Member Moderator Builder Resident Builder

    Joined:
    Mar 1, 2017
    Messages:
    14,734
    Likes Received:
    4,261
    Intermittent wiring fault. Something like a loose terminal that loses contact when the machine moves and tucks on wiring.

    The text message of errors/alarms are more helpful
     
  5. huckthe1

    huckthe1 New
    Builder

    Joined:
    Jun 6, 2023
    Messages:
    4
    Likes Received:
    1
    upload_2023-6-9_22-13-4.png
    It finishes homing on X and Y starts traveling and stops. I added time for sense and went to 9 on pull off.

    I did find moving my Y Cable that the problem is at the connectors. My red wire is connected but not getting good connection. Will work on anchoring my cables so they do not move. My machine is purring lightly (and much quieter) Still can't believe I built this laser contraption out of some wire, few electronic parts, plywood and 3-d printed parts. The wire was to keep everything together. Thanks again Peter
     
  6. Peter Van Der Walt

    Peter Van Der Walt OpenBuilds Team
    Staff Member Moderator Builder Resident Builder

    Joined:
    Mar 1, 2017
    Messages:
    14,734
    Likes Received:
    4,261
    So per the error, it couldn't detect pulling away from a switch.

    1) Homing Pull-off set to recommended 10mm in Grbl Settings?
    2) used Troubleshooting tab to confirm all switches are correctly plugged into the correct port (for example, Y doesn't accidentally trigger X and vice versa)?
    3) check if shaft coupler slipping on motor shaft or leadscrew preventing the move (tighten setscrews)

    Redo the terminal, leaving a high resistance connection and only sorting out cable routing will result in melting connectors in no time. Cut, strip, redo terminals
     
  7. huckthe1

    huckthe1 New
    Builder

    Joined:
    Jun 6, 2023
    Messages:
    4
    Likes Received:
    1
    Cut and redid terminal ends. Somehow I came up with 2 different limit switches so after a little more searching found the correct pair to work on my cutter. This is the first time in 3 years I got the homing switches to work. Thanks for the tip looking at Troubleshooter to see which was triggered. No w to complete my tune up and do some practice burns to get things dialed in. Thanks again. I owe you a beer. After pulling my hair out for a bit, I sure needed one.
     
    Peter Van Der Walt likes this.
  8. Colin53

    Colin53 New
    Builder

    Joined:
    Dec 5, 2020
    Messages:
    10
    Likes Received:
    1
    Hi Peter,
    Earlier in this thread, (over a year ago) I was seeking help with getting the x32 and SuperPIDv2 to play nice. Everything was working well, but I haven't used my machine in some time. Last week I updated Control and went to run a job but was having trouble with the xyz probe. Firmware update on the x32 seemed to be the solution, and I hadn't updated since I got the x32. Did the firmware update, the probe is working again, but now, despite the $16=1 solution for the Tool relay which worked in the past, the superPID now gets a "tool on" @ 5000rpm at the end of its boot cycle. To turn the tool off, I have to do a "tool on" in Control, which ramps up the rpm, then a "tool off" which lights up the "tool on" led on the x32. This happens with the x32 either powered up or disconnected completely. If I remove the QC from the Tool relay, the PID boots up normally, in a "tool off" state. Was the x32 previously saving the state of the relay when powered off, and is now not with the new firmware? PID requires 5v for tool off, 0v for tool on (I've reached out to Vhipe as well to see if they have any advice). My current workaround is to turn on and connect the x32, manually make sure the PID "tool off" requirements are in place, then power up the PID. Any advice?
     
  9. Peter Van Der Walt

    Peter Van Der Walt OpenBuilds Team
    Staff Member Moderator Builder Resident Builder

    Joined:
    Mar 1, 2017
    Messages:
    14,734
    Likes Received:
    4,261
    When you flashed the firmware, did you perhaps use the "...and ERASE settings" option? If so, restore your last Grbl Settings backup.
    Some of the default settings might differ from what you had before
     
  10. Colin53

    Colin53 New
    Builder

    Joined:
    Dec 5, 2020
    Messages:
    10
    Likes Received:
    1
    no, did not erase, also did backup and restore settings.
     
  11. Peter Van Der Walt

    Peter Van Der Walt OpenBuilds Team
    Staff Member Moderator Builder Resident Builder

    Joined:
    Mar 1, 2017
    Messages:
    14,734
    Likes Received:
    4,261
    Still sounds like Grbl Settings / Pin Inversion
     
  12. Colin53

    Colin53 New
    Builder

    Joined:
    Dec 5, 2020
    Messages:
    10
    Likes Received:
    1
    something I should be looking at other than $16?
     
  13. Peter Van Der Walt

    Peter Van Der Walt OpenBuilds Team
    Staff Member Moderator Builder Resident Builder

    Joined:
    Mar 1, 2017
    Messages:
    14,734
    Likes Received:
    4,261
    Check if things around $33-36 from Additional or extended settings looks sane too
    Normally the update goes smooth, and since the PWM/0-10v section is used by other laser/vfd guys (same output pin) I am sure we'd have heard if it was related
     
  14. Colin53

    Colin53 New
    Builder

    Joined:
    Dec 5, 2020
    Messages:
    10
    Likes Received:
    1
    Yeah, those are all fine. What I'm seeing is, if I turn the x32 off but leave the usb connected, it saves the "tool on" state required by the PID to be in a "tool off" on boot up. If I disconnect the usb, it forgets that state when I reconnect. This wasn't the case before the FW update, as I routinely disconnect the usb when I'm done using the machine.
     
  15. Peter Van Der Walt

    Peter Van Der Walt OpenBuilds Team
    Staff Member Moderator Builder Resident Builder

    Joined:
    Mar 1, 2017
    Messages:
    14,734
    Likes Received:
    4,261
    USB keeps powering the microcontroller. 24V is just turned off (motors, 0-10v, auxilary 5V stepdown, etc) - while powered of USB you haven't rebooted (Same for old and new - thats hardware power path)

    grbl doesn't "store" spindle state, it should always come online as spindle powered off.
     
  16. Colin53

    Colin53 New
    Builder

    Joined:
    Dec 5, 2020
    Messages:
    10
    Likes Received:
    1
    Ok, so x32, on boot from unpowered state (plug in usb, turn on main), will default to "tool off" (0v, starts the router) at the tool relay regardless of the value of $16? Just saying, previous to the fw update, I could power everything on, boot up, and the relay was doing what it was supposed to (5v for tool off) per $16=1. What am I missing? Thank you for your patience btw.
     
  17. Colin53

    Colin53 New
    Builder

    Joined:
    Dec 5, 2020
    Messages:
    10
    Likes Received:
    1
    Ok, here's what I've determined: It's not recognizing M5 without a preceding M3 on boot. I put 2 simple startup blocks, $N0=M3 and $N1=M5 and that now results in "tool on" led on at boot up, and the PID does not recieve the run command.
     
  18. Peter Van Der Walt

    Peter Van Der Walt OpenBuilds Team
    Staff Member Moderator Builder Resident Builder

    Joined:
    Mar 1, 2017
    Messages:
    14,734
    Likes Received:
    4,261
    Something here still seems odd. 0v should be Router OFF. >0v (ie above 0, to 3.3v) should turn on the spindle. Is your Spindle controller expecting the opposite?
     
  19. Colin53

    Colin53 New
    Builder

    Joined:
    Dec 5, 2020
    Messages:
    10
    Likes Received:
    1
    yes. superPIDv2 is 0v tool on. In my communication with the manufacturer, Vhipe, they said the v1 was actually 0v off, but they swapped it for the v2 due to "customer demand" or something. Yes, 0v on, hence the $16=1 change.
     
  20. Baroudeur

    Baroudeur New
    Builder

    Joined:
    Jul 13, 2021
    Messages:
    25
    Likes Received:
    1
    Hail
    Tried the last version with web builder, and the $42=4 is refused, no way to choose the number 4 to manage the door parking.
     
  21. Andy Middleton

    Builder

    Joined:
    Apr 14, 2015
    Messages:
    32
    Likes Received:
    3
    Hey guys! been a while ;-)
    Got a new project, converting a CNC Jiachen JD-1325DSX, it is an old 2008 version, would like to add BBx32 + Interface:
    1) What is BBx32 max motor amps? can't find this info, need to replace external driver of 7.0A for X and 2Y (Z is configured for 3.5A, I'm sure BBx32 should handle this)
    2) And/Or, can BBx32 use external drivers..? The X & Y axis are currently at 1/128 micro stepping (Z is 1/32), but have seen in docs that BBx32 can only set up to 1/32...? This part am a bit hazy, but if use the internal signal Step+ & Dir+ pins for X & Y, would that signal be at 1/1 or would it be at the microstep configured (1/8 default), and would I then only need to switch the external drivers to 1/16...? (1/8 x 1/16 = 1/128 final microsteps)... I am supposing that this CNC is using 1/128 to achieve the quoted 12000mm/min max XY speed, the alternative is if I drop back to 1/32 speed would drop to 3000mm/min (although torque would be x4)
    3) I have yet to fully explore the installed VFD, but from what I can see, it would seem this machine is set up to run the toolpath via software, but the spindle is manually adjusted from its control panel on the side of the machine... here I would see 2 options.. at least would like to use the Relay1 to activate the tool (I think is set up like this now), or, if I can locate manual for VFD (no luck yet!), better use the 0-10v VFD speed, but need to find the right terminal in VFD, and also find how to change its programming!

    I think these are my initial doubts, once I have things clearer I will probably have more questions ;-)

    PD my Venture conversion has gone very well with original BB, after revising threads here am thinking of using the currently unused original Emergency Stop as a Software Door, to apply a Parking routine for when have to adjust something on the fly (loose clamp/vacuum, clean dust shoe, etc)

    Take care!
     
  22. Peter Van Der Walt

    Peter Van Der Walt OpenBuilds Team
    Staff Member Moderator Builder Resident Builder

    Joined:
    Mar 1, 2017
    Messages:
    14,734
    Likes Received:
    4,261
    Checkout docs.openbuilds.com/blackbox-x32 to learn more about it.
    No external drivers (plug and play system). Post complete motor specs to confirm, BlackBox can handle up to 4A motors, ideally with 3-6v coils, 1-2mH inductance.
     
  23. Andy Middleton

    Builder

    Joined:
    Apr 14, 2015
    Messages:
    32
    Likes Received:
    3
    Morning Peter!

    Thanks for the quick response as always, yes, I have seen the docs about the BBx32, really a big step up from the original ... had missed the 4A on the specs , the motors are 85BYGH450B-008, here are specs attached (not too sure about how well they will play with BB, are slightly out of range you specified, but I am not knowledgable enough at this level of detail to be able to understand without explanation)...
    however, I have already revised the actual external driver config (M860S, 7.8A peak max, X & 2Y are configured for 5A RMS via switches, and 1/128 microsteps), and had also found another post, BlackBox, about breaking out signals from onboard headers.. although just realised that was about original BB... does the BBx32 have these headers available..?

    The size of this CNC make me think it will need those 5A that are actually configured to avoid missing steps (and I also do not like to run any hardware at max capacity, 80% is more comfortable = 3.2A), so this at the moment is what I have to investigate to see if I can use the BBx32, the original BB, or go with a Duet + Interface/Duet Panel (I have successfully converted a 1m3 3D printer to Duet with external drivers, although can't remember right now how many microsteps had applied to that build)

    Appreciate all advise, links to learn, etc, gotta go to work now, so will revise later, thanks again!

    Andy
    :)
     

    Attached Files:

  24. David the swarfer

    David the swarfer OpenBuilds Team
    Staff Member Moderator Builder Resident Builder

    Joined:
    Aug 6, 2013
    Messages:
    3,401
    Likes Received:
    1,895
    I would buy an ESP32 devkit board, program it, and wire it directly to the existing drivers and keep both those drivers and the existing power supply.
    If you use the same pinouts as the Blackbox (defined for the ESP32) it makes wiring quite easy and reproducable.
    https://www.aliexpress.com/item/1005001648850998.html?_t=pvid:a0b606e5-f735-4f8c-a291-d58e433c1918
     
  25. Andy Middleton

    Builder

    Joined:
    Apr 14, 2015
    Messages:
    32
    Likes Received:
    3
    Hi David,
    I must first admit that I wouldn't know where to start with that! I'm proficient with hardware, and understand enough software to be able to configure an existing FW (Marlin, RepRapPro, Grbl) to the setup I am using, but wouldn't know how to program an ESP32 or wire it to the existing drivers! I understand (somewhat!) how to assign pinouts (but did not know the BB had an available sketch where this info was available!), but going from there to using that info to wire up a new system, not sure... (maybe I could with time and investigation!)

    I understand enough to be able to take the PCB signal pinouts for STEP & DIR and wire them to the corresponding input pins on the external driver, so if this should work with BBx32, then would probably have enough confidence to go ahead with buying BBx32, & Interface keypad (+ XYZ probe), but 500$ + shipping to EU has to be a sure thing that it will work (even if it is not completely conventional way of working for the machine I wish to convert) ;-)

    PD FWIW I have here an ESP32, although the board layout is a little different from the photo on Aliexpress, I bought it for an Arduino project a couple of years ago, but never really took advantage of all it can do over a regular Arduino Nano, for example... would be interesting to follow up on what you say, although I feel a gap in my knowledge would have to be filled before I could even try

    Cheers!

    Andy
    :)
     
  26. David the swarfer

    David the swarfer OpenBuilds Team
    Staff Member Moderator Builder Resident Builder

    Joined:
    Aug 6, 2013
    Messages:
    3,401
    Likes Received:
    1,895
    lets keep this simple, the BBx32 will run your machine, but because it cannot supply 7amps (and since your drivers are much bigger I would expect the psu voltage to be 36 or 48v, BB only does 24v) your machine will not be able to move as fast as it could with the current drivers, nor cut as deep and so on, it will work but will be limited compared to what it could do.

    since you are in europe you may have a local supplier of grblHAL control boards
    look through GitHub - grblHAL/Controllers: List of controllers supported by grblHAL
    maybe this one 32bit GRBL 4-Axis USB CNC Motion Controller

    arduino experience is all you need, programming an ESP32 is pretty much the same thing except we have
    an online compiler for grblHAL that will produce the binaries we need and we have a flashing tool that can upload to any ESP32 board.

    Here is the one I built (since replaced by a real X32)
    20230802_132954a.jpg
    in the picture above, the female header along the near edge is where the motor drivers connect , in order Y2,Z,Y1,X
    the processor is labelled XYZA because this one was programmed for that, and I had another one programmed for XYYZ so I could just plug swap them for testing.


    20230802_133003a.jpg 20230802_133019a.jpg
     
  27. Andy Middleton

    Builder

    Joined:
    Apr 14, 2015
    Messages:
    32
    Likes Received:
    3

    Hi David,

    Really interesting info! And as life goes, yesterday I found this article:
    Phil Barrett's PicoCNC Aims to Provide Professional Laser, Lathe, and Router Control at a Low Cost - Hackster.io
    And thru this found out about quite a few more boards, most of them on the page you linked, so this is a really interesting way forward... I think I should be able to connect the Interface pretty easy, and the xyz probe too... I'm very curious about the one I Iink here, have not found out yet if it actually has a Raspbian OS and the GrblHAL is interfaced thru that, or if only GrblHAL runs on this ... it would be great to be able to use wifi but also have jobs independent of an external computer (part of the reason for choosing and Interface as stand alone capability is important), so if could ALSO generate gcode from svg or dxf on the same machine, that would be the all in one!

    The first question that jumps to mind seeing your set up, is that there are only the axis controlled there..? I can CNC without them, but endstops, spindle control and external relays for suction/air would obviously be great additions to a ready made setup, and I don't think I have the time or patience (and possibly the knowledge, but a challenge is always fun and informative!) to go that way, especially now I see there are many more options to be able to use the full current and microsteps of this machine...

    Don't get me wrong, when I need an all in one replacement or for a new build that is within the BB capabilities, I would go here first, as the above options are all more elaborate and therefore have more failure points, but if it can't do what I need for this build, then at the very least I thank this forum and its experts for the info that I believe will more easily complete this conversion ;-)

    Thanks for all the info! It has been guiding for me

    Cheers!
    Andy
    :)
     
  28. David the swarfer

    David the swarfer OpenBuilds Team
    Staff Member Moderator Builder Resident Builder

    Joined:
    Aug 6, 2013
    Messages:
    3,401
    Likes Received:
    1,895
    that'll work.

    correct, I use no endstops or any other frills except a Z probe, which I did not connect to this controller since it was for testing 4th axis stuff. I could unplug this and plug in my old Arduino Uno board in a few seconds if I needed probing, but I can just as easily probe with a piece of paper (-:

    Now that I have an X32 I have to rewire my probes so I might just and home sensors too. anything is possible, I've been happy faking the home for many years so increasing complexity may not be what I want, yet spindle and vacuum control is something I want....

    great
     
  29. GS76

    GS76 Well-Known
    Builder

    Joined:
    Mar 22, 2020
    Messages:
    151
    Likes Received:
    33
    I use the Openbuilds Nema17 stepper motors with the Meanwell LRS-350-24 power supply.

    My set-up needs a higher torque setting. I have increased the current pots on the X32 black box, but it is going into overcurrent mode.

    Should I get a different stepper motor, i.e. higher current or torque, as the controller has a 4A limit? It has to remain a Nema17 frame size due to the CNC machine design.

    Or

    Must I consider reducing the pre-load on the lead screws and any other areas causing additional resistive torque loading?

    Or

    Must I keep turning down the max rate and acceleration settings to get to a point where the setup can work based on what I have?

    Thanks again for the support.
     
  30. GS76

    GS76 Well-Known
    Builder

    Joined:
    Mar 22, 2020
    Messages:
    151
    Likes Received:
    33
    Further to my comment above, should I look at this motor, even though the stepper motor is heavier? See the attached.
     

    Attached Files:

Share This Page

  1. This site uses cookies to help personalise content, tailor your experience and to keep you logged in if you register.
    By continuing to use this site, you are consenting to our use of cookies.
    Dismiss Notice