Let me start of by saying, although my first CNC build by myself I have assisted with a friends DIY CNC and i have built my own 3D SLA printer so I am loosely familiar with the operation of the electronics and mechanical side. I am also writing this build largely as an after the fact build and will be updating with more of my use cases for buying this machine. This is however my first build log so please bare with me!
Well now that is out of the way here we are, 2 boxes of excitement from OpenBuilds Part Store, ready to build! Slight damage to the smaller box however the packaging is so good, almost too good (is this possible??) that nothing was damaged, I will touch on this further down.

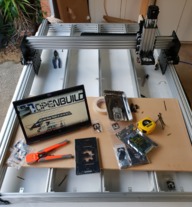
Now, I mentioned the packaging - it was incredibly well packaged. So well packaged it took me near-on and hour to get all the pieces out ready to build! The damaged box popped one of the packing bubbles but nothing inside was damaged as each component is also individually bubble wrapped. (Sorry i have missplaced the photo of all unboxed items.)
Mechanical build

Assembling bearings - used the metal tray and provided spanner half way through to press in the bearings because I was losing the fingerprints on my thumbs. I have to mention the little OpenBuilds detail on the bearings and housing was impressive, this is what sets them apart from some other kits.


First of two gantry assemblies, followed the build along video for the whole process which was great. One issue I had with the kit which was minor, one of the grub screws that came with the GT3 pulley was un-cut (no threads) I have a mountain of spares from RC cars and happened to have a slightly too long grub screw as replacement.
It is important to ensure you mark the eccentric spacers (on the 6mm) as it is very important for calibrating the machine later.


Trying not to go on too much, built second gantry plate.

Sorry, got a little excited and forgot to document the Z / X carriage assembly.

Attached X axis gantry C beam to plates, first time I forgot to put on the Z assembly

Looking good!


End plates on, this is my first time using T(v)-slot for construction and it makes everything super square - this will not be my last time using it.

My daughter decided Dad needed some assistance. She did up the screws tighter than I was...

Wasteboard members installed, this machine is feeling very solid.
Let the Wiring begin!


Mess of wires, there is some order I promise.


Lesson learnt: I had this grand idea that I learnt running multiple cables in my house, this is a bag taped over the end of the wires to group them and in theory make it easier to run through the drag chain. DO NOT DO THIS! it didn't help and probably made it more difficult - have to try these things though right?


Drag chain installed on the gantry, I found this chain 1 section too short which I thought was weird as it would not reach the home position correctly. This is actually a simple fix as you can install new sections without re-threading the cables, there was going to be ~35cm of drag chain left from the Y axis so I took 1 section and installed it as pictured. Pop the tops open on each side of where you will insert the section, un clip them from eachother and put in the spare single. Perfect fit now

Lesson learnt: I had another idea to invert the bracket on the fixed section of Y axis drag chain as I noticed the T-nut would sit below the endplate. This proved to be a mistake as it created a pinch point at either end of the machine and restricted the movement of the gantry, in the end I swapped the bracket back to the way it was instructed and removed the endcap so the bracket mounted slightly higher, fixed!


Few more pictures of the wiring around the gantry...


I love how the aesthetics have been considered along with the function of the machine, this looks great and functional.

More "helpers". Excuse the grass gardening took a hit to build this machineThis is some of the large bubble wrap that came around the mechanical parts.


Gantry looking tidy (unlike my garage and bench).


Controller mounted to the provided cover, mounted to the frame, power supply connected, wiring tidied and first power-up test.
First homing operation, "It Verks!"
Conclusion and other build notes:
Items I had trouble with and missed in the video walkthrough but are addressed in the actual build:
- Use cable ties to secure the belts next to the belt tension brackets.
- Don't over-tighten the gantry v-wheels. I ended up following this guide from Ooznest:
- Calibrate the machine! the default settings are just a starting point. Calibration guide followed here:
I have marked this build as complete however as addressed in the reason for build, I will now be adapting a number of designs initially hand made to be cut using this machine, all designs will be uploaded and free to use under the CC - Attribution license. My intention is to allow these designs to be accessible and used by all who would not normally be able to afford the commercial option.
Feel free to contact me if you have any need for a aid device to be designed, I will happily do so based of pictures and/or discussion.
WorkBee 1510 - First CNC Build
Build in 'Cartesian Style CNC' published by Scadam, Nov 20, 2018.
This build will go through the construction of a WorkBee 1510 kit from the OpenBuilds Part Store, all mechanical and electrical components were purchased from the store in late October 2018.
-
-
Build Author Scadam, Find all builds by Scadam
-
- Loading...
-
Build Details
- Build License:
-
- CC - Attribution - CC BY
Reason for this Build
I make items to donate to aid people with special needs that would alternatively have to spend many thousands of dollars on specialty components. All designs will also be posted here for others to use, I design all components from scratch based on advice from close friends. -
Parts list
Qty Part Name Part Link Comments 1 Wiring Kit - OpenBuilds WorkBee 1510 (60" x 40") https://openbuildspartstore.com/openbuilds-workbee-1510-6... Link 4 NEMA 23 Stepper Motors https://openbuildspartstore.com/nema-23-stepper-motor/ Link 1 24V Power Supply Bundle https://openbuildspartstore.com/24v-meanwell-power-supply... Link 1 CNC xPRO V3 Controller Stepper Driver https://openbuildspartstore.com/cnc-xpro-v3-controller-st... Link 1 OpenBuilds Workbee 1510 (60" x 40") Kit https://openbuildspartstore.com/openbuilds-workbee-1510-6... Link


