
Hardware
My build intent was to make a small, rigid plate cutter for aluminum parts. I had 2x 500mm and 1x 250mm C-beams and 1x C-Beam XLarge Gantry Plate. At the time I started, I couldn't spring for any more parts but I needed a couple regular C-Beam Gantry Plates so I made some by hand.

The handmade plates.
They were close but not anywhere near perfect. They got the machine up and running though and I cut some plates from Fusion 360 templates I downloaded.

New cnc cut plates added.
Also missing was a extra C-Beam to create a frame for it. My plan was to mount the machine to a 2000lb cast bench I have. This should help machine rigidity. I drilled and tapped some holes into the bench and attached some 2" angle iron then I welded two pieces of 3 1/2" x 1 1/2" box section steel to those. The result was so rigid and immovable that I could push and pull on it with all my weight and it didn't even flex.
I wan't sure how high I should make the x gantry from the cutting table so I decided to make it adjustable by drilling out and adding nut inserts into the back of the steel.
The custom Fusion 360 X gantry plate incorporates a combo of Xtreme Mini V Wheels on the inside and Solid V Wheels on the outside. I have plans to tie in another plate and wheels on the back for decreased play on that.

Nut inserts for adjusting gantry height.
No C-Beam End Mounts either, so I made those to and welded them into a C shape with holes to bolt the gantry at any height I needed depending on the thickness of the stock I was going to cut. So far so good, the machine is incredibly rigid and even when pushing it a little too hard, I get zero chatter or flexing. A 6mm carbide flat end mill will just snap without any warning and keep on running the GCode like it doesn't care.
Electrical
3x Open Builds NEMA 23 Stepper Motor - High Torque Series.
MEAN WELL SE-600-48 AC to DC Power Supply, Single Output, 48V, 12.5 Amp, 600W.
Drivers are 3x 2/4 phase Nema 23 Stepper Motor Driver 24-50VDC 1.5A-4.5A 256 Microstep M542T.
Cat6 ethernet wire + GLS Audio Speaker Plug Twist Lock 4 Pole Speaker Plugs for connecting to motors.
500W Air Cooled 0.5kw, ER11 Chinese spindle.
And just to be safe because I have had issues in the past with the machine loosing steps.
1/2" Tinned Copper Metal Braided Sleeving on the motor wires.
Uxcell AC 115/250V 20A CW4L2-20A-S Noise Suppressor Power EMI Filter.
Ferrite Core Cord Rings on everything. (Chinese spindle == EM noise)
Since these additions, I have had zero issues running long jobs.
Arduino Mega2560 running gnea/grbl-Mega.
Elegoo 8 Channel DC 5V Relay Module with Optocoupler for Arduino
Raspberry Pi V3 model B.
Arducam 5 Megapixels 1080p camera for Raspberry Pi.
Badger Air Brush compressor for coolant. (it's quiet and had it for years)
8mm Metric Acme Lead Screw.
All the hardware connecting this together is all the standard couplings etc. found on openbuildspartstore.com


One note on grbl for Mega: It's just my stupid mistake but I had a hard time initially getting the grbl for Mega to work. I had grbl v1.1 for Arduino Uno previously installed in the Arduino app libraries and even though I opened the grblUpload sketch for mega, upload with no errors, it took the dependancies for Uno at compile time and you get no warning as to what's going wrong. My bad. Removing grbl for uno did the trick.
Software
So this is where things get a little out of hand lol, After spending many late nights, sitting in my garage with my Mac-Book running UGCS, noise, dust etc. I though I would tackle remote operation. This is when I added the Raspberry Pi. I had never had one before, no clue what it could do so a couple days of tinkering was required.
Here is the breakdown. Not sure it's the best approach but it works mint.
Raspberry Pi with default Raspbian Linux OS running. I hard wired it with it's own ethernet cable with the intent on running streaming video. Wifi wasn't cutting it. I assigned the Pi a static IP Address through my TimeCapsule so I would always know how to SSH in from anywhere. I had previously seen a post about using an Alamode - Arduino Compatible Raspberry Pi Plate to communicate between the two micro controllers. I purchased one but figures I would try just straight USB connection between them. Hey it worked!. One less board to wire up. I am sure I will use the Alamode board somewhere in the future.
On the Pi, I installed cnc.js.
GitHub - cncjs/cncjs: A web-based interface for CNC milling controller running Grbl, Smoothieware, or TinyG. UGCS worked on the Pi but the 3D viewer never worked. I figured it was something to do with some java class missing on the arm versions of Java for the Pi. Whatever, I wasn't going to get into it.
I had never wavered from UGCS before and wasn't sure about going to a web based interface. You get used to it though and it's actually very cool.

For the camera, I installed mjpg-streamer
GitHub - jacksonliam/mjpg-streamer: Fork of http://sourceforge.net/projects/mjpg-streamer/ on the Pi
This was tricky to understand and get running but taking time to read up on it finally get's it working.
I created a shell script to start up the cnc server and the streaming video server with an easy command.
I ran a job just to see if all that software running on the Pi would interfere with the cutting, but so far so good.
I would suggest the Pi 3 thought. It's dual cores and has all the wifi, ethernet, usb stuff already on board. Super easy.
The Relay board was used to splice in the compressor/coolant (Arduino pin 9) and the spindle (Arduino pin 6).
From the cnc server M3, M5, M7 & M9 worked right out of the box. There was one thing with Fusion 360 exporting the tool paths though. I would get an error about enabling coolant (mist, flood etc.) A little googling and I found I needed to copy/edit grbl.csp from Fusion. See this: Post Processor Coolant - Here is how to support additional coolant modes - Autodesk Community
Pendant:
I happened to have a ShuttlePro lying around that I use for Logic Pro audio editing. It's an input device for scrubbing through timelines. Turns out though, you can map the dials and buttons to various CNC controller commands and viola, a pimp cnc pendant. It's fantastic for fine tuning the work position.
So, remote operation/automation with real time video was in the bag. Kick back and cut from my favorite chair. I realize mounting material to cut is manual, but...
I realize there are a lot of details left out but I'm good with follow up if anybody has specific questions.
Cheers.
UPDATE:
Added spindle speed and power control.
Added limit switches (again) and finally it worked. Homes like a champ.
Added Y-Table strength via some bearings.
Made a DIY depth probe.
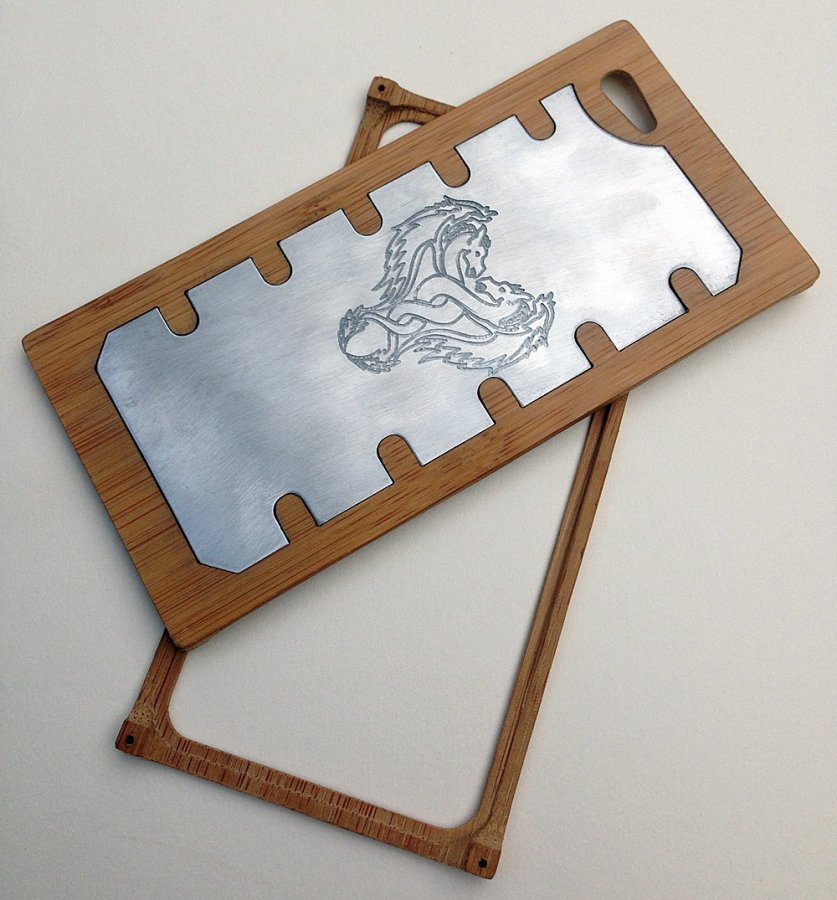
iPhone case prototype. Bamboo and Aluminum.
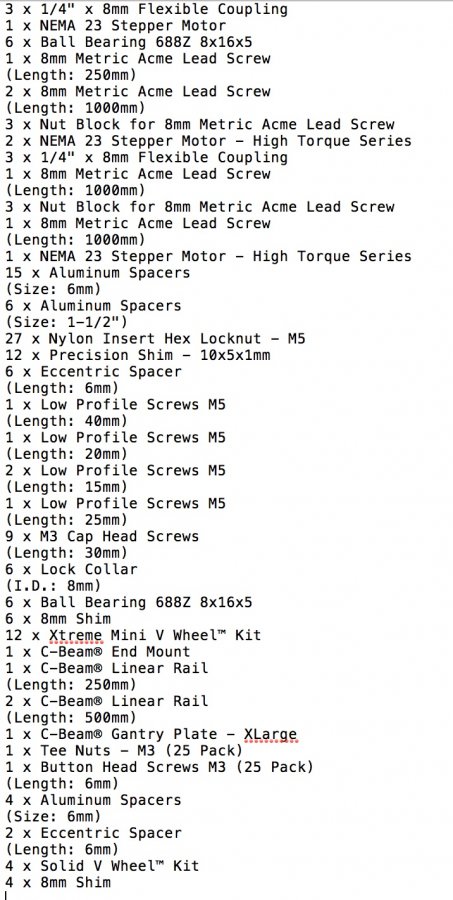
Open Builds parts list.
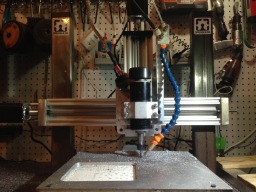
Small C-Beam Plate Maker With Remote Login & Operation
Build in 'X/Y Table Style CNC Mill' published by DaveStewart, Aug 25, 2017.
C-Beam Plate cutter with Raspberry Pi V3, Arduino Mega2560 and Camera. Remote login & operation via SSH with cnc.js server, mjpg server on the Pi.
-
-
Build Author DaveStewart, Find all builds by DaveStewart
-
- Loading...
-
Build Details
- Build License:
-
- CC - Creative Commons Public Domain (CCO 1+)
Reason for this Build
For fun


