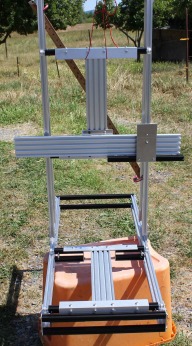
This project is to design and build the XYZ movement system. It supports a number of different motor types and actuator systems such as belts and lead screws, but that is up to each builder. I will probably use lashless ball screws and brush type servo motors under PID control.
So many 3D printer systems are very fragile and require special techniques to adjust and require constant adjustment.
In contrast, I'm designing a system which will be easy to assemble and require no adjustments to keep it moving with no lash because all axes are spring loaded.
I know of course that there is no free lunch - somebody has to pay - and when I tell you that the machine will be easy to build and use, you are quite right to ask "What's the catch? Why don't other 3D printer makers do it?" Here's the answer: My design is a little more bulky. It's height and depth are twice it's working area. So, if you have a 12x12x12 inch working area, it will be a bit over 24 inches tall and 24 inches deep (front to back) and a bit over 12 inches wide. I can trade off Cute and get Robust and Simple.
These are my goals:
- Lashless spring loaded rolling system that is always snug and never needs adjusting, and is never too tight.
- Easy to build at home without the need for any machining and without precision drilling or cutting.
- Robust: Should be able to run a long time before anything wears out.
One of the things this project leverages on is the availability of parts made for other wonderful projects.
For example, the long V-Slot extrusions come at 1M long from the factory, so those are all the same length. No machining or cutting needed. The 420mm long T-Slot extrusions that run right to left came precut and even pretapped because they are used in perhaps the MM2 3D printer. Again, no need to cut those to length.
The 3x3 and 6x6 inch and other aluminum plates come precut to size from online suppliers such as online metals.com which allow you to order any size. Again, no need for custom machining. Using a set of cheap digital calipers, one can scribe lines and points on the aluminum plates, then accurately center punch and then drill.
Part of the design is that for all the pieces that are hand fabricated, the exact dimensions are not critical because all critical exact dimensions rely on precut items.
You will need digital calipers, a drill press, a carbide toothed miter saw for cutting aluminum extrusions shorter, some drill bits, and a 5mm x 0.8 pitch tap. It's nice to also have some sanding blocks to smooth out some aluminum edges that can be sharp.
Here are some pictures:
(Note: You can see all pictures in high resolution here. Click a pic there to see full size.)

Above: Original color coded concept drawing.

Above: Side view. Notice how end plates are just squares of 0.1 inch or 1/8th inch thick aluminum plate which can be ordered from online metals precut. The small ones are 3x3 inches and the large ones 6x6 inches. They are easily scribed with cheap digital calipers, punched with a center punch, then drilled. Plates of same size can be stacked, clamped, and drilled together to assure uniform hole patterns.

Above: The spring tensioned X-Axis roller system.

Above: Notice how the upper spring holes the sliding black T-Slot chunk against the plate, while the lower two springs provide a constant tension so the rollers are always perfectly adjusted. The sliding surface is greased with some heavy grease to keep it moving smoothly. The two horizontal bolts that hold in place the black vertical T-Slot block are low profile heads and are not tightened, except one is spring loaded. This allows the block to slide but not go anyplace.

Above: Using a washer as a T-Slot nut for the spring..!

Above: Front view.

Above: Closeup of Y-Axis roller assembly.

Above: Y-Axis roller assembly

Above: Closeup of 6x6 inch plate.
Easy to build and robust 3D printer framework
Build in '3D PRINTER BUILDS' published by Jesse Gordon, Jun 20, 2015.
Lord willing I will be showing you how build a robust and easy to build 3D printer framework using V-Slot rails and rollers. It's a little bulky, but it has all spring tensioned rollers on all axes, and can be built entirely without custom machining on any parts. You will need digital calipers, a drill press, a carbide toothed miter saw for cutting aluminum extrusions, and lots of little screws!
-
-
-
- Build Progress:
-
- Build in Progress...
Attached Files:
chauvelot and Mark Carew like this. -
-
Build Author Jesse Gordon, Find all builds by Jesse Gordon
-
- Loading...
-
Build Details
- Build License:
-
- CC - Attribution - CC BY
Reason for this Build
So many 3D printers either require lots of custom machined/stamped parts or are difficult to get adjusted so they can run free or they are fragile, and I wanted to make one that was robust, easy, and accurate. The penalty was size, but I think it's worth it.Inspired by
Trying to work with other 3D printers inspired me on account of their difficulty.


