
After my first cut with the new C-Beam XL if figured it was time to review what it took.
I don't have a lot of pictures for the actual mechanical build because I followed the normal build process because they would just look like the one's in the build manual. I will say that the instructions were great and I had no problems at all with the mechanical build. I printed the adapter ring for the Makita router on my 3D printer and mounted the router.
I did have some problems getting the electrical working. I had a cheap 24Volt power supply and some cheap stepper drivers and I could get any of the 4 steppers work just fine, but as soon as I tried to hook 2 or more up to the power supply the drivers would alarm and not allow me to do anything with them. So I did what I should have done to start with and went to the Open Builds store and got another power supply and 4 DQ542MA's. Thanks to Kyo's video I had them wired up and working in about an hour.
After getting every thing hooked up and calibrated it was time for the first cut. Put a 1/8" bit and cut a few patterns that I created. I am very happy to have these as the first cut.
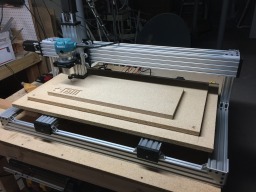
C-Beam XL build
Build in 'X/Y Table Style CNC Mill' published by WildBill, Apr 1, 2017.
So for a summary its a great kit that was easy to build, could not be more happy.
-
-
Build Author WildBill, Find all builds by WildBill
-
- Loading...
-
Build Details
- Build License:
-
- CC - Creative Commons Public Domain (CCO 1+)