Welcome to Our Community

Some features disabled for guests. Register Today.

myOX : a 4' x 2' OX with potential

Discussion in 'CNC Mills/Routers' started by Serge E., Jun 19, 2014.
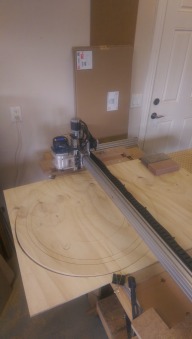
  1. GrayUK

    GrayUK Openbuilds Team Elder
    Staff Member Moderator Builder

    Joined:
    May 5, 2014
    Messages:
    1,668
    Likes Received:
    627
    Couldn't it be faced with a frictionless material. I can't remember the name of it, but it is like a laminated melamine material. :rolleyes:
    Serge, about the vacuum you mentioned. I have been thinking of using a cylinder type vacuum, which sucks and blows. The idea being, that I run one pipe to the work surface which is blowing, and another which is sucking. That, with a sort of flat duck mouth nozzle on both, use one to direct the blow towards the waste material, and the other to catch the material. Indeed, if one could design and print a nozzle that wrapped around the cutting head, as a single unit, it could work rather well. However, I know there is a chance of runaway, rather like acoustic feedback. :)
    Just an idea.
    Gray
     
  2. Paruk

    Paruk Journeyman
    Builder

    Joined:
    Jul 13, 2014
    Messages:
    397
    Likes Received:
    148
    GrayUK likes this.
  3. Serge E.

    Serge E. Journeyman
    Builder

    Joined:
    May 6, 2014
    Messages:
    730
    Likes Received:
    251
    Thanks for the reminder. I was going to see if it generates enough pressure, without damaging the work surface, to just give that extra little bit I need when working with, say, 3/4" plywood, especially for smaller parts which prove (to me) difficult to clamp in all corners. Planed piece of wood or othr material should be ok. With the 1/2" ply, a large piece tends to curve / dome just enough to be a pain ...

    The spoil board is (quite) flat (now). But when I clamp a long and narrow piece of wood in one accessible corner, bottom right corner usually to edge of table, the opposite corner tends to move up just a tad from the pressure (clamping too tight maybe ?) The piece of wood itself might be at fault with tiniest bow as well. Anyways, your dust shield / push down should give just enough pressure to keep the tool end the right distance from the work piece surface.

    I am planning to use upcycled HDPE for at least the 'sled' portion. It should prove quite slippery. If wide enough, it should not mark... and it should be able to slide over most engraving (ex: text) and even shallow pocketing ...

    I need to take some measurements specific to myOX, or maybe for a typical OX setup (to share with others), and then start a prototype. myOX has plenty of strength to keep the 'sled' down. However, as you say, the "push down" should not be overkill either. It needs some sort of an adjustment or excessive pressure "release".

    I had thought of using something like spring loaded rolling balls. But I like your 'sled' approach better as it won't gather chips/dust ...

    I think it's worth a try. At worse, I'll remelt the HDPE and make something else with it. ;)
     
  4. Serge E.

    Serge E. Journeyman
    Builder

    Joined:
    May 6, 2014
    Messages:
    730
    Likes Received:
    251
    I was thinking of upcycling some HDPE (melted bottle caps and such) for at least the "sled" portion. It seems as slick as teflon.

    As for the vacuum, I thought I was crazy of thinking along the lines of what you mention. Unless we're both nuts, eh ?

    My router blows air down pretty hard. This probably helps creating that cloud of finer chips and dust in the garage, especially when I work with MDF ! Man, the stuff covers everything ... even goes inside cabinets, drawers, etc.

    All I need is the vacuum part. I am toying with the concept of a circular nozzle or more likely two (not quite) half circles connected to a single hose. The "flat" nozzle needs to be large enough not to jam with larger/longer chips ...

    Combining with Florian's "push down sled" could make the result one sick dust collector, eh ?

    Maybe if I throw in some shock absorbers and struts, the likes used in model monster trucks, instead of just plain old springs ... :rolleyes: Oh wait, that would be crazy, eh ? But they can have all of the needed adjustments : oil (thickness), spring pre-load, etc.

    A simple approach would be to enclose the entire machine, plugging in one hefty vacuum hose and creating almost a vacuum enclosure - that should suck just about anything that isn't glued/clamped/screwed down. :eek:
     
  5. Florian Bauereisen

    Florian Bauereisen Well-Known
    Builder

    Joined:
    Feb 24, 2014
    Messages:
    188
    Likes Received:
    60
    Hi,
    I did not, on the proto use HdPe or suchlicke as i could not figure an easy way of attaching it to the holddown itself.
    The complete starshaped ( in my case) part made out of HdPe i didn`t tust to withstand the pushing without getting bend...
    someone needs to try :D
    Anyway my setup really sucks about 95% of all dust and chips which is more than i expected for this first try..

    BTW: be carefull when working with MDF it is far from harmless for your health. They have just "upped" the regulations for carpenters over here in germany when working with it.

    So at least always use your vaccum cleaner and a mask as long your dust collection isn`t ready to use..

    greets

    flo
     
  6. Serge E.

    Serge E. Journeyman
    Builder

    Joined:
    May 6, 2014
    Messages:
    730
    Likes Received:
    251
    Did you have your drawings online ? I can't seem to find them, just the images. I'll probably have to redo anyways for myOX ... to big router and I need to let it blow the air it sucks from the top (self cooling) ...

    With MDF, I hold the vacuum hose (4") close to the tool. But my router blows so hard and the MDF dust is so fine, lots escape. Lucky me, I have dense nose hair :confused::ROFL: so it gets filtered if I happen to take a breath during a such a job. Seriously, I use disposable masks; got a ton of them from a wholesale place a while back.
     
    GrayUK likes this.
  7. Serge E.

    Serge E. Journeyman
    Builder

    Joined:
    May 6, 2014
    Messages:
    730
    Likes Received:
    251
    Me thinks I have my working surface "perfectly" flat, or just about. Turns out that when I was clamping my work piece to the edge of the table (work piece, spoil board, work surface, spanner 40mm V-rail, table top and finally table beam) I was squeezing, even if 3/4" thick work piece, at least 1 or 2 mm. There was a small gap beneath the spanner beam (X axis) and the work table. Doh ! :oops: For now the solution was to fit a wide washer of just the right thickness. No gap, I can clamp as hard as I can with no issues now.

    I now clamp the work piece in all four corners, two if it's a narrow work piece.

    I can now route a 3/32" groove on 3/4" plywood for at least 15" (didn't try on a longer piece) and just hit the glue joint between layers. Amazing how precise the OX is :thumbsup: (and probably was all this time). The table and work surface needs to be just as precise. :oops:

    I am almost temped to try and engrave my wife's iPad. :duh:

    By accident (honest) I also confirmed myOX is plenty strong. In trying to 'clamp' the work piece by screwing it down near zero mark, I forgot my test job didn't have a builtin safety margin. myOX happily routed right through the deck screw ! There were a few sparks !! myOX just went on, not skipping a single step. :eek: Obviously, I stopped the run before the second, deeper, pass. Yes, the bit is scrap... small piece is chipped off, blackened tip. I still have plenty of these low cost, yet solid, bits to go.

    All I need now is a handle on feeds and speeds ...
     
    GrayUK likes this.
  8. Serge E.

    Serge E. Journeyman
    Builder

    Joined:
    May 6, 2014
    Messages:
    730
    Likes Received:
    251
    Well, several 'test' (read 'free') signs later and things are looking real good. Quite a few custom signs done for family and friends ... Pictures (and movies !) to follow soon.

    As important as having a flat table and spoil board is, it is even more important to have flat material to work on. Doh ! This seems harder as the work pieces get larger. 3/4" plywood cut down to about 30" x 48" tends to curve if not stacked flat. Kept vertical too long, it will easily bow by 1/8" or more, as I found out the hard way. :oops: Clamping that big a piece just in the four corners does not get that bow out ! :banghead:

    So I transformed the low cost pipe with transparent table cloth protector 'dust shield' over myOX into a full fledge 2x shelving. The pictures should follow soon on this as well. Now I can stack my wood sheets up above myOX - nice and flat(er).

    In other words : if you are building a large OX, make certain your material will be kept flat. That's where a vacuum table comes in, right ? How to clamp the centre of a large (relatively thin) work piece ? I doubt double sided tape would work for thicker plywood.

    I'm also wishing I would of went with 1000mm for my Y axis. The 750mm only gives me 20" or so of working Y, which seems to get in my way for too many projects. But that's an other story for a later modification of myOX. First I need to stop giving away signs... been going through quite a few sheets of plywood over the last few months.
     
  9. Serge E.

    Serge E. Journeyman
    Builder

    Joined:
    May 6, 2014
    Messages:
    730
    Likes Received:
    251
    Here's a wall clock :

    IMAG1226.jpg
     
    GrayUK and snokid like this.
  10. Serge E.

    Serge E. Journeyman
    Builder

    Joined:
    May 6, 2014
    Messages:
    730
    Likes Received:
    251
    Check out the gallery Done with myOX for more as I catch up to posting images and YouTube from the past few months (as I recover them).
     
    Mark Carew and GrayUK like this.
  11. Serge E.

    Serge E. Journeyman
    Builder

    Joined:
    May 6, 2014
    Messages:
    730
    Likes Received:
    251
    Here's an interesting approach to move your machine out of the way - check at 1m14 :

    upload_2016-10-20_20-21-33.png
     
  12. Rick 2.0

    Rick 2.0 OpenBuilds Team
    Staff Member Moderator Builder Resident Builder

    Joined:
    Dec 20, 2013
    Messages:
    2,862
    Likes Received:
    1,528
    Better explanation:


    Overall a bit of a hack job. There are better designs out there. The Woodpecker offers a much more balanced design.

     
  13. Serge E.

    Serge E. Journeyman
    Builder

    Joined:
    May 6, 2014
    Messages:
    730
    Likes Received:
    251
    Remember how I was having this puzzling situation with my table top not being perfectly flat and parallel to the X-Y plane of myOX ? There seem to be a sag towards the center of the table width ...

    After screwing the 3/4" MDF every 6" or so to my table/stand and making multiple passes with the 2" planing bit, it had to perfectly be in plane, right ? Well, not quite ...

    First, given the width of my X axis, nearly 52", using the standard OX design and having a heavy router cantilevered, there is some flex. However, that was not the (only) issue at hand.

    Turns out the problem is mostly due to my (poor) clamping ! You see, no matter where along the width of myOX I worked, the further from the front clamps the bit went, the worse the 'sag' was ... up to about 2 mm ! With smaller pieces, which is easy to get on a table over 26"x52", I could only clamp up front. But large work pieces made the problem more obvious...

    In doing some 'large' production runs of big and small pieces (clocks, Christmas decorations, ...) for friends, families and a craft show (an other story to follow), moving the work area here and there and all over the table, it hit me. My clamping is cramping my style. I could not clamp smaller pieces in all four corners - the table was too big. If I clamped large pieces in all four corners, their center still had a slight curve near their centre.

    So I got myself two lengths of angle iron and used them to basically make a full length clamp. That help, but it still was not perfect. The larger work pieces were not sitting flat on the table. If I cut through the material being cut would be relieved of the clamping and sometimes stuck out in the path of the tool (danger !! danger !!) myOX is strong enough to push its way through. But the smaller bits aren't and ... either became two or burnt dark. In addition, the belts aren't made for that kind of strain either. Making more tabs and or larger/thicker tabs was just making for more work to finish the pieces by hand.

    If I used the idea of the push plate near the router working end, the flex in the gantry came into play with thicker pieces. It's kept low, but some of the force was pushing upwards ... making for sometimes wavy depth of cuts.

    If I used double sided tape, strong enough to hold the "twisted" work piece in place, how the heck was I suppose to take it off afterwards ?!? Just more work ...

    2nd lesson, make sure your sheet form material is relatively flat ... on its own. I've stored some 1/2" plywood, flat, and it is curling in the corners. Had a larger piece overhanging the stack and it was curling upwards. WT...? Even stacked several layers thick, the sheets still manage to get a bit of a curve.

    I cut those larger 1/2" pieces of plywood into smaller pieces ... but not too small to avoid lack of clamping space. 3/4" is lot better for larger pieces.

    3rd lesson, might be time to start working with solid wood rather than plywood.

    Got myself a stack of wide solid wood floor boards ... and a planer - to remove the grooves on the back side (and the thin finish on the top side). Upcycling reclaimed flooring cuts the cost down. That works great regardless of the clamping. I'm working myOX again ...

    Found myself a good source for kiln dried slabs of oak and such as well. 2 1/4" thick, up to 30" wide and 8+' long at great price. I just have to drive 2 hours to pick the stuff up ... I miss my van ! ;( Got a first piece at a 3rd the price of others ... but had to cut it in two to fit inside the new (short) SUV. If this works out, I will need an enclosed trailer sooner than later.

    New problem though. at 2.25" thick, those slabs barely make it beneath the planing bit with router fully retracted ! I need to remove my table top to gain 3/4". I need to fix 'rails' on the slab to rest it directly on the Vslot with a reference plane. It would be needed anyways given the slabs are rough mil cut anyways ... But i'll try to keep my top on (don't want to screw back on). I might need to stick to slabs less than 14" wide so they fit through the new planer before going to myOX for the engraving and cutting.

    Wish me luck as I graduate to large scale projects ...
     
    GrayUK likes this.
  14. Serge E.

    Serge E. Journeyman
    Builder

    Joined:
    May 6, 2014
    Messages:
    730
    Likes Received:
    251
    First, I hope everyone is enjoying the holidays with family and friends.

    2nd, unfortunately, myOX is having an odd issue. After running several days of many jobs few weeks ago, with no issues, it now randomly has a lost of control of the Z axis. The odd part is that it is always after a full retract and just before moving to the next area to be worked on.

    myOX goes about doing its thing, goes to one of the many small pockets and, just as it finishes the pockets it does the full retract to the safe height (1/8" above material surface), the router drops from the safe zone to below the work surface as much as 3/8" !! It seems to stop as it heads to the new X,Y coordinate. In the fraction of a second it takes me to pull the plug, myOX already ran a few inches across the work piece, spoiling it. This happens randomly, never at the same pocket. i ran the job several times as I try to debug over several days,

    Each time I run the job, whether cutting into the 3/4" plywood or cutting air, myOX traces the outline with no issues. It's mostly X and Y axis movement with very little Z movement, cutting an odd shape clock pattern. A good 10 minutes worth of moving about to trace the outline. Only once it messed up early on - it moved to the center, drilled the marker hole for the job and, it pulled out of the hole to the safe height and the router dropped down below material surface. Otherwise it did at least the full contour and a pocket or two before dropping the router.

    I first thought of a loose wire. It isn't. It would be a lot more random and frequent if it was. Eventually not working at all, right ?? Anyways, no loose wire. The Z stepper is wired with no splicing, other than at the stepper itself. Nothing is loose at either end... it is solid copper wire which runs down through the drag belt. Could it be just the flexing which weakened one or more of the four solid wires to the Z stepper ?

    I then thought it was heat related. The driver chip shutting itself off as it approached critical temperature. So I checked the heat sinks of all four drivers on the 1st generation CNC xPro controller being used. Three were a bit loose - both Y drivers and the Z. But I had no issues with the Y axis. Just to be safe, I removed the heatsinks, cleaned both driver chips and heatsinks, reapplied heat transfer compound and reinstalled the heat sinks. As I ran the job again, this time cutting air, the problem is still there !

    I started testing with an other job, although very similar it as about 7000 lines of Gcode compared to 56000 with the other - much more precise curves, etc. The problem was still there at the same transition - between a full retract and about to change X,Y .... normally above the material's surface.

    I checked the cooling fans, having moved them out of the way to get to the heat sinks, I thought maybe they were not blowing as well as they should directly unto the heat sinks. But all was well. It is now a much cleaner install as I never finished the shields, using bigger fans.

    I found my temperature sensor and checked the drivers as myOX worked, air cutting that is, and after a job which, for once, ran without the issue (!) The hottest they got was about 34c. After all, the fans are blowing the cold air from the garage unto them... Winter keeps it nice and cool, even with the small heater blowing at my feet from far.

    Then I ran the actual job, cutting into the same 3/4" plywood just in case it went wrong. The problem was back !!

    So here I am, left scratching my head. What the heck is going on ? Why just the Z and only in between a full retract and moving to an other area ? The wiring to the X stepper is also in the drag belt, but might be stranded copper wire. I have to check ...

    I guess I should do the old 'swap driver' to drive the Z axis stepper and see what happens ... I would have to disengage the belt for both X and Y, make certain Z doesn't try to go beyond its physical limit of a few inches ... The xPro has all four of the drivers soldered on, otherwise it would of been easier to swap the drivers themselves.

    I do have an other xPro, 2nd generation, which I could move from the much smaller C-Beam router and see if the problem moves along as well. I'll have to note the settings and all that fun stuff ...

    puzzled.
     
  15. Moag

    Moag Veteran
    Staff Member Builder Resident Builder

    Joined:
    Mar 16, 2016
    Messages:
    183
    Likes Received:
    294
    Stab in the dark, ... I would be having a closer look at the "solid copper wire"? and replace it something that copes with flexing through the radus of your drag chain.
     
    Joe Santarsiero likes this.
  16. Serge E.

    Serge E. Journeyman
    Builder

    Joined:
    May 6, 2014
    Messages:
    730
    Likes Received:
    251
    Thanks, I was thinking more along those lines as I wrote about my situation ... I have to go check, but I think that's the only place I used solid copper wire on myOX. I think I ran out of the stranded cable way back when I was wiring myOX, and it worked. I will replace tomorrow and see what happens.
     
    Moag likes this.
  17. Moag

    Moag Veteran
    Staff Member Builder Resident Builder

    Joined:
    Mar 16, 2016
    Messages:
    183
    Likes Received:
    294
    Good luck and have a great new year Serge E.

    Just a thought for interest sake, when the wires are out of your OX give them a bit of a stretch and and test for continuity of the wires to see if that was the problem.
     
  18. Serge E.

    Serge E. Journeyman
    Builder

    Joined:
    May 6, 2014
    Messages:
    730
    Likes Received:
    251
    Have a great new year as well.

    Will definitely give them a good stretch test as I will hopefully be able to use them to pull the replacement wire through the drag belt.
     
    Moag likes this.
  19. GrayUK

    GrayUK Openbuilds Team Elder
    Staff Member Moderator Builder

    Joined:
    May 5, 2014
    Messages:
    1,668
    Likes Received:
    627
    You don't think it might be to do with your Z screw?
    Connections slipping at the top?
    The dreaded Grub screw?
    Gray
     
  20. Serge E.

    Serge E. Journeyman
    Builder

    Joined:
    May 6, 2014
    Messages:
    730
    Likes Received:
    251
    Well, I took my courage with both hands and went at myOX wiring earlier today. The cable runs for the Z axis was just heavier gauge stranded cable and in apparently good shape. Nonetheless, I replaced it with the smaller gauge used for the Y axis... It turns out my X axis was also using the heavier gage cable which also ran through the same drag belt. Each set of 4 wires are also in their own cable wrap within the drag belt.

    The splice with the wires from the Z stepper and the heavier gauge wires was right in the area where the drag belt bent most ! The cable wrap seemed severely ... crushed. But the splices were nice and solid. As for the splices for the X axis, they were further down the drag belt, in an area which never bends.

    Somewhat embarassing to say, I was looking at the CNC xPro controller backwards (my bit of dislexia ?) The one driver I was mentioning as the Z axis is actually the X axis driver (bottom right). My issue, nonetheless, was and unfortunaely remains with the Z axis ... upper left driver !

    I correctly cut the wires for the Z axis, but when I disconnected the end at the bottom right driver and pulled each one ... I didn't see the cut wires move at the other end ! Yet, all four wires came quite easely... So my X-axis (!) was not spliced properly ALL this time, with no issues ... until I pulled those wires out.

    I had to pull new wires for both X and Z ...

    Note to self : next time I get drag belts, get the kind with a face that opens ! I had kept one wire from each set of 4 in the drag belt to pull the new sets through. One went all the way through with no problems. But the other set was released 2/3rd of the way ! I had to undo every two sections of the drag belt to push/pull the wires the rest of the way through ...

    Soldered the respective sets to the steppers leads. Connected the other end to the respective drivers on the controller. Did a quick test with 1/8" moves to see all was well. It WASN'T ! My Z was moving in the opposite direction. That's easy to fix, just swap one pair of wires around. Retested and all was great.

    Ran the same job once more, directly into the still waiting 3/4" plywood ... Things looked good for the first few minutes. Until it once more dropped the router down. This time, it wasn't between a full retract and the move towards a new area.

    So I have to check the ONE heatsink I didn't reinstall a few days back. :banghead: :banghead:

    The few minutes of rewiring turning into a couple of hours, I packed things up and left things for tomorrow ...
     
  21. Serge E.

    Serge E. Journeyman
    Builder

    Joined:
    May 6, 2014
    Messages:
    730
    Likes Received:
    251
    I hope not. Wouldn't it slip all the time instead of randomly, especially with what seemed to be a specific sequence (between a full retract and the move to an other area) ? It doesn't slip with frequent Z movements (like doing the pockets or the 200 moves up/down by 1/8" in 4 seconds or so of testing).

    Having rewired the Z axis (and the X axis :oops:) I still have my issue with Z slipping on occasion.

    I'll check the ONE heat sink not checked a few days back, actually the one for the Z axis (upper left corner driver). :oops::banghead::oops: I doubt it, but it is a bit loose, especially after having worked on the controller ... I use heat transfer 'grease' and a dab of silicon which seemed to work, until recently. Is there a better way to 'glue' the heat sinks on the driver chips ??

    I sure hope it is as simple as that. Otherwise, I'll have to swap with my other controller and see if the problem disappears. In which case, it's something to do with the old controller. Otherwise, I will be at a loss I'll have to post in the CNC xPro thread.

    Is fighting gravity (and the weight of the router) too much for the driver after a while ?? Would the driver heat up more/quicker then the other three drivers which just push the gantry (Y) and router (X) about ?
     
  22. Serge E.

    Serge E. Journeyman
    Builder

    Joined:
    May 6, 2014
    Messages:
    730
    Likes Received:
    251
    Well, it doesn't look like it was the wiring. It doesn't seem to be the 'grub screws' on the Z lead screw either - no slipping. So I'm back to the heat sinks, more specifically the one sitting on the Z driver chip.

    I removed, cleaned and reseated the heatsink... A dab of silicon to hold in place, as was done from the very beginning, with no issues, and a few times in the last few days. The difference this time is to blow some warmth to dry the silicon given the garage sits at about 10c even with a small radiant heater going to keep my feet warm. I'm also waiting for the heat transfer paste to dry along with the silicon.

    I also used a thin slice of V-slot to add a 'tower' to the basic square heat sink. Kind of a quick and dirty approach, for now... It's not going to make a huge difference being just pressure fitted with a bit of heat transfer paste for good measure. It stays on, so will see what happens as myOX goes to work. It can't hurt, even if it falls off - the controller is vertically mounted (Z and main Y drivers towards top).

    Otherwise, I will have to pull the other CNC xPro controller out (a long overdue ongoing 2nd build :thumbsup:) and swap with the one in myOX and see what happens.

    I'm wondering if my fans are getting weak ... they don't seem to be blowing that hard. their own motors/bearings might be filled with very fine wood dust ? In the weeks prior to having the issue with my Z slipping randomly, I had myOX working real hard ... Christmas ornoments, signs, ... and planning the 2+" thick oak slab !

    I have seen Aavid does all sorts of heatsinks and heat transfer pads, epoxy, etc. It gave me a few ideas for later, like building a combo fan holder / heatsinks for the CNC xPro ...

    Stay tune and don't hesitate to throw some ideas to help me correct my slipping Z situation.
     
  23. Serge E.

    Serge E. Journeyman
    Builder

    Joined:
    May 6, 2014
    Messages:
    730
    Likes Received:
    251
    Wait a cotton picking minute ... I do have an issue with my Z but nothing looked at up to now seems to be at cause.

    After all of this head scratching and self doubting, I tried something way out in left field : I used a 'feature' of Universal Gcode Sender to exercise my Z axis and see what would happen if I kept it going up and down for a while.

    I set the default step size to 0.125" and kept clicking the 'Return to Zero". UGS moves the head up by the default step size to then go home and back down (I was already at 0,0,0) :

    G21 G90 G0 Z3.175
    G90 G28 X0 Y0

    myOX's Z axis was going up and down dozens of times in a row with not a single issue. Great, but I was no further ahead to solving my issue.

    Patience is a virtue.

    So I changed the default step to 0.25" and kept clicking the 'Return to Zero'. Now UGS moved the router up/down by 1/4" and everything was still going great no matter how fast or slow I was clicking the return to zero button.

    I changed to 3/8". Beautiful.

    I changed to 1/2". Beautiful but rather boring by now ...

    I changed to 3/4'. Still going great, but, wait, there was a hint of an odd noise from the stepper (router is off all this time).

    I changed to 7/8". Oh sh.... !!! The stepper seem to stall just past 3/4" of the way up !!!! :banghead::blackeye: The odd noise happened just as the stepper momentarely stalled. :confused:o_O Stepper went about 3/4" and stayed there ... each time I tried this big a move.

    I changed to 13/16". It moved fine every single time, but the odd noise was still perceived as with 3/4" moves. There seems to have something wrong with the stepper, eh ?

    So I stopped using the return to zero, doing manual up and downs. The behaviour remained, but I was able to step it through a dozen up and down movements without risk of crashing the bit into my spoil board.

    I changed to 1". The stepper seemed to pause near 3/4 of the move (guessing from above numbers) BUT went part of the way further MISSING a fraction of the move in the process. There was my issue. Best of all, I could repeat it almost on demand. A few times, very rare, it would do the full move upward but the stepper was not sounding healthy in the process.

    Each time, I would loose a rather consistent and proportional portion of the moves longer than 3/4", up or down ! I will not bore you with the numbers (not that I noted any down, nor filmed the process).

    I moved the Z to a different starting height and tested again. Same results : a continuous move of about 3/4" or more triggered the 'slip' regardless of the start position... In fact, it was more like a 'stall' or 'sticking'. This kind of removes any issues with the lead screw, grub screws, ...

    QED, as used to be written at the end of a mathematical proof : "quod erat demonstrandum" meaning "which is what had to be shown".

    I am now left to suspect the stepper motor is at fault ...

    I'm ok as long as I don't do a move of more than 3/4" UP or DOWN. If I break the move into portions smaller than 3/4" all is well. If any move UP or DOWN is more than 3/4", the issue presents itself. o_O And, yes, every time I had the issue in the last days is with the "full retract" : going up, you guessed it, 3/4" of material thickness plus 1/8" to safe height. I just could not hear the noise made by the stepper over the spinning router.

    Does that make sense to anyone ?

    The "good" news, I can use myOX as long as I keep any single Z moves to less than 3/4" (for now). Temporarily, I can use GW Editor to tweak the g-code while I find myself a new NEMA 23 for my Z ... Amazon.ca here I come.

    Did I happen to mention that a while back, while I was planning the thick oak slab, just before I began to have the issue in fact, I had a slight ... situation ?

    At the time, using a 2" planning bit which the router and myOX had no issue handling, low rpm, slow feed, doing shallow passes with a SketchUpMake/SketchUCAM generated pocket path. Well, there was a few "minor" issues. The router stalled a few time as it went into the higher corners of the slab. I pulled the plug, realigned and restarted the shallow pocket... Bang, it hit an other high spot and again nearly stalled the router as it went down into the slab. Afte a few of these situations, I started doing manual passes : a shallow left-right pass into the material, up to safe height, going back right-left, move Y 3/4" over, down and starting a next pass. Not that much slower than the pocket path, but I could see any potential issues before they happened since I was bit more attentive. I could also avoid burn marks which the pocketing path did in one direction. I could just skip over the low area of the slab as well, working the corners down before doing full width passes. I could test depth of cut and feed rate as well. All this said, I think I messed up the Z stepper during those few "stalls" ... at least just enough to affect moves of more than 3/4". If that makes any sense to anyone ...
     
    Moag and GrayUK like this.
  24. Giarc

    Giarc OpenBuilds Team
    Staff Member Moderator Builder Resident Builder

    Joined:
    Jan 24, 2015
    Messages:
    2,921
    Likes Received:
    1,620
    Congrats! Sounds like you figured it out. In kind of makes me think I should purchase a spare to have on hand.
     
  25. Serge E.

    Serge E. Journeyman
    Builder

    Joined:
    May 6, 2014
    Messages:
    730
    Likes Received:
    251
    Just to be sure, I completely loosened the flexible coupling from the Z stepper and the lead screw. The problem showed up as explained earlier - any move of more than 3/4" had 'sticking' of the stepper. The longer the move, ex 3" (I could now send), the worse the 'sticking' even though there was now no load on the stepper.

    Since nothing has changed on myOX for quite a while, expect for temperature in garage, I have to place my bet on the stepper being at fault.

    I still don't understand why it can do up ~ 3/4" moves with no issue, but nothing beyond, in either directions, even with no load. Seems to be a full rotation of shaft (6.35 mm x pi = approx. 3/4"). Coincidence ??? This would further point to a stepper fault, right ?

    Amazon.ca doesn't have the stepper (a StepperOnline 23HS30-2804S) in its warehouses. Amazon.com has it for 40$US and I could go for a three pack for only 98$. However, they won't deliver this item to Canada. My passport is being renewed, so I can not go pick it up for an other 2-3 weeks. I bought the other three steppers direct from StepperOnline. They have tons in stock in Asia somewhere, for only 18$ at quantity 1 plus shipping (a bit over 20$us !) to Canada. Sold. If DHL doesn't screw it up like it did with my previous order from StepperOnline, I should have it early next week. :thumbsup:

    :duh: I should of check this two weeks ago, when the problem first became evident. :oops:
     
  26. Serge E.

    Serge E. Journeyman
    Builder

    Joined:
    May 6, 2014
    Messages:
    730
    Likes Received:
    251
    If all four of your steppers are identical, it would not be a bad idea to have a spare on hand ...

    Which reminds me, I need to get some extra G3 belt. It tends to stretch over time (especially if you get the occasional jam). I lost about an inch on my X axis when trying to take the bit of slack out ... I should go for double the length and do the belt over belt upgrade while I'm at it. Maybe get a couple of 1000+ mm 80mm V-slot to stretch my Y at the same time ... I could use the extra inches. :rolleyes:
     
  27. Giarc

    Giarc OpenBuilds Team
    Staff Member Moderator Builder Resident Builder

    Joined:
    Jan 24, 2015
    Messages:
    2,921
    Likes Received:
    1,620
    My x and y axis steppers are identical the z is smaller (176 oz). However, there is no reason the my z could not be replaced by a larger Nema 23.
     
  28. GrayUK

    GrayUK Openbuilds Team Elder
    Staff Member Moderator Builder

    Joined:
    May 5, 2014
    Messages:
    1,668
    Likes Received:
    627
    Serge. Is this difficulty, of getting stuff in and out of your country, something we in England have got to look forward to, when we are cast out on our own? :cry:
    Gray
     
  29. Serge E.

    Serge E. Journeyman
    Builder

    Joined:
    May 6, 2014
    Messages:
    730
    Likes Received:
    251
    I just managed to mess the one stepper, they otherwise work fine whether in the summer heat or the winter cold. myOX pushed clamps out of the way a few times. Not certain how I managed to mess the Z stepper, but it was not temperature related.

    Just finished planning the first oak slab with no issues. Z worked fine since moves are at most 1/8". No heat/cold issues when running for a few hours nearly non stop.

    I still would like to understand why making a full rotation in one shot makes my one stepper bind ...


    I thought of that, will wait for the new stepper to come in since I'll have to take things apart at that time ... I can always use that damaged stepper in other projects, as long as keep individual moves to less than 3/4".

    They offered the 'express' service, but I declined. It's like Amazon's shipping. I never take the express option and all my orders seem to arrive just as fast if not faster.

    The person punched holes in my old passport and gave it back to me. He said, with the receipt for the renewal, it's at discretion of USA customs officer to let me through or not ... I suspect I will get my new passport in less than 2 weeks anyways.
     
  30. Serge E.

    Serge E. Journeyman
    Builder

    Joined:
    May 6, 2014
    Messages:
    730
    Likes Received:
    251
    From what I understand of the UK situation, it was a choice made by UK government rather than being casted out (by rest of EU)... But I feel the pain. And to think we actually have a Free Trade agreement (NAFTA) between Canada, USA & Mexico. Imagine if we didn't have one ...

    I can't wait to see what will happen once Trump puts up his wall ... that's if he can front the cash with USA taxpayers' money. Funny thing is that he won't be able to send us the bill, unless there's a mail slot in that wall. We'll write "Moved, forwarding address unknown" and bounce it right back ... or maybe just tape the mail slot shut. :ROFL:
     
    Giarc and GrayUK like this.

Share This Page

  1. This site uses cookies to help personalise content, tailor your experience and to keep you logged in if you register.
    By continuing to use this site, you are consenting to our use of cookies.
    Dismiss Notice