This mill actually won't be CNC'ed, but it'll be hard to tell: I want put stepper motors on all axes and then use shuttles on a control-board to control the mill. This will allow me to do funny things like speed limiters, automate some tasks, etc. I'll probably also make it be a DRO as well.
Everything will be driven by threaded rod. Maybe acme. Maybe I'll make the threads on my lathe. Maybe I'll never finish this project...
The design is done in OpenSCAD. Its just how I roll.
... Who am I kidding? I'll end up using it as a CNC as well.
I also have some half-baked ideas about doing 4th and 5th axes. Later....
March 19, 2017 update
I finally ordered some C-beam, and started cutting! I also bought some hardware, but not enough to *ASSEMBLE*. hope to fix that this week. Meanwhile, here's a photo of the aluminium and the acme rod.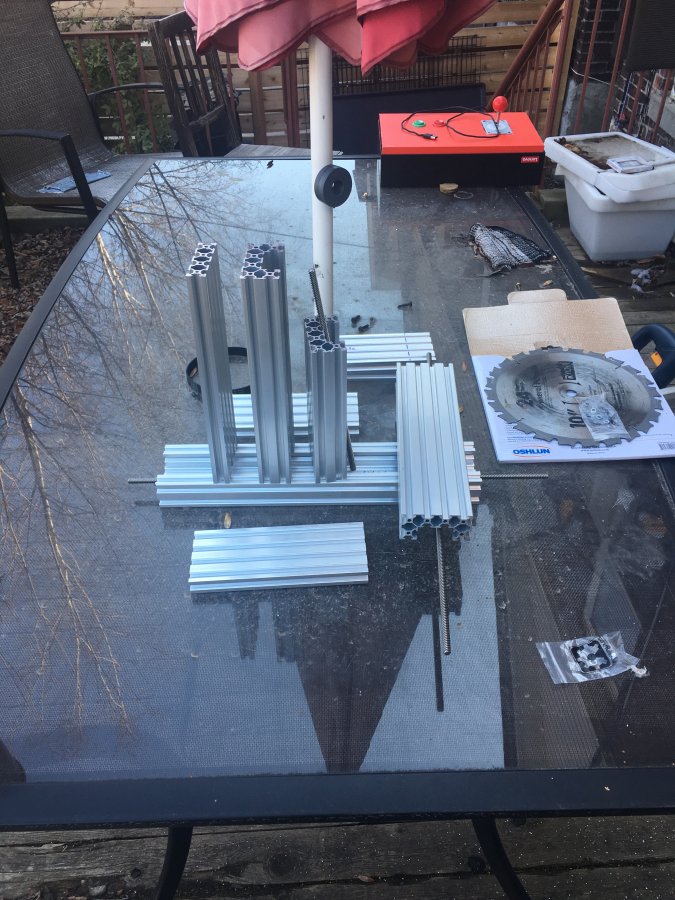
March 23rd, 2017
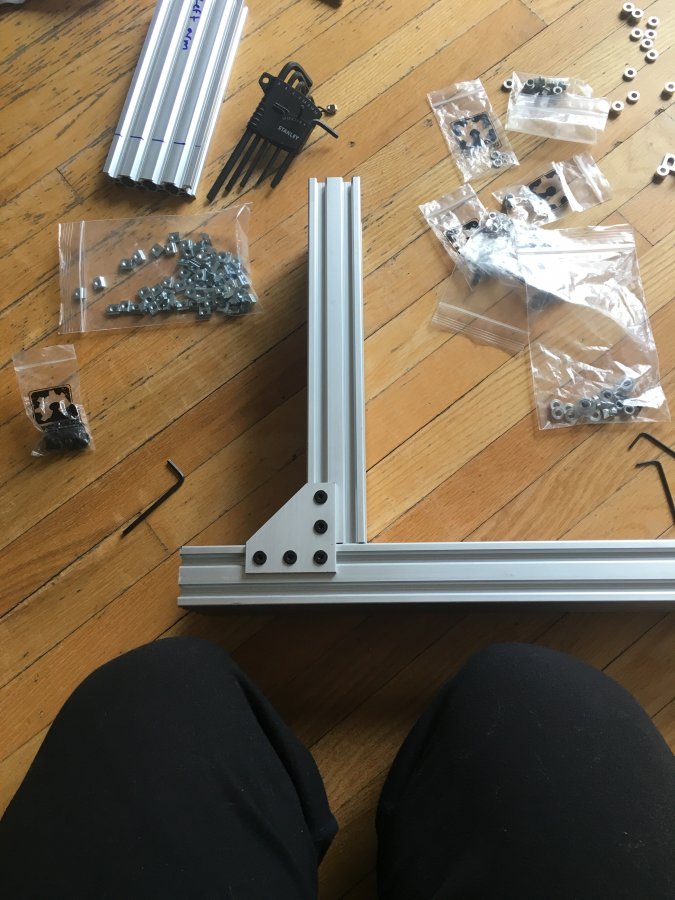
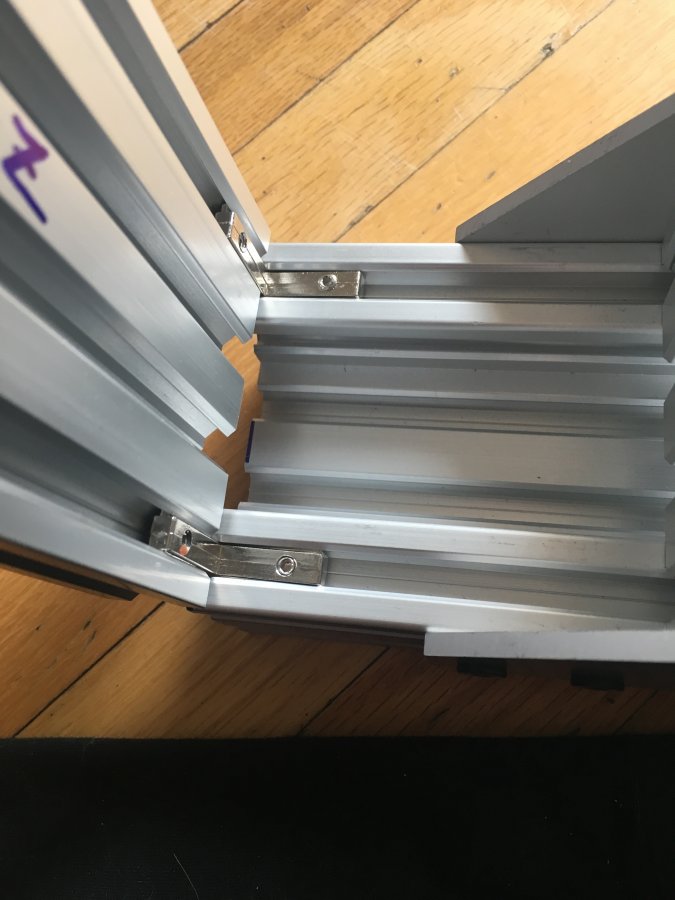
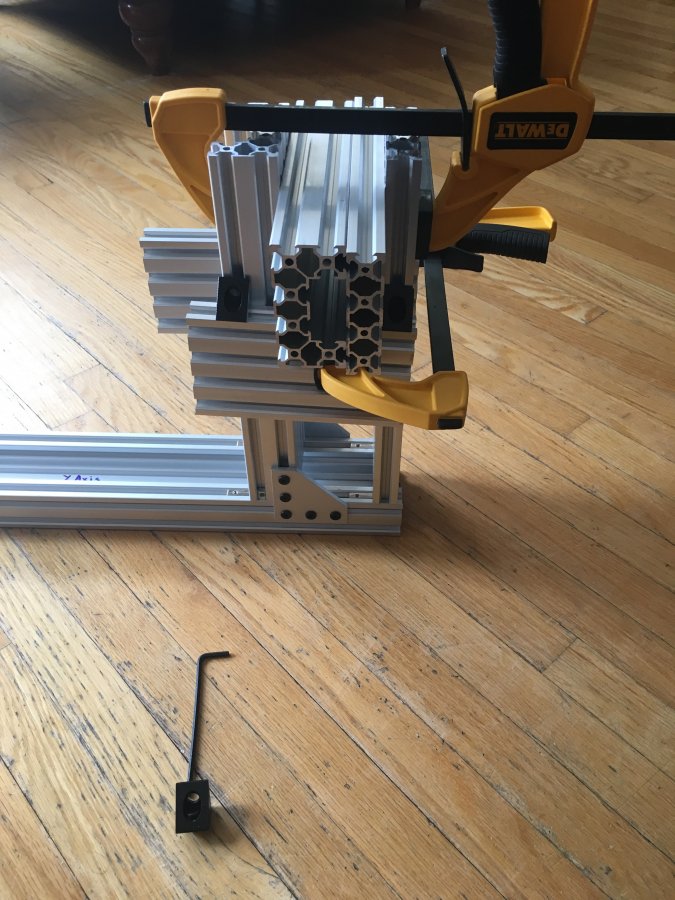
I got more bits, and have something kinda assembled. Nothing is square at the moment, and I'm short 7 corner brackets, not to mention a bunch of little bits here and there. Also, makerparts is out of C-Beam end mounts. Need those.
Then I can start thinking about the electronics. I know I'm going to start with GRBL and a nice little shield I got off tindie ( GRBL Compatible Shield for Arduino by 18Robots ), and I have some NEMA17s, but I'm going to want to change those to 23's, I think, and I need some stepper drivers too.
March 29, 2017
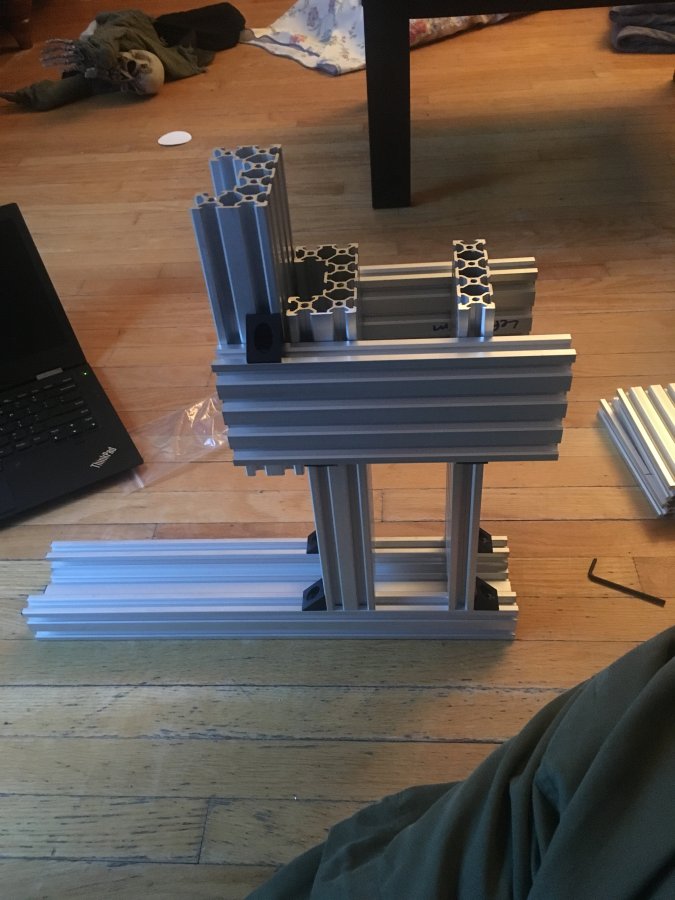
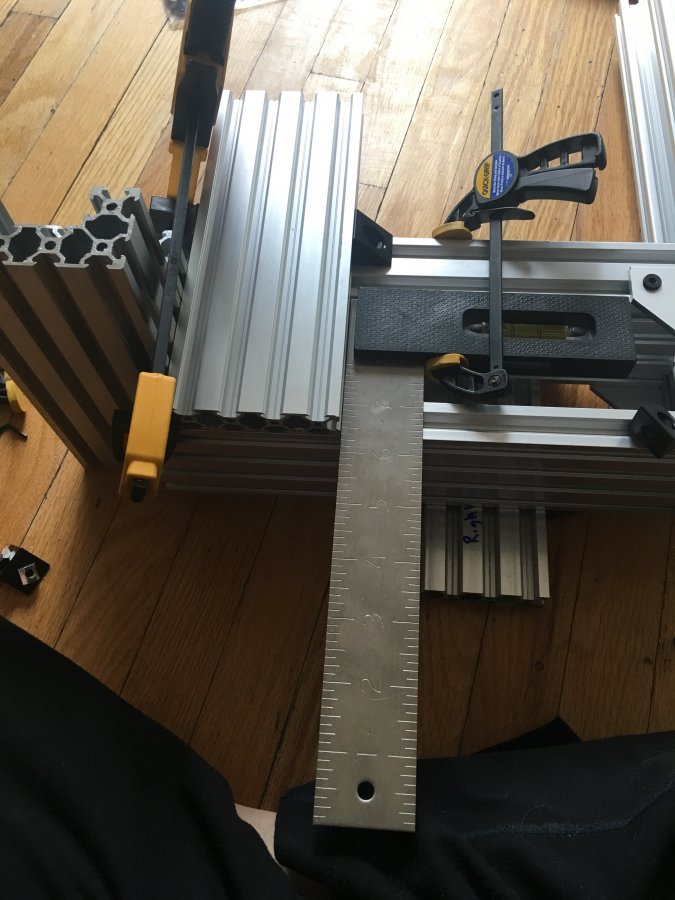
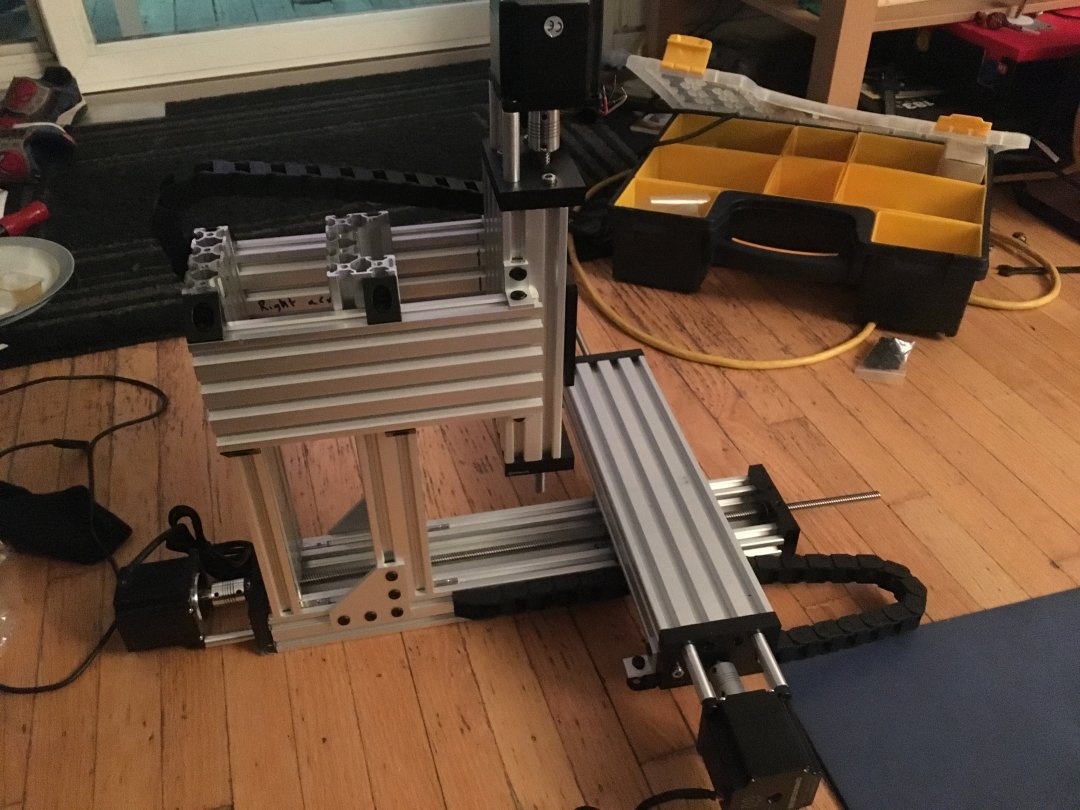
A bunch more parts came in, and I rebuilt the mill, this time worrying about how square everything was. There's a part of me that wants to do a few designs for objects that are easy to build that will conveniently allow you to bolt bits of t-slot together and be confident its square... the rest of me says "Good idea, but you have too many projects as it is."
I used 2 hidden corner brackets to attach the C-beam Z-pillar to the Y-axis. I spent a lot of time making sure it was square and centred. I then used a pair of aluminum brackets to fully attach the two c-beams together. I double-checked squareness, but nothing had pulled out of line. Yay!
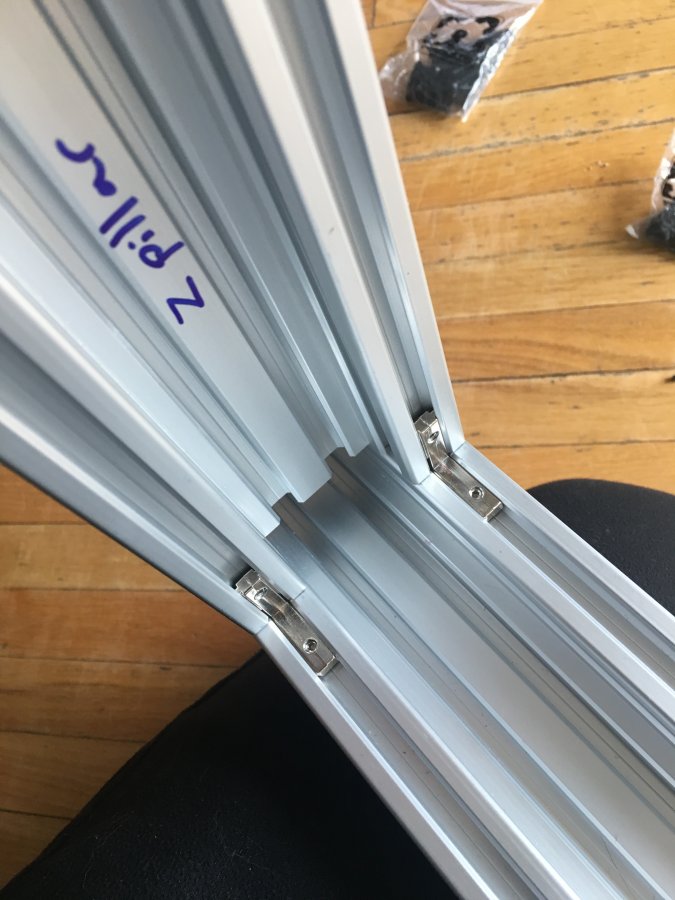
I used two more hidden brackets to attach the back pillar. I used other pieces of v-slot and C-beam to make sure it was square to the front pillar. That assumes Al extrusions are straight and square, but I'm assuming that anyways...
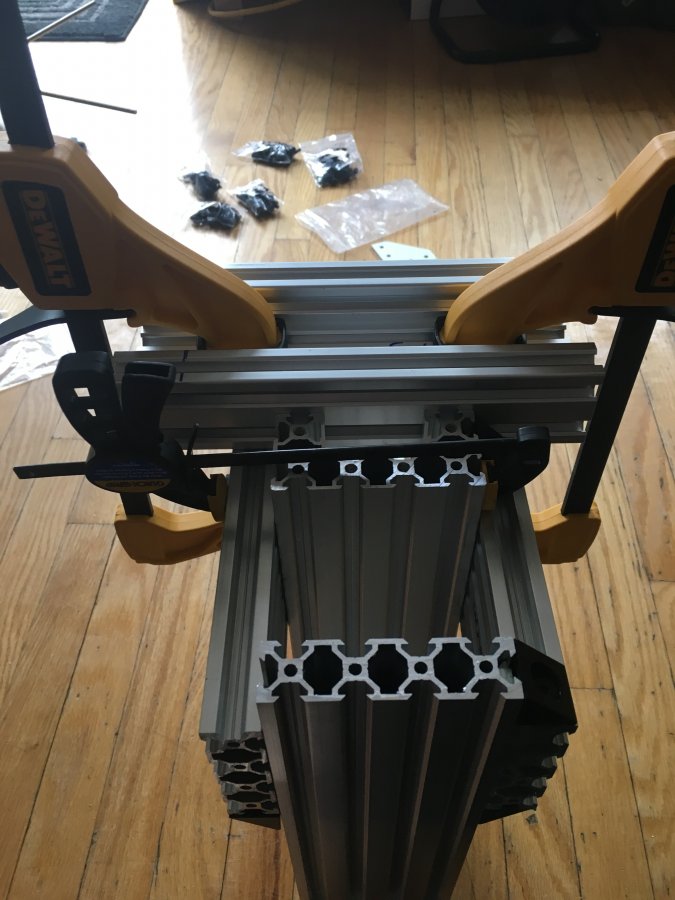
Remember boys and girls: you can't own too many clamps.

Different angles of the clamping of the rear pillar. I'm not sure why I went with the angles overkill...
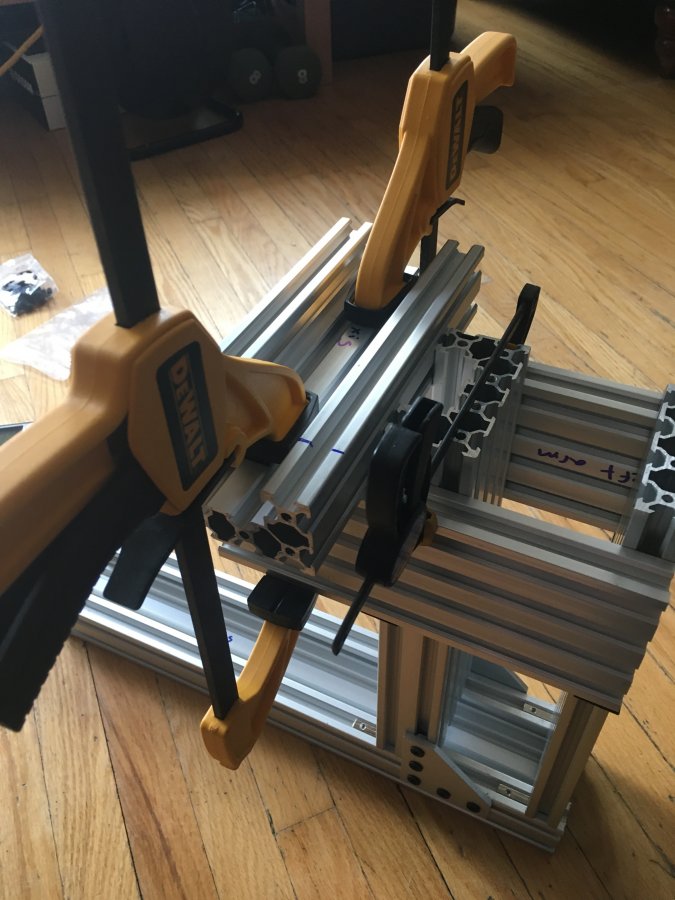
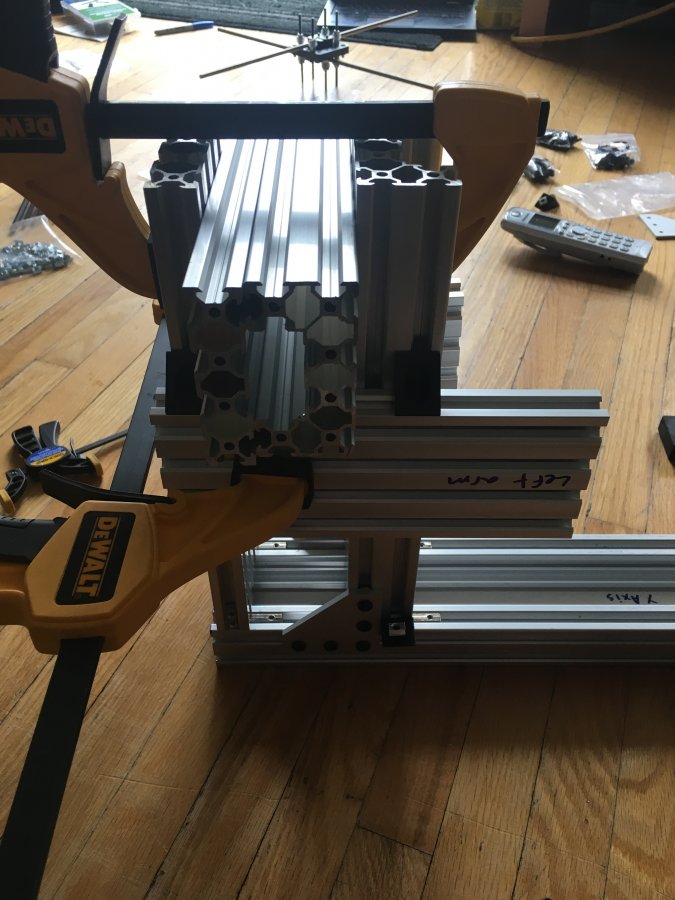
These photos show the arms, that hold the Z-axis out over the centre of the XY table, being attached. They're set down from the top of the pillar just enough to leave room for the angled corner connectors. Before these were attached, everything felt rigid. but it feels more solid now that they're bolted down. I'm not sure if I've taken up some flex, or if its just psychosomatic. Probably a bit of both.
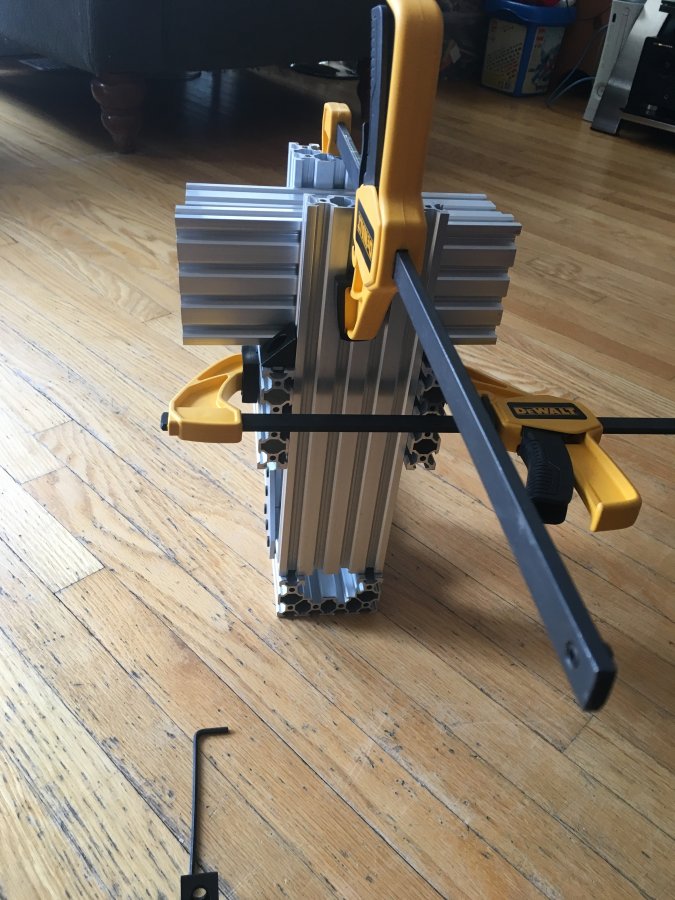
I've got the gantry plates, but I mis-ordered the screws I needed. No big deal, machine screws can be cut. I got 2 of 3 plates assembled when the cutting bit on my dremel broke, so I need to go buy more.
I also need to decide: am I going to wait patiently for makerparts.ca to get more c-beam end plates in stock? Or order them from openbuilds? or just use my drill press to make my own?
May 18th, 2017
Picking up where I left off... I had some quarter-inch Al plate stock, so I cut it up to make end-plates for the C-beam. I drilled the holes for mounting the plates, and everything was awesome, so I went and drilled the holes for the acme rod. At that point, something was wrong, and no matter what I did, the rod didn't seem to line up right! Eventually, 2 things happened: (1) Makerparts.ca got more stock, (2) I gave up making my own and ordered...
I also ordered some NEMA23 motors with mounting hardware. I ended up ordering helical couplers, too. I had some, but it looks like the bore on the motor-side was too small because the motor shaft was a quarter inch, while the helical was for 5mm. I have a few NEMA17s that the helicals fit, so they won't be wasted.
Finally, I got a meter of drag chain off banggood. I split it in half, and have the XY axis chain attached (its on the Y axis, it carries wires for X). The other half will carry wires for the tool head, but the chain will need some modification to be fully attached. I might just order a second chain instead, though.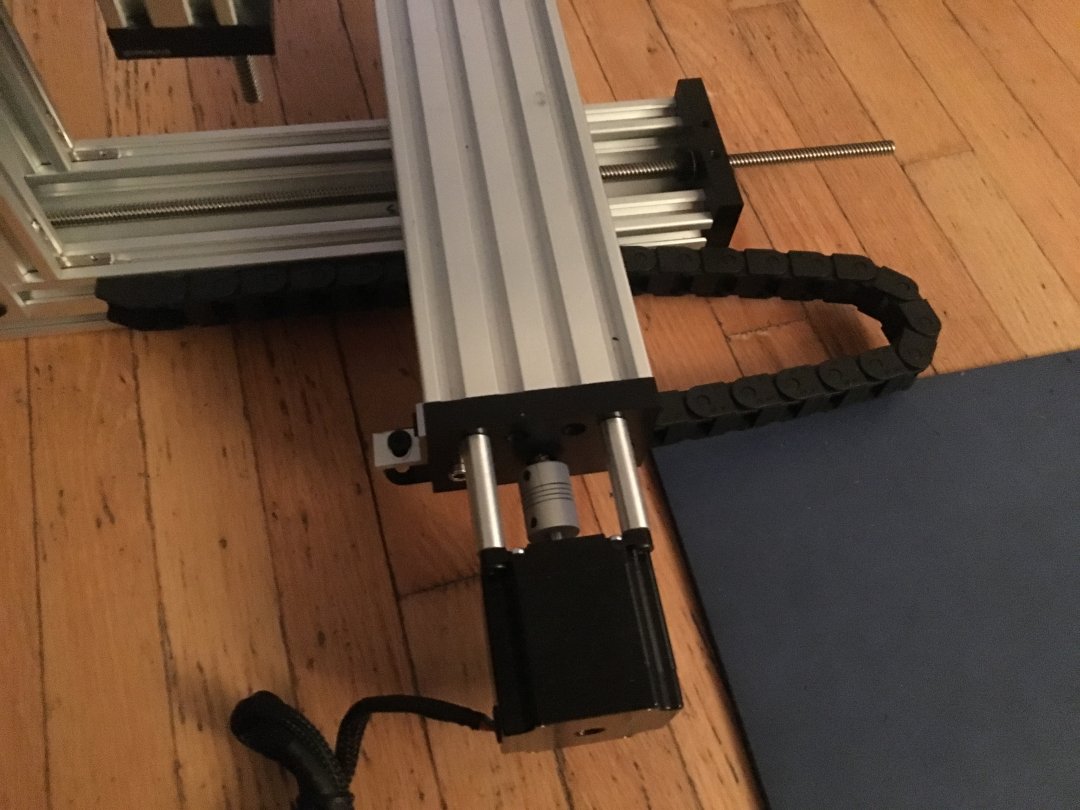
Next stop: I'm triming down the ACME rod, and getting into the electronics. I'm planning to use an arduino with GRBL, and use Big Easy Drivers (Big Easy Driver stepper motor driver, though you can buy them from sparkfun or creatron). The two amps of current the BED will draw was an interesting problem. I wondered if I could find something cheaper than the power supplies that openbuilds sells... the short answer is maybe. Banggood had some switching power supplies that output "4 to 6 amps at 24V" for 9 bucks before taxes and shipping. At 4A, I need two to drive all three BEDs, but I just ordered 3, one per BED. You never know the quality of what you're ordering from China, and I figure running them below spec will probably be good for reliability, and at 27 bucks, its still cheaper than the larger power supplies normally used.
I still need to decide what I'm going to do for the spindle. I'll probably start with just using a dremel, but my ideal world is that I come up with some way of using R8 collets so that I can share tools and collets with my friend's much larger mill.
May 29th, 2017
My power supplies arrived. I still need to go buy 2 more BED's and an arduino, but I'm getting to the wiring phase of this project.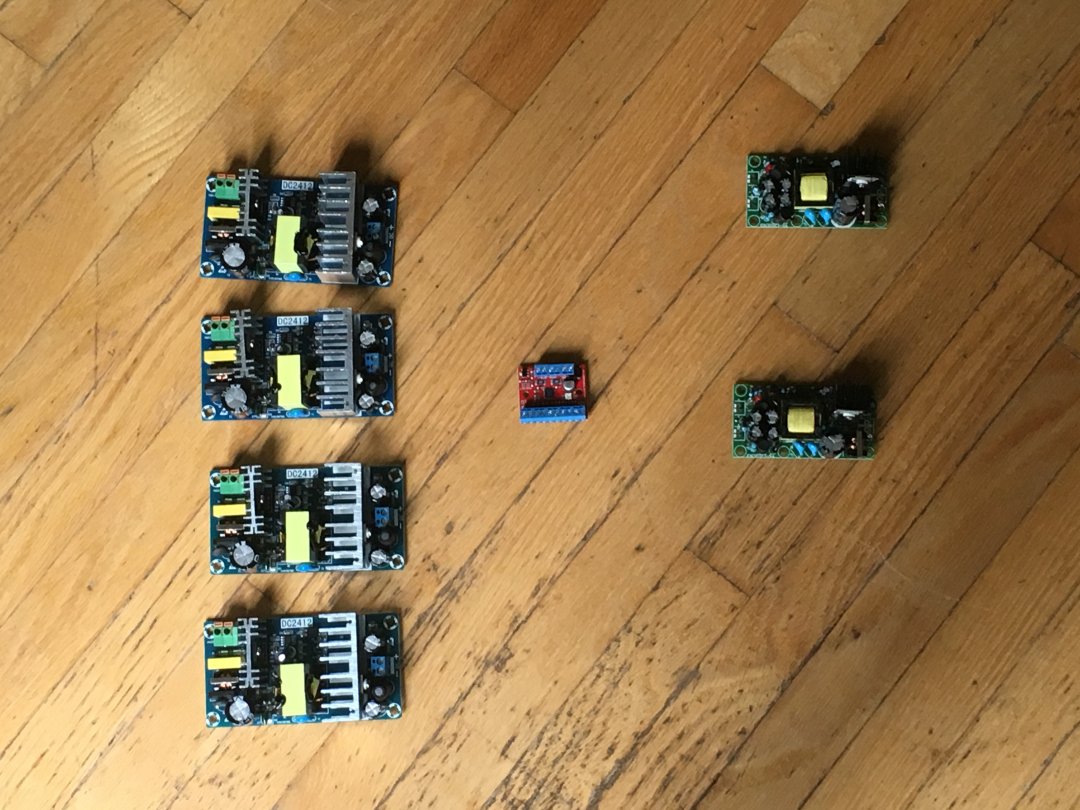
The boards in this image are: 4x24V6A SPS, 1 BED, 2x12V5V20W SPS.
I really only need 1 of the 12V/5V units, but they were 6 bucks. I figured a spare was a good idea.
June 4, 2017
I got all the electronics, and wired it up this weekend. Its still kinda hacky, since I don't have an enclosure yet, and I need to decide on and replace a bunch of connectors, but it runs! I even got some video!
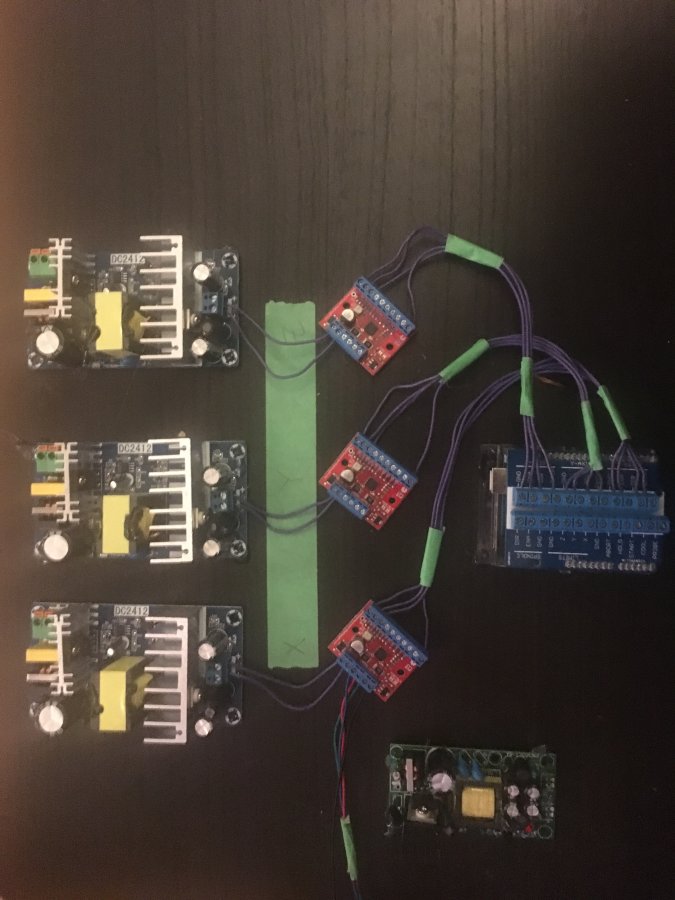
This photo has neither power nor motors connected, but you get the idea.
Movement! Its drawing a circle and square. Nothing exciting, but its moving.
MiniMill
Build in 'CNC ROUTER BUILDS' published by MTO, Jun 4, 2017.
Building a small mill to match my 7x12 lathe.
-
-
Build Author MTO, Find all builds by MTO
-
- Loading...
-
Build Details
- Build License:
-
- CC - Attribution Share Alike - CC BY SA
Reason for this Build
I wanted a small manual mill to play with as I learn machining, but even the small mills at places like Harbor Freight, BusyBee Tools, or PrincessAuto were too big (IMO), and kinda expensive. I also have access to larger mills if/when I need them, so I really wanted something cheap and simple with a 1 cubic foot (or less) work envelope.Inspired by
John Mueller's OXmill and the Sier Z6000 mill on Alibaba! -
Parts list
-
Attached Files:


